The Complete PCR Protocol Guide: From DNA Amplification Fundamentals to Advanced Optimization & Validation
This comprehensive guide provides researchers, scientists, and drug development professionals with an in-depth understanding of polymerase chain reaction (PCR) for DNA amplification.
The Complete PCR Protocol Guide: From DNA Amplification Fundamentals to Advanced Optimization & Validation
Abstract
This comprehensive guide provides researchers, scientists, and drug development professionals with an in-depth understanding of polymerase chain reaction (PCR) for DNA amplification. It covers foundational principles, including the history and mechanics of PCR, and delivers detailed, step-by-step standard protocols. The article systematically addresses critical troubleshooting and optimization strategies to overcome common experimental pitfalls and enhance specificity and yield. Furthermore, it explores advanced validation techniques, quantitative methods, and cutting-edge applications such as multiplex assays and pathogen detection, providing a complete framework for implementing robust, reproducible PCR in both research and clinical settings.
Understanding PCR: The Fundamental Principles of DNA Amplification
The Polymerase Chain Reaction (PCR) represents one of the most transformative methodological breakthroughs in modern molecular biology. This technique, which enables the exponential amplification of specific DNA sequences from minimal starting material, has fundamentally reshaped scientific research, clinical diagnostics, and drug development. From its conceptual origins to its current status as a foundational tool in laboratories worldwide, PCR's evolution demonstrates how a simple concept can revolutionize entire fields. This article details the historical development of PCR, outlines core protocols essential for DNA amplification research, and explores its advanced applications, particularly within drug development. Framed within the context of a broader thesis on PCR methodology, this review provides researchers with both the technical protocols and the historical understanding necessary to leverage this powerful technology in their scientific pursuits.
Historical Development of PCR
The development of PCR was not a single event but a convergence of scientific discoveries spanning several decades, culminating in a technique that would democratize genetic analysis.
Foundational Discoveries (1953-1983)
The groundwork for PCR was laid by fundamental advances in molecular biology. In 1953, James Watson and Francis Crick elucidated the double-helix structure of DNA, noting in their publication that the structure "immediately suggests a possible copying mechanism for the genetic material" [1] [2]. This was followed by Arthur Kornberg's isolation of the first DNA polymerase from E. coli in 1957, for which he received a Nobel Prize in 1959 [1] [2]. A critical conceptual precursor emerged from the work of Gobind Khorana and his team in the early 1970s, who investigated "repair synthesis" using primers and DNA polymerase to copy gene segments [1]. Notably, researcher Kjell Kleppe in Khorana's lab envisioned a two-primer system that could lead to the replication of a specific DNA segment, describing a process strikingly similar to PCR [2]. Despite these conceptual advances, the technique for exponential amplification remained unrealized for over a decade.
The Invention and Development at Cetus Corporation
In 1983, Kary Mullis, a chemist at Cetus Corporation, conceived of PCR while working on oligonucleotide synthesis [1] [2]. Mullis was inspired by Frederick Sanger's DNA sequencing method, which used a single primer. Mullis's key innovation was adding a second primer to the opposite strand and realizing that repeated cycles of denaturation, annealing, and extension using DNA polymerase could create a chain reaction yielding exponential amplification of a specific DNA segment [1]. The initial experiments in 1983-1984 were challenging. The early process used the Klenow fragment of E. coli DNA polymerase, which was heat-labile and had to be replenished after each denaturation step [2]. The first successful amplification of a genomic DNA target—a 110 bp fragment from the β-hemoglobin gene—was confirmed via Southern blotting in November 1984, as the product was not initially visible on agarose gels [1] [2].
Critical Innovation: Thermostable Enzymes
A major breakthrough came with the introduction of a thermostable DNA polymerase. In 1969, Thomas Brock had reported the isolation of Thermus aquaticus (Taq), a thermophilic bacterium from Yellowstone National Park's hot springs [1]. The DNA polymerase from this bacterium (Taq polymerase) was isolated in 1976 and could withstand the high temperatures required for DNA denaturation [2]. In the fall of 1985, Susanne Stoffel and David Gelfand at Cetus successfully isolated Taq polymerase, and Randy Saiki soon demonstrated its superior performance in PCR [1] [2]. This innovation eliminated the need to add fresh enzyme after each cycle, enabling the automation of PCR in thermal cyclers [1]. The first paper describing PCR with Taq polymerase was published in 1985, and the enzyme was later named "Molecule of the Year" by the journal Science in 1989 [1].
Commercialization and Widespread Adoption
The partnership between Cetus Corporation and Perkin-Elmer was instrumental in commercializing PCR technology. Their joint venture led to the development of automated thermal cyclers and the commercial release of "AmpliTaq DNA Polymerase" in November 1987 [1]. As the technique spread, its impact was recognized with the highest scientific honors. Kary Mullis was awarded the Nobel Prize in Chemistry in 1993, less than a decade after PCR's invention, underscoring its profound and rapid impact on science [1]. The subsequent development of real-time quantitative PCR (qPCR) and digital PCR (dPCR) further expanded the applications of the technology from qualitative detection to precise quantification [3] [4].
Table 1: Key Milestones in the History of PCR
| Year | Event | Key Figure(s)/Entity | Significance |
|---|---|---|---|
| 1953 | DNA Structure Discovery | Watson & Crick | Elucidated the double-helix structure and its copying mechanism [1]. |
| 1957 | First DNA Polymerase Isolated | Arthur Kornberg | Identified the enzyme central to DNA replication [1]. |
| 1971 | Concept of Two-Primer Replication | Kjell Kleppe | Envisioned a process similar to PCR for replicating a specific DNA segment [2]. |
| 1983 | Invention of PCR | Kary Mullis | Conceptualized the use of two primers and repeated cycles for exponential amplification [1]. |
| 1985 | First Clinical Application | Cetus Team | Used PCR to analyze sickle cell anemia mutation [1]. |
| 1985 | Use of Taq Polymerase | Stoffel, Gelfand, & Saiki | Introduced a thermostable enzyme, enabling automation [1]. |
| 1987 | First Commercial PCR Machine | Perkin-Elmer & Cetus | Made PCR technology accessible to labs worldwide [1]. |
| 1993 | Nobel Prize in Chemistry | Kary Mullis | Recognized the profound importance of the PCR method [1]. |
Core PCR Methodology and Protocols
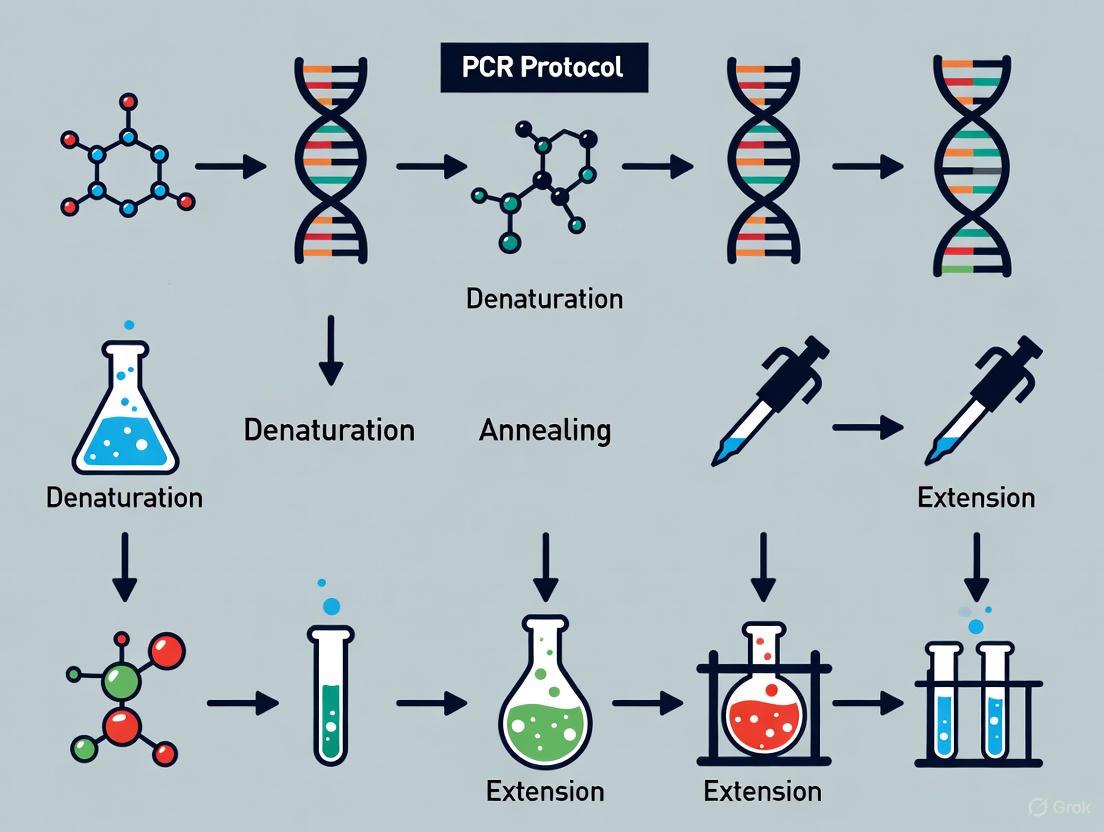
The fundamental principle of PCR is the enzymatic amplification of a specific DNA sequence defined by two oligonucleotide primers. The process involves three core steps repeated for 25-40 cycles.
Basic Principle and Reaction Components
PCR mimics the natural process of DNA replication but is confined to a short, targeted region of the genome. The core steps are:
- Denaturation: The double-stranded DNA template is heated to 94-98°C to separate it into two single strands.
- Annealing: The temperature is lowered to 50-65°C to allow the sequence-specific primers to bind (anneal) to their complementary sequences on the template strands.
- Extension: The temperature is raised to 72°C (the optimal temperature for many DNA polymerases), and the polymerase synthesizes new DNA strands by extending the primers in the 5' to 3' direction [3].
The exponential amplification occurs because the products of one cycle serve as templates for the next, theoretically doubling the amount of the target sequence with each cycle.
Essential Research Reagent Solutions
A standard PCR reaction requires a precise mixture of key components, each playing a critical role. The table below details these essential reagents.
Table 2: Key Research Reagent Solutions for a Standard PCR
| Reagent | Function | Typical Concentration |
|---|---|---|
| Template DNA | The DNA sequence to be amplified. | 1 pg - 1 µg (depending on source and complexity) |
| DNA Polymerase (e.g., Taq) | Enzyme that synthesizes new DNA strands by adding nucleotides. | 0.5 - 2.5 units per 50 µL reaction |
| Primers (Forward & Reverse) | Short, single-stranded DNA oligonucleotides that define the start and end of the target sequence. | 0.1 - 1.0 µM each |
| Deoxynucleotides (dNTPs) | The building blocks (dATP, dCTP, dGTP, dTTP) for the new DNA strands. | 200 µM each |
| Reaction Buffer | Provides optimal chemical conditions (pH, salts) for polymerase activity. | 1X concentration |
| Divalent Cations (MgCl₂) | Essential cofactor for DNA polymerase activity. Concentration is a key optimization parameter. | 1.5 - 2.5 mM |
Protocol: Standard Endpoint PCR for DNA Amplification
This protocol is designed for the amplification of a specific DNA fragment for downstream applications such as cloning, sequencing, or gel analysis.
I. Pre-PCR Setup
- Laboratory Preparation: Designate separate, clean areas for reagent preparation, sample addition, and post-PCR analysis to prevent contamination. Use aerosol-resistant pipette tips.
- Reagent Thawing: Thaw all reagents (except the polymerase) on ice or a cold block. Mix by gentle vortexing and briefly centrifuge to collect contents at the bottom of the tube.
- Master Mix Preparation: Prepare a master mix on ice for all reactions plus a 10% excess to account for pipetting error. This ensures consistency across samples.
- For a 50 µL reaction: 5.0 µL of 10X Reaction Buffer, 2.0 µL of 25 mM MgCl₂ (2.0 mM final), 1.0 µL of 10 mM dNTP mix (200 µM each final), 1.25 µL of 10 µM Forward Primer (0.25 µM final), 1.25 µL of 10 µM Reverse Primer (0.25 µM final), 0.25 µL of Taq DNA Polymerase (1.25 units), and 33.25 µL of Nuclease-Free Water.
- Aliquot and Add Template: Aliquot the appropriate volume of master mix into each PCR tube. Then, add the template DNA to each respective tube. Include a negative control containing nuclease-free water instead of template.
II. Thermal Cycling
- Load Thermocycler: Place the tubes in a pre-heated thermal cycler (or start the block at the initial denaturation temperature).
- Run the Following Program:
- Initial Denaturation: 95°C for 2-5 minutes (ensures complete separation of complex genomic DNA).
- Amplification (25-35 cycles):
- Denaturation: 95°C for 30 seconds.
- Annealing: X°C for 30 seconds (X is primer-specific; calculate Tm and optimize).
- Extension: 72°C for Y seconds (Y is ~1 minute per 1 kb of amplicon).
- Final Extension: 72°C for 5-10 minutes (ensures all amplicons are fully extended).
- Hold: 4-10°C indefinitely.
III. Post-PCR Analysis
- Analyze Product: Analyze the PCR product by agarose gel electrophoresis. A successful reaction will show a single, bright band of the expected size when compared to a DNA ladder. The negative control should show no bands, indicating the absence of contamination.
Evolution of PCR Technologies
The basic PCR methodology has been extensively refined and adapted, leading to a family of specialized techniques that cater to diverse research needs.
Diagram 1: The Evolution of PCR Technologies
Quantitative PCR (qPCR) and Digital PCR (dPCR)
Real-Time Quantitative PCR (qPCR) allows for the detection and quantification of a specific DNA sequence in real time as the amplification occurs, unlike traditional "endpoint" PCR. This is achieved by using fluorescent dyes or probes that intercalate with the double-stranded DNA or bind specifically to the target sequence. The cycle threshold (Ct), the point at which fluorescence crosses a background threshold, is used for quantification [3] [5]. qPCR is further divided into relative quantification, which compares expression levels between samples, and absolute quantification, which determines the exact copy number using a standard curve [6].
Digital PCR (dPCR) is a more recent refinement that provides absolute quantification without the need for a standard curve. The reaction mixture is partitioned into thousands of individual nanoliter-volume reactions, so that each contains either zero or one (or a few) target molecules. After PCR amplification, the number of positive partitions is counted, allowing for precise, absolute quantification of the target nucleic acid using Poisson statistics. dPCR is particularly valuable for detecting rare mutations, copy number variations, and viral load quantification due to its high sensitivity and precision [3] [4].
Advanced PCR Formats and Applications
Reverse Transcription PCR (RT-PCR) is a fundamental technique for gene expression analysis. It involves first converting RNA into complementary DNA (cDNA) using the enzyme reverse transcriptase. This cDNA then serves as the template for a standard PCR reaction. When combined with qPCR, it becomes RT-qPCR, the gold standard for quantifying levels of gene expression [3] [5].
Multiplex PCR enables the simultaneous amplification of multiple targets in a single reaction by using multiple pairs of primers, each specific to a different DNA sequence. This is highly efficient for pathogen identification, genotyping, and high-throughput screening. The primers must be carefully designed to have similar annealing temperatures and to produce amplicons of distinct sizes or with different fluorescent labels to be distinguishable [1].
PCR Chips and Microfluidics represent a significant technological leap by miniaturizing and automating PCR processes onto microfluidic devices. These chips, often made of silicon, glass, or polymers like PDMS, contain microchannels and reaction chambers that handle nanoliter to picoliter volumes. This miniaturization offers substantial advantages, including reduced reagent consumption, faster thermal cycling due to low thermal mass, potential for portability, and high-throughput parallel processing. PCR chips are instrumental in applications ranging from point-of-care diagnostics to high-throughput biomarker validation in drug development [4].
Table 3: Comparison of Key PCR Variants
| Technique | Primary Function | Key Advantage | Common Applications |
|---|---|---|---|
| Standard PCR | Amplification of a specific DNA sequence | Simplicity and low cost | Cloning, genotyping, sequencing template preparation |
| Real-Time PCR (qPCR) | Quantification of nucleic acids | Real-time monitoring and high sensitivity | Gene expression analysis, viral load monitoring, SNP detection |
| Digital PCR (dPCR) | Absolute quantification of nucleic acids | Highest precision and sensitivity, no standard curve needed | Detection of rare mutations, copy number variation, liquid biopsies |
| Reverse Transcription PCR (RT-PCR) | Amplification of RNA sequences | Converts RNA into a DNA template for amplification | Gene expression studies, RNA virus detection |
| Multiplex PCR | Simultaneous amplification of multiple targets | High efficiency and throughput | Pathogen identification, genetic disease screening, forensic analysis |
PCR in Modern Drug Development
PCR has become an indispensable tool in the pharmaceutical industry, accelerating and refining multiple stages of drug discovery and development.
Biomarker Discovery and Validation
Biomarkers are biological molecules that indicate a biological state, and are crucial for explaining disease mechanisms, stratifying patients, and monitoring therapeutic responses [4]. The limitations of traditional biomarker discovery methods (e.g., ELISA, Western blotting)—such as low throughput, large sample volume requirements, and suboptimal sensitivity—are effectively addressed by modern PCR technologies [4]. PCR chips, in particular, have revolutionized this field by enabling high-throughput, parallel processing of samples with minimal reagent consumption, allowing researchers to identify and validate novel biomarkers with greater accuracy and reproducibility [4]. Furthermore, single-cell PCR chips allow for biomarker detection at a single-cell resolution, revealing heterogeneity within cell populations that is often masked in bulk analyses [4].
Pharmacogenomics and Personalized Medicine
PCR is fundamental to pharmacogenetics, which studies how genetic variations affect an individual's response to drugs. By detecting specific genetic polymorphisms (e.g., in genes coding for drug-metabolizing enzymes), PCR-based tests can predict therapeutic efficacy and the likelihood of adverse events, aiding in dose selection and personalized treatment plans [3]. This forms the basis for companion diagnostics, where a specific PCR test is developed alongside a drug to identify the patient population most likely to benefit from the treatment [4]. This approach is a cornerstone of personalized medicine, ensuring "that the right patient receives the right treatment" [4].
Supporting Gene and Small Molecule Therapies
PCR plays multiple critical roles in the development of advanced therapies. For Adeno-Associated Virus (AAV)-based gene therapies, PCR is used in biodistribution studies to track where AAV vectors localize in tissues after administration and to monitor vector-derived RNA levels in patients, thereby assessing the therapy's delivery and activity [3]. In the development of small molecule drugs, qPCR and RT-qPCR are used to measure changes in gene expression in response to drug treatment. This helps identify molecular biomarkers linked to drug efficacy or toxicity and track the downstream effects of small molecule inhibitors, such as kinase inhibitors on signal transduction pathways [3].
Protocol: Analytical Validation of a qPCR Assay for Transcriptional Biomarkers
The use of qPCR assays in clinical drug development requires rigorous analytical validation to ensure the generated data is reliable and meaningful [5]. This protocol outlines the key steps for validating an external standard qPCR assay.
I. Reagent Preparation and Calibration
- Standard Curve Generation: Produce a high-quality RNA standard via in vitro transcription of the target sequence from a linearized cloning vector. Purify the transcript to ensure uniformity and accurately determine its concentration (e.g., by absorbance at 260 nm). Calculate the copy number based on the known size and concentration.
- Prepare Serial Dilutions: Generate a calibration curve using 6-10 concentrations of the standard, typically via 10-fold serial dilutions, in replicates.
II. Assay Validation and QC Establishment
- Define Analytical Parameters: Perform a minimum of five independent analytical runs to assess:
- Precision (Imprecision): Calculate the intra-assay and inter-assay Coefficient of Variation (%CV).
- Accuracy (Bias): Determine the percentage difference (% bias) between the measured concentration and the "true" known concentration of the standard.
- Determine Quantification Limits:
- Lower Limit of Quantification (LLQ): The lowest copy number measurable with a %CV and % bias ≤ ±30%, and which generates a Ct value < 36 cycles.
- Upper Limit of Quantification (ULQ): The highest concentration measurable with a %CV and % bias ≤ ±30%.
- The range between LLQ and ULQ defines the assay's quantitative range.
- Quality Control (QC) Samples: Prepare validation samples (e.g., low, mid, and high-range concentrations) by spiking the transcript into a relevant matrix (e.g., total RNA). These should be used in large batches to serve as long-term QC samples for future clinical sample runs.
III. Clinical Sample Analysis
- Run Clinical Samples: With the validated assay and established QC acceptance criteria, analyze clinical samples. Include the calibration curve and QC samples in every analytical run to monitor and ensure consistent performance [5].
Diagram 2: The Role of PCR in Clinical Drug Development Decision-Making
From its conceptualization in the early 1980s to its current status as a bedrock of molecular biology, PCR has undergone a remarkable evolution. The journey from a manual, labor-intensive process using a heat-labile enzyme to automated, quantitative, and miniaturized platforms reflects continuous innovation. The development of qPCR, dPCR, and microfluidic PCR chips has expanded the technique's utility from simple DNA amplification to sensitive quantification, single-cell analysis, and high-throughput biomarker screening. Within drug development, PCR now provides critical insights that guide decision-making, from target identification and patient stratification to monitoring therapeutic efficacy. As PCR technology continues to converge with fields like artificial intelligence and multi-omics, its role in accelerating drug discovery and advancing personalized medicine is poised to grow even further, solidifying its legacy as one of science's most transformative tools.
The Polymerase Chain Reaction (PCR) is a foundational technique in molecular biology that allows for the exponential amplification of a specific DNA sequence. At its core, the process relies on the precise repetition of three temperature-dependent steps: denaturation, annealing, and extension. These steps form one cycle, which is typically repeated 25-40 times to generate millions to billions of copies of a target DNA fragment from a minimal starting amount. Understanding the mechanics of each step is critical for researchers and drug development professionals to optimize assays, develop diagnostics, and ensure reproducible results in DNA amplification research. This application note details the quantitative parameters, molecular interactions, and experimental protocols that govern these core mechanics, providing a framework for robust PCR experimental design.
The Three-Step Cycling Process
The power of PCR hinges on the cyclic repetition of three fundamental steps. The table below summarizes the core function and typical conditions for each step.
Table 1: Core Steps of the PCR Cycle
| Step | Core Function | Typical Temperature | Typical Duration |
|---|---|---|---|
| Denaturation | Separates double-stranded DNA into single strands | 94–98°C | 15 seconds to 2 minutes |
| Annealing | Allows primers to bind to their complementary sequences on the template | 45–72°C (typically 3–5°C below primer Tm) | 30 seconds to 1 minute |
| Extension | Synthesizes a new DNA strand complementary to the template | 70–75°C (depending on the polymerase) | 1 minute per kilobase (varies with polymerase) |
Denaturation
The cycle begins with the denaturation step, where the reaction mixture is heated to a high temperature, typically between 94°C and 98°C. This heat input provides the kinetic energy necessary to break the hydrogen bonds holding the two complementary strands of the DNA template together, resulting in single-stranded DNA molecules. These single strands serve as the templates for the subsequent copying process. The initial denaturation at the start of the PCR program is often longer (1-3 minutes) to ensure complete separation of all complex double-stranded DNA, such as genomic DNA [7]. For subsequent cycles, a shorter duration of 15-60 seconds is usually sufficient [7]. Factors such as high GC content ((>)65%) may require higher denaturation temperatures or longer incubation times to ensure complete strand separation [7].
Annealing
Immediately following denaturation, the reaction temperature is rapidly lowered to a defined annealing temperature, typically between 50°C and 65°C. This temperature is critical for specificity, as it determines how selectively the primers bind to their complementary sequences on the single-stranded DNA templates. Primers are short, single-stranded DNA oligonucleotides (usually 15-30 nucleotides long) that are designed to flank the target region [8].
The annealing temperature is calculated based on the melting temperature (Tm) of the primers, which is the temperature at which 50% of the primer-DNA duplexes are dissociated. A common starting point is to set the annealing temperature 3–5°C below the lowest Tm of the primer pair [7]. The simplest formula for estimating Tm is: Tm = 4(G + C) + 2(A + T), where G, C, A, and T represent the number of each nucleotide in the primer [7] [9]. If the temperature is too high, primers may not bind efficiently, leading to low yield. If it is too low, primers may bind non-specifically to incorrect sites, resulting in amplification of non-target products [7]. The annealing step typically lasts 30 seconds to 1 minute [9].
Extension
The final step in the cycle is extension or elongation, during which the DNA polymerase synthesizes a new DNA strand. The temperature is raised to the optimal temperature for the DNA polymerase's activity, which is often 72°C for commonly used enzymes like Taq polymerase [9] [10]. At this temperature, the polymerase binds to the 3' end of the primer-template hybrid and begins adding free deoxynucleotide triphosphates (dNTPs) in a 5' to 3' direction, synthesizing a new DNA strand complementary to the template [11].
The duration of the extension step is directly proportional to the length of the amplicon and the synthesis rate of the DNA polymerase. A common rule of thumb is 1 minute per kilobase for Taq DNA Polymerase, though "fast" enzymes may require less time [7]. For instance, Pfu DNA polymerase, known for its high fidelity, typically requires 2 minutes per kilobase [7]. After the final cycle, a final extension step of 5-15 minutes is often included to ensure all amplicons are fully extended and to allow for proper 3'-dA tailing if the PCR product is intended for TA cloning [7].
Detailed Experimental Protocol for a Standard PCR
This protocol is designed for a conventional three-step PCR using a thermostable DNA polymerase and is scalable for multiple reactions.
Reagent Preparation and Master Mix
Research Reagent Solutions:
Table 2: Essential Reagents for a Standard PCR
| Reagent | Final Concentration/Amount | Function |
|---|---|---|
| Template DNA | 1–1000 ng (10^4–10^7 molecules) | The DNA sample containing the target sequence to be amplified. |
| Forward & Reverse Primers | 0.1–1.0 µM each (20–50 pmol per reaction) | Short, single-stranded DNA sequences that define the start and end points of the target region. |
| DNA Polymerase (e.g., Taq) | 0.5–2.5 units per 50 µL reaction | Heat-stable enzyme that synthesizes new DNA strands by adding dNTPs. |
| dNTP Mix | 200 µM each (dATP, dCTP, dGTP, dTTP) | The building blocks (nucleotides) used by the polymerase to synthesize new DNA. |
| PCR Buffer (10X) | 1X concentration | Provides the optimal pH and salt conditions (including Mg²⁺) for polymerase activity. |
| Magnesium Chloride (MgCl₂) | 1.5–2.5 mM (if not in buffer) | Essential cofactor for DNA polymerase activity. Concentration requires optimization. |
| Nuclease-Free Water | Q.S. to final volume | Solvent that maintains reaction volume and ionic strength. |
Procedure:
- Design Primers: Design forward and reverse primers (15–30 nucleotides) with comparable melting temperatures (Tm within 5°C), 40–60% GC content, and avoid self-complementarity or primer-dimer formation [8]. Use tools like NCBI Primer-BLAST for specificity.
- Thaw Reagents: Thaw all PCR reagents (except the polymerase) on ice or a cold block. Mix each reagent by gentle vortexing and brief centrifugation.
- Prepare Master Mix: Calculate the volumes required for a single 50 µL reaction (see Table 3). To minimize pipetting error and ensure consistency between samples, prepare a Master Mix for all reactions plus 10% extra. Add reagents in the following order to a sterile 1.5 mL microcentrifuge tube: water, buffer, dNTPs, MgCl₂ (if needed), primers, and DNA polymerase [8] [11].
- Aliquot and Add Template: Mix the Master Mix thoroughly by pipetting. Aliquot the appropriate volume of Master Mix into individual PCR tubes or a multi-well plate. Then, add the required volume of template DNA to each tube. Include a negative control (replace template with nuclease-free water).
- Seal and Centrifuge: Cap the tubes or seal the plate. Briefly centrifuge to collect all contents at the bottom and eliminate air bubbles.
Table 3: Sample Pipetting Scheme for a 50 µL Reaction
| Reagent | Final Concentration | Volume per 50 µL Reaction |
|---|---|---|
| Nuclease-Free Water | - | 33.0 µL |
| 10X PCR Buffer | 1X | 5.0 µL |
| 10 mM dNTP Mix | 200 µM | 1.0 µL |
| 25 mM MgCl₂ | 1.5–2.5 mM | 2.0 µL (varies) |
| 20 µM Forward Primer | 0.4 µM | 1.0 µL |
| 20 µM Reverse Primer | 0.4 µM | 1.0 µL |
| DNA Polymerase (5 U/µL) | 1.25 U | 0.25 µL |
| Template DNA | Variable (e.g., 100 ng) | 6.75 µL (example) |
| Total Volume | 50.0 µL |
Thermal Cycler Programming
- Program the Thermal Cycler: Before assembling the reaction, program the thermal cycler with the following standard protocol [7] [9] [8]:
- Initial Denaturation: 94–95°C for 2–5 minutes (activates hot-start polymerases and ensures full DNA denaturation).
- Cycling (25–40 cycles):
- Denaturation: 94–95°C for 15–30 seconds.
- Annealing: X°C (primer-specific, see optimization below) for 30–60 seconds.
- Extension: 72°C for 1 minute per kilobase of the target amplicon.
- Final Extension: 72°C for 5–10 minutes.
- Hold: 4–10°C indefinitely.
- Load and Run: Place the PCR tubes/plate in the thermal cycler and start the run.
Post-Amplification Analysis
- Analyze PCR Product: Once cycling is complete, analyze the amplified DNA by agarose gel electrophoresis.
- Visualize: Use an intercalating dye to visualize the DNA under UV light. A single, sharp band of the expected size should be visible. A smear or multiple bands indicate non-specific amplification, requiring protocol optimization.
Optimization and Troubleshooting Strategies
Despite its robustness, PCR often requires optimization for each new primer-template pair. Key parameters to optimize are annealing temperature and MgCl₂ concentration.
Annealing Temperature Optimization
The calculated Tm is only a starting point. Empirical optimization is crucial for specificity and yield.
Protocol:
- Method: Use a thermal cycler with a gradient function. Set the annealing step to a temperature gradient across the block (e.g., from 50°C to 65°C) for the same primer pair and template.
- Analysis: Run the PCR and analyze the products by gel electrophoresis. The optimal temperature is the highest one that produces a strong, specific band with no non-specific products [7]. If no product is observed, lower the temperature in increments of 2–3°C. If non-specific products are present, raise the temperature similarly [7].
MgCl₂ Concentration Optimization
Mg²⁺ is a critical cofactor for polymerase activity, and its optimal concentration depends on the specific buffer, dNTP, and primer combination.
Protocol:
- Method: Set up a series of reactions where the concentration of MgCl₂ is varied, typically between 1.0 mM and 4.0 mM in increments of 0.5 mM.
- Analysis: Analyze the products by gel electrophoresis. The concentration that yields the strongest specific product with the least background is chosen for future experiments.
Troubleshooting Common Issues
- No Product: Check primer design and concentration, lower the annealing temperature, increase MgCl₂ concentration, or ensure the polymerase is active.
- Non-specific Bands/Background Smear: Increase the annealing temperature, reduce cycle number, reduce primer or MgCl₂ concentration, or use a hot-start polymerase.
- Primer-Dimer Formation: Redesign primers to avoid 3'-end complementarity, increase annealing temperature, or use higher-quality primers.
The polymerase chain reaction (PCR) is a foundational technique in molecular biology that enables the enzymatic amplification of specific DNA sequences from a complex template. The success and fidelity of this process are critically dependent on the precise formulation of the reaction mixture. This application note details the function, optimization, and interplay of four essential PCR components—DNA polymerase, primers, deoxynucleoside triphosphates (dNTPs), and reaction buffer—within the context of DNA amplification research for drug development and scientific discovery. A thorough understanding of these components is paramount for designing robust and reproducible experimental protocols.
Core Components and Their Functions
DNA Polymerase
DNA polymerase is the core enzymatic driver of PCR, responsible for synthesizing new DNA strands by incorporating nucleotides complementary to the template strand. The thermostable Taq DNA polymerase, isolated from Thermus aquaticus, revolutionized PCR by surviving the high denaturation temperatures required for each cycle, with a half-life of approximately 40 minutes at 95°C [12]. It incorporates nucleotides at a rate of about 60 bases per second at 70°C and can typically amplify targets up to 5 kb in length [12].
Modern PCR utilizes a range of engineered DNA polymerases with enhanced properties. Key characteristics for selection include:
- Thermal Stability: Essential for withstanding prolonged exposure to denaturing temperatures (95-98°C). Polymerases from hyperthermophiles, such as Pfu from Pyrococcus furiosus, offer superior stability [13].
- Fidelity: Refers to the accuracy of nucleotide incorporation. Proofreading polymerases with 3'→5' exonuclease activity, common in archaeal enzymes, possess higher fidelity and lower error rates (e.g., 10⁻⁶ to 10⁻⁷ errors/base) compared to non-proofreading enzymes like Taq (2 × 10⁻⁴ to 2 × 10⁻⁵ errors/base) [13]. This is critical for applications like cloning and sequencing.
- Processivity: The number of nucleotides incorporated per polymerase-binding event. Enhanced processivity is beneficial for amplifying long or complex templates [13].
- Extension Rate: The speed of DNA synthesis, typically one minute per 1000 bases for many polymerases, though this can vary [13].
Hot-start PCR, achieved through antibody-based or chemical modification of the enzyme, is a common technique to inhibit polymerase activity at low temperatures, thereby preventing non-specific amplification and primer-dimer formation prior to the first denaturation step [13].
Table 1: Common DNA Polymerases and Their Properties
| Polymerase | Source | Proofreading | Typical Application | Key Characteristic |
|---|---|---|---|---|
| Taq | Thermus aquaticus | No | Standard PCR, genotyping | Thermostable, relatively low fidelity |
| Pfu | Pyrococcus furiosus | Yes | High-fidelity PCR, cloning | High fidelity, thermostable |
| Engineered Blends | Recombinant | Varies | Long-range, GC-rich, fast PCR | Enhanced processivity, speed, and/or fidelity |
Primers
PCR primers are short, single-stranded DNA oligonucleotides (typically 15-30 nucleotides) that define the start and end points of the amplification target by binding flanking sequences via complementary base pairing [12] [14]. The forward primer anneals to the antisense (template) strand, and the reverse primer anneals to the sense strand, enabling DNA polymerase to extend the region between them.
Proper primer design is arguably the most critical factor for PCR specificity and efficiency. The following design principles should be adhered to [12] [15] [14]:
- Length: 15–30 nucleotides.
- GC Content: 40–60%, with uniform distribution of G and C bases.
- Melting Temperature (Tm): 55–70°C, with the Tm of the forward and reverse primers within 5°C of each other.
- 3' End: Should end with a C or G base (GC clamp) to promote stronger anchoring due to stronger hydrogen bonding, but avoid runs of more than three G or C bases, which can promote mispriming.
- Specificity: Avoid self-complementarity (hairpins), complementarity between primers (primer-dimers), and direct repeats.
Primer concentration in the reaction is typically between 0.1–1 μM. Higher concentrations can lead to nonspecific amplification and primer-dimer formation, while lower concentrations may result in low yield or no amplification [12] [13].
Deoxynucleoside Triphosphates (dNTPs)
dNTPs (dATP, dCTP, dGTP, dTTP) are the essential building blocks from which DNA polymerase synthesizes new DNA strands [12]. They are typically added to the PCR reaction in equimolar concentrations to ensure balanced incorporation.
The recommended final concentration of each dNTP is generally 0.2 mM (200 μM) for standard PCR [12] [13]. This concentration is maintained well above the estimated Km of DNA polymerase (0.010–0.015 mM) to ensure efficient incorporation, while avoiding inhibition that can occur at excessively high concentrations [12]. The concentration of dNTPs is intrinsically linked to the Mg²⁺ concentration, as Mg²⁺ binds to dNTPs to form the active substrate for the polymerase. Unbalanced dNTP concentrations can be intentionally used in certain applications, such as random mutagenesis [12].
Modified nucleotides, such as deoxyuridine triphosphate (dUTP), can be substituted for dTTP. When used in conjunction with Uracil-DNA Glycosylase (UDG) pre-treatment, this strategy can prevent carryover contamination from previous PCR reactions [12]. Other modified dNTPs (e.g., biotin- or fluorescein-labeled) are used to incorporate labels for downstream detection and analysis.
Reaction Buffer
The PCR buffer provides the optimal chemical environment for DNA polymerase activity and primer-template hybridization. Its most critical component is Magnesium ions (Mg²⁺), which act as an essential cofactor for DNA polymerase [12]. Mg²⁺ facilitates the formation of the complex between primers and the DNA template by stabilizing the negative charges on their phosphate backbones and catalyzes phosphodiester bond formation during polymerization [12].
The final concentration of Mg²⁺ usually ranges between 0.5–5.0 mM, with 1.5 mM being a common starting point [13] [14]. Optimization is often required, as the concentration affects reaction specificity, fidelity, and yield. Excess Mg²⁺ can reduce specificity and, for proofreading enzymes, may impact fidelity, while insufficient Mg²⁺ can result in low yield [12] [16]. The Mg²⁺ concentration must be higher than the total dNTP concentration [16].
Beyond MgCl₂, PCR buffers may contain other components such as Tris-HCl (to maintain a stable pH, usually around 8.0-8.5), potassium salt (K⁺, typically 35-100 mM to promote primer annealing), and additives like detergents to stabilize the enzyme [13] [14].
Component Interplay and Reaction Optimization
The four core components do not function in isolation; their concentrations are interdependent and must be balanced for a successful reaction. The relationship between Mg²⁺ and dNTPs is a prime example, as Mg²⁺ chelates dNTPs, making them unavailable for the polymerase. If the dNTP concentration is increased, the Mg²⁺ concentration may need to be proportionally increased to ensure an adequate supply of free Mg²⁺ for the enzyme [12]. Furthermore, the fidelity of non-proofreading DNA polymerases can be improved by using lower dNTP concentrations (0.01–0.05 mM) with proportionally reduced Mg²⁺ [12].
Table 2: Standard 50 μL PCR Reaction Setup
| Reagent | Standard Final Concentration | Stock Solution | Example Volume for 1 Reaction | Notes |
|---|---|---|---|---|
| Sterile Water | - | - | Variable (to 50 µL) | Q.S. to final volume |
| 10X PCR Buffer | 1X | 10X | 5 µL | May contain 15 mM MgCl₂ |
| MgCl₂ | 0.5 - 5.0 mM (often 1.5 mM) | 25 mM | 0 - 3 µL | Omit if already in buffer; requires titration |
| dNTP Mix | 200 µM (each) | 10 mM (each) | 1 µL | |
| Forward Primer | 0.1 - 1 µM | 20 µM | 0.5 µL | |
| Reverse Primer | 0.1 - 1 µM | 20 µM | 0.5 µL | |
| DNA Template | 10⁴ - 10⁷ molecules | Variable | 1 µL (e.g., 100 ng gDNA) | Amount depends on source & complexity |
| DNA Polymerase | 0.5 - 2.5 Units | e.g., 5 U/µL | 0.5 µL | Follow manufacturer's recommendations |
| Total Volume | 50 µL |
Workflow for PCR Setup
The following experimental workflow outlines a standard protocol for setting up a conventional PCR, from primer design to analysis.
Thermal Cycling Protocol
After assembling the reaction, it is placed in a thermal cycler. A typical 3-step cycling protocol is as follows [15] [17]:
- Initial Denaturation: 94–98°C for 3–5 minutes. One cycle.
- Amplification Cycles (25–35 cycles):
- Denaturation: 94–98°C for 10–60 seconds.
- Annealing: 52–65°C (typically 5°C below the primer Tm) for 30 seconds.
- Extension: 70–80°C (72°C for Taq) for 1 minute per 1000 bp.
- Final Extension: 70–80°C for 5–10 minutes. One cycle.
- Hold: 4°C indefinitely.
The Researcher's Toolkit: Essential Reagents and Materials
Table 3: Key Research Reagent Solutions for PCR
| Item | Function/Description | Application Notes |
|---|---|---|
| Hot-Start DNA Polymerase | Engineered to be inactive at room temperature, reducing off-target amplification. | Critical for high-specificity applications. Available as antibody-mediated or chemically modified [13]. |
| PCR Master Mix | A pre-mixed, optimized solution containing buffer, dNTPs, Mg²⁺, and polymerase. | Saves time, reduces pipetting errors and contamination risk [15] [17]. |
| dNTP Mix | An equimolar mixture of dATP, dCTP, dGTP, and dTTP. | Sourced as a ready-to-use solution at a defined concentration (e.g., 10 mM each) [14]. |
| MgCl₂ Solution | A separate, standardized Mg²⁺ source for fine-tuning reaction conditions. | Essential for optimization when the buffer's Mg²⁺ concentration is not optimal for a specific primer/template [14]. |
| PCR Additives | Reagents like DMSO (1-10%), formamide (1.25-10%), or BSA (10-100 μg/mL). | Used to enhance amplification of difficult templates (e.g., GC-rich) or counteract inhibitors [13] [14]. |
| Nuclease-Free Water | Sterile, purified water guaranteed to be free of nucleases and contaminants. | Prevents degradation of reagents and template, and avoids introduction of exogenous DNA [14]. |
Advanced Applications and Concluding Remarks
The foundational components described herein are the bedrock upon which specialized PCR applications are built. Quantitative PCR (qPCR) leverages fluorescent dyes or probes to monitor amplification in real-time, requiring precise reagent concentrations for accurate quantification [18] [19] [20]. Reverse Transcription PCR (RT-PCR) first converts RNA into complementary DNA (cDNA) using a reverse transcriptase enzyme, before proceeding with standard PCR amplification [15]. Other advanced formats, such as multiplex PCR (amplifying multiple targets simultaneously) and long-range PCR (amplifying large fragments >10 kb), rely on specialized polymerases and meticulously optimized buffer systems to achieve their goals [13].
In conclusion, a deep and practical understanding of the roles and optimal conditions for DNA polymerase, primers, dNTPs, and buffer is non-negotiable for successful DNA amplification research. Systematic optimization of these components, guided by the principles and protocols outlined in this note, will empower researchers and drug development professionals to achieve specific, efficient, and reliable PCR results.
Within the broader context of developing robust Polymerase Chain Reaction (PCR) protocols for DNA amplification research, the design of oligonucleotide primers stands as a critical foundational step. Proper primer design directly determines the success, specificity, and efficiency of PCR, which is a cornerstone technique in molecular biology, diagnostics, and drug development [21]. Optimal primers are paramount for achieving maximal specificity and efficiency, making them a cornerstone of accurate molecular biology experiments [22]. This guide details the essential rules and methodologies for designing high-quality primers, providing researchers with a structured framework to enhance experimental reproducibility and accuracy in DNA amplification research.
Core Principles of Primer Design
The quality of oligonucleotide primers is the most significant determinant of reaction specificity and efficiency in PCR [23]. Adherence to established thermodynamic and structural rules during the design phase is non-negotiable for robust amplification. The following parameters are fundamental to designing primers that minimize off-target binding and ensure stable annealing.
Length, Melting Temperature, and GC Content
The physical characteristics of a primer—its length, melting temperature, and base composition—are interconnected properties that govern its hybridization behavior.
- Primer Length: For standard PCR applications, optimal primer length is typically between 18 and 30 nucleotides [22] [24]. This range provides a balance between specificity and efficient annealing; shorter primers may reduce specificity, while longer primers can form secondary structures that hinder annealing [23] [25].
- Melting Temperature (Tm): The Tm is the temperature at which 50% of the DNA duplex dissociates into single strands. The ideal Tm for primers generally falls between 55°C and 65°C [23] [24]. Crucially, the forward and reverse primers in a pair should have closely matched Tms, ideally within 1–2°C of each other, to ensure synchronous binding to the template DNA during the annealing step [23] [14].
- GC Content: The proportion of Guanine (G) and Cytosine (C) bases in the primer should be between 40% and 60%, with an ideal content of around 50% [22] [24] [14]. This provides sufficient sequence complexity while avoiding overly stable GC-rich regions that can promote non-specific binding.
Table 1: Optimal Ranges for Key Primer Design Parameters
| Parameter | Optimal Range | Significance |
|---|---|---|
| Primer Length | 18–30 nucleotides [22] [24] | Balances specificity and binding efficiency. |
| GC Content | 40–60% [22] [24] | Ensures stable hybridization; avoids high Tm or secondary structures. |
| Tm | 55–65°C [23] [24] | Determines optimal annealing temperature. |
| Tm Difference (Primer Pair) | ≤ 2–5°C [24] [14] | Ensures both primers bind efficiently and simultaneously. |
Sequence Composition and 3'-End Stability
Beyond general parameters, the specific sequence of the primer, particularly at its 3' end, is vital for accurate initiation of DNA synthesis.
- 3'-End Stability (GC Clamp): The last five bases at the 3' end of the primer, often called the "core," should be rich in G and C bases [23]. The presence of G or C residues creates a GC clamp, which strengthens binding through their three hydrogen bonds and helps prevent "breathing" (fraying) of the primer ends, thereby enhancing priming efficiency [14] [26]. However, avoid runs of three or more G or C bases at the very 3' end, as this can lead to non-specific binding [22] [26].
- Avoiding Repetitive Sequences: Primer sequences should not contain runs of the same nucleotide (homopolymers, e.g., AAAAA) or consecutive di-nucleotide repeats (e.g., ATATAT). These repeats can cause the polymerase to slip, resulting in mispriming and heterogeneous products [14].
- Template Specificity: The primer sequence must be unique to the intended target. Using bioinformatics tools like NCBI BLAST to check for the target specificity of the primers is a critical step to avoid amplification of related pseudogenes or homologous sequences [24] [14].
Avoiding Secondary Structures
Primers must be screened for self-complementarity, which can lead to secondary structures that sequester the primer and prevent it from binding to the template DNA [23].
- Hairpins: Intramolecular folding within a single primer can create stem-loop structures. The ΔG (free energy) for any hairpin should be weaker (more positive) than -3 kcal/mol for internal hairpins and -2 kcal/mol for hairpins at the 3' end [25].
- Self-Dimers and Cross-Dimers: Self-dimers form when two copies of the same primer anneal to each other, while cross-dimers form when the forward and reverse primers anneal. These structures are preferentially amplified, consuming reagents and lowering the yield of the desired product [23] [14]. The ΔG for any dimer should be weaker than -5 kcal/mol for the 3' end and -6 kcal/mol for internal dimers [25].
Table 2: Guidelines for Avoiding Primer Secondary Structures
| Structure | Description | Acceptable ΔG Threshold |
|---|---|---|
| Hairpin | Intra-primer folding into a stem-loop. | > -3 kcal/mol (internal); > -2 kcal/mol (3' end) [25] |
| Self-Dimer | Inter-molecular annealing between two identical primers. | > -5 kcal/mol (3' end); > -6 kcal/mol (internal) [25] |
| Cross-Dimer | Inter-molecular annealing between forward and reverse primers. | > -5 kcal/mol (3' end); > -6 kcal/mol (internal) [25] |
Optimization Strategies and Experimental Protocols
Once primers are designed according to the core principles, meticulous experimental setup and optimization are required to achieve high-fidelity amplification.
Calibrating the Annealing Temperature
The annealing temperature (Ta) is perhaps the most critical thermal parameter, directly controlling the stringency of primer-template binding [23].
- Relationship between Tm and Ta: For most standard PCR protocols, the optimal annealing temperature is typically 3–5°C below the calculated Tm of the primers [22] [23]. A Ta that is too low permits primers to bind to sequences with imperfect complementarity, leading to non-specific amplification. Conversely, a Ta that is too high reduces reaction efficiency, as the primers cannot anneal to the template effectively, resulting in low or no product yield [23].
- Gradient PCR: The most efficient method for determining the optimal Ta is to perform a gradient PCR experiment. This involves running the same reaction across a range of annealing temperatures (e.g., 50–68°C) in a thermal cycler with a gradient function. The optimal Ta is identified as the highest temperature that yields a strong, specific product [23].
Diagram 1: Workflow for Annealing Temperature Optimization
Reaction Component Optimization
The chemical environment of the PCR significantly impacts specificity and yield.
- Magnesium Ion Concentration: Magnesium ions (Mg²⁺) are an essential cofactor for all thermostable DNA polymerases [23]. The typical optimal concentration ranges from 1.5 to 2.5 mM, but fine-tuning is often necessary [17] [14]. Low Mg²⁺ concentrations result in reduced enzyme activity and poor yield, while high concentrations promote non-specific amplification and lower fidelity [23]. A titration of Mg²⁺ concentration (e.g., 0.5, 1.0, 1.5, 2.0, 2.5, 3.0 mM) is recommended for optimization.
- Polymerase Selection: The choice of DNA polymerase depends on the application. Standard Taq polymerase is robust for routine screening but lacks proofreading activity. For applications requiring high fidelity, such as cloning or sequencing, use a high-fidelity polymerase (e.g., Pfu, KOD), which possesses 3'→5' exonuclease (proofreading) activity and can reduce error rates significantly [23].
- Enhancers and Additives: For challenging templates, such as those with high GC content (>65%), additives can be invaluable. Dimethyl sulfoxide (DMSO), used at 2–10%, helps resolve secondary structures by lowering the Tm of DNA [23] [14]. Betaine, at a final concentration of 1–2 M, homogenizes the thermodynamic stability of GC- and AT-rich regions, improving the amplification of long or GC-rich targets [23].
Detailed Experimental Protocol
Primer Design and Preparation Workflow
Diagram 2: Primer Design and Preparation Workflow
Standard PCR Protocol
The following is a detailed methodology for setting up a conventional PCR reaction [17] [14].
Materials and Reagents Table 3: Research Reagent Solutions for Standard PCR
| Reagent | Final Concentration/Amount | Function |
|---|---|---|
| Template DNA | 1–1000 ng (10^4–10^7 molecules) [14] | The target DNA to be amplified. |
| Forward & Reverse Primers | 0.1–1.0 µM (typically 20–50 pmol per reaction) [22] [14] | Bind complementary sequences to define amplicon. |
| dNTP Mix | 200 µM (50 µM of each dNTP) [14] | Building blocks for new DNA strands. |
| PCR Buffer (10X) | 1X | Provides optimal pH and salt conditions. |
| MgCl₂ (25 mM) | 1.5–2.5 mM (if not in buffer) [17] | Essential cofactor for DNA polymerase. |
| Taq DNA Polymerase | 0.5–2.5 units per 50 µL reaction [17] | Enzyme that synthesizes new DNA strands. |
| Sterile Water | Q.S. to final volume | - |
Procedure
Reaction Assembly: Thaw all reagents on ice. Assemble the reaction in a sterile, thin-walled 0.2 mL PCR tube on ice, in the following order to prevent premature reaction initiation:
- Sterile Water (to a final volume of 50 µL)
- 10X PCR Buffer: 5 µL
- dNTP Mix (10 mM): 1 µL
- Forward Primer (20 µM): 1 µL
- Reverse Primer (20 µM): 1 µL
- Template DNA: variable volume (e.g., 0.5 µL of 2 ng/µL genomic DNA)
- MgCl₂ (25 mM): variable volume (e.g., 2 µL for 2 mM final concentration, if needed)
- Taq DNA Polymerase: 0.5–1 µL
Note: For multiple reactions, prepare a Master Mix of all common components to minimize pipetting errors and ensure consistency [14].
Thermal Cycling: Place the tubes in a thermal cycler and run the following standard program:
- Initial Denaturation: 94–95°C for 2–5 minutes (activates hot-start enzymes, fully denatures complex DNA).
- Amplification (25–40 cycles):
- Denaturation: 94–95°C for 15–30 seconds.
- Annealing: X°C for 15–60 seconds (set 3–5°C below primer Tm; optimize via gradient PCR).
- Extension: 72°C for 1 minute per 1 kb of amplicon.
- Final Extension: 72°C for 5–10 minutes to ensure all amplicons are fully extended.
- Hold: 4–10°C indefinitely.
Product Analysis: Analyze the PCR products by agarose gel electrophoresis. Mix 5–10 µL of the reaction with a DNA loading dye and load onto an agarose gel stained with ethidium bromide or a safer alternative. Visualize under UV light to confirm the presence of a single, sharp band of the expected size [17].
The Scientist's Toolkit
Table 4: Essential Research Reagent Solutions for PCR
| Item | Category | Critical Function |
|---|---|---|
| High-Fidelity DNA Polymerase | Enzyme | Reduces error rates for cloning/sequencing (e.g., Pfu, KOD) [23]. |
| Hot-Start Taq Polymerase | Enzyme | Prevents non-specific amplification and primer-dimer formation by requiring heat activation [23] [27]. |
| DMSO | Buffer Additive | Disrupts secondary structures in GC-rich templates [23] [14]. |
| Betaine | Buffer Additive | Equalizes DNA melting temperatures, aiding in long-range or GC-rich PCR [23]. |
| Nuclease-Free Water | Solvent | Prevents degradation of primers and template. |
| dNTP Mix | Nucleotides | Provides the essential nucleotides for DNA synthesis. |
| Optimized MgCl₂ Solution | Cofactor | Titratable source of Mg²⁺ for fine-tuning reaction specificity and yield [23]. |
Executing PCR: A Step-by-Step Protocol and Diverse Applications
Within the broader scope of DNA amplification research, the polymerase chain reaction (PCR) remains a foundational technique, enabling the exponential amplification of specific DNA sequences from minimal starting material [14] [21]. First introduced by Kary Mullis in 1983, this method leverages a thermostable DNA polymerase and thermal cycling to achieve millions of copies of a target DNA fragment, which is indispensable for subsequent genetic analysis [21] [28]. The reliability and sensitivity of standard PCR make it a cornerstone in diverse fields, including clinical diagnostics, forensic science, biomedical research, and drug development [21] [29]. This application note provides a detailed, actionable protocol for researchers, focusing on precise reagent formulation and optimized thermal cycling parameters to ensure robust and reproducible amplification results.
Principles of PCR
The core principle of PCR involves a repetitive, three-step cyclic process that leads to the exponential amplification of a target DNA sequence located between two primer binding sites [28]. The process begins with denaturation, where the double-stranded DNA template is heated to a high temperature (typically 94–98°C) to separate it into two single strands [7] [28]. Next, during annealing, the temperature is lowered to allow short, single-stranded DNA primers to bind (anneal) to their complementary sequences on either side of the target DNA [21] [28]. Finally, in the extension step, a thermostable DNA polymerase synthesizes a new DNA strand complementary to the template strand by adding nucleotides in the 5' to 3' direction [17] [28]. The power of PCR lies in the chain reaction; the newly synthesized DNA strands themselves become templates for subsequent cycles, leading to a theoretical doubling of the target sequence with each cycle, resulting in millions of copies after 25-35 cycles [28].
The following diagram illustrates this cyclical process and the exponential growth of DNA products.
Materials and Reagents
The Scientist's Toolkit: Essential Research Reagent Solutions
A standard PCR reaction requires a specific set of components, each playing a critical role in the amplification process [14] [28]. The table below details these essential reagents, their specific functions, and their final concentrations in a typical 50 µL reaction.
| Reagent | Function | Final Concentration/Amount |
|---|---|---|
| DNA Template | Contains the target sequence to be amplified. | 1–1000 ng (104–107 molecules) [14] [21] |
| DNA Polymerase (e.g., Taq) | Thermally stable enzyme that synthesizes new DNA strands. | 0.5–2.5 units per 50 µL reaction [17] [14] |
| Primers (Forward & Reverse) | Short oligonucleotides that define the start and end of the target sequence. | 20–50 pmol each (0.1–1.0 µM) [14] |
| Deoxynucleotides (dNTPs) | Building blocks (dATP, dCTP, dGTP, dTTP) for new DNA strands. | 200 µM of each dNTP [14] [28] |
| PCR Buffer | Provides optimal chemical environment (pH, salts) for polymerase activity. | 1X concentration (often supplied as 10X) [14] |
| Divalent Cations (MgCl₂) | Essential cofactor for DNA polymerase activity. | 1.5–2.0 mM (must be optimized) [14] [28] |
| Sterile Water | Solvent to bring the reaction to the final volume. | Q.S. to 50 µL [14] |
Reagent Setup and Optimization
For consistent results, it is crucial to prepare reactions carefully. When setting up multiple reactions, creating a Master Mix—a cocktail containing all common reagents except the template DNA—is highly recommended to minimize pipetting errors and ensure uniformity across samples [14]. The reagents should be thawed completely and kept on ice during setup [14]. A positive control (with a known, amplifiable template) and a negative control (with water instead of template) should always be included to verify reagent functionality and rule out contamination [14] [16].
Standard PCR Protocol and Cycling Conditions
Experimental Protocol: Reaction Setup and Thermal Cycling
Procedure:
- Reagent Preparation: On ice, assemble the following components in a sterile, thin-walled 0.2 mL PCR tube in the order listed, according to the volumes in Table 2 for a 50 µL reaction [14].
- Mixing: Gently mix the reaction by pipetting up and down 20 times. If using a thermal cycler without a heated lid, overlay the reaction mixture with 50 µL of mineral oil to prevent evaporation [17].
- Thermal Cycling: Place the tube in a thermal cycler and run the program based on the parameters in Table 3.
Table 2: Reagent Table for a Standard 50 µL PCR Reaction This table provides a detailed breakdown for setting up a single reaction. For multiple reactions, prepare a master mix.
| Component | Final Concentration/Amount | Volume for 1x Reaction (µL) | Notes |
|---|---|---|---|
| Sterile Nuclease-free Water | Q.S. to 50 µL | 33.0 | Added first to ensure proper mixing. |
| 10X PCR Buffer | 1X | 5.0 | Supplied with enzyme; may contain Mg²⁺. |
| MgCl₂ (25 mM) | 1.5–2.0 mM | 0–2.0 | Omit if already in buffer; requires optimization [14]. |
| dNTP Mix (10 mM) | 200 µM each | 1.0 | Mixture of dATP, dCTP, dGTP, dTTP. |
| Forward Primer (20 µM) | 0.4 µM | 1.0 | Sequence-specific to target. |
| Reverse Primer (20 µM) | 0.4 µM | 1.0 | Sequence-specific to target. |
| DNA Template | 1–1000 ng | Variable (e.g., 0.5–5.0) | Amount depends on template complexity. |
| Taq DNA Polymerase (5 U/µL) | 1.25 U | 0.25 | Add last to avoid degradation. |
| Total Volume | 50.0 |
Table 3: Standard PCR Thermal Cycling Conditions These parameters are typical for Taq DNA polymerase and a 0.1–1.0 kb amplicon. Optimization may be required [17] [7].
| Step | Temperature | Time | Cycles | Purpose |
|---|---|---|---|---|
| Initial Denaturation | 94–95 °C | 2–5 minutes | 1 | Complete separation of dsDNA template; activation of hot-start enzymes. |
| Cycling | 25–35 | |||
| Denaturation | 94–95 °C | 20–30 seconds | Melts DNA before each cycle. | |
| Annealing | 50–65 °C* | 20–40 seconds | Primer binding to template. | |
| Extension | 72 °C | 1 minute per kb | DNA synthesis. | |
| Final Extension | 72 °C | 5–10 minutes | 1 | Ensures all amplicons are full-length. |
| Final Hold | 4–15 °C | ∞ | 1 | Short-term storage of products. |
*The annealing temperature is critical and is typically calculated 3–5°C below the primer's melting temperature (Tm). A gradient thermal cycler is ideal for optimization [7].
Post-Amplification Analysis
Following PCR, analyze the amplified products (amplicons) by agarose gel electrophoresis [17] [21].
- Prepare a 1–2% agarose gel in an appropriate buffer containing a DNA-intercalating dye.
- Mix a portion of the PCR product with a loading dye and load into the gel alongside a DNA molecular weight ladder.
- Run the gel at a constant voltage until sufficient separation is achieved.
- Visualize the DNA bands under ultraviolet light. A single, sharp band of the expected size indicates specific amplification.
Troubleshooting and Optimization
Even with a standard protocol, PCR can fail. The table below outlines common problems, their potential causes, and solutions [14] [16].
| Problem | Possible Cause | Solution |
|---|---|---|
| No Product | Inhibitors in template, insufficient cycles, incorrect annealing temperature. | Purify template DNA; increase cycles (up to 40); lower annealing temperature in 2°C increments [16]. |
| Non-specific Bands/Smearing | Annealing temperature too low, excess primers/template, too many cycles. | Increase annealing temperature; reduce amount of primers/template; reduce cycle number [16]. |
| Primer-Dimer Formation | Primer 3' ends complementary, annealing temperature too low. | Redesign primers to avoid 3' complementarity; increase annealing temperature [14] [16]. |
For challenging templates like GC-rich sequences (>65% GC content), additives such as DMSO (1–10%), formamide (1.25–10%), or betaine (0.5 M to 2.5 M) can be included in the reaction to facilitate denaturation and improve yield and specificity [14] [7] [16].
The standard PCR protocol detailed herein provides a reliable framework for the robust amplification of target DNA sequences. The critical factors for success are the use of high-quality, optimized reagents and precisely controlled thermal cycling parameters. By understanding the function of each component and systematically troubleshooting common issues, researchers can adapt this foundational protocol to a wide array of applications, from basic gene analysis to advanced clinical and drug development research. The reproducibility and sensitivity of PCR solidify its status as an indispensable tool in the molecular biologist's arsenal.
The evolution of the Polymerase Chain Reaction (PCR) from a simple DNA amplification technique to a sophisticated quantitative and analytical tool has revolutionized molecular biology and clinical diagnostics. While conventional end-point PCR provides qualitative analysis by detecting the final amplified product via gel electrophoresis, advanced PCR variations offer greater precision, quantification, and multiplexing capabilities essential for contemporary research and diagnostic applications [30]. These advanced methods include Reverse Transcription PCR (RT-PCR), quantitative PCR (qPCR), multiplex PCR, and long-range PCR, each addressing specific experimental needs across diverse scientific disciplines.
The selection of an appropriate PCR method depends on multiple factors including the starting material (DNA or RNA), required quantification precision, number of targets, and amplicon length. This article provides detailed application notes and experimental protocols for these advanced PCR variations, framed within the context of optimizing DNA amplification research for drug development and clinical diagnostics. We present standardized protocols, troubleshooting guidelines, and comparative analyses to facilitate implementation of these techniques in research settings.
Quantitative PCR (qPCR) and Real-Time PCR
Principles and Applications
Quantitative PCR (qPCR), also known as real-time PCR, enables researchers to measure DNA amplification as it occurs through fluorescent detection systems. Unlike conventional PCR that provides results only after completion of all amplification cycles, qPCR monitors fluorescence after each cycle, allowing precise quantification of initial template amounts [30]. The fundamental principle involves tracking the fluorescence intensity that reflects the current amount of DNA amplicons throughout the amplification process. During initial cycles, fluorescence remains at background levels, but eventually reaches a point where it increases above detectable levels—termed the quantification cycle (Cq) or threshold cycle (Ct)—which correlates proportionally with the initial number of template molecules in the sample [30].
qPCR provides either absolute quantification using standard curves constructed from serial dilutions of samples with known concentrations, or relative quantification when comparing expression levels between samples. The technique has become indispensable for gene expression analysis, pathogen detection, genetic testing, and disease research [31]. Its superior quantification capabilities, higher resolution, and faster processing compared to end-point PCR make it particularly valuable for applications requiring precise measurement of nucleic acid concentrations [30].
Detailed qPCR Protocol and Optimization
Stepwise Optimization Protocol: Achieving accurate and reproducible qPCR results requires meticulous optimization of several parameters. A stepwise optimization approach should include primer sequence refinement, annealing temperature calibration, primer concentration titration, and cDNA concentration range determination [32]. The optimal conditions are achieved when a standard cDNA concentration curve demonstrates R² ≥ 0.9999 and amplification efficiency (E) = 100 ± 5% for the best primer pair of each gene [32] [33]. This level of optimization is prerequisite for reliable application of the 2–ΔΔCT method for data analysis.
Primer Design Considerations: Primers for qPCR should ideally span an exon-exon junction, with one amplification primer potentially spanning the actual exon-intron boundary [31]. This design strategy reduces false positives from contaminating genomic DNA, as intron-containing genomic sequences would not be amplified efficiently. When primers cannot be designed across exon boundaries or exon-intron junctions, treatment of RNA samples with RNase-free DNase I or dsDNase is necessary to remove contaminating genomic DNA [31].
Essential Controls: All qPCR experiments should include a minus reverse transcriptase control ("no RT" control) containing all reaction components except the reverse transcriptase [31]. This control tests for contaminating DNA, as no amplification should occur without reverse transcription. If amplification is detected in this control, it indicates presence of contaminating DNA that must be addressed before proceeding with experimental samples.
qPCR Troubleshooting Guide
Common qPCR issues and their solutions include:
- Poor Amplification Efficiency: Often caused by PCR inhibitors or suboptimal primer design. Dilute template prior to standard curve generation to find ideal Ct range. Verify primer specificity using BLAST and include a melt curve to confirm single product formation [34].
- Inconsistent Biological Replicates: May indicate RNA degradation or minimal starting material. Check RNA concentration and quality with spectrophotometry (ideal 260/280 ratio: 1.9-2.0) and run on agarose gel to detect degradation [34].
- Amplification in No Template Control (NTC): Caused by reagent contamination or primer-dimer formation. Clean work area and pipettes with 70% ethanol, prepare fresh primer dilutions, and add a dissociation curve to detect primer-dimer formation [34].
- Unexpected Ct Values: May result from incorrect thermal cycling conditions or sample evaporation. Verify thermal cycling protocol before runs and ensure tube caps are properly sealed to prevent evaporation during storage [34].
Reverse Transcription PCR (RT-PCR)
Principles and Applications
Reverse Transcription PCR (RT-PCR) combines reverse transcription of RNA into complementary DNA (cDNA) with amplification of specific cDNA targets. The key difference from standard PCR is the starting material—RT-PCR uses purified RNA as a template to generate cDNA, which is then amplified [30]. This technique enables detection and quantification of RNA molecules, making it invaluable for gene expression analysis, viral load detection, and studying RNA virus infections.
RT-PCR can be performed using either one-step or two-step approaches, each with distinct advantages and limitations [31]. The decision between these approaches depends on experimental requirements, including throughput, sensitivity needs, and number of targets to be analyzed from each sample.
Detailed RT-PCR Protocol
One-Step vs. Two-Step RT-PCR: The one-step approach combines reverse transcription and PCR in a single tube and buffer, using both reverse transcriptase and DNA polymerase [31]. This method utilizes only sequence-specific primers, resulting in less experimental variation, fewer pipetting steps (reducing contamination risk), and higher reproducibility, making it suitable for high-throughput applications [31]. However, it offers less flexibility as reaction conditions represent a compromise between the two enzymatic steps, potentially reducing sensitivity and the number of detectable targets per sample.
In the two-step approach, reverse transcription and PCR are performed in separate tubes with different optimized buffers and reaction conditions [31]. This method generates stable cDNA pools that can be stored for extended periods and used for multiple reactions, allows amplification of both target and reference genes from the same cDNA pool without multiplexing, and provides flexible priming options [31]. The main disadvantages include increased risk of contamination due to additional handling steps, longer processing time, and greater optimization requirements.
Reverse Transcription Primer Selection: Four different priming strategies are available for cDNA synthesis:
- Oligo(dT) Primers: Stretches of thymine residues that anneal to the poly(A) tail of mRNA, producing full-length cDNA but with bias toward the 3' end [31].
- Random Primers: Short (6-9 base) oligonucleotides that anneal at multiple points along RNA transcripts, enabling amplification of all RNA types including those without poly(A) tails but potentially producing truncated cDNA [31].
- Sequence-Specific Primers: Custom primers targeting specific mRNA sequences, generating specific cDNA pools with increased sensitivity but limited to one gene of interest [31].
- Combined Approaches: Often, mixtures of oligo(dT) and random primers are used to diminish generation of truncated cDNAs and improve reverse transcription efficiency [31].
Template Considerations: Researchers must decide whether to use total RNA or mRNA as the starting material. While mRNA may provide slightly greater sensitivity, total RNA is often preferred because it requires fewer purification steps (ensuring more quantitative recovery), facilitates better normalization to starting cell numbers, and avoids skewed results from differential mRNA recovery yields [31].
Table 1: Comparison of One-Step vs. Two-Step RT-PCR Approaches
| Parameter | One-Step RT-PCR | Two-Step RT-PCR |
|---|---|---|
| Procedure | Reverse transcription and PCR in single tube | Separate tubes for reverse transcription and PCR |
| Handling Time | Faster with fewer pipetting steps | More time-consuming with additional steps |
| Risk of Contamination | Lower | Higher due to multiple handling steps |
| cDNA Stability | Not applicable - direct amplification | Stable cDNA pool stored for future use |
| Flexibility | Limited - conditions compromised for both reactions | High - optimized conditions for each step |
| Throughput | Suitable for high-throughput applications | Lower throughput |
| Sensitivity | Potentially lower due to compromised conditions | Higher with optimized conditions for each step |
| Priming Options | Limited to sequence-specific primers | Multiple options: oligo(dT), random, or gene-specific |
Multiplex PCR
Principles and Applications
Multiplex PCR enables simultaneous amplification of multiple targets in a single reaction tube, using different primer pairs targeting distinct sequences. This approach conserves precious samples, reduces reagent costs, and increases throughput—particularly beneficial when sample material is limited [35]. The technique requires careful optimization to ensure comparable amplification efficiency for all targets while minimizing primer-dimer formation and nonspecific amplification.
Advanced multiplex PCR applications now achieve remarkable multiplicity, with some systems capable of amplifying over 100 targets simultaneously [36]. For example, optimized multiplex PCR-next-generation sequencing (NGS) approaches have been developed for comprehensive HLA genotyping, simultaneously targeting HLA-A, -B, -C, -DPB1, -DQB1, and -DRB1 loci in a single reaction [37]. Such high-plex applications require sophisticated primer design tools and careful optimization to ensure uniform coverage across all targets.
Detailed Multiplex PCR Protocol
Primer Design and Compatibility: Successful multiplex PCR requires primers that work harmoniously without forming secondary structures or primer-dimers. Ultiplex, a web-based multiplex primer design tool, facilitates batch design and compatibility checking by excluding mutual secondary structures and false alignments across the genome [36]. This tool offers flexible parameters for users to define references, primer Tm values, product lengths, plex numbers, and tag oligos, significantly simplifying the primer design process for complex multiplex assays.
Reaction Optimization: Commercial multiplex PCR kits, such as the QIAGEN Multiplex PCR Kit, incorporate specialized components to enhance performance. These include HotStarTaq DNA Polymerase for reduced nonspecific amplification during setup, and unique PCR buffers containing additives like Factor MP that increase local primer concentration at the template and stabilize specifically bound primers [35]. The kit also provides Q-Solution, a proprietary additive that facilitates amplification of difficult templates (e.g., GC-rich sequences) by modifying DNA melting behavior, used at a single working concentration without toxicity concerns [35].
Thermal Cycling Conditions: Standard thermal cycling parameters for multiplex PCR begin with a 15-minute incubation at 95°C to activate the hot-start polymerase, followed by 30-35 cycles of denaturation (98°C for 20 seconds), annealing (63°C for 1 minute), and extension (72°C for 5 minutes), with a final extension at 72°C for 5-10 minutes [35] [37]. These conditions may require adjustment based on specific primer characteristics and target sequences.
Application-Specific Implementation: In HLA genotyping applications, multiplex PCR primers are designed to target specific loci with varying concentrations in the primer mix (e.g., HLA-A: 0.04 μM, HLA-B: 0.1 μM, HLA-C: 0.15 μM, HLA-DQB1: 0.18 μM, HLA-DRB1: 0.07 μM, HLA-DPB1: 0.04 μM) to balance amplification efficiency across targets [37]. This careful balancing ensures uniform coverage across all loci despite sequence differences and varying amplification efficiencies.
Long-Range PCR
Principles and Applications
Long-range PCR enables amplification of significantly longer DNA fragments than conventional PCR—up to 20 kb from human genomic DNA and up to 40 kb from λDNA [38]. This capability is particularly valuable for applications requiring analysis of large genomic regions, including genetic disorder diagnostics, haplotype phasing, and structural variant detection. The technique employs specialized enzyme mixtures, typically combining thermostable Taq DNA polymerase with a proofreading DNA polymerase to enhance processivity and accuracy over extended templates [38].
Recent applications demonstrate the power of long-range PCR combined with long-read sequencing technologies. For example, one study established a robust workflow using long-range PCR and Nanopore sequencing for phasing distantly separated variants (up to 20 kb apart) and analyzing genomic regions with high homology [39]. This approach successfully phased 15 heterozygous single nucleotide variant pairs and 10 small InDels with 100% concordance to known phases, highlighting its utility for clinical diagnostics [39].
Detailed Long-Range PCR Protocol
Polymerase Selection: Specialized polymerase mixtures are essential for successful long-range PCR. The Expand Long Template PCR System contains a blend of thermostable Taq DNA polymerase and a proofreading thermostable DNA polymerase, providing high yields of long PCR products [38]. Similarly, the UltraRun LongRange PCR Kit has demonstrated 90% success rates for DNA amplification up to 22 kb [39]. These specialized formulations maintain activity over extended extension times required for long amplicons.
Buffer Optimization: Buffer composition critically influences long-range PCR success. The Expand Long Template PCR System provides three specialized buffers optimized for different fragment size ranges: Buffer 1 for 0.5-9 kb, Buffer 2 for 9-12 kb, and Buffer 3 for fragments >12 kb [38]. Buffers should be thawed and equilibrated at 37-56°C before use, with thorough vortexing to dissolve any crystals that may have formed during storage.
Thermal Cycling Parameters: Optimal thermal cycling conditions for long-range PCR require extended extension times. For a 15 kb fragment, recommended elongation time is approximately 11 minutes [38]. Programs typically begin with initial denaturation at 95°C for 2-10 minutes, followed by 30-35 cycles of denaturation (94°C for 30-60 seconds), annealing (temperature specific to primer Tm for 30-60 seconds), and extension (68°C for 1 minute per kb), with a final extension at 68°C for 7-10 minutes. Ramping rates between temperatures should be minimized to maintain enzyme activity and proper template denaturation.
Troubleshooting Common Issues: When PCR products show smearing on gels, potential solutions include decreasing cycle numbers, reducing template concentration, lowering enzyme amount, testing all available buffers, or reducing elongation temperature to 66°C [38]. To minimize chimeric reads—a known PCR artifact in long-range amplification where sequences from different biological templates combine—limit cycles to 26 and optimize primer design [39]. The median proportion of chimeric reads can be maintained at 2.80% under optimized conditions [39].
Comparative Analysis of PCR Methods
Method Selection Guide
Table 2: Comparison of Advanced PCR Techniques and Their Applications
| Parameter | End-Point PCR | qPCR | Digital PCR | Multiplex PCR | Long-Range PCR |
|---|---|---|---|---|---|
| Quantification | Qualitative to semi-quantitative | Quantitative based on standard curves | Absolute quantification using Poisson statistics | Qualitative to semi-quantitative | Qualitative |
| Primary Application | Target detection, cloning | Gene expression, pathogen quantification | Rare variant detection, copy number variation | Pathogen typing, SNP analysis, HLA genotyping | Large fragment amplification, haplotype phasing |
| Throughput | Moderate | High | Moderate | High for multiple targets | Low to moderate |
| Dynamic Range | Limited | Large (5+ logs) | Limited by partition number | Target-dependent | Target-dependent |
| Precision | + | ++ | +++ | ++ | + |
| Key Equipment | Thermal cycler, gel system | Real-time thermal cycler | Digital PCR system | Thermal cycler | Thermal cycler with extended elongation capability |
| Cost Considerations | Low | Moderate | High | Moderate (reduces per-target cost) | Moderate |
Integrated Workflows
Advanced PCR applications increasingly combine multiple techniques in integrated workflows. For example, a comprehensive HLA genotyping approach combines multiplex PCR with next-generation sequencing, where the initial multiplex PCR simultaneously amplifies six HLA loci (HLA-A, -B, -C, -DPB1, -DQB1, -DRB1) in a single tube, followed by library preparation and high-resolution sequencing [37]. This integrated approach demonstrates how combining PCR variations enhances efficiency and information yield compared to individual methods.
Similarly, targeted variant phasing combines long-range PCR with Nanopore sequencing in an end-to-end workflow [39]. This approach overcomes limitations of short-read sequencing in phasing distantly separated variants and analyzing regions with high sequence homology, demonstrating the complementary nature of advanced PCR methods with emerging sequencing technologies.
Research Reagent Solutions
Table 3: Essential Research Reagents for Advanced PCR Applications
| Reagent Category | Specific Examples | Function and Application Notes |
|---|---|---|
| Polymerase Systems | HotStarTaq DNA Polymerase, Expand Long Template PCR System, UltraRun LongRange PCR Kit | Catalyze DNA amplification; specialized formulations for specific applications like multiplex or long-range PCR |
| Specialized Buffers | QIAGEN Multiplex PCR Buffer, Expand Long Template Buffers | Optimize reaction conditions for specific PCR types; contain proprietary additives for enhanced specificity |
| PCR Additives | Q-Solution, DMSO, Factor MP | Modify DNA melting behavior, enhance specificity, and improve amplification of difficult templates |
| Reverse Transcriptases | Moloney murine leukemia virus RT, Avian myeloblastosis virus RT | Convert RNA to cDNA for RT-PCR applications; vary in thermal stability and RNase H activity |
| Primer Design Tools | Ultiplex, Primer3Plus, Primer-BLAST | Facilitate design of specific primers with minimal secondary structures for standard and multiplex applications |
| Nucleic Acid Purification Kits | QIAamp DNA/RNA kits | Extract high-quality nucleic acids free of inhibitors that could compromise PCR efficiency |
Workflow Visualization
Diagram 1: Advanced PCR Method Selection Workflow. This diagram illustrates the decision process for selecting appropriate PCR methods based on research objectives, from sample collection through data analysis.
Quantitative PCR (qPCR) and next-generation sequencing (NGS) have become foundational technologies in modern pathogen detection and variant surveillance. These methodologies provide critical tools for public health officials, researchers, and drug development professionals to track infectious disease threats, characterize emerging variants, and guide therapeutic interventions. The application of these technologies follows rigorous experimental protocols and quality control measures to ensure data accuracy and reproducibility. This article presents contemporary case studies demonstrating the practical application of advanced molecular detection methods within the broader context of PCR protocol for DNA amplification research, highlighting specific experimental workflows, data analysis techniques, and reagent systems employed in real-world public health and clinical diagnostics scenarios.
Case Study 1: Wastewater Surveillance of SARS-CoV-2 Variants Using Targeted Amplicon Sequencing
Wastewater surveillance has emerged as a powerful public health tool for monitoring community transmission of pathogens. The National Wastewater Surveillance System (NWSS) implemented by the Centers for Disease Control and Prevention (CDC) provides a robust framework for tracking SARS-CoV-2 variants through a high-throughput bioinformatics pipeline.
Experimental Protocol
Sample Collection and Processing:
- Wastewater samples were collected from 130 sites across 32 US jurisdictions during November 2023–July 2024 [40].
- Samples were concentrated, DNase treated, and reverse transcribed before amplification [40].
- Amplification was performed using the NEB Q5 High-Fidelity PCR Kit with ARTIC version 5.3.2 primers [40].
- Sequencing libraries were prepared with the NEBNext Ultra II DNA Library Prep Kit and pair-end sequenced (2 × 300 bp) on the Illumina NextSeq 2000 platform [40].
Bioinformatic Analysis:
- Raw sequencing data were processed using Aquascope version 2.1.0, which performed quality checks, adapter removal, and alignment to the SARS-CoV-2 reference genome (MN908947.3) [40].
- Primers used for amplification were trimmed from the sequences [40].
- Relative abundance of SARS-CoV-2 lineages was estimated using Freyja with SARS-CoV-2 UShER barcodes [40].
- Lineage aggregation and normalization were performed, with lineages representing <5% of the total categorized as "Other" [40].
Table 1: Key Experimental Components for Wastewater Surveillance
| Component | Specification | Function |
|---|---|---|
| PCR Kit | NEB Q5 High-Fidelity | High-fidelity amplification with proofreading capability |
| Primers | ARTIC v5.3.2 | Targeted amplification of SARS-CoV-2 genome regions |
| Library Prep Kit | NEBNext Ultra II DNA Library Prep | Preparation of sequencing-ready libraries |
| Sequencing Platform | Illumina NextSeq 2000 | High-throughput sequencing (2 × 300 bp) |
| Bioinformatics Pipeline | Aquascope v2.1.0 | Quality control, variant identification, lineage abundance estimation |
Results and Data Analysis
The wastewater surveillance data revealed distinct temporal trends in the emergence and spread of the JN.1 variant. Analysis of 3,377 unique samples showed JN.1 was first detected in November 2023, increased to prevalence in early December 2023, peaked in early March 2024, and subsequently declined through July 2024 [40]. The pipeline also detected the sequential emergence of JN.1 sublineages (JN.1.7 and JN.1.11.1) and the appearance of KP.2 and KP.3 lineages [40].
The following workflow diagram illustrates the complete wastewater surveillance process:
Case Study 2: Clinical Detection of Respiratory Pathogens Using Targeted NGS
The integration of DNA and RNA sequencing approaches provides comprehensive pathogen detection in clinical settings. A recent study evaluated targeted NGS (tNGS) for diagnosing lower respiratory tract infections (LRTIs), demonstrating enhanced sensitivity compared to conventional methods [41].
Experimental Protocol
Sample Processing and Nucleic Acid Extraction:
- Sputum samples (100 μL) were mixed with liquefaction reagent and incubated at 37°C for 10-15 minutes [41].
- Samples were centrifuged at 12,000×g for 5 minutes [41].
- Nucleic acids were extracted using the VAMNE Magnetic Pathogen DNA/RNA Kit [41].
- RNA was reverse transcribed to cDNA using the Hieff NGS ds-cDNA Synthesis Kit [41].
Library Preparation and Targeted Enrichment:
- Libraries were prepared using 50 ng of nucleic acid and the HieffNGS C37P4 One Pot cDNA&gDNA Library Prep Kit [41].
- A custom probe panel targeting 306 respiratory pathogens or subtypes was used for hybridization capture [41].
- Optimal hybridization conditions were determined as 0.3 fmol probe dosage, 4-hour hybridization at 60°C, and capture at 65°C [41].
- Eight barcoded libraries were pooled per sequencing run [41].
Sequencing and Analysis:
- Sequencing was performed on the Gene+Seq-100 platform with 100-bp single-end reads [41].
- A target depth of 5 million reads per sample was established [41].
- Quality thresholds included Q20 ≥95% and Q30 ≥88% [41].
Table 2: Performance Metrics of tNGS for Respiratory Pathogen Detection
| Parameter | Result | Methodology |
|---|---|---|
| Sensitivity | 97.73% | Compared to composite reference standard (n=281 patients) |
| Specificity | 75.41% | Compared to composite reference standard (n=281 patients) |
| Limit of Detection | 100-200 CFU/mL | Established using simulated samples |
| Turnaround Time | 16 hours | From sample to result |
| AMR Marker Concordance | 80.56% | Compared to antimicrobial susceptibility testing |
| Viral Subtyping | 61.40% | Of target viruses subtype-resolved |
Research Reagent Solutions
Table 3: Essential Research Reagents for Pathogen Detection Protocols
| Reagent/Kit | Application | Function |
|---|---|---|
| NEB Q5 High-Fidelity PCR Kit | Wastewater surveillance | High-fidelity amplification with proofreading activity for accurate sequencing |
| ARTIC v5.3.2 Primers | SARS-CoV-2 variant tracking | Targeted amplification of SARS-CoV-2 genome regions for tiled amplicon sequencing |
| NEBNext Ultra II DNA Library Prep Kit | NGS library preparation | Preparation of sequencing-ready libraries from amplified DNA |
| VAMNE Magnetic Pathogen DNA/RNA Kit | Clinical sample processing | Simultaneous extraction of DNA and RNA from complex clinical matrices |
| Hieff NGS ds-cDNA Synthesis Kit | RNA pathogen detection | Reverse transcription of RNA to cDNA for sequencing library preparation |
| HieffNGS C37P4 One Pot cDNA&gDNA Library Prep Kit | tNGS library preparation | Simultaneous preparation of libraries from both cDNA and DNA |
Advanced qPCR Data Analysis Methods
Robust data analysis is critical for accurate pathogen detection and quantification. Several advanced methods have been developed to address limitations of traditional cycle-threshold (Ct) analysis:
The "Dots in Boxes" Method for High-Throughput qPCR Analysis
New England Biolabs developed a "dots in boxes" visualization method to evaluate qPCR performance across multiple targets and conditions [42]. This approach captures key MIQE guideline metrics including PCR efficiency, dynamic range, target specificity, and precision as single data points plotted in two dimensions [42]. PCR efficiency is plotted on the y-axis (ideal range: 90-110%) and delta Cq (ΔCq = Cq(NTC) - Cq(lowest input)) on the x-axis (ideal: ≥3) [42]. Each data point includes a quality score (1-5) based on linearity (R² ≥ 0.98), reproducibility (replicate Cq variation ≤1), RFU consistency, curve steepness, and curve shape [42].
The maxRatio Method for Robust Quantification
The maxRatio method transforms amplification curves to ratio curves with well-defined peaks, identifying a consistent point within the exponential region without user intervention [43]. This method calculates a ratio at each cycle using the formula: Ratioₙ = (Signalₙ - Signalₙ₋₁) / Signalₙ₋₁ [43]. Key parameters include:
- MR (maxRatio) value: Magnitude of the ratio curve at maximum [43]
- FCN (fractional cycle number): Cycle number at which the maximum occurs [43]
- Width parameter: Half width at half maximum of the ratio curve [43]
The Cy₀ Method for Inhibition-Resistant Quantification
The Cy₀ method uses nonlinear regression of Richards' equation to real-time PCR data, minimizing dependence on PCR kinetics [44]. This approach does not require the assumption of equal reaction efficiency between unknowns and standard curve, making it resistant to quantitative inaccuracies caused by slight amplification inhibition [44]. In validation studies, when PCR efficiency was decreased by 4%, the Cy₀ method maintained accuracy while Ct, second derivative maximum (Cp), and sigmoidal curve fitting (SCF) methods showed significant quantitative errors up to 400% [44].
The following diagram illustrates the relationship between different qPCR data analysis methods:
The case studies presented demonstrate the powerful application of PCR-based methodologies in contemporary pathogen detection and variant surveillance. Wastewater sequencing using targeted amplicon approaches provides public health officials with community-level variant tracking, while clinical tNGS platforms enable comprehensive pathogen identification in diagnostic settings. Advanced qPCR analysis methods address limitations of traditional approaches, particularly in challenging conditions involving inhibition or requiring high-throughput applications. These protocols and methodologies continue to evolve, enhancing the precision, efficiency, and scope of pathogen detection in both research and public health contexts. As molecular technologies advance, integration of these approaches will further strengthen global capacity for infectious disease surveillance and outbreak response.
Molecular diagnostics and research have been transformed by integrated workflows that seamlessly connect nucleic acid extraction with amplification and analysis. This integration is particularly critical for polymerase chain reaction (PCR)-based applications, where the quality of each step profoundly impacts downstream results. Efficient workflow integration minimizes manual handling, reduces contamination risk, decreases processing time, and enhances reproducibility across diverse applications from clinical diagnostics to fundamental research [45] [46]. Within the broader context of DNA amplification research, optimized integrated systems enable researchers to obtain reliable results faster, supporting advancements in pathogen detection, genetic analysis, and biomarker discovery.
This application note provides detailed protocols and experimental data for a fully integrated approach to nucleic acid extraction and analysis, featuring both manual and automated methods to accommodate varying laboratory needs and scales.
Integrated Experimental Workflow
The complete integrated workflow for nucleic acid analysis encompasses sample preparation, nucleic acid extraction, PCR amplification, and result analysis. The following diagram illustrates the logical relationships and sequential steps in this process:
Nucleic Acid Extraction Protocols
HotShot Vitis Method for Plant Tissues
The HotShot Vitis method is a rapid, optimized DNA extraction protocol specifically developed for challenging plant tissues such as grapevine, which contain high levels of PCR inhibitors like polysaccharides and polyphenols [47].
Materials and Reagents
- Alkaline Lysis Buffer: 60 mM NaOH, 0.2 mM disodium EDTA, 1% (w/v) PVP-40, 0.1% (w/v) SDS, 0.5% (w/v) sodium metabisulfite, adjusted to pH 12
- Neutralization Buffer: 40 mM Tris-HCl, adjusted to pH 5
- Tissue Homogenization: Bioreba extraction bags with Omex grinder
- Equipment: Thermo-mixer, microcentrifuge, 1.5 mL microcentrifuge tubes
Step-by-Step Protocol
- Sample Preparation: Place 500 mg of grapevine tissues (midribs and veins) in a Bioreba extraction bag with 3 mL of alkaline lysis buffer [47].
- Homogenization: Thoroughly homogenize the tissue at room temperature using an Omex grinder.
- Aliquot Transfer: Transfer 500 µL of the homogenate to a 1.5 mL microcentrifuge tube.
- Thermal Incubation: Incubate at 95°C for 10 minutes at 300 rpm in a thermo-mixer.
- Cooling: Cool samples on ice for 3 minutes.
- Neutralization: Add an equal volume (500 µL) of neutralization buffer, mix gently, and centrifuge at 10,000 × g for 5 minutes at 12°C.
- Supernatant Collection: Carefully transfer the supernatant to a new tube, avoiding pellet disturbance.
- Storage: Store DNA extracts at 4°C for short-term use (within one week) or at -20°C for longer preservation.
Automated Extraction Using Magnetic Bead Technology
For high-throughput applications, automated extraction systems provide consistency and efficiency. The following protocol is optimized for viral nucleic acid extraction [48].
Materials and Reagents
- Lysis Buffer: Containing 6 M guanidinium hydrochloride, optimized at pH 4-5
- Carrier RNA: Essential for improving viral genome recovery
- Washing Buffers: Standard ethanol-based buffers
- Elution Buffers: DNase/RNase free water or 1× TE buffer
- Equipment: Automated nucleic acid extractor with magnetic bead capability
Step-by-Step Protocol
- Sample Lysis: Mix samples with lysis buffer containing 6 M guanidinium hydrochloride and carrier RNA.
- Binding: Incubate with magnetic beads to allow nucleic acid binding.
- Washing: Perform two wash steps with washing buffers.
- Elution: Elute nucleic acids in DNase/RNase free water or 1× TE buffer.
- Quality Assessment: Measure nucleic acid concentration and purity using spectrophotometric methods.
PCR Amplification and Analysis
Conventional PCR Protocol
Reaction Setup
Set up a standard 50 µL reaction mixture with the following components [14]:
Table 1: Conventional PCR Reaction Components
| Component | Final Concentration | Volume per 50 µL Reaction |
|---|---|---|
| 10X PCR Buffer | 1X | 5 µL |
| dNTPs | 200 µM | 1 µL of 10 mM stock |
| MgCl₂ | 1.5-4.0 mM | Variable (0-8 µL of 25 mM stock) |
| Forward Primer | 0.4-1.0 µM | 1 µL of 20 µM stock |
| Reverse Primer | 0.4-1.0 µM | 1 µL of 20 µM stock |
| DNA Template | 1-1000 ng | Variable |
| DNA Polymerase | 0.5-2.5 units | 0.5-1.0 µL |
| Sterile Water | - | To 50 µL |
Thermal Cycling Conditions
- Initial Denaturation: 93-95°C for 2-5 minutes
- Amplification (30-40 cycles):
- Denaturation: 93-95°C for 20-30 seconds
- Annealing: 52-65°C for 20-40 seconds (primer-specific)
- Extension: 72°C for 1 minute per kb
- Final Extension: 72°C for 5-10 minutes
- Hold: 4°C indefinitely
Advanced Detection Systems
Centrifugal Force Real-Time Digital PCR (crdPCR)
The crdPCR system (digiQuark) represents a significant advancement in digital PCR technology, featuring minimal sample loss (2.14%) and integrated artificial intelligence analysis [49].
Table 2: Performance Comparison of PCR Detection Methods
| Parameter | Conventional PCR | Real-Time PCR | Digital PCR (crdPCR) |
|---|---|---|---|
| Quantification | Semi-quantitative | Relative quantification | Absolute quantification |
| Detection Limit | Moderate | High | Very High (1.38 copies/μL) |
| Sample Partitioning | No | No | Yes (22,000 microwells) |
| Analysis Method | End-point | Real-time fluorescence | Real-time with AI |
| Throughput | Moderate | High | High |
| Hands-on Time | High | Moderate | Low |
Automated Analysis with Artificial Intelligence
The True-Positive Select (TPS) method integrated into crdPCR uses artificial neural networks (ANN) to analyze real-time amplification graphs from each micro-well, effectively addressing the "rain" phenomenon that complicates traditional dPCR analysis [49]. This method improves detection accuracy in low-concentration samples by distinguishing true positives from false positives based on amplification curve characteristics rather than fixed thresholds.
Research Reagent Solutions
The following table details essential reagents and materials for implementing integrated nucleic acid analysis workflows:
Table 3: Essential Research Reagents for Nucleic Acid Analysis Workflows
| Reagent/Material | Function | Application Notes |
|---|---|---|
| PVP-40 | Binds polyphenols | Critical for plant tissue extraction to remove PCR inhibitors [47] |
| Guanidinium HCl | Denaturing agent | Optimal at 6 M concentration for viral nucleic acid extraction [48] |
| Carrier RNA | Improves nucleic acid recovery | Essential for low-concentration viral genomes [48] |
| Magnetic Beads | Nucleic acid binding | Enable automated extraction and purification |
| Sodium Metabisulfite | Antioxidant | Preserves nucleic acid integrity during extraction [47] |
| Taq DNA Polymerase | DNA amplification | Thermostable enzyme for PCR; 0.5-2.5 units/50 µL reaction [14] |
| Hydrolysis Probes | Target detection | Enable real-time PCR detection with fluorophore-quencher pairs |
Workflow Integration and Automation
Fully Automated Systems
Recent advancements in workflow integration have led to the development of complete automation solutions such as the CURECA system, which integrates sample preprocessing, nucleic acid extraction, PCR setup, amplification, and result analysis into a single continuous workflow [50]. This system operates 24/7 with minimal manual intervention, significantly reducing processing time and potential for human error.
Automated Data Analysis
Systems like PCR.Ai provide automated interpretation of qPCR amplification curves, offering standardized results while significantly reducing hands-on time (saving 45 minutes per respiratory run and 32 minutes per norovirus run) [45]. This automation maintains 100% concordance with manual interpretation while eliminating inter-observer variability.
Troubleshooting and Optimization
In Silico Validation
Regular in silico validation of PCR assays using tools like PCRv ensures ongoing assay effectiveness as new pathogen variants emerge [51]. This approach uses ClustalW and SSEARCH programs to compare primer and probe sequences against expanding nucleotide databases, identifying potential false negatives due to sequence divergence.
Assay Redesign Considerations
When PCR assays demonstrate unacceptably low sensitivity (some published assays show false negative rates up to 94%), comprehensive redesign using whole-genome based automated signature design is recommended [52] [53]. This may require multiple signature sets to detect all sequenced strains of a target pathogen.
Integrated workflows from nucleic acid extraction to result analysis represent the current standard for efficient, reproducible molecular diagnostics and research. The protocols and systems described herein provide researchers with robust methods adaptable to various throughput needs and sample types. As automation and artificial intelligence continue to advance, further integration and standardization of these workflows will enhance reliability, reduce turnaround times, and expand access to molecular analysis across diverse laboratory settings.
Perfecting Your Reaction: A Strategic Guide to PCR Troubleshooting and Optimization
Within the framework of DNA amplification research, the Polymerase Chain Reaction (PCR) is a foundational technique. However, even experienced researchers encounter problems that can compromise experimental results. These issues primarily manifest as a complete lack of amplification, the appearance of non-specific bands, or smeared products on an agarose gel. This application note provides a detailed diagnostic guide and robust protocols to troubleshoot these common PCR problems, ensuring the reliability and reproducibility of your amplification experiments.
Systematic Problem Diagnosis
A targeted approach to troubleshooting begins with accurate identification of the problem visualized via gel electrophoresis. The tables below summarize the primary causes and solutions for the most common PCR issues.
Table 1: Diagnosing No or Weak Amplification
| Possible Cause | Detailed Explanation & Solution |
|---|---|
| Poor DNA Template Quality/Quantity | Template degradation, contamination with inhibitors (e.g., phenol, EDTA, heparin), or insufficient concentration can prevent amplification [54]. Assess DNA integrity by gel electrophoresis, measure concentration via spectrophotometry (A260/280 ratio ~1.8), and use 10-100 ng of clean DNA per 50 µL reaction [55] [14]. For inhibitory samples, dilute the template or use inhibitor-tolerant polymerases [16] [54]. |
| Suboptimal Reaction Components | - Primers: Verify design specificity and concentration (typically 0.1–1 µM) [54]. - DNA Polymerase: Ensure enzyme is active and used at the correct concentration (e.g., 0.5-2.5 units/50 µL reaction) [14]. - dNTPs/Mg²⁺: Use balanced, fresh dNTPs (200 µM each) and optimize Mg²⁺ concentration (typically 1.5-2.5 mM), as excess dNTPs can chelate Mg²⁺ [14] [54]. |
| Incorrect Thermal Cycling Conditions | - Annealing Temperature Too High: Increase temperature in 2°C increments or perform gradient PCR. The optimal temperature is often 3–5°C below the primer Tm [16] [54]. - Insufficient Cycle Number: For low-abundance targets, increase cycles up to 40 [16]. - Extension Time Too Short: Ensure sufficient time for polymerase activity (e.g., 1 min/kb) [16]. |
Table 2: Diagnosing Non-Specific Bands and Smears
| Problem & Cause | Detailed Explanation & Solution |
|---|---|
| Non-Specific Bands (Multiple unintended bands) | - Low Annealing Temperature: Primers bind to partially complementary sites. Solution: Increase temperature incrementally or use a gradient cycler [55] [16]. - Poor Primer Design: Primers with self-complementarity or non-specific targets. Solution: Redesign primers using software (e.g., Primer-BLAST, Primer3) ensuring they are 18-30 bases long with a Tm of 52-65°C and similar Tm for each primer [55] [14]. - Excess Enzyme, Primers, or Template: High concentrations promote off-target binding. Solution: Use recommended concentrations and consider hot-start polymerase to prevent activity during setup [55] [54]. |
| Smearing (A continuous smear of DNA on the gel) | - Excess Template DNA: Too much DNA can cause random priming and amplification. Solution: Reduce template amount by 2–5 fold [16] [56]. - Too Many PCR Cycles: Over-cycling can lead to accumulation of non-specific products and errors. Solution: Reduce the number of cycles (typically 25-35 is sufficient) [55] [57]. - Contamination: Contaminating DNA from previous PCR products or the environment. Solution: Use separate pre- and post-PCR work areas, UV-irradiate equipment, and include a negative (no-template) control [16] [58]. - Low Annealing Temperature / Long Extension Time: Both can reduce stringency. Solution: Increase annealing temperature and/or reduce extension time [16] [56]. |
Experimental Protocols for Troubleshooting
Core PCR Protocol and Master Mix Preparation
This standard protocol serves as a baseline from which to begin optimizations [14].
- Reagent Thawing and Preparation: Wear gloves. Thaw all PCR reagents (except polymerase) on ice and mix gently by vortexing. Briefly centrifuge to collect contents at the bottom of the tube. Keep reagents on ice throughout setup.
Master Mix Formulation: For multiple reactions, prepare a master mix to ensure consistency. A typical 50 µL reaction is outlined below. Multiply volumes by (n+1) to account for pipetting error, where 'n' is the number of reactions.
Table 3: Standard 50 µL PCR Reaction Master Mix
Component Final Concentration Volume per 50 µL Reaction Sterile Nuclease-Free Water - Q.S. to 50 µL 10X PCR Buffer 1X 5 µL dNTP Mix (e.g., 10 mM) 200 µM (each) 1 µL Forward Primer (e.g., 20 µM) 0.4 µM 1 µL Reverse Primer (e.g., 20 µM) 0.4 µM 1 µL Template DNA 10-100 ng Variable (e.g., 0.5-5 µL) DNA Polymerase (e.g., 5 U/µL) 1.25 U 0.25 µL Total Volume 50 µL Note: MgCl₂ is often included in the 10X buffer at a final concentration of 1.5 mM. If not, it must be added separately (e.g., 1-3 µL of 25 mM MgCl₂) [14].
- Aliquoting and Adding Template: Pipette the appropriate volume of master mix into each PCR tube. Then, add the template DNA to the respective tubes. For the negative control, add sterile water instead of template.
- Thermal Cycling: Place tubes in a thermal cycler pre-heated to the initial denaturation temperature. A standard cycling program is:
- Initial Denaturation: 94–98°C for 2–5 minutes.
- Amplification (25–35 cycles):
- Denature: 94–98°C for 20–30 seconds.
- Anneal: Tm-specific temperature (e.g., 55–65°C) for 15–30 seconds.
- Extend: 72°C for 1 minute per kilobase of amplicon.
- Final Extension: 72°C for 5–10 minutes.
- Hold: 4–10°C.
Optimization Workflows
When the core protocol fails, employ these systematic optimization strategies.
Diagram 1: A systematic workflow for diagnosing and troubleshooting common PCR problems.
Gradient PCR for Annealing Temperature Optimization
The most common and critical optimization is determining the correct annealing temperature (Ta).
- Preparation: Prepare a standard master mix as in Table 3.
- Cycler Programming: Use a thermal cycler with a gradient function. Set a temperature gradient across the block that spans a realistic range (e.g., 50°C to 70°C) based on the calculated Tm of your primers.
- Analysis: Run the PCR and analyze products on an agarose gel. Identify the temperature that produces the highest yield of the desired specific product with the absence of non-specific bands. This temperature becomes the optimized Ta for future experiments [55].
Diagram 2: A basic workflow for optimizing annealing temperature using gradient PCR.
Touchdown PCR for Enhanced Specificity
Touchdown PCR is highly effective for increasing specificity, particularly when primer design is suboptimal or the optimal Ta is unknown [16].
- Program Setup: The initial cycles use an annealing temperature several degrees above the estimated Tm of the primers.
- Temperature Decrement: The annealing temperature is decreased by 1°C every cycle or every second cycle over a defined range (e.g., from 72°C down to 55°C over 18 cycles).
- Final Amplification: After the touchdown phase, 15-20 additional cycles are run at the final, lowest temperature of the touchdown range.
- Principle: Early high-stringency cycles preferentially amplify the specific target. By the time the temperature drops to permit non-specific binding, the specific product is already abundant and outcompetes non-target sequences.
The Scientist's Toolkit: Essential Reagents & Materials
Table 4: Key Research Reagent Solutions for PCR Troubleshooting
| Reagent/Material | Function in PCR | Application Note |
|---|---|---|
| Hot-Start DNA Polymerase | Remains inactive at room temperature, preventing non-specific primer extension and primer-dimer formation during reaction setup. Activated by high initial denaturation temperature. | Crucial for improving specificity and yield. Available through chemical modification, antibody binding, or physical separation [58] [54]. |
| PCR Enhancers/Additives | Help amplify difficult templates (e.g., GC-rich, high secondary structure) by altering DNA melting behavior or polymerase stability. | - DMSO (1-10%): Disrupts base pairing.- Betaine (0.5-2.5 M): Equalizes Tm of GC and AT pairs.- BSA (10-100 µg/mL): Binds inhibitors [14] [54]. Use lowest effective concentration. |
| dNTP Mix | The four deoxynucleotides (dATP, dCTP, dGTP, dTTP) provide the building blocks for new DNA synthesis. | Use a balanced, high-quality mix at a final concentration of 200 µM each. Unbalanced concentrations can increase error rates [14] [54]. |
| MgCl₂ / MgSO₄ Solution | Serves as a essential cofactor for DNA polymerase activity. Concentration directly impacts enzyme fidelity, specificity, and yield. | Critical optimization parameter. Typical final concentration is 1.5-2.5 mM. Excess Mg²⁺ reduces fidelity and can cause non-specific bands [55] [54]. |
| Nuclease-Free Water | The solvent for the reaction, free of nucleases that could degrade primers, template, or products. | Essential for reagent preparation and reaction setup to prevent sample and reagent degradation. |
Effective PCR troubleshooting hinges on a methodical approach that combines an understanding of reaction biochemistry with practical optimization strategies. By systematically diagnosing problems based on gel evidence, applying targeted solutions such as gradient and touchdown PCR, and utilizing key reagents like hot-start polymerases and specific enhancers, researchers can overcome the common challenges of no amplification, non-specific bands, and smearing. This ensures the generation of high-quality, reliable data essential for downstream applications in research and drug development.
The Polymerase Chain Reaction (PCR) is a foundational technique in molecular biology, yet achieving specific and efficient amplification of a target DNA sequence often requires careful optimization of reaction parameters. The success of DNA amplification research directly hinges on the fine-tuning of critical components, as suboptimal conditions readily lead to reaction failure, nonspecific products, or reduced yield. This application note provides a structured framework for researchers and drug development professionals to systematically optimize three pivotal levers: Mg2+ concentration, annealing temperature, and the use of PCR additives. By detailing established protocols and providing actionable data tables, this guide aims to enhance experimental reproducibility and reliability in PCR-based research.
The Critical Role of Mg2+ Concentration
Magnesium ions (Mg2+) serve as an essential cofactor for thermostable DNA polymerases, directly enabling enzyme activity and the catalytic formation of phosphodiester bonds during DNA synthesis [59] [60]. The concentration of Mg2+ in the reaction is paramount because it influences the fidelity, specificity, and overall efficiency of the amplification process.
Mechanism of Action and Optimization Rationale
Mg2+ facilitates the interaction between the DNA polymerase and the DNA template. It stabilizes the double-stranded structure of DNA by neutralizing the negative charges on the phosphate backbone of the DNA, which is crucial for primer annealing [59]. Furthermore, Mg2+ is directly involved in the catalytic center of the DNA polymerase, participating in the nucleophilic attack when a dNTP is incorporated into the growing DNA strand [60]. The free Mg2+ concentration is dynamically affected by other reaction components, particularly dNTPs, which chelate the ions, thereby reducing their availability for the polymerase [59] [61]. An imbalance in Mg2+ concentration can have dramatic consequences: insufficient Mg2+ results in low or no product yield due to impaired polymerase activity, while excessive Mg2+ stabilizes non-specific primer-template interactions, leading to spurious amplification and the appearance of multiple bands on an agarose gel [62] [61].
Experimental Protocol for Mg2+ Titration
A systematic titration is the most reliable method for determining the optimal Mg2+ concentration for a given primer-template system.
Materials:
- Template DNA (e.g., genomic, plasmid)
- Forward and Reverse Primers
- 10X PCR Buffer (without MgCl2)
- MgCl2 solution (e.g., 25 mM stock)
- dNTP Mix (10 mM each)
- DNA Polymerase (e.g., Taq)
- Nuclease-free Water
Procedure:
- Prepare a Master Mix containing all common reagents: 1X PCR buffer, 0.2 mM of each dNTP, 0.2–0.5 µM of each primer, 0.5–1.0 U of DNA polymerase, and a constant amount of template DNA per reaction.
- Aliquot the Master Mix into 6-8 PCR tubes.
- Add MgCl2 to each tube to create a concentration gradient. A typical range is 1.0 mM to 4.0 mM in increments of 0.5 mM [14] [62].
- Adjust the volume in each tube to be identical with nuclease-free water.
- Run the PCR using the standard cycling conditions for your system.
- Analyze the results via agarose gel electrophoresis. The optimal condition is the lowest Mg2+ concentration that produces a strong, specific amplicon with minimal to no non-specific background.
Table 1: Effects of Mg2+ Concentration on PCR Performance
| Mg2+ Concentration | Expected Outcome | Recommendation |
|---|---|---|
| Too Low (< 1.0 mM) | Low or no yield; reaction failure. | Increase concentration in 0.5 mM steps. |
| Optimal (1.5 - 2.5 mM) | High yield of specific product; clean background. | This is the ideal working range for most Taq-based reactions. |
| Too High (> 3.0 - 4.0 mM) | Increased non-specific bands; primer-dimer formation. | Decrease concentration; re-optimize. |
Optimizing Primer Annealing Temperature
The annealing temperature (Ta) is arguably the most critical cycling parameter for ensuring primer specificity. The Ta dictates the stringency of binding between the primer and its complementary template sequence.
Theoretical Calculation of Annealing Temperature
The annealing temperature is intrinsically linked to the melting temperature (Tm) of the primer-template duplex. The Tm is the temperature at which 50% of the primer molecules are annealed to their complementary sequence. Several formulas can be used to calculate Tm, with the simplest being suitable for primers longer than 13–20 nucleotides [14]: Tm = 64.9 + 41 * (number of G's and C's - 16.4) / length of the primer [63] A common starting point is to set the Ta at 3–5°C below the calculated Tm of the primer with the lower Tm value [62] [64]. For a more precise theoretical optimum, the following formula can be applied, which also accounts for the Tm of the PCR product [63] [64]: Ta Opt = 0.3 x (Tm of primer) + 0.7 x (Tm of product) – 14.9
Experimental Protocol for Annealing Temperature Optimization
Theoretical calculations provide an estimate, but empirical determination using a thermal cycler with a gradient function is the gold standard.
Materials:
- Optimized Master Mix (including optimized Mg2+ concentration if known)
- Template DNA
- Forward and Reverse Primers
- Gradient Thermal Cycler
Procedure:
- Prepare a Master Mix containing all reaction components at their optimal concentrations.
- Aliquot the mix into PCR tubes.
- Place the tubes in the thermal cycler and set the annealing step to a temperature gradient. A typical range to test is from 50°C to 65°C [62].
- Execute the PCR amplification.
- Analyze the products by agarose gel electrophoresis. The optimal annealing temperature is the highest temperature that yields a strong, specific amplicon. This high-stringency condition minimizes non-specific binding.
Table 2: Troubleshooting Guide for Annealing Temperature
| Observation | Potential Cause | Solution |
|---|---|---|
| No product | Ta too high; primers cannot anneal. | Lower Ta in 2°C increments or perform a broader gradient. |
| Smear or multiple bands | Ta too low; non-specific priming. | Increase Ta in 2°C increments. Use a gradient to find the optimum. |
| Weak specific band | Ta is suboptimal, or primer efficiency is low. | Test a narrow Ta gradient around the current temperature. Check primer design and concentration. |
The following workflow diagram outlines the strategic process for optimizing a PCR protocol, integrating the levers discussed in this guide.
Utilizing PCR Additives and Enhancers
For challenging templates—such as those with high GC content, strong secondary structure, or long amplicons—standard optimization may prove insufficient. In these cases, chemical additives can be powerful tools to enhance reaction specificity and yield.
Common Additives and Their Mechanisms
PCR additives work through diverse mechanisms, such as altering DNA melting dynamics, stabilizing the polymerase, or disrupting secondary structures.
Table 3: Common PCR Additives and Usage Guidelines
| Additive | Mechanism of Action | Recommended Concentration | Application Notes |
|---|---|---|---|
| DMSO | Disrupts base pairing; reduces DNA secondary structure and Tm. | 2 - 10% [60] [14] | Can inhibit Taq polymerase at high concentrations. Essential for GC-rich templates. |
| Betaine | Equalizes the stability of AT and GC base pairs; disrupts secondary structure. | 0.5 M - 2.5 M [60] [14] | Particularly effective for GC-rich templates and long amplicons. |
| Formamide | Destabilizes DNA duplexes; lowers Tm and increases stringency. | 1 - 5% [60] [65] | Reduces non-specific priming. Use at lower concentrations to avoid polymerase inhibition. |
| TMAC | Stabilizes primer binding; increases hybridization specificity. | 15 - 100 mM [60] [65] | Useful with degenerate primers to prevent mispriming. |
| BSA | Binds to inhibitors in the reaction (e.g., phenols); stabilizes polymerase. | 10 - 100 μg/mL [60] [14] | Helpful when amplifying from complex biological samples (e.g., blood, plant extracts). |
Experimental Protocol for Testing Additives
- Begin with a reaction mixture that has been previously optimized for Mg2+ and annealing temperature but still shows poor performance.
- Select one or two promising additives based on the specific challenge (e.g., Betaine for GC-rich regions).
- Prepare separate Master Mixes, each containing a different additive at its lowest recommended concentration.
- Run the PCR and analyze the results by gel electrophoresis.
- If an additive shows a positive effect, perform a concentration gradient to find its optimal level. Note that additives may interact, so testing combinations requires a more complex factorial experimental design.
The Scientist's Toolkit: Research Reagent Solutions
The following table details key reagents essential for successful PCR optimization.
Table 4: Essential Reagents for PCR Optimization
| Reagent / Solution | Function | Key Considerations |
|---|---|---|
| MgCl2 Solution | Source of Mg2+ cofactor for DNA polymerase. | Concentration must be optimized for each primer-template system. |
| dNTP Mix | Provides the nucleotide building blocks (dATP, dCTP, dGTP, dTTP) for new DNA synthesis. | Use balanced, equimolar concentrations. High concentrations can increase error rate; low concentrations enhance fidelity [62] [61]. |
| Hot-Start DNA Polymerase | Polymerase engineered to be inactive at room temperature, preventing non-specific amplification during reaction setup. | Crucial for improving specificity and yield, especially in complex multiplex assays [62]. |
| PCR Enhancer Kits | Commercial blends of additives (e.g., DMSO, Betaine, proprietary compounds). | Provide a standardized and convenient way to screen multiple enhancers simultaneously. |
| Gradient Thermal Cycler | Instrument capable of maintaining different temperatures across a block of PCR tubes during a single run. | Indispensable for the efficient, empirical optimization of annealing temperatures. |
Mastering the interplay between Mg2+ concentration, annealing temperature, and PCR additives is a cornerstone of robust molecular biology research. A systematic approach—beginning with Mg2+ titration, followed by annealing temperature optimization via gradient PCR, and culminating in the strategic use of additives for challenging templates—provides a reliable path to high-quality amplification results. By adhering to the detailed protocols and guidelines outlined in this application note, researchers can effectively troubleshoot failed reactions, enhance the specificity and yield of their PCR assays, and accelerate their scientific discoveries in genomics, diagnostics, and drug development.
Within the framework of DNA amplification research, the pursuit of specificity and yield is paramount. Conventional Polymerase Chain Reaction (PCR) can be hampered by non-specific amplification and primer-dimer formation, which compromises data integrity and confounds results. Hot-start PCR and touchdown PCR are two advanced techniques developed to circumvent these prevalent challenges. Hot-start methods prevent premature enzymatic activity during reaction setup, while touchdown PCR employs a dynamic thermal profile to favor specific product amplification. When integrated, these strategies form a powerful synergistic approach for amplifying difficult targets, enhancing assay robustness, and ensuring reproducible results—a critical consideration for researchers and drug development professionals. This application note provides a detailed protocol for implementing these methods, complete with structured data and workflows for seamless integration into your research pipeline.
Principles and Mechanisms
Hot-Start PCR
Hot-start PCR is a technique designed to suppress non-specific amplification by inhibiting DNA polymerase activity during reaction setup at ambient temperatures. At lower temperatures, primers can bind non-specifically to DNA templates with low homology (a process called mispriming) or to each other, forming primer-dimers. Standard DNA polymerases possess some residual activity at these temperatures, leading to the extension of these incorrect products. Hot-start methods employ an enzyme modifier—such as an antibody, affibody, aptamer, or chemical modification—that physically blocks the polymerase's active site until a high-temperature initial denaturation step (typically above 90°C) releases the inhibitor [66] [67]. This simple yet effective strategy ensures that the first extension event occurs only under stringent cycling conditions, dramatically improving amplification specificity and yield [66].
Touchdown PCR
Touchdown PCR is a thermal cycling modification that enhances specificity by systematically varying the annealing temperature over the course of the reaction. The process begins with an annealing temperature set 5–10°C above the calculated melting temperature (Tm) of the primers. This high stringency ensures that only the most perfectly matched primer-template hybrids form, selectively amplifying the desired target in the initial cycles. The annealing temperature is then gradually decreased by 0.5–1°C per cycle until it reaches, or "touches down," at a temperature 2–5°C below the optimal Tm [66] [68] [69]. The principle is that by the time the cycling parameters reach permissive temperatures, the specific amplicon has already undergone several rounds of geometric amplification and outcompetes any non-specific products for reagents [70]. This method is particularly valuable when the exact Tm is uncertain, or for challenging templates such as those with high GC content or complex secondary structures [71].
Synergistic Application
While each technique is powerful independently, their combination creates a robust system for optimal DNA amplification. The hot-start protocol prevents non-specific synthesis during reaction preparation and the initial heating phase, while the touchdown profile further enriches for the correct product during the critical early cycles. This combined approach is almost essential for demanding applications such as multiplex PCR, amplification from complex samples like whole blood, or when using primers with unknown or variable homology to the template [72] [69] [67].
Comparative Analysis
The table below summarizes the core principles, mechanisms, and primary applications of hot-start and touchdown PCR, providing a clear comparison of these two powerful techniques.
Table 1: Core Characteristics of Hot-Start and Touchdown PCR
| Feature | Hot-Start PCR | Touchdown PCR |
|---|---|---|
| Primary Goal | Increase specificity by preventing activity during setup [66] | Increase specificity & sensitivity via cycling parameters [69] [70] |
| Core Mechanism | Enzyme inhibitor (e.g., antibody, aptamer) inactivated at high temp [66] [67] | Annealing temperature starts high, decreases incrementally [66] [68] |
| Solves | Mispriming, primer-dimer formation [66] | Off-target priming, inefficient amplification [68] [69] |
| Typical Applications | High-throughput PCR, multiplex PCR, routine amplification [66] | GC-rich templates, degenerate primers, difficult templates [70] [71] |
Experimental Protocols
Protocol 1: Hot-Start PCR
This protocol is suitable for most research applications, including high-throughput setups, and can be adapted for various commercial hot-start enzymes.
Research Reagent Solutions
Table 2: Essential Reagents for Hot-Start PCR
| Reagent | Function | Example & Notes |
|---|---|---|
| Hot-Start DNA Polymerase | Catalyzes DNA synthesis; inactive at room temp. | Invitrogen Platinum II Taq, Q5 Hot Start High-Fidelity DNA Polymerase. Choose based on fidelity and processivity needs [66] [73]. |
| 10X Reaction Buffer | Provides optimal ionic conditions and pH. | Often supplied with the enzyme. May contain MgCl₂ [8]. |
| dNTP Mix | Building blocks for new DNA strands. | Typically used at 200 µM of each dNTP final concentration [73] [8]. |
| Primers | Define the start and end of the target amplicon. | 17-40 nucleotides, 40-60% GC content. Use at 0.2–0.5 µM each, final concentration [73] [8]. |
| Template DNA | The DNA containing the target sequence. | 1 pg–1 ng (plasmid) or 1 ng–1 µg (genomic) per 50 µL reaction [73]. |
| Nuclease-Free Water | Solvent to achieve final reaction volume. | Must be sterile to prevent nuclease contamination. |
Step-by-Step Procedure
Reaction Setup (on ice):
- Thaw all reagents (except the polymerase) and mix thoroughly by gentle vortexing. Centrifuge briefly to collect contents.
- Prepare a master mix for multiple reactions to minimize pipetting error and ensure consistency. Add components in the following order to a nuclease-free tube on ice:
- Nuclease-Free Water (to a final volume of 25/50 µL)
- 10X Reaction Buffer (1X final concentration)
- dNTP Mix (200 µM final concentration of each dNTP)
- Forward Primer (0.2–0.5 µM final concentration)
- Reverse Primer (0.2–0.5 µM final concentration)
- Template DNA
- Mix the master mix by pipetting gently. Aliquot the appropriate volume into individual PCR tubes.
- Add the Hot-Start DNA Polymerase (0.5–2.5 U/50 µL reaction) to each tube last. Mix gently and centrifuge briefly.
Thermal Cycling:
- Place the tubes in a thermal cycler and initiate the following program. The initial denaturation/activation step is critical.
- Initial Denaturation/Activation: 98°C for 30–120 seconds. This step simultaneously activates the hot-start enzyme and fully denatures the template. [66] [73]
- Amplification (25–35 cycles):
- Denature: 95–98°C for 5–30 seconds.
- Anneal: 50–65°C (primer-specific) for 10–30 seconds.
- Extend: 72°C (or enzyme-specific temperature) for 15–60 seconds/kb.
- Final Extension: 72°C for 5–10 minutes.
- Hold: 4–10°C.
Post-Amplification Analysis:
- Analyze PCR products using standard agarose gel electrophoresis.
The following workflow diagram illustrates the key mechanistic steps of hot-start PCR:
Diagram 1: Hot-Start PCR Mechanism
Protocol 2: Combined Hot-Start Touchdown PCR
This protocol leverages the specificity benefits of both techniques and is highly recommended for challenging amplifications.
Research Reagent Solutions
The essential reagent list from Protocol 4.1.1 is also applicable here. The key difference lies in the thermal cycling profile.
Step-by-Step Procedure
Reaction Setup (on ice):
Thermal Cycling:
- The cycling program consists of two distinct phases.
- Initial Denaturation/Activation: 98°C for 30–120 seconds.
- Touchdown Phase (10–15 cycles):
- Standard Amplification Phase (20–25 cycles):
- Denature: 95–98°C for 5–30 seconds.
- Anneal: Use the final ("touchdown") temperature from the previous phase. Hold for 10–30 seconds.
- Extend: 72°C for 15–60 seconds/kb.
- Final Extension: 72°C for 5–10 minutes.
- Hold: 4–10°C.
Post-Amplification Analysis:
- Analyze PCR products using agarose gel electrophoresis.
The sequential process of touchdown PCR is visualized in the following diagram:
Diagram 2: Touchdown PCR Workflow
Troubleshooting and Optimization
Even with advanced techniques, optimization is often required. The table below outlines common issues and their solutions.
Table 3: Troubleshooting Guide for Hot-Start and Touchdown PCR
| Problem | Potential Cause | Recommended Solution |
|---|---|---|
| No/Low Yield | Touchdown start temp too high; extension time too short; inhibitors present. | Verify primer Tm; increase extension time (30-60 sec/kb); use a high-processivity enzyme or additives like BSA for direct PCR from blood [66] [67]. |
| Non-specific Bands | Too many total cycles; final annealing temperature too low. | Keep total cycles to <35; set final touchdown temperature 1-2°C below calculated Tm; ensure hot-start enzyme is used [69] [71]. |
| Primer-Dimers | Primer design; annealing temperature too low during setup. | Redesign primers to avoid 3' complementarity; keep reactions on ice until cycling; use a robust hot-start polymerase [66] [8]. |
Advanced Optimization: PCR Additives
For persistently difficult templates (e.g., GC-rich sequences), incorporating PCR enhancers can be decisive.
Table 4: Common PCR Additives for Challenging Amplifications
| Additive | Function | Recommended Final Concentration |
|---|---|---|
| DMSO | Reduces DNA secondary structure, lowers Tm [73]. | 3–10% [73] [8] |
| Betaine | Equalizes Tm of GC and AT base pairs; useful for GC-rich templates [73]. | 0.5 M – 1.5 M [73] |
| Trehalose | Protects polymerase from inhibitors; beneficial for direct PCR from blood [67]. | 0.4 M [67] |
| Q5 High GC Enhancer | Proprietary mix (contains DMSO, glycerol) to aid GC-rich and structured templates [73]. | 1X (as per mfr. protocol) [73] |
Hot-start and touchdown PCR are not merely incremental improvements but foundational strategies for enhancing the specificity, sensitivity, and reliability of DNA amplification. By understanding their complementary mechanisms—hot-start controlling enzymatic activity spatially (at setup) and touchdown controlling it temporally (across cycles)—researchers can strategically deploy them to overcome a wide array of experimental challenges. The detailed protocols and troubleshooting guides provided herein offer a practical framework for implementing these powerful techniques. Their adoption is strongly recommended for critical applications in genetic analysis, diagnostics, and drug development, where the fidelity of amplification is directly linked to the validity of the scientific conclusions.
Within DNA amplification research, the integrity of polymerase chain reaction (PCR) experiments is paramount. The exquisite sensitivity of PCR, a technique capable of amplifying a single DNA molecule into billions of copies, also renders it exceptionally vulnerable to two major challenges: inhibition and contamination [74] [75]. These issues represent significant barriers to data accuracy and reproducibility, potentially leading to false-negative results through the suppression of amplification or false-positive results from the amplification of non-target DNA [76] [77]. This document provides detailed application notes and protocols, framed within a broader thesis on PCR optimization, to equip researchers and drug development professionals with robust strategies to identify, prevent, and mitigate these pervasive problems. A proactive and systematic approach is not merely beneficial but is essential for generating reliable and valid data in any molecular biology setting.
Understanding the distinct origins of inhibition and contamination is the first step toward implementing effective countermeasures. Inhibition refers to the suppression of the DNA polymerase's activity, while contamination involves the introduction of exogenous nucleic acids that are subsequently amplified.
PCR inhibitors are substances that co-purify with the target nucleic acid and interfere with the amplification efficiency. They can originate from the original sample matrix or be introduced during sample collection and processing.
Table 1: Common PCR Inhibitors and Their Sources
| Source | Specific Inhibitors | Mechanism of Action |
|---|---|---|
| Blood & Tissues | Heme, IgG, lactoferrin [76] [78] | Binds to DNA polymerase, interfering with its activity [78]. |
| Stool & Fecal Samples | Bile salts, complex polysaccharides [76] | Interacts directly with DNA or PCR components like MgCl₂ [76]. |
| Urine | Urea [76] | Interferes with polymerase activity and other PCR mixture components [76]. |
| Clinical Specimens | Heparin (from blood collection tubes) [76] | Known to inhibit PCR amplification [76]. |
| Tissue Fixatives | Formalin (from FFPE tissue) [76] | Introduces inhibitors and causes nucleic acid cross-linking [76]. |
| Environmental Samples | Humic and fulvic acids [78] | Interfere with the PCR reaction [78]. |
Contamination is primarily categorized by the nature of the contaminating DNA, which dictates the strategy for its elimination.
- Carryover Contamination: This is the most significant source of false-positive results. It occurs when PCR amplicons (the products of previous amplification reactions) are introduced into a new reaction [79] [75]. A single PCR can generate up to 10⁸ copies of the target sequence, creating a pervasive reservoir of potential contaminants in the laboratory environment [75].
- Cross-Contamination: This involves the transfer of template nucleic acids between samples during handling, leading to pre-amplification contamination [75]. This can occur through aerosols, contaminated gloves, or shared equipment [80].
- Reagent and Environmental Contamination: Contaminants can also be introduced via contaminated reagents, disposable supplies, or even nucleic acids from organisms previously analyzed in the laboratory [75].
Detection and Monitoring Strategies
Vigilant monitoring through appropriate controls is non-negotiable for diagnosing and preventing issues related to inhibition and contamination.
Controls for Detecting Contamination
- No-Template Control (NTC): This control contains all PCR reaction components—primers, master mix, water—except for the template DNA [80] [77]. Its purpose is to detect contamination in the reagents or the environment. The absence of amplification in the NTC indicates a contamination-free reaction [80]. If amplification occurs, it signals that one or more reagents have been contaminated with the target sequence [77].
- Negative Control: This control consists of a sample matrix known to lack the target gene of interest. It helps verify that the amplification assay itself is not producing non-specific signals [81].
Controls for Detecting Inhibition
- Inhibition Control (Internal Control): This involves spiking the clinical specimen with a known, non-interfering target (e.g., a synthetic DNA sequence or a whole organism) either pre-extraction or post-extraction [76]. Failure to amplify this control indicates the presence of inhibitors in the sample. The Clinical and Laboratory Standards Institute (CLSI) recommends evaluating the need for this control on a case-by-case basis, with some regulatory bodies accepting its discontinuation if the inhibition rate for a specimen matrix is demonstrated to be below 1% [76].
Table 2: Inhibition Rates Across Specimen Matrices
| Specimen Matrix | Inhibition Rate | Context |
|---|---|---|
| Overall (Pre-extraction spike) | 0.87% | Based on 5,613 specimens [76]. |
| Overall (Post-extraction spike) | 0.01% | Based on 381,093 specimens [76]. |
| Urine | >1% | Higher inhibition rate observed [76]. |
| Formalin-Fixed, Paraffin-Embedded (FFPE) Tissue | >1% | Higher inhibition rate observed [76]. |
| All other matrix types (e.g., swabs, blood, CSF) | ≤1% | Generally low inhibition rates [76]. |
Prevention and Elimination Strategies
A multi-layered defense strategy incorporating physical, chemical, and enzymatic methods is the most effective way to safeguard PCR experiments.
Laboratory Design and Workflow
The cornerstone of contamination prevention is a unidirectional workflow through physically separated areas.
- Reagent Preparation Area: This should be the cleanest space, ideally with positive air pressure, and dedicated to preparing and aliquoting PCR master mixes [79] [75]. No extracted nucleic acids or amplified products should ever be handled here [79].
- Sample Preparation Area: This area, ideally under negative air pressure, is designated for nucleic acid extraction and the addition of DNA template to reactions [79]. It should contain dedicated equipment and consumables.
- Amplification and Detection Area: This separate room houses the thermal cyclers and real-time platforms [79]. It should be under negative pressure to contain amplified products, and no pre-amplification materials should be introduced [79].
Crucially, personnel and materials must move in a unidirectional manner from pre-amplification to post-amplification areas, never returning [79]. Lab coats, gloves, pipettes, and consumables must be dedicated to each area [79] [80].
Standard Operational Protocols
- Pipetting and Aerosol Management: Use aerosol-barrier (filter) tips for all liquid handling to prevent aerosol contamination of pipette shafts [79] [77]. Open sample tubes carefully and after a brief spin to prevent splashing [79].
- Surface Decontamination: Regularly clean work surfaces and equipment with a freshly prepared 10-15% sodium hypochlorite (bleach) solution, allowing 10-15 minutes of contact time before wiping with de-ionized water [79] [75] [77]. Bleach is highly effective at degrading DNA. Seventy percent ethanol can be used for general cleaning but is insufficient for DNA decontamination alone [79].
- Ultraviolet (UV) Irradiation: Exposing work surfaces, plasticware, and master mixes to UV light (254 nm) for 5-20 minutes can inactivate contaminating DNA by inducing thymidine dimers [75]. This is an easy and effective method for decontaminating equipment and open surfaces [75].
- Reagent and Consumable Management: Aliquot all reagents into single-use volumes to avoid contaminating entire stocks [80] [77]. Use disposable supplies wherever possible.
Biochemical and Enzymatic Methods
- Uracil-DNA-Glycosylase (UNG): This is the most widely used enzymatic method to prevent carryover contamination [79] [75] [77]. The protocol involves:
- Incorporation: Substituting dTTP with dUTP in the PCR master mix. All newly synthesized amplicons will then contain uracil instead of thymine [75].
- Pre-PCR Incubation: Before the thermal cycling begins, the reaction mixture is treated with UNG enzyme at room temperature. The UNG recognizes and catalyzes the removal of uracil bases from the contaminating, dUTP-containing amplicons from previous runs, rendering them non-amplifiable [75] [77].
- Enzyme Inactivation: The UNG is thermally inactivated during the initial denaturation step (e.g., 95°C for 5 minutes) of the PCR cycle, protecting the new, dUTP-containing amplicons that will be synthesized [75].
- Closed-Tube Detection Systems: Technologies like real-time PCR drastically reduce the risk of carryover contamination because amplification and detection occur in a sealed tube, eliminating the need for post-amplification handling [75] [81].
Detailed Experimental Protocols
Protocol: Using UNG to Prevent Carryover Contamination
This protocol is adapted for use with a UNG-containing master mix.
Research Reagent Solutions:
| Item | Function |
|---|---|
| UNG-containing Master Mix | Provides DNA polymerase, dNTPs (including dUTP), UNG enzyme, and optimized buffer in a single tube. |
| Template DNA | The sample nucleic acid to be amplified. |
| Primers | Forward and reverse primers specific to the target sequence. |
| Nuclease-free Water | To adjust reaction volume; must be free of nucleases to prevent degradation of reagents. |
Methodology:
- Prepare Master Mix: Thaw all reagents on ice. Briefly centrifuge tubes to collect contents at the bottom. In a sterile tube in the Reagent Preparation Area, combine the following for each reaction:
- UNG-containing Master Mix: X µL (as per manufacturer's instructions)
- Forward Primer (10 µM): Y µL
- Reverse Primer (10 µM): Y µL
- Nuclease-free Water: to a final volume of (Total Volume - Template Volume)
- Aliquot and Add Template: Pipette the appropriate volume of master mix into each reaction tube or well. In the Sample Preparation Area, add the template DNA to its respective tube. Include a No-Template Control (NTC) by adding nuclease-free water instead of template.
- UNG Incubation: Seal the plate or tubes and place them in the thermal cycler. Initiate a hold step at 25°C for 10 minutes to allow the UNG enzyme to degrade any contaminating uracil-containing DNA [75].
- Amplification: Immediately proceed with the PCR cycling protocol, which must include a 5-minute initial denaturation at 95°C to inactivate the UNG enzyme before cycling begins [75]. Example cycling parameters:
- UNG Inactivation: 95°C for 5 minutes
- 35-40 Cycles of:
- Denaturation: 95°C for 15-30 seconds
- Annealing: 50-70°C for 15-30 seconds
- Extension: 68-72°C for 30-60 seconds
- Analysis: Analyze results. The NTC should show no amplification, confirming the absence of carryover contamination.
Workflow for Suspected Contamination Incidents
Despite best efforts, contamination can occur. A systematic response is critical.
Following this workflow, as outlined in sources [80] and [77], ensures a thorough response to eliminate the source of contamination and prevent its recurrence.
Managing inhibition and contamination is a fundamental aspect of any rigorous PCR-based research program. By integrating the strategies outlined here—thoughtful laboratory design, consistent use of controls, disciplined workflow practices, and the application of techniques like UNG treatment—researchers can significantly mitigate these risks. The protocols and application notes provided serve as a foundation for establishing robust quality assurance in DNA amplification, thereby ensuring the generation of precise, reproducible, and trustworthy data that is essential for scientific advancement and drug development.
Ensuring Accuracy: PCR Assay Validation, Controls, and Comparative Analysis
In DNA amplification research, the integrity of experimental results is paramount. Controls in Polymerase Chain Reaction (PCR) are not merely procedural steps; they are fundamental components of the scientific method, serving as internal safeguards that validate the entire experimental process. Properly implemented controls allow researchers to distinguish true biological signals from artifacts, thereby ensuring the reliability and accuracy of their data. The PCR process, which relies on repeated cycles of heat denaturation, primer annealing, and primer extension to amplify specific DNA sequences, is susceptible to various pitfalls including contamination, inhibition, and amplification errors [74]. Without robust controls, these technical issues can compromise data interpretation and lead to erroneous conclusions. This application note details the establishment of three essential control types—no-template, positive, and endogenous controls—framed within the context of rigorous PCR protocol for DNA amplification research targeted at scientists and drug development professionals.
Understanding Fundamental PCR Controls
No-Template Control (NTC)
The No-Template Control (NTC) is a critical sentinel against contamination. An NTC reaction contains all components of the PCR master mix—including primers, nucleotides, buffer, and DNA polymerase—but deliberately excludes any template DNA [82]. The primary function of the NTC is to detect contamination of the PCR reagents with amplifiable nucleic acids. When amplification occurs in the NTC, it provides unambiguous evidence of contaminating DNA, which could lead to false-positive results in the experimental samples. This contamination could originate from various sources, including amplicon carryover from previous reactions, contaminated reagents, or environmental DNA. The interpretation of NTC results is straightforward: a valid NTC should show no amplification signal. Any detectable amplification in the NTC invalidates the entire experimental run, necessitating decontamination procedures and repetition of the experiment with fresh reagents.
Positive Control
The Positive Control serves as a verification that the PCR conditions and reagents are functionally capable of amplifying the target sequence. This reaction contains all PCR components, including a known template that contains the target sequence of interest [82]. The positive control template can be an absolute standard of known concentration (such as a plasmid with a cloned insert or genomic DNA from an established cell line) or simply a known positive sample that confirms target presence [82]. The key purpose of the positive control is to identify false negatives caused by reaction failure. If the positive control fails to amplify while experimental samples show no amplification, the entire experiment is compromised due to technical failure rather than true target absence. This failure could result from degraded reagents, improper thermal cycler calibration, or incorrect reaction setup. Conversely, successful amplification in the positive control confirms that the PCR conditions are optimal, providing confidence in negative results obtained from experimental samples.
Endogenous Control
The Endogenous Control, often referred to as a reference gene or housekeeping gene, is typically a constitutively expressed genomic sequence present in the sample material [82]. Unlike the NTC and positive control, which are typically run in separate reaction wells, the endogenous control is often amplified in the same reaction as the target sequence (in multiplex PCR) or in a parallel reaction using the same sample material. The fundamental purpose of the endogenous control is to verify the quality and sufficiency of the sample DNA and to detect the presence of PCR inhibitors. It controls for variations in sample collection, nucleic acid extraction efficiency, and sample loading. Successful amplification of the endogenous control with no amplification of the target sequence provides confidence that the target is genuinely absent or below the detection limit rather than the result of sample degradation or inhibition. Commonly used endogenous controls include genes encoding proteins such as β-actin, GAPDH, or ribosomal RNA genes, which are typically expressed at constant levels across various tissue types and experimental conditions [81].
Table 1: Summary of Essential PCR Controls
| Control Type | Purpose | Key Components | Interpretation of Results |
|---|---|---|---|
| No-Template Control (NTC) | Detect contamination in reagents | All PCR components except template DNA | No amplification should occur; amplification indicates contamination |
| Positive Control | Verify PCR reaction functionality | All PCR components including known target template | Amplification must occur; no amplification indicates reaction failure |
| Endogenous Control | Assess sample quality and detect inhibitors | Amplification of constitutively present gene in sample DNA | Successful amplification validates sample quality; no amplification suggests degradation or inhibition |
Advanced Control Strategies: Internal Positive Controls (IPCs)
While the three fundamental controls described above are essential, advanced applications often require more sophisticated control strategies. Internal Positive Controls (IPCs) represent a more robust approach that can monitor the entire PCR process from nucleic acid extraction through amplification. An IPC is a control sequence that is introduced into the sample and co-amplified with the target sequence, typically using a distinct primer-probe set [82]. Internal Positive Controls can be further categorized based on their design and origin as shown in the table below.
Table 2: Comparison of Internal Control Types
| Feature | Exogenous Homologous | Exogenous Heterologous | Endogenous |
|---|---|---|---|
| Universal use in multiple assays | No | Yes | No |
| Serves as control for purification procedure | Yes | Yes | Yes |
| Differentiates purification errors from amplification errors | Yes | Yes | No |
| Template quantities are defined and consistent | Yes | Yes | No |
| Non-competitive internal control design | No | Yes | Yes [82] |
The most significant advantage of exogenous heterologous ICs is that their template quantity is defined and consistent, unlike endogenous controls whose levels may vary with sample type or pathological conditions [82]. Furthermore, heterologous ICs can be designed to avoid competition for PCR components, making them suitable as universal controls across multiple assays.
Experimental Protocol: Implementation of PCR Controls
Comprehensive Workflow for Control Implementation
The following workflow diagram illustrates the strategic implementation and interpretation of PCR controls within a typical experimental setup:
Detailed Procedural Guidelines
Materials and Reagents:
- Template DNA (experimental samples)
- Known positive control template (plasmid DNA, genomic DNA from positive cell line, or previously verified positive sample)
- PCR master mix (containing DNA polymerase, dNTPs, and reaction buffer)
- Sequence-specific primers for target amplification
- Primers for endogenous control amplification
- Nuclease-free water
- PCR tubes or plates
- Thermal cycler
Procedure:
- Preparation of No-Template Control (NTC):
- Combine all PCR reaction components except template DNA according to the following table.
- Replace template DNA with an equivalent volume of nuclease-free water.
- Mix thoroughly by gentle vortexing and brief centrifugation.
Preparation of Positive Control:
- Combine all PCR reaction components including a known positive template.
- Use the same primer set and reaction conditions as for experimental samples.
- Ensure the positive control template is at an appropriate concentration to yield robust amplification.
Preparation of Experimental Samples with Endogenous Controls:
- For each experimental sample, set up two parallel reactions: one with target-specific primers and one with endogenous control primers.
- Alternatively, design a multiplex reaction that simultaneously amplifies both target and endogenous control with distinct primer sets.
- Use identical reaction conditions and template amounts for both target and endogenous control amplifications.
Table 3: Example PCR Setup with Controls (25 µL Reaction)
| Component | Experimental Sample | NTC | Positive Control | Endogenous Control |
|---|---|---|---|---|
| 2X PCR Master Mix | 12.5 µL | 12.5 µL | 12.5 µL | 12.5 µL |
| Target Forward Primer (10 µM) | 1 µL | 1 µL | 1 µL | - |
| Target Reverse Primer (10 µM) | 1 µL | 1 µL | 1 µL | - |
| Endogenous Control Forward Primer (10 µM) | - | - | - | 1 µL |
| Endogenous Control Reverse Primer (10 µM) | - | - | - | 1 µL |
| Template DNA | 5 µL | - | - | 5 µL |
| Positive Control Template | - | - | 5 µL | - |
| Nuclease-Free Water | 5.5 µL | 10.5 µL | 5.5 µL | 5.5 µL |
| Total Volume | 25 µL | 25 µL | 25 µL | 25 µL |
Thermal Cycling Conditions:
- Program thermal cycler according to established parameters for your specific application:
Analysis and Interpretation:
- Analyze PCR products using appropriate detection methods (agarose gel electrophoresis, qPCR fluorescence curves, etc.).
- Apply the interpretation guidelines outlined in Section 2 to validate your experimental results.
The Scientist's Toolkit: Essential Research Reagent Solutions
Successful implementation of PCR controls requires specific high-quality reagents and materials. The following table details essential components for establishing robust PCR controls in DNA amplification research.
Table 4: Essential Research Reagents for PCR Controls
| Reagent/Material | Function in Control Experiments | Application Notes |
|---|---|---|
| Nuclease-Free Water | Diluent for reagent preparation; template replacement in NTC | Must be certified nuclease-free to prevent degradation of reaction components [17] |
| DNA Polymerase | Enzyme that catalyzes DNA synthesis during amplification | Select based on fidelity requirements (e.g., standard Taq for routine PCR, high-fidelity enzymes for cloning) [74] |
| Synthetic Control Templates | Well-characterized templates for positive controls | Plasmid DNA with cloned target sequence or synthetic oligonucleotides; ideal for quantitative applications |
| Primer Sets for Endogenous Controls | Amplification of reference genes for sample quality assessment | Design for genes with stable expression (e.g., β-actin, GAPDH, ribosomal RNA genes); avoid pseudogenes [81] |
| dNTP Mix | Building blocks for DNA synthesis | Use balanced solutions of dATP, dTTP, dCTP, and dGTP; quality affects amplification efficiency and fidelity |
| PCR Buffer with MgCl₂ | Provides optimal chemical environment for amplification | Mg²⁺ concentration is critical; may require optimization between 1.5-4.0 mM for different applications [17] |
The establishment of robust controls—specifically no-template, positive, and endogenous controls—forms the foundation of reliable PCR-based research. These controls function as an integrated system to monitor contamination, verify reaction performance, and assess sample quality. By implementing the protocols and strategies outlined in this application note, researchers can significantly enhance the validity and reproducibility of their DNA amplification experiments, thereby generating data of the highest quality for scientific publication and drug development applications.
Within DNA amplification research, the integrity of quantitative PCR (qPCR) data is paramount. The technique's sensitivity makes it powerful, but also vulnerable to misinterpretation without rigorous validation. This article details three critical components of a robust qPCR framework: the traditional calibration curve, the innovative PCR-Stop analysis, and the comprehensive MIQE (Minimum Information for Publication of Quantitative Real-Time PCR Experiments) guidelines. Employing these methods in concert provides a solid foundation for generating reliable, reproducible, and publication-quality data, which is essential for researchers and drug development professionals [83] [84].
The calibration curve provides a direct link between the quantification cycle (Cq) and the initial quantity of a target, the PCR-Stop analysis offers a unique window into the crucial early cycles of the PCR reaction, and the MIQE guidelines establish a standardized checklist for reporting experimental details. This multi-faceted approach addresses both the practical execution of assays and the subsequent data interpretation, forming a core part of any thesis focused on advancing DNA amplification research [85] [86].
Calibration Curves: The Gold Standard for Quantification
Principles and Applications
The calibration curve method is a fundamental and reliable approach for both absolute and relative quantification in qPCR. It simplifies calculations and avoids several theoretical and practical problems associated with PCR efficiency assessment alone. By including a standard curve on each plate, the method provides routine validation for the entire qPCR methodology [85] [87]. The core principle involves creating a standard curve by plotting the Cq values of known template concentrations against the logarithm of their initial quantities. The resulting regression line allows for the determination of unknown sample concentrations and provides key performance metrics for the assay, including its efficiency and dynamic range [88].
Detailed Protocol for Implementation
1. Standard Preparation:
- Source: Prepare a series of standard dilutions from a sample of known concentration. This can be genomic DNA, purified PCR product, or plasmid DNA [89]. Use serial dilutions (e.g., 5- or 10-fold) spanning several orders of magnitude (e.g., from 10^1 to 10^8 copies) to establish a wide dynamic range [88].
- Quality: Ensure the DNA standard is of high quality, with appropriate concentration and purity (e.g., good 260/280 ratio) [88].
- Replication: Run each standard dilution in at least triplicate to assess repeatability and pipetting precision [88].
2. qPCR Run:
- Include the series of standard dilutions, unknown samples, and no-template controls (NTCs) on the same plate. Using water instead of DNA in the NTCs helps detect contamination and background amplification [88].
3. Data Analysis:
- Calculate Cq Values: Determine the Cq for each standard and unknown sample.
- Construct the Curve: Plot the average Cq value (y-axis) against the logarithm of the initial known quantity (x-axis) for each standard dilution.
- Perform Linear Regression: Fit a trendline to the data points and obtain the equation of the line (y = mx + c) and the coefficient of determination (R²).
- Determine Unknowns: Use the regression equation to calculate the initial quantity of the target in unknown samples from their Cq values.
4. Key Performance Metrics:
- Amplification Efficiency (E): Calculated from the slope of the standard curve using the formula:
E = (10^(-1/slope) - 1. Ideal efficiency is 100% (doubling every cycle), corresponding to a slope of -3.32. An efficiency between 90% and 110% (slope between -3.58 and -3.10) is generally acceptable [88]. - Coefficient of Determination (R²): This value indicates the linearity of the PCR reaction and the precision of the standard dilutions. An R² value of >0.990 is expected for a robust assay [88].
- Standard Deviation of Cq: The variation between replicate Cq values should be small, typically within 0.2 cycles, indicating good repeatability [88].
Table 1: Interpretation of Standard Curve Quality Metrics
| Metric | Ideal Value | Acceptable Range | Interpretation of Suboptimal Values |
|---|---|---|---|
| Amplification Efficiency | 100% | 90% - 110% | <90%: Inhibitors, poor primer design. >110%: PCR inhibition in concentrated standards, pipetting errors. |
| R² Value | 1.000 | >0.990 | Poor linearity, inaccurate serial dilutions, or inconsistent amplification. |
| Cq Standard Deviation | <0.1 | <0.2 | High technical variation; check pipette calibration and reaction mix homogeneity. |
The following workflow outlines the key steps in generating and utilizing a qPCR calibration curve:
PCR-Stop Analysis: Probing Early Amplification Efficiency
Principles and Applications
PCR-Stop analysis is a powerful validation tool that directly investigates assay performance during the initial, otherwise invisible, cycles of qPCR [84] [86]. Its primary intention is to determine whether DNA duplication during these early cycles corresponds to the overall efficiency derived from the calibration curve. This method is particularly valuable for confirming that the polymerase reaction starts immediately with its average efficiency, validating the use of the formula ( y = x(1 + E)^n ) from the first cycle, where y is the final product, x is the initial template, E is efficiency, and n is the number of cycles [86].
Furthermore, PCR-Stop analysis serves as a validation tool for ranges above 10 initial target molecule numbers (ITMN), revealing whether an assay has two-fold quantitative resolution and exposing its quantitative and qualitative limits. This makes it an ideal supplement to Poisson analysis, which operates below 10 ITMN [84].
Detailed Protocol for Implementation
1. Experimental Setup:
- Prepare six batches of the same target DNA sample, with each batch containing at least eight identical replicates. The ITMN should be >10 to exceed Poisson distribution limits [86].
- The target DNA quantity can be chosen to be near the assay's limit of quantification to test performance in the boundary area, or at a higher level to test quantitative resolution.
2. Pre-Run Amplification:
- Subject the batches to PCR pre-runs with an ascending number of cycles:
- Batch 0: Place directly in the cooler (0 pre-run cycles).
- Batch 1: Subject to a short PCR run of 1 cycle.
- Batch 2: Subject to a short PCR run of 2 cycles.
- ... continue for Batches 3, 4, and 5 (3, 4, and 5 pre-run cycles, respectively).
- After the pre-runs, cool all batches.
3. Main qPCR Run:
- Transfer all batches to the real-time PCR thermocycler and run a normal qPCR protocol with the full number of cycles (e.g., 40-45 cycles) [86].
4. Data Analysis and Interpretation: Four key criteria are used to analyze the results [86]:
- Criterion I: DNA Duplication. Calculate the efficiency during the first cycles from the steady increase in the average measured quantity for each batch. This should correlate with the efficiency from the calibration curve.
- Criterion II: Relative Standard Deviation (RSD). Calculate the RSD of the values within the eight replicates of each batch. A perfect assay would have 0% RSD; a well-performing assay like the prfA example showed an RSD of approximately 20% [86].
- Criterion III: Steady Increase. The average values for each batch should show a regular and steady increase, demonstrating quantitative resolution.
- Criterion IV: Negative Samples. The absence of amplification in negative controls demonstrates the assay's qualitative detection limit.
Table 2: Example PCR-Stop Analysis Results for Two Assays (Data from [86])
| Number of Pre-Runs | Theoretical Copies (prfA) | prfA Average (copies) | prfA RSD (%) | exB Average (copies) | exB RSD (%) |
|---|---|---|---|---|---|
| 0 | 10 | 11 | 20 | 7 | 63 |
| 1 | 20 | 26 | 19 | 3 | 282 |
| 2 | 40 | 42 | 17 | 97 | 103 |
| 3 | 80 | 87 | 24 | 21 | 174 |
| 4 | 160 | 153 | 31 | 57 | 201 |
| 5 | 320 | 310 | 25 | 318 | 58 |
The data in Table 2 illustrates a well-performing assay (prfA) versus a poorly performing one (exB). The prfA assay shows a consistent increase in average quantity and a relatively stable RSD, while the exB assay shows highly inconsistent averages and very high RSD, despite having a seemingly good calibration curve [86].
The workflow for a PCR-Stop analysis experiment is summarized below:
The MIQE Guidelines: Ensuring Experimental Transparency
Principles and Significance
The MIQE guidelines are a set of recommendations designed to ensure the reliability of qPCR results, promote consistency between laboratories, and increase experimental transparency [83]. They were created in response to a lack of consensus on how to perform and interpret qPCR experiments and a frequent lack of sufficient experimental detail in publications, which prevents readers from critically evaluating the quality of the results or repeating the experiments.
Adherence to MIQE is now considered a prerequisite for publishing qPCR data in many reputable scientific journals. The guidelines provide a checklist that should accompany manuscript submissions, detailing the minimum information required to evaluate a qPCR experiment. This includes full disclosure of all reagents, sequences, and analysis methods [83].
Key Application for Researchers
For a researcher developing a PCR protocol for a thesis, the MIQE guidelines serve as a comprehensive blueprint for experimental design, execution, and reporting. The core principle is to provide all necessary information so that the experiment can be repeated and the data critically evaluated. Essential information to document includes:
- Sample Details: Description and storage of the biological source, nucleic acid extraction method, and quality control (e.g., RNA Integrity Number).
- Reverse Transcription: For gene expression studies, details on the kit, priming method, and concentrations used.
- qPCR Protocol: Complete information on primers and probes (sequences, concentrations, validation data), the qPCR master mix, exact thermal cycling conditions, and the instrument used.
- Data Analysis: Specification of the software, methods for Cq determination, statistical methods, and normalization strategy (e.g., reference gene validation) [83].
The Scientist's Toolkit: Essential Reagents and Materials
Table 3: Key Research Reagent Solutions for qPCR Validation
| Item | Function/Description | Application Notes |
|---|---|---|
| Absolute Standards | Purified PCR product, plasmid DNA, or synthetic oligonucleotides of known concentration used to generate calibration curves. | Essential for absolute quantification. Must be accurately quantified and serially diluted [89]. |
| Universal Calibrators (e.g., AccuCal) | A commercially available DNA calibrator that provides a universal standard for both dye- and probe-based assays, simplifying absolute quantification across multiple runs and genes [89]. | Helps circumvent biases introduced by traditional reference genes and standard curves. |
| Hot-Start DNA Polymerase | A modified polymerase that is inactive at room temperature, preventing non-specific amplification and primer-dimer formation before the PCR starts. | Critical for assay specificity and robustness. PCR-Stop analysis can be used to compare different hot-start formulations [86]. |
| Intercalating Dye (e.g., SYBR Green I) | A fluorescent dye that emits light upon binding to double-stranded DNA, allowing for real-time detection of PCR products. | Cost-effective and flexible for assaying multiple targets. Requires melt curve analysis to verify specificity [90]. |
| Hydrolysis Probes (e.g., TaqMan) | Sequence-specific probes labeled with a fluorophore and a quencher. Cleavage during PCR generates a fluorescent signal, providing high specificity. | Ideal for multiplex assays and when distinguishing highly similar sequences. More expensive than dye-based methods [90]. |
| Nuclease-Free Water | Water certified to be free of RNases, DNases, and PCR inhibitors. | Used for preparing dilutions and reaction mixes to prevent sample degradation and false negatives. |
| No-Template Control (NTC) | A reaction mixture that contains all components except the template DNA/cDNA. | A critical control to identify contamination or non-specific amplification in the reagents [88]. |
Integrated Data Analysis and Statistical Considerations
Proper statistical handling of qPCR data is essential for deriving meaningful biological conclusions. Key considerations include:
- Outlier Identification: Use objective statistical methods to identify and handle outlying values. A preliminary approach is the "box and whisker" plot, where data points lying substantially beyond 1.5 times the inter-quartile range are considered potential outliers. More formal statistical tests should follow to determine if they should be rejected or retained [91].
- Error Propagation: Variances calculated for Cq values or other intermediate results must be traced through all calculations (e.g., using the law of error propagation) to the final normalized result. This provides a realistic estimate of the confidence intervals for the reported expression levels [85] [87].
- Comparison of Calibration Curves: Instead of visual comparison, use an objective statistical test (e.g., analysis of covariance, ANCOVA) to determine if the slopes (efficiencies) and intercepts of two calibration curves are significantly different [91].
- Normalization with Multiple Reference Genes: When using multiple reference genes, summarize their data into a single normalizing factor using the geometric mean, which is more robust than the arithmetic mean [85] [87].
Validation is the cornerstone of credible qPCR research. As detailed in this article, a multi-pronged approach utilizing calibration curves, PCR-Stop analysis, and the MIQE guidelines provides a robust framework for any DNA amplification project. The calibration curve establishes the fundamental relationship for quantification, PCR-Stop analysis offers an unprecedented look into the early amplification efficiency and resolution of an assay, and the MIQE guidelines ensure that the entire process is documented with sufficient rigor and transparency. For the thesis researcher, integrating these methods is not merely a recommendation for publication, but a best practice that ensures the generation of high-quality, reliable data that can confidently support scientific conclusions and advance the field of drug development and molecular biology.
Quantitative PCR (qPCR), also known as real-time PCR, is a molecular technique that has reshaped the landscape of biological research and medicine due to its high sensitivity and specificity [81]. Unlike traditional PCR that provides end-point detection, qPCR combines detection with amplification, enabling researchers to monitor the amplification of DNA in real time as the reaction occurs [81]. This technique allows for both qualitative and quantitative assessment of nucleic acids, making it invaluable for applications ranging from gene expression profiling to pathogen detection and clinical diagnostics [81].
The fundamental principle of qPCR centers on detecting and quantifying a fluorescent signal that increases in direct proportion to the amount of PCR product in a reaction [81]. By recording the fluorescence at each amplification cycle, researchers can observe the exponential phase of the PCR reaction, which provides quantitative information about the initial amount of target template. The integration of detection with amplification makes qPCR a powerful tool for precise nucleic acid quantification, supporting various applications in genetics, diagnostics, and beyond [81].
Fundamental Concepts in qPCR Analysis
The Threshold Cycle (Ct) Value
The Threshold Cycle (Ct) value, also known as Quantification Cycle (Cq), is the cornerstone of qPCR data analysis [81]. The Ct value is defined as the cycle number at which the fluorescent signal of the reaction crosses a predetermined threshold, significantly above the baseline fluorescence [81]. This value represents the point during the amplification process where target amplification is first detected.
The relationship between Ct value and initial template concentration is inverse and logarithmic: the higher the initial amount of target template, the lower the Ct value [81] [92]. Each difference of one Ct value represents a two-fold difference in initial template concentration when amplification efficiency is optimal [92]. For example, a sample with a Ct value of 25 has twice the initial template concentration as a sample with a Ct value of 26.
Table 1: Interpretation of Ct Values in qPCR Experiments
| Ct Value Range | Template Abundance | Interpretation Considerations |
|---|---|---|
| Very Low (e.g., < 15) | Very high | May indicate potential contamination; sample dilution may be necessary for accurate quantification |
| Low (e.g., 15-25) | High | Strong positive result; ideal for reliable quantification |
| Intermediate (e.g., 25-35) | Moderate to low | Typical range for many biological targets; results are generally reliable |
| High (e.g., > 35) | Very low | May be near the detection limit; results should be interpreted with caution |
Several factors can influence Ct values, including initial template concentration, amplification efficiency, sample quality, and PCR inhibition. Proper experimental design and validation are essential to ensure that Ct values accurately reflect the biological reality being studied.
Reaction Efficiency and Its Importance
Amplification efficiency is a critical parameter in qPCR that measures how effectively the target sequence is duplicated during each PCR cycle [93] [92]. Ideal amplification efficiency is 100%, meaning the amount of PCR product doubles with each cycle [92]. In practice, efficiency between 90-110% is generally considered acceptable [92].
Efficiency can be calculated using the formula: E = 10^(-1/slope) [93] [92]
The slope is derived from a standard curve generated by serial dilutions [93]. For ideal amplification (100% efficiency), the slope should be -3.32 [92]. Efficiency is often expressed as a percentage: % Efficiency = (E-1) × 100 [92].
The accuracy of both absolute and relative quantification methods depends heavily on knowing the amplification efficiency of the target and reference genes [93] [94]. Ignoring assay-specific PCR efficiency can lead to significant Cq-dependent biases in reported results [94]. Even minor variations in amplification efficiency can lead to considerable variation in calculated gene expression values [93].
Absolute Quantification Using Standard Curves
Principles of Standard Curve Analysis
Absolute quantification determines the exact amount of a target sequence in a sample, typically expressed as copy number or concentration [95]. This method relies on generating a standard curve using known concentrations of a standard material [95]. The standard curve is created by plotting the Ct values of the standards against the logarithm of their known concentrations or copy numbers [95].
The standard curve serves as a reference for determining the concentration of unknown samples by comparing their Ct values to the curve [95]. A linear regression fit is applied to the data points, and the resulting equation is used to calculate the concentration of unknown samples based on their Ct values [95].
Table 2: Comparison of Common Standards for Absolute Quantification
| Standard Type | Description | Advantages | Considerations |
|---|---|---|---|
| Plasmid DNA | PCR product cloned into a vector [95] | Large amounts can be produced; identity can be verified by sequencing [95] | Should be linearized to match amplification efficiency of genomic DNA/cDNA [95] |
| PCR Fragments | Purified PCR product containing target sequence [95] | Simple production; no cloning required | Include at least 20bp upstream/downstream of primer binding sites [95] |
| Genomic DNA | Genomic DNA with single-copy target [95] | Appropriate for single-copy genes when pseudogenes can be excluded | Requires knowledge of genome size; suitable only for specific applications [95] |
| In Vitro RNA Transcripts | RNA generated by in vitro transcription [95] | Most accurate for gene expression studies; accounts for RT efficiency [95] | Requires complete removal of plasmid DNA; check for degradation [95] |
Protocol for Absolute Quantification
Experimental Procedure:
Standard Preparation: Prepare a minimum of five serial dilutions (typically 10-fold) of the standard material with known concentration [92] [95]. The dilution series should cover the expected concentration range of the unknown samples.
qPCR Setup: Run the qPCR reaction with both the standard dilutions and unknown samples in the same plate. Include appropriate controls (no template control, negative control) [81].
Data Collection: Record the Ct values for all standards and unknowns.
Standard Curve Generation: Plot the Ct values of the standards against the logarithm of their known concentrations. Apply linear regression to generate a trendline with the equation y = mx + b, where y = Ct, x = log(concentration), m = slope, and b = y-intercept [95].
Efficiency Calculation: Calculate the amplification efficiency using the formula: E = 10^(-1/slope) [93] [92].
Concentration Determination: For unknown samples, use the standard curve equation to calculate their concentrations based on their Ct values.
The following workflow diagram illustrates the complete process of absolute quantification using a standard curve:
For RNA quantification, RNA standards are preferred as they account for the variable efficiency of reverse transcription [95]. After reverse transcription, the generated cDNA serves as template for the subsequent real-time PCR [95].
Relative Quantification Using the ΔΔCt Method
Principles of the ΔΔCt Method
The ΔΔCt method is the most widely used approach for relative quantification in qPCR experiments [81] [93] [92]. This method determines the relative change in gene expression of a target gene between different experimental conditions (e.g., treated vs. untreated), normalized to one or more reference genes [81] [92].
The ΔΔCt method relies on two key assumptions:
- The amplification efficiencies of both target and reference genes are approximately equal (differing by no more than 5%) [92].
- The amplification efficiency is near 100% (the template doubles each cycle) [92].
When these conditions are met, the relative quantification (RQ) can be calculated using the formula: RQ = 2^(-ΔΔCt) [81] [92]
Protocol for the ΔΔCt Method
Experimental Procedure:
Experimental Design: Include both test samples and calibrator samples (e.g., untreated controls) in your experimental design [92].
Reference Gene Selection: Select appropriate reference genes (housekeeping genes) with stable expression across all experimental conditions [81] [92]. Validate their stability before proceeding with experiments.
qPCR Run: Amplify both target and reference genes for all samples in the same plate. Include appropriate controls.
Data Analysis: Calculate the ΔΔCt value using the following steps:
Fold Change Calculation: Calculate the relative quantification (fold change) using the formula: RQ = 2^(-ΔΔCt) [81] [92].
The following workflow illustrates the complete ΔΔCt calculation process:
Table 3: ΔΔCt Calculation Example
| Sample | Ct Target | Ct Reference | ΔCt | ΔΔCt | Fold Change (2^(-ΔΔCt)) |
|---|---|---|---|---|---|
| Calibrator | 25.5 | 20.1 | 5.4 | 0.0 | 1.0 |
| Test 1 | 24.3 | 20.0 | 4.3 | -1.1 | 2.1 |
| Test 2 | 26.8 | 20.2 | 6.6 | 1.2 | 0.4 |
When amplification efficiencies between target and reference genes are not equal, alternative methods such as the Pfaffl method (standard curve method for relative quantification) should be used instead [92]. This method incorporates the actual amplification efficiencies of both target and reference genes into the calculation [92].
Essential Controls and Quality Assessment
Required Experimental Controls
Appropriate controls are essential for ensuring the reliability and accuracy of qPCR experiments [81]. The following controls should be included in every qPCR run:
No Template Control (NTC): Contains all reaction components except the template DNA [81]. Any detected amplification in the NTC suggests contamination.
Negative Control: Sourced from the sample but lacks the gene of interest [81]. It should show no amplification or may reveal non-target amplification.
Positive Control: Includes the sample template with the known target [81]. Lack of amplification suggests an error in the assay.
Endogenous Control: A housekeeping gene with consistent expression across experimental conditions, crucial for relative quantification [81].
Data Quality Assessment
The MIQE (Minimum Information for Publication of Quantitative Real-time PCR Experiments) guidelines provide a framework for ensuring qPCR data quality and reproducibility [94]. Key quality assessment parameters include:
Amplification Efficiency: Should be between 90-110% for both target and reference genes [92].
Standard Curve Correlation Coefficient (R²): Should be >0.98 for reliable quantification [95].
Sample Replicates: Include at least three technical replicates for each sample to assess variability [93].
RNA Integrity: Assess RNA quality before reverse transcription, especially when working with challenging samples [27].
Recent initiatives emphasize the importance of submitting raw qPCR data during manuscript submission to improve transparency and reproducibility [94]. The Real-time PCR Data Essential Spreadsheet Format (RDES) has been developed for this purpose [94].
The Scientist's Toolkit: Essential Reagents and Materials
Table 4: Essential Research Reagent Solutions for qPCR
| Reagent/Material | Function | Key Considerations |
|---|---|---|
| Thermostable DNA Polymerase | Enzyme that synthesizes new DNA strands; Taq polymerase is most common [28] [27] | Heat stability is crucial; hot-start versions reduce nonspecific amplification [27] |
| qPCR Master Mix | Optimized mixture containing buffer, dNTPs, polymerase, and sometimes dye [81] | Provides reaction consistency; often includes passive reference dye for normalization |
| Detection Chemistry | DNA intercalating dyes (e.g., SYBR Green) or sequence-specific probes (e.g., hydrolysis probes, molecular beacons) [81] | Dyes are cost-effective but less specific; probes offer higher specificity but require custom design [81] |
| Primers | Short single-stranded DNA fragments that define the target region to be amplified [28] | Should be 15-30bp with 40-60% GC content; Tm around 60-65°C; avoid self-complementarity [81] [14] |
| Standard Reference Materials | Known concentrations of DNA or RNA used for standard curves in absolute quantification [95] | Should mimic the amplification characteristics of the natural target; must be accurately quantified [95] |
| Reverse Transcriptase | Enzyme for converting RNA to cDNA for RT-qPCR applications [27] | Essential for gene expression studies; robustness and efficiency vary between enzymes [27] |
qPCR analysis provides powerful methods for nucleic acid quantification through the interpretation of Ct values, standard curves, and the ΔΔCt method. Understanding these fundamental concepts enables researchers to select the appropriate quantification approach for their specific application. Absolute quantification using standard curves offers exact copy number determination, while the ΔΔCt method provides a reliable approach for comparing relative expression changes between samples.
Successful qPCR analysis depends on rigorous experimental design, appropriate controls, validation of amplification efficiency, and proper data interpretation. By adhering to established guidelines and quality control measures, researchers can ensure the generation of robust, reproducible data that advances our understanding of biological systems and supports drug development efforts.
Within the framework of a broader thesis on PCR protocol for DNA amplification research, this application note provides a comparative assessment of three cornerstone molecular technologies: Polymerase Chain Reaction (PCR), CRISPR-based detection, and Next-Generation Sequencing (NGS). PCR remains the gold standard for DNA amplification in research and clinical diagnostics due to its robust sensitivity and well-established protocols [96]. However, emerging techniques like CRISPR-based diagnostics and NGS offer distinct advantages in specificity, multiplexing, and comprehensive genomic analysis [97] [98]. This document details the fundamental principles, provides quantitative performance comparisons, and outlines detailed experimental protocols to guide researchers and drug development professionals in selecting the optimal technology for their specific applications, from routine detection to complex genomic characterization.
The table below summarizes the core characteristics, advantages, and limitations of each technology to provide a foundational comparison.
Table 1: Fundamental comparison of PCR, CRISPR-based detection, and Sequencing technologies
| Feature | PCR / qPCR | CRISPR-Based Detection | Next-Generation Sequencing (NGS) |
|---|---|---|---|
| Core Principle | Enzymatic, thermal-cycle-dependent amplification of target DNA | Sequence-specific binding and cleavage by Cas proteins, often coupled with isothermal amplification | Massively parallel sequencing of DNA fragments |
| Primary Application | Target amplification and quantification; gene expression analysis | Highly specific nucleic acid detection and single-nucleotide polymorphism (SNP) identification | Whole genome, exome, or targeted sequencing; variant discovery |
| Key Advantage | High sensitivity (can detect 10-100 copies); quantitative capability (qPCR) | Single-base specificity; suitable for point-of-care use; isothermal conditions | Unbiased, hypothesis-free discovery; comprehensive data output |
| Key Limitation | Prone to primer-dimer artifacts and non-specific amplification; requires thermocycling | Requires pre-amplification for high sensitivity; newer clinical landscape | High cost; complex data analysis; not suitable for rapid diagnosis |
| Typical Assay Time | 1.5 - 2 hours [96] | 45 minutes - 2 hours [99] [100] | Several hours to days |
| Equipment Needs | Thermocycler (and detector for qPCR) | Can be minimal (e.g., water bath); portable readers available | High-cost, sophisticated instrumentation |
| Sample Throughput | High (96/384-well plates) | Flexible, from single to moderate throughput | Very high (multiplexing thousands of samples) |
The following workflow diagram illustrates the general processes for each technology, highlighting key differences in complexity and hands-on time.
Quantitative Performance Data
Selecting the appropriate technology requires a clear understanding of its performance metrics. The following table compiles key quantitative data from recent research and commercial implementations, focusing on sensitivity, specificity, and operational parameters.
Table 2: Quantitative performance metrics for molecular detection technologies
| Technology / Platform | Target | Sensitivity | Specificity | Limit of Detection (LOD) | Time to Result | Reference |
|---|---|---|---|---|---|---|
| RT-PCR (COVID-19) | SARS-CoV-2 genes | 100% | 100% | 500 copies/mL | ~2 hours | [99] |
| Automated CRISPR (COVID-19) | SARS-CoV-2 N gene | 98.2% | 100% | 800 copies/mL | ~30 minutes | [99] |
| RAA-CRISPR/Cas12a | Pseudorabies virus gE gene | 100% (vs. PCR) | 100% (vs. PCR) | 10 copies/μL | 45 minutes | [100] |
| ctPCR (Cas9-typing) | HPV16 and HPV18 L1 gene | High (detected in clinical samples) | High (discriminated 13 HPV subtypes) | Not specified | < 3 hours | [101] |
| CRISPR-MTB | Mycobacterium tuberculosis | 79% | 98% | More sensitive than culture | Not specified | [98] |
| Digital Droplet PCR (ddPCR) | Circulating tumor DNA (ctDNA) | High (detects low abundance) | High | Capable of detecting <0.1% allele frequency | Several hours | [97] |
Beyond the core metrics, the efficiency and success rates of genetic manipulations and detections are critical. In experimental setups, CRISPR-mediated gene editing has shown success rates ranging from 50% to 90%, underscoring its high efficiency but also variability [102]. Furthermore, the high specificity of CRISPR systems allows them to distinguish between targets with single-base resolution, a significant advantage over traditional PCR primers that are more prone to off-target effects [98].
Detailed Experimental Protocols
Protocol: CRISPR-typing PCR (ctPCR) for DNA Detection and Genotyping
The ctPCR method leverages the specificity of Cas9 to enable precise DNA detection and genotyping, overcoming limitations of traditional PCR primer design for discriminating highly similar sequences [101].
Workflow Overview:
Materials & Reagents:
- Template DNA: Sample containing target DNA (e.g., viral gene).
- Cas9 Nuclease: Recombinant Cas9 protein (e.g., from NEB).
- sgRNAs: A pair of sgRNAs designed to flank the genotyping region of the target DNA.
- Primers: Universal primers for PCR1; general-specific (gs) primers and a general primer for the T-adaptor for PCR2.
- Enzymes: Premix Taq, T4 DNA Ligase.
- T-Adaptor: Prepared by annealing oligos oJW102 and oJW103.
- Buffers: Cas9 Nuclease Reaction Buffer, T4 DNA Ligase Buffer.
Step-by-Step Procedure:
- PCR1 (Target Amplification):
- Amplify the target DNA using a pair of universal primers. This step confirms the presence of the target (e.g., virus infection).
- Reaction Setup: Standard PCR mix with DNA template and universal primers.
- Cycling Conditions: Initial denaturation at 95°C for 2 min; 30 cycles of 95°C for 15 s, 60°C for 30 s, 72°C for 60 s; final extension at 72°C for 5 min.
CAT Treatment (Cas9 cutting, A-tailing, T-adaptor ligation):
- Cas9 Digestion:
- Pre-assemble Cas9-sgRNA complex: 1x Cas9 Nuclease Reaction Buffer, 30 nM Cas9 Nuclease, 30 nM of each sgRNA. Incubate at 25°C for 10 min.
- Add 200 ng of PCR1 product (linearized). Incubate at 37°C for 5 min.
- A-Tailing:
- Transfer 5 µL of digestion reaction into 5 µL of Premix Taq. Incubate at 72°C for 5 min.
- T-Adaptor Ligation:
- Add 1x T4 DNA Ligase Buffer, 830 nM T-adaptor, and 5 U T4 DNA Ligase to the A-tailing reaction. Incubate at 22°C for 5 min.
- Cas9 Digestion:
PCR2 (Genotyping Amplification):
- Amplify the CAT-treated DNA using gs-primers specific to the Cas9-digested ends of the target genotype.
- Reaction Setup: Use SYBR Green-based PCR mix with gs-primers.
- Cycling Conditions: Same as PCR1. The presence of an amplicon in PCR2 identifies the specific genotype (e.g., virus subtype).
Protocol: RAA-CRISPR/Cas12a for Rapid, Isothermal Detection
This protocol describes a rapid, isothermal method combining Recombinase Aided Amplification (RAA) with CRISPR-Cas12a for sensitive detection of specific DNA targets, ideal for point-of-care settings [100].
Workflow Overview:
Materials & Reagents:
- RAA Kit: RAA Basic Nucleic Acid Amplification Kit (AmpFuture).
- CRISPR Components: LbCas12a protein, crRNA designed for the target (e.g., PRV gE gene).
- Fluorescent Reporter: ssDNA reporter (e.g., FAM-TTATT-BHQ1).
- Lateral Flow Strips: CRISPR-Cas12a-specific nucleic acid detection strips (e.g., from BaoYing TongHui).
- Primers: Specific RAA primers.
Step-by-Step Procedure:
- RAA Isothermal Amplification:
- Set up the RAA reaction according to the manufacturer's instructions using extracted DNA and target-specific primers.
- Incubate the reaction at 37°C for 20-30 minutes to amplify the target DNA.
CRISPR-Cas12a Detection:
- Prepare the CRISPR reaction mix containing LbCas12a protein, crRNA, and the fluorescent ssDNA reporter.
- Transfer a portion of the RAA amplification product into the CRISPR reaction mix.
- Incubate at 37°C for 10-15 minutes to allow for target binding and subsequent trans-cleavage of the reporter.
Result Interpretation:
- Fluorescence Readout: Measure fluorescence intensity using a portable fluorometer. A significant increase over background indicates a positive result.
- Lateral Flow Readout: Apply the reaction mixture to the sample pad of the lateral flow strip. The appearance of both test and control lines indicates a positive result.
The Scientist's Toolkit: Essential Research Reagents and Materials
Successful implementation of these advanced molecular techniques relies on a suite of specific reagents and materials. The following table details key solutions for the featured CRISPR-based detection protocols.
Table 3: Key research reagent solutions for CRISPR-based detection methods
| Reagent / Material | Function | Example in Protocol | Critical Parameters / Notes |
|---|---|---|---|
| Cas Proteins | Effector nuclease that binds and cleaves nucleic acids. | Cas9 (ctPCR) [101], Cas12a (RAA-CRISPR) [100] | Specificity (DNA/RNA target), PAM requirement, activation of non-specific cleavage (e.g., Cas12a). |
| Guide RNA (sgRNA/crRNA) | Provides target specificity by complementary base pairing. | sgRNAs for HPV L1 gene [101], crRNA for PRV gE gene [100] | Design for minimal off-target effects; requires TTTN PAM for Cas12a. |
| Isothermal Amplification Mix | Amplifies target nucleic acids at constant temperature. | RAA Kit [100] | Enables rapid amplification without thermocyclers, crucial for point-of-care use. |
| Fluorescent Reporter | Generates signal upon Cas-mediated collateral cleavage. | ssDNA-FAM/BHQ1 for Cas12a [100] | Quencher-fluorophore pair; cleavage generates fluorescent signal. |
| Lateral Flow Strips | Provides visual, instrument-free readout. | CRISPR-specific detection strips [100] | Contains immobilized antibodies to capture labeled reporter fragments. |
| T-Adaptor | Facilitates ligation and universal priming in multi-step assays. | Annealed oligos oJW102/oJW103 [101] | Allows for subsequent PCR with a general primer after Cas9 cleavage and A-tailing. |
PCR, CRISPR-based detection, and sequencing are powerful, complementary technologies in the molecular biologist's arsenal. PCR remains the unmatched workhorse for robust DNA amplification and quantification. CRISPR-based systems offer a paradigm shift for rapid, specific, and potentially field-deployable diagnostics. Sequencing provides the ultimate comprehensive analysis for discovery and complex characterization. The choice of technology must be driven by the specific research question, weighing requirements for speed, sensitivity, specificity, cost, and data comprehensiveness. The continued evolution and integration of these protocols, such as combining pre-amplification with CRISPR detection, will further empower research and accelerate drug development.
Conclusion
Mastering PCR requires a solid grasp of its foundational principles, a meticulous approach to protocol execution, strategic problem-solving for optimization, and rigorous validation to ensure data reliability. The future of PCR lies in the development of more multiplexed, rapid, and cost-effective assays, as demonstrated by their critical role in responding to emerging viral variants. For biomedical and clinical research, the continued refinement of PCR protocols and validation standards will be paramount for advancing molecular diagnostics, personalized medicine, and our understanding of disease mechanisms, ultimately leading to improved patient outcomes and stronger public health responses.
References
- 1. of History ( Polymerase ) Chain Reaction PCR [https://www.news-medical.net/life-sciences/History-of-Polymerase-Chain-Reaction-(PCR).aspx]
- 2. of History - Wikipedia polymerase chain reaction [https://en.wikipedia.org/wiki/History_of_polymerase_chain_reaction]
- 3. of Applications in PCR - KCAS Bio Drug Development [https://kcasbio.com/blogs/pcr-applications-drug-development/]
- 4. Chips for Biomarker Discovery and... Polymerase Chain Reaction [https://pmc.ncbi.nlm.nih.gov/articles/PMC11944077/]
- 5. Quantitative PCR assays in clinical drug development [https://www.europeanpharmaceuticalreview.com/article/2637/quantitative-pcr-assays-in-clinical-drug-development/]
- 6. Auto-qPCR; a python-based web app for automated and reproducible analysis of qPCR data | Scientific Reports [https://www.nature.com/articles/s41598-021-99727-6]
- 7. Parameters—Six Key... | Thermo Fisher Scientific - US PCR Cycling [https://www.thermofisher.com/us/en/home/life-science/cloning/cloning-learning-center/invitrogen-school-of-molecular-biology/pcr-education/pcr-reagents-enzymes/pcr-cycling-considerations.html]
- 8. : Basic Polymerase Plus Troubleshooting... Chain Reaction Protocol [https://www.jove.com/t/3998/polymerase-chain-reaction-basic-protocol-plus-troubleshooting]
- 9. Polymerase Chain Reaction [https://www.sigmaaldrich.com/IL/en/technical-documents/technical-article/genomics/pcr/polymerase-chain-reaction]
- 10. Module 4.2: Denaturation , Annealing , and Primer Extension ... [https://pressbooks.umn.edu/cvdl/chapter/module-4-4-denaturation-annealing-and-primer-extension/]
- 11. Video: PCR : Principle, Instrumentation, and Applications [https://app.jove.com/v/5056/pcr-principle-instrumentation-and-applications]
- 12. Setup—Six Critical PCR ... | Thermo Fisher Scientific - ZA Components [https://www.thermofisher.com/za/en/home/life-science/cloning/cloning-learning-center/invitrogen-school-of-molecular-biology/pcr-education/pcr-reagents-enzymes/pcr-component-considerations.html]
- 13. Optimizing PCR : Proven Tips and Troubleshooting Tricks | The Scientist [https://www.the-scientist.com/optimizing-pcr-proven-tips-and-troubleshooting-tricks-71660]
- 14. Polymerase Chain Reaction: Basic Protocol Plus Troubleshooting and Optimization Strategies - PMC [https://pmc.ncbi.nlm.nih.gov/articles/PMC4846334/]
- 15. PCR Protocols & Primer Design Guide | Boster Bio [https://www.bosterbio.com/protocol-and-troubleshooting/pcr-protocol]
- 16. Troubleshooting your PCR [https://www.takarabio.com/learning-centers/pcr/faq/troubleshooting]
- 17. Standard PCR Protocol [https://www.sigmaaldrich.com/US/en/technical-documents/protocol/genomics/pcr/standard-pcr]
- 18. Statistical significance of quantitative | BMC Bioinformatics PCR [https://bmcbioinformatics.biomedcentral.com/articles/10.1186/1471-2105-8-131]
- 19. Comprehensive Algorithm for Quantitative Real-Time Polymerase ... [https://pmc.ncbi.nlm.nih.gov/articles/PMC2716216/]
- 20. Research Techniques Made Simple: Polymerase Chain Reaction (PCR) - PMC [https://pmc.ncbi.nlm.nih.gov/articles/PMC4102308/]
- 21. Polymerase Chain Reaction (PCR) - StatPearls - NCBI Bookshelf [https://www.ncbi.nlm.nih.gov/books/NBK589663/]
- 22. PCR primer design [https://www.qiagen.com/us/knowledge-and-support/knowledge-hub/bench-guide/pcr/introduction/pcr-primer-design]
- 23. Optimizing PCR Reaction Conditions for High Fidelity and Yield [https://www.labx.com/resources/optimizing-pcr-reaction-conditions-for-high-fidelity-and-yield/5579]
- 24. and Tips for PCR & qPCR Rules | IDT Primer Design [https://eu.idtdna.com/page/support-and-education/decoded-plus/how-to-design-primers-and-probes-for-pcr-and-qpcr/]
- 25. (General Primer ) | PPTX Designing Rules [https://www.slideshare.net/slideshow/primer-designing-general-rules/100643511]
- 26. guide - 5 tips for best PCR results Primer design [https://the-dna-universe.com/2022/09/05/primer-design-guide-the-top-5-factors-to-consider-for-optimum-performance/]
- 27. PCR Amplification | An Introduction to PCR Methods [https://www.promega.com/resources/guides/nucleic-acid-analysis/pcr-amplification/]
- 28. Polymerase chain reaction - Wikipedia [https://en.wikipedia.org/wiki/Polymerase_chain_reaction]
- 29. in the Real World: 5 Uses You'll Actually See ( Pcr ) Reagent 2025 [https://www.linkedin.com/pulse/pcr-reagent-real-world-5-uses-youll-actually-see-jyekc]
- 30. dPCR vs qPCR vs end-point PCR [https://www.qiagen.com/us/knowledge-and-support/knowledge-hub/bench-guide/pcr/digital-pcr/digital-pcr-vs-quantitative-pcr-vs-end-point-pcr]
- 31. Basic Principles of RT - qPCR | Thermo Fisher Scientific - US [https://www.thermofisher.com/us/en/home/brands/thermo-scientific/molecular-biology/molecular-biology-learning-center/molecular-biology-resource-library/spotlight-articles/basic-principles-rt-qpcr.html]
- 32. Stepwise Optimization of Real-Time RT - PCR Analysis [https://pubmed.ncbi.nlm.nih.gov/36995635/]
- 33. An optimized for stepwise protocol of real-time optimization - RT ... PCR [https://www.nature.com/articles/s41438-021-00616-w?error=cookies_not_supported&code=6ba424d0-6197-4981-8488-6ec645b48c34]
- 34. qPCR Troubleshooting Guide - Azure Biosystems [https://azurebiosystems.com/qpcr-resources/troubleshooting/]
- 35. QIAGEN Multiplex Kit PCR [https://www.qiagen.com/us/products/discovery-and-translational-research/pcr-qpcr-dpcr/pcr-enzymes-and-kits/end-point-pcr/qiagen-multiplex-pcr-kit]
- 36. The web-based multiplex PCR primer design software Ultiplex and the associated experimental workflow: up to 100- plex multiplicity - PubMed [https://pubmed.ncbi.nlm.nih.gov/34794394/]
- 37. Frontiers | Optimized multiplex PCR-NGS for comprehensive HLA genotyping in Chinese populations: resolving ambiguities at high resolution [https://www.frontiersin.org/journals/immunology/articles/10.3389/fimmu.2025.1551173/full]
- 38. Expand™ Long Template PCR System Protocol Troubleshooting [https://www.sigmaaldrich.com/US/en/technical-documents/protocol/genomics/pcr/expand-long-template-pcr-system]
- 39. Long-range PCR and Nanopore sequencing for localisation and phasing variants: an end-to-end clinical application workflow | BMC Medical Genomics | Full Text [https://bmcmedgenomics.biomedcentral.com/articles/10.1186/s12920-025-02251-z]
- 40. Early Release - Detection and Tracking of SARS-CoV-2 Lineages through National Wastewater Surveillance System Pathogen Genomics - Volume 31, Supplement—May 2025 - Emerging Infectious Diseases journal - CDC [https://wwwnc.cdc.gov/eid/article/31/13/24-1411_article]
- 41. Integrating DNA and RNA sequencing for enhanced pathogen detection in respiratory infections | Journal of Translational Medicine | Full Text [https://translational-medicine.biomedcentral.com/articles/10.1186/s12967-025-06342-4]
- 42. High-Throughput Data Analysis for qPCR | NEB | NEB [https://www.neb.com/en-us/tools-and-resources/feature-articles/development-of-a-high-throughput-data-analysis-method-for-quantitative-real-time-pcr]
- 43. A new method for robust quantitative and qualitative analysis of real-time PCR - PMC [https://pmc.ncbi.nlm.nih.gov/articles/PMC2504305/]
- 44. A new real-time PCR method to overcome significant quantitative inaccuracy due to slight amplification inhibition | BMC Bioinformatics | Full Text [https://bmcbioinformatics.biomedcentral.com/articles/10.1186/1471-2105-9-326]
- 45. Automation and standardisation of clinical molecular testing using PCR.Ai – A comparative performance study - PMC [https://pmc.ncbi.nlm.nih.gov/articles/PMC7172212/]
- 46. & Real-Time Nucleic Analysis System Market... Acid Extraction PCR [https://www.researchandmarkets.com/reports/6134245/nucleic-acid-extraction-and-real-time-pcr-analysis]
- 47. An optimized extraction DNA for reliable protocol -based... PCR [https://plantmethods.biomedcentral.com/articles/10.1186/s13007-025-01460-y]
- 48. of Integration with Automated... Nucleic Acid Extraction Protocol [https://pubmed.ncbi.nlm.nih.gov/29668220/]
- 49. Developing centrifugal force real-time digital PCR for detecting extremely low DNA concentration | Scientific Reports [https://www.nature.com/articles/s41598-024-62199-5]
- 50. Seegene Announces Development of CURECA™, a Next-Generation Fully Automated PCR Solution Featuring Customizable Pre-treatment Automation [https://www.seegene.com/press_release/20250409_02]
- 51. PCR diagnostics: In silico validation by an automated tool using freely available software programs - ScienceDirect [https://www.sciencedirect.com/science/article/pii/S0166093419301247]
- 52. Predicting the sensitivity and specificity of published real-time PCR assays - PMC [https://pmc.ncbi.nlm.nih.gov/articles/PMC2566554/]
- 53. Predicting the sensitivity and specificity of published real-time PCR assays | Annals of Clinical Microbiology and Antimicrobials | Full Text [https://ann-clinmicrob.biomedcentral.com/articles/10.1186/1476-0711-7-18]
- 54. PCR Troubleshooting Guide | Thermo Fisher Scientific - US [https://www.thermofisher.com/us/en/home/life-science/cloning/cloning-learning-center/invitrogen-school-of-molecular-biology/pcr-education/pcr-reagents-enzymes/pcr-troubleshooting.html]
- 55. Troubleshooting 101: How to Address PCR - Non Amplification? Specific [https://geneticeducation.co.in/pcr-troubleshooting-101-how-to-address-non-specific-amplification/]
- 56. Troubleshooting PCR Part Three: Solutions for Weak Bands and Smearing | GoldBio [https://goldbio.com/articles/article/troubleshooting-pcr-part-three-solutions-for-weak-bands-and-smearing]
- 57. Why do I get an unexpected band or multiple bands for my PCR result? [https://www.aatbio.com/resources/faq-frequently-asked-questions/Why-do-I-get-an-unexpected-band-or-multiple-bands-for-my-PCR-result]
- 58. : Common... | MyBioSource Learning Center PCR Troubleshooting [https://www.mybiosource.com/learn/pcr-troubleshooting-common-problems-and-solutions/]
- 59. Setup—Six Critical Components to... | Thermo Fisher Scientific - US PCR [https://www.thermofisher.com/us/en/home/life-science/cloning/cloning-learning-center/invitrogen-school-of-molecular-biology/pcr-education/pcr-reagents-enzymes/pcr-component-considerations.html]
- 60. Enhancement of DNA amplification efficiency by using PCR additives [https://www.bocsci.com/blog/enhancement-of-dna-amplification-efficiency-by-using-pcr-additives/]
- 61. Polymerase chain reaction optimization - Wikipedia [https://en.wikipedia.org/wiki/Polymerase_chain_reaction_optimization]
- 62. Optimization of Annealing Temperature and other PCR Parameters [https://www.genaxxon.com/shop/en/blog/optimization-of-annealing-temperature-and-other-pcr-parameters]
- 63. | AAT Bioquest PCR Annealing Temperature Optimization [https://www.aatbio.com/resources/application-notes/pcr-annealing-temperature-optimization]
- 64. How to Calculate Annealing for Temperature | IDT PCR [https://eu.idtdna.com/pages/support/faqs/how-do-you-calculate-the-annealing-temperature-for-pcr-]
- 65. New specificity and yield enhancer of polymerase chain reactions - PMC [https://pmc.ncbi.nlm.nih.gov/articles/PMC102717/]
- 66. Methods - Top Ten Strategies | Thermo Fisher Scientific - UY PCR [https://www.thermofisher.com/uy/en/home/life-science/cloning/cloning-learning-center/invitrogen-school-of-molecular-biology/pcr-education/pcr-reagents-enzymes/pcr-methods.html]
- 67. Development of a Simple Direct and Hot-Start PCR Using Escherichia coli-Expressing Taq DNA Polymerase - PMC [https://pmc.ncbi.nlm.nih.gov/articles/PMC10379934/]
- 68. Touchdown Polymerase Chain Reaction (PCR) - PubMed [https://pubmed.ncbi.nlm.nih.gov/29717053/]
- 69. Touchdown PCR: Easy Intro Plus 5 Expert Tips [https://bitesizebio.com/2203/touchdown-pcr-a-primer-and-some-tips/]
- 70. Standard vs. Touchdown PCR | AAT Bioquest [https://www.aatbio.com/resources/application-notes/standard-vs-touchdown-pcr]
- 71. What is touchdown (TD)- PCR ? | Genetic Education [https://geneticeducation.co.in/what-is-touchdown-td-pcr/]
- 72. Type-specific amplification of viral DNA using touchdown and hot start PCR - ScienceDirect [https://www.sciencedirect.com/science/article/abs/pii/016609349490099X]
- 73. Q5/Phusion PCR - Bennett Lab Wiki - Rice University Campus Wiki [https://wiki.rice.edu/confluence/pages/viewpage.action?pageId=25370815]
- 74. of Genomic Amplification by DNA | SpringerLink PCR [https://link.springer.com/protocol/10.1385/0-89603-485-2:143]
- 75. Regulatory Concern of Polymerase Chain Reaction (PCR) Carryover Contamination | IntechOpen [https://www.intechopen.com/chapters/52932]
- 76. Inhibition Controls for Qualitative Real-Time PCR Assays: Are They Necessary for All Specimen Matrices? - PMC [https://pmc.ncbi.nlm.nih.gov/articles/PMC4042775/]
- 77. Avoiding Contamination | Thermo Fisher Scientific - US [https://www.thermofisher.com/us/en/home/life-science/pcr/real-time-pcr/real-time-pcr-learning-center/real-time-pcr-basics/good-laboratory-practice-avoid-contamination-qpcr-experiments.html]
- 78. Overcoming inhibition in real-time diagnostic PCR - PubMed [https://pubmed.ncbi.nlm.nih.gov/23104280/]
- 79. The Devil in the Details: Contamination in a PCR Lab [https://www.rapidmicrobiology.com/news/the-devil-in-the-details-contamination-in-a-pcr-lab]
- 80. How to prevent PCR contamination – miniPCR bio [https://www.minipcr.com/how-to-prevent-pcr-contamination/]
- 81. Insights into qPCR: Protocol , Detection Methods, and... | The Scientist [https://www.the-scientist.com/insights-into-qpcr-protocol-detection-methods-and-analysis-71478]
- 82. PCR controls [https://www.qiagen.com/us/knowledge-and-support/knowledge-hub/bench-guide/pcr/reference-genes-and-controls/pcr-controls]
- 83. The MIQE : minimum information for publication of... guidelines [https://pubmed.ncbi.nlm.nih.gov/19246619/]
- 84. PCR-Stop analysis as a new tool for qPCR assay validation | Scientific Reports [https://www.nature.com/articles/s41598-018-26116-x]
- 85. A standard curve based method for relative real time PCR data processing - PMC [https://pmc.ncbi.nlm.nih.gov/articles/PMC1274258/]
- 86. PCR-Stop analysis as a new tool for qPCR assay validation - PMC [https://pmc.ncbi.nlm.nih.gov/articles/PMC5974342/]
- 87. A standard curve based method for relative real time PCR data processing | BMC Bioinformatics | Full Text [https://bmcbioinformatics.biomedcentral.com/articles/10.1186/1471-2105-6-62]
- 88. Learn about the importance of the qPCR standard curve [https://bitesizebio.com/31470/obligate-qpcr-standard-curve/]
- 89. A simple, accurate and universal method for quantification of PCR - PMC [https://pmc.ncbi.nlm.nih.gov/articles/PMC4784296/]
- 90. Quantitative PCR Basics [https://www.sigmaaldrich.com/IT/it/technical-documents/technical-article/genomics/qpcr/quantitative-pcr]
- 91. Standardisation of data from real-time quantitative PCR methods – evaluation of outliers and comparison of calibration curves | BMC Biotechnology | Full Text [https://bmcbiotechnol.biomedcentral.com/articles/10.1186/1472-6750-5-31]
- 92. Relative Quantification of Gene Expression Using qPCR [https://bitesizebio.com/29322/methods-relative-quantification-qpcr-data/]
- 93. qPCRtools: An R package for qPCR data processing and visualization - PMC [https://pmc.ncbi.nlm.nih.gov/articles/PMC9513427/]
- 94. Disclosing quantitative RT‐PCR raw data during manuscript submission: a call for action - PMC [https://pmc.ncbi.nlm.nih.gov/articles/PMC10158759/]
- 95. Absolute Quantification qPCR | Relative Quantification qPCR [https://www.qiagen.com/us/knowledge-and-support/knowledge-hub/bench-guide/pcr/pcr-quantification/pcr-quantification]
- 96. CRISPR-based systems for sensitive and rapid on-site COVID-19 diagnostics - PMC [https://pmc.ncbi.nlm.nih.gov/articles/PMC9174145/]
- 97. - CRISPR diagnostics for circulating cell-free DNA: a paradigm... based [https://pubs.rsc.org/en/content/articlehtml/2025/sd/d5sd00083a]
- 98. CRISPR: The Future of Molecular Diagnostics? | Today's Clinical Lab [https://www.clinicallab.com/crispr-the-future-of-molecular-diagnostics-25264]
- 99. Evaluation of an automated CRISPR-based diagnostic tool for rapid detection of COVID-19 - PMC [https://pmc.ncbi.nlm.nih.gov/articles/PMC9868009/]
- 100. Frontiers | Development and application of... [https://www.frontiersin.org/journals/microbiology/articles/10.3389/fmicb.2025.1641525/full]
- 101. CRISPR-typing PCR (ctPCR), a new Cas9-based DNA detection method | Scientific Reports [https://www.nature.com/articles/s41598-018-32329-x]
- 102. Statistics and Facts ( CRISPR ) | Market.us Media 2025 [https://media.market.us/crispr-statistics/]