Solving Non-Specific Amplification in PCR: A Comprehensive Guide for Researchers and Drug Developers
Non-specific amplification remains a significant challenge in PCR, compromising data accuracy, diagnostic reliability, and experimental efficiency in biomedical research and drug development.
Solving Non-Specific Amplification in PCR: A Comprehensive Guide for Researchers and Drug Developers
Abstract
Non-specific amplification remains a significant challenge in PCR, compromising data accuracy, diagnostic reliability, and experimental efficiency in biomedical research and drug development. This comprehensive article provides researchers and scientists with a systematic framework to understand, troubleshoot, and prevent non-specific amplification. Covering foundational principles to advanced validation strategies, it explores the root causes, presents optimized methodological approaches, details practical troubleshooting protocols, and introduces cutting-edge validation techniques. By integrating proven laboratory practices with emerging technologies like deep learning prediction models, this guide empowers professionals to achieve higher PCR specificity, enhance experimental reproducibility, and improve clinical assay performance across diverse applications from basic research to diagnostic development.
Understanding Non-Specific Amplification: From Basic Concepts to Recognition and Impact
What is Non-Specific Amplification?
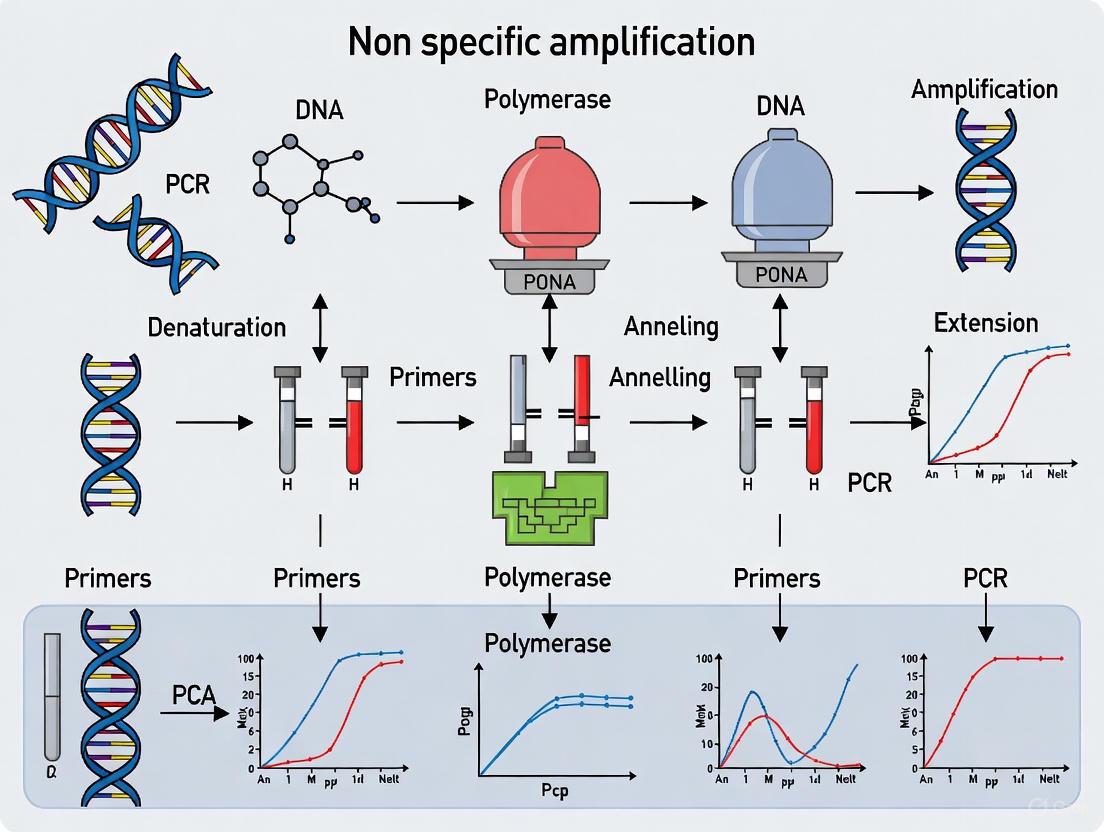
In PCR, non-specific amplification occurs when the reaction produces unintended or random DNA sequences, with or without your target sequence, resulting in multiple or single amplicons of an incorrect size [1]. It does not include the valid amplification of target contamination present in your samples or workflow [2].
This phenomenon can generally be divided into two scenarios [1]:
- Non-specific amplification with multiple amplicons: Various unwanted fragments of incorrect size are generated.
- Non-specific amplification with a single amplicon: A single incorrect-sized amplicon is generated.
How to Recognize Non-Specific Amplification on a Gel
Non-specific amplification is most easily recognized by comparing your electrophoresis gel results to the expected outcome. The table below summarizes common artefacts [2].
| Visual Artefact | Description | Example Lane in Fig. 1 |
|---|---|---|
| Primer Dimers | A bright band at the very bottom of the gel (20-60 bp in length) [2]. | Lanes 2, 3, 4, 5, 6, 7, 8, 9, 10 |
| Primer Multimers | A ladder-like pattern of bands (e.g., 100 bp, 200 bp, etc.) [2]. | |
| Smears | A continuous, hazy spread of DNA, from short to long [2]. | Lanes 3, 4, 5, 6, 7 |
| Non-Specific Bands | One or more discrete, unexpected bands at various sizes [2]. | Lanes 8 (three bands) & 9 (one band) |
| DNA Stuck in Well | PCR product fails to enter the gel, often accompanied by a smear below the well [2]. | Lane 4 |
| Residual Primers | A diffuse, hazy band at the very bottom of the gel (around primer length, e.g., 21-30 bp) [2]. | Lanes 2, 3, 4, 5, 6, 7, 8, 9, 10 |
The diagram below illustrates a model gel electrophoresis result showcasing these different types of non-specific amplification and artefacts.
Troubleshooting Guide: Causes and Solutions
The following table outlines the primary causes of non-specific amplification and evidence-based solutions to resolve them [3] [1].
| Cause | Description | Recommended Solution |
|---|---|---|
| Suboptimal Annealing Temperature [1] | Temperature is too low, giving primers flexibility to bind to random, partially complementary sites on the template. | Increase the annealing temperature stepwise in 1–2°C increments. The optimal temperature is usually 3–5°C below the calculated Tm of the primers [3]. Perform gradient PCR to determine the ideal temperature [1]. |
| Poor Primer Design [1] | Primers are not specific enough, have complementarity to other genomic regions, or form secondary structures like hairpins. | Redesign primers using software (e.g., Primer3). Ensure they are 18-30 nt long, have a GC content of 40-60%, and avoid repeats. The 3' end should be capped with a G or C to strengthen binding [4]. Verify specificity with in silico PCR [1]. |
| Excessive Primer Concentration [3] [1] | High primer concentration promotes primer-dimer formation and non-specific binding. | Optimize the final primer concentration, typically within the range of 0.1–1.0 μM (a common optimal range is 0.4–0.5 μM) [3] [5]. |
| High Template Quantity or Poor Quality [3] [1] | Too much template DNA increases the chance of non-specific annealing. Degraded DNA can appear as smears. | Use an appropriate amount of template (e.g., 10-100 ng per reaction for genomic DNA) [1]. Re-purify the DNA to remove contaminants (proteins, salts, phenol) and assess integrity by gel electrophoresis [3]. |
| Incorrect Mg²⁺ Concentration [3] [1] | Excess Mg²⁺ acts as a cofactor for DNA polymerase and can boost its activity indiscriminately, leading to non-specific products. | Optimize the Mg²⁺ concentration. While a common range is 1.5-2.5 mM, the ideal concentration should be determined empirically for each primer-template system [1]. |
| Contaminated Reagents [1] | Contamination with other DNA sources (e.g., amplicons from previous PCRs) can lead to amplification of multiple targets. | Use Uracil-N-Glycosylase (UNG), which incorporates dUTP in place of dTTP in new amplicons. UNG enzymatically degrades these contaminating amplicons before PCR begins [6]. |
| Too Many PCR Cycles [1] | A high number of cycles can lead to the accumulation of non-specific products that become visible after the reaction reaches the plateau phase. | Reduce the number of cycles. A standard run of 25-35 cycles is typically sufficient. Avoid unnecessary over-cycling [5] [1]. |
Experimental Protocol: A Systematic Approach to Optimization
If you are encountering persistent non-specific amplification, follow this detailed troubleshooting protocol.
Objective: To identify the optimal conditions that suppress non-specific amplification while maintaining or enhancing the yield of the desired target product.
Materials:
- Thermal cycler with gradient functionality
- Gel electrophoresis equipment
- Standard PCR reagents: DNA polymerase, buffer, dNTPs, primers, template DNA
- Reagents for optimization: MgCl₂ (if separate), DMSO, PCR additives
Methodology:
Initial Assessment: Run your current PCR protocol and analyze the product on an agarose gel. Note the types of non-specific artefacts (refer to the table and diagram above).
Annealing Temperature Gradient:
- Set up a series of identical PCR reactions, varying only the annealing temperature.
- Use your thermal cycler's gradient function to test a range, for example, from 55°C to 65°C in 2°C increments.
- Analyze the results by gel electrophoresis. The lane with the strongest target band and the absence of non-specific bands indicates the optimal annealing temperature [3] [1].
Mg²⁺ Concentration Optimization:
- Prepare a set of reactions with a Mg²⁺ concentration gradient (e.g., 1.0 mM, 1.5 mM, 2.0 mM, 2.5 mM, 3.0 mM).
- Use the optimal annealing temperature determined in the previous step.
- Analyze by gel electrophoresis to find the Mg²⁺ concentration that gives the best specificity and yield [3].
Primer and Template Titration:
- Primer Titration: Test a range of final primer concentrations from 0.1 μM to 0.5 μM in 0.1 μM increments to minimize primer-dimer formation [3].
- Template Titration: Test a series of template concentrations (e.g., 10 ng, 25 ng, 50 ng, 100 ng) to find the minimum amount that still produces a strong specific band [1].
Incorporate a Hot-Start Polymerase:
- If not already in use, switch to a hot-start DNA polymerase. These enzymes are inactive at room temperature, preventing non-specific priming and primer-dimer formation during reaction setup. They are activated only after the initial high-temperature denaturation step [3].
Use PCR Additives (for difficult templates):
- If your target is GC-rich or has complex secondary structures, additives can help. Test the inclusion of DMSO (e.g., 2-5%), formamide (1-3%), or a commercial GC-enhancer to improve specificity by helping to denature the template [3].
The logical workflow for this systematic optimization is summarized below.
Preventing Contamination: A Critical Best Practice
Contamination from previous amplification products (amplicons) is a major source of false-positive, non-specific results, especially in clinical and diagnostic settings [6].
- Physical Barriers: Maintain strict unidirectional workflow through physically separated pre- and post-PCR areas. Use dedicated equipment, lab coats, and gloves in each area [6] [7].
- Chemical Decontamination: Routinely clean work surfaces and equipment with 10% sodium hypochlorite (bleach), which causes oxidative damage to DNA, followed by ethanol to remove the bleach [6].
- Enzymatic Control (UNG): This is the most widely used technique. Incorporate uracil-N-glycosylase (UNG) and dUTP into your PCR master mix. UNG will degrade any contaminating uracil-containing amplicons from previous runs before the PCR starts, but it will not affect your native, thymine-containing target DNA [6].
The Scientist's Toolkit: Essential Research Reagent Solutions
The following table details key reagents and materials crucial for preventing and troubleshooting non-specific amplification.
| Reagent / Material | Function in Preventing Non-Specific Amplification | Key Considerations |
|---|---|---|
| Hot-Start DNA Polymerase [3] | Remains inactive at room temperature during reaction setup, preventing non-specific priming and primer-dimer formation. Activated only at high temperatures. | Essential for improving specificity. Available in specialized master mixes. |
| Uracil-N-Glycosylase (UNG) [6] | Prevents carryover contamination by degrading PCR products (amplicons) from previous reactions that contain dUTP, before the new PCR cycle begins. | Requires the use of dUTP in the nucleotide mix. Must be inactivated by heat after the pre-PCR incubation. |
| Gradient Thermal Cycler [3] [1] | Allows simultaneous testing of multiple annealing temperatures in a single run, drastically speeding up optimization. | Critical for efficient empirical determination of the optimal annealing temperature. |
| PCR Additives (e.g., DMSO) [3] [4] | Helps denature DNA templates with high GC-content or secondary structures, making them more accessible to primers and polymerase, thereby improving specificity. | Use at the lowest effective concentration (e.g., 2-5% for DMSO) as it can inhibit Taq polymerase at higher levels. |
| Optimized Primer Pairs [4] [1] | Well-designed primers are the foundation of specific amplification. They should be specific to the target, have matched Tm, and lack self-complementarity. | Design primers 18-30 nt long with 40-60% GC content. The 3' end should be a G or C to enhance binding specificity. |
FAQs: Identifying and Troubleshooting Common Gel Electrophoresis Artefacts
What are the most common types of non-specific amplification seen on a gel?
The most common types of non-specific amplification visible after gel electrophoresis are primer dimers, PCR smears, and amplicons of unexpected sizes [2].
- Primer Dimers: These are short, amplifiable products formed by two primers hybridizing to each other. They typically appear as a bright band at the bottom of the gel, between 20-60 bp in size, and can sometimes form larger "primer multimers" that create a ladder-like pattern [2].
- PCR Smears: A continuous smear of DNA running down the lane indicates the presence of DNA fragments of many different sizes. This is often caused by sample degradation, excessive template DNA, or primers binding randomly to the template [2].
- Amplicons of Unexpected Sizes: One or more discrete bands that are either smaller or larger than the target amplicon. These are produced when primers bind to non-target sequences on the DNA template [2].
Why are my bands smeared and fuzzy instead of sharp?
Smeared or fuzzy bands are a common sign of poor resolution and can have several causes, related to either the sample or the electrophoresis process itself [8].
- Sample Degradation: Nucleic acids can be degraded by nucleases, creating a range of fragment sizes that appear as a smear [8].
- Sample Overloading: Loading too much DNA into the well can overload the gel's capacity, leading to smearing [9] [10]. A general recommendation is to load 0.1–0.2 μg of DNA per millimeter of gel well width [10].
- Excessive Voltage: Running the gel at a very high voltage generates heat, which can denature DNA fragments and cause band diffusion [8].
- Incorrect Gel Concentration: Using a gel with a pore size not optimized for your fragment size range can lead to poor separation and smearing [8]. For example, a low percentage agarose gel will not resolve small fragments well.
- Incompatible Loading Buffer: For double-stranded DNA, avoid using a loading dye containing a denaturant, as this can disrupt the sample [10].
What does it mean if my DNA is "stuck in the well"?
If DNA remains in the well after electrophoresis, it indicates that large, complex molecules are physically unable to enter the gel matrix. Common causes include [2]:
- Carryover of contaminants from DNA extraction, such as proteins or salts.
- Overloading of the PCR product.
- Formation of artefactual DNA complexes due to non-specific priming.
- Malformed or reused wells in the agarose gel.
Why is my DNA ladder running crooked, and what does it mean?
A crooked DNA ladder indicates an uneven electric field across the gel. This can be caused by [9]:
- Uneven buffer levels in the electrophoresis tank.
- An unlevel gel tray during the run.
- Crooked or damaged electrodes in the gel tank.
- Electrodes covered in agarose gel due to leakage during casting.
How can I tell the difference between non-specific bands and primer dimers?
The key differentiator is their size and location on the gel.
- Primer Dimers form a very bright, discrete band at the very bottom of the gel (typically below 100 bp) [2].
- Non-Specific Bands are discrete bands higher up on the gel but at a position that does not correspond to the expected size of your target amplicon [2].
- Residual Primers, which are unincorporated primers left over from the PCR reaction, form a diffuse, hazy band at the very bottom of the gel, below the primer dimer band [2].
Troubleshooting Guide: Gel Electrophoresis Patterns and Solutions
The following table summarizes common gel electrophoresis artefacts, their visual patterns, and primary solutions.
| Artefact Pattern | Visual Description on Gel | Primary Causes | Recommended Solutions |
|---|---|---|---|
| Primer Dimers [2] | Bright band at 20-60 bp; possible ladder-like multimers. | High primer concentration; mispriming during setup. | Reduce primer concentration; use a hot-start polymerase; set up reactions on ice. |
| PCR Smear [8] [2] | Fuzzy, continuous smear from top to bottom of lane. | Degraded DNA; too much template DNA; low annealing temperature; high voltage. | Re-extract DNA; dilute template; increase annealing temperature; run gel at lower voltage. |
| Unexpected Bands [2] [1] | Discrete bands at incorrect sizes (non-target). | Low annealing temperature; poorly designed primers. | Optimize annealing temperature (use gradient PCR); redesign primers for specificity. |
| DNA Stuck in Well [2] | DNA remains in the well, does not enter gel. | Carryover of contaminants (protein, salt); well overloading. | Improve DNA extraction/purification; dilute DNA sample; ensure wells are properly formed. |
| "Smiling" or "Frowning" Bands [8] | Bands curve upwards (smile) or downwards (frown). | Uneven heat distribution across gel (Joule heating). | Run gel at lower voltage; use a gel tank with an efficient cooling system; ensure buffer level is even. |
| Faint or No Bands [8] [10] | Bands are very weak or completely absent. | Low sample quantity; degraded sample; incorrect electrode connection; insufficient stain. | Increase sample amount; check sample integrity; verify power supply connections; optimize staining. |
| Poor Band Resolution [8] [10] | Bands are close together and poorly separated. | Incorrect gel percentage; overloading; run time too short/voltage too high. | Use appropriate gel % for fragment size; load less DNA; run gel longer at lower voltage. |
Experimental Protocol: A Systematic Approach to Diagnosing Non-Specific Amplification
Step 1: Record and Document the Gel
Always start by capturing a high-quality digital image of your gel under UV light. Use a gel imaging system or a smartphone in a dark room with an orange filter. Reduce ambient light and ensure the imaging surface is clean. Document your gel layout (gel map) to keep track of samples and ladders [9].
Step 2: Assess Gel and Ladder Quality
Before analyzing your samples, check the quality of your run.
- Evaluate the DNA Ladder: The ladder in the first and/or last lane should have clear, distinct bands. Poor ladder resolution (smeared, crooked, or faint bands) indicates a problem with the electrophoresis run itself, which will affect all samples [9].
- Inspect the Gel: Look for physical issues like bubbles, cloudiness (from undissolved agarose), or contaminants [9].
Step 3: Identify and Categorize Artefacts
Compare your sample lanes to the ladder and the expected size of your target amplicon. Use the descriptions in the troubleshooting table above to categorize any observed artefacts, such as smears, primer dimers, or unexpected bands [2].
Step 4: Execute a Troubleshooting Workflow
Follow the logical pathway below to diagnose the root cause of non-specific amplification based on the artefacts you observed.
Research Reagent Solutions for Troubleshooting
The following table lists key reagents and their roles in preventing and resolving non-specific amplification.
| Research Reagent | Function in Troubleshooting | Specific Application Note |
|---|---|---|
| Hot-Start DNA Polymerase [3] [1] | Reduces non-specific amplification and primer-dimer formation by remaining inactive until a high-temperature activation step. | Essential for improving PCR specificity. Use according to manufacturer's protocol. |
| Gradient Thermal Cycler [3] [1] | Allows for empirical optimization of the annealing temperature across a range in a single run. | Critical for finding the optimal annealing temperature to enhance primer specificity. |
| MgCl₂ Solution [1] | Mg²⁺ is a cofactor for DNA polymerase. Its concentration directly impacts fidelity and specificity. | Optimize concentration (typically 1.5-2.5 mM). Excess Mg²⁺ can promote non-specific binding. |
| PCR-Grade Nucleases [10] | Prevents sample degradation by destroying contaminating nucleases in reagents or on labware. | Use molecular biology grade water and reagents. Wear gloves to prevent nuclease introduction. |
| Agarose Gels (Various %) [11] [10] | The gel matrix separates DNA fragments by size. The percentage must be matched to the target fragment size. | Use 0.7-1% for large fragments (500-10,000 bp); 2% or higher for small fragments (100-500 bp). |
| DNA Ladder [9] | A mix of DNA fragments of known sizes used to estimate the size of PCR amplicons. | Run the ladder on every gel, preferably in the first and last lanes, to monitor run quality and for size estimation. |
Non-specific amplification is a common challenge in polymerase chain reaction (PCR) experiments, where primers bind to unintended regions or to each other instead of the specific target DNA sequence. This phenomenon can compromise experimental results, leading to false positives, reduced target yield, and difficulties in interpreting data. For researchers and drug development professionals, understanding and troubleshooting these artifacts is crucial for obtaining reliable, reproducible results. This guide focuses on three prevalent types of non-specific amplification: primer dimers, smears, and unexpected bands, providing comprehensive solutions to enhance PCR specificity and efficiency.
FAQs: Identifying and Troubleshooting Common PCR Artifacts
What are primer dimers and how can I prevent them?
Answer: Primer dimers are small, unintended DNA fragments that form when primers anneal to each other instead of the target DNA template. They typically appear as fuzzy bands or smears below 100 bp on an agarose gel [12]. Primer dimers form through self-dimerization (a single primer with complementary regions) or cross-dimerization (two primers with complementary sequences), creating free 3' ends that DNA polymerase can extend [12].
Prevention Strategies:
- Optimize Primer Design: Use primer design tools to create primers with low 3' end complementarity. Ensure primers are 15-30 bases long with 40-60% GC content and avoid runs of single bases or dinucleotide repeats [13].
- Adjust Reaction Components: Lower primer concentrations to reduce the primer-to-template ratio. Use hot-start DNA polymerases to prevent enzyme activity during reaction setup at room temperature [12] [14].
- Optimize Thermal Cycling: Increase annealing temperature to promote specific binding and increase denaturation times to disrupt primer interactions [12].
What causes smeared bands in my PCR results and how can I fix this?
Answer: Smears appear as a continuous spread of DNA fragments of varying sizes on an electrophoresis gel. They result from random, non-specific amplification of DNA and can obscure target bands [2].
Common Causes and Solutions:
- Excessive Template DNA: Too much template DNA can increase chances of non-specific binding. Solution: Perform serial dilutions of template DNA to determine the optimal concentration [15].
- Suboptimal Reaction Conditions: Low annealing temperatures or long extension times promote non-specific priming. Solution: Optimize annealing temperature and ensure extension times are appropriate (typically 1 min/kb) [16].
- Carryover Contamination: Contaminants from previous PCR products or reagents can cause smearing. Solution: Use filter pipette tips, designate separate work areas for pre- and post-PCR steps, and prepare fresh reagents [15] [17].
- Poor DNA Quality: Degraded DNA template can produce smears. Solution: Re-extract DNA using a method that minimizes fragmentation and check integrity by gel electrophoresis [2].
Why do I get unexpected bands in my PCR?
Answer: Unexpected bands are non-target amplicons that differ in size from your expected product. They occur when primers bind to partially homologous sequences elsewhere in the genome [2].
Troubleshooting Approaches:
- Check Primer Specificity: Verify that primers are unique to your target sequence using tools like NCBI Primer-BLAST. Avoid primers with complementary regions [13] [18].
- Optimize Magnesium Concentration: Excess Mg²⁺ can reduce specificity. Solution: Test Mg²⁺ concentrations in 0.2-1 mM increments to find the optimal range [15] [18].
- Increase Stringency: Raise the annealing temperature in 1-2°C increments using a gradient cycler. Implement touchdown PCR for difficult templates [3] [18].
The table below synthesizes key quantitative data and recommendations for resolving non-specific amplification.
| Problem Type | Common Characteristics | Optimal Parameter Ranges | Primary Solutions |
|---|---|---|---|
| Primer Dimers | Fuzzy band/smear below 100 bp [12] | Primer concentration: 0.1-0.5 µM [15]; Annealing temperature: 3-5°C below primer Tm [3] | Use hot-start polymerase [12]; Redesign primers to avoid 3' complementarity [13] |
| Smeared Bands | Continuous DNA spread of varying sizes | Template DNA: 1 pg–10 ng (low complexity) or 1 ng–1 µg (high complexity) per 50 µl reaction [18]; Cycle number: 25-35 [16] | Optimize template concentration [15]; Increase annealing temperature [3]; Use high-fidelity polymerase [18] |
| Unexpected Bands | Discrete bands of incorrect size | Mg²⁺ concentration: 1.5–5.0 mM (optimize in 0.5 mM steps) [15]; Annealing time: 15-30 seconds [16] | Check primer specificity in silico [13]; Use gradient PCR to optimize annealing [18]; Reduce cycle number [16] |
Experimental Protocols for Troubleshooting
Protocol 1: Systematic Optimization of Annealing Temperature
Purpose: To determine the optimal annealing temperature for specific primer-template binding, minimizing non-specific amplification.
Materials:
- Thermal cycler with gradient functionality
- Standard PCR reagents: template DNA, primers, dNTPs, reaction buffer, hot-start DNA polymerase [3]
- Agarose gel electrophoresis equipment
Methodology:
- Prepare Master Mix: Combine PCR components on ice: sterile water, 10X PCR buffer, dNTPs (200 µM each), MgCl₂ (1.5 mM, if not in buffer), primers (0.1-0.5 µM each), template DNA (1-100 ng), and hot-start DNA polymerase (0.5-2.5 units/50 µl reaction) [13].
- Set Up Gradient PCR: Aliquot master mix into PCR tubes. Program thermal cycler with an annealing temperature gradient spanning 5°C below to 5°C above the calculated Tm of your primers.
- Run PCR: Execute the following program: initial denaturation (94-95°C for 2-5 min); 25-35 cycles of denaturation (94-95°C for 30 sec), gradient annealing (30 sec), and extension (72°C, 1 min/kb); final extension (72°C for 5-10 min) [3].
- Analyze Results: Separate PCR products by agarose gel electrophoresis. Identify the temperature producing the strongest target band with minimal non-specific products.
Protocol 2: Magnesium Titration for Specificity Enhancement
Purpose: To optimize Mg²⁺ concentration, a critical cofactor for DNA polymerase that significantly impacts primer binding specificity.
Materials:
- 25 mM MgCl₂ solution
- Standard PCR reagents (as in Protocol 1)
Methodology:
- Prepare Reaction Series: Create a master mix without Mg²⁺. Aliquot equal volumes into 8 PCR tubes.
- Titrate Mg²⁺: Add MgCl₂ to achieve final concentrations from 1.5 to 5.0 mM in 0.5 mM increments [15].
- Perform PCR: Run standard PCR cycling using the annealing temperature determined in Protocol 1.
- Evaluate Results: Analyze products by gel electrophoresis. Select the Mg²⁺ concentration yielding the strongest specific product with minimal artifacts.
Workflow and Mechanism Diagrams
Diagram 1: Experimental Workflow for PCR Troubleshooting
Diagram 2: Mechanisms of Non-Specific Amplification
The Scientist's Toolkit: Research Reagent Solutions
The table below details essential reagents and materials for troubleshooting non-specific amplification in PCR.
| Reagent/Material | Function in Troubleshooting | Application Notes |
|---|---|---|
| Hot-Start DNA Polymerase | Inhibits polymerase activity at room temperature, preventing primer dimer formation and non-specific priming during reaction setup [12] [14] | Available in antibody-mediated, aptamer-mediated, or chemically modified forms; requires heat activation [14] |
| MgCl₂ Solution (25 mM) | Cofactor for DNA polymerase; concentration optimization crucial for reaction specificity and efficiency [15] [18] | Titrate from 1.5-5.0 mM final concentration; excess Mg²⁺ promotes non-specific binding [15] |
| PCR Additives (DMSO, BSA, Betaine) | Enhance specificity by reducing secondary structures in GC-rich templates or stabilizing reaction components [13] [3] | Use at optimal concentrations (DMSO: 1-10%; BSA: 10-100 μg/ml; Betaine: 0.5-2.5 M); high concentrations can inhibit PCR [13] [3] |
| Gradient Thermal Cycler | Allows simultaneous testing of multiple annealing temperatures to determine optimal primer-binding stringency [3] [18] | Essential for empirical determination of optimal annealing temperature when primer Tm calculations are uncertain |
| Molecular Grade Water | Serves as PCR reaction solvent without nuclease contamination or PCR inhibitors [18] | Always use nuclease-free, high-purity water to prevent reaction degradation |
Non-specific amplification in the forms of primer dimers, smears, and unexpected bands represents significant challenges in PCR research, but they can be systematically addressed through careful experimental design and optimization. By understanding the mechanisms behind these artifacts, implementing targeted troubleshooting strategies, and utilizing appropriate reagents and protocols, researchers can significantly improve PCR specificity and reliability. The approaches outlined in this guide provide a comprehensive framework for diagnosing and resolving common PCR problems, enabling more accurate and reproducible results in molecular biology research and drug development applications.
Primary Causes and Contributing Factors
Non-specific amplification is one of the most common challenges in polymerase chain reaction (PCR), leading to incorrect, ambiguous, and unwanted results that compromise experimental integrity [1]. This phenomenon occurs when the PCR reaction amplifies unintended or random DNA sequences, producing multiple bands or a single amplicon of incorrect size instead of the desired target fragment [1]. For researchers, scientists, and drug development professionals, addressing this issue is critical for obtaining reliable data in applications ranging from basic genetic research to medical diagnostics and personalized medicine development [19]. This guide examines the primary causes of non-specific amplification and provides evidence-based troubleshooting methodologies to overcome this persistent problem in molecular biology workflows.
Primary Causes of Non-Specific Amplification
Non-specific amplification in PCR arises from multiple factors that can compromise reaction specificity. Understanding these fundamental causes is essential for effective troubleshooting and optimization.
Table 1: Primary Causes and Mechanisms of Non-Specific Amplification
| Primary Cause | Specific Factor | Underlying Mechanism | Resulting Artifact |
|---|---|---|---|
| Suboptimal Temperature Conditions | Low annealing temperature [1] | Increases primer flexibility, allowing binding to partial complementary sequences | Multiple unwanted amplification bands [1] |
| Incorrect denaturation temperature [20] | Incomplete separation of DNA strands affects subsequent primer binding | Incorrect or non-specific products [20] | |
| Primer-Related Issues | Poor primer design [1] | Complementarity with non-target genomic regions promotes off-target binding | Multiple amplicons of incorrect sizes [1] |
| Excessive primer concentration [1] [21] | Higher number of primers increases random binding during temperature transitions | Random short fragments and primer-dimers [1] | |
| Primer-dimer formation [1] | Self-complementary primers bind to each other instead of template | Short amplicons (50-100 bp) that compete with target [1] | |
| Reaction Component Imbalances | High MgCl₂ concentration [1] | Over-stabilizes DNA duplexes and enhances non-specific Taq polymerase activity | Non-specific binding and amplification [1] |
| Excessive template DNA [1] | Increases chances of primers binding to non-target sequences | Non-specific amplification [1] | |
| Unbalanced dNTP concentrations [20] | Degraded or unequal dNTP ratios promote polymerase errors | Sequence errors and spurious amplification [20] | |
| Protocol & Contamination Issues | Too many PCR cycles [1] | Increased cycles allow amplification of initially minor non-specific products | Accumulation of unwanted amplification products [1] |
| Reaction contamination [1] [20] | Foreign DNA introduces non-target sequences that get amplified | Multiple unexpected bands [1] | |
| Long bench times during setup [22] | Extended pre-PCR exposure enables primer interactions at low temperatures | Artifact formation even with hot-start procedures [22] |
Essential Experimental Protocols for Troubleshooting
Gradient PCR Optimization Protocol
Gradient PCR is a fundamental method for simultaneously testing multiple annealing temperatures to identify optimal conditions that minimize non-specific amplification.
Materials Required:
- Thermal cycler with gradient capability
- Standard PCR reagents: template DNA, primers, dNTPs, reaction buffer, DNA polymerase
- Gel electrophoresis equipment for analysis
Procedure:
- Prepare a standard PCR master mix according to your established protocol.
- Aliquot the master mix into PCR tubes or plate wells.
- Program the thermal cycler with an annealing temperature gradient spanning approximately 5°C below to 5°C above the calculated primer Tm.
- Run the PCR amplification using the following cycling parameters [1]:
- Initial Denaturation: 95°C for 2-5 minutes
- Amplification (25-35 cycles):
- Denaturation: 95°C for 15-60 seconds
- Annealing: Gradient temperatures for 30-60 seconds
- Extension: 72°C for 1 minute per kb
- Final Extension: 72°C for 5-10 minutes
- Analyze results using agarose gel electrophoresis to identify the highest annealing temperature that still produces strong target amplification without non-specific bands.
Primer Design and Validation Protocol
Proper primer design is crucial for preventing non-specific amplification. This protocol outlines key criteria and validation steps.
In Silico Design Criteria:
- Use software such as Primer3 or Primer-BLAST for initial design [1] [22].
- Apply the following design parameters [23] [22]:
- Primer length: 18-30 nucleotides (optimal 19-22 nt)
- GC content: 40-60%
- Melting temperature (Tm): 52-65°C (ensure forward and reverse primers differ by ≤1°C)
- Avoid complementary 3' ends to prevent primer-dimer formation
- Check for specificity to target sequence using BLAST analysis
- Analyze potential secondary structures using tools like Oligoanalyzer, aiming for hetero-dimer strength of ΔG ≤ -9 kcal/mol [22].
Experimental Validation:
- Test primer specificity using positive control cDNA and negative controls (no-template and minus-RT) [22].
- Perform melting curve analysis post-amplification to verify single product formation.
- Confirm product size by gel electrophoresis and validate by sequencing if necessary [22].
Hot-Start PCR Implementation
Hot-start PCR prevents premature primer extension and reduces non-specific amplification during reaction setup.
Materials Required:
- Hot-start DNA polymerase (antibody-mediated or chemically modified)
- Standard PCR components
Procedure:
- Prepare reactions on ice or a cooled thermal block.
- Use a hot-start DNA polymerase that remains inactive until the initial denaturation step.
- Program the thermal cycler with an extended initial denaturation (2-5 minutes at 95°C) to fully activate the enzyme.
- Proceed with optimized cycling parameters [23].
Mechanism: Hot-start techniques prevent polymerase activity at low temperatures during reaction setup, thereby eliminating mispriming and primer-dimer formation that occur before cycling begins [23].
Research Reagent Solutions
Table 2: Essential Reagents for Troubleshooting Non-Specific Amplification
| Reagent Category | Specific Products/Functions | Role in Preventing Non-Specific Amplification |
|---|---|---|
| DNA Polymerases | Hot-start Taq polymerase [23] | Prevents enzymatic activity during reaction setup, reducing primer-dimer formation |
| High-fidelity enzymes (Pfu, Vent) [20] [23] | 3'-5' exonuclease activity provides proofreading for higher specificity | |
| Reaction Enhancers | DMSO (1-10%) [23] | Disrupts secondary structures in GC-rich templates, improving specificity |
| Formamide (1.25-10%) [23] | Weakens base pairing, increases primer annealing specificity | |
| BSA (400ng/μL) [23] | Binds inhibitors present in biological samples, improving reaction efficiency | |
| Non-ionic detergents (Tween 20, Triton X-100) [23] | Stabilize DNA polymerases and prevent secondary structure formation | |
| Buffer Components | Magnesium chloride (MgCl₂) [1] [23] | Essential cofactor for polymerase; concentration must be optimized (typically 1.5-2.5mM) |
| PCR buffer systems [1] | Provides optimal pH and salt conditions for specific amplification | |
| Specialized Kits | QIAcuity digital PCR kits [24] | Enables absolute quantification with high sensitivity and precision for detection of low-level targets |
| Multiplex PCR master mixes [23] | Optimized for simultaneous amplification of multiple targets without cross-reactivity |
Troubleshooting Workflow Diagram
The following diagram illustrates a systematic approach to troubleshooting non-specific amplification in PCR:
Frequently Asked Questions (FAQs)
Q1: Why do I see multiple bands in my PCR gel even though my primers are designed for a single target? Multiple bands typically indicate non-specific amplification, most commonly caused by low annealing temperature, excessive primer concentration, or poorly designed primers with off-target binding sites [1]. First, optimize the annealing temperature using gradient PCR. Then, verify primer specificity using in silico tools and consider reducing primer concentration to 0.1-1μM [23].
Q2: How can I prevent primer-dimer formation in my PCR reactions? Primer-dimer formation can be minimized by ensuring primers lack complementary 3' ends, using lower primer concentrations (0.1-0.5μM), implementing hot-start PCR, and maintaining higher annealing temperatures [1] [23]. Also, avoid excessive cycle numbers as this can amplify initially minor primer-dimer products [1].
Q3: What is the optimal MgCl₂ concentration for minimizing non-specific amplification? The optimal MgCl₂ concentration typically ranges from 1.5 to 2.5 mM, but this should be determined empirically for each primer-template system [1] [25]. Higher Mg²⁺ concentrations stabilize DNA duplexes and can promote non-specific binding, so titrate MgCl₂ in 0.5 mM increments to find the lowest concentration that provides specific amplification [1].
Q4: How does hot-start PCR help reduce non-specific amplification? Hot-start PCR prevents DNA polymerase activity during reaction setup by using antibody inhibition or chemical modification that is reversed at high temperatures [23]. This prevents primer-dimer formation and mispriming that occur when reagents are mixed at room temperature, ensuring amplification only begins at the first denaturation step [23].
Q5: Why do I sometimes get non-specific amplification even with previously optimized protocols? Even validated protocols can produce non-specific amplification due to factors like reagent lot variations, template quality differences, or contamination [1]. Additionally, recent research shows that extended bench times during plate setup can significantly increase artifacts, even with hot-start procedures [22]. Minimize time between reaction preparation and PCR initiation, and always include appropriate controls.
Q6: When should I consider using specialized PCR additives like DMSO or BSA? DMSO (1-10%) is beneficial for GC-rich templates (>60% GC) as it helps disrupt secondary structures [23]. BSA (400ng/μL) is helpful when inhibitors may be present in samples, such as with fecal matter or other complex biological materials [23]. Test these additives systematically as they can affect primer Tm and reaction efficiency.
Impact on Downstream Applications and Data Integrity
FAQs: Understanding and Resolving Non-Specific Amplification
How does non-specific amplification affect my downstream applications and data integrity?
Non-specific amplification severely compromises data integrity and the success of downstream applications. It leads to:
- Inaccurate Quantification: In qPCR, non-specific products compete for reagents with the target amplicon, leading to inaccurate Ct values and flawed gene expression data [2].
- Failed Sequencing: For Sanger sequencing, the presence of multiple, non-specific DNA fragments results in messy, unreadable chromatograms. For Next-Generation Sequencing (NGS), it reduces the proportion of usable reads for your target, increasing costs and compromising data quality [2].
- Compromised Cloning: Non-specific bands can be mistakenly ligated into vectors, resulting in a high percentage of false-positive clones that do not contain the insert of interest. This wastes significant time and resources on colony screening and validation [2].
- Obscured Results: In diagnostic or genotyping assays, smears or extra bands can obscure the true result, leading to incorrect interpretation and false positives or negatives [2].
What are the visual signs of non-specific amplification in my gel?
When analyzing your PCR product on an agarose gel, watch for these artefacts instead of a single, crisp band of the expected size [2]:
- Primer Dimers: A bright band, typically between 20-60 bp, at the very bottom of the gel. This indicates two primers have hybridized to each other and been amplified [2].
- Multiple Bands: Several discrete bands of unexpected sizes, either larger or smaller than your target amplicon [2].
- Smears: A broad, fuzzy "smear" of DNA appears as a ladder or a continuous spread, indicating the random amplification of DNA fragments of various lengths [2].
- DNA Stuck in Well: Sometimes, the PCR product fails to enter the gel and remains in the well, which can be associated with the formation of extremely large DNA complexes or carryover of inhibitors from the DNA extraction [2].
My PCR consistently produces primer dimers. What should I do first?
Primer dimers form when primers anneal to each other. To prevent them, focus on reaction setup and primer design [2] [17].
- Use Hot-Start Polymerase: This enzyme is inactive until a high-temperature activation step, preventing low-temperature activity during reaction setup that can promote primer-dimer formation [17] [3].
- Optimize Primer Concentration: High primer concentration increases the chance of primers interacting. Test a lower concentration within the standard range of 0.05-1 µM [17] [26].
- Set Up Reactions on Ice: Prepare your master mix and assemble reactions on ice to further minimize enzyme activity and non-specific priming before the PCR begins [2] [20].
- Redesign Primers: Check that the 3' ends of your primers are not complementary to each other, as this is a common cause of dimerization [17] [13].
Troubleshooting Guide: Solving Non-Specific Amplification
The following table provides a structured approach to diagnosing and fixing the root causes of non-specific amplification.
| Observation | Primary Cause | Recommended Solutions |
|---|---|---|
| Multiple Bands or Smears | Low Stringency / Annealing Temperature Too Low | Increase annealing temperature in 2°C increments [27] [3]. Use a gradient thermal cycler for optimization [26]. Perform Touchdown PCR [27]. |
| Excess Template or Primers | Reduce template amount by 2-5 fold [27]. Optimize primer concentration (0.05-1 µM) [3] [26]. | |
| High Mg2+ Concentration | Optimize Mg2+ concentration; high levels reduce specificity. Adjust in 0.2-1.0 mM increments [17] [3] [26]. | |
| Poor Primer Design | Verify primer specificity using BLAST. Redesign primers to avoid self-complementarity and ensure a Tm within 5°C for each primer [27] [13]. | |
| Primer Dimers | Non-specific activity during setup | Switch to a hot-start DNA polymerase [17] [3]. Set up all reactions on ice [20]. |
| Primer Concentration Too High | Lower the concentration of primers in the reaction [17] [28]. | |
| Smearing | Too Many Cycles | Reduce the number of PCR cycles to prevent accumulation of non-specific products in later cycles [27] [3]. |
| Contaminated Reagents | Use fresh reagents. Establish separate pre- and post-PCR work areas. Include a negative (no-template) control to check for contamination [27]. | |
| Degraded Template or Primers | Check DNA integrity by gel electrophoresis. Visually, genomic DNA should appear as a single high-molecular-weight band [3]. Prepare fresh primer aliquots [3]. |
Experimental Protocol: A Step-by-Step Guide to Optimize PCR Specificity
This protocol provides a systematic method to optimize your PCR conditions to eliminate non-specific amplification.
Primer Design and Validation
Proper primer design is the most critical factor for specific amplification [13].
- Length: Design primers 18-30 nucleotides long.
- Melting Temperature (Tm): Ensure both primers have a Tm within 5°C of each other, ideally between 55-65°C.
- GC Content: Aim for 40-60%.
- 3' End: Avoid G or C runs (more than 3) at the 3' end and ensure the 3' ends are not complementary to prevent dimer formation.
- Specificity Check: Always use a tool like NCBI Primer-BLAST to verify primer specificity to your target sequence.
Optimization of Thermal Cycling Conditions
If non-specific products persist, use this multi-step optimization workflow.
Reaction Setup for Maximum Specificity
Follow this guide to prepare a 50 µL standard reaction mixture.
Materials:
- Template DNA (1 pg - 1 µg, depending on source)
- Forward and Reverse Primers (20 µM stock each)
- Hot-Start DNA Polymerase (e.g., PrimeSTAR HS, Q5 Hot Start)
- 10X PCR Buffer (usually supplied with enzyme)
- dNTP Mix (10 mM total)
- 25 mM MgCl₂ (if not in buffer)
- Nuclease-free Water
Procedure:
- Prepare Master Mix on Ice: Combine the following components in a sterile tube to minimize tube-to-tube variation [13].
- Nuclease-free Water: Q.S. to 50 µL
- 10X PCR Buffer: 5 µL
- dNTP Mix (10 mM): 1 µL
- Forward Primer (20 µM): 1 µL
- Reverse Primer (20 µM): 1 µL
- Hot-Start DNA Polymerase: 0.5 - 1.25 µL (per mfr. instructions)
- Add Template: Aliquot the master mix into individual PCR tubes, then add the template DNA to each. Include a negative control with water instead of template.
- Thermal Cycling: Place tubes in a pre-heated thermal cycler and run the optimized program.
The Scientist's Toolkit: Essential Reagents for Specific PCR
| Reagent / Material | Function | Key Considerations for Specificity |
|---|---|---|
| Hot-Start DNA Polymerase | Enzyme engineered to be inactive at room temperature. | Prevents non-specific priming and primer-dimer formation during reaction setup. The single most important factor for improving specificity [17] [3]. |
| PCR Additives (e.g., DMSO, BSA, Betaine) | Co-solvents that help denature complex templates. | DMSO (1-10%) can improve amplification of GC-rich regions. BSA (10-100 µg/mL) can bind inhibitors. Use the lowest effective concentration [3] [13]. |
| Gradient Thermal Cycler | Instrument that allows different tubes to be run at slightly different temperatures simultaneously. | Essential for efficiently optimizing the annealing temperature for a new primer set [3] [26]. |
| Molecular-Grade Water | Nuclease-free, pure water for preparing all reagents. | Prevents degradation of primers, template, and enzyme by nucleases, and avoids contamination with exogenous DNA [27] [3]. |
| Agarose Gel Electrophoresis System | Standard method for visualizing PCR products. | Used to assess product size, specificity (single vs. multiple bands), and check for primer dimers and smears [2] [29]. |
Advanced PCR Methods and Techniques to Enhance Specificity
Hot-start PCR is a refined molecular biology technique designed to prevent a common issue in conventional polymerase chain reaction (PCR): the formation of nonspecific amplification products and primer-dimers during reaction setup at non-stringent temperatures [30]. This modification addresses the fundamental problem that DNA polymerase enzymes possess residual activity at room temperature and below, allowing primers to bind non-specifically to DNA templates or to each other before thermal cycling begins [30] [31]. These nonspecific complexes are then extended by the polymerase, generating unwanted by-products that compete with the target amplification, ultimately reducing yield, sensitivity, and reliability [30] [32].
The core principle of hot-start PCR involves keeping one or more essential reaction components inactive or physically separated until the reaction mixture reaches a temperature that promotes stringent primer binding (typically >45-55°C) [30] [31]. By inhibiting polymerase activity during the initial setup and the first temperature ramp, the technique ensures that primer extension only initiates after the first high-temperature denaturation step, dramatically improving amplification specificity [30] [32]. This is particularly crucial for applications requiring high sensitivity and accuracy, including diagnostic testing, cloning, next-generation sequencing, and quantitative analysis of low-abundance targets [33].
Mechanisms of Hot-Start PCR
Various biochemical and physical methods have been developed to implement the hot-start principle, each with distinct mechanisms and operational characteristics.
Antibody-Mediated Inhibition
One of the most common methods utilizes neutralizing antibodies or other binding molecules that block the active site of DNA polymerase at low temperatures.
- Mechanism: Specific antibodies, Affibody molecules, or aptamers bind reversibly to the polymerase's active site, rendering it inactive [30] [32].
- Activation: During the initial denaturation step (typically 94-95°C for 30 seconds to 5 minutes), the inhibitory molecule denatures irreversibly and dissociates, releasing fully active polymerase [32] [31].
- Examples: Platinum Taq DNA Polymerase (antibody-based), Phire Hot Start II DNA Polymerase (Affibody-based) [30] [32].
- Advantages: Rapid activation, full restoration of enzyme activity, and performance identical to the native enzyme post-activation [32].
Chemical Modification
This method employs covalent modification of the polymerase enzyme itself with thermolabile protecting groups.
- Mechanism: The polymerase is chemically modified at critical functional residues, blocking its activity [32].
- Activation: Extended heating at 94-95°C for 10-15 minutes gradually cleaves the protecting groups, restoring enzymatic activity [32].
- Examples: AmpliTaq Gold DNA Polymerase [32].
- Advantages: Very stringent inhibition at room temperature [32].
- Limitations: Longer activation times required, and full enzyme activity may not always be restored, which can impact the amplification of long targets (>3 kb) [32].
Physical Separation Methods
Early hot-start methods relied on physical barriers to separate reaction components.
- Wax Beads: A solid wax barrier is created between the polymerase and other reaction components. When the tube is heated, the wax melts, allowing components to mix and the reaction to begin [30].
- Manual Hot-Start: A critical component (typically polymerase or magnesium) is added to the reaction tube only after the temperature has reached the initial denaturation step [30] [31]. This method is prone to contamination and impractical for high-throughput applications [30].
Primer-Based and dNTP-Based Methods
Advanced approaches modify other reaction components to confer hot-start properties.
- Modified Primers: Primers are synthesized with thermolabile groups (e.g., 4-oxo-1-pentyl phosphotriester groups) at their 3'-terminus. These groups block primer extension until they are thermally cleaved at high temperatures, converting the primer to an extendable form [33].
- Modified dNTPs: Deoxynucleotides (dNTPs) are chemically modified with heat-labile protecting groups at the 3'-terminus. These "CleanAmp" dNTPs prevent polymerase incorporation until the protecting groups are removed during the initial heat activation step [30] [31].
Comparative Analysis of Hot-Start Technologies
The following table summarizes the key characteristics, advantages, and limitations of the primary hot-start methods.
Table 1: Comparative Analysis of Major Hot-Start PCR Technologies
| Technology | Mechanism of Inhibition | Activation Requirement | Key Advantages | Key Limitations |
|---|---|---|---|---|
| Antibody-Based [32] | Reversible binding to polymerase active site | Short initial denaturation (e.g., 30 sec-2 min at 95°C) | Fast activation; full enzyme activity restored | Contains animal-derived antibodies (potential for exogenous proteins) |
| Affibody-Based [32] | Reversible binding with engineered protein domains | Short initial denaturation | Animal-free; low protein load; fast activation | May be less stringent than antibody method |
| Chemical Modification [32] | Covalent modification of polymerase | Longer initial heat step (e.g., 10-15 min at 95°C) | Stringent inhibition; animal-free | Longer activation; potential incomplete reactivation; not ideal for long amplicons |
| Aptamer-Based [30] [32] | Reversible binding with oligonucleotides | Short initial denaturation | Animal-free; fast activation | Less stringent; reversible inhibition if temperature drops |
| Primer-Based [33] | 3'-end modification blocks extension | Integrated into thermal cycling | High flexibility; can be used with any standard polymerase | Requires specialized primer synthesis |
| Physical Barrier [30] | Wax layer separates components | Melting of wax during first cycle | No enzyme modification | More manual setup; less reproducible |
Troubleshooting Guide & FAQs
This section addresses common experimental challenges and questions related to hot-start PCR implementation.
Frequently Asked Questions
Q1: When should I definitely use hot-start PCR? Hot-start PCR is particularly beneficial in the following scenarios: when amplifying low-copy-number targets, when using multiple primer pairs (multiplex PCR), when the DNA template is highly complex (e.g., genomic DNA), for high-throughput setups where reactions are assembled at room temperature, and for any application requiring maximum specificity and yield, such as cloning or diagnostic assays [30] [32] [31].
Q2: My hot-start PCR still shows nonspecific bands. What could be wrong? Even with hot-start polymerase, nonspecific amplification can occur due to several factors:
- Suboptimal Annealing Temperature: The annealing temperature may be too low. Recalculate the primer Tm and test a temperature gradient, starting 3-5°C below the lowest Tm [34] [3].
- Excessive Mg²⁺ Concentration: High Mg²⁺ concentrations can reduce specificity. Optimize Mg²⁺ concentration in 0.2-1 mM increments [34] [3].
- Poor Primer Design: Verify primers for self-complementarity, hairpins, and 3'-end complementarity that could promote primer-dimer formation [34] [3].
- Too Much Template or Enzyme: Excessive template DNA or polymerase can lead to mispriming. Ensure you are using the recommended quantities [3].
Q3: I am getting no amplification product with my hot-start enzyme. How can I fix this?
- Verify Activation: Ensure the initial activation/denaturation step is performed at the correct temperature and for the recommended duration, especially for chemically modified enzymes that require longer activation [32].
- Check Component Integrity: Use fresh, high-quality template DNA and ensure primers are properly resuspended and not degraded [34] [3].
- Optimize Reaction Conditions: Recalculate primer Tms and test an annealing temperature gradient. Check that all reaction components, including dNTPs and Mg²⁺, are at correct concentrations [34].
- Increase Cycle Number: For low-copy targets, increasing the number of PCR cycles (e.g., to 40) may be necessary [3].
Q4: Can hot-start PCR help with primer-dimer formation? Yes, this is one of its primary benefits. By inhibiting the polymerase during reaction setup, hot-start methods prevent primers from being extended at low temperatures, even if they bind to each other transiently, thereby drastically reducing or eliminating primer-dimer formation [30] [32].
Troubleshooting Common Problems
Table 2: Troubleshooting Guide for Hot-Start PCR Experiments
| Observation | Potential Causes | Recommended Solutions |
|---|---|---|
| No Product [34] [3] | - Incomplete polymerase activation- Incorrect annealing temperature- Poor template quality/quantity- Missing reaction component | - Ensure correct initial denaturation time/temp- Test annealing temp gradient; verify primer Tm- Check template integrity and concentration- Repeat reaction setup carefully |
| Multiple or Nonspecific Bands [34] [3] [32] | - Annealing temperature too low- Excessive Mg²⁺ concentration- Primer concentration too high- Enzyme activity before activation | - Increase annealing temperature- Titrate Mg²⁺ concentration downward- Lower primer concentration (0.1-0.5 µM)- Set up reactions on ice; use chilled components |
| Low Yield [30] [3] | - Insufficient number of cycles- Incomplete activation (chemical hot-start)- Extension time too short- Inhibitors in template | - Increase cycle number (e.g., 35-40 cycles)- Extend initial activation step- Increase extension time- Further purify template DNA |
| Smearing on Gel [3] | - Excess enzyme or template- Too many cycles- Contamination with nucleases- Non-specific priming | - Reduce amount of polymerase or template- Reduce number of cycles- Use fresh, nuclease-free reagents- Increase stringency (raise annealing temp) |
Research Reagent Solutions
Selecting the appropriate reagents is critical for successful hot-start PCR. The following table outlines key materials and their functions.
Table 3: Essential Research Reagents for Hot-Start PCR
| Reagent / Material | Function / Description | Implementation Example |
|---|---|---|
| Hot-Start DNA Polymerase | Engineered enzyme inactive at room temp; core of the system | Choose from antibody-based (Platinum Taq), chemically modified (AmpliTaq Gold), or Affibody-based (Phire Hot Start) [32]. |
| Modified dNTPs (CleanAmp) | dNTPs with thermolabile 3'-OH blocking groups; confer hot-start property to any polymerase | Use CleanAmp dNTP Mix in place of standard dNTPs; blocking group removed during initial denaturation [31]. |
| Hot-Start Primer Pairs | Primers with thermolabile modifications at 3'-end | Synthesize primers with OXP modifications; unmodified after heating, enabling specific extension [33]. |
| Optimized Buffer Systems | Provides ideal ionic and pH environment; may include additives | Use manufacturer-recommended buffer. For GC-rich targets, use buffers with GC enhancers [3]. |
| Magnesium Salt Solutions (MgCl₂/MgSO₄) | Essential cofactor for DNA polymerase; concentration critically affects specificity | Optimize concentration (typically 1.5-2.5 mM); titrate in 0.2-1 mM increments for best results [34] [3]. |
Experimental Protocols
Standard Protocol for Antibody-Based Hot-Start PCR
This protocol uses a typical antibody-inactivated hot-start DNA polymerase.
Reaction Setup (on ice):
- Combine in a thin-walled PCR tube:
- 10-50 ng Genomic DNA template (or 1 pg-10 ng plasmid)
- 1X Manufacturer's Reaction Buffer
- 0.2 mM each dNTP
- 0.5 µM each forward and reverse primer
- 1.5-2.0 mM MgCl₂ (final concentration; see buffer composition)
- 1.0 unit of Antibody-Hot-Start DNA Polymerase
- Nuclease-free water to a final volume of 25-50 µL.
- Mix gently and centrifuge briefly.
- Combine in a thin-walled PCR tube:
Thermal Cycling:
- Initial Denaturation/Activation: 95°C for 2 minutes (denatures antibody, activates polymerase).
- Amplification (25-35 cycles):
- Denature: 95°C for 15-30 seconds.
- Anneal: 55-65°C (primer-specific) for 15-30 seconds.
- Extend: 72°C for 1 minute per kb of amplicon.
- Final Extension: 72°C for 5-10 minutes.
- Hold: 4°C.
Analysis:
- Analyze 5-10 µL of the PCR product by agarose gel electrophoresis.
This protocol is for primers synthesized with 4-oxo-1-pentyl (OXP) phosphotriester modifications.
Reaction Setup:
- Combine in a thin-walled PCR tube:
- Template DNA (amount optimized for target)
- 1X Standard PCR Buffer (e.g., with 1.5 mM MgCl₂)
- 0.2 mM each dNTP
- 0.2-0.5 µM each OXP-modified primer
- 0.5-2.5 units of standard (non-hot-start) DNA polymerase
- Nuclease-free water to final volume.
- Mix gently and centrifuge.
- Combine in a thin-walled PCR tube:
Thermal Cycling:
- Initial Denaturation/Activation: 95°C for 2-5 minutes. This step both denatures the template and thermally cleaves the OXP groups from the primers, converting them to extendable forms.
- Amplification (30-40 cycles):
- Denature: 95°C for 15-30 seconds.
- Anneal: Use an annealing temperature 3-5°C higher than the calculated Tm of the unmodified primer.
- Extend: 72°C for 1 minute per kb.
- Final Extension: 72°C for 5 minutes.
- Hold: 4°C.
Analysis:
- Analyze the product by agarose gel electrophoresis.
Optimization Strategies for Challenging Amplicons
For GC-Rich Templates (>60% GC) [3]:
- Use a polymerase blend designed for high GC content.
- Include co-solvents/additives like DMSO (1-5%), formamide (1-3%), or GC enhancer solutions.
- Increase denaturation temperature (to 98°C) and/or time.
- Use a "touchdown" PCR protocol.
For Long Amplicons (>5 kb) [3]:
- Select a polymerase with high processivity and proofreading activity.
- Extend extension time (e.g., 2-3 minutes per kb).
- Ensure sufficient template quality (high molecular weight DNA).
- Reduce annealing and extension temperatures by 2-3°C to enhance enzyme stability and primer binding.
Core Concept: What is Touchdown PCR?
Touchdown (TD) PCR is a modified Polymerase Chain Reaction technique designed to enhance the specificity and sensitivity of DNA amplification by progressively lowering the annealing temperature during the initial cycles of the reaction [35] [36]. This method systematically reduces non-specific amplification and primer-dimer formation, which are common challenges in conventional PCR [37].
The core principle involves starting with an annealing temperature 10°C above the calculated Tm of the primers [35]. Over a series of cycles, the annealing temperature is gradually decreased—typically by 1°C per cycle—until it reaches the optimal, or "touchdown," temperature [36]. This initial high-temperature phase favors the accumulation of the desired amplicon, which has the highest primer-template complementarity. Once formed, this specific product outcompetes non-specific targets in the later, lower-temperature cycles [35] [38].
The Touchdown PCR Process
The following diagram illustrates the two-phase temperature profile of a typical touchdown PCR protocol.
Troubleshooting Guide: Common Issues and Solutions
This section addresses specific problems you might encounter during touchdown PCR experiments, offering targeted solutions based on the core principles of the technique.
FAQ 1: I still see non-specific bands on my gel after touchdown PCR. What can I do?
Non-specific amplification can persist if the initial annealing temperature is not high enough or if the reaction conditions are not sufficiently stringent.
- Increase the initial annealing temperature: If your calculated primer Tm is 55°C, starting at 65°C (Tm +10°C) may not be sufficient. Try increasing the starting temperature in 1-2°C increments [35].
- Incorporate a hot-start DNA polymerase: Using a hot-start enzyme prevents polymerase activity at room temperature during reaction setup, which is a common source of primer-dimer and non-specific products [35] [3] [36].
- Use PCR additives: For difficult templates (e.g., GC-rich sequences), include additives like DMSO or betaine. These help denature secondary structures and can improve specificity [35] [39].
- Reduce the number of cycles: Excessive cycling can lead to the appearance of non-specific bands. Keep the total number of amplification cycles (including the touchdown phase) below 35 [35].
- Verify primer design: Re-check your primers for specificity using BLAST alignment to ensure they are not complementary to off-target sites [40].
FAQ 2: My PCR yield is very low after switching to a touchdown protocol. How can I improve it?
Low yield in touchdown PCR often occurs because the initial high annealing temperatures are too stringent, limiting early amplification.
- Adjust the touchdown temperature range: Instead of starting 10°C above the Tm, begin 7-8°C above and decrease the temperature more slowly, for example, by 1°C every second or third cycle [35].
- Set the final annealing temperature 1-2°C below the calculated Tm: This ensures the reaction becomes permissive enough for robust amplification in the later cycles [35].
- Check template quality and quantity: Ensure your template DNA is intact and pure. Degraded DNA or the presence of inhibitors (e.g., phenol, EDTA) can severely reduce yield [3] [41]. Re-purify the template if necessary.
- Increase the amount of DNA polymerase: If using additives like DMSO, a slightly higher concentration of enzyme might be required to compensate for any minor inhibition [3].
FAQ 3: I am trying to amplify a GC-rich template. How can I optimize touchdown PCR for this?
GC-rich sequences (>60% GC) form strong secondary structures that hinder polymerase progression, making them notoriously difficult to amplify.
- Combine TD-PCR with GC-rich additives: Use a combination of DMSO (typically 5-10%) and betaine (1 M) in your PCR mixture. These additives help destabilize secondary structures [39] [36].
- Use a specialized DNA polymerase: Opt for polymerases with high processivity and those specifically formulated for GC-rich templates [3] [39] [36].
- Increase the denaturation temperature: Perform the denaturation step at 98°C instead of 95°C to more effectively melt apart the GC-rich double-stranded DNA [36].
- Add an extra denaturation cycle: An initial, extended denaturation at 96-97°C can be extremely useful for difficult templates [35].
Experimental Protocol and Optimization Data
Standard Touchdown PCR Protocol
The table below outlines a detailed protocol based on a primer Tm of 57°C [35]. This can be adapted to your specific primer Tm by adjusting the temperatures accordingly.
Table 1: Example Touchdown PCR Protocol
| Step | Temperature (°C) | Time | Stage and Number of Cycles |
|---|---|---|---|
| 1. Initial Denaturation | 95 | 3:00 | |
| 2. Denature | 95 | 0:30 | Stage 1: Touchdown (10 cycles) |
| 3. Anneal | 67 (Tm +10) | 0:45 | Temperature decreases by 1°C per cycle |
| 4. Extension | 72 | 0:45 | |
| 5. Denature | 95 | 0:30 | Stage 2: Amplification (15-20 cycles) |
| 6. Anneal | 57 (Final Tm) | 0:45 | Temperature is held constant |
| 7. Extension | 72 | 0:45 | |
| 8. Final Extension | 72 | 15:00 |
Optimization Guide: Key Parameters to Adjust
Table 2: Touchdown PCR Optimization Parameters
| Parameter | Typical Setting | Optimization Recommendations for Common Issues |
|---|---|---|
| Initial Annealing Temp | Tm +10°C | Low Yield: Start at Tm +7°C. Non-specific Bands: Start at Tm +12°C [35]. |
| Temperature Decrement | 1°C per cycle | For finer control: Decrease by 1°C every 2nd or 3rd cycle [35]. |
| Number of Touchdown Cycles | 10-15 | For greater specificity: Use 15-20 cycles in the touchdown phase. |
| Final Annealing Temp | Calculated Tm | To boost yield: Set final temperature 1-2°C below the calculated Tm [35]. |
| PCR Additives | None (standard) | GC-rich templates: Use 5% DMSO and/or 1 M Betaine [39]. Inhibition: Add BSA (0.1-1 μg/μL) [17]. |
The Scientist's Toolkit: Essential Reagents and Materials
The success of touchdown PCR relies on the quality and appropriateness of the reagents used. The following table lists key materials and their functions.
Table 3: Research Reagent Solutions for Touchdown PCR
| Reagent / Material | Function in Touchdown PCR | Key Considerations |
|---|---|---|
| Hot-Start DNA Polymerase | Enzyme inactive at room temperature; activated at high temp. Reduces primer-dimer and non-specific amplification during setup [35] [36]. | Choose based on template difficulty (e.g., high-fidelity or high-processivity enzymes for complex targets) [3] [39]. |
| PCR Additives (DMSO, Betaine) | Destabilize DNA secondary structures, lower effective Tm of primers. Crucial for amplifying GC-rich templates [39] [36]. | Titrate concentration for optimal results (e.g., DMSO 2-10%, Betaine 0.5-1.5 M). High concentrations can inhibit polymerase [3]. |
| High-Purity dNTPs | Building blocks for DNA synthesis. | Use balanced, equimolar concentrations to prevent misincorporation and reduce PCR error rate [41]. |
| Magnesium Salt (MgCl₂/MgSO₄) | Cofactor for DNA polymerase; critical for enzyme activity and fidelity [3]. | Concentration must be optimized. Excess Mg²⁺ can lead to non-specific products; too little can cause low yield [41] [40]. |
| Nuclease-Free Water | Solvent for the reaction. | Ensures the reaction is free of contaminants and nucleases that could degrade primers or template [40]. |
Workflow: Implementing Touchdown PCR in Your Research
The following workflow provides a logical, step-by-step guide for integrating touchdown PCR into your experimental pipeline, from primer design to analysis.
Core Principles of Primer Design
Successful Polymerase Chain Reaction (PCR) relies heavily on well-designed primers. The following parameters are critical for maximizing specificity and amplification efficiency.
Table 1: Fundamental Primer Design Parameters
| Parameter | Ideal Range | Key Considerations & Rationale |
|---|---|---|
| Length | 18–30 nucleotides [42] [43] | Shorter primers (18-24 bp) hybridize faster and are more efficient, while longer primers may offer higher specificity but slower hybridization rates [42]. |
| Melting Temperature (Tm) | 60–64°C [43]; Aim for ≥54°C [42] | Tm is the temperature at which 50% of the primer-DNA duplex dissociates. The two primers in a pair should have Tms within 2°C of each other for synchronized binding [42] [43]. |
| Annealing Temperature (Ta) | 3–5°C below the primer Tm [3] [43] | The Ta must be optimized; a temperature that is too low causes non-specific binding, while one that is too high reduces reaction efficiency [3] [43]. |
| GC Content | 40–60% [42]; 35–65% is also cited [43] | GC base pairs form stronger bonds (3 H-bonds) than AT pairs (2 H-bonds). A very high GC content can lead to non-specific binding, while a very low one can weaken binding [42]. |
| GC Clamp | Presence of G or C bases in the last 5 nucleotides at the 3' end [42] | Promotes strong binding at the site where polymerase initiation is most critical. Avoid more than 3 G or C residues at the 3' end to prevent non-specific binding [42]. |
Table 2: Parameters to Avoid for Assay Specificity
| Feature | Potential Consequence | Design Recommendation |
|---|---|---|
| Self-Complementarity | Primer-dimer formation and hairpin structures, which compete with target amplification [42]. | Keep "self-complementarity" and "self 3′-complementarity" scores low. The ΔG of any secondary structures should be weaker (more positive) than -9.0 kcal/mol [42] [43]. |
| Cross-Complementarity | Hybridization between forward and reverse primers (cross-dimer), leading to primer-dimer artifacts [42]. | Screen primer pairs for heterodimers using oligonucleotide analysis tools [43]. |
| Runs of Single Bases | Mis-priming and secondary structure formation [44]. | Avoid stretches of 4 or more identical nucleotides [44] [43]. |
| G at 5' End of Probe | Quenching of the fluorophore, reducing fluorescence signal [42] [43]. | Design probes without a G residue at the very 5' end. |
Troubleshooting Guide: FAQs on Non-Specific Amplification
FAQ 1: My gel shows multiple bands or bands of the wrong size. What is the cause and how can I fix it?
This is a classic sign of non-specific amplification, where your primers are binding to unintended sequences.
- Primary Cause: The PCR conditions are not sufficiently stringent, allowing primers to anneal to off-target sites [45].
- Solutions:
- Increase Annealing Temperature: This is the most common fix. Increase the temperature in increments of 2°C [3] [45]. The optimal Ta is typically 3–5°C below the calculated Tm of the primers [3].
- Use a Hot-Start DNA Polymerase: These enzymes are inactive at room temperature, preventing spurious amplification during reaction setup. They are activated only after the first high-temperature denaturation step, dramatically improving specificity [3] [46].
- Optimize Primer Concentration: High primer concentrations can promote primer-dimer formation and mis-priming. Try lowering the concentration, typically in the range of 0.1–1 µM [3] [47].
- Check Primer Design: Verify that your primers are specific to the target and do not have complementary regions, especially at their 3' ends. Redesign if necessary [3] [47].
- Reduce Cycle Number: A high number of cycles can allow minor non-specific products to amplify detectably. Reduce the number of cycles to the minimum required for sufficient yield [45].
- Employ Touchdown PCR: This technique starts with a high annealing temperature and gradually lowers it in subsequent cycles, ensuring that the most specific primer binding is amplified first [45].
FAQ 2: I see a bright, low molecular weight band at the bottom of my gel. What is a primer-dimer and how do I prevent it?
A primer-dimer is a short, amplifiable duplex formed by the two primers hybridizing to each other, rather than to the template DNA. It appears as a band around 20-60 bp [2].
- Primary Cause: Complementarity between the 3' ends of your forward and reverse primers [42] [17].
- Solutions:
- Redesign Primers: Use software tools to check for and minimize 3'-end complementarity between your primer pair [43].
- Optimize Primer Concentrations: As with general non-specific amplification, lowering the primer concentration can reduce dimer formation [3] [48].
- Use Hot-Start Polymerase: This is highly effective at preventing the enzymatic extension that creates stable primer-dimers during reaction setup [46].
- Set Up Reactions on Ice: If a hot-start enzyme is not available, keep all reagents and the reaction tube on ice until cycling begins to minimize enzyme activity at low temperatures [3].
FAQ 3: My PCR product appears as a smear on the gel instead of a sharp band. What does this mean?
A smear indicates that the PCR is generating a mixture of DNA fragments of many different sizes.
- Primary Causes: Too much template DNA, degraded template DNA, primers binding non-specifically to fragmented DNA, or an excessively long extension time [2] [45].
- Solutions:
- Reduce Template Amount: Overloading the reaction with template increases the chance of non-specific binding. Reduce the amount by 2–5 fold [45].
- Check Template DNA Integrity: Run your template DNA on a gel to ensure it is not degraded, which can create a pool of random fragments for primers to bind to [3] [2].
- Increase Annealing Temperature: This increases stringency and reduces non-specific binding [45].
- Shorten Extension Time: An excessively long extension time can lead to the generation of non-specific secondary products [45].
Experimental Protocol: Primer Optimization Matrix
When establishing a new PCR assay, especially for quantitative PCR (qPCR), optimizing primer concentrations is crucial for achieving high efficiency and specificity under a universal thermal cycling profile [48]. The following protocol outlines a systematic approach.
Objective: To determine the optimal forward and reverse primer concentrations for a specific PCR assay.
Materials:
- PCR reagents: DNA polymerase, buffer, dNTPs, MgCl₂, nuclease-free water.
- Template DNA.
- Forward and Reverse Primers (stock solutions, e.g., 100 µM).
- Thermal cycler.
Method:
- Prepare Primer Dilutions: Dilute your forward and reverse primer stocks to a working concentration (e.g., 10 µM).
- Set Up the Matrix: In a 96-well plate or PCR tubes, set up a series of reactions that test different combinations of forward and reverse primer concentrations. A common test range is 100 nM, 200 nM, and 300 nM for each primer [48].
- Run the PCR: Amplify the reactions using your standard cycling conditions.
- Analyze the Results:
- qPCR Analysis: The optimal primer combination is the one that yields the lowest Cq (Quantification Cycle) value, the highest fluorescence signal (amplification efficiency), and the smallest standard deviation between replicates [48].
- Gel Electrophoresis: Verify that the optimal condition produces a single, sharp band of the expected size and the least amount of primer-dimer [48].
The workflow for this optimization process is as follows:
Essential Research Reagent Solutions
Table 3: Key Reagents for Troubleshooting Non-Specific Amplification
| Reagent / Tool | Function in Preventing Non-Specific Amplification |
|---|---|
| Hot-Start DNA Polymerase | Inactive at room temperature, preventing primer-dimer and non-target amplification during reaction setup. Requires high-temperature activation [3] [46]. |
| PCR Additives (e.g., BSA, Betaine, GC Enhancers) | BSA can bind inhibitors; betaine and specific GC enhancers help denature GC-rich templates and secondary structures, improving specificity and yield of difficult targets [3] [17]. |
| Primer Design Software (e.g., IDT SciTools, Eurofins Tools) | Calculates Tm, checks for secondary structures (hairpins, self-dimers), and assesses specificity via BLAST alignment to ensure primers are unique to the target [42] [43]. |
| Gradient Thermal Cycler | Allows empirical determination of the optimal annealing temperature by testing a range of temperatures in a single run [3] [47]. |
| Nuclease-Free Water and Aerosol Barrier Tips | Prevents contamination by nucleases or exogenous DNA, which can be a source of non-specific amplification and false positives [45]. |
Troubleshooting Guides
FAQ: How do I choose between DMSO and BSA to improve my PCR results?
The choice between DMSO and BSA depends on the primary issue with your PCR reaction.
- Use DMSO when amplifying templates with high GC content (>60%). DMSO helps prevent the formation of secondary structures by interfering with base pairing, which makes it easier to denature the DNA template. The recommended concentration is typically 1–10% [23] [49].
- Use BSA when you suspect the reaction contains inhibitors or when dealing with complex templates like genomic DNA. BSA acts as a stabilizer, binding to inhibitors that might be present in the sample or reagents, thereby preventing them from interfering with the DNA polymerase. The recommended concentration is typically 0.1–0.8 μg/μL (or 10–400 ng/μL in the final reaction) [17] [23] [50].
For particularly challenging GC-rich templates, using BSA as a co-additive with DMSO can significantly increase amplification yields, as the two additives can work through complementary mechanisms [49].
FAQ: What is the recommended protocol for optimizing PCR additives?
A systematic, step-by-step protocol is recommended to effectively troubleshoot your reaction.
Step 1: Establish a Baseline Run your current PCR protocol with a positive control and a no-template control to confirm the problem (e.g., no amplification, smearing, or non-specific bands) [51].
Step 2: Titrate Additives Prepare a master mix for your PCR reaction, then aliquot it into separate tubes.
- For DMSO, test a range of 0% (control), 1%, 2.5%, 5%, and 10% (v/v) [23] [49].
- For BSA, test a range of 0 μg/μL (control), 0.1 μg/μL, 0.4 μg/μL, and 0.8 μg/μL [52] [50] [49].
- For combined enhancement, test a combination of 5% DMSO with 0.4 μg/μL BSA [49].
Step 3: Run the PCR and Analyze Results Execute the PCR cycle and analyze the products on an agarose gel. Compare the yield and specificity of the amplification across the different conditions to identify the optimal additive concentration [1].
FAQ: Can I use DMSO and BSA together?
Yes, using DMSO and BSA together is a valid strategy and can be highly effective for difficult templates. Research has shown that BSA can act as a powerful co-enhancer when used with organic solvents like DMSO, producing significantly higher yields for GC-rich DNA targets across a broad size range than when using either additive alone [49].
Table 1: PCR Additive Concentrations and Functions
| Additive | Recommended Final Concentration | Primary Function | Common Use Cases |
|---|---|---|---|
| DMSO | 1–10% [23] | Disrupts secondary structures, lowers DNA melting temperature (Tm) [23] | GC-rich templates (>60%) [23] [49] |
| Formamide | 1.25–10% [23] [49] | Destabilizes DNA double helix, increases primer specificity [23] | GC-rich templates, often as an alternative to DMSO [49] |
| BSA | 0.1–0.8 μg/μL [52] [50] [49] | Binds to inhibitors (e.g., phenols, polysaccharides), stabilizes polymerase [23] [50] | Inhibited reactions (e.g., from direct cell lysates, fecal samples, wastewater) [50] [49] |
| T4 gp32 Protein | 0.2 μg/μL [50] | Binds to single-stranded DNA, preventing secondary structure and inhibitor binding [50] | Highly inhibited samples (e.g., wastewater), complex templates [50] |
| Betaine | Varies | Destabilizes DNA secondary structure, equalizes Tm [17] | GC-rich templates, reduces base composition bias [17] |
Experimental Protocols
Detailed Protocol: Optimizing a PCR Reaction with Additives for a GC-Rich Target
This protocol is designed to systematically find the best additive condition for amplifying a challenging, high-GC target.
Materials:
- Template DNA (GC content >60%)
- Forward and reverse primers
- PCR master mix (including buffer, dNTPs, MgCl₂, and DNA polymerase)
- Sterile water
- DMSO (100%)
- BSA (e.g., 10 μg/μL stock solution)
- PCR tubes
- Thermal cycler
Method:
- Prepare the Master Mix: Calculate the total volume needed for one positive control reaction and five test reactions, plus ~10% excess. Create a master mix containing all the standard PCR components except the template and additives.
- Aliquot the Master Mix: Dispense equal volumes of the master mix into six PCR tubes.
- Add Template: Add the same amount of template DNA to each tube. Mix gently.
- Add Additives: Add the additives and water to each tube as outlined in the table below to achieve the final concentrations.
| Tube | Condition | DMSO | BSA (10 μg/μL stock) | Sterile Water |
|---|---|---|---|---|
| 1 | No-additive Control | 0 μL | 0 μL | To final volume |
| 2 | DMSO 2.5% | 0.625 μL | 0 μL | To final volume |
| 3 | DMSO 5% | 1.25 μL | 0 μL | To final volume |
| 4 | BSA 0.4 μg/μL | 0 μL | 1.0 μL | To final volume |
| 5 | BSA 0.8 μg/μL | 0 μL | 2.0 μL | To final volume |
| 6 | DMSO 5% + BSA 0.4 μg/μL | 1.25 μL | 1.0 μL | To final volume |
*Note: Volumes are calculated for a 25 μL final reaction volume. Adjust according to your specific reaction setup.
- Run PCR: Place the tubes in a thermal cycler and start the optimized PCR program, which may include an initial denaturation step at 94–98°C, followed by 25–35 cycles of denaturation, annealing, and extension [23].
- Analyze Results: Separate the PCR products by agarose gel electrophoresis. Identify the condition that provides the strongest specific band with the least background smearing or non-specific products.
Workflow Visualization
The Scientist's Toolkit
Table 2: Essential Research Reagent Solutions
| Reagent / Material | Function in PCR Enhancement |
|---|---|
| DMSO (Dimethyl Sulfoxide) | An organic solvent that disrupts secondary structures in GC-rich DNA by interfering with hydrogen bonding, facilitating strand separation during denaturation [23] [49]. |
| BSA (Bovine Serum Albumin) | A protein additive that binds to and neutralizes common PCR inhibitors (e.g., phenols, humic acids) present in sample preparations, preventing them from inactivating the DNA polymerase [17] [23] [50]. |
| Hot-Start DNA Polymerase | A modified enzyme inactive at room temperature. Prevents non-specific priming and primer-dimer formation during reaction setup, significantly enhancing specificity [17] [53]. |
| MgCl₂ Solution | A critical cofactor for DNA polymerase activity. Its concentration must be optimized, as it directly affects enzyme fidelity, specificity, and yield [17] [54] [53]. |
| PCR-Grade Water | Nuclease-free, sterile water used to prepare reagents and reactions. Essential for preventing contamination and degradation of reaction components [51]. |
FAQs and Troubleshooting Guides
GC-Rich Template Amplification
Q1: Why is amplifying GC-rich DNA templates (≥60% GC content) particularly challenging in PCR?
GC-rich DNA sequences present several technical challenges that often lead to PCR failure or low yield. The primary reasons include:
- High Thermal Stability: The three hydrogen bonds in G-C base pairs make these regions more thermostable than A-T pairs (two bonds), requiring more energy to denature [55] [56]. This stability is primarily due to base-stacking interactions [56].
- Formation of Stable Secondary Structures: GC-rich regions readily form secondary structures like hairpin loops. These structures are stable and do not melt well at standard PCR denaturation temperatures, which can block polymerase progression and lead to truncated products [55] [56].
- Primer Binding Issues: The primers themselves can form self-dimers, cross-dimers, or stem-loop structures, especially if they have GC-rich 3' ends, leading to mispriming and inefficient amplification [56].
Q2: What are the main strategies to successfully amplify a GC-rich template?
Successful amplification of GC-rich targets requires a multi-pronged approach focusing on reagents and cycling conditions [55]:
- Use Specialized Polymerases and Buffers: Choose DNA polymerases with high processivity, which display high affinity for DNA templates and are more suitable for difficult targets [3]. Many manufacturers offer polymerases and companion buffers or GC Enhancers specifically formulated to inhibit secondary structure formation and increase primer stringency (e.g., OneTaq GC Buffer, Q5 High GC Enhancer) [55].
- Employ PCR Additives: Additives can be crucial. Betaine, DMSO, and glycerol work by reducing secondary structures, while formamide can increase primer annealing stringency [55] [3] [13].
- Optimize Thermal Cycling Conditions: Adjust your protocol by increasing the denaturation temperature (though avoid exceeding 95°C for long to preserve polymerase activity) and using a higher annealing temperature to improve specificity [3] [56]. A slower ramp speed can also help with long GC-rich targets [57].
- Adjust Mg²⁺ Concentration: Optimize the Mg²⁺ concentration, as it is a critical cofactor for polymerase activity and primer binding. A gradient from 1.0 mM to 4.0 mM in 0.5 mM increments can help find the optimal concentration [55] [3].
Table 1: Troubleshooting Common Problems with GC-Rich PCR
| Problem on Gel | Possible Cause | Recommended Solution |
|---|---|---|
| No product (blank gel) | Incomplete denaturation of template; polymerase stalling | Use a specialized polymerase for GC-rich targets; add a GC enhancer; increase denaturation temperature [3] [55] [56]. |
| Smear of DNA | Non-specific binding; low annealing temperature; high Mg²⁺ | Increase annealing temperature; optimize Mg²⁺ concentration; use hot-start polymerase; try a gradient thermocycler [3] [55] [17]. |
| Multiple bands | Non-specific primer binding; primer-dimer formation | Review primer design for specificity; optimize primer concentration; increase annealing temperature [3] [2] [17]. |
Long-Range PCR
Q3: What defines Long-Range PCR and what are its key technical requirements?
Long-Range PCR refers to the amplification of DNA targets that are longer than standard PCR amplicons, typically over 5 kb and potentially up to 40 kb or more. The success of Long-Range PCR hinges on several factors [3]:
- Polymerase Choice: Standard polymerases like Taq are insufficient. Use a DNA polymerase blend that includes a proofreading enzyme (e.g., Pfu) to correct replication errors during the long extension process. These polymerases are specifically designed for long PCR [3].
- Extension Time: The extension time must be prolonged according to the amplicon length. A common guideline is to allow 1 minute per kilobase, but this should be optimized for the specific polymerase [3].
- Template Quality: The integrity of the template DNA is critical. Minimize shearing and nicking during DNA isolation to ensure the template is intact and of high molecular weight [3].
- Thermal Cycling Adjustments: Reducing the annealing and extension temperatures by a few degrees can help with primer binding and enzyme thermostability over the longer amplification time [3].
Q4: My Long-Range PCR results in smeared or truncated products. How can I fix this?
This is a common issue often related to reaction conditions [3] [2]:
- Check Template Integrity: Degraded DNA will appear as a smear. Re-evaluate template DNA integrity by gel electrophoresis and re-purify if necessary [3] [2].
- Optimize Extension Time and Temperature: Ensure the extension time is sufficient for the target length. For very long targets, reducing the extension temperature (e.g., to 68°C) can help maintain polymerase activity throughout the process [3].
- Verify Polymerase Sufficiency: The reaction may contain an insufficient amount of DNA polymerase for the long task. Increase the amount of polymerase within the manufacturer's recommended range [3].
- Use a "Touchdown" Protocol: For complex templates, a touchdown PCR protocol can enhance specificity by starting with a higher annealing temperature and gradually lowering it over successive cycles [3].
Nested PCR
Q5: What is the principle behind Nested PCR and when should it be used?
Nested PCR is a two-stage technique designed to dramatically improve the specificity and sensitivity of amplification. It uses two sets of primers. The first set (outer primers) is used for an initial PCR round to amplify the target region. A small aliquot of this first reaction is then used as the template for a second PCR round using a second set of primers (inner primers) that bind within the first amplicon.
It is particularly useful in these scenarios [3] [2]:
- Low Template Concentration: When the starting amount of target DNA is very low (e.g., single-copy genes).
- High Background or Non-Specific Amplification: When standard PCR produces significant non-specific products that obscure the target band.
- Amplifying from Complex Samples: When the sample contains many PCR inhibitors or a complex mixture of DNA (e.g., environmental samples).
Q6: What is the most critical step to avoid contamination in Nested PCR?
The most critical step is physical separation. The primary risk is carryover contamination of the first-round PCR product into the second-round setup, which can lead to false-positive results.
- Use Separate Work Areas: Perform reagent setup, the first PCR, and the second PCR in physically separated rooms or, at a minimum, using separate benches and equipment [17].
- Use Dedicated Pipettes and Tips: Utilize different sets of pipettes for pre- and post-PCR steps, and always use filter tips to prevent aerosol contamination.
- Aliquot Reagents: Prepare master mixes separately for the first and second rounds to avoid cross-contamination.
The following workflow outlines the key stages and critical contamination controls for a successful Nested PCR procedure.
Experimental Protocols
Detailed Protocol: Amplifying a GC-Rich Target
This protocol is adapted from recommendations for amplifying genes from Mycobacterium bovis, which has a genome-wide GC content >60% [57].
Objective: To amplify a 1.8 kb gene with 77.5% GC content. Principle: Combine a high-fidelity polymerase with a specialized enhancer and adjusted cycling conditions to overcome thermal stability and secondary structures.
Materials:
- Template DNA: 10–100 ng of genomic DNA.
- Primers: Forward and reverse primers (20 μM each), designed with Tm of ~65–70°C.
- Polymerase: Q5 High-Fidelity DNA Polymerase (NEB #M0491) or equivalent.
- Buffer: Q5 Reaction Buffer (5X).
- Additive: Q5 High GC Enhancer (5X).
- dNTPs: 10 mM mix.
- PCR-grade water.
Method:
- Prepare a 50 μL reaction mix on ice in a thin-walled 0.2 mL PCR tube as shown in the table below.
- Gently mix the components by pipetting up and down. Centrifuge briefly.
- Load the tube into a thermal cycler and run the following program:
- Initial Denaturation: 98°C for 2 minutes.
- 35 Cycles of:
- Denaturation: 98°C for 20 seconds.
- Annealing & Extension: 72°C for 1 minute 30 seconds. (This is a 2-step protocol; the high temperature facilitates primer binding and polymerase progression through tough structures).
- Use a slow ramp rate (e.g., 1°C/second) from the denaturation to the annealing/extension step. [57]
- Final Extension: 72°C for 5–10 minutes.
- Hold: 4–10°C.
Table 2: Reaction Setup for GC-Rich PCR
| Reagent | Final Concentration | Volume for 50 μL Reaction |
|---|---|---|
| Q5 Reaction Buffer (5X) | 1X | 10 μL |
| Q5 High GC Enhancer (5X) | 1X | 10 μL |
| dNTPs (10 mM) | 200 μM | 1 μL |
| Forward Primer (20 μM) | 0.4 μM | 1 μL |
| Reverse Primer (20 μM) | 0.4 μM | 1 μL |
| Template DNA | - | 1–5 μL (10–100 ng) |
| Q5 High-Fidelity Polymerase | - | 0.5–1.0 μL (as per mfr.) |
| PCR-grade Water | - | to 50 μL |
Detailed Protocol: Two-Step Nested PCR for Low-Abundance Targets
Objective: To specifically detect a low-copy-number target sequence amidst a complex genomic background. Principle: The use of two sequential amplification rounds with two primer sets exponentially increases specificity and sensitivity.
Materials:
- Template DNA: Sample containing the target.
- Primers: Two pairs (Outer Set and Inner Set) for the target, designed so the inner primers bind within the sequence flanked by the outer primers.
- PCR Master Mix: Contains buffer, dNTPs, and a hot-start DNA polymerase.
- PCR-grade water.
Method: Round 1:
- Prepare a 25 μL reaction mix containing:
- 1X PCR Master Mix
- 0.2 μM each outer primer
- 1–100 ng template DNA
- Run a standard PCR program with an annealing temperature optimized for the outer primers.
- Upon completion, dilute the first-round PCR product 1:50 to 1:100 with PCR-grade water.
Round 2:
- In a new PCR tube, in a separate work area, prepare a 50 μL reaction mix containing:
- 1X PCR Master Mix
- 0.2 μM each inner primer
- 1–2 μL of the diluted first-round product as template.
- Run a second PCR program with an annealing temperature optimized for the inner primers.
- Analyze 5–10 μL of the second-round product by gel electrophoresis.
Research Reagent Solutions
The following table summarizes key reagents essential for implementing the specialized PCR methods discussed in this guide.
Table 3: Essential Reagents for Specialized PCR Applications
| Reagent Category | Example Products | Function in Specialized PCR |
|---|---|---|
| Specialized Polymerases | OneTaq DNA Polymerase, Q5 High-Fidelity DNA Polymerase, AccuPrime GC-Rich DNA Polymerase | Engineered for high processivity and fidelity; often supplied with optimized buffers for difficult templates like GC-rich or long targets [55] [3] [56]. |
| PCR Enhancers/Additives | GC Enhancer (NEB), Betaine, DMSO, BSA | Disrupt secondary structures (GC-rich templates), increase primer stringency, or counteract the effect of PCR inhibitors in the sample [55] [3] [13]. |
| Hot-Start Polymerases | Various antibody- or chemically modified Taq | Remain inactive at room temperature to prevent non-specific priming and primer-dimer formation during reaction setup, thereby improving specificity and yield in all PCR types [3] [17]. |
| Optimized Primer Design Tools | NCBI Primer-BLAST, Primer3 | Assist in designing primers with appropriate length, Tm, and specificity, which is the foundation for any successful PCR, especially nested and long-range [13]. |
Systematic Troubleshooting and Protocol Optimization Strategies
Annealing Temperature Optimization Using Gradient PCR
Non-specific amplification poses a significant challenge in polymerase chain reaction (PCR) experiments, often leading to ambiguous results, failed sequencing reactions, and compromised data integrity. Within the broader context of solving non-specific amplification in PCR research, annealing temperature optimization emerges as a critical parameter controlling reaction specificity. This technical support guide focuses on gradient PCR as a systematic experimental approach to identify optimal annealing conditions, providing researchers, scientists, and drug development professionals with comprehensive troubleshooting methodologies to enhance PCR specificity and reliability across diverse experimental contexts.
Understanding Annealing Temperature and Its Impact on PCR Specificity
The Critical Role of Annealing Temperature
The annealing step in PCR represents a precise molecular recognition event where primers specifically bind to complementary sequences on the template DNA. When the annealing temperature is too low, primers gain flexibility to bind to sequences with partial complementarity, resulting in amplification of non-target DNA sequences. Conversely, excessively high annealing temperatures prevent stable primer-template binding, leading to reduced or absent amplification of the desired target [1].
The melting temperature (Tm) of a primer defines the temperature at which 50% of the primer-DNA complexes dissociate, providing a theoretical starting point for annealing temperature optimization. Tm can be calculated using several methods, with the simplest formula being:
Tm = 4(G + C) + 2(A + T)
where G, C, A, and T represent the number of each nucleotide in the primer [58]. More sophisticated calculations account for salt concentrations:
Tm = 81.5 + 16.6(log[Na+]) + 0.41(%GC) - 675/primer length [58]
For initial PCR setup, a general guideline recommends setting the annealing temperature 3-5°C below the calculated Tm of the lower-melting primer [58] [59]. However, due to variations in template composition, buffer conditions, and primer characteristics, experimental determination of optimal annealing temperature remains essential for achieving maximal specificity.
Consequences of Non-Optimal Annealing Temperatures
Non-specific amplification resulting from suboptimal annealing temperatures manifests in several ways during gel electrophoresis analysis:
- Multiple bands of incorrect sizes instead of a single clean band at the expected amplicon size [1]
- Smear patterns indicating random amplification across the template [2]
- Primer-dimers appearing as bright bands at 20-60 bp, formed by primers hybridizing to each other [2]
- Unexpected single bands of incorrect size when a single non-target sequence is preferentially amplified [1]
These artifacts not only compromise immediate experimental results but can also interfere with downstream applications including cloning, sequencing, and diagnostic assays.
Gradient PCR: A Systematic Approach to Temperature Optimization
Principles of Gradient PCR
Gradient PCR employs thermal cyclers with the capability to maintain different temperatures across individual wells within the same run, allowing simultaneous testing of a range of annealing temperatures. This methodology dramatically reduces optimization time and reagent consumption compared to sequential single-temperature experiments [60]. The fundamental premise involves setting up identical PCR reactions across a thermal block with a predefined temperature gradient, enabling direct comparison of amplification efficiency and specificity across annealing temperatures.
Establishing the Temperature Gradient Range
Selecting an appropriate temperature range represents the most critical step in gradient PCR design. The optimal gradient span typically covers 5°C below to 5°C above the calculated Tm of the lower-melting primer [60]. For example, with primers having Tm values of 58°C and 60°C, an effective gradient range would be 53-63°C, encompassing potential optimal annealing conditions for both primers.
Table 1: Recommended Gradient Ranges Based on Primer Characteristics
| Primer Set Characteristics | Recommended Gradient Range | Key Considerations |
|---|---|---|
| Primers with similar Tm (<3°C difference) | Tm ±5°C | Focuses on stringency optimization |
| Primers with divergent Tm (>5°C difference) | Lower Tm -5°C to higher Tm | Accommodates both primer binding requirements |
| Unknown optimal temperature | 50-70°C | Broad screening approach |
| GC-rich templates (>65% GC) | Higher range: 60-72°C | Accounts for increased duplex stability |
| AT-rich templates | Lower range: 45-60°C | Compensates for weaker binding |
Technical Considerations for Gradient PCR Setup
Successful implementation of gradient PCR requires attention to several technical factors:
- Temperature uniformity: Verify that your thermal cycler provides consistent temperature distribution across wells. "Better-than-gradient" blocks with separate heating/cooling units offer superior precision compared to standard gradient technologies [58].
- Reaction consistency: Prepare a master mix containing all reaction components except template to ensure identical composition across all reactions, then aliquot into individual tubes or wells [61].
- Template quality: Use high-quality, purified DNA template to prevent optimization artifacts. Assess DNA integrity by gel electrophoresis and measure purity using spectrophotometric ratios (A260/280 ≈ 1.8-2.0) [3].
- Control reactions: Include both positive and negative controls to validate reaction specificity and identify potential contamination [1].
Experimental Protocol: Gradient PCR Optimization
Materials and Equipment
Table 2: Essential Reagents and Equipment for Gradient PCR Optimization
| Item | Function/Importance | Recommended Specifications |
|---|---|---|
| Thermal cycler with gradient capability | Enables simultaneous testing of multiple annealing temperatures | Precise temperature control across all wells; "better-than-gradient" technology preferred [58] |
| DNA polymerase | Catalyzes DNA synthesis | Hot-start enzymes recommended to prevent non-specific amplification during reaction setup [3] |
| PCR buffer | Maintains optimal pH and salt conditions | Manufacturer-recommended formulation; may include isostabilizing components for universal annealing [62] |
| Primers | Defines target sequence | HPLC-purified; 18-22 nucleotides; minimal self-complementarity [1] |
| Template DNA | Source of target sequence | 10-100 ng per reaction; high purity (A260/280 ≈ 1.8) [1] |
| dNTPs | Building blocks for DNA synthesis | Balanced equimolar mixture; avoid repeated freeze-thaw cycles [59] |
| Magnesium solution | Cofactor for DNA polymerase | Concentration typically 1.5-2.0 mM; requires optimization [59] |
Step-by-Step Methodology
Calculate primer melting temperatures: Determine Tm for both forward and reverse primers using appropriate calculation methods. Note any significant differences (>5°C) between primers [58].
Prepare PCR master mix:
- 10 μL: 10X PCR buffer (with MgCl₂ if included)
- 2 μL: 10 mM dNTP mixture
- 1 μL: Forward primer (10 μM stock)
- 1 μL: Reverse primer (10 μM stock)
- 0.5-1 μL: DNA polymerase (0.5-2.5 U/μL)
- X μL: Template DNA (10-100 ng total)
- Y μL: Nuclease-free water to bring final volume to 100 μL
Mix components thoroughly by gentle vortexing followed by brief centrifugation [61].
Aliquot reactions: Dispense equal volumes (e.g., 25 μL) of master mix into individual tubes or wells of a PCR plate. The number of reactions should correspond to the gradient capability of your thermal cycler.
Program thermal cycler:
- Initial denaturation: 94-98°C for 1-3 minutes
- Denaturation cycle: 94-98°C for 20-30 seconds
- Annealing gradient: Set according to predetermined range (e.g., 55-70°C) for 30-60 seconds
- Extension: 72°C for 1 minute per kb of expected product
- Number of cycles: 25-35
- Final extension: 72°C for 5-10 minutes [58]
Execute PCR program and analyze results using agarose gel electrophoresis.
Results Interpretation and Analysis
Following gel electrophoresis, analyze the results systematically:
Identify the optimal temperature: Look for the lane displaying a single, intense band of the expected size with minimal non-specific products or primer-dimers [60].
Assess temperature effects:
- Lower temperatures typically yield higher products but may show non-specific bands
- Higher temperatures produce cleaner results but may reduce yield
- The optimal balance provides strong target amplification with minimal background [63]
Document results: Record the precise annealing temperature corresponding to the well with optimal amplification. Note that thermal cyclers may have positional variations in temperature accuracy.
Advanced Optimization Strategies
Touchdown PCR as a Complementary Approach
Touchdown PCR represents a valuable alternative or complementary approach to gradient optimization. This method begins with annealing temperatures 5-10°C above the estimated Tm, then progressively decreases the temperature by 1-2°C every few cycles until the calculated Tm is reached. The initial high-stringency cycles promote specific amplification, while later cycles amplify the specific products with higher efficiency [59].
Buffer Systems with Universal Annealing Properties
Some specialized PCR buffer systems incorporate isostabilizing components that enable primer-template annealing at a universal temperature (typically 60°C), even with primers of different melting temperatures. These systems can significantly reduce optimization time, particularly when working with multiple primer sets [62].
Multiplex PCR Considerations
When optimizing annealing temperatures for multiplex PCR (amplifying multiple targets simultaneously), gradient PCR becomes particularly valuable. The optimal temperature must accommodate all primer sets in the reaction. Using specialized polymerases with enhanced specificity and buffer systems designed for multiplexing can improve success rates [62].
Troubleshooting Guide: Common Gradient PCR Challenges
Table 3: Troubleshooting Common Gradient PCR Problems
| Problem | Potential Causes | Solutions |
|---|---|---|
| No amplification at any temperature | Primer design issues, enzyme inactivity, insufficient template | Verify primer specificity, check enzyme activity, increase template concentration (up to 100 ng), include positive control [64] |
| Non-specific bands at all temperatures | Primer concentration too high, Mg²⁺ concentration excessive, insufficient denaturation | Reduce primer concentration (0.1-0.5 μM), optimize Mg²⁺ concentration (1.5-2.0 mM), increase denaturation temperature/time [3] |
| Inconsistent results across gradient | Poor thermal uniformity, pipetting errors, evaporation | Verify thermal cycler calibration, use master mix for consistency, ensure proper sealing of reactions [60] |
| Smear patterns across multiple lanes | Template degradation, excessive template amount, contaminating DNA | Assess template integrity, reduce template amount (10-50 ng), ensure clean technique [2] |
| Primer-dimer formation | Low annealing temperature, excessive primer concentration, 3'-end complementarity | Increase annealing temperature, reduce primer concentration, redesign primers with non-complementary 3'-ends [1] |
Frequently Asked Questions (FAQs)
Q1: How wide should my gradient range be for initial optimization? A: A 10-15°C range typically provides sufficient coverage while maintaining resolution. For example, if your calculated Tm is 60°C, a gradient from 55-65°C allows systematic evaluation of stringency effects [60].
Q2: Can I use gradient PCR for multiplex optimization? A: Yes, gradient PCR is particularly valuable for multiplex assays where finding a single annealing temperature that works for multiple primer sets is challenging. The universal annealing buffer systems can further simplify this process [62].
Q3: How many cycles should I use for gradient optimization? A: 25-35 cycles typically provides sufficient product for detection while avoiding plateau effects that can mask differences between temperatures. If working with low template concentrations, up to 40 cycles may be necessary [58].
Q4: What should I do if I get no specific amplification across my entire gradient? A: First verify your primer design and template quality. Consider using a touchdown PCR approach or incorporating PCR enhancers like DMSO (3-10%) or betaine (1-1.5 M) for difficult templates [3] [59].
Q5: How much product should I load for gel analysis after gradient PCR? A: Load 5-10 μL of each PCR reaction for standard agarose gel electrophoresis. Using DNA ladders with appropriate size ranges is essential for verifying expected product sizes [2].
Within the comprehensive framework of solving non-specific amplification in PCR research, gradient PCR emerges as an indispensable tool for systematic annealing temperature optimization. By enabling simultaneous evaluation of multiple temperatures in a single run, this approach significantly accelerates protocol development while conserving valuable reagents and researcher time. The methodologies outlined in this guide provide researchers with a structured pathway to enhance PCR specificity, ultimately supporting the generation of robust, reproducible data across diverse applications from basic research to drug development. Through careful implementation of gradient PCR optimization and integration with complementary troubleshooting strategies, scientists can effectively address the persistent challenge of non-specific amplification, strengthening the experimental foundation of their molecular research programs.
FAQs on PCR Component Titration
How does magnesium concentration affect PCR specificity and yield?
Magnesium ion (Mg²⁺) is an essential cofactor for DNA polymerase activity. It facilitates the binding of primers to the template and catalyzes the formation of phosphodiester bonds between nucleotides [65]. However, improper concentration is a common cause of non-specific amplification.
The table below summarizes the effects and optimal ranges for MgCl₂ in PCR:
| Condition | Effect on PCR | Optimal Range | Recommended Action |
|---|---|---|---|
| Too Low (< 1.5 mM) | Weak or no amplification; primers fail to bind to the template [66] [65]. | 1.5 - 2.0 mM for Taq DNA Polymerase [67]. | Optimize by supplementing concentration in 0.5 mM increments up to 4 mM [67]. |
| Optimal | Specific amplification with good yield [67] [68]. | 1.5 - 4.5 mM; typically 1.5 - 2.0 mM [67] [66]. | Use as a starting point and fine-tune for each primer-template system. |
| Too High (> 2.5-4.5 mM) | Non-specific binding, spurious bands, and primer-dimer formation due to reduced enzyme fidelity [3] [66] [69]. | Varies by template and buffer components. | Decrease concentration in 0.2 - 1.0 mM increments to improve specificity [69]. |
What are the guidelines for optimizing primer and template concentrations?
Excessive primer concentration is a primary driver of non-specific products and primer-dimers, while incorrect template quantity can either lead to no product or high background [3] [54].
The following table provides standard quantitative guidelines for primer and template titration:
| Component | Typical Optimal Concentration | Effect of Low Concentration | Effect of High Concentration |
|---|---|---|---|
| Primers | 0.1 - 1.0 µM; typically 0.1 - 0.5 µM per primer [67] [54]. | Low or no yield of the desired product [3]. | Non-specific amplification, primer-dimer formation, and spurious bands [3] [67]. |
| Template DNA (Plasmid) | 1 pg – 10 ng per 50 µL reaction [67] [69]. | Non-specific amplification; extra bands [67]. | |
| Template DNA (Genomic) | 1 ng – 1 µg per 50 µL reaction [67] [69]. |
Diagram 1: A systematic workflow for troubleshooting non-specific amplification in PCR.
Experimental Protocols for Component Titration
Protocol 1: Magnesium Titration for Improved Specificity
This protocol is designed to identify the optimal MgCl₂ concentration to maximize target yield while minimizing non-specific bands [67] [69].
Materials:
- PCR reagents: DNA polymerase, 10X PCR buffer (without MgCl₂), dNTP mix, primers, template DNA, nuclease-free water.
- MgCl₂ stock solution (e.g., 25 mM or 50 mM).
- Thermocycler.
Method:
- Prepare a master mix for all common components sufficient for n+1 reactions, where n is the number of Mg²⁺ conditions to be tested. Calculate for 50 µL reactions:
- 5 µL of 10X PCR buffer (without MgCl₂)
- 1 µL of dNTP mix (10 mM each)
- 1.25 µL of forward primer (10 µM)
- 1.25 µL of reverse primer (10 µM)
- 10 - 100 ng of genomic DNA template
- 1 unit of DNA polymerase
- Nuclease-free water to 45 µL (before adding Mg²⁺).
- Aliquot 45 µL of the master mix into each PCR tube.
- Add MgCl₂ stock solution to each tube to achieve the desired final concentrations. A typical titration range is 1.0 mM to 4.0 mM in 0.5 mM increments [67].
- Mix the reactions gently and briefly centrifuge.
- Run the PCR using the appropriate cycling conditions for your target.
- Analyze the results by agarose gel electrophoresis. The condition with the brightest specific band and the cleanest background indicates the optimal MgCl₂ concentration.
Protocol 2: Primer and Template Titration
This protocol simultaneously optimizes the primer-to-template ratio, which is critical for specificity [3] [22].
Materials:
- PCR reagents: DNA polymerase, 2X PCR master mix (with fixed Mg²⁺), primer stocks, template DNA stocks, nuclease-free water.
- Thermocycler.
Method:
- Design a two-dimensional titration matrix. For example, test three template amounts (e.g., 10 ng, 50 ng, 100 ng of genomic DNA) against three primer concentrations (e.g., 0.1 µM, 0.5 µM, 1.0 µM final concentration).
- Prepare separate master mixes for each primer concentration, using the 2X master mix, nuclease-free water, and the primer stock.
- Aliquot the master mixes into PCR tubes.
- Add the different amounts of template DNA to the respective tubes. Include a no-template control (NTC) for each primer concentration to check for primer-dimer formation or contamination.
- Run the PCR using the appropriate cycling conditions.
- Analyze by agarose gel electrophoresis. The optimal condition provides a strong specific product with a clear NTC.
The Scientist's Toolkit: Research Reagent Solutions
| Reagent / Tool | Function in Troubleshooting | Application Note |
|---|---|---|
| Hot-Start DNA Polymerase | Reduces non-specific amplification and primer-dimers that form during reaction setup by remaining inactive until the first high-temperature denaturation step [3] [12]. | Essential for high-specificity applications. Use according to manufacturer's instructions for activation temperature and time. |
| PCR Additives (e.g., DMSO) | Helps denature GC-rich templates and resolve secondary structures that promote non-specific binding [3] [68]. | Use at 3-10% (v/v). Higher concentrations can inhibit polymerase; may require adjustment of enzyme amount [3] [68]. |
| Gradient Thermocycler | Allows empirical determination of the optimal annealing temperature for a primer pair across a range of temperatures in a single run [3] [69]. | The most efficient way to optimize annealing temperature. |
| No-Template Control (NTC) | Critical diagnostic for detecting contamination or primer-dimer formation independent of the template DNA [12]. | A clear NTC confirms that amplification in sample wells is derived from the intended template. |
Non-specific amplification is a common challenge in polymerase chain reaction (PCR) that can compromise experimental results, particularly in diagnostic and drug development applications. This phenomenon occurs when primers bind to non-target DNA sequences, leading to unwanted amplification products that can obscure target bands, reduce amplification efficiency, and generate ambiguous results. Proper optimization of cycling conditions—specifically denaturation times and cycle numbers—serves as a critical strategy for enhancing amplification specificity and yield. This guide provides detailed troubleshooting methodologies to help researchers address these fundamental PCR parameters within the broader context of solving non-specific amplification.
Frequently Asked Questions
How do denaturation time and temperature affect PCR specificity?
Insufficient denaturation can lead to incomplete separation of DNA strands, creating opportunities for primers to bind non-specifically and generate multiple unwanted products [58]. Denaturation parameters must be optimized based on template characteristics to ensure specific amplification.
Optimization Protocol:
- Initial Denaturation: Begin with 2 minutes at 95°C for most templates [70]
- Cycle Denaturation: Use 15-30 seconds at 95°C during cycling [70]
- GC-Rich Templates: Increase time to 1-3 minutes or temperature to 98°C [58]
- Complex Templates: For genomic DNA or samples with secondary structure, extend denaturation time [58]
Table 1: Denaturation Conditions for Different Template Types
| Template Type | Initial Denaturation | Cycle Denaturation | Special Considerations |
|---|---|---|---|
| Standard Templates | 95°C for 2 minutes | 95°C for 15-30 seconds | - |
| GC-Rich Templates (>65% GC) | 95-98°C for 2-3 minutes | 95-98°C for 20-30 seconds | May require additives like DMSO or betaine [58] |
| Genomic DNA | 95°C for 2-3 minutes | 95°C for 30 seconds | Longer times needed due to complexity [58] |
| Plasmid DNA | 95°C for 1-2 minutes | 95°C for 15-20 seconds | Shorter times often sufficient |
What is the relationship between cycle number and non-specific amplification?
Excessive cycle numbers can dramatically increase non-specific amplification by allowing minor artifacts to accumulate to detectable levels, particularly in later cycles when reagent depletion occurs and enzyme fidelity may decrease [2] [1].
Optimization Strategy:
- Standard Applications: Use 25-35 cycles for most applications [58]
- Low Template Samples: Increase to 35-40 cycles when target copy number is low [58]
- Prevention Approach: Use the minimum number of cycles that provides adequate yield [1]
- Cycle Monitoring: If non-specific products appear, reduce cycles by 3-5 increments [71]
Table 2: Recommended Cycle Numbers Based on Application and Template
| Application/Template | Recommended Cycles | Rationale |
|---|---|---|
| Routine PCR | 25-30 cycles | Balances yield with specificity [70] |
| Low Copy Number Targets | Up to 40 cycles | Enhances detection sensitivity [58] |
| Quantitative PCR | 35-45 cycles | Enables accurate quantification [7] |
| High-Fidelity Applications | 25-30 cycles | Minimizes errors from overcycling [71] |
| Nested PCR (First Round) | 15-20 cycles | Reduces non-specific products before second round [71] |
How can I systematically troubleshoot cycling conditions to reduce non-specific bands?
A methodical approach to adjusting denaturation times and cycle numbers can effectively resolve non-specific amplification while maintaining target yield.
Systematic Troubleshooting Protocol:
- Initial Assessment:
Denaturation Optimization:
Cycle Number Adjustment:
Complementary Approaches:
What specific adjustments should I make for difficult templates like GC-rich regions?
GC-rich templates (≥65% GC content) require specialized denaturation conditions due to their increased thermodynamic stability and tendency to form secondary structures.
GC-Rich Template Protocol:
- Enhanced Denaturation:
Cycle Modifications:
Validation:
Research Reagent Solutions
Table 3: Key Reagents for Optimizing Denaturation and Cycle Conditions
| Reagent | Function | Application Notes |
|---|---|---|
| Hot-Start DNA Polymerase | Reduces non-specific amplification during reaction setup | Essential for low annealing temperature applications [72] |
| Betaine | Reduces DNA secondary structure, equalizes Tm | Use at 1-1.5 M for GC-rich templates [73] |
| DMSO | Improves DNA denaturation efficiency | Use at 3-10% concentration; reduces annealing temperature [73] |
| TMA Oxalate | Increases specificity and yield | Use at 2 mM concentration [73] |
| MgCl₂ | Cofactor for DNA polymerase | Optimize between 1.5-2.0 mM; excess causes non-specific bands [70] |
| GC Enhancer | Specifically formulated for difficult templates | Commercial formulations available with optimized buffers [3] |
Optimizing denaturation times and cycle numbers represents a fundamental approach to resolving non-specific amplification in PCR. Through systematic adjustment of these parameters based on template characteristics and careful implementation of complementary strategies, researchers can significantly enhance amplification specificity while maintaining sufficient yield for downstream applications. The protocols and reference data provided here offer a structured framework for troubleshooting non-specific amplification within the broader context of PCR optimization for research and diagnostic applications.
Template Quality Assessment and Preparation Improvements
FAQs: Template Quality and Non-Specific Amplification
How does template quality contribute to non-specific amplification in PCR?
Non-specific amplification occurs when primers bind to unintended regions of the template DNA, leading to off-target products, smeared bands on gels, or multiple unexpected bands. [2] [17] Template quality is a critical factor. Degraded or contaminated DNA provides numerous unintended binding sites for primers. [3] Furthermore, impurities carried over from the extraction process (such as phenol, EDTA, or salts) can inhibit the DNA polymerase, reducing reaction specificity and promoting errors. [74] [3]
What are the key indicators of poor template quality?
You can assess template quality using several methods:
- Spectrophotometry: Measure the absorbance ratios at 260nm and 280nm. A ratio of ~1.8 is generally accepted for pure DNA. Significantly lower ratios suggest protein or phenol contamination. [28] [17]
- Gel Electrophoresis: Visualize the DNA on an agarose gel. Intact genomic DNA should appear as a single, tight high-molecular-weight band. A smear below the main band indicates degradation. [3]
- PCR Inhibitors: The presence of inhibitors like heparin, hemoglobin, urea, or humic acids can be suspected if dilution of the template (e.g., 10- to 100-fold) improves amplification. [74] [3]
What are the best practices for preparing and storing DNA template to prevent issues?
- Purification: Use high-quality purification kits and follow manufacturer protocols stringently to remove contaminants. [3] For problematic samples, consider ethanol precipitation to remove residual salts. [3]
- Storage Conditions: Always store purified DNA in molecular-grade water or TE buffer (pH 8.0) to prevent degradation by nucleases. Avoid resuspending DNA in water that may be acidic, as low pH can lead to depurination. [75] [3]
- Minimize Damage: Handle DNA gently during isolation to minimize shearing and nicking. Avoid exposing DNA to short-wavelength UV light for prolonged periods during gel excision, as this can cause damage. [3]
Technical Guide: Troubleshooting Template-Related Non-Specific Amplification
Problem Assessment Workflow
The following diagram outlines a logical sequence for diagnosing and resolving template-related non-specific amplification.
Quantitative Data for Template Optimization
The table below summarizes key quantitative guidelines for template preparation and usage to minimize non-specific amplification. [76] [23] [75]
Table 1: Optimal Template DNA Guidelines for PCR
| Template Type | Recommended Amount per 50 µL Reaction | Purity Indicator (A260/280) | Storage Condition |
|---|---|---|---|
| Genomic DNA | 1 ng – 1 µg (typically 30-100 ng) | ~1.8 | TE buffer (pH 8.0) or molecular-grade water, -20°C |
| Plasmid / Viral DNA | 1 pg – 10 ng | ~1.8 | TE buffer (pH 8.0), -20°C |
| E. coli Genomic DNA | 100 pg – 1 ng | ~1.8 | TE buffer (pH 8.0), -20°C |
| cDNA (RNA equivalent) | As little as 10 pg | N/A | -20°C or -80°C |
Detailed Protocol: Ethanol Precipitation for Template Clean-up
This protocol is effective for removing salts, detergents, and other soluble contaminants from DNA samples. [3]
- Estimate Volume: Measure the volume of your DNA sample.
- Add Salt: Add 1/10th volume of 3 M sodium acetate (pH 5.2). Mix thoroughly. Alternatively, ammonium acetate can be used to co-precipitate DNA while leaving oligonucleotides in solution.
- Add Ethanol: Add 2–2.5 volumes of ice-cold 100% ethanol. Mix by inverting the tube several times.
- Precipitate: Incubate at -20°C for 30 minutes to overnight. Longer incubation can increase yield.
- Pellet DNA: Centrifuge at >12,000 × g for 15 minutes at 4°C. Carefully decant the supernatant without disturbing the pellet (which may not always be visible).
- Wash: Add 500 µL of ice-cold 70% ethanol. Centrifuge at >12,000 × g for 5 minutes. Carefully decant the supernatant.
- Dry: Air-dry the pellet for 5–10 minutes or use a vacuum concentrator. Do not over-dry, as this can make the DNA difficult to resuspend.
- Resuspend: Resuspend the purified DNA in an appropriate volume of molecular-grade water or TE buffer (pH 8.0).
Research Reagent Solutions
The following table lists key reagents and materials essential for ensuring high template quality and preventing non-specific amplification. [74] [23] [75]
Table 2: Essential Reagents for Template Quality Control and PCR Specificity
| Reagent / Material | Function / Purpose | Key Considerations |
|---|---|---|
| High-Quality DNA Purification Kits | Isolate pure, intact DNA from various sample types, removing common PCR inhibitors. | Follow manufacturer's protocol meticulously. Ensure no residual alcohols or buffers remain. |
| Hot-Start DNA Polymerase | Reduces non-specific amplification and primer-dimer formation by inhibiting polymerase activity at low temperatures. | Essential for improving specificity. Choose antibody-mediated or chemically modified versions. |
| Molecular-Grade Water | A pure, nuclease-free solvent for resuspending DNA and preparing reaction mixes. | Prevents introduction of nucleases and contaminants that can degrade template or inhibit PCR. |
| TE Buffer (pH 8.0) | Optimal storage buffer for DNA, preventing degradation by nucleases and acid-induced depurination. | Preferred over water for long-term storage of DNA templates. |
| PCR Additives (e.g., BSA, Betaine) | Helps overcome PCR inhibition. BSA binds inhibitors; betaine destabilizes secondary structures in GC-rich templates. | Use at recommended concentrations (e.g., BSA at ~400 ng/µL). [23] |
| Magnesium Chloride (MgCl₂) | An essential cofactor for DNA polymerase. Its concentration must be optimized. | Excess Mg²⁺ reduces fidelity and increases non-specific products. Typically optimized between 1.5-2.0 mM. [76] [75] |
Contamination Prevention and Laboratory Best Practices
Within the broader context of solving non-specific amplification in PCR research, contamination control is not merely a best practice—it is a fundamental prerequisite for data integrity. The exquisite sensitivity of PCR makes it vulnerable to contaminants that can cause false positives, reduce assay efficiency, and compromise reproducibility. For researchers, scientists, and drug development professionals, adhering to a rigorous contamination prevention protocol is essential for generating reliable and meaningful results. This guide provides targeted troubleshooting and FAQs to address the specific challenges of contamination and non-specific amplification in the laboratory.
Frequently Asked Questions (FAQs)
1. What are the most common sources of contamination in PCR? The primary sources are carryover contamination from previously amplified PCR products (amplicons) and cross-contamination between samples [6]. A single PCR reaction can generate as many as 10^9 copies of the target sequence, and if aerosolized, these amplicons can contaminate laboratory reagents, equipment, and ventilation systems [6]. Contamination can also be introduced via plasmid clones or from high concentrations of target organisms in clinical specimens.
2. How can I tell if my PCR reaction is contaminated? The use of a No-Template Control (NTC) is the most common way to monitor for contamination [77]. In this control, all reaction components are added except the DNA template. If amplification is observed in the NTC well, it indicates that one or more of your reagents or the laboratory environment has been contaminated with the target DNA [77]. The pattern of amplification (e.g., consistent Ct values across NTCs vs. random amplification) can help identify the source.
3. What is UNG treatment and how does it prevent carryover contamination? Uracil-N-Glycosylase (UNG) is an enzymatic pre-amplification sterilization method and one of the most widely used contamination control techniques [6] [77]. In this method, dTTP in the PCR master mix is replaced with dUTP. As a result, all newly synthesized PCR amplicons will contain uracil instead of thymine. In subsequent PCR setups, the UNG enzyme is added to the reaction mix and incubated prior to thermal cycling. It hydrolyzes any uracil-containing contaminating DNA from previous reactions, rendering it unamplifiable. The enzyme is then inactivated during the first high-temperature denaturation step, allowing the new PCR to proceed with natural dTTP in the sample template [6].
4. My PCR shows multiple bands or a smear on the gel. Is this due to contamination? While contamination can cause non-specific products, multiple bands or a smear are more typically symptoms of non-specific amplification rather than external contamination. Common causes include poor primer design, an annealing temperature that is too low, excessive magnesium ion concentration, or too much template DNA or enzyme [78] [3]. The troubleshooting table below provides specific solutions.
Troubleshooting Guide: Non-Specific Amplification and Contamination
This table summarizes common issues, their possible causes, and recommended solutions.
| Observation | Possible Cause | Solution |
|---|---|---|
| Multiple Bands or Smear on Gel | Primer annealing temperature too low [78] | Increase annealing temperature in 1-2°C increments; use a gradient cycler [3]. |
| Mispriming due to poor primer design [78] | Verify primer specificity using BLAST; avoid repeats and self-complementarity; ensure 40-60% GC content [13] [79]. | |
| Excess Mg2+ concentration [3] | Optimize Mg2+ concentration, typically in 0.2-1 mM increments [78]. | |
| Too much template DNA or enzyme [3] | Titrate template DNA (e.g., 1 pg–10 ng for plasmid; 1 ng–1 µg for genomic DNA per 50 µl reaction) and use recommended polymerase units [78] [3]. | |
| False Positive / NTC Amplification | Carryover contamination from amplicons [6] | Implement UNG treatment; use physical barriers and dedicated pre- and post-PCR areas [6] [77]. |
| Contaminated reagents or equipment [78] | Prepare fresh solutions; use aerosol-resistant filter tips; decontaminate surfaces with 10% bleach followed by 70% ethanol [6] [77]. | |
| No PCR Product | Presence of PCR inhibitors [7] | Re-purify template DNA via alcohol precipitation, drop dialysis, or silica column kits [78] [3]. |
| Poor template quality or integrity [78] | Analyze DNA via gel electrophoresis; use template with A260/280 ratio ~1.8-2.0 [78]. | |
| Primer-Dimer Formation | Primer 3'-end complementarity [13] | Redesign primers to avoid 3'-end complementarity, especially with G/C bases [13] [79]. |
| Excess primer concentration [3] | Optimize primer concentration, usually within 0.1–1 µM [3]. | |
| Low annealing temperature [3] | Increase annealing temperature [3]. |
Best Practices for Contamination Control
Physical and Workflow Barriers
Establishing unidirectional workflow is the most critical step in preventing contamination.
- Dedicated Areas: Maintain physically separate areas for 1) reagent preparation, 2) sample preparation, 3) PCR amplification, and 4) post-PCR analysis [6] [77]. These areas should ideally be in different rooms.
- Dedicated Equipment: Each area must have dedicated instruments, disposable devices, laboratory coats, gloves, and aerosol-free pipettes [6]. Never bring equipment or consumables from a post-PCR area into a pre-PCR area.
- Unidirectional Workflow: Personnel should move from "clean" areas (reagent prep) to "dirty" areas (post-PCR analysis) and not return on the same day without changing personal protective equipment [77].
Decontamination Protocols
- Surface Decontamination: Regularly clean work surfaces, centrifuges, and vortexers with a 10% sodium hypochlorite (bleach) solution, followed by 70% ethanol to remove the bleach [6] [77]. Bleach causes oxidative damage to DNA, rendering it unamplifiable [6]. Prepare fresh bleach dilutions frequently.
- UV Irradiation: Use UV light (254-300 nm) to irradiate workstations and equipment (like empty pipettes and tubes) for 5-20 minutes before use. UV light induces thymidine dimers in DNA [6]. Note that its efficacy is reduced for short or GC-rich templates and can damage enzymes and primers if used on a complete reaction mix [6].
Proper Laboratory Technique
- Aerosol Management: Always use positive-displacement pipettes or aerosol-resistant filtered tips to prevent aerosol contamination [78] [77].
- Aliquoting Reagents: Prepare and store reagents in small, single-use aliquots to avoid repeated freeze-thaw cycles and prevent contamination of stock solutions [77].
- Glove Use: Change gloves frequently, especially when moving between workstations or after handling potentially contaminated materials [77].
The following workflow diagram illustrates the key stages of a contamination-aware PCR process.
Research Reagent Solutions
The following table details key reagents and materials used to prevent contamination and improve PCR specificity.
| Item | Function | Key Considerations |
|---|---|---|
| Aerosol-Resistant Filter Tips | Prevents aerosols from contaminating pipette shafts and subsequent samples. | Essential for all liquid handling, especially in sample and reagent preparation [77]. |
| Uracil-N-Glycosylase (UNG) | Enzymatically degrades carryover contamination from previous uracil-containing PCR products. | Requires the use of dUTP in the PCR master mix instead of dTTP [6] [77]. |
| Hot-Start DNA Polymerase | Reduces non-specific amplification and primer-dimer formation by inhibiting polymerase activity at room temperature. | Activated only at high temperatures, improving assay specificity and yield [78] [23]. |
| PCR Additives (e.g., DMSO, BSA) | Improves amplification efficiency of difficult templates (e.g., GC-rich). | DMSO (1-10%) helps denature GC-rich secondary structures. BSA (400 ng/µL) can bind and neutralize inhibitors [13] [23]. |
| Bleach (Sodium Hypochlorite) | Surface decontaminant that oxidizes and fragments DNA. | Use a 10% solution for decontaminating surfaces and equipment; requires fresh preparation [6] [77]. |
| DNA Cleanup Kits | Purifies template DNA to remove contaminants like salts, proteins, and phenol that inhibit polymerase. | Critical step when working with complex samples (e.g., blood, soil) [78] [3]. |
Detailed Experimental Protocol: Implementing UNG for Carryover Prevention
Principle: This protocol incorporates dUTP and UNG into the PCR workflow to selectively destroy amplification products from previous reactions that may contaminate the current setup [6].
Materials:
- PCR reagents (primers, dNTP mix with dUTP, reaction buffer, hot-start polymerase)
- Uracil-N-Glycosylase (UNG)
- Template DNA
- Nuclease-free water
- Sterile, aerosol-resistant pipette tips and microcentrifuge tubes
Procedure:
- Prepare Master Mix: On ice, combine the following components in a sterile tube to create a master mix for all reactions (including NTCs), scaled up for the number of reactions plus ~10% overage [13]:
- Nuclease-free water (Q.S. to final volume)
- 10X PCR Buffer (1X final concentration)
- dNTP mix with dUTP (200 µM final concentration of each dNTP)
- Forward and Reverse Primers (0.1–1 µM final concentration each)
- Uracil-N-Glycosylase (UNG) (follow manufacturer's recommended concentration)
- Hot-Start DNA Polymerase (0.5-2.5 units per 50 µL reaction)
Aliquot and Add Template: Aliquot the master mix into individual PCR tubes. Then, add the template DNA to the respective sample tubes. For the No-Template Control (NTC), add nuclease-free water instead of template.
UNG Incubation: Place the sealed reaction tubes in the thermal cycler and incubate at 25°C for 10 minutes [6]. During this step, the UNG enzyme will actively degrade any uracil-containing DNA contaminants.
Enzyme Inactivation and PCR Amplification: Immediately following the incubation, run the standard PCR cycling program, beginning with a denaturation step at 95°C for 2-5 minutes. This high temperature will permanently inactivate the UNG enzyme, preventing it from degrading the new, uracil-containing amplicons that will be synthesized in the current PCR [6].
Analysis: Proceed with the analysis of your PCR products (e.g., gel electrophoresis). Store PCR products at -20°C or, for short-term, at 72°C if re-analysis is planned, as residual UNG activity could degrade the products over time [6].
Validation Techniques and Comparative Analysis of PCR Methods
Frequently Asked Questions (FAQs)
1. What is in silico PCR and how does it help with primer validation? In silico PCR is a computational approach that simulates the polymerase chain reaction on a computer. It uses primer sequences to search a DNA database (like a whole genome) to predict all potential amplification products. This process is a valuable and productive adjunctive method for ensuring primer or probe specificity across a broad spectrum of PCR applications [80]. By predicting the location and size of amplicons before you enter the lab, it helps you identify primers that might bind to non-target sites and cause non-specific amplification, thereby saving time and resources.
2. I see multiple bands or a smear on my gel. How can in silico PCR help? Multiple bands or smears are classic signs of non-specific amplification, where primers have bound to and amplified off-target sequences [2]. In silico PCR helps you troubleshoot this by allowing you to check your primer pair against the specific genome you are working with. The tool will list all predicted amplification products and their locations. If the results show more than one amplicon from your primer pair, it confirms that your primers are not specific and allows you to redesign them before your next wet-lab experiment [80].
3. What does a "primer dimer" result mean in an in silico PCR analysis? While in silico PCR tools are primarily designed to find products between a forward and a reverse primer, the concept of primer dimers is critical. Primer dimers are short, non-specific amplicons formed when two primers hybridize to each other rather than to the template DNA [2]. Although not always directly detected by all in silico tools, understanding this concept is key. If your experimental gel shows a very bright band around 20-60 bp, it is likely a primer dimer. In silico primer analysis, including checks for self-complementarity, can help you design primers with minimal complementary 3' ends to avoid this issue.
4. My primers have degenerate bases. Can I use them in an in silico PCR simulation? Yes, many in silico PCR tools accept degenerate primer sequences. These tools use the International Union of Pure and Applied Chemistry (IUPAC) codes for ambiguous nucleotides. For example, the code 'N' represents any base (A, C, G, or T), while 'R' represents a purine (A or G) [81]. The software will then simulate PCR by considering all possible sequence combinations represented by the degenerate codes. However, note that computational and experimental studies have shown that degenerate primers can reduce amplification efficiency, and non-degenerate primers may perform better even for non-consensus targets [82].
5. What are the key parameters I need to set for an accurate in silico PCR run? To get results that closely mimic your physical PCR, you should configure several key parameters in the software [83]:
- Max/Min Product Size: Set a realistic range (e.g., 100-3000 bp) to filter out nonsensical results.
- Number of Mismatches Allowed: Often, you can specify the number of mismatches, particularly at the 3'-end of the primer, which is critical for elongation.
- Template Type: Specify if your DNA is linear or circular, as this affects the amplification.
- Genome or Sequence Database: Always select the correct and most current version of the genome you are targeting.
Troubleshooting Guide
| Problem | Possible Cause | In Silico Diagnostic Step | Solution |
|---|---|---|---|
| Non-specific Bands | Primers binding to multiple genomic locations with high similarity. | Run an in silico PCR search. If multiple amplicons are predicted, the primers are not specific [80]. | Redesign primers to regions of the target gene with low homology to other parts of the genome. |
| No Amplification | Primers have too many mismatches with the intended template, or the amplicon size is outside the practical range. | Verify that the in silico PCR predicts a single amplicon of the expected size with your template sequence. | Check for sequencing errors in the primer design. Adjust primer binding sites and rerun the in silico validation. |
| Smear on Gel | Non-specific amplification often due to low annealing temperature or degraded DNA [2]. | While in silico PCR can identify some causes of smearing (e.g., multiple binding sites), it cannot assess DNA quality. | Use the in silico tool to check primer specificity. If primers are specific, troubleshoot template quality and PCR cycling conditions (e.g., increase annealing temperature). |
| Primer Dimers | Primers with self-complementary 3' ends, leading to primer-primer hybridization [2]. | Use primer analysis software (often integrated into in silico platforms) to check for self-complementarity and hairpin formation. | Redesign primers to minimize complementarity at the 3' ends. Use a hot-start polymerase to prevent activity during setup. |
In Silico PCR Workflow and Analysis
The following diagram illustrates the standard workflow for using an in silico PCR tool to validate primers.
Understanding Primer Binding Specificity
The logic flow below outlines how an in silico PCR algorithm evaluates primer binding to a template, which determines whether a specific amplicon is predicted.
Experimental Protocol: Validating Primers Using In Silico PCR
This protocol provides a detailed methodology for using in silico tools to validate primer specificity, a critical step before any wet-lab experiment [80] [83].
1. Define Input Parameters:
- Primer Sequences: Obtain the forward and reverse primer sequences in standard 5' to 3' format. Degenerate bases are allowed using IUPAC codes [81].
- Target Genome: Identify the correct and most recent version of the reference genome or sequence database (e.g., NCBI RefSeq).
- Mismatch Tolerance: Set the number of allowed mismatches. For high stringency, set this to zero. You may allow 1-2 mismatches to study primer behavior in non-ideal conditions.
- Amplicon Size Range: Define a realistic range (e.g., Min: 70 bp, Max: 3000 bp) to filter out irrelevant results.
2. Execute the In Silico PCR:
- Use a reliable web-based or stand-alone in silico PCR tool (e.g., UCSC In-Silico PCR, PrimerDigital tool, or UGENE workflow) [80] [81] [83].
- Input the primer sequences and selected parameters.
- Run the analysis. The tool will scan the entire selected genome for regions where both primers bind within the specified distance and mismatch tolerance.
3. Analyze the Output:
- The primary output is a list of predicted amplicons. A successful, specific validation will show a single amplicon of the expected size.
- If multiple amplicons are listed, note their genomic locations and sizes. This indicates a high risk of non-specific amplification in the lab.
- If no amplicons are found, verify that the correct genome assembly was selected and that the primer sequences are accurate.
4. Interpret and Iterate:
- Based on the results, decide whether to proceed with the primers or redesign them. Primers that produce multiple amplicons in silico should be re-designed to increase specificity.
Research Reagent Solutions
The following table details key materials and software tools essential for conducting in silico PCR and related experimental work [80] [81] [83].
| Item | Function / Description |
|---|---|
| FastPCR Software | A stand-alone Java application for in silico PCR; allows batch file processing and analysis of large datasets [80]. |
| UGENE Workflow Designer | An open-source bioinformatics platform that includes a workflow for performing in silico PCR with configurable parameters [83]. |
| PrimerDigital In Silico Tool | A web-based tool for predicting PCR products and off-target effects, supporting degenerate primers and bisulfite-converted DNA [81]. |
| Hot-Start DNA Polymerase | A modified polymerase inactive at room temperature, preventing non-specific amplification and primer-dimer formation during reaction setup [23]. |
| DMSO (Dimethyl Sulfoxide) | An additive used in PCR to reduce secondary structure in GC-rich templates, improving specificity and yield [23]. |
| dNTPs | Deoxynucleotide triphosphates (dATP, dCTP, dGTP, dTTP); the building blocks for DNA synthesis during PCR [23]. |
In Polymerase Chain Reaction (PCR) research, the reliability of your results is paramount. Control experiments are iterations of the larger experiment where a known component is used to test part of the experimental process or to establish a baseline for comparison [84]. When troubleshooting persistent issues like non-specific amplification, a well-designed strategy employing positive, negative, and internal controls is your most powerful tool. These controls allow you to systematically isolate and identify the source of the problem, whether it lies in reaction components, thermal cycling conditions, or sample integrity. By incorporating these controls into your workflow, you can diagnose experimental failures, validate successful results, and ultimately save valuable time and resources.
Understanding the Core Control Types
Positive Controls
A positive control is used to confirm that your PCR experiment is functioning correctly [85] [84]. It consists of a known DNA template that has previously been demonstrated to amplify successfully with your primer set.
- Purpose: To verify that all PCR components and the thermal cycling protocol are working correctly. A failure in the positive control indicates a problem with the PCR process itself, not the sample DNA.
- Composition: This can be an absolute standard (a nucleic acid template of known copy number), a known positive sample, or purified genomic DNA from an abundant source that is easy to amplify [85] [84].
- Interpretation: The appearance of the expected amplicon confirms that your PCR setup is valid. The absence of a band suggests a fundamental failure in the PCR process that requires troubleshooting of reagents, primers, or cycling conditions.
Negative Controls
Negative controls are designed to detect contamination in your PCR reagents or workflow [85] [84].
- Purpose: To identify the presence of contaminating nucleic acids (e.g., from previous PCR products, the environment, or cross-sample contamination) that could lead to false-positive results.
- Composition: A no-template control (NTC) contains all real-time PCR components except the template DNA, which is replaced by PCR-grade water [85].
- Interpretation: A clean, negative result (no amplification) indicates that your reagents and workflow are free of contamination. Any amplification in the NTC signifies contamination, potentially invalidating all results from that experimental run.
Internal Controls
An internal control is used to test for the presence of PCR inhibitors within a sample [85]. It is particularly crucial for samples derived from complex biological sources like blood, soil, or plant tissues.
- Purpose: To distinguish between a true negative result (target sequence is absent) and a false negative result (PCR failure due to inhibition).
- Composition: This involves a duplex reaction where the target sequence and a control sequence are amplified simultaneously using different primer sets [85]. Internal controls can be exogenous (added to the sample) or endogenous (naturally occurring in the test specimen).
- Interpretation: If the internal control amplifies but the target does not, the target is likely absent. If neither amplifies, the reaction may be inhibited.
The logical relationship between these controls and the conclusions they support is summarized in the following workflow:
Troubleshooting Guide: FAQs on Controls and Non-Specific Amplification
FAQ 1: My negative control shows amplification (false positive). What does this mean and how do I fix it?
A positive signal in your negative control indicates contamination of your PCR reagents with template DNA [85] [84].
- Interpretation: Systemic contamination is present. The results of all samples in the run are suspect and should not be trusted.
- Corrective Actions:
- Decontaminate Workspace: Thoroughly clean your pipettes, work surfaces, and equipment with a DNA-degrading solution (e.g., 10% bleach or commercial DNA-away solutions).
- Use New Reagents: Prepare fresh aliquots of all reagents, especially water and buffer. Discard old stock solutions.
- Employ Good Technique: Use dedicated pre-PCR and post-PCR areas. Always use filter tips to prevent aerosol contamination. Wear gloves [86].
- Implement UV Irradiation: Expose your reaction setup area to UV light before and after use to destroy any contaminating DNA.
FAQ 2: My positive control failed (no amplification). What should I check first?
A failed positive control points to a general failure of the PCR process itself [84].
- Interpretation: The core PCR machinery is not functioning. The problem is not with your sample DNA but with the reaction setup.
- Corrective Actions:
- Verify Reagent Integrity: Check that all reagents are fresh and have been stored properly. Ensure your DNA polymerase has not lost activity.
- Check Primer Quality: Confirm that primers are resuspended correctly and are not degraded. Run a gel to check for primer integrity.
- Review Thermal Cycler Program: Ensure the denaturation, annealing, and extension temperatures and times are correct for your enzyme and amplicon. Verify the thermal cycler block calibration [86].
- Confirm Template Quality: Even for a positive control, ensure the template DNA is of good quality and concentration.
FAQ 3: My sample and positive control show multiple bands or a smear (non-specific amplification). How can I improve specificity?
Non-specific amplification is a common issue where primers bind to non-target sequences [3] [86].
- Interpretation: The reaction conditions are too permissive, allowing primers to bind to regions with low homology.
- Corrective Actions:
- Optimize Annealing Temperature: Increase the annealing temperature in 1-2°C increments. Use a gradient thermal cycler to find the optimal temperature, which is typically 3-5°C below the primer Tm [3].
- Use a Hot-Start DNA Polymerase: Hot-start enzymes remain inactive until a high-temperature activation step, preventing nonspecific amplification and primer-dimer formation during reaction setup at room temperature [36] [3].
- Try Touchdown PCR: Start with an annealing temperature higher than the calculated Tm and gradually decrease it over subsequent cycles. This enriches the desired specific product early in the reaction [36].
- Optimize Mg²⁺ Concentration: Excess Mg²⁺ can reduce specificity. Titrate Mg²⁺ concentration in 0.2-1.0 mM increments to find the optimal level [86].
- Review Primer Design: Check for self-complementarity or complementarity between primers. Ensure primers are specific to your target sequence [3].
FAQ 4: My sample shows no amplification, but my positive control is fine. What is the likely cause?
This scenario suggests that the PCR itself is working, but there is an issue with your sample [84].
- Interpretation: The target is either absent from the sample, or the sample contains PCR inhibitors, or the DNA is of poor quality/quantity.
- Corrective Actions:
- Check for Inhibitors: Include an internal positive control (IPC) in a duplex reaction with your sample. If the IPC fails to amplify, inhibitors are likely present. Further purify the sample DNA by alcohol precipitation or column purification [85] [86].
- Assess DNA Quality and Quantity: Check the concentration and purity of your sample DNA via spectrophotometry (A260/A280 ratio ~1.8). Analyze integrity by gel electrophoresis [3].
- Increase Template Amount: If the target is present in low copy number, try increasing the amount of input DNA or the number of PCR cycles (up to 40 cycles) [3].
FAQ 5: When should I use an internal control, and how do I choose one?
An internal control is essential whenever your sample source is known to contain PCR inhibitors or when you must be certain that a negative result is genuine, not due to reaction failure [85].
- Interpretation: Needed to validate negative results, especially in diagnostic, forensic, or environmental applications.
- Selection Guide:
- Endogenous Controls: Naturally occurring in the sample (e.g., a host gene like β-actin when detecting a pathogen). Risk: Varying abundance can impair assay sensitivity for the target [85].
- Exogenous Homologous Controls: An artificial template with the same primer binding sites as the target, but a different internal sequence. Risk: Competition with the target for primers can reduce sensitivity [85].
- Exogenous Heterologous Controls: A control sequence with its own unique primer set. This is often the best option as it avoids competition and can be universally applied to multiple assays [85].
Experimental Protocols for Implementing Controls
Protocol: Setting Up a Standard PCR with Controls
This protocol outlines the steps for setting up a conventional PCR experiment, including the essential positive and negative controls [13].
Materials and Reagents:
- DNA template (sample and positive control template)
- Forward and reverse primers
- PCR buffer (usually 10X concentration, may contain MgCl₂)
- MgCl₂ (if not in buffer)
- dNTP mix (10 mM each)
- DNA polymerase (preferably hot-start)
- Sterile, PCR-grade water
- PCR tubes and caps
- Ice bucket and micropipettors
Procedure:
- Design and Plan: Design your experiment to include one reaction per sample plus one for the negative control and one for the positive control. Prepare a master mix to ensure consistency.
- Thaw and Prepare: Thaw all reagents completely on ice and mix them gently before use.
- Create Master Mix (for n samples + 10% extra): In a sterile 1.5 mL microcentrifuge tube, combine the following in the listed order:
- Sterile Water: Q.S. to final volume
- 10X PCR Buffer: 1X final concentration (e.g., 5 µL per 50 µL reaction)
- dNTP Mix (10 mM each): 200 µM final (e.g., 1 µL per 50 µL reaction)
- MgCl₂ (25 mM): 1.5-2.5 mM final (e.g., 0-4 µL per 50 µL reaction; adjust if not in buffer)
- Forward Primer (20 µM): 20-50 pmol per reaction (e.g., 1 µL per 50 µL reaction)
- Reverse Primer (20 µM): 20-50 pmol per reaction (e.g., 1 µL per 50 µL reaction)
- DNA Polymerase: 0.5-2.5 units per reaction (e.g., 0.5 µL per 50 µL reaction)
- Aliquot Master Mix: Mix the master mix thoroughly by pipetting up and down. Aliquot the appropriate volume into individual PCR tubes.
- Add Templates:
- Sample Tubes: Add the calculated volume of sample DNA template.
- Negative Control Tube: Add PCR-grade water in place of template.
- Positive Control Tube: Add the known, working positive control template.
- Run PCR: Place tubes in a thermal cycler and run the appropriate program, which typically includes an initial denaturation/hot-start activation, followed by 25-40 cycles of denaturation, annealing, and extension, with a final extension.
- Analyze Results: Analyze PCR products by agarose gel electrophoresis. Interpret the results based on the logic outlined in the decision tree above.
Protocol: Using an Internal Control to Detect Inhibition
This protocol describes how to incorporate an exogenous heterologous internal control (IC) into a PCR to check for inhibition [85].
Materials and Reagents:
- All standard PCR reagents (as in Protocol 4.1)
- Internal Control DNA template (a known sequence not found in your samples)
- Internal Control-specific forward and reverse primers
- Alternatively, a commercial internal control kit can be used.
Procedure:
- Design and Validation: The internal control should be designed to generate an amplicon of a different size than the target amplicon so they can be distinguished by gel electrophoresis. The primer sets for the target and IC must be validated to ensure they do not interfere with each other.
- Spike the Sample: During the reaction setup, spike a defined, low amount of the IC DNA template into every sample reaction, including the positive control reaction. The negative control (NTC) should also be spiked with the IC to ensure the IC reagents are not contaminated.
- Prepare Master Mix: Create a master mix that contains all standard PCR components plus the primers for both your target and the internal control.
- Run and Analyze: Perform PCR and analyze the products. The presence of the IC band confirms that the reaction was not inhibited. The absence of the IC band (while the positive control with IC works) indicates the sample contains inhibitors.
The Scientist's Toolkit: Research Reagent Solutions
The following table details key reagents and their roles in establishing robust PCR controls and troubleshooting non-specific amplification.
| Reagent/Technique | Function in Control Strategies & Troubleshooting |
|---|---|
| Hot-Start DNA Polymerase | Enzyme modified to be inactive at room temperature. Critical for specificity: prevents non-specific priming and primer-dimer formation during reaction setup, a common source of false positives and high background [36] [3]. |
| PCR-Grade Water | Ultrapure, nuclease-free water. Essential for negative controls to ensure no ambient DNA/RNA causes false positives. Used to compensate for volume when no template is added [84]. |
| Known Positive Template | A well-characterized DNA sample that amplifies with your primers. Serves as the core component of the positive control to verify the entire PCR process is functional [85] [84]. |
| Internal Control Template | A non-target DNA sequence (exogenous or endogenous) spiked into or naturally present in the sample. Used in a duplex reaction to distinguish true negatives from PCR inhibition [85]. |
| MgCl₂/MgSO₄ Solution | Cofactor for DNA polymerase. Its concentration significantly impacts specificity and yield. Titration is a key troubleshooting step for both low yield and non-specific bands [3] [86]. |
| PCR Additives (e.g., DMSO, Betaine) | Co-solvents that help denature complex DNA structures. Aid in amplifying GC-rich templates and can improve specificity by reducing secondary structures that cause mispriming [36] [3]. |
| Touchdown PCR | A cycling strategy where the annealing temperature starts high and decreases in later cycles. Promotes specificity by favoring accumulation of the desired product when conditions are most stringent [36]. |
Advanced Strategy: Integrating Controls into a Comprehensive Workflow
For complex problems like persistent non-specific amplification, combining multiple control strategies with advanced techniques is often necessary. The following workflow integrates the controls and techniques discussed into a cohesive troubleshooting plan.
Comparative Analysis of Polymerase Enzymes and Master Mixes
Non-specific amplification is a pervasive challenge in polymerase chain reaction (PCR) that compromises experimental results by generating unwanted DNA products alongside the target amplicon. These spurious results manifest as multiple bands, smears on agarose gels, or primer-dimers, compliciting data interpretation and reducing assay sensitivity [13] [17]. For researchers and drug development professionals, this issue can delay critical findings, invalidate experimental results, and increase costs. Non-specific amplification occurs when primers bind to unintended regions of the template DNA or to each other, resulting in the amplification of incorrect products [17]. This technical brief provides a comprehensive troubleshooting framework and comparative analysis of enzymatic solutions to address non-specific amplification, enabling researchers to achieve precise and reliable PCR outcomes.
Troubleshooting Guide: Addressing Non-Specific Amplification
Common Problems and Solutions
Question: What are the primary causes of non-specific amplification in PCR, and how can I resolve them?
Non-specific amplification typically results from suboptimal reaction conditions, problematic primer design, or inappropriate enzyme selection. The table below summarizes the common causes and evidence-based solutions.
Table 1: Troubleshooting Guide for Non-Specific Amplification
| Problem Manifestation | Root Causes | Recommended Solutions | Supporting Experimental Protocol |
|---|---|---|---|
| Multiple bands or smeared products on agarose gel [17] | - Annealing temperature too low [3]- Excess Mg²⁺ concentration [3]- Primer concentration too high [3]- Non-hot-start DNA polymerase [14] | - Increase annealing temperature in 1-2°C increments [3]- Optimize Mg²⁺ concentration (0.5-5.0 mM range) [13] [23]- Reduce primer concentration (0.1-1 μM optimal) [23]- Switch to hot-start DNA polymerase [14] | Use a gradient thermal cycler to test annealing temperatures ±5°C from calculated Tm. Perform Mg²⁺ titration in 0.5 mM increments [13]. |
| Primer-dimer formation [17] | - Complementary 3' ends on primers [13]- High primer concentration [17]- Long annealing times [17]- Low annealing temperatures [17] | - Redesign primers with non-complementary 3' ends [13]- Optimize primer concentration [3]- Shorten annealing time [3]- Increase annealing temperature [17] | Check primer specificity using NCBI Primer-BLAST. Test primer pairs for complementarity with bioinformatics tools [13]. |
| Non-specific amplification with high-fidelity enzymes | - Enzyme activity at room temperature during setup [14]- Insufficient initial denaturation [3] | - Use hot-start polymerase formats [14]- Set up reactions on ice [3]- Increase initial denaturation temperature/time (98°C for 30-60s) [36] | Physically separate template and polymerase until final reaction temperature is reached [87]. |
| Persistent non-specificity with optimized conditions | - Complex template (GC-rich, secondary structures) [3]- Contaminating DNA [20] | - Use PCR additives (DMSO, BSA, betaine) [13] [23]- Change to highly processive polymerase [3]- Implement separate pre- and post-PCR areas [17] | Add DMSO (1-10%), formamide (1.25-10%), or BSA (10-100 μg/mL) to reaction mix [13] [23]. |
Advanced Optimization Strategies
Question: After addressing basic parameters, what advanced strategies can further enhance specificity?
When standard troubleshooting fails, these proven methodologies can overcome persistent non-specific amplification:
Touchdown PCR: This method begins with an annealing temperature 5-10°C above the primer's calculated Tm to ensure only perfect primer-template matches occur initially. The temperature is gradually decreased by 1°C per cycle until it reaches the optimal annealing temperature. This approach preferentially enriches the specific target early in the amplification process [36].
Nested PCR: Employ two sequential amplification rounds. The first uses "outer" primers targeting flanking regions, while the second uses "nested" primers binding within the first product. This double selection makes it statistically unlikely for non-specific products from the first round to be amplified in the second, dramatically increasing specificity [36].
Hot-Start PCR: This technique uses polymerases rendered inactive at room temperature through antibodies, aptamers, or chemical modifications. Inhibition is reversed during the initial denaturation step, preventing enzymatic activity during reaction setup that can lead to primer-dimer formation and mispriming [14] [36].
Diagram: Relationship between causes and solutions for non-specific amplification
Comparative Analysis of Polymerase Enzymes and Master Mixes
Polymerase Enzyme Characteristics
Question: How do different DNA polymerase enzymes influence non-specific amplification, and which should I select for my application?
DNA polymerases vary significantly in key characteristics that directly impact specificity. The table below provides a comparative analysis of enzymes relevant to solving non-specific amplification.
Table 2: Comparative Analysis of DNA Polymerase Enzymes
| Polymerase Type | Fidelity (Error Rate) | Processivity | Thermostability | Hot-Start Method | Best Applications for Specificity |
|---|---|---|---|---|---|
| Standard Taq | Low (10⁻⁴-10⁻⁵) [23] | Low [36] | Moderate (up to 95°C) | Not available | Routine PCR with simple templates; not recommended for problematic targets [23] |
| Hot-Start Taq | Low (10⁻⁴-10⁻⁵) | Low | Moderate | Antibody, aptamer, or chemical modification [14] | High-throughput setups; routine PCR with risk of primer-dimer formation [14] [36] |
| Pfu & Other Proofreading Enzymes | High (10⁻⁶-10⁻⁷) [23] | Moderate | High (up to 98°C) [23] | Available in specialized formats | Cloning, sequencing, mutagenesis; long amplicons [3] [23] |
| High-Processivity Engineered Enzymes | Variable (Low to High) | High [36] | High (up to 98°C) | Typically antibody-based | GC-rich templates; multiplex PCR; direct PCR from crude samples [3] [36] |
| Polymerase Blends | Variable | High | High | Available in specialized formats | Long-range PCR; difficult templates requiring balance of fidelity and processivity [36] |
Master Mix Selection Criteria
Question: What factors should I consider when selecting a PCR master mix to minimize non-specific amplification?
PCR master mixes provide pre-mixed, optimized solutions containing buffer, dNTPs, Mg²⁺, and polymerase. For critical applications, consider these factors:
- Hot-Start Mechanism: Select mixes with robust hot-start inhibition (antibody or aptamer-based) to prevent pre-amplification activity [14] [36].
- Buffer Formulation: Choose specialized buffers for challenging templates (GC-rich, high secondary structure). Some include compatibility enhancers for inhibitors common in direct PCR [88] [36].
- Processivity and Tolerance: For direct PCR from crude samples (cells, tissue), select master mixes containing high-processivity enzymes with inhibitor tolerance [36].
- Manufacturing Quality: For clinical or regulated environments, choose vendors with cGMP manufacturing, strict quality control, and lot-to-lot consistency [88].
- Additive Compatibility: Ensure the master mix is compatible with required additives like DMSO, betaine, or BSA if dealing with difficult templates [13] [23].
The Scientist's Toolkit: Essential Research Reagent Solutions
Table 3: Key Reagents for Troubleshooting Non-Specific Amplification
| Reagent / Solution | Function / Purpose | Optimal Concentration Range | Mechanism in Specificity Enhancement |
|---|---|---|---|
| Hot-Start DNA Polymerase | Inhibits polymerase activity during reaction setup [14] | 0.5-2.5 U/50 μL reaction [13] | Prevents primer-dimer formation and mispriming at low temperatures [14] |
| Magnesium Chloride (MgCl₂) | Essential cofactor for DNA polymerase [13] | 0.5-5.0 mM [13] [23] | Affects primer-template binding stringency; optimization crucial for specificity [3] |
| DMSO (Dimethyl Sulfoxide) | Additive for difficult templates [23] | 1-10% [13] [23] | Disrupts secondary structures in GC-rich DNA, facilitating polymerase progression [36] |
| BSA (Bovine Serum Albumin) | Additive for inhibitor-prone samples [23] | 10-100 μg/mL [13] | Binds to inhibitors commonly found in biological samples, protecting polymerase activity [23] |
| Betaine | Additive for GC-rich templates [13] | 0.5 M to 2.5 M [13] | Equalizes DNA melting temperatures, reducing secondary structure formation [13] |
| dNTPs | Nucleotide building blocks [13] | 20-200 μM each [23] | Balanced concentrations (equimolar) prevent misincorporation and reduce error rates [3] |
| PCR-Grade Water | Solvent for reactions | N/A | Ensures no nucleases, ions, or contaminants interfere with reaction stringency [3] |
Experimental Protocols for Specificity Enhancement
Protocol 1: Systematic Optimization for Problematic Targets
This protocol provides a methodological framework for addressing persistent non-specific amplification.
Objective: To establish optimal conditions for specific amplification of challenging targets. Materials: Template DNA, primers, hot-start DNA polymerase, 10X PCR buffer, MgCl₂ (25 mM), dNTP mix (10 mM), PCR-grade water, additives (DMSO, BSA, betaine).
Procedure:
- Primer Validation: Verify primer design using NCBI Primer-BLAST. Ensure length (15-30 nt), GC content (40-60%), and Tm (52-65°C with ≤5°C difference between primers) meet optimal criteria [13].
- Initial Hot-Start Setup: Prepare master mix on ice containing: 1X PCR buffer, 200 μM dNTPs, 1.5 mM MgCl₂, 0.5 μM each primer, 1.25 U hot-start polymerase, and template DNA (10⁴-10⁷ molecules) in 50 μL reaction [13].
- Annealing Temperature Gradient: Perform PCR with annealing temperature gradient spanning ±5°C from calculated primer Tm [3].
- Mg²⁺ Titration: If non-specificity persists, test MgCl₂ concentrations from 1.0-4.0 mM in 0.5 mM increments [13].
- Additive Screening: Include DMSO (3%, 5%, 7%), formamide (1.25-5%), or betaine (1.0-2.0 M) in separate reactions [13] [23].
- Thermal Cycling Parameters:
Protocol 2: Touchdown PCR for Enhanced Specificity
Objective: To preferentially amplify specific targets during initial PCR cycles. Materials: As in Protocol 1, with gradient thermal cycler.
Procedure:
- Reaction Setup: Prepare master mix as in Protocol 1, using hot-start polymerase.
- Thermal Cycling Parameters:
- Initial denaturation: 95°C for 2 min
- 10 cycles of: Denaturation 95°C for 30s, Annealing at 65-70°C (decrease 0.5-1°C each cycle) for 30s, Extension 72°C for 1 min/kb
- 25 cycles of: Denaturation 95°C for 30s, Annealing at 60°C (or optimal temperature) for 30s, Extension 72°C for 1 min/kb
- Final extension: 72°C for 5 min [36]
- Analysis: Evaluate products on agarose gel. Touchdown PCR typically yields a single, dominant band of expected size.
Diagram: Touchdown PCR experimental workflow
Frequently Asked Questions (FAQs)
Q1: Why do I still get non-specific bands even after using hot-start polymerase? Hot-start polymerase prevents mispriming during reaction setup but doesn't address mispriming during cycling. Check your annealing temperature using a gradient PCR, optimize Mg²⁺ concentration, and verify primer design for specificity and absence of secondary structures [3] [14].
Q2: How can I quickly determine if my non-specific amplification is due to primer issues? Test your primers using an annealing temperature gradient. If the pattern of non-specific bands changes dramatically with temperature, primer annealing is likely the issue. If the pattern remains consistent, consider template degradation or contamination [3].
Q3: What is the single most effective change to reduce primer-dimer formation? Implementing robust hot-start PCR is highly effective. Additionally, ensure primer concentrations are optimized (typically 0.1-1 μM) and redesign primers if 3' ends show significant complementarity [13] [14].
Q4: When should I consider changing polymerases rather than optimizing conditions? Consider switching to a high-processivity or specialized polymerase when: (1) amplifying GC-rich templates (>65% GC), (2) performing direct PCR from crude samples, (3) requiring amplification of long targets (>5 kb), or (4) when multiplexing multiple primer pairs [3] [36].
Q5: How do PCR additives like DMSO and betaine actually work? DMSO disrupts base pairing by interfering with hydrogen bonding and DNA stability, effectively lowering the melting temperature of DNA. Betaine (a zwitterion) reduces the dependence of DNA melting temperature on base composition, helping to uniformly melt GC-rich regions that cause polymerase stalling [13] [23].
Q6: Are there instances where non-specific amplification indicates a need for new primers? Yes, particularly when: (1) previous optimization attempts have failed, (2) smearing appears in previously clean reactions (indicating accumulated contaminants specific to your primers), or (3) bioinformatic analysis reveals significant off-target binding sites in your template [17].
Deep Learning Approaches for Predicting Amplification Efficiency
FAQ: Core Concepts and Workflows
What is the main advantage of using deep learning for predicting PCR amplification efficiency?
Deep learning models, particularly 1D Convolutional Neural Networks (1D-CNNs), can predict sequence-specific amplification efficiencies based on DNA sequence information alone. This allows for the in silico design of inherently homogeneous amplicon libraries before any wet-lab experiment is conducted. These models achieve high predictive performance, with an AUROC of 0.88 and an AUPRC of 0.44, enabling the identification of sequences prone to poor amplification [89].
How can deep learning help understand the root causes of amplification bias?
Deep learning models can function as discovery tools. By employing interpretation frameworks like CluMo (Motif Discovery via Attribution and Clustering), researchers can identify specific sequence motifs adjacent to adapter priming sites that are closely associated with poor amplification. This approach has helped challenge long-standing PCR design assumptions by elucidating adapter-mediated self-priming as a major mechanism causing low amplification efficiency [89].
What types of deep learning models are suitable for PCR-related time-series data?
For fluorescence data obtained cycle-by-cycle during qPCR, models capable of processing sequential data are ideal. These include [90] [91]:
- Long Short-Term Memory (LSTM)
- Bidirectional LSTM (Bi-LSTM)
- Gated Recurrent Unit (GRU)
- Recurrent Neural Network (RNN)
- Transformer
Studies on using these models to shorten RT-PCR diagnostic time for COVID-19 have shown that Bi-LSTM and GRU can reduce the required cycles by 25-50% without significantly compromising diagnostic performance [91].
What is the experimental workflow for generating data to train an amplification efficiency model?
The following diagram illustrates the key steps for creating a reliably annotated dataset to train a deep learning model for predicting amplification efficiency.
Workflow for Training Data Generation: The process involves creating a pool of synthetic DNA sequences with common primer binding sites, followed by serial PCR amplification (e.g., 90 cycles split into several runs). Samples are sequenced at different cycle points to track changes in each sequence's coverage over time. This data is then fitted to an exponential amplification model to calculate a sequence-specific amplification efficiency (εᵢ) for each template. Finally, sequences are annotated with their calculated efficiency, creating the ground-truth dataset for model training [89].
FAQ: Troubleshooting and Experimental Guidance
My model performs well on training data but generalizes poorly. What could be wrong?
Poor generalization often stems from the training dataset. Key considerations are [89]:
- Lack of Sequence Diversity: Ensure your training set includes a wide variety of sequences (e.g., different GC content, lengths, and motif structures). Models trained on biologically enriched, low-complexity regions may not generalize well to synthetic DNA pools, and vice versa.
- Inaccurate Ground-Truth Labels: The accuracy of your model is capped by the reliability of the amplification efficiency values (εᵢ) used for training. Verify that the PCR and sequencing protocol used to generate this data is robust and that efficiency calculations are reproducible across technical replicates.
- Sequence Length and Context: The model's input, typically one-hot encoded sequences, must be standardized in length and must include the critical regions, especially the adapter and primer-binding sites, as motifs here are highly impactful [89].
How can I identify sequence motifs causing poor amplification from my trained model?
You can use interpretation frameworks like CluMo to move from a "black-box" prediction to identifiable motifs. The process involves analyzing the model's attributions to find sequence patterns that the model associates with low efficiency. The following diagram outlines the logical steps for this motif discovery process.
Motif Discovery Logic: After training a model, you input sequences and use methods like DeepLIFT or SHAP to calculate attribution scores for each nucleotide, quantifying its influence on the prediction. Regions with high attribution scores are then clustered across multiple sequences to find conserved patterns. These candidate motifs are finally validated experimentally by testing sequences with and without the motif to confirm their effect on amplification efficiency [89].
A small subset of my sequences consistently shows very poor amplification. What is a likely cause?
Deep learning models have helped identify that adapter-mediated self-priming is a major cause of very poor amplification efficiency. Specific motifs near the primer-binding site can cause the adapter to act as a primer on the same or another molecule of the same sequence, leading to non-productive amplification and severe under-representation. This is often reproducible and independent of pool diversity [89].
The table below summarizes key performance metrics from recent studies applying deep learning to predict PCR efficiency and outcomes.
Table 1: Performance Metrics of Deep Learning Models in PCR Applications
| Application | Model Type | Key Performance Metric | Reported Value | Impact |
|---|---|---|---|---|
| Predicting Sequence-Specific Efficiency [89] | 1D-CNN | AUROC | 0.88 | Enables design of homogeneous amplicon libraries |
| Predicting Sequence-Specific Efficiency [89] | 1D-CNN | AUPRC | 0.44 | Identifies poorly amplifying sequences |
| Early COVID-19 RT-PCR Diagnosis [90] | LSTM | Sensitivity (24th model) | 90.00% | Allows diagnosis with fewer cycles |
| Early COVID-19 RT-PCR Diagnosis [90] | LSTM | Specificity (24th model) | 92.54% | Maintains accuracy with reduced time |
| Early COVID-19 RT-PCR Diagnosis [91] | Bi-LSTM, GRU | Diagnostic Performance | Maintained with 50% fewer cycles | Cuts standard 40-cycle time in half |
The Scientist's Toolkit: Research Reagent Solutions
Table 2: Essential Reagents and Materials for Deep Learning-Guided PCR Research
| Item | Function/Description | Relevance to Workflow |
|---|---|---|
| Synthetic Oligonucleotide Pools | Defined, random-sequence DNA libraries for controlled experiments. | Provides high-quality, reliable data for training models, free from biases in biological samples [89]. |
| High-Fidelity Hot-Start Polymerase | DNA polymerase with minimal error rate and reduced low-temperature activity. | Critical for generating clean amplification data with minimal non-specific products and artifacts during training data generation [92] [17] [93]. |
| Deep Learning Model (1D-CNN) | A model that learns from DNA sequences to predict amplification efficiency. | The core tool for in silico prediction and design, identifying problematic sequences before synthesis [89]. |
| Model Interpretation Framework (e.g., CluMo, SHAP) | Software to identify which sequence features drive model predictions. | Transforms a "black-box" model into a tool for biological discovery, revealing inhibitory motifs like self-priming sequences [89]. |
| Unique Molecular Identifiers (UMIs) | Random barcodes added to individual template molecules before amplification. | Can be used in validation studies to precisely track amplification efficiency and account for initial synthesis bias [89]. |
Post-Amplification Sterilization Methods including UNG Treatment
In the context of a broader thesis on solving non-specific amplification in PCR research, controlling carryover contamination is a fundamental prerequisite. The exquisite sensitivity of amplification techniques makes them vulnerable to false-positive results caused by the intrusion of amplification products (amplicons) from previous reactions [6]. A single PCR can generate as many as 10^9 copies of a target sequence, and even a minute aerosol can contain up to 10^6 amplicons [6]. Uncontrolled, this leads to the accumulation of aerosolized products in laboratory reagents, equipment, and ventilation systems, compromising experimental integrity [6]. Post-amplification sterilization methods, therefore, are not merely best practices but essential components of a robust PCR workflow, with Uracil-N-Glycosylase (UNG) treatment being the most widely adopted and effective technique.
FAQs on Contamination Control and UNG Treatment
What is the principle behind UNG sterilization in PCR?
The UNG method is a pre-emptive sterilization technique that prevents the re-amplification of carryover contamination. Its operation is based on a simple but clever biochemical substitution and removal process, as shown in the workflow below:
The principle relies on two key steps [6] [94]:
- dUTP Incorporation: In all PCR assays, deoxythymidine triphosphate (dTTP) is partially or completely replaced with deoxyuridine triphosphate (dUTP). The DNA polymerase incorporates dUTP as if it were dTTP, resulting in new amplification products that are functionally identical but contain uracil bases instead of thymine in their DNA backbone.
- Sterilization of Contaminants: Before the start of every subsequent PCR, the enzyme Uracil-N-Glycosylase (UNG) is added to the reaction mix. If any uracil-containing amplicons from previous runs have contaminated the mix, UNG recognizes the uracil bases and catalyzes the cleavage of the N-glycosylic bond between the uracil base and the sugar-phosphate backbone. This reaction creates an "abasic" or apyrimidinic site. When the thermal cycling begins, the high temperature (95°C) and alkaline pH cause the DNA strand to break at these abasic sites, rendering the contaminating DNA incapable of being amplified.
Why am I observing degradation of my specific PCR product when using UNG?
Observing degradation of the desired specific product indicates that the UNG enzyme is remaining active during later stages of the PCR or analysis, rather than being fully inactivated. The primary causes and solutions are detailed below.
Possible Causes and Recommended Solutions:
| Problem | Cause | Solution |
|---|---|---|
| Residual UNG Activity | Incomplete heat inactivation during initial PCR cycles can lead to degradation of newly synthesized uracil-containing amplicons [95]. | Ensure the initial denaturation step is at 95°C for sufficient time (e.g., 2-5 minutes) to fully inactivate UNG [6]. |
| Post-PCR Handling | UNG can be reactivated after PCR if products are stored at lower temperatures, leading to slow degradation over time [95]. | Store PCR products at -20°C or, for short-term, at 72°C to prevent enzyme reactivation. Avoid prolonged storage at 4°C or room temperature [6] [95]. |
| Interference with Analysis | Residual UNG activity can cause smearing or band degradation, particularly in high-resolution polyacrylamide gels [95]. | For gel analysis, use agarose gels instead of polyacrylamide, as the degradation effect is less pronounced [95]. |
My no-template control (NTC) is positive even with UNG treatment. What now?
A positive NTC (amplification in the absence of added template) while using UNG signifies that contamination is present, but the UNG system has failed to eliminate it. The troubleshooting table below addresses this scenario.
Troubleshooting a Positive No-Template Control (NTC) with UNG:
| Observation | Possible Cause | Solution |
|---|---|---|
| Consistent Ct in all NTCs | Contamination of a core reagent (e.g., water, master mix, primers) with uracil-containing DNA [94]. | Prepare fresh aliquots of all reagents. Use a new batch of master mix or water. |
| Consistent Ct in all NTCs | Contamination with non-uracil-containing DNA (e.g., plasmid DNA, genomic DNA). UNG only destroys uracil-containing DNA [94]. | Scrutinize sample preparation and template handling areas. Use mechanical barriers and bleach decontamination [6]. |
| Variable Ct across NTCs | Random aerosol contamination during reaction setup [94]. | Improve laboratory technique: use aerosol-resistant filter tips, dedicate pre-and post-PCR areas, and decontaminate surfaces with 10% bleach [6] [94]. |
| Low-level amplification | Very high levels of contaminating amplicon that exceed the capacity of the UNG in the reaction [96]. | Perform a thorough laboratory clean-up, including equipment and ventilation systems, to reduce the overall contaminant load [6]. |
How can I improve the efficiency of UNG-mediated carryover prevention?
For challenging applications or in environments with a high risk of contamination, the basic UNG protocol can be enhanced. A patent by [96] describes improved methods involving polyamines or enzymes with AP lyase activity.
Quantitative Data on UNG Enhancement with Spermine:
The table below, based on experimental data from [96], shows how adding the polyamine spermine can drastically improve contamination control. The data represents the maximum number of contaminating amplicon copies that could be added to a reaction without resulting in a false positive.
| [UNG] in Reaction | Max Contaminant Copies Sterilized (Without Spermine) | Max Contaminant Copies Sterilized (With 100 µM Spermine) | Improvement Factor |
|---|---|---|---|
| 0.001 U/rxn | 1,000 | >1,000,000 | >1,000x |
| 0.01 U/rxn | 10,000 | >1,000,000 | >100x |
Enhanced Experimental Protocol: This protocol integrates the use of polyamines for improved sterilization [96].
- Reaction Assembly: Prepare the PCR master mix containing all standard components: primers, polymerase, dNTPs (with dUTP substituting for dTTP), and reaction buffer.
- Additive Inclusion: Supplement the master mix with spermine or spermidine at a final concentration between 0.01 mM and 1 mM.
- UNG Addition: Add UNG enzyme to the mix. The concentration may require optimization but is often in the range of 0.01 to 0.1 units per reaction.
- Sterilization Incubation: Incubate the assembled reaction (before thermal cycling) at 50°C for 5 minutes. This allows UNG to cleave uracils in any contaminants.
- Thermal Cycling: Proceed with standard PCR cycling. The initial denaturation step at 94-95°C will simultaneously inactivate UNG, fragment the abasic-site-containing contaminants, and initiate the new amplification.
Complementary Sterilization and Contamination Control Methods
While UNG is highly effective, a robust contamination control strategy employs multiple layers of defense. The following diagram illustrates the multi-barrier approach required for effective contamination control, integrating UNG treatment with stringent laboratory practices.
Mechanical and Chemical Barriers
- Physical Laboratory Layout: Maintain strict unidirectional workflow. Physically separate the laboratory into dedicated areas for reagent preparation, sample preparation, amplification, and product analysis [6] [94]. Traffic and materials must never flow from post-amplification areas back to pre-amplification areas.
- Decontamination of Surfaces: Regularly clean work surfaces, equipment, and instruments with a 10% sodium hypochlorite (bleach) solution, followed by ethanol to remove the bleach [6] [94]. Bleach causes oxidative damage to DNA, rendering it unamplifiable.
- Good Laboratory Practice: Use aerosol-resistant filter pipette tips and wear gloves. Change gloves frequently and decontaminate them with ethanol or bleach if moving between areas is unavoidable. Aliquot all reagents to avoid repeated freeze-thaw cycles and cross-contamination of stock solutions [94].
Alternative Sterilization Methods
- Psoralen/Isopsoralen Treatment: This is a post-amplification sterilization method. Furocoumarin compounds like psoralen are added to the completed PCR reaction. When exposed to UV light (300-400 nm), psoralen intercalates into double-stranded DNA and forms covalent cross-links (cyclobutane adducts) between pyrimidine bases. This cross-linking blocks the DNA polymerase during subsequent amplification attempts, preventing re-amplification of the products [6].
- UV Irradiation: Exposing the assembled reaction mix (without template) to UV light (254/300 nm) for 5-20 minutes can sterilize it by inducing thymidine dimers and other covalent modifications in any contaminating DNA. However, its efficacy is suboptimal for short (<300 nucleotides) or GC-rich templates and can damage primers and polymerase if overused [6].
The Scientist's Toolkit: Key Research Reagents
| Reagent | Function in Sterilization | Key Considerations |
|---|---|---|
| Uracil-N-Glycosylase (UNG) | Core enzyme that cleaves uracil bases from DNA backbone, creating abasic sites in contaminants [6] [94]. | Must be completely inactivated by heat during PCR; activity is reduced with GC-rich targets. |
| dUTP | Uracil-containing nucleotide that is incorporated into amplicons during PCR, making them susceptible to future UNG cleavage [6]. | Often used in a mixture with dTTP (e.g., 0.5 mM dUTP + 0.05 mM TTP) to maintain amplification efficiency [96]. |
| Polyamines (Spermine, Spermidine) | Additives that enhance the degradation of DNA strands containing UNG-induced abasic sites during the heating step, dramatically improving contamination control [96]. | Typical working concentration is 0.01-1 mM. Requires optimization for specific assays. |
| Psoralen / Isopsoralen | Post-amplification reagent that cross-links amplicons upon UV exposure, preventing their denaturation and replication in future runs [6]. | Requires a separate UV irradiation step after amplification is complete. |
| Sodium Hypochlorite (Bleach) | Chemical decontaminant that oxidizes and fragments nucleic acids on laboratory surfaces and equipment [6] [94]. | Use at 10% concentration; requires a fresh preparation as it degrades over time. |
Conclusion
Solving non-specific amplification in PCR requires a multifaceted approach that integrates foundational understanding, methodological precision, systematic troubleshooting, and rigorous validation. The key takeaways emphasize that primer design and annealing temperature optimization remain the most critical factors for specificity, while techniques like hot-start PCR and additives provide powerful enhancement. Emerging technologies, particularly deep learning models that predict sequence-specific amplification efficiency, represent the future of PCR optimization by enabling pre-experiment design of highly specific assays. For biomedical and clinical research, these advancements promise more reliable diagnostic assays, improved detection sensitivity for low-abundance targets, and greater reproducibility in genetic analysis. As PCR continues to evolve as a cornerstone technology in drug development and molecular diagnostics, mastering these specificity-enhancing strategies will be essential for advancing personalized medicine, biomarker discovery, and precision oncology applications.
References
- 1. PCR Troubleshooting 101: How to Address Non-Specific ... [https://geneticeducation.co.in/pcr-troubleshooting-101-how-to-address-non-specific-amplification/]
- 2. Troubleshooting Non-Specific Amplification [https://bento.bio/resources/bento-lab-advice/troubleshooting-non-specific-amplification-with-bento-lab/]
- 3. PCR Troubleshooting Guide | Thermo Fisher Scientific - US [https://www.thermofisher.com/us/en/home/life-science/cloning/cloning-learning-center/invitrogen-school-of-molecular-biology/pcr-education/pcr-reagents-enzymes/pcr-troubleshooting.html]
- 4. Four Tips for Optimizing Your PCR Amplification [https://www.genscript.com/synthetic-biology-news/four-tips-for-optimizing-your-pcr-amplification.html]
- 5. Free Guide: Top 5 PCR Optimization Tips - Yeasen [https://www.yeasenbio.com/blogs/molecular-biology/free-guide-top-5-pcr-optimization-tips]
- 6. Preventing PCR Amplification Carryover Contamination in ... [https://www.annclinlabsci.org/content/34/4/389.long]
- 7. Polymerase Chain Reaction (PCR) - StatPearls - NCBI - NIH [https://www.ncbi.nlm.nih.gov/books/NBK589663/]
- 8. Troubleshooting Common Electrophoresis Problems and ... [https://www.labx.com/resources/troubleshooting-common-electrophoresis-problems-and-artifacts/5539]
- 9. Interpreting Electrophoresis Gels [https://bento.bio/resources/bento-lab-advice/interpreting-electrophoresis-gels-with-bento-lab/]
- 10. Nucleic Acid Gel Electrophoresis Troubleshooting [https://www.thermofisher.com/us/en/home/life-science/cloning/cloning-learning-center/invitrogen-school-of-molecular-biology/na-electrophoresis-education/na-electrophoresis-troubleshooting.html]
- 11. Protocols Agarose Gel Electrophoresis [https://www.addgene.org/protocols/gel-electrophoresis/]
- 12. Troubleshooting primer dimer in PCR [https://www.minipcr.com/primer-dimer-pcr/]
- 13. Polymerase Chain Reaction: Basic Protocol Plus ... [https://pmc.ncbi.nlm.nih.gov/articles/PMC4846334/]
- 14. Optimizing Your PCR To Avoid Non-specific Amplification [https://aptamergroup.com/optimizing-your-pcr-to-avoid-non-specific-amplification/]
- 15. Why do I get smeared PCR products? [https://www.qiagen.com/us/resources/faq/87]
- 16. Why do I get an unexpected band or multiple ... [https://www.aatbio.com/resources/faq-frequently-asked-questions/Why-do-I-get-an-unexpected-band-or-multiple-bands-for-my-PCR-result]
- 17. PCR Troubleshooting: Common Problems and Solutions [https://www.mybiosource.com/learn/pcr-troubleshooting-common-problems-and-solutions/]
- 18. PCR Troubleshooting Guide [https://www.neb.com/en-us/tools-and-resources/troubleshooting-guides/pcr-troubleshooting-guide?srsltid=AfmBOooJSeZvIYnSSaYou930UzusDqdgmEVijmc1ceXyPO1i6lCZgjh7]
- 19. Polymerase Chain Reaction (PCR) Global Market Report 2025 [http://tbrctest.tbrc.info/report/polymerase-chain-reaction-pcr-global-market-report]
- 20. PCR Basic Troubleshooting Guide [https://www.creative-biogene.com/blog/pcr-basic-troubleshooting-guide]
- 21. PCR Troubleshooting Guide & Solutions [https://www.bosterbio.com/protocol-and-troubleshooting/pcr-troubleshooting?srsltid=AfmBOooqHIyf9DIgpCwJEOxTNTdzoAm_z-eqGXPZQn1D35O3jxp2lNyN]
- 22. of Amplification products in quantitative nonspecific ... polymerase [https://pmc.ncbi.nlm.nih.gov/articles/PMC5727009/]
- 23. Optimizing PCR : Proven Tips and Troubleshooting Tricks | The Scientist [https://www.the-scientist.com/optimizing-pcr-proven-tips-and-troubleshooting-tricks-71660]
- 24. Digital PCR outperforms quantitative real-time PCR for the ... [https://pmc.ncbi.nlm.nih.gov/articles/PMC12288185/]
- 25. Optimization: PCR Affecting Factors and Efficien Reaction Specificity [https://www.mybiosource.com/learn/pcr-optimization-factors-affecting-reaction-specificity-and-efficien/]
- 26. PCR Troubleshooting Guide [https://www.neb.com/en-us/tools-and-resources/troubleshooting-guides/pcr-troubleshooting-guide?srsltid=AfmBOor1EzZ6d5-V6TQoThjZWdZ7CtVoTc04G0F9lKlMhl2f0j7ieG1H]
- 27. Troubleshooting your PCR [https://www.takarabio.com/learning-centers/pcr/faq/troubleshooting?srsltid=AfmBOopjKaefKP6Dh5MFBFVi9ooUg4OONmtBdBlSUlh2lGcoe0mmKgQP]
- 28. PCR Troubleshooting Guide [https://www.genscript.com/pcr-troubleshooting-guide.html]
- 29. DNA Source Selection for Downstream Applications Based ... [https://pmc.ncbi.nlm.nih.gov/articles/PMC4991598/]
- 30. Hot start PCR [https://en.wikipedia.org/wiki/Hot_start_PCR]
- 31. Hot Start PCR - an overview [https://www.sciencedirect.com/topics/biochemistry-genetics-and-molecular-biology/hot-start-pcr]
- 32. How is Hot-Start Technology Beneficial For Your PCR [https://www.thermofisher.com/us/en/home/brands/thermo-scientific/molecular-biology/molecular-biology-learning-center/molecular-biology-resource-library/spotlight-articles/hot-start-technology-benefits-PCR.html]
- 33. Hot Start PCR with heat-activatable primers [https://pmc.ncbi.nlm.nih.gov/articles/PMC2582603/]
- 34. PCR Troubleshooting Guide [https://www.neb.com/en-us/tools-and-resources/troubleshooting-guides/pcr-troubleshooting-guide?srsltid=AfmBOoo5pwW0OTd3-WKCIlZEOwEP-O2pOE3fKgp76PXAaZ6mcpRXLm1i]
- 35. Touchdown PCR: Easy Intro Plus 5 Expert Tips [https://bitesizebio.com/2203/touchdown-pcr-a-primer-and-some-tips/]
- 36. PCR Methods - Top Ten Strategies [https://www.thermofisher.com/us/en/home/life-science/cloning/cloning-learning-center/invitrogen-school-of-molecular-biology/pcr-education/pcr-reagents-enzymes/pcr-methods.html]
- 37. What is touchdown (TD)-PCR? [https://geneticeducation.co.in/what-is-touchdown-td-pcr/]
- 38. Touchdown PCR for increased specificity and sensitivity in ... [https://pubmed.ncbi.nlm.nih.gov/18772872/]
- 39. Optimizing PCR amplification of GC-rich nicotinic ... [https://pmc.ncbi.nlm.nih.gov/articles/PMC12145843/]
- 40. Troubleshooting your PCR [https://www.takarabio.com/learning-centers/pcr/faq/troubleshooting?srsltid=AfmBOooUjfVvwghO7kdB2tkShSY2JCdkBzxoZGN96Sa9ZQNO9XURebGG]
- 41. PCR Troubleshooting Guide [https://www.neb.com/en-us/tools-and-resources/troubleshooting-guides/pcr-troubleshooting-guide?srsltid=AfmBOoo71CRkG8L49ZNee1hw5R-yfN9Q6YGsX79L4dA3KVgIvZCppNUq]
- 42. Primer design guide - 5 tips for best PCR results [https://the-dna-universe.com/2022/09/05/primer-design-guide-the-top-5-factors-to-consider-for-optimum-performance/]
- 43. Rules and Tips for PCR & qPCR Primer Design | IDT [https://www.idtdna.com/page/support-and-education/decoded-plus/how-to-design-primers-and-probes-for-pcr-and-qpcr/]
- 44. PCR Troubleshooting Guide & Solutions [https://www.bosterbio.com/protocol-and-troubleshooting/pcr-troubleshooting?srsltid=AfmBOooYXz_TMDNl6COl1jVWfJA52QMWyR5iFa-fjJJVyiX0KdAH9s9a]
- 45. Troubleshooting your PCR [https://www.takarabio.com/learning-centers/pcr/faq/troubleshooting?srsltid=AfmBOopAP6i-stt0p_ASxNn5k7mV55FP55JGAagQhLJHWAPhE61-0ILz]
- 46. How does HotStart PCR help minimize nonspecific ... [https://www.qiagen.com/us/resources/faq/2676]
- 47. PCR Troubleshooting Guide [https://www.neb.com/en-us/tools-and-resources/troubleshooting-guides/pcr-troubleshooting-guide?srsltid=AfmBOoqVVp52AjYbT98os-USLqKVzLCgwlNweLn-hmWi-IvlubyJWgLh]
- 48. Validation of a primer optimisation matrix to improve the ... [https://pmc.ncbi.nlm.nih.gov/articles/PMC2706253/]
- 49. Bovine serum albumin further enhances the effects of organic ... [https://bmcresnotes.biomedcentral.com/articles/10.1186/1756-0500-5-257]
- 50. Evaluation of PCR-enhancing approaches to reduce ... [https://www.sciencedirect.com/science/article/abs/pii/S0048969724069250]
- 51. Troubleshooting your PCR [https://www.takarabio.com/learning-centers/pcr/faq/troubleshooting?srsltid=AfmBOop5XxJR0rYowI36urMTTOoz-r7LR-CID8H6Ol63RJZGEYDOnjvr]
- 52. Getting No Bands in your PCR Result - Tips to Help [https://www.goldbio.com/blogs/articles/troubleshooting-pcr-part-two-what-to-do-when-you-are-not-getting-bands?srsltid=AfmBOoov6813_qkOihnwIXkGIfymn1dXZLCmVQQYFPb8O45cOHkKmtXk]
- 53. PCR Troubleshooting Guide [https://www.neb.com/en-us/tools-and-resources/troubleshooting-guides/pcr-troubleshooting-guide?srsltid=AfmBOoo4aEwmbDxzIiWnmYcbv3kJku7mE71MTLF14FsSpXsszoNM5dEg]
- 54. PCR Setup—Six Critical Components to Consider [https://www.thermofisher.com/us/en/home/life-science/cloning/cloning-learning-center/invitrogen-school-of-molecular-biology/pcr-education/pcr-reagents-enzymes/pcr-component-considerations.html]
- 55. Four tips for PCR amplification of GC-rich sequences [https://www.neb.com/en-us/nebinspired-blog/four-tips-for-pcr-amplification-of-gc-rich-sequences?srsltid=AfmBOori8rNUzszsVsBqUInF2pvNW9HfZ50W6bc7jidxci54pwcSzB3W]
- 56. 5 easy tips to address problems amplifying GC-rich regions [https://bitesizebio.com/24002/problems-amplifying-gc-rich-regions-problem-solved/]
- 57. PCR procedures to amplify GC-rich DNA sequences of ... [https://pubmed.ncbi.nlm.nih.gov/33316290/]
- 58. PCR Cycling Parameters—Six Key Considerations for ... [https://www.thermofisher.com/us/en/home/life-science/cloning/cloning-learning-center/invitrogen-school-of-molecular-biology/pcr-education/pcr-reagents-enzymes/pcr-cycling-considerations.html]
- 59. Faster PCR Optimization [https://bitesizebio.com/31937/optimizing-your-pcr-faster/]
- 60. 5 Essential Tips for Successful Gradient PCR [https://www.4esci.com/5-essential-tips-for-successful-gradient-pcr.html?srsltid=AfmBOoqa77pLRk7sH0F-gQC5q7L5tQQAkpKgF_RNXWrGXAS_0I5fcYfg]
- 61. The Essential PCR Troubleshooting Checklist [https://bitesizebio.com/343/the-essential-pcr-troubleshooting-checklist/]
- 62. How to Simplify PCR Optimization Steps for Primer Annealing [https://www.thermofisher.com/us/en/home/brands/thermo-scientific/molecular-biology/molecular-biology-learning-center/molecular-biology-resource-library/spotlight-articles/pcr-annealing-optimization-universal-annealing.html]
- 63. Gradient PCR for Optimization [https://www.eppendorf.com/us-en/lab-academy/life-science/molecular-biology/gradient-pcr-for-optimization/]
- 64. PCR Troubleshooting Guide [https://www.neb.com/en-us/tools-and-resources/troubleshooting-guides/pcr-troubleshooting-guide?srsltid=AfmBOop1pF1uYkJRCF1-LrJEyIMynf-cr9ZFonHZ3udGc-wOKLZozyFn]
- 65. What Is the Role of MgCl2 in PCR Amplification Reactions? [https://www.excedr.com/resources/what-is-the-role-of-mgcl2-in-pcr]
- 66. How does magnesium concentration affect PCR? [https://www.aatbio.com/resources/faq-frequently-asked-questions/how-does-magnesium-concentration-affect-pcr]
- 67. Guidelines for PCR Optimization with Taq DNA Polymerase [https://www.neb.com/en-us/tools-and-resources/usage-guidelines/guidelines-for-pcr-optimization-with-taq-dna-polymerase?srsltid=AfmBOoqxOqoGxAj14O8Ca3_9H0HdmMlWd-qvHNJTgADhs9cw_bRjwo0f]
- 68. Optimization of PCR Conditions for Amplification of GC‐ ... [https://pmc.ncbi.nlm.nih.gov/articles/PMC6807403/]
- 69. PCR Troubleshooting Guide [https://www.neb.com/en-us/tools-and-resources/troubleshooting-guides/pcr-troubleshooting-guide?srsltid=AfmBOoqpYfSNO-EI3aBzJ_Oe3A2XBgdeLiXc-Eq8wRv7QLWZUHtMRYhJ]
- 70. Guidelines for PCR Optimization with Taq DNA Polymerase [https://www.neb.com/en-us/tools-and-resources/usage-guidelines/guidelines-for-pcr-optimization-with-taq-dna-polymerase?srsltid=AfmBOoraKry2dA1jV2DsAN_QYl5SH0wB-lsOkH3L8xp9UBaVYAH7rpxh]
- 71. Troubleshooting your PCR [https://www.takarabio.com/learning-centers/pcr/faq/troubleshooting?srsltid=AfmBOormnv3cKaDXZkThKju7iIJH_mNcfelhVhcdG_KcU8-xKsS5eman]
- 72. PCR Troubleshooting Guide [https://www.neb.com/en-us/tools-and-resources/troubleshooting-guides/pcr-troubleshooting-guide?srsltid=AfmBOopcfKBqYkrS8WIYD7RfRTOrhXSKJhq-pTXhCfWCLqkJKGRAj_0E]
- 73. New specificity and yield enhancer of polymerase chain ... [https://pmc.ncbi.nlm.nih.gov/articles/PMC102717/]
- 74. Troubleshooting your PCR [https://www.takarabio.com/learning-centers/pcr/faq/troubleshooting?srsltid=AfmBOoqPfeRG9-fgmIghitBrnK_SgkVOZkhuV-qyG9p6YhEGVmowAmiW]
- 75. Optimizing your PCR [https://www.takarabio.com/learning-centers/pcr/faq/optimization?srsltid=AfmBOorDy38CSNNZ4ChWhRfBO-Fk6hurxw49D9NcOyMyVihHvHF9tFWx]
- 76. Guidelines for PCR Optimization with Taq DNA Polymerase [https://www.neb.com/en-us/tools-and-resources/usage-guidelines/guidelines-for-pcr-optimization-with-taq-dna-polymerase?srsltid=AfmBOoqoWTAf04Oo2BxwIUxHDd3B31RwcqIoOEB5zVCSRnSJS1ajZXuB]
- 77. Avoiding Contamination | Thermo Fisher Scientific - IE [https://www.thermofisher.com/ie/en/home/life-science/pcr/real-time-pcr/real-time-pcr-learning-center/real-time-pcr-basics/good-laboratory-practice-avoid-contamination-qpcr-experiments.html]
- 78. PCR Troubleshooting Guide [https://www.neb.com/en-us/tools-and-resources/troubleshooting-guides/pcr-troubleshooting-guide?srsltid=AfmBOooimS4z6foT_4stDJh8SPl7I-3XaHTa605puao_TgCglVgRfLnt]
- 79. How to Design Primers | ZYMO RESEARCH [https://www.zymoresearch.com/blogs/blog/how-to-design-primers-for-pcr-experiments]
- 80. In silico PCR analysis: a comprehensive bioinformatics tool ... [https://www.frontiersin.org/journals/bioinformatics/articles/10.3389/fbinf.2024.1464197/full]
- 81. in silico PCR tool [https://primerdigital.com/tools/epcr.html]
- 82. generation of amplicon libraries without degenerate primer ... [https://pubmed.ncbi.nlm.nih.gov/41159003/]
- 83. In Silico PCR Sample [https://ugene.net/docs/workflow-designer/workflow-samples/scenarios/in-silico-pcr-sample/]
- 84. Controls in PCR and PCR assays [https://bento.bio/resources/bento-lab-advice/controls-in-pcr-and-pcr-assays-with-bento-lab/]
- 85. PCR controls [https://www.qiagen.com/us/knowledge-and-support/knowledge-hub/bench-guide/pcr/reference-genes-and-controls/pcr-controls]
- 86. PCR Troubleshooting Guide [https://www.neb.com/en-us/tools-and-resources/troubleshooting-guides/pcr-troubleshooting-guide?srsltid=AfmBOopP66JBIK5qtiFkUs594MkfRA9P_JDmoM3nrOY7jiUaExrscjKB]
- 87. versus Specific isothermal DNA nonspecific through... amplification [https://pubmed.ncbi.nlm.nih.gov/18729381/]
- 88. What to Consider When Choosing a PCR Master Mix [https://www.clinicallab.com/what-to-consider-when-choosing-a-pcr-master-mix-25787]
- 89. Predicting sequence-specific amplification efficiency in ... [https://www.nature.com/articles/s41467-025-64221-4]
- 90. The application of a deep learning system developed to ... [https://www.nature.com/articles/s41598-022-05069-2]
- 91. Comparison of the Diagnostic Performance of Deep ... [https://pmc.ncbi.nlm.nih.gov/articles/PMC9966023/]
- 92. How can I reduce nonspecific or non-template amplification? [https://www.neb.com/en-us/faqs/2013/10/24/how-can-i-reduce-nonspecific-or-non-template-amplification?srsltid=AfmBOookvKjTTD9xGp5NWcx-wpL66ZVqWXJu9r4RL8ad_KaJ006PzfjZ]
- 93. PCR Troubleshooting Guide [https://www.neb.com/en-us/tools-and-resources/troubleshooting-guides/pcr-troubleshooting-guide?srsltid=AfmBOopFpRCAEqo0VldnvLVFdhfgFN1bjVVfKd5C7N2wLDit9G216e2J]
- 94. Avoiding Contamination | Thermo Fisher Scientific - ES [https://www.thermofisher.com/us/en/home/life-science/pcr/real-time-pcr/real-time-pcr-learning-center/real-time-pcr-basics/good-laboratory-practice-avoid-contamination-qpcr-experiments.html]
- 95. Influence of residual uracil-DNA glycosylase activity on the ... [https://www.sciencedirect.com/science/article/abs/pii/S0167701298001043]
- 96. EP2138590A1 - Improved method for the prevention of ... [https://patents.google.com/patent/EP2138590A1/en]