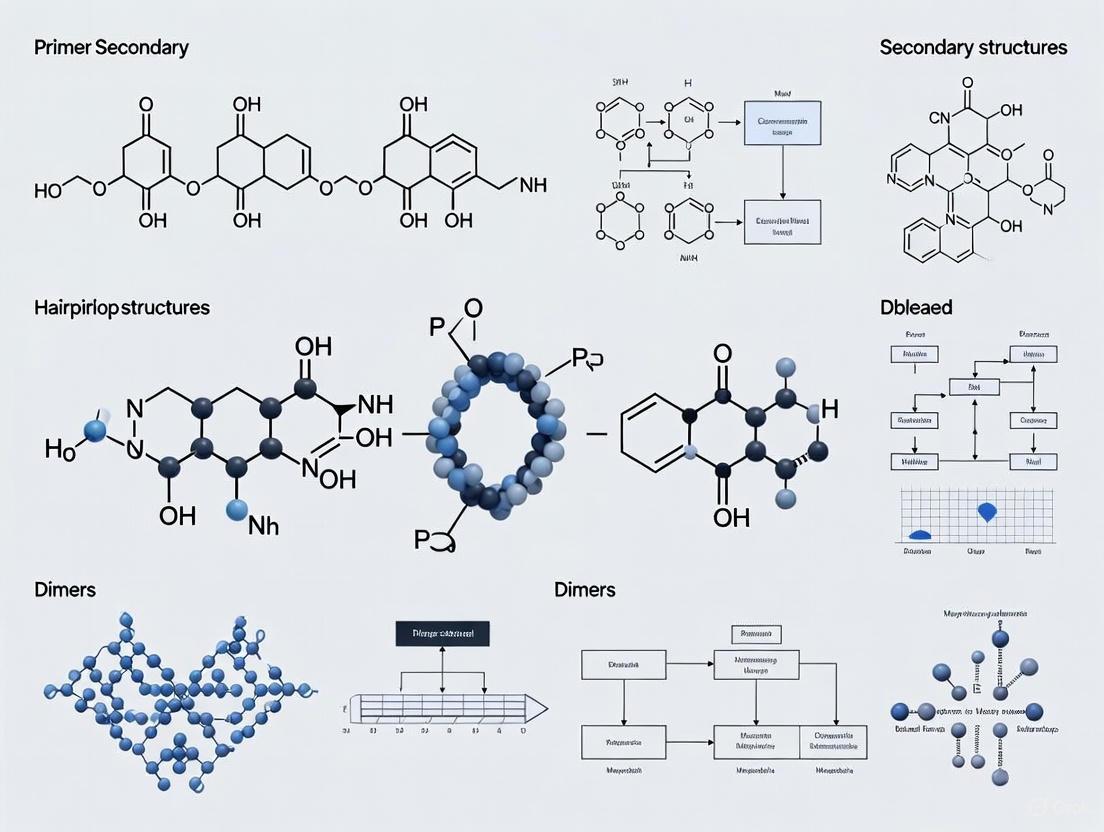
Primer Secondary Structures: A Comprehensive Guide to Managing Hairpin Loops and Dimers in Biomedical Research
This article provides researchers, scientists, and drug development professionals with a comprehensive guide to primer secondary structures, focusing on the significant impact of hairpin loops and primer dimers on assay...
Primer Secondary Structures: A Comprehensive Guide to Managing Hairpin Loops and Dimers in Biomedical Research
Abstract
This article provides researchers, scientists, and drug development professionals with a comprehensive guide to primer secondary structures, focusing on the significant impact of hairpin loops and primer dimers on assay reliability. It covers foundational thermodynamic principles, practical methodologies for detection and prevention using modern bioinformatics tools, advanced troubleshooting strategies for complex reactions like RT-LAMP and qPCR, and rigorous validation techniques to ensure data integrity. By synthesizing current scientific literature and practical protocols, this resource aims to equip professionals with the knowledge to optimize molecular assays, reduce false results, and accelerate diagnostic and therapeutic development.
The Hidden Culprits: Understanding How Hairpins and Dimers Sabotage Your Assays
In molecular biology, the fidelity and efficiency of techniques such as the polymerase chain reaction (PCR) and loop-mediated isothermal amplification (LAMP) are paramount. These methods rely on the specific binding of oligonucleotide primers to a target DNA sequence. However, the intended reaction pathway can be compromised by primer secondary structures—primarily hairpins and dimers—where primers adopt conformations or interact with each other in unplanned ways. These aberrant structures sequester primers, promote non-specific amplification, and compete for essential enzymatic reagents, ultimately leading to reduced assay sensitivity, false-positive results, and a general decrease in amplification efficiency [1] [2]. For researchers and drug development professionals, understanding the nature, formation, and impact of these structures is a fundamental step in developing robust and reliable diagnostic and research assays. This guide provides an in-depth technical examination of primer hairpins and dimers, framing the problem within the broader context of primer design research.
Defining the Structures: Mechanisms and Formation
Primer Hairpins (Self-Complementarity)
A primer hairpin, or stem-loop structure, is an intramolecular interaction that occurs when a single primer folds back on itself because it contains two inverted regions of complementarity [3] [4].
- Mechanism of Formation: Within a single primer, a sequence of nucleotides (the "stem") is complementary to another sequence elsewhere within the same primer. This allows the molecule to form a double-stranded stem with an unpaired loop at the fold.
- Structural Impact: The formation of a stable hairpin structure can physically block the primer from annealing to its target template DNA [3]. This is particularly detrimental when the hairpin involves the 3' end of the primer, as this is the site from which DNA polymerase initiates synthesis [4].
- Prevalence: Hairpins are especially common in long primers, such as the 40–45 base Forward and Backward Inner Primers (FIP and BIP) used in LAMP assays, due to the increased probability of self-complementary regions existing within their sequence [2].
The following diagram illustrates the mechanism of hairpin formation and its consequences in an amplification reaction:
Primer Dimers (Self-Dimers and Cross-Dimers)
A primer dimer (PD) is the result of intermolecular interactions between primers. There are two primary types [3] [5]:
- Self-Dimer: Formed when two identical primers (e.g., two forward primers) anneal to each other via complementary regions.
- Cross-Dimer: Formed when two different primers (e.g., the forward and reverse primer) anneal to each other.
- Mechanism of Formation and Amplification: The process occurs in distinct steps, which can lead to the amplification of the dimer itself, consuming reaction resources [5]:
- Annealing: Two primers anneal to each other at their 3' ends through complementary bases.
- Extension: If the 3' ends are base-paired and stable, DNA polymerase binds and extends both primers, synthesizing a short, double-stranded DNA product.
- Amplification: In subsequent PCR cycles, this newly synthesized short duplex can serve as a template for further primer binding and extension, leading to exponential amplification of the primer dimer product.
The diagram below outlines this process and its negative impact on the target amplification:
Quantitative Parameters for Evaluation
The stability of hairpins and dimers can be quantified using thermodynamic parameters, which allows for objective assessment and comparison during primer design.
Table 1: Key Thermodynamic and Sequence Parameters for Evaluating Secondary Structures
| Parameter | Description | Optimal or Tolerated Range | Key Considerations |
|---|---|---|---|
| Gibbs Free Energy (ΔG) | Energy required to break the secondary structure; more negative values indicate greater stability [6] [4]. | Hairpins: - 3' end: ΔG > -2 kcal/mol [4] - Internal: ΔG > -3 kcal/mol [4] Dimers: - 3' end: ΔG > -5 kcal/mol [4] - General: > -9 kcal/mol [6] | A ΔG of -9 kcal/mol or more negative for a dimer is a strong indicator of a problematic oligo [6]. |
| Melting Temperature (Tm) | Temperature at which 50% of the secondary structure dissociates [6]. | Below the reaction annealing temperature [6]. | If the Tm of a hairpin or dimer is higher than your reaction's annealing temperature, the structure is stable and will cause problems [6]. |
| Self-Complementarity | A measure of a primer's tendency to bind to itself [3]. | Keep the score as low as possible [3]. | This parameter is a direct indicator of the potential for hairpin and self-dimer formation. |
| GC Content | Percentage of guanine and cytosine bases in the primer [3] [4]. | 40–60% [3] [4]. | GC bonds are stronger (3 H-bonds) than AT bonds (2 H-bonds). High GC content, especially at the 3' end, can lead to overly stable non-specific binding [3]. |
| GC Clamp | Presence of G or C bases in the last 5 bases at the 3' end [3] [4]. | Presence is good, but avoid more than 3 G/Cs in the last 5 bases [3] [4]. | Promotes specific binding at the critical 3' end, but too many can cause non-specific binding [3]. |
Detection and Experimental Analysis
Detecting primer secondary structures is a critical step in both primer validation and troubleshooting failed amplification experiments.
In Silico Analysis and Tools
Before ordering primers, their sequences should be analyzed computationally.
- Objective: To predict and quantify the stability of potential hairpins and dimers.
- Protocol:
- Tool Selection: Use online tools such as IDT OligoAnalyzer [6], Thermo Fisher Multiple Primer Analyzer [7], or MFEprimer [8].
- Sequence Input: Enter the primer sequence(s) into the tool.
- Parameter Calculation: The tool will calculate and report potential secondary structures, including their ΔG and Tm values.
- Evaluation: Compare the calculated ΔG values against the tolerated thresholds listed in Table 1. Primers with structures exceeding these thresholds should be redesigned.
Experimental Detection Methods
After primer synthesis, experimental validation is necessary.
Gel Electrophoresis (for Endpoint PCR):
- Principle: Amplification products are separated by size on an agarose gel. Primer dimers appear as a smear or diffuse band typically between 30-50 bp, which is distinguishable from the larger, well-defined band of the correct amplicon [5] [9].
- Protocol: Run the PCR product on a 2-3% agarose gel alongside a DNA ladder. A no-template control (NTC) is essential, as it will show primer dimers in the absence of the target band, confirming their identity [9].
Melting Curve Analysis (for qPCR with Intercalating Dyes):
- Principle: When using non-specific dyes like SYBR Green, the melting temperature (Tm) of the amplified product is analyzed. Primer dimers, being short and low in GC content, have a lower and distinct Tm compared to the specific amplicon [5].
- Protocol: After the qPCR amplification cycles, slowly increase the temperature from 60°C to 95°C while continuously monitoring fluorescence. A single, sharp peak indicates a specific product. Additional peaks at lower temperatures indicate non-specific products like primer dimers.
Research Reagent Solutions and Experimental Toolkit
Successfully navigating the challenges of secondary structures requires a combination of sophisticated reagents and design tools.
Table 2: Essential Reagents and Tools for Managing Secondary Structures
| Tool / Reagent | Function / Description | Key Feature |
|---|---|---|
| Hot-Start DNA Polymerase | A modified enzyme that is inactive at room temperature, preventing enzymatic activity during reaction setup [5] [9]. | Suppresses extension of primers that anneal non-specifically or form dimers before the first denaturation step, dramatically reducing background [5]. |
| Primer Design Software (e.g., NCBI Primer-BLAST) | Algorithms that check for potential secondary structures and off-target binding during the design phase [10] [5]. | Incorporates thermodynamic parameters (ΔG, Tm) to screen out problematic primers before synthesis [10]. |
| Secondary Structure Analysis Tools (e.g., IDT OligoAnalyzer) | Web-based tools specifically for analyzing pre-designed oligonucleotides for hairpins and dimers [6] [7]. | Provides quantitative data (ΔG, Tm) on predicted structures, allowing for informed primer selection [6]. |
| Magnesium Ion (Mg²⁺) Optimization | Mg²⁺ is a essential cofactor for DNA polymerase; its concentration strongly influences primer annealing and specificity [1]. | Titrating Mg²⁺ concentration can help fine-tune reaction stringency and reduce non-specific primer interactions [1]. |
| Betaine | A chemical additive used in some protocols, such as LAMP, to help amplify GC-rich targets and destabilize secondary structures [2]. | Can improve amplification efficiency by reducing the stability of primer hairpins and other secondary structures in the template. |
Prevention and Optimization Strategies
The most effective approach to primer dimers and hairpins is proactive prevention through rigorous primer design and reaction optimization.
Primer Design Guidelines
- Strategic Sequence Design: Avoid long runs of a single nucleotide (max 4bp) and di-nucleotide repeats (e.g., ATATATAT) [4]. Ensure the 3' end has low self-complementarity to prevent self-priming [3].
- Adhere to Standard Parameters: Follow the well-established rules for primer length (18-24 bp for PCR), melting temperature (52-65°C, with forward and reverse primers within 2°C of each other), and GC content (40-60%) [3] [4].
- Experimental Validation with NTCs: Always include a No-Template Control (NTC) in every run. Amplification in the NTC is a clear indicator of primer-dimer formation or non-specific amplification, confirming the need for re-optimization [9].
Reaction Condition Optimization
- Increase Annealing Temperature: Raising the annealing temperature increases stringency, preventing primers from binding to each other or to non-target sequences with imperfect complementarity [9].
- Lower Primer Concentration: Using excessively high primer concentrations increases the likelihood of intermolecular collisions and dimer formation. Titrating down the primer concentration can reduce this without significantly impacting specific yield [9].
- Use Hot-Start Polymerases: This is one of the most effective experimental interventions. By preventing polymerase activity at low temperatures, it eliminates the extension of primer dimers formed during reaction setup [5] [9].
Primer hairpins and dimers represent a significant challenge in molecular biology, capable of compromising the accuracy and efficiency of critical techniques like PCR and LAMP. A comprehensive understanding of their formation mechanisms, guided by quantitative thermodynamic parameters such as ΔG and Tm, is the first step toward mitigation. By employing a rigorous workflow that integrates sophisticated in silico design tools, strategic reagent selection like hot-start enzymes, and careful experimental optimization, researchers can effectively suppress these secondary structures. Mastering the control of primer behavior is not merely a technical exercise; it is a fundamental requirement for generating reliable, reproducible, and meaningful data in research and diagnostic applications.
The Thermodynamic Basis of Secondary Structure Formation
Secondary structure formation in nucleic acids and proteins is a fundamental process governed by the principles of thermodynamics. These local spatial arrangements, such as hairpin loops, β-sheets, and α-helices, are critical for biological function, influencing everything from enzymatic activity to molecular recognition. For researchers investigating primer design or drug development, understanding the thermodynamic drivers of these structures—particularly problematic formations like hairpin loops and primer-dimers—is essential for developing reliable assays and therapeutics. This guide provides an in-depth examination of the thermodynamic principles, prediction methodologies, and experimental characterization techniques relevant to secondary structure formation, with a specific focus on its implications in primer and drug research.
Fundamental Thermodynamic Principles
Secondary structure formation is a spontaneous process that occurs when the change in Gibbs free energy (ΔG) is negative. The relationship between enthalpy (ΔH) and entropy (ΔS), governed by the equation ΔG = ΔH - TΔS, dictates structural stability. Favorable negative enthalpy changes from bond formation compete against unfavorable negative entropy changes resulting from increased molecular order.
In nucleic acids, the nearest-neighbor model provides a robust framework for calculating the stability of secondary structures [11] [12]. This model decomposes structures into loops and base-pair stacks, each with assigned free energy parameters derived from optical melting experiments [12]. The total free energy is the sum of these individual components, enabling computational prediction of minimum free energy structures [11].
For proteins, secondary structure formation is primarily driven by hydrogen bonding between backbone amide groups, with characteristic patterns defining α-helices and β-sheets [13]. The thermodynamic stability of these elements is influenced by side-chain interactions and solvent effects, making prediction more complex than for nucleic acids.
Table: Thermodynamic Parameters for Nucleic Acid Secondary Structure Elements
| Structure Element | Energy Contribution | Primary Stabilizing Force | Typical Role in Stability |
|---|---|---|---|
| Base-pair Stacking | -1.5 to -3.5 kcal/mol [12] | Van der Waals interactions, base stacking | Major stabilizing factor |
| Hairpin Loop | +3 to +6 kcal/mol (destabilizing) | Entropic penalty for loop formation | Major destabilizing factor; size-dependent |
| Internal Loop/Bulge | Variable, generally destabilizing | Entropic penalty, imperfect base stacking | Reduces overall stability |
| Multi-branch Loop | Complex, often destabilizing | Entropic penalty, electrostatic repulsion | Reduces overall stability |
Secondary Structures in Primer Design and Function
Hairpin Loops and Primer-Dimers
In primer design, unintended secondary structures represent a major source of experimental failure. A hairpin loop forms when a single primer folds back on itself, creating a stem-loop structure stabilized by intramolecular base pairing. This prevents the primer from binding to its target template [3] [14]. Primer-dimers are another common artifact, forming when two primers hybridize to each other via complementary sequences instead of to the template DNA [1]. This can be a homodimer (two identical primers) or a heterodimer (forward and reverse primers) [1]. Both structures reduce amplification efficiency by sequestering primers and generating nonspecific products, potentially leading to false-positive results in applications like loop-mediated isothermal amplification (LAMP) [1].
The formation of these structures is governed by thermodynamics. Hairpin stability increases with longer stem regions and smaller loops, while primer-dimer formation is driven by strong complementarity, particularly at the 3' ends where extension occurs [1] [14]. The presence of G/C-rich regions at the 3' end (a "GC clamp") can enhance target binding but also increases the risk of non-specific dimerization due to the stronger triple hydrogen bonds of G-C pairs compared to the double bonds of A-T pairs [3].
Thermodynamic Optimization in Design
Effective primer design requires balancing multiple thermodynamic parameters to minimize off-target structures while maintaining efficient target binding [14]:
- Melting Temperature (Tₘ): The temperature at which 50% of the primer-template duplex dissociates. Primers in a pair should have Tₘ values within 2°C for synchronous binding [3] [14]. The optimal range is typically 54–65°C [3].
- GC Content: Ideally maintained between 40–60%. Higher GC content increases Tₘ and binding strength but raises the risk of non-specific binding and secondary structure formation [3] [14].
- Length: Optimal primer length is generally 18–24 nucleotides. Shorter primers risk reduced specificity, while longer primers increase the likelihood of secondary structures and exhibit slower hybridization rates [3] [14].
Table: Primer Design Parameters to Minimize Secondary Structures
| Design Parameter | Optimal Value/Range | Rationale | Thermodynamic Consequence |
|---|---|---|---|
| Length | 18–24 nucleotides [3] [14] | Balances specificity with hybridization efficiency & minimizes intramolecular folding | Longer sequences increase ΔS penalty for folding |
| GC Content | 40%–60% [3] [14] | Balances duplex stability (3 H-bonds for G-C) vs. risk of non-specific binding | Higher GC content yields more negative ΔH (stabilizing) |
| Melting Temp (Tₘ) | 54°C–65°C; pair within 2°C [3] [14] | Ensures synchronous binding of both primers | Matched ΔG for both primer-template duplexes |
| 3'-End Complementarity | Avoid >3 G/C in last 5 bases [14] | Prefers stable binding but avoids primer-dimer extension | Limits favorable ΔG for dimer formation at critical extension point |
| Self-Complementarity | Minimize (low score in design tools) [3] | Reduces chance of hairpins and self-dimers | Unfavorable ΔG for intramolecular vs. intermolecular binding |
Computational Prediction and Simulation Methods
Physics-Based and Machine Learning Approaches
Computational methods for predicting nucleic acid secondary structure primarily fall into two categories: physics-based methods and machine learning approaches. Physics-based methods, implemented in tools like RNAfold and RNAstructure, use free energy parameters derived from experimental data to identify the minimum free energy structure through dynamic programming algorithms [11] [12]. These methods have the advantage of being based on physical principles and allow for the incorporation of experimental constraints [11].
Machine learning methods, such as CONTRAfold and ContextFold, train scoring parameters from known reference structures rather than experimental free energy values [12]. While these can achieve high accuracy, their rich parameterization makes them prone to overfitting, potentially limiting their robustness for novel sequences [12]. Hybrid methods like MXfold2 represent the current state-of-the-art, integrating deep learning-derived folding scores with Turner's nearest-neighbor free energy parameters [12]. This approach uses thermodynamic regularization during training to ensure the predicted folding scores remain close to physical free energy values, significantly improving robustness against overfitting [12].
Diagram: MXfold2's Hybrid Prediction Architecture. The workflow integrates deep learning with thermodynamic parameters and applies thermodynamic regularization to prevent overfitting [12].
Force Fields in Molecular Dynamics
For atomistic-level simulations, molecular mechanics force fields parameterize the energetic terms governing nucleic acid conformation. The AMBER and CHARMM force families are most widely used, with continual refinements addressing specific limitations [15]. For example, the AMBER parmbsc0 modification corrected α/γ backbone torsions that caused deformations in long simulations, while the OL3 modification improved glycosidic torsion balance in RNA [15]. These force fields, when combined with explicit solvent models and particle mesh Ewald electrostatics treatment, enable accurate simulation of nucleic acid dynamics, including spontaneous transitions between A-form and B-form DNA under appropriate environmental conditions [15].
Experimental Characterization Techniques
Structure Probing Technologies
Experimental characterization of secondary structures relies on various probing technologies that provide data on nucleotide accessibility and pairing status. Methods like SHAPE-Seq, DMS-Seq, and icSHAPE utilize chemicals that modify RNA nucleotides according to their local stereochemistry and pairing status [16]. When combined with next-generation sequencing, these techniques enable transcriptome-wide analysis of RNA secondary structure (RNA structurome) under different cellular conditions [16].
Differential analysis of structure probing data across conditions identifies structurally variable regions (SVRs) that may have regulatory functions. Computational frameworks like DiffScan address challenges in normalization and systematic bias removal, then scan transcripts to identify SVRs with adaptive lengths and locations [16]. This approach provides nucleotide-resolution insight into dynamic RNA structural changes, revealing connections between structural variation and biological processes such as mRNA abundance regulation [16].
Diagram: DiffScan Analysis Workflow. The framework normalizes structure probing (SP) data to remove systematic bias before scanning for structurally variable regions with adaptive lengths [16].
Biophysical Characterization Methods
Several established biophysical techniques provide detailed information on secondary structure composition and stability:
Circular Dichroism (CD) Spectroscopy: Measures differential absorption of left- and right-circularly polarized light, providing estimates of α-helix, β-sheet, and random coil content in proteins [13]. CD requires low sample consumption and can monitor structural changes under different conditions but provides only approximate structural information [13].
Fourier Transform Infrared (FTIR) Spectroscopy: Detects vibrational modes of protein backbones, particularly amide I bands, which are sensitive to secondary structure [13]. FTIR provides detailed chemical environment information but requires careful sample preparation due to water absorption interference [13].
Solid-State Nuclear Magnetic Resonance (ssNMR): Provides high-resolution analysis of local conformations at atomic level, particularly useful for studying insoluble materials like silk fibroin [17]. ssNMR can probe both crystalline and amorphous regions and study protein-water interactions through stable isotopic labeling [17].
X-Ray Crystallography: Determines three-dimensional structure by analyzing X-ray diffraction patterns from protein crystals [13]. While primarily used for tertiary structure determination, it provides atomic-level details of secondary structure elements [13].
The Scientist's Toolkit: Essential Research Reagents and Materials
Table: Key Reagent Solutions for Secondary Structure Research
| Reagent/Material | Function in Research | Application Context |
|---|---|---|
| Stable Isotopes (¹³C, ¹⁵N) | Enables high-resolution ssNMR analysis | Selective labeling of specific residues in proteins or nucleic acids for atomic-level structure determination [17] |
| Structure Probing Chemicals | Reacts with nucleotides based on pairing status | SHAPE (e.g., NMIA), DMS for RNA structure probing in high-throughput sequencing platforms [16] |
| Hexethylene Glycol (HEG) Blocker | Prevents primer extension by polymerase | Used in Scorpion primer-probes to separate the probe element from the primer element [1] |
| Magnesium Ions (Mg²⁺) | Cofactor for DNA polymerase; affects structure | Essential for PCR/LAMP but high concentrations can promote primer-dimer formation [1] |
| Fluorophore-Quencher Pairs | Signal generation in real-time detection | Molecular beacons, Scorpions, TaqMan probes; FRET-based signaling [1] |
| DMSO | Additive for PCR/sequencing | Reduces secondary structure in GC-rich templates by lowering melting temperature [14] |
The thermodynamic basis of secondary structure formation represents a critical intersection of molecular biophysics and practical application in biomedical research. For scientists designing primers for diagnostic assays or developing nucleic acid-based therapeutics, understanding the delicate balance between enthalpy-driven stabilization and entropy-driven disorder is paramount. Robust computational methods that integrate physical principles with machine learning, coupled with advanced experimental characterization techniques, continue to enhance our predictive capabilities. As these methods evolve, particularly with the integration of artificial intelligence and high-throughput structural data, researchers will be better equipped to design molecules with minimized off-target structures and optimized function, accelerating progress in diagnostics and drug development.
This whitepaper provides a systematic analysis of how nucleic acid secondary structures, specifically hairpin loops and primer-dimers, impact molecular biology techniques by depleting primers and creating significant background noise. Through a synthesis of recent peer-reviewed research, we quantify the effects of these structures on experimental outcomes, particularly in quantitative PCR (qPCR) and hybridization assays. The data reveal that secondary structures can suppress amplification efficiency by over 100-fold and alter hybridization kinetics by two orders of magnitude, presenting critical challenges for assay precision. This technical guide presents standardized experimental protocols for detecting and quantifying these phenomena, alongside informatics tools for predictive design. For researchers in drug development and diagnostic sciences, understanding and mitigating these effects is essential for ensuring data accuracy and reproducibility in genomic applications.
Nucleic acid secondary structures represent a fundamental challenge in molecular biology, particularly in techniques reliant on hybridization efficiency such as quantitative PCR (qPCR), sequencing, and various diagnostic applications. These structures—including hairpin loops and primer-dimers—compete with intended molecular interactions, effectively depleting available primers and creating substantial background signals that compromise data quality. Within the broader context of primer secondary structure research, it is essential to recognize that these phenomena are not merely theoretical considerations but practical impediments to experimental success with quantifiable impacts on efficiency and specificity [18].
The thermodynamics of DNA structural motifs have been extensively characterized, providing a framework for understanding how sequence composition translates into functional behavior in experimental systems [19]. What has been less appreciated until recently is the significant impact of even thermodynamically unfavorable secondary structures—those with positive ΔG° values—which can transiently form under typical assay conditions and substantially alter reaction kinetics [20] [21]. This technical guide synthesizes current research to quantify these effects, provide validated detection methodologies, and recommend mitigation strategies for researchers developing molecular assays.
Quantitative Effects of Secondary Structures
Impact of Hairpin Structures on qPCR Efficiency
Hairpin structures in DNA templates significantly impair qPCR amplification efficiency through competitive inhibition of primer binding. Systematic investigations have demonstrated that the physical location and structural stability of hairpins directly determine the magnitude of amplification suppression.
Table 1: Effects of Hairpin Structures on qPCR Amplification Efficiency
| Hairpin Location | Stem Length | Loop Size | Amplification Efficiency | Mechanism |
|---|---|---|---|---|
| Inside amplicon | 20 bp | N/A | No targeted products formed | Complete inhibition of primer binding |
| Inside amplicon | Increasing | Decreasing | Notable suppression | Competitive primer binding inhibition |
| Outside amplicon | Increasing | Decreasing | Moderate suppression | Reduced template accessibility |
| Near primer-binding sites | ≥ Stable structures | N/A | Significant suppression | Physical blockade of primer annealing |
Research indicates that hairpins formed within the amplicon region produce more dramatic suppression effects compared to those outside the amplicon [22]. The suppression magnitude increases proportionally with stem length and inversely with loop size, with particularly severe impacts observed for hairpins containing long stems (e.g., 20-bp) that prevent amplification entirely. These effects are primarily attributed to competitive inhibition of primer binding to the template, as confirmed through melting temperature (Tm) measurements [22]. For reliable qPCR system design, it is recommended to analyze at least 60-bp sequences around primer-binding sites—both inside and outside anticipated amplicons—to identify and avoid regions prone to forming stable secondary structures.
Thermodynamics and Kinetics of Hairpin Formation
The stability and dynamics of nucleic acid hairpins demonstrate strong dependence on loop size and environmental conditions such as salt concentration. Biophysical studies utilizing laser temperature-jump spectroscopy have quantified these relationships, revealing fundamental principles governing hairpin behavior.
Table 2: Loop-Size Dependence of Hairpin Stability and Kinetics
| Nucleic Acid Type | Salt Conditions | Stability Scaling with Loop Length (L) | Folding Time Scaling | Molecular Interpretation |
|---|---|---|---|---|
| ssDNA | 100 mM NaCl | ∼L^8.5 ± 0.5 | ∼L^2.2 ± 0.5 | Strong intraloop stacking with Na+ |
| ssDNA | 2.5 mM MgCl2 | ∼L^4 ± 0.5 | N/A | Weaker intraloop interactions with Mg2+ |
| RNA | 2.5 mM MgCl2 | ∼L^4 ± 0.5 | ∼L^2.6 ± 0.5 | Similar stabilization as ssDNA in Mg2+ |
The steep dependence of hairpin stability on loop size (∼L^8.5) in sodium-containing buffers indicates significant intraloop stacking interactions that preferentially stabilize small loops [23]. This stabilization is substantially reduced in magnesium-containing buffers (∼L^4), suggesting different ion-specific interactions with the loop structures. Interestingly, despite differences in polynucleotide type and salt conditions, the folding times for both ssDNA and RNA hairpins show similar scaling with loop size (∼L^2.2-2.6), indicating that the rate-limiting step is dominated by an entropic search for the correct nucleating conformation [23]. The folding timescale is approximately three orders of magnitude slower than theoretical estimates for ideal polymer loop formation, highlighting the significance of intrachain interactions that create a "rough" free energy landscape with transient trapping in misfolded conformations.
Primer-Dimer Formation and Hybridization Kinetics
Primer-dimerization represents a significant source of background in amplification reactions, depleting functional primers and generating non-specific amplification products. Systematic investigations have quantified the sequence requirements for stable dimer formation, while research on hybridization kinetics has revealed surprising impacts of even unstable secondary structures.
Table 3: Primer-Dimer Formation and Hybridization Kinetics Parameters
| Parameter | Threshold Value | Impact on Reaction | Experimental Method |
|---|---|---|---|
| Consecutive basepairs | >15 | Stable dimer formation | Free-solution conjugate electrophoresis |
| Non-consecutive basepairs | 20/30 total | No stable dimers formed | Free-solution conjugate electrophoresis |
| Dimerization temperature | Inverse correlation | Reduced dimerization at higher temperatures | Capillary electrophoresis at 18-62°C |
| Positive ΔG° secondary structures | N/A | Up to 100-fold rate change | Stopped-flow fluorescence spectroscopy |
Experimental studies using free-solution conjugate electrophoresis (FSCE) with drag-tag modified oligonucleotides have demonstrated that stable dimer formation requires more than 15 consecutive basepairs, while non-consecutive basepairs do not create stable dimers even when 20 out of 30 possible basepairs are bonded [24]. Dimerization shows an inverse correlation with temperature, providing a strategic approach for suppression through thermal optimization.
Beyond stable dimers, research has revealed that even thermodynamically unfavorable secondary structures (with positive ΔG° values) can alter hybridization kinetics by up to two orders of magnitude [20] [21]. This hybridization follows second-order reaction kinetics but exhibits non-Arrhenius temperature dependence, indicating a nucleation-limited process rather than the rate-limiting destruction of stable secondary structures. These findings underscore the importance of considering both thermodynamic stability and kinetic pathways in assay design.
Experimental Protocols for Detection and Quantification
Capillary Electrophoresis for Primer-Dimer Analysis
Free-solution conjugate electrophoresis (FSCE) provides a robust method for quantifying primer-dimer formation under various temperature conditions. This protocol enables precise separation of short DNA fragments without sieving matrix effects, allowing direct observation of dimerization events.
Diagram 1: FSCE primer-dimer analysis workflow
The protocol involves conjugating an electrically neutral poly-N-methoxyethylglycine (NMEG) drag-tag to one primer's 5'-end via a thiol linker, which modifies electrophoretic mobility without affecting hybridization [24]. Key steps include:
- Drag-tag conjugation: Incubate reduced thiolated DNA oligomers with a 40:1 molar excess of NMEG oligomer overnight at room temperature using Sulfo-SMCC chemistry.
- Sample preparation: Mix drag-tagged and non-drag-tagged DNA primers, heat-denature at 95°C for 5 minutes, anneal at 62°C for 10 minutes, and cool to 25°C.
- Capillary electrophoresis: Separate using 1× TTE buffer (89 mM Tris, 89 mM TAPS, 2 mM EDTA) with 0.03% pHEA dynamic capillary coating at temperatures ranging from 18°C to 62°C.
- Detection: Utilize two-color laser-induced fluorescence (LIF) detection with different fluorophores (e.g., ROX, FAM) for unambiguous peak assignment.
This method enables precise quantification of dimerization propensity across temperatures, revealing that consecutive base pairing—not merely total complementarity—governs stable dimer formation [24].
Stopped-Flow Fluorescence for Hybridization Kinetics
Stopped-flow fluorescence spectroscopy provides high-temporal resolution measurements of hybridization kinetics, enabling quantification of how secondary structures impact association rates.
Protocol Details:
- Oligonucleotide design: 23-mer sequences with similar melting temperatures but varying propensity for secondary structure formation [20].
- Experimental conditions: Measure hybridization rates in stopped-flow apparatus with fluorescence detection across temperature range (typically 15-45°C).
- Data analysis: Fit kinetic traces to second-order reaction models and extract rate constants.
- Thermal validation: Determine melting temperatures for all sequences via UV absorbance thermal denaturation.
This approach has demonstrated that positive ΔG° secondary structures can alter hybridization rates by up to 100-fold, despite their transient nature [20]. The non-Arrhenius temperature dependence indicates nucleation-limited hybridization, requiring specialized models that account for the probability of intramolecular base pairing competing with intermolecular hybridization.
Melt-Curve Analysis for qPCR Specificity
Melt-curve analysis represents an essential quality control step for SYBR Green qPCR assays, enabling detection of non-specific amplification and primer-dimer formation.
Procedure:
- Perform qPCR amplification with SYBR Green chemistry.
- After final amplification cycle, gradually increase temperature from 60°C to 95°C while continuously monitoring fluorescence.
- Analyze derivative plot (-dF/dT vs. Temperature) for peak number and morphology.
Interpretation:
- A single sharp peak suggests specific amplification of a single product.
- Multiple peaks, shoulder peaks, or unusually wide peaks indicate non-specific amplification or primer-dimer formation [25].
- Asymmetrical peaks may suggest complex anomalies requiring further investigation.
This method provides a critical post-amplification verification of reaction specificity, especially important for SYBR Green assays where the dye binds indiscriminately to all double-stranded DNA [25].
The Scientist's Toolkit: Essential Research Reagents and Materials
Successful investigation of secondary structure effects requires specialized reagents and analytical tools. The following table summarizes key solutions for experimental research in this domain.
Table 4: Research Reagent Solutions for Secondary Structure Studies
| Reagent/Material | Function | Application Notes |
|---|---|---|
| Poly-N-methoxyethylglycine (NMEG) drag-tags | Modifies electrophoretic mobility without charge | Enables FSCE separation of short DNA fragments; 12-36 unit lengths available [24] |
| SYBR Green I dye | Fluorescent dsDNA binding | qPCR detection; requires melt-curve analysis to verify specificity [25] |
| 2-aminopurine (2AP) | Fluorescent adenine analog | Reports on local conformational changes in kinetics studies [23] |
| Modified TTE buffer (89 mM Tris, 89 mM TAPS, 2 mM EDTA) | Free-solution electrophoresis | Maintains stable pH and conductivity for CE separations [24] |
| PolyDuramide polymer (pHEA) | Dynamic capillary coating | Suppresses electroosmotic flow and sample-capillary interactions [24] |
| Laser temperature-jump apparatus | Rapid perturbation of equilibrium | Measures hairpin folding/unfolding kinetics on microsecond timescales [23] |
Informatics and Predictive Modeling Tools
Computational tools play an essential role in predicting and mitigating secondary structure effects prior to experimental validation. Several software platforms offer specialized capabilities for evaluating primer secondary structures and dimerization potential.
Comparative Analysis of Primer Design Tools:
- FastPCR: Offers comprehensive dimer detection including 3'-end and internal cross-dimers, with support for non-Watson-Crick base pairing; high success rate in experimental validation [26].
- NCBI/Primer-BLAST: Combines Primer3 algorithms with BLAST search for specificity verification; limited in detecting internal primer dimers [26] [27].
- IDT SciTools (PrimerQuest, OligoAnalyzer): Provides user-friendly interface and thermodynamic analysis; incorporates nearest-neighbor parameters for accurate Tm calculations [26] [19].
- PrimerBank: Curated database of experimentally validated primers with uniform properties (60-63°C Tm, 150-350 bp amplicons); implements cross-reactivity filters based on unique 15mer requirement [27].
Advanced algorithms incorporate linguistic complexity assessment, with high-performance tools demonstrating LC values of 91.1±3.6% compared to 73.2±10.8% for less sophisticated alternatives [26]. For drug development professionals, selecting tools that implement rigorous dimer prediction and secondary structure analysis is critical for first-pass success in assay development.
The quantitative data presented in this technical guide unequivocally demonstrate that nucleic acid secondary structures—both stable and transient—significantly deplete primers and create background through multiple mechanisms. Hairpin structures in templates can suppress qPCR amplification efficiency by over 100-fold, while primer-dimers form stable complexes with as few as 15 consecutive basepairs, effectively reducing available primer concentrations. Perhaps most surprisingly, even thermodynamically unfavorable secondary structures with positive ΔG° values can alter hybridization kinetics by two orders of magnitude, emphasizing that traditional thermodynamic analysis alone is insufficient for predicting assay behavior.
For researchers and drug development professionals, these findings underscore the critical importance of integrated experimental and computational approaches to assay design. The protocols and tools described herein provide a framework for systematically evaluating and mitigating secondary structure effects, thereby improving data quality and reproducibility. As molecular techniques continue to evolve toward greater sensitivity and multiplexing capacity, accounting for these fundamental biophysical principles will become increasingly essential for success in genomic medicine, diagnostic development, and basic research. Future directions in this field will likely include more sophisticated predictive models that incorporate kinetic parameters alongside thermodynamic calculations, and expanded experimental databases correlating sequence features with functional outcomes across diverse reaction conditions.
Loop-mediated isothermal amplification (LAMP) and its reverse transcription variant (RT-LAMP) represent a paradigm shift in nucleic acid amplification technology, offering rapid, sensitive, and specific detection of target sequences without the need for thermal cycling. The technique's exceptional specificity is conferred by the use of four to six primers that recognize six to eight distinct regions of the target DNA, making it particularly valuable for diagnostic applications in resource-limited settings [28]. However, this very strength introduces a significant vulnerability: the increased primer complexity dramatically elevates the risk of forming problematic secondary structures including hairpins, self-dimers, and hetero-dimers [2].
Within the context of broader research on primer secondary structures, this case study examines how these structures disproportionately impact complex assays like LAMP and RT-LAMP compared to conventional PCR. The pronounced effect stems from both the multiplicity of primers and the isothermal reaction conditions, which create an environment where minor thermodynamic imperfections in primer design can lead to catastrophic assay failure. Understanding these effects is not merely academic; it directly impacts the reliability of diagnostic tests for infectious diseases like COVID-19 [29] [30], where false negatives or false positives have significant public health implications.
Quantitative Impact: Assessing the Consequences of Secondary Structures
Performance Degradation in Diagnostic Applications
The presence of amplifiable secondary structures in LAMP primer sets manifests as measurable performance degradation across multiple parameters. Research demonstrates that primer dimers and self-amplifying hairpins contribute to increased background fluorescence, reduced amplification efficiency, and poorer discrimination between positive and negative samples when monitored in real-time with intercalating dyes [2]. This baseline elevation occurs because these non-specific structures create templates for DNA polymerase activity, effectively sequestering enzyme resources and generating false fluorescent signals that obscure true positive results.
Table 1: Comparative Performance of RT-LAMP Versus RT-qPCR for SARS-CoV-2 Detection
| Parameter | RT-LAMP Performance | RT-qPCR Performance | Reference |
|---|---|---|---|
| Sensitivity | 90.7% (at 40 copies/µL) | Higher sensitivity, especially at low viral loads | [29] |
| Specificity | 100% | High specificity | [29] |
| Limit of Detection | 40 RNA copies/µL (CT <27) | 10-100 copies/reaction | [29] [31] |
| Time to Result | ~30-60 minutes | Several hours | [29] [31] |
| Cost per Test | ~USD 2.5 | ~USD 10 | [29] |
| Equipment Needs | Water bath or simple heater | Thermal cycler | [29] |
The sensitivity limitations of RT-LAMP become particularly evident when compared directly with RT-qPCR methodologies. One prospective study evaluating SARS-CoV-2 detection in healthcare workers found RT-LAMP to be the least sensitive among the RNA-based molecular tests evaluated, with RT-qPCR using the CDC (USA) protocol demonstrating superior accuracy [32]. This performance gap is not inherent to the LAMP methodology itself, but rather reflects the greater technical challenges in designing multiple primers that function harmoniously without forming problematic secondary structures.
Thermodynamic Thresholds for Problematic Structures
The stability of secondary structures follows predictable thermodynamic principles, allowing researchers to establish thresholds for identifying problematic primers. The free energy change (ΔG) quantifies the thermodynamic favorability of structure formation, with more negative values indicating greater stability.
Table 2: Thermodynamic Thresholds for Problematic Secondary Structures
| Structure Type | Acceptable (ΔG, kcal/mol) | Moderate Risk (ΔG, kcal/mol) | High Risk (ΔG, kcal/mol) | Action Required |
|---|---|---|---|---|
| Hairpins | > -3 (pref. > -2) | -3 to -6 | < -6 | Accept if > -3; redesign if < -6 |
| Self-Dimers | > -5 (pref. > -3) | -5 to -8 | < -8 | Accept if > -5; redesign if < -8 |
| Hetero-Dimers | > -5 (pref. > -3) | -5 to -8 | < -8 | Critical for primer pairs; redesign if < -8 |
Note: Structures involving 3' ends are particularly problematic. Even moderate ΔG values (< -5 kcal/mol) at 3' ends should trigger redesign, as they prevent proper primer extension [33].
The application of these thresholds during primer design has demonstrated remarkable improvements in assay performance. In one systematic investigation, modifying published primer sets for dengue virus and yellow fever virus to eliminate amplifiable primer dimers and hairpins resulted in significantly reduced background and improved signal-to-noise ratio in both real-time monitoring and endpoint detection using the QUASR technique [2]. This demonstrates that addressing secondary structures is not merely preventive but can rescue otherwise promising primer sets.
Experimental Protocols: Methodologies for Detection and Validation
Protocol for Secondary Structure Analysis
Comprehensive secondary structure analysis should precede all experimental work with LAMP primers. The following protocol provides a standardized approach:
Access Analysis Tools: Navigate to specialized secondary structure prediction tools such as the OligoPool Secondary Structure Predictor or IDT OligoAnalyzer [33].
Input Sequences: Paste all primer sequences (F3, B3, FIP, BIP, LF, LB) into the input field. For complete analysis, enter both individual primers and combinations that will be present together in reactions.
Set Temperature Parameters: Configure the analysis temperature to match your experimental conditions. For LAMP assays, use 63-65°C as the standard reaction temperature, but also check stability at 37°C if room temperature setup is required [33] [28].
Select Structure Types: Analyze all relevant structure types:
- Hairpins (for each primer individually)
- Self-dimers (for each primer individually)
- Hetero-dimers (for all possible primer pairs)
Interpret Results: Calculate ΔG values for all detected structures and compare against established thresholds (Table 2). Pay particular attention to complementarity at the 3' ends, as even weak interactions in this region can prevent proper primer extension [33].
Validate Experimentally: Use techniques such as non-denaturing gel electrophoresis to confirm computational predictions, as migration anomalies can indicate stable secondary structures.
Protocol for Empirical Validation of LAMP Primers
Computational predictions require experimental validation through controlled amplification studies:
Prepare Reaction Mixtures:
- Use standardized LAMP master mix containing strand-displacing DNA polymerase (e.g., Bst 2.0 or Bst 3.0), isothermal amplification buffer, dNTPs, and betaine [2] [28].
- Add primers at standard concentrations: 0.2 μM each F3 and B3; 1.6 μM each FIP and BIP; 0.8 μM each LoopF and LoopB [2].
- Include appropriate detection systems: intercalating dye (SYTO series) for real-time monitoring or colorimetric pH indicators for endpoint detection.
Run No-Template Controls:
Assess Sensitivity:
Evaluate Specificity:
- Test against near-neighbor non-target sequences to ensure specificity.
- For viral detection, verify absence of cross-reaction with other related viruses [30].
Diagram: Secondary Structure Impact and Validation Workflow. This workflow illustrates the process for identifying and addressing problematic secondary structures in LAMP primer design.
The Scientist's Toolkit: Essential Reagents and Solutions
Successful LAMP assay development requires specific reagents optimized for isothermal amplification. The following table details essential components and their functions:
Table 3: Essential Research Reagents for LAMP and RT-LAMP Assays
| Reagent/Solution | Function | Specific Examples | Optimization Notes |
|---|---|---|---|
| Strand-Displacing DNA Polymerase | Isothermal amplification without denaturation | Bst 2.0, Bst 3.0, Bst-XT WarmStart | WarmStart versions prevent non-specific amplification at room temperature [28] |
| Reverse Transcriptase | RNA template conversion to cDNA | AMV Reverse Transcriptase, WarmStart RTx | Required for RT-LAMP; some master mixes include blend [2] |
| Isothermal Amplification Buffer | Optimal reaction conditions | New England Biolabs Isothermal Buffer | Typically includes MgSO4, (NH4)2SO4, KCl, and detergent [2] |
| Betaine | Reduces secondary structure in GC-rich regions | 0.8 M final concentration | Essential for neutralizing DNA base composition bias [2] |
| Detection System | Visual or fluorescent signal detection | Colorimetric pH indicators, intercalating dyes, calcein | Colorimetric (phenol red) enables visual detection [29] [28] |
| Primer Sets | Target recognition and amplification initiation | F3, B3, FIP, BIP, LF, LB | FIP/BIP typically 40-45 bases; higher concentration than F3/B3 [28] [34] |
Structural Vulnerabilities: Hairpins, Dimers, and Their Cascade Effects
Hairpin Formation in Inner Primers
The forward and backward inner primers (FIP and BIP) present particular vulnerabilities to hairpin formation due to their extended length (typically 40-45 bases). These composite primers contain two distinct target recognition regions connected by a thymine linker, creating inherent self-complementarity potential. When stable hairpins form (ΔG < -6 kcal/mol), they effectively sequester a portion of primers in inactive conformations, reducing the available primer concentration and compromising amplification efficiency [2].
The operational consequences of hairpin formation are most severe when the 3' end participates in the secondary structure. Even moderate stability (ΔG -3 to -6 kcal/mol) can sufficiently block the 3' terminus from initiating synthesis, resulting in delayed amplification or complete false-negative results. This effect is particularly pronounced in targets with lower initial copy numbers, where every primer molecule is critical for initiating amplification [2].
Primer-Dimer Interactions in Multi-Primer Systems
The six-primer system of LAMP creates a combinatorial challenge for avoiding inter-primer complementarity. Unlike conventional PCR with one primer pair, LAMP has 15 potential pairwise interactions to consider. Hetero-dimers between forward and reverse primers are particularly problematic when they involve 3' complementarity, as this can create amplifiable templates that consume reagents and generate false-positive signals [33] [2].
The impact of primer-dimers extends beyond mere primer sequestration. These structures can serve as unintended templates for the highly processive Bst polymerase, leading to spurious amplification products that deplete dNTPs and enzyme activity. In colorimetric LAMP assays, this non-specific amplification can trigger the pH-induced color change even in no-template controls, completely compromising assay reliability [29].
Diagram: Structural Vulnerabilities in LAMP Primers. This diagram illustrates how different primer secondary structures lead to specific assay failures.
Mitigation Strategies: Computational and Experimental Approaches
Advanced Primer Design Considerations
Sophisticated primer design represents the first line of defense against secondary structure formation. Rather than simply avoiding problematic sequences, successful LAMP primer design incorporates strategic approaches:
Consensus Targeting: Design primers against conserved regions identified through multiple sequence alignment. One study targeting SARS-CoV-2 developed primers using consensus sequences from Indonesian isolates and major variants of concern, ensuring robustness against natural sequence variation [34].
3' End Optimization: Pay particular attention to the final 5 nucleotides at the 3' end. Avoid complementarity of ≥3 consecutive bases between any primers, and ensure the 3' terminus remains unpaired in potential hairpin structures [33].
Thermodynamic Balancing: Design all primers with similar melting temperatures (typically 60-65°C) while maintaining ΔG values above critical thresholds. Use specialized LAMP primer design tools like the NEB LAMP Primer Design Tool that incorporate these considerations [28].
Reaction Condition Optimization
Strategic manipulation of reaction conditions can suppress secondary structure formation:
Temperature Optimization: While standard LAMP protocols use 63-65°C, slightly increasing temperature (e.g., to 66-67°C) can disrupt marginally stable secondary structures without compromising specific amplification.
Additive Supplementation: Betaine (0.8-1.2 M) reduces base composition stability differences and can disrupt weak secondary structures. For particularly problematic primers, DMSO (2-5%) may be added to further destabilize hairpins [14].
Time-Controlled Amplification: Establish strict reaction termination points (typically 30-45 minutes) to prevent late-stage spurious amplification from overwhelming specific signals [31].
The pronounced effect of secondary structures in LAMP and RT-LAMP assays represents both a challenge and an opportunity for molecular assay development. The case studies and data presented demonstrate that hairpins, self-dimers, and hetero-dimers directly impact key performance parameters including sensitivity, specificity, and reliability. These effects stem from the fundamental nature of multi-primer isothermal amplification systems and are exacerbated by the isothermal conditions that preserve these structures throughout the reaction.
Successful mitigation requires integrated computational and experimental approaches. Thermodynamic prediction using established ΔG thresholds provides a powerful screening tool, while empirical validation through controlled amplification studies remains essential. The development of LAMP assays for critical applications like SARS-CoV-2 detection [29] [30] demonstrates that these challenges can be overcome through rigorous primer design and reaction optimization.
As LAMP technology continues to expand into point-of-care diagnostics, environmental monitoring, and food safety testing, the principles outlined in this case study will become increasingly important. Future developments in primer design algorithms, polymerase engineering, and reaction formulations will likely further reduce the vulnerability of LAMP assays to secondary structure effects. However, the fundamental understanding of these pronounced effects will remain essential for researchers developing the next generation of molecular diagnostics.
In molecular diagnostics and research, the specificity of nucleic acid amplification techniques is paramount. Non-specific amplification, often manifesting as primer-dimers or self-amplifying hairpins, represents a significant challenge that can compromise experimental results, particularly in sensitive applications like viral detection and diagnostic assays [2]. The thermodynamic property known as Gibbs free energy (ΔG) serves as a crucial quantitative parameter for predicting and mitigating these undesirable amplification events. This technical guide explores the fundamental relationship between ΔG and amplification specificity, providing researchers with a framework for optimizing primer design through thermodynamic principles.
The formation of primer secondary structures is particularly problematic in techniques employing multiple primers, such as loop-mediated isothermal amplification (LAMP), where six primers targeting distinct regions significantly increase the likelihood of intermolecular interactions [2] [35]. Inner primers (FIP and BIP) in LAMP, typically 40-45 bases in length, demonstrate heightened susceptibility to forming stable hairpin structures due to their extended sequence. Research indicates that even minor changes to primer sequences to eliminate amplifiable primer dimers and hairpins can substantially improve assay performance when monitored in real-time with intercalating dyes or fluorescent endpoint detection methods like QUASR [2].
Thermodynamic Fundamentals of Nucleic Acid Interactions
The Nearest-Neighbor Model and Gibbs Free Energy
The stability of base pair interactions in nucleic acid hybridization processes is strongly influenced by the identity and orientation of neighboring base pairs. The nearest-neighbor (NN) model for nucleic acid thermodynamics has been successfully applied to predict the stability of secondary structures of DNA/RNA [2]. This model estimates the change in Gibbs free energy (ΔG) during hybridization, providing a quantitative measure of interaction stability. The ΔG value represents the overall energy change for the hybridization process, with more negative values indicating thermodynamically more stable structures.
The NN model calculates duplex stability by considering the free energy contributions of all overlapping dinucleotide pairs. Each nucleotide pair (e.g., AA/TT, AT/TA, TA/AT, CA/GT, GT/CA, CT/GA, GA/CT, CG/GC, GC/CG, GG/CC) contributes specific free energy values based on extensive empirical measurements. The sum of these dinucleotide values, along with initiation and termination parameters, provides the overall ΔG for the hybridization event. This computational approach allows researchers to evaluate potential primer interactions before experimental validation.
Correlation Between ΔG and Non-Specific Amplification
Research has demonstrated that the free energy of annealing (ΔG) is the key driver of amplification efficiency [36]. Statistical analyses using logistic regression have confirmed that ΔG values are significantly predictive of amplification status (p = 7.35e-12) [36]. The stability of amplifiable secondary structures can be correlated with the probability of non-specific amplification through a single thermodynamic parameter derived from ΔG calculations [2].
In practice, primers with more negative ΔG values for dimer formation or hairpin structures are more likely to cause non-specific amplification. This correlation enables the development of predictive models that can flag problematic primers during the design phase. One study developed a Thermodynamic Mismatch Model (TMM) that incorporates ΔG, the position of the 3' mismatch closest to the terminus (iX), and an interaction term (ΔGiX) to accurately predict amplification outcomes [36]. This model outperformed approaches based solely on free energy or other thermodynamic models, achieving an area under the receiver operating characteristic curve of 0.953 [36].
Table 1: Thermodynamic Stability Thresholds for Primer Structures
| Structure Type | Problematic ΔG Threshold | Experimental Impact |
|---|---|---|
| Primer Self-Dimer | ≤ -9 kcal/mol [37] | Increased fluorescent background, slower amplification |
| Cross Primer Dimer | ≤ -9 kcal/mol [37] | False positive signals, reduced target amplification |
| Hairpin Structures | ≤ -3 kcal/mol (especially with 3' complementarity) [2] | Self-amplification, primer sequestration |
| 3' End Interactions | Stable structures within 6 bases of 3' end [36] | Disrupted polymerase binding, failed amplification |
Experimental Protocols for ΔG Analysis
In Silico Analysis of Primer Secondary Structures
Protocol 1: Comprehensive Thermodynamic Profiling of Primers
Sequence Input: Obtain primer sequences in 5' to 3' orientation. For LAMP assays, ensure all six primers (F3, B3, FIP, BIP, LoopF, LoopB) are included in the analysis [2].
Software Selection: Utilize established oligonucleotide analysis tools such as:
Parameter Configuration: Set appropriate reaction conditions:
Free Energy Calculation: Execute analysis for:
- Self-dimerization (forward and reverse primers independently)
- Cross-dimerization (between all primer combinations)
- Hairpin formation (particularly for inner primers >40 bases)
- ΔG recording for all stable structures (ΔG ≤ -5 kcal/mol)
Interpretation: Flag primers with:
- Stable dimers (ΔG ≤ -9 kcal/mol) [37]
- Hairpins with 3' complementarity
- Stable structures within the 3' hexamer
Experimental Validation of Non-Specific Amplification
Protocol 2: Empirical Verification of Primer Specificity
Reaction Setup:
- Prepare no-template controls (NTC) containing all reaction components except the target nucleic acid [37]
- Use standardized master mix compositions appropriate for the amplification technique
- For RT-LAMP: 1× Isothermal amplification buffer, 8 mM MgSO4, 1.4 mM each dNTP, 0.8 M betaine, 0.2 μM each F3/B3, 1.6 μM each FIP/BIP, 0.8 μM each LoopF/LoopB, Bst 2.0 WarmStart DNA polymerase, and reverse transcriptase [2]
Amplification Conditions:
Detection Methods:
Data Interpretation:
- Monitor amplification curves in NTC for slow rise, indicating non-specific amplification [2]
- Compare amplification efficiency between test and control reactions
- Analyze melting curves for multiple peaks suggesting heterogeneous products
Primer Optimization Based on Thermodynamic Parameters
Protocol 3: Iterative Refinement of Problematic Primers
Identify Problematic Regions: Based on ΔG calculations, locate specific sequence elements contributing to stable secondary structures.
Implement Strategic Modifications:
- For hairpins: Redesign regions with 3' complementarity by introducing non-complementary bases
- For primer dimers: Adjust overlapping homologous regions, particularly at 3' ends
- Maintain overall primer length and GC content requirements (40-60%) [3]
Validate Modified Primers:
Experimental Confirmation:
- Test optimized primers in no-template controls
- Compare performance with original primers using standardized template concentrations
- Verify improved specificity through single amplification products in melting curves or gel electrophoresis
Table 2: Troubleshooting Guide for Non-Specific Amplification
| Problem | Potential Cause | ΔG-Based Solution |
|---|---|---|
| Rising baseline in no-template controls [2] | Stable primer dimers with ΔG ≤ -9 kcal/mol | Redesign primers to increase ΔG of dimer formation by breaking complementarity |
| Self-amplifying hairpin structures [2] | Hairpins with 3' complementarity and ΔG ≤ -3 kcal/mol | Introduce mismatches in stem region while maintaining target binding |
| Delayed amplification in positive samples | Primer sequestration in secondary structures | Modify sequence to destabilize internal structures (less negative ΔG) |
| Multiple peaks in melting curve analysis [37] | Co-amplification of specific and non-specific products | Increase annealing temperature, optimize Mg2+ concentration, redesign problematic primers |
Visualization of the ΔG-Based Primer Optimization Workflow
The following diagram illustrates the systematic process for correlating ΔG calculations with experimental optimization to minimize non-specific amplification:
Diagram 1: Primer optimization workflow based on ΔG analysis. The process iterates between in silico prediction and experimental validation until specificity is achieved.
Research Reagent Solutions for Thermodynamic Analysis
Table 3: Essential Research Tools for ΔG Analysis and Primer Validation
| Reagent/Tool | Function/Application | Implementation Example |
|---|---|---|
| OligoAnalyzer (IDT) [38] | Calculates ΔG for dimer and hairpin formation | Analyze self-complementarity and 3'-end stability during primer design |
| mFold Tool [2] | Predicts secondary structure formation | Identify stable hairpins in long primers (>40 nt) |
| SYTO dyes (Thermo Fisher) [2] | Real-time monitoring of DNA amplification | Detect non-specific amplification in no-template controls |
| Bst 2.0 WarmStart Polymerase [2] | Reduces non-specific initiation at low temperatures | Improve LAMP assay specificity |
| Multiple Prime Analyzer (Thermo Fisher) [2] | Evaluates multi-primer interactions | Assess all possible dimer combinations in LAMP primer sets |
| LinRegPCR [40] | Calculates PCR efficiency from amplification data | Correlate primer ΔG values with actual amplification efficiency |
| geNorm [41] | Determines reference gene stability | Normalize qPCR data using multiple control genes |
The correlation between Gibbs free energy (ΔG) and non-specific amplification provides researchers with a powerful predictive tool for optimizing nucleic acid amplification assays. By incorporating thermodynamic analysis into primer design pipelines, scientists can proactively address the challenges posed by primer dimers and self-amplifying hairpins, particularly in complex multi-primer systems like LAMP. The quantitative parameters outlined in this guide, particularly the ΔG thresholds for various secondary structures, offer concrete criteria for evaluating primer suitability before experimental validation.
Future developments in this field will likely focus on the integration of machine learning approaches with thermodynamic principles to further enhance prediction accuracy. As demonstrated by the Thermodynamic Mismatch Model [36], combining ΔG with additional parameters such as mismatch position and type can yield highly reliable amplification outcome predictions. The ongoing refinement of these models, coupled with increasingly sophisticated oligonucleotide analysis tools, will continue to improve the specificity and reliability of molecular diagnostics and research applications.
Practical Strategies: Designing Robust Primers and Using Analytical Tools
The precision of polymerase chain reaction (PCR) experiments is fundamentally dictated by the physicochemical properties of oligonucleotide primers. While secondary structures such as hairpin loops and primer-dimers are recognized as major sources of assay failure, their formation is directly governed by core primer design parameters. This whitepaper delineates the foundational rules for primer length, melting temperature (Tm), GC content, and the GC clamp, framing them as critical control points for suppressing deleterious secondary structures. We provide a quantitative framework and validated experimental protocols to empower researchers in systematically designing robust primers, thereby enhancing the reliability of PCR in diagnostic and drug development applications.
In molecular biology, the polymerase chain reaction is a cornerstone technique. Its success, however, is almost entirely contingent on the judicious design of its primers [18]. Poorly designed primers are a primary source of failed experiments, often resulting in non-specific amplification, low yield, or no product at all. A significant factor behind these failures is the propensity of primers to form secondary structures, such as hairpin loops and dimers (self-dimers and cross-dimers) [4]. These structures arise from intramolecular or intermolecular base-pairing, which sequesters the primer from its intended template and drastically reduces amplification efficiency [3].
The formation of these problematic structures is not a random occurrence but is directly influenced by a set of core design parameters. Primer length, melting temperature (Tm), GC content, and the sequence of the 3' end collectively determine the thermodynamic stability and specificity of primer-template binding [42] [43]. By adhering to strict quantitative guidelines for these parameters, researchers can preemptively minimize the risk of secondary structure formation. This guide establishes these core rules, integrating them into a cohesive strategy for developing highly specific and efficient primers, with a particular emphasis on mitigating the interactions that lead to structural complications.
Core Primer Design Parameters and Rules
Adherence to the following quantitative guidelines is essential for developing primers that are specific, efficient, and resistant to forming secondary structures.
Primer Length
Primer length is a primary determinant of both specificity and binding efficiency. Excessively long primers hybridize slowly and can promote non-specific binding, whereas very short primers may lack the specificity required for unique target identification [3].
- Optimal Range: The consensus across multiple sources is 18–24 nucleotides [3] [14] [4]. Some guidelines extend this range to 18–30 bases for standard PCR [42] [44].
- Rationale: This range provides a sequence long enough to ensure uniqueness within a complex genome while remaining short enough to hybridize efficiently to the template DNA during the annealing phase of the PCR [43] [45].
Melting Temperature (Tm)
The melting temperature (Tm) is the temperature at which 50% of the primer-DNA duplexes dissociate into single strands. It is a critical measure of duplex stability and directly dictates the annealing temperature (Ta) of the PCR reaction [3] [4].
- Optimal Tm Range: A Tm of 60–65°C is widely recommended for most applications [44]. Broader acceptable ranges are reported between 55–65°C [45] and 65–75°C [42].
- Tm Matching for Primer Pairs: The forward and reverse primers in a pair should have Tm values within 1–5°C of each other [43] [45] [44]. A difference of ≤2°C is ideal for synchronized binding and efficient amplification [14].
- Annealing Temperature (Ta): The annealing temperature for the PCR cycle is typically set 2–5°C below the Tm of the primers [3] [44].
GC Content
GC content refers to the percentage of guanine (G) and cytosine (C) bases in the primer sequence. Since G-C base pairs form three hydrogen bonds (as opposed to two for A-T pairs), the GC content significantly influences the primer's stability and Tm [3].
- Optimal Range: The GC content should be maintained between 40–60% [42] [3] [4].
- Rationale: A GC content below 40% can result in primers that bind too weakly, while a content above 60% increases the risk of non-specific, high-affinity binding and promotes the formation of stable secondary structures [43].
The GC Clamp
The GC clamp refers to the strategic placement of G or C bases at the 3' end of the primer. This practice enhances the stability of the initial polymerase binding site but must be applied judiciously [42] [14].
- Definition: The presence of one or two G or C bases within the last five nucleotides at the 3' end [3] [14].
- Rationale: The stronger bonding of a GC clamp provides a more stable starting point for the DNA polymerase, promoting specific initiation of DNA synthesis [45].
- Critical Avoidance: The primer should not end with more than 3 G or C bases in the last five nucleotides, as this can drastically increase non-specific priming and is a known risk factor for primer-dimer formation [42] [4].
Table 1: Summary of Core Primer Design Parameters and Their Guidelines
| Parameter | Recommended Range | Critical Rationale & Connection to Secondary Structures |
|---|---|---|
| Primer Length | 18–24 nucleotides [14] | Balances specificity (longer) with hybridization efficiency (shorter). Longer primers have a higher probability of intramolecular folding. |
| Melting Temperature (Tm) | 60–65°C [44] | Determines annealing temperature. A Tm that is too low often necessitates a low Ta, which tolerates mismatches and promotes dimerization. |
| Tm Difference (Pair) | ≤ 2°C (max 5°C) [14] [44] | Ensures both primers anneal synchronously. A large difference can lead to single-primer extension cycles, increasing the chance of self-dimer formation. |
| GC Content | 40–60% [42] [4] | Provides thermodynamic stability. High GC content (>60%) strongly promotes stable hairpins and self-dimers due to increased hydrogen bonding. |
| GC Clamp | 1-2 G/C bases in last 5 bases [3] | Stabilizes the 3' end for polymerase binding. More than 3 G/C bases at the 3' end is a primary cause of primer-dimer artifacts [42]. |
A Workflow for Designing and Validating Primers
The following integrated workflow combines parameter selection with specific steps to mitigate secondary structures.
Diagram 1: Primer design and validation workflow.
Define Target and Apply Core Parameters
- Target Definition: Obtain the precise target genomic or cDNA sequence from a curated database like NCBI RefSeq [14]. Clearly define the region to be amplified.
- Primer Design: Using a dedicated tool (e.g., Primer3, Geneious Prime, or IDT PrimerQuest), input your sequence and set the constraints as defined in Table 1 [46] [44]. The software will generate candidate primer pairs based on these parameters.
Screen for Secondary Structures
This is a critical, non-negotiable step. All candidate primers must be analyzed for their propensity to form secondary structures.
- Hairpins (Intramolecular Folding): Screen for regions within a single primer that are complementary and can fold back on themselves. The stability of hairpins is represented by the Gibbs Free Energy (ΔG); more negative values indicate more stable, problematic structures. Optimally, a 3' end hairpin with a ΔG of -2 kcal/mol is tolerated, but higher (less negative) values are preferable [4].
- Self-Dimers and Cross-Dimers (Intermolecular Binding): Use thermodynamic analysis tools (e.g., IDT OligoAnalyzer) to check if two copies of the same primer (self-dimer) or the forward and reverse primers (cross-dimer) can bind to each other. The ΔG for any dimer should be weaker (more positive) than -9.0 kcal/mol [44]. Pay particular attention to complementarity at the 3' ends, as this directly competes with target binding and can lead to amplification of primer-dimer artifacts.
Validate Specificity and Performance
- Specificity Check: Use NCBI Primer-BLAST to verify that your primer pair will amplify only the intended target sequence and not other regions in the organism's genome [10] [44]. This tool integrates primer design with BLAST-based specificity checking.
- In Silico Validation: Simulate the PCR reaction using in silico PCR tools (e.g., from UCSC) to confirm the expected product size and the absence of spurious products from the reference genome [14].
- Empirical Validation: Even well-designed primers may require optimization. Employ a gradient PCR to experimentally determine the optimal annealing temperature, which can help overcome minor secondary structures or suboptimal binding [43]. Analyze the PCR product on a gel to confirm a single amplicon of the correct size and the absence of primer-dimer bands.
Successful primer design and validation rely on a suite of in silico tools and laboratory reagents.
Table 2: Essential Research Reagents and Tools for Primer Design and Validation
| Tool / Reagent | Primary Function | Role in Mitigating Secondary Structures |
|---|---|---|
| NCBI Primer-BLAST [10] | Integrated primer design & specificity checking. | The premier public tool for ensuring primers are unique to the target, preventing off-target binding that can complicate analysis. |
| IDT OligoAnalyzer Tool [44] | Thermodynamic analysis of oligonucleotides. | Calculates Tm, and critically, analyzes ΔG values for hairpins and dimers, allowing for direct screening of problematic primers. |
| Primer3 [46] [14] | Core primer design engine. | Incorporated into many platforms (e.g., Geneious, Primer-BLAST) to generate candidate primers that meet core parameter rules. |
| DMSO [14] | PCR additive. | Aids in amplifying GC-rich templates by destabilizing DNA secondary structures, both in the template and the primers themselves. |
| Gradient PCR Thermocycler | Empirical reaction optimization. | Essential for determining the true optimal annealing temperature (Ta), which can be raised to suppress non-specific binding and dimerization. |
The core principles of primer design—length, Tm, GC content, and the GC clamp—are more than just a checklist for efficiency; they are the first and most crucial line of defense against the formation of primer secondary structures. By understanding the thermodynamic principles that underpin these rules and integrating them into a systematic workflow that includes rigorous in silico screening, researchers can dramatically increase the success rate of their PCR assays. For scientists in drug development and diagnostics, where reproducibility and accuracy are paramount, a disciplined approach to primer design is not just a best practice but a fundamental requirement for generating reliable and meaningful data.
Step-by-Step Guide to Using OligoAnalyzer for Hairpin and Dimer Analysis
In the realm of molecular biology and drug development, the specificity and efficiency of polymerase chain reaction (PCR) are paramount. The formation of primer secondary structures such as hairpin loops and primer-dimers constitutes a significant challenge, often leading to nonspecific amplification, reduced yield, and false-positive results [1]. Hairpins occur due to intramolecular interactions within a single primer, while primer-dimers are formed by intermolecular complementarity between primers [3]. These structures can interfere with the primer's ability to bind to the target DNA template, compromising the integrity of genetic experiments and diagnostic assays. Tools like the OligoAnalyzer Tool from Integrated DNA Technologies (IDT) provide a critical in-silico method for researchers to preemptively identify and mitigate these issues, ensuring the success of downstream applications [6].
Primer Secondary Structures: Hairpins and Dimers
Hairpin Loops
A hairpin, or stem-loop structure, forms when two regions within a single oligonucleotide are complementary and base-pair with each other, creating a loop [3]. This intramolecular folding prevents the primer from hybridizing to its intended target sequence. The stability of a hairpin is influenced by the length of the complementary regions and the GC content, as GC base pairs form three hydrogen bonds, conferring greater stability than AT pairs [3]. In PCR and qPCR, hairpin formation can lead to non-specific amplicons or a complete lack of amplification product [3].
Primer-Dimers
Primer-dimers are unintended amplification artifacts formed when primers hybridize to each other instead of the target template [1]. There are two primary types:
- Self-dimers: Formed by the hybridization of two identical primers (e.g., two forward primers) [3].
- Hetero-dimers (Cross-dimers): Formed by the hybridization of forward and reverse primers [3] [1].
When these dimers form, the DNA polymerase can extend the primers, generating short, unwanted products that compete for reaction resources and can be mistaken for true amplicons in techniques like gel electrophoresis or quantitative PCR [1]. The risk of dimer formation is heightened in techniques employing multiple primers at high concentrations, such as Loop-Mediated Isothermal Amplification (LAMP) [1].
Consequences in Research and Diagnostics
The formation of these secondary structures can significantly impact experimental outcomes. Primer-dimers and hairpins are known to cause false-positive results in diagnostic tests, reduce amplification efficiency, and lead to signal loss [1]. For researchers and professionals in drug development, where accuracy is critical, such artifacts can invalidate experimental results and lead to incorrect conclusions. Therefore, rigorous in-silico checks are an indispensable part of the primer design workflow [14].
A Step-by-Step Guide to Using OligoAnalyzer
IDT's OligoAnalyzer Tool is a freely accessible online resource that allows for the comprehensive analysis of oligonucleotides. The following protocol provides a detailed methodology for assessing primers for hairpin and dimer formation.
Access and Sequence Input
- Access the Tool: Navigate to the IDT OligoAnalyzer Tool website through your web browser. You may need to create a free account on the IDT website to access the tool [47].
- Input Oligonucleotide Sequence: In the provided sequence box, enter the nucleotide sequence of your primer (e.g., the forward primer) in the 5' to 3' direction. The tool will automatically accept the sequence and display basic properties such as molecular weight and extinction coefficient [47].
Hairpin Analysis
- Initiate Analysis: To the right of the sequence input box, click on the 'Hairpin' analysis option [6].
- Adjust Reaction Conditions: A new interface will appear, allowing you to modify default parameters such as oligo concentration, Na+ concentration, and Mg2+ concentration to closely match your intended experimental conditions [6].
- Interpret Results: The tool will display a list of potential hairpin structures that the oligonucleotide can form. For each structure, it provides a diagram and key thermodynamic parameters.
- Key Parameter: The melting temperature (Tm) of the hairpin structure is the most critical value [6].
- Interpretation: If the calculated Tm of the hairpin is lower than your reaction's annealing temperature, the structure is unlikely to be stable and will not interfere. If the Tm is higher than your annealing temperature, the hairpin is stable and the primer should be redesigned [6].
Self-Dimer Analysis
- Initiate Analysis: Click on the 'Self-Dimer' button to the right of the sequence box [6].
- Interpret Results: A new window will open, listing all possible duplex structures that two copies of the same primer can form.
- Key Parameter: The tool calculates the delta G (ΔG) value for each potential dimer, which represents the Gibbs free energy and indicates the stability of the structure [6].
- Interpretation: A strongly negative delta G value (typically –9 kcal/mol or more negative) suggests a stable dimer that is likely to form and cause problems during amplification. Primers with such values should be redesigned [6].
Hetero-Dimer Analysis
- Initiate Analysis: Click on the 'Hetero-Dimer' button. This action will open a second sequence input box below the first [6].
- Input Second Primer Sequence: Enter the sequence of your second primer (e.g., the reverse primer) into the new box [6].
- Calculate and Interpret: Click the 'Calculate' button. The tool will analyze the interaction between the two primers. As with self-dimers, evaluate the delta G (ΔG) value. A hetero-dimer with a ΔG of –9 kcal/mol or more negative is considered problematic and warrants primer redesign [6].
The following workflow diagram summarizes the entire analysis process:
Figure 1: A decision workflow for analyzing primers using the OligoAnalyzer tool.
Interpretation of Results and Thresholds
Correct interpretation of the thermodynamic parameters provided by OligoAnalyzer is crucial for deciding whether a primer is suitable for use. The following table summarizes the key parameters and their critical thresholds.
Table 1: Key Thermodynamic Parameters and Interpretation Guidelines for Primer Analysis
| Analysis Type | Key Parameter | Threshold Value | Interpretation | Recommended Action |
|---|---|---|---|---|
| Hairpin | Melting Temperature (Tm) | Varies | Tm lower than reaction annealing temperature [6]. | Primer is acceptable. |
| Tm higher than reaction annealing temperature [6]. | Redesign primer. | |||
| Self-Dimer | Gibbs Free Energy (ΔG) | –9 kcal/mol | ΔG less negative than –9 kcal/mol [6]. | Dimer is weak; primer is likely acceptable. |
| ΔG of –9 kcal/mol or more negative [6]. | Dimer is stable; redesign primer. | |||
| Hetero-Dimer | Gibbs Free Energy (ΔG) | –9 kcal/mol | ΔG less negative than –9 kcal/mol [6]. | Dimer is weak; primer pair is likely acceptable. |
| ΔG of –9 kcal/mol or more negative [6]. | Dimer is stable; redesign one or both primers. |
The Scientist's Toolkit: Essential Reagent Solutions
The following table details key reagents and materials referenced in this guide that are essential for experimental work involving primer analysis and nucleic acid amplification.
Table 2: Essential Research Reagents and Materials for Primer Analysis and Amplification
| Reagent/Material | Function/Description | Relevance to Hairpin/Dimer Analysis |
|---|---|---|
| Oligonucleotides (Primers/Probes) | Short, single-stranded DNA sequences that bind to a specific target region to initiate DNA synthesis [3]. | The primary subject of analysis; their sequence determines propensity for secondary structure formation. |
| DNA Polymerase | Enzyme that synthesizes new DNA strands by adding nucleotides to the 3' end of a primer [1]. | Can extend primers that have formed dimers, leading to unwanted amplification products [1]. |
| Deoxynucleotide Triphosphates (dNTPs) | The building blocks (A, dG, dC, dT) used by DNA polymerase to synthesize DNA [1]. | High concentrations can increase the likelihood of primer-dimer formation and extension [1]. |
| Magnesium Ions (Mg²⁺) | A divalent cation that acts as a cofactor for DNA polymerase and stabilizes DNA duplexes [1]. | Concentration critically affects reaction stringency and stability of secondary structures; high concentrations facilitate dimer formation [1]. |
| Dimethyl Sulfoxide (DMSO) | A chemical additive that reduces secondary structure in DNA templates and primers. | Can be used to mitigate issues caused by hairpins in GC-rich sequences, improving amplification efficiency. |
This technical guide provides a comprehensive framework for interpreting the critical thermodynamic parameters of ΔG (Gibbs Free Energy) and melting temperature (Tm) in PCR primer design. Within the broader context of primer secondary structure research, we establish quantitative thresholds for these parameters that predict and prevent the formation of problematic hairpin loops and primer-dimers. By integrating empirical data with computational validation protocols, this whitepaper delivers a standardized methodology for researchers and drug development professionals to optimize assay specificity and efficiency, thereby reducing experimental artifacts in molecular diagnostics and therapeutic development pipelines.
The success of polymerase chain reaction (PCR) and quantitative PCR (qPCR) assays hinges on the precise thermodynamic behavior of oligonucleotide primers. Two parameters, ΔG and Tm, serve as fundamental predictors of this behavior. ΔG (Gibbs Free Energy) quantifies the spontaneity of secondary structure formation, where negative values indicate favorable (spontaneous) formation of unwanted structures like hairpins and dimers [48]. Melting temperature (Tm) represents the temperature at which 50% of DNA duplexes dissociate and 50% remain bound, directly influencing primer annealing efficiency [3]. Research into primer secondary structures consistently demonstrates that uncontrolled formation of hairpin loops and dimers competitively inhibits primer binding to intended target sequences, depletes reaction reagents, and generates spurious amplification products that compromise quantification accuracy [2] [49]. This is particularly critical in diagnostic and drug development applications, where false positives or reduced sensitivity can have significant downstream consequences. A thermodynamically-guided design approach, based on robust interpretation of ΔG and Tm outputs, provides a physical chemistry foundation for preventing these artifacts.
Core Thermodynamic Concepts and Quantitative Thresholds
Gibbs Free Energy (ΔG) and Secondary Structure Stability
ΔG values calculated by primer design tools predict the stability of secondary structures. The more negative the ΔG value, the more stable and problematic the structure, as it is more likely to form spontaneously and resist denaturation during the PCR annealing step [48]. The following table summarizes critical ΔG thresholds for different secondary structure types:
Table 1: ΔG Thresholds for Primer Secondary Structures
| Structure Type | ΔG Threshold (kcal/mol) | Biological Implication |
|---|---|---|
| Hairpins (3' end) | > -2.0 | 3' end hairpins prevent polymerase binding and extension [48]. |
| Hairpins (Internal) | > -3.0 | Internal hairpins are slightly easier to denature but still impede annealing [48]. |
| Self-Dimers & Cross-Dimers | > -9.0 | Stable dimerization sequesters primers and leads to spurious amplification [44] [49]. |
| Extensible Dimers | > -5.0 to -9.0 (Condition-dependent) | Structures with stable 3' complements are extendable by polymerase, causing strong PCR artifacts [49]. |
Inter-primer homology (cross-dimers) and intra-primer homology (self-dimers and hairpins) arise from complementary sequences within or between primers [3]. For a primer to function correctly, its 3' end must remain available for the DNA polymerase to bind and initiate extension. Stable secondary structures involving the 3' end, indicated by highly negative ΔG values, are therefore particularly detrimental [49].
Melting Temperature (Tm) and Annealing Specificity
Tm is a cornerstone parameter for determining the optimal annealing temperature (Ta) in a PCR protocol. The relationship between Tm and Ta is foundational for reaction specificity. The ideal primer Tm typically falls between 60°C and 64°C, with the two primers in a pair differing in Tm by no more than 2°C to ensure simultaneous efficient binding [44] [50]. The annealing temperature (Ta) should be set no more than 5°C below the Tm of the primers [44]. If the Ta is too low, primers may tolerate mismatches and bind to non-target sequences, while a Ta that is too high reduces reaction efficiency by preventing sufficient primer binding [44] [48].
For qPCR assays involving a probe, the probe's Tm should be 5–10°C higher than the primer Tms to ensure it binds to the target before the primers, guaranteeing efficient hybridization and cleavage for fluorescence detection [44]. Tm is intrinsically linked to primer length and GC content. Primers should be 18–30 nucleotides long, with a GC content between 40% and 60% [44] [48] [50]. A higher GC content generally elevates Tm due to the three hydrogen bonds in G-C base pairs versus two in A-T pairs [3]. Furthermore, a GC clamp—the presence of one or two G or C bases within the last five nucleotides at the 3' end—can enhance the specificity of primer binding [48] [3].
Table 2: Summary of Key Primer and Probe Design Parameters
| Parameter | Ideal Range | Rationale |
|---|---|---|
| Primer Length | 18 - 30 bp [44] [50] | Balances specificity and efficient hybridization. |
| GC Content | 40% - 60% [44] [3] | Provides sequence complexity without excessive stability. |
| Primer Tm | 60°C - 64°C [44] | Compatible with standard enzyme activity and cycling conditions. |
| Tm Difference (Primer Pair) | ≤ 2°C [44] [3] | Ensures both primers anneal with similar efficiency. |
| Annealing Temperature (Ta) | Tm - (2°C to 5°C) [44] [48] | Optimizes specific binding while minimizing mismatches. |
| Probe Tm (qPCR) | Primer Tm + (5°C - 10°C) [44] | Ensures probe is bound before primer extension begins. |
| ΔG (All Structures) | > -9.0 kcal/mol [44] | Prevents formation of stable, reaction-hindering structures. |
Experimental Protocols for Validation
Protocol 1: Empirical Validation of Primer-Dimer Formation
This protocol assesses whether predicted dimer ΔG values correlate with observable amplification artifacts, providing experimental validation for computational thresholds [49].
- Primer Set Selection: Select a panel of 20-30 primer pairs with calculated dimer ΔG scores spanning a wide range, from -3.0 kcal/mol to -15.0 kcal/mol.
- PCR Reaction Setup:
- Template: Use a no-template control (NTC) to exclusively visualize artifacts from primer interactions.
- Master Mix: 1X Isothermal Amplification Buffer, 8 mM MgSO₄, 1.4 mM each dNTP, 0.8 M betaine, 0.2 µM of each F3/B3 primer, 1.6 µM of each FIP/BIP primer (for LAMP), 0.8 units of Bst 2.0 WarmStart DNA polymerase, in a 10 µL total reaction volume [2].
- Cycling Conditions: 63°C for 60 minutes (for LAMP) or standard PCR cycles with an annealing temperature 5°C below the primer Tm.
- Analysis by Gel Electrophoresis:
- Separate the PCR products on a 2-3% agarose gel.
- Stain with GelRed or ethidium bromide and visualize under UV light.
- Classification: Score primer pairs as "dimer-forming" if a band of unexpected size (typically lower molecular weight than the target amplicon) is present in the NTC lane. The absence of such bands classifies the pair as "dimer-free" [49].
- Data Correlation: Correlate the empirical results (dimer-forming vs. dimer-free) with the pre-calculated ΔG scores to establish an experimental ΔG threshold for your specific reaction conditions.
Protocol 2: ROC Analysis for Dimer Prediction Tool Validation
This advanced protocol uses Receiver Operating Characteristic (ROC) analysis to quantitatively evaluate the predictive power of a dimer prediction algorithm [49].
- Gold-Standard Dataset Creation: Compile a dataset of at least 50 primer pairs with empirically determined status (dimer-forming or dimer-free) from Protocol 1.
- Dimer Score Calculation: Run the primer sequences through the prediction tool (e.g., PrimerDimer [49]) to obtain a numerical dimer score (e.g., ΔG in kcal/mol) for each pair.
- ROC Curve Generation:
- Use a tool like PrimerROC to generate the curve [49].
- The tool plots the True Positive Rate (Sensitivity) against the False Positive Rate (1 - Specificity) for every possible dimer score threshold.
- Calculate AUC: Determine the Area Under the Curve (AUC). An AUC of 1 represents perfect prediction, while 0.5 is no better than chance.
- Threshold Determination:
- Identify the optimal dimer-free threshold—the ΔG value above which the first false negative (a dimer-forming pair incorrectly classified as dimer-free) occurs.
- At this threshold, the false negative rate is zero, and the classification of dimer-free primers is maximized, which is the primary goal of diagnostic primer design.
Computational Tools and Workflow
A robust primer design workflow leverages multiple specialized tools for comprehensive thermodynamic analysis. The following diagram illustrates the integration of these tools and parameters in a systematic primer design and validation workflow.
Diagram 1: Primer design and validation workflow.
- PrimerQuest (IDT) & Primer3: These are primary design engines. They generate candidate primer pairs based on user-defined constraints (e.g., amplicon size, Tm range) [44] [51]. They perform initial checks for self-complementarity but should not be relied upon as the sole assessment tool.
- OligoAnalyzer (IDT): This is a critical tool for in-depth thermodynamic analysis. Input your candidate primer sequences to calculate precise Tm and, most importantly, to analyze for hairpins and self-dimers/heterodimers. The tool provides the ΔG value for each potential structure, which must be compared against the thresholds in Table 1 [44] [48].
- Primer-BLAST (NCBI): This tool is essential for verifying primer specificity. It checks the proposed primers against a selected database (e.g., Refseq mRNA) to ensure they are unique to the intended target and will not generate off-target amplicons [10]. This step is crucial for avoiding false positives in complex genomic samples.
- PrimerROC/PrimerDimer: These specialized tools use ROC analysis to provide a condition-independent, ΔG-based threshold for predicting extensible primer-dimers with high accuracy (>92%) [49]. This is particularly valuable for multiplex assay design.
Advanced Applications and Research Reagent Solutions
In complex assays, the principles of ΔG and Tm control are even more critical. In multiplex PCR, the number of potential primer interactions increases polynomially with each added primer, dramatically raising the risk of dimer formation [49]. Meticulous screening of all primer combinations using the described tools and thresholds is non-negotiable. Similarly, techniques like reverse transcription LAMP (RT-LAMP) are highly susceptible to amplifiable hairpins and dimers due to the use of long inner primers (FIP/BIP, typically 40–45 bases) and multiple primers (6 per target) [2]. Research shows that minor primer modifications to eliminate these structures, guided by ΔG analysis, can dramatically improve assay performance and reduce non-specific background amplification [2].
Table 3: Research Reagent Solutions for Thermodynamic Optimization
| Reagent / Tool | Function / Application | Specifications / Notes |
|---|---|---|
| Bst 2.0 WarmStart Polymerase | Isothermal amplification (e.g., LAMP, RT-LAMP). | Reduces non-specific amplification at low temperatures; used at 3.2 units/10 µL reaction [2]. |
| Double-Quenched Probes (IDT) | qPCR detection with low background. | Incorporate ZEN/TAO internal quencher for longer probes and higher signal-to-noise [44]. |
| SYTO 9 / SYTO 82 Dyes | Real-time monitoring of LAMP/RT-LAMP. | Intercalating dyes for tracking total DNA synthesis; compatible with FAM/HEX channels [2]. |
| Betaine | PCR additive for GC-rich targets. | Used at 0.8 M concentration to reduce secondary structure formation in template and primers [2]. |
| OligoAnalyzer Tool (IDT) | Analyze Tm, hairpins, dimers, mismatches. | Uses nearest-neighbor model for accurate ΔG calculation; includes BLAST analysis [44]. |
| PrimerROC/PrimerDimer | Condition-independent dimer prediction. | Employs ROC analysis to determine a dimer-free ΔG threshold with >92% accuracy [49]. |
| AMV Reverse Transcriptase | Reverse Transcription in RT-LAMP. | Converts RNA to cDNA; used at 2.0 units/10 µL reaction in RT-LAMP protocols [2]. |
Interpreting ΔG values and melting temperature thresholds through a rigorous, evidence-based framework is fundamental to advanced primer design. By adhering to the quantitative thresholds for ΔG and Tm outlined in this guide, researchers can effectively minimize the detrimental effects of hairpin loops and primer-dimers. The integration of sophisticated computational tools like OligoAnalyzer and PrimerROC with empirical validation protocols provides a reliable pipeline for developing robust PCR and qPCR assays. This thermodynamic approach is indispensable for achieving the high levels of specificity and efficiency required in modern molecular research, clinical diagnostics, and pharmaceutical development, ensuring that primer performance is predictable and reproducible.
The Role of Primer Concentration and Quality in Preventing Artifacts
In the realm of molecular biology, the integrity of polymerase chain reaction (PCR) and quantitative PCR (qPCR) experiments is paramount, especially in critical applications like drug development and diagnostic assay creation. The formation of artifactual byproducts, such as primer-dimers and non-specific amplification, poses a significant threat to data accuracy and experimental reproducibility. While primer secondary structures like hairpin loops and self-dimers are well-recognized challenges, the specific roles of primer concentration and oligonucleotide quality as determining factors are often underestimated. This technical guide delves into the mechanisms by which these parameters influence artifact generation, framing the discussion within a broader thesis on primer secondary structure research. It provides researchers with actionable, data-driven protocols to optimize these factors, thereby safeguarding the fidelity of their molecular assays.
Theoretical Foundations: Primer-Artifact Interactions
Mechanisms of Primer-Dimer Formation
The conventional understanding of primer-dimer artifacts attributes their formation to the direct hybridization of two primers via complementary 3'-ends, creating a structure extensible by DNA polymerase [52]. This mechanism is thermodynamically favored when primers exhibit high self-complementarity or cross-complementarity, particularly at their 3' termini.
However, an alternative and often overlooked mechanism involves the genomic DNA itself. Research indicates that background genomic DNA can facilitate primer-dimer formation by providing a scaffold where two primers bind in close proximity, even with minimal 3'-end complementarity [52]. In this model, the middle and 5'-regions of the primers bind to the genomic DNA with sufficient stability to allow the 3'-ends to be extended, eventually incorporating a short region of the other primer. This mechanism is particularly prevalent when one or both primers bind inefficiently to the intended target due to secondary structure or suboptimal thermodynamics. This insight is crucial for a comprehensive thesis on primer secondary structures, as it expands the concept of artifact genesis beyond simple intermolecular interactions to include template-mediated facilitation.
Impact of Artifacts on Data Integrity
The consequences of artifact formation are far-reaching and can severely compromise experimental outcomes. Primer-dimers and non-specific products compete for essential reaction components, such as nucleotides, primers, and DNA polymerase, thereby reducing the yield and efficiency of the desired amplification product [52]. In qPCR experiments, this competition leads to inaccurate quantification, as fluorescent signals are derived from both target and non-target amplicons. Furthermore, in sensitive applications like high multiplex amplicon sequencing or low-frequency variant detection, these artifacts contribute significantly to background noise, increasing false-positive rates and obscuring true biological signals [53]. The table below summarizes the primary types of PCR artifacts and their consequences.
Table 1: Common PCR Artifacts and Their Impacts on Experimental Data
| Artifact Type | Formation Mechanism | Primary Consequences |
|---|---|---|
| Primer-Dimer | Hybridization of two primers via 3' ends or via a genomic DNA scaffold [52] | Reduced amplification efficiency; inaccurate qPCR quantification; increased background noise. |
| Non-Specific Amplification | Partial annealing of primers to off-target sequences, often due to low annealing temperature or high primer concentration. | Co-amplification of unwanted products; reduced target yield; complex electrophoretograms. |
| Polymerase Errors (Taq Errors) | Misincorporation of nucleotides by DNA polymerase during amplification [54]. | Overestimation of sequence diversity; false positives in mutation detection. |
| Chimeras/Heteroduplexes | Fusion of sequences from different templates or incomplete extension products [54]. | Inaccurate community analysis in microbiome and metagenomic studies. |
The Critical Role of Primer Concentration
Concentration-Dependent Artifact Genesis
Primer concentration is a pivotal factor in the kinetics of PCR and a key determinant of artifact formation. Excessive primer concentration increases the likelihood of primer-primer interactions, thereby elevating the risk of primer-dimer formation through both direct dimerization and template-mediated mechanisms [52]. This is especially problematic in the later cycles of PCR, where the relative concentration of primers to amplicon is high. In multiplex PCR assays, which involve hundreds of primer pairs, this problem is exacerbated due to the vast number of potential primer-primer interactions, making stringent optimization of concentration non-negotiable [53].
Furthermore, high primer concentrations can lower the effective annealing temperature of the reaction, promoting non-specific binding and off-target amplification. This occurs because at high concentrations, even weak, partial matches between a primer and an off-target site can facilitate stable binding. Consequently, controlling primer concentration is not merely about ensuring sufficient primer for amplification but is a critical strategy to enforce reaction specificity and suppress competing side reactions.
Empirical Data and Optimization Guidelines
Empirical studies have demonstrated a direct correlation between amplification protocols and the accumulation of artifacts. For instance, one study showed that reducing the number of PCR cycles from 35 to 15, followed by a "reconditioning" step, led to a dramatic reduction in artifactual sequences. The incidence of unique 16S rRNA sequences (ribotypes) dropped from 76% in the standard 35-cycle library to 48% in the modified protocol, with the majority of the former being attributed to Taq polymerase errors and chimeras [54]. This underscores how prolonged amplification under high primer concentration conditions favors the accumulation of artifacts.
Table 2: Impact of PCR Cycle Number on Artifact Accumulation (based on [54])
| Parameter | Standard Library (35 cycles) | Modified Library (15 + 3 cycles) |
|---|---|---|
| % Chimeric Sequences | 13% | 3% |
| % Unique 16S rRNA Sequences | 76% | 48% |
| Estimated Total Sequences (Chao-1) | 3,881 | 1,633 |
| Library Coverage | 24% | 64% |
Optimization involves titrating primer concentrations to find the lowest level that supports robust amplification of the specific target without generating artifacts. A common starting point is a concentration of 100 nM for each primer in a qPCR reaction, but the optimal concentration may vary from 50 nM to 500 nM and must be determined empirically for each assay. For high multiplex PCR, where individual primer concentrations are necessarily lower, precise pooling and quantification are essential to ensure balanced amplification across all targets while minimizing dimer formation [53].
Primer Quality and Design as a Determinant of Specificity
Fundamental Parameters for High-Quality Primers
The intrinsic quality of a primer sequence is the first line of defense against artifacts. Several key parameters must be optimized during the design phase to ensure specific and efficient amplification.
- Length and Melting Temperature (Tm): Primers should be 18-30 nucleotides long, with an optimal Tm of 60-64°C. The Tms of a primer pair should not differ by more than 2°C to ensure synchronous binding [44] [14].
- GC Content and Clamp: The GC content should be maintained between 40-60% to ensure stable yet specific binding. A "GC clamp"—the presence of one or two G or C bases at the 3' end—can enhance binding specificity, but more than three in the last five bases should be avoided as it can promote non-specific priming [3] [14].
- Secondary Structures: Primers must be screened for self-complementarity and hairpin formation. The free energy (ΔG) for any potential self-dimers, cross-dimers, or hairpins should be weaker (more positive) than -9.0 kcal/mol to prevent stable secondary structures from forming [44].
The Critical Importance of 3'-End Complementarity
The stability of the 3'-end of a primer is particularly crucial. This region is where DNA polymerase initiates extension, and any stability here, even if imperfect, can be extended into a primer-dimer artifact. Therefore, a primary design goal is to minimize complementarity at the 3'-ends between and within primers. It is recommended to avoid placing G residues at the very 3'-end and to design primers so that the last two nucleotides are AA or TT, which reduces the stability of potential dimer structures [52]. The following diagram illustrates the primary mechanisms of primer-dimer formation.
Advanced Experimental Protocols for Artifact Mitigation
Protocol: Primer Concentration Titration for qPCR
Objective: To determine the optimal primer concentration that maximizes target amplification efficiency while minimizing primer-dimer and non-specific artifacts.
- Preparation: Reconstitute lyophilized primers to a stock concentration of 100 µM. Dilute to a working stock of 10 µM.
- Titration Matrix: Prepare a series of qPCR reactions where the concentration of the forward and reverse primers is varied symmetrically. A standard range is 50 nM, 100 nM, 200 nM, 300 nM, and 500 nM. Keep all other reaction components (master mix, template, water) constant.
- Amplification: Run the qPCR protocol using standard cycling conditions, including a dissociation curve (melt curve) analysis at the end.
- Analysis:
- Amplification Curves: Assess the Cq (quantification cycle) value and the shape of the curve. The optimal concentration yields a low Cq with a steep, sigmoidal curve.
- Melt Curves: A single, sharp peak in the melt curve indicates a single, specific amplicon. Broader or multiple peaks suggest non-specific amplification or primer-dimers.
- Gel Electrophoresis: Post-qPCR, run the products on an agarose gel. A single band of the expected size confirms specificity. A low molecular weight smear or band indicates primer-dimer formation.
- Selection: Choose the primer concentration that provides the best combination of low Cq and high specificity.
Protocol: Molecular Barcoding for High Multiplex Amplicon Sequencing
Objective: To eliminate PCR duplicates and polymerase errors in high multiplex sequencing, enabling accurate variant calling at very low frequencies (<1%) and improving quantification [53].
- Primer Design: Design one primer per amplicon to contain a molecular barcode region—a stretch of 6-12 random nucleotides—sandwiched between a 5' universal sequence and the 3' target-specific sequence. Pool all barcoded primers (BC primers). The other primer is non-barcoded and pooled separately (non-BC primers).
- Initial Extension: Anneal the BC primer pool to the target DNA and extend. At this stage, each original DNA molecule is tagged with a unique molecular barcode.
- Purification: Perform a two-round size selection purification to rigorously remove all unused BC primers. This step is critical to prevent "barcode resampling" and primer-dimer formation in subsequent steps [53].
- Limited PCR Amplification: Amplify the products using the non-BC primer pool and a universal primer that binds to the universal sequence on the BC primer.
- Second Purification: Remove unused primers from the amplicons.
- Universal PCR: Amplify the material to the desired quantity using primers that add platform-specific sequencing adapters.
The workflow for this powerful protocol is detailed below.
The Scientist's Toolkit: Research Reagent Solutions
The following table catalogues essential reagents and tools for implementing the artifact prevention strategies discussed in this guide.
Table 3: Essential Research Reagents and Tools for Artifact Prevention
| Reagent / Tool | Function / Description | Role in Artifact Prevention |
|---|---|---|
| Nuclease-Free Water | High-purity water free of RNases and DNases. | Serves as a pure solvent for primer resuspension and reaction setup, preventing enzymatic degradation and contamination. |
| UV Spectrophotometer / Fluorometer | Instruments for accurate nucleic acid quantification (e.g., Nanodrop, Qubit). | Ensures precise measurement of primer stock concentrations, which is critical for consistent and accurate primer titration. |
| OligoAnalyzer Tool (IDT) | Free online tool for analyzing Tm, hairpins, dimers, and mismatches. [44] | Allows in silico screening of candidate primers for stable secondary structures (ΔG < -9 kcal/mol) before ordering. |
| Primer-BLAST (NCBI) | Tool that combines primer design with specificity analysis against a selected database. [14] | Identifies potential off-target binding sites for primers, allowing for redesign to avoid non-specific amplification. |
| Molecular Barcoded Primers | Primers containing a 5' region with random nucleotides to uniquely tag original molecules. [53] | Enables bioinformatic collapse of PCR duplicates and identification of polymerase errors in NGS data, drastically reducing false positives. |
| Size Selection Beads | Magnetic beads (e.g., SPRI beads) for clean-up and size selection of DNA fragments. | Critical for protocols like molecular barcoding to efficiently remove unused primers and prevent primer-dimer carryover. |
The prevention of amplification artifacts is not a matter of chance but a rigorous exercise in controlling reaction biochemistry. As detailed in this guide, primer concentration and quality are not peripheral concerns but central pillars supporting experimental integrity. The interplay between primer design, which dictates the potential for secondary structures, and primer concentration, which kinetically drives artifact formation, requires careful consideration. By adopting a systematic approach—incorporating stringent in silico design, empirical concentration optimization, and advanced techniques like molecular barcoding—researchers can effectively suppress artifacts. This disciplined methodology ensures that the resulting data, whether used in basic research or high-stakes drug development, is a true reflection of biological reality rather than an artifact of the process used to reveal it.
Advanced Design Considerations for GC-Rich Targets and Multiplex Assays
Amplifying guanine-cytosine (GC)-rich targets and conducting multiplex assays represent two of the most technically challenging areas in polymerase chain reaction (PCR) optimization. GC-rich sequences, typically defined as regions exceeding 60% GC content, pose significant obstacles due to their propensity for forming stable secondary structures and strong hydrogen bonding between complementary strands [55] [56]. These characteristics can impede DNA polymerase progression during amplification, leading to poor yield or complete amplification failure. Simultaneously, multiplex PCR—which enables simultaneous amplification of multiple targets in a single reaction—introduces complexities in primer compatibility and reaction optimization that extend beyond singleplex applications [55]. Within the broader context of primer secondary structures research, understanding the interplay between hairpin loops, primer-dimers, and template thermodynamics becomes paramount for developing robust assays across diverse applications from basic research to clinical diagnostics and drug development.
This technical guide examines advanced strategies for overcoming these challenges through optimized primer design, reagent selection, and cycling conditions. We present systematically organized experimental data and detailed protocols to provide researchers with actionable methodologies for successful amplification of difficult targets, with particular emphasis on maintaining reaction specificity and efficiency when dealing with complex template structures or multiple primer pairs.
Molecular Challenges of GC-Rich Templates
Structural Complexities and Amplification Barriers
GC-rich templates present multiple overlapping challenges that complicate PCR amplification. The primary issue stems from the molecular stability of GC base pairs, which form three hydrogen bonds compared to the two bonds in AT base pairs [3]. This increased stability results in higher melting temperatures (Tₘ) for DNA duplexes, often exceeding standard PCR denaturation conditions. When GC content reaches 65% or higher, as encountered in gene promoter regions like the epidermal growth factor receptor (EGFR) promoter with up to 88% GC content, conventional PCR protocols frequently fail [56].
The strong hydrogen bonding in GC-rich regions promotes formation of stable secondary structures, including hairpins and intramolecular folds, that physically block polymerase progression during extension phases [55] [56]. These structures are particularly problematic when they occur near primer binding sites, as they can prevent proper annealing or cause premature termination of amplification. Additionally, GC-rich sequences tend to form non-B DNA conformations such as G-quadruplexes and i-motifs, which present further obstacles to efficient polymerization [57].
Research indicates that the negative impact of these structures extends beyond simple steric hindrance. Stable secondary structures can cause DNA polymerases to "stutter" along templates, resulting in incomplete products and reduced yield [55]. In clinical contexts, this becomes especially relevant when working with suboptimal sample sources such as formalin-fixed paraffin-embedded (FFPE) tissues, where DNA is already fragmented and cross-linked, further reducing amplification efficiency [56].
Thermodynamic Implications for Primer Design
The thermodynamic behavior of GC-rich templates directly influences primer binding kinetics and specificity. Standard primer design parameters often prove inadequate for these challenging sequences, necessitating specialized approaches. Primers with GC content between 40-60% are generally recommended for standard PCR, but this range may require adjustment for GC-rich targets [3] [42]. Similarly, melting temperature calculations must account for the unique thermodynamics of GC-rich duplexes, with optimal Tₘ values typically falling between 65-75°C for these applications [42].
The presence of consecutive guanine or cytosine residues can exacerbate primer-dimer formation and mispriming through G-C stabilizations, even when overall GC percentages appear balanced [42]. This phenomenon underscores the importance of analyzing not only quantitative GC content but also nucleotide distribution throughout the primer sequence. Research on primer secondary structures has demonstrated that thermodynamic stability of amplifiable secondary structures, particularly those with 3' complementarity, strongly correlates with non-specific amplification [2].
Strategic Optimization for GC-Rich Targets
Primer Design Modifications
Successful amplification of GC-rich targets requires deliberate primer design strategies that address their unique characteristics. The following specialized approaches have demonstrated efficacy in challenging amplification contexts:
GC Clamp Implementation: Incorporating one or two G or C bases at the 3' end of primers enhances binding stability through stronger hydrogen bonding. However, avoid placing more than three G/C residues in the final five bases, as this promotes non-specific priming [14]. This strategic placement, known as a "GC clamp," significantly improves priming efficiency without excessively raising overall Tₘ [3].
Extended Primer Length: While standard primers range from 18-24 nucleotides, slightly longer primers (24-30 nucleotides) can improve binding specificity in GC-rich contexts without significantly compromising efficiency. The increased length provides additional binding energy that helps overcome secondary structure interference [3].
Strategic GC Distribution: Position consecutive GC residues toward the center of the primer rather than at the ends to minimize steric hindrance and secondary structure formation. This approach maintains binding energy while reducing the likelihood of primer-dimer artifacts [3].
Avoidance of Self-Complementarity: Meticulously screen primers for regions of self-complementarity, particularly at the 3' end, where even limited complementarity can initiate primer-dimer formation and self-amplifying structures [2].
Chemical Enhancers and Additives
PCR additives play a crucial role in destabilizing the secondary structures that impede amplification of GC-rich templates. The table below summarizes the most effective compounds and their mechanisms of action:
Table 1: PCR Additives for GC-Rich Amplification
| Additive | Recommended Concentration | Mechanism of Action | Considerations |
|---|---|---|---|
| DMSO | 3-10% [56] | Disrupts hydrogen bonding, reduces DNA thermal stability | Lower primer Tₘ by several degrees; requires annealing temperature optimization |
| Betaine | 0.5-1.5 M [57] | Equalizes base-pair stability, prevents secondary structure formation | Can be combined with DMSO for synergistic effect; compatible with most DNA polymerases |
| GC Enhancer | Manufacturer's recommendation | Proprietary formulations that destabilize GC duplexes | Specifically optimized for commercial enzyme systems [55] |
| MgCl₂ | 1.5-2.5 mM [56] | Cofactor for DNA polymerase, stabilizes nucleic acid interactions | Requires titration; excessive concentrations promote non-specific amplification |
Experimental data demonstrates that combining additives often yields better results than single compounds. Research on EGFR promoter amplification (75.45% GC content) established that 5% DMSO was necessary for successful amplification, with lower concentrations producing negligible product [56]. Similarly, studies on nicotinic acetylcholine receptor subunits (GC content up to 65%) showed that incorporating both DMSO and betaine significantly improved amplification efficiency [57].
Polymerase Selection and Reaction Conditions
Enzyme selection critically influences GC-rich amplification success. Highly processive DNA polymerases demonstrate superior performance for these challenging templates due to their stronger binding to template DNA and ability to read through secondary structures [55]. Polymerase blends containing both thermostable and proofreading enzymes often provide optimal results for long GC-rich targets by combining processivity with high fidelity [55].
Thermal cycling parameters require careful optimization for GC-rich targets:
Higher Denaturation Temperature: Increasing denaturation temperature to 98°C, rather than the standard 95°C, improves strand separation in GC-rich regions [55]. Hyperthermostable DNA polymerases maintain activity at these elevated temperatures.
Extended Denaturation Time: Longer denaturation intervals (up to 30-60 seconds) help overcome the increased thermal stability of GC-rich duplexes [56].
Optimized Annealing Temperature: Empirical determination of annealing temperature through gradient PCR is essential. Research indicates optimal annealing temperatures may be 7°C or more higher than calculated values for extremely GC-rich targets [56].
Combined Annealing/Extension Steps: Two-step PCR protocols that combine annealing and extension at 68-72°C can improve efficiency for some GC-rich targets by minimizing time spent at suboptimal temperatures [55].
Diagram 1: GC-Rich PCR Optimization Workflow
Multiplex PCR Design Considerations
Primer Compatibility and Specificity
Multiplex PCR introduces unique challenges by requiring multiple primer pairs to function simultaneously without interference in a single reaction tube. The primary consideration involves maintaining specificity when numerous primers are present at concentrations that could promote cross-reactivity. The following design principles are critical for successful multiplex assays:
Uniform Tm Across Primers: All primers in a multiplex reaction should have closely matched melting temperatures (within 2-5°C) to ensure efficient annealing under uniform thermal conditions [55] [42]. This synchronization prevents preferential amplification of specific targets and ensures balanced product yields.
Elimination of Cross-Homology: Comprehensive in silico analysis is essential to identify and eliminate regions of complementarity between different primers, particularly at 3' ends where extension initiates. Even limited complementarity can initiate primer-dimer formation that depletes reaction components and generates artifacts [55] [2].
Amplicon Size Differentiation: Design primer pairs to generate distinctly sized amplicons that can be resolved by standard electrophoretic methods or detection platforms. Ideal size differences should exceed 10% between adjacent products to ensure clear discrimination [55].
Validated Singleplex Performance: Each primer pair should be rigorously validated in singleplex reactions before multiplex integration. This step confirms specificity and efficiency while establishing baseline performance metrics for comparison [55].
Reaction Optimization for Multiple Targets
Multiplex PCR demands careful balancing of reaction components to maintain efficiency across multiple amplification events. The following table outlines key optimization parameters:
Table 2: Multiplex PCR Optimization Parameters
| Parameter | Standard PCR | Multiplex PCR | Rationale |
|---|---|---|---|
| Primer Concentration | 0.1-0.5 µM each | 0.1-0.3 µM each primer | Prefers lower concentrations to minimize primer-dimer formation while maintaining sensitivity |
| DNA Polymerase | Standard Taq | Hot-Start enzyme [55] | Critical for preventing mispriming during reaction setup; antibody-based inactivation preferred |
| MgCl₂ Concentration | 1.5 mM | 2.0-3.0 mM [55] | Higher concentrations accommodate multiple primer-template complexes; requires optimization |
| Extension Time | Based on longest target | 1.5-2× standard time | Accommodates slower polymerization through potential secondary structures across multiple targets |
| Template Concentration | 10-100 ng | 50-200 ng | Higher template amounts ensure adequate copies of all targets, especially minority variants |
Hot-start DNA polymerases are particularly valuable in multiplex applications as they prevent nonspecific amplification during reaction setup by employing enzyme modifiers such as antibodies, affibodies, or aptamers that inhibit polymerase activity at room temperature [55]. This technology enables the convenience of setting up multiple reactions at ambient temperature without significantly compromising specificity, making it indispensable for high-throughput multiplex experiments.
Commercial multiplex master mixes often provide optimized conditions specifically formulated for balancing amplification efficiency across multiple targets. These specialized formulations typically include proprietary enhancers and buffer systems that stabilize primer-template interactions while suppressing artifactual amplification [55].
Experimental Protocols and Methodologies
Systematic Optimization Protocol for GC-Rich Targets
Based on successful amplification of the GC-rich EGFR promoter region (75.45% GC content), the following step-by-step protocol provides a methodological framework for challenging targets:
Template Preparation:
- Use DNA concentrations of at least 2 μg/ml for complex targets [56]
- For FFPE-derived DNA, assess fragmentation and purity before optimization
Initial Reaction Setup:
Thermal Cycling Optimization:
- Apply initial denaturation at 98°C for 3-5 minutes for complete strand separation
- Perform gradient PCR across a 8-10°C annealing temperature range centered on calculated Tₘ
- Utilize two-step cycling (combined annealing/extension at 68°C) if primer Tₘ values permit [55]
- Extend elongation time to 1-2 minutes per kilobase for complex structures
Empirical Refinement:
This protocol successfully amplified the challenging EGFR promoter region, requiring 5% DMSO, MgCl₂ concentration of 1.5 mM, and an annealing temperature of 63°C despite a calculated Tₘ of 56°C [56].
Multiplex Assay Development Workflow
Developing robust multiplex PCR assays requires systematic validation at each stage:
Bioinformatic Design Phase:
- Identify all target sequences and define amplicon sizes with minimum 20-base pair differences
- Design primers with uniform length (18-24 bases) and Tₘ (60-65°C)
- Screen for inter-primer complementarity using multiple analysis tools [46]
- Verify specificity in silico using Primer-BLAST against relevant genomes [14]
Wet-Lab Validation Phase:
- Validate each primer pair individually in singleplex reactions
- Optimize annealing temperature for each pair using thermal gradients
- Systematically combine primer pairs, adjusting concentrations to balance amplification
- Incorporate hot-start polymerase and specialized multiplex buffer formulations [55]
Analytical Validation Phase:
- Establish detection method capable of resolving all amplicons (e.g., capillary electrophoresis)
- Determine sensitivity and limit of detection for each target in multiplex format
- Assess reproducibility across multiple replicates and operators
- Test cross-reactivity with related but non-target sequences
Diagram 2: Multiplex PCR Development Workflow
The Scientist's Toolkit: Essential Research Reagents
Table 3: Essential Reagents for Challenging PCR Applications
| Reagent Category | Specific Examples | Function & Application |
|---|---|---|
| Specialized DNA Polymerases | Platinum II Taq Hot-Start DNA Polymerase [55] | High processivity for GC-rich targets and direct PCR; hot-start mechanism prevents mispriming |
| PCR Additives | DMSO, Betaine, GC Enhancer [55] [56] | Destabilize secondary structures, improve strand separation in GC-rich templates |
| Commercial Master Mixes | Platinum Multiplex PCR Master Mix [55] | Pre-optimized formulations for multiplex applications with enhanced specificity |
| Hot-Start Modifiers | Antibody-based enzyme inhibitors [55] | Suppress polymerase activity at room temperature during reaction setup |
| Direct PCR Reagents | Specialized lysis buffers [55] | Enable amplification without nucleic acid purification, preserving sample integrity |
Advanced PCR design for GC-rich targets and multiplex assays requires integrated optimization strategies addressing primer thermodynamics, reaction chemistry, and enzymatic properties. Successful amplification of challenging templates necessitates deliberate primer modifications including GC clamps, strategic nucleotide distribution, and stringent elimination of secondary structure potential. Chemical additives such as DMSO and betaine function synergistically with high-processivity polymerase systems to overcome the stable hydrogen bonding and complex secondary structures that characterize GC-rich regions.
For multiplex applications, maintaining reaction specificity with multiple primer pairs demands rigorous in silico design, empirical validation, and specialized reaction formulations that suppress artifactual amplification while maintaining balanced efficiency across all targets. The systematic methodologies presented in this guide provide researchers with evidence-based frameworks for developing robust PCR assays capable of addressing complex research questions in genomics, diagnostics, and therapeutic development.
As PCR technologies continue evolving, emerging methods such as enzymatic methyl-seq (EM-seq) offer promising alternatives to bisulfite conversion for methylation studies in GC-rich regions, potentially overcoming the GC-bias that has historically complicated epigenetic analysis of CpG islands [58]. These advancements, coupled with refined understanding of primer secondary structures and their thermodynamic implications, will further enhance our ability to navigate the most challenging amplification contexts in molecular biology.
From Theory to Bench: Solving Real-World Secondary Structure Problems
In molecular diagnostics, the integrity of an assay's results is paramount. However, researchers often encounter subtle yet critical performance issues such as a slowly rising baseline in real-time amplification curves, unexpectedly low yield of the desired product, or the appearance of spurious bands during analysis. These symptoms are frequently dismissed as simple optimization issues, but within the context of a broader thesis on primer secondary structures, they can be diagnosed as direct consequences of primer dimer interactions and self-amplifying hairpin loops. The loop-mediated isothermal amplification (LAMP) technique, with its requirement for multiple long primers, is particularly prone to these artefacts due to the increased sequence complexity and the thermodynamic potential for undesirable secondary structures [2]. This guide provides an in-depth technical examination of these phenomena, offering validated experimental protocols and analytical frameworks to identify, understand, and resolve these critical challenges in assay development.
The Core Problem: Primer Secondary Structures and Their Impact
Primer dimers and hairpin structures are well-known theoretical pitfalls in primer design, yet their concrete impact on assay performance is often underestimated. In LAMP and RT-LAMP assays, the problem is exacerbated. The technique employs six primers targeting distinct regions of the target nucleic acid, which inherently increases the probability of off-pathway interactions between them [2]. The inner primers (FIP and BIP), which are typically 40–45 bases in length, present a particular vulnerability. Their extended sequence space dramatically increases the likelihood of forming intramolecular hairpin structures or intermolecular dimer complexes with other primers in the reaction [2].
The manifestation of these structures is not binary but exists on a spectrum of detrimental effects. A slowly rising baseline during real-time monitoring with intercalating dyes is a classic indicator of amplifiable primer dimers and hairpins. This phenomenon results from the polymerase-mediated extension of these aberrant structures, generating double-stranded DNA and producing a fluorescent background that depletes reagent efficiency and obscures the threshold for positive signals [2]. Furthermore, stable hairpin structures can sequester a significant fraction of the primer in an inactive form, leading to a reduction in the effective primer concentration. This directly translates to low yield of the specific amplicon and can cause complete assay failure. Even hairpins with 3' complementarity that is one or two bases away from the terminus have been shown to be capable of self-amplification, leading to spurious bands that complicate endpoint analysis and compromise diagnostic accuracy [2].
Quantitative Evidence: Resolving Primer Artefacts
The following case study, reconstructed from published research, demonstrates the measurable impact of primer artefacts and the benefits of systematic refinement [2] [59].
Table 1: Impact of Primer Refinement on RT-LAMP Assay Performance
| Viral Target | Primer Set | Presence of Amplifiable Secondary Structures? | Time to Threshold (Tt) / min | Endpoint Fluorescence (QUASR) | Key Modification |
|---|---|---|---|---|---|
| Yellow Fever Virus (YFV) | Original | Yes: Primer dimers | Delayed & Rising Baseline | High Background | Adjusted 1 base in FIP |
| Refined | No | Significantly Lower Tt | High Specific Signal | ||
| Dengue Virus Serotype 2 & 4 | Original | Yes: Primer dimers | Delayed & Rising Baseline | High Background | Adjusted 1 base in B3 |
| Refined | No | Significantly Lower Tt | High Specific Signal | ||
| Dengue Virus Serotype 1 & 3 | Original | Yes: Self-amplifying hairpin | Not Applicable (Self-amplification) | High Background | Adjusted 2 bases in BIP |
| Refined | No | Reliable Amplification | High Specific Signal |
The data in Table 1 illustrates that minor, targeted modifications to primer sequences—such as adjusting a single base—can successfully eliminate amplifiable secondary structures. The resulting assays show marked improvement, characterized by a lower and more stable baseline, a significantly reduced time to threshold (indicating faster amplification), and a higher, more specific endpoint signal. This eliminates the symptoms of rising baselines and spurious results, leading to more robust and reliable assays [2].
Experimental Protocol: Detection and Resolution
This section provides a detailed methodology for diagnosing and resolving issues related to primer secondary structures, based on established experimental workflows [2].
Workflow for Diagnosis and Resolution
The following diagram outlines the logical pathway from symptom observation to a resolved and functional assay.
Detailed Methodologies
1. In Silico Analysis of Primer Secondary Structures [2]
- Hairpin Analysis: Utilize available folding tools, such as the mFold tool provided by Integrated DNA Technologies (IDT), to simulate the most stable secondary structures formed by individual primers, with special attention to the long FIP and BIP primers.
- Primer Dimer Analysis: Use multiple primer analyzer software, such as the Multiple Prime Analyzer from Thermo Fisher, to check for potential cross-dimers between all primer pairs in the set (F3-B3, F3-FIP, F3-LoopF, etc.). The analysis should focus on complementarity at the 3' ends, which is most problematic for polymerase extension.
2. Thermodynamic Stability Calculations [2]
- The stability of predicted secondary structures must be quantified using the nearest-neighbor (NN) model. This model estimates the change in Gibbs free energy (ΔG) for the formation of a structure, considering the identity and orientation of neighboring base pairs.
- Calculate the ΔG for all potential dimer and hairpin structures. A single, aggregated thermodynamic parameter derived from these calculations can be correlated with the probability of non-specific amplification. The goal of primer refinement is to make this aggregate ΔG value less favorable (more positive), thereby reducing the likelihood of primer artefacts.
3. Primer Refinement Strategy [2]
- The most effective strategy is often to introduce minimal sequence changes to disrupt stable, amplifiable structures while preserving target specificity.
- As demonstrated in the case study (Table 1), this can involve adjusting a single base in a primer (e.g., in an FIP or B3 primer) to break a dimer interface, or adjusting two bases within a BIP primer to resolve a self-amplifying hairpin. The changes should be guided by the in-silico analysis to ensure target-binding regions remain functional.
4. Experimental Validation with Controls [2]
- Reaction Composition: The standard RT-LAMP reaction mixture includes: 1× Isothermal Amplification Buffer, 8 mM MgSO₄, 1.4 mM each dNTP, 0.8 M betaine, and primers at specified concentrations (e.g., 0.2 µM F3/B3, 1.6 µM FIP/BIP, 0.8 µM LoopF/LoopB). The enzymatic components are 3.2 units of Bst 2.0 WarmStart DNA Polymerase and 2.0 units of AMV Reverse Transcriptase.
- Real-time Monitoring: Perform reactions at 63 °C in the presence of a LAMP-compatible intercalating dye (e.g., SYTO 9, SYTO 82). Monitor fluorescence in real-time on a suitable instrument (e.g., Bio-Rad CFX 96). The critical comparison is between the original and modified primer sets, with a no-template control (NTC) to detect spontaneous amplification.
- Endpoint Analysis: For techniques like QUASR, supplement the reaction with a quencher oligonucleotide complementary to the dye-labeled primer. After amplification, capture the endpoint fluorescence. A successful refinement will show a bright signal in positive samples and a dark, quenched background in the NTC.
The Scientist's Toolkit: Essential Research Reagents
Table 2: Key Reagents for Investigating Primer Secondary Structures
| Reagent / Tool | Function / Purpose | Specific Example |
|---|---|---|
| Bst 2.0 WarmStart Polymerase | DNA-dependent DNA polymerase with strand-displacing activity, essential for LAMP; WarmStart feature prevents non-specific activity at low temperatures. | New England Biolabs [2] |
| AMV Reverse Transcriptase | RNA-dependent DNA polymerase for the initial reverse transcription step in RT-LAMP. | Life Science Advanced Technologies [2] |
| LAMP-compatible Intercalating Dye | Fluorescent dye that binds double-stranded DNA, allowing real-time monitoring of amplification (e.g., baseline rise). | SYTO 9, SYTO 82 (Thermo Fisher) [2] |
| Betaine | Additive that reduces the formation of secondary structures in DNA, improving amplification efficiency and specificity. | Standard molecular biology supplier [2] |
| In-Silico Hairpin Tool | Software for predicting intramolecular secondary structures formed by single-stranded primers. | mFold tool (Integrated DNA Technologies) [2] |
| Multiple Primer Analyzer | Software for predicting intermolecular interactions, such as primer dimers, between all primers in a set. | Multiple Prime Analyzer (Thermo Fisher) [2] |
| QUASR Probes & Quenchers | For endpoint detection: a dye-labeled primer and a complementary quencher oligonucleotide to differentiate specific amplicons from non-specific products. | Custom synthesized [2] |
The symptoms of rising baselines, low yield, and spurious bands are not mere inconveniences but are direct diagnostic tools for underlying primer pathology. A methodical approach that combines rigorous in-silico thermodynamic analysis with experimental validation, as outlined in this guide, allows researchers to move beyond superficial troubleshooting. By fundamentally understanding and addressing the stability of primer secondary structures—particularly the amplifiable dimers and hairpins that plague complex assays like LAMP—scientists can develop robust, reliable, and high-performing molecular diagnostics, thereby strengthening the foundation of drug development and clinical research.
In molecular biology, the polymerase chain reaction (PCR) stands as a foundational technique, yet its success is profoundly dependent on the meticulous optimization of reaction conditions. This process is particularly critical within the context of a broader thesis on primer secondary structures, hairpin loops, and dimers research. Non-optimal conditions can exacerbate the formation of these secondary structures, leading to issues such as nonspecific amplification, primer-dimer artifacts, and significantly reduced yield. For researchers, scientists, and drug development professionals, mastering these parameters is not merely procedural but essential for generating reliable, reproducible, and high-quality data. The annealing temperature serves as the primary governor of primer-stringency binding, directly influencing whether primers anneal specifically to their intended target or misfire to create off-target products or self-dimers. Concurrently, reaction additives function as crucial modulators of the reaction environment, stabilizing enzymes, resolving template secondary structures, and homogenizing nucleic acid thermodynamics to enhance both efficiency and fidelity. This guide provides an in-depth examination of these two pillars of PCR optimization, integrating core principles, detailed experimental protocols, and quantitative data analysis to establish a robust framework for overcoming common challenges in complex amplification tasks.
Core Principles of Annealing Temperature and Additives
The Mechanism of Annealing Temperature
The annealing temperature (Tₐ) is arguably the most critical thermal parameter in a PCR protocol, acting as the primary determinant for the stringency of primer-template binding. It is intrinsically linked to the primers' melting temperature (Tₘ), which is the temperature at which 50% of the primer-template duplex dissociates into single strands [60]. The relationship between Tₘ and Tₐ is foundational: for most standard PCR protocols, the optimal annealing temperature is typically set 2–5 °C below the calculated Tₘ of the primer with the lowest melting temperature [14] [61]. This slight reduction from the Tₘ facilitates stable binding while maintaining sufficient stringency to discourage mismatched hybrids.
The consequences of an improperly set Tₐ are significant. An excessively high Tₐ (e.g., at or above the Tₘ) prevents the primers from forming stable duplexes with the template, leading to poor reaction yield or complete amplification failure. Conversely, a Tₐ that is too low permits primers to bind to non-target sequences with partial complementarity, resulting in nonspecific amplification, background smearing on gels, and the formation of primer-dimers [61]. Primer-dimers are short, artifactual products formed when primers anneal to each other via complementary sequences, particularly at their 3' ends. These structures are efficiently amplified, consuming reaction reagents and competitively inhibiting the amplification of the desired target, thereby drastically reducing overall yield and assay sensitivity [62].
The Action of Key Reaction Additives
Reaction additives are chemical agents used to modify the physical properties of the reaction mixture, thereby overcoming obstacles that impede efficient amplification. Their use is particularly warranted when dealing with challenging templates, such as those with high GC content, strong secondary structure, or long amplicon lengths.
Dimethyl Sulfoxide (DMSO) is a polar solvent that acts by disrupting base pairing. It is particularly effective for amplifying GC-rich templates (typically >65%) by interfering with the formation of stable secondary structures and lowering the apparent melting temperature of the DNA, which facilitates denaturation [61]. It is commonly used at concentrations between 2% and 10% (v/v).
Betaine (also known as trimethylglycine) operates through a different mechanism. At concentrations of 1 M to 2 M, it functions as a biological osmolyte that homogenizes the thermodynamic stability of DNA duplexes. It weakens the strong hydrogen bonding in GC-rich regions while strengthening the weaker bonding in AT-rich regions. This equalization reduces the dependence of duplex stability on local base composition, preventing the polymerase from stalling at rigid GC-clamps and thus improving the amplification efficiency and specificity of complex templates [61].
Magnesium Ions (Mg²⁺) serve a dual and indispensable role. Firstly, they act as an essential cofactor for all thermostable DNA polymerases, directly enabling the catalytic incorporation of nucleotides [60] [63]. Secondly, Mg²⁺ stabilizes the double-stranded primer-template hybrid and influences the overall stringency of the reaction. Its concentration must be carefully titrated, as it directly affects fidelity, specificity, and yield. A concentration that is too low results in low enzyme activity and poor yield, while an excessively high concentration promotes non-specific binding and reduces replication fidelity by increasing the error rate of the polymerase [61] [63].
Systematic Optimization Protocols
Gradient PCR for Annealing Temperature Optimization
Determining the optimal annealing temperature empirically is vastly superior to relying on calculation alone. Gradient PCR is the most efficient and widely adopted method for this purpose.
Materials:
- Optimized primer pair (typically 0.1–0.5 µM each, final concentration)
- DNA template (e.g., 1–100 ng genomic DNA)
- 2X PCR Master Mix (containing buffer, dNTPs, MgCl₂, and DNA polymerase)
- Nuclease-free water
- Thermal cycler with gradient functionality
Method:
- Prepare a master mix sufficient for all reactions, containing nuclease-free water, 2X PCR Master Mix, primers, and template. Mix thoroughly by gentle pipetting.
- Aliquot equal volumes of the master mix into individual PCR tubes or a multi-well plate.
- Place the samples in the thermal cycler and set the gradient function across a temperature range that brackets the calculated average
Tₘof the primer pair by approximately ±5°C. For instance, if the averageTₘis 60°C, set a gradient from 55°C to 65°C. - Run the PCR protocol with a standard denaturation and extension profile, allowing the cycler to assign different annealing temperatures to each column.
- After amplification, analyze the products using agarose gel electrophoresis. Include a DNA ladder for size determination.
Analysis: Visualize the gel under UV light. The optimal annealing temperature is identified by the lane that produces a single, intense band of the expected amplicon size with the absence of non-specific bands or primer-dimer smears near the well front [61]. A systematic study on pig DNA detection using the cytochrome b gene demonstrated this principle clearly, finding that an annealing temperature of 58°C provided the lowest Cycle Threshold (Ct) value and highest amplification efficiency compared to 57°C, 59°C, and 60°C [64].
Additive Titration for Challenging Templates
When standard optimization fails, particularly for GC-rich templates or long amplicons, a systematic titration of additives is required.
Materials:
- All materials from the Gradient PCR protocol
- Additive stock solutions: DMSO (100%), Betaine (5M), and varying concentrations of MgCl₂ (e.g., 25 mM, 50 mM)
Method:
- Prepare a series of master mixes, each containing a different concentration of the additive to be tested.
- For DMSO: Test a range from 0% to 10% in increments of 2%.
- For Betaine: Test a range from 0 M to 2.0 M in increments of 0.5 M.
- For MgCl₂: Starting from the base concentration in the master mix (typically 1.5 mM), test a range from 1.0 mM to 4.0 mM in increments of 0.5 mM. This is crucial as the standard Mg²⁺ concentration may be suboptimal [63].
- Use the empirically determined optimal annealing temperature from the gradient PCR experiment.
- Aliquot and run the PCR reactions as described previously.
- Analyze the results via agarose gel electrophoresis.
Analysis: Evaluate the gels to identify the additive condition that yields the strongest specific band with the cleanest background. It is often beneficial to combine additives (e.g., DMSO and Betaine), but this should be done cautiously, testing different combinations to find a synergistic effect without inhibiting the polymerase.
The following workflow diagram illustrates the sequential process for systematically optimizing both annealing temperature and reaction additives.
Quantitative Data and Analysis
The following tables consolidate key quantitative findings from meta-analyses and experimental studies to guide evidence-based optimization.
Table 1: Meta-Analysis of MgCl₂ Optimization in PCR (compiled from [63])
| Parameter | Optimal Range | Quantitative Effect | Theoretical Implication |
|---|---|---|---|
| MgCl₂ Concentration | 1.5 – 3.0 mM | Every 0.5 mM increase raises DNA melting temperature by ~1.2°C | Logarithmic relationship between [Mg²⁺] and Tₘ; critical for cofactor activity & fidelity. |
| Low [Mg²⁺] Effect | < 1.5 mM | Reduced enzyme activity; poor reaction yield. | Insufficient cofactor for polymerase, leading to failed amplification. |
| High [Mg²⁺] Effect | > 3.0 mM | Non-specific amplification; decreased fidelity. | Reduced binding stringency promotes primer mis-annealing and increases error rate. |
| Template Dependency | Genomic DNA | Requires higher [Mg²⁺] than simple templates. | Complex template structures require greater cofactor concentration for efficient polymerization. |
Table 2: Experimental Optimization Parameters for PCR Components
| Component | Optimal or Tested Range | Impact of Deviation from Optimum | Experimental Context |
|---|---|---|---|
| Annealing Temp. (Tₐ) | Tₘ - (2–5)°C [14] [61] | Low Tₐ: nonspecific binding. High Tₐ: low/no yield. | Pig DNA detection: 58°C was optimal vs. 57°C/59°C/60°C [64]. |
| Primer Concentration | 0.1 – 0.5 µM (common range) | High conc.: primer-dimer formation. Low conc.: inefficient amplification. | Pig DNA detection: 0.4 µM was optimal vs. 0.2 µM and 0.3 µM [64]. |
| DMSO | 2 – 10% (v/v) [61] | >10% can inhibit polymerase. Resolves secondary structures in GC-rich templates. | Standard additive for challenging amplifications. |
| Betaine | 1.0 – 2.0 M [61] | Homogenizes duplex stability; improves amplification of complex templates. | Standard additive for challenging amplifications. |
The Scientist's Toolkit: Research Reagent Solutions
Table 3: Essential Reagents for PCR Optimization
| Reagent / Material | Function / Purpose | Example Application |
|---|---|---|
| High-Fidelity Polymerase | DNA polymerase with 3'→5' exonuclease (proofreading) activity for high accuracy. | Cloning, sequencing, and any application requiring minimal error rates [61]. |
| Hot-Start Polymerase | Polymerase inactive at room temperature; activated by heat. Prevents non-specific amplification and primer-dimer formation during reaction setup [61]. | All PCR applications, especially those prone to nonspecific amplification or using complex templates. |
| Gradient Thermal Cycler | Instrument capable of generating a temperature gradient across a block for simultaneous testing of multiple annealing temperatures. | Empirical determination of optimal annealing temperature (Tₐ) [61]. |
| MgCl₂ Stock Solution | Separate, sterile solution of MgCl₂ for fine-tuning the Mg²⁺ concentration independent of the master mix buffer. | Titration of the critical cofactor to optimize specificity and yield [63]. |
| DMSO (100%) | Additive to disrupt base pairing and lower DNA Tₘ. | Amplification of GC-rich templates (>65% GC) [61]. |
| Betaine (5M) | Additive to equalize the melting temperature of DNA duplexes. | Amplification of templates with strong secondary structure or extreme GC content [61]. |
| Agarose Gel Electrophoresis System | Standard method for separating and visualizing DNA fragments by size to assess amplification specificity and yield. | Primary analysis of PCR products post-amplification. |
The wet-lab optimization of annealing temperature and reaction additives is a systematic and indispensable process for achieving specific, efficient, and reliable PCR results. This is especially true in research focused on primer secondary structures, where the inherent propensity for hairpins and dimer formation can severely compromise experimental outcomes. By first establishing the optimal annealing temperature through gradient PCR and then refining the reaction environment with targeted additives like DMSO, betaine, and magnesium, scientists can overcome the thermodynamic and kinetic barriers posed by complex templates. The quantitative data and detailed protocols provided in this guide offer a robust framework for this optimization process. Mastering these techniques empowers researchers and drug development professionals to enhance the quality of their data, increase experimental reproducibility, and accelerate the pace of discovery in molecular biology and diagnostic applications.
In molecular biology, the efficacy of techniques such as PCR, qPCR, and advanced genome editing with prime editors is fundamentally dependent on the precise design of oligonucleotide primers. A significant challenge in this domain is the formation of primer secondary structures, including hairpin loops and primer-dimers, which can severely compromise experimental results by reducing amplification efficiency, specificity, and overall yield [1]. Hairpin loops occur due to intramolecular folding when regions within a single primer are complementary, while primer-dimers form through intermolecular annealing between two primers [3] [1]. These structures are not merely inconveniences; they act as potent substrates for DNA polymerase, leading to the amplification of undesired products and generating false-positive signals, particularly in sensitive applications like reverse transcription loop-mediated isothermal amplification (RT-LAMP) and quantitative PCR [2].
The strategic redesign of primers, particularly through a method known as "bumping" priming sites, addresses these challenges by making minor sequence alterations that disrupt the thermodynamic stability of these problematic secondary structures. This guide provides an in-depth examination of the protocols for primer redesign, framed within a broader research context on managing secondary structures. It delivers detailed methodologies, quantitative data on design parameters, and visual workflows to equip researchers and drug development professionals with the tools necessary to optimize their primer systems for maximum reliability and performance.
Understanding the Problem: Hairpins and Dimers
Definition and Formation Mechanisms
- Hairpin Loops (Secondary Structures): These intramolecular structures form when a segment of a primer folds back on itself to create a double-stranded stem and a single-stranded loop [1]. This folding is driven by complementary regions within the primer itself, particularly prevalent in long primers such as the 40–45 base Forward and Backward Inner Primers (FIP and BIP) used in LAMP assays [2].
- Primer-Dimers: These are intermolecular artifacts formed when two primers anneal to each other instead of the target template. Primer-dimers can be homodimers (between two identical primers) or heterodimers (between forward and reverse primers) [1]. When primers hybridize at their 3′ ends, DNA polymerase can extend them, generating an undesired amplification product that consumes reaction reagents and competes with the target amplicon [1].
Consequences for Research and Diagnostics
The formation of these structures has direct, detrimental impacts on experimental data. In LAMP and RT-LAMP assays, primer-dimers and self-amplifying hairpins are known to cause a slowly rising baseline in real-time fluorescence monitoring, indicative of non-specific amplification [2]. This depletes primers and nucleotides, reducing the assay's efficiency, sensitivity, and speed. Ultimately, this can lead to poor discrimination between positive and negative samples and an increased risk of false-positive results, a critical concern in both clinical diagnostics and foundational research [2].
The 'Bumping' Protocol: A Thermodynamic Remediation Strategy
The "bumping" technique involves making minor, strategic sequence adjustments to primers—typically at the 3' end—to destabilize the base-pairing interactions that stabilize secondary structures without compromising specificity for the intended target.
Detailed Experimental Workflow
The following protocol, adapted from studies on RT-LAMP optimization, provides a step-by-step methodology for identifying problematic primers and implementing the "bumping" redesign [2].
Workflow for Bumping Priming Sites
Step 1: In Silico Identification of Secondary Structures
- Procedure: Screen primer sequences using thermodynamic prediction tools such as the mFold tool (Integrated DNA Technologies) or the Multiple Prime Analyzer (Thermo Fisher) [2].
- Action: Input the primer sequence and analyze all possible secondary structures. The tool will return potential hairpins and dimers along with their predicted Gibbs Free Energy (ΔG).
Step 2: Thermodynamic Stability Assessment
- Procedure: Calculate the stability of identified structures using the nearest-neighbor (NN) model [2].
- Action: The NN model estimates the change in Gibbs free energy (ΔG) for the formation of a secondary structure. A more negative ΔG indicates a more stable, and therefore more problematic, structure. Research indicates that structures with a ΔG more negative than -9 kcal/mol have a high probability of causing non-specific amplification [2].
Step 3: Implementing the 'Bump'
- Procedure: Modify 1-2 nucleotides at the 3' end of the primer that are involved in the stable base-pairing of the hairpin or dimer [2].
- Action: For example, if the 3' end sequence
...CCTGis complementary to an internal sequence forming a hairpin, change it to...CCTA. Substitute with nucleotides that disrupt complementarity (e.g., change a G to an A, or a C to a T).
Step 4: Post-Redesign Validation
- Procedure: Re-analyze the modified primer sequence using the same in silico tools.
- Action: The goal is to achieve a ΔG for the most stable putative structure that is greater than (less negative than) -5 kcal/mol, which significantly reduces the likelihood of non-specific amplification [2].
Step 5: Experimental Verification
- Procedure: Test the original and "bumped" primers in a no-template control (NTC) reaction using your standard amplification conditions (e.g., RT-LAMP at 63°C or PCR with appropriate annealing temperature) [2].
- Action: Monitor amplification in real-time. Successful redesign is confirmed by the elimination of the rising baseline in the NTC for the "bumped" primer, while target amplification in positive controls remains efficient.
Case Study: Resolving a Self-Amplifying Hairpin in a Dengue Virus Primer
Research on DENV RT-LAMP primers provides a concrete example. A published primer was found to form a stable hairpin due to complementarity between its 3' end and an internal region [2].
- Original Sequence (problematic): The 3' end was capable of forming a hairpin with a ΔG < -9 kcal/mol, leading to self-amplification and a rising baseline in fluorescence.
- Redesigned Sequence ("bumped"): Two nucleotides at the 3' end were modified. This single change disrupted the stability of the hairpin, increasing its ΔG to > -5 kcal/mol.
- Experimental Outcome: The modified primer set showed no amplification in the NTC, while its sensitivity for detecting the target DENV RNA was preserved. This demonstrates that "bumping" can eliminate non-specific background without sacrificing assay performance [2].
Quantitative Primer Design Parameters for Structural Integrity
Beyond "bumping," adhering to established primer design parameters is the first line of defense against secondary structures. The following table consolidates critical design criteria from industry and academic protocols [65] [3] [14].
Table 1: Optimal Primer Design Parameters to Minimize Secondary Structures
| Parameter | Recommended Optimal Range | Rationale & Structural Impact |
|---|---|---|
| Length | 18–30 nucleotides (nt) [42]; 18–24 nt is ideal for standard PCR [65] [3] [14] | Short primers anneal efficiently but may lack specificity; long primers (>30 nt) hybridize slower and are prone to secondary structure [65]. |
| GC Content | 40–60% [65] [3] [14] | Balances stable binding (GC pairs form 3 H-bonds) and minimizes risk of nonspecific, high-Tm annealing. Avoid extremes [3]. |
| GC Clamp | 1-2 G or C bases at the 3' end [3] [14] [42] | Strengthens binding at the critical point of polymerase extension. Avoid >3 G/C in the last 5 bases to prevent non-specific binding [3] [14]. |
| Melting Temp (Tₘ) | 50–65°C [65] [14]; 60–75°C is also common [42] | Must be high enough for specificity. Primer pairs should be within 2–5°C of each other for synchronized annealing [65] [14] [42]. |
| Self-Complementarity | Keep "Self-Complementarity" and "Self 3'-Complementarity" scores low [3] | Directly measures the potential for a primer to form hairpins (self-complementarity) or for two primers to form dimers (inter-primer homology) [3] [42]. |
| Runs & Repeats | Avoid runs of >4 identical bases or dinucleotide repeats (e.g., ACCCC, ATATAT) [14] [42] | These sequences can promote mispriming and slippage, and are often associated with difficult-to-synthesize oligonucleotides that may have structural issues [42]. |
Advanced Applications: From PCR to Prime Editing
The principles of sound primer design extend to cutting-edge genome editing technologies. Research into prime editing has revealed that the sequence of the inserted DNA itself can impact editing efficiency through factors like secondary structure formation.
Table 2: Factors Influencing Prime Editing Insertion Efficiency Relevant to Primer Design
| Factor | Impact on Insertion Efficiency | Design Implication |
|---|---|---|
| Insert Length | Non-monotonic; 3-4 nt and 15-21 nt sequences insert more efficiently in some contexts [66]. | Consider length constraints when designing edits. Efficiency drops significantly for inserts >45 nt [66]. |
| Nucleotide Composition & GC Content | GC content affects insertion rates, though the optimal range is context-dependent [66]. | Maintain awareness of GC content in the pegRNA's reverse transcriptase template, analogous to primer design. |
| Secondary Structure | The secondary structure of the insertion sequence itself is a significant determinant of efficiency [66]. | Use in silico tools to predict and minimize secondary structure in the intended edit sequence within the pegRNA. |
| Cellular Repair Context | MMR proficiency and 3' flap nucleases (TREX1/2) suppress insertion, especially of longer sequences [66]. | Cell line choice and modulation of repair pathways (e.g., using MMR-deficient lines) can be part of the experimental strategy. |
A machine learning model that incorporated these sequence and repair features could predict relative insertion frequency with an R value of 0.70, highlighting the deterministic role of sequence-level properties [66].
Successful primer redesign and validation rely on a suite of specific reagents and software tools.
Table 3: Research Reagent Solutions for Primer Redesign and Validation
| Tool / Reagent | Function / Application | Specific Example / Note |
|---|---|---|
| Thermodynamic Prediction Software | In silico analysis of hairpins, dimers, and ΔG calculation. | mFold (IDT), Multiple Prime Analyzer (Thermo Fisher), OligoAnalyzer [2]. |
| Specialized DNA Polymerase | Amplification of GC-rich templates; high-fidelity PCR for cloning/mutagenesis. | PrimeSTAR Max DNA Polymerase [67]. |
| Seamless Cloning Kit | Site-directed mutagenesis, insertions, deletions for primer/plasmid validation. | In-Fusion Cloning systems [67]. |
| Reverse Transcriptase | For RT-LAMP and RT-PCR assays when working with RNA targets. | AMV Reverse Transcriptase [2]. |
| Isothermal Polymerase | For LAMP and RT-LAMP assays. | Bst 2.0 WarmStart DNA Polymerase [2]. |
| Reaction Additives | Improving amplification efficiency of complex templates. | Betaine, DMSO [14] [2]. |
| Integrated Design Platform | Automated primer design, in silico testing, and sequence analysis. | Geneious Prime [46]. |
The formation of primer secondary structures represents a significant obstacle in molecular biology, capable of derailing experiments and compromising diagnostic results. The primer redesign protocol of "bumping" priming sites offers a targeted, thermodynamics-driven strategy to mitigate this risk. By making precise sequence modifications informed by in silico ΔG calculations and validating them experimentally, researchers can effectively eliminate non-specific amplification. When combined with adherence to foundational primer design parameters and an understanding of how sequence features impact even advanced techniques like prime editing, these protocols provide a comprehensive framework for optimizing genetic assays. This ensures the generation of robust, reliable, and reproducible data across basic research and drug development applications.
Special Considerations for Troubleshooting qPCR and Isothermal Amplification
In molecular diagnostics and research, quantitative polymerase chain reaction (qPCR) and isothermal amplification techniques represent foundational methodologies for nucleic acid detection. However, their accuracy and reliability are persistently challenged by non-specific amplification, predominantly driven by primer secondary structures such as hairpin loops and dimers. These artifacts compete for enzyme resources, generate false-positive signals, and reduce assay sensitivity, presenting significant hurdles in both research and clinical diagnostics [2] [68]. Within the context of a broader thesis on primer secondary structures, this guide examines the fundamental principles and troubleshooting approaches for these ubiquitous techniques, emphasizing the thermodynamic and practical aspects of primer design and optimization. The high complexity of primer design in techniques like loop-mediated isothermal amplification (LAMP), which utilizes 4-6 primers targeting 6-8 regions, intrinsically increases the likelihood of such problematic structures [2] [69]. Understanding and mitigating these effects is not merely a procedural step but a critical factor in ensuring data integrity across applications from viral load quantification to biomarker discovery in drug development.
Core Principles and Problematic Structures
Primer Dimers and Hairpins in Nucleic Acid Amplification
Primer dimers and self-amplifying hairpins constitute the most common sources of non-specific amplification. Primer dimers form when primers hybridize to each other via complementary sequences rather than to the target template. These can be homodimers (between two identical primers) or heterodimers (between two different primers with complementary sequences) [68]. The extension of these dimerized primers by DNA polymerase produces amplifiable products that consume reaction components and generate background signal, severely impacting quantification accuracy, especially in qPCR using intercalating dyes [70].
Hairpin structures occur when a single primer folds back upon itself, forming a stable internal loop. This is particularly problematic for long primers, such as the 40-45 base inner primers (FIP and BIP) commonly used in LAMP [2]. When these hairpins exhibit 3' complementarity, they can become self-amplifying structures, leading to exponential amplification even in the absence of the target template. Research has demonstrated that even hairpins with complementarity one or two bases away from the 3' end can facilitate this self-amplification, contributing to a slowly rising baseline in real-time monitoring [2].
Quantitative Impact on Assay Performance
The formation of these secondary structures has quantifiable detrimental effects:
- Sequestering of Primers: Active primer concentration is reduced, lowering the efficiency and speed of the assay [2].
- Generation of Fluorescent Background: Double-stranded primer extension products intercalate with fluorescent dyes, raising the baseline fluorescence and impairing the accurate determination of the quantification cycle (Cq) in qPCR or time-to-positive in LAMP [2] [70].
- Reduced Sensitivity and Accuracy: The combined effects lead to poorer discrimination between positive and negative samples, increased false-positive rates, and later than expected Cq values [70] [71].
Table 1: Characteristic Symptoms and Causes of Amplification Problems
| Observation | Potential Causes | Primary Technique Affected |
|---|---|---|
| Exponential amplification in No-Template Control (NTC) | Contamination or self-amplifying primer structures [70] | qPCR & Isothermal |
| High background fluorescence / Slowly rising baseline | Primer-dimer formation and self-amplifying hairpins [2] | qPCR & Isothermal (real-time) |
| Jagged amplification plot | Poor amplification, weak signal, or mechanical errors [70] | qPCR |
| Cq much earlier than anticipated | High primer-dimer production (when using binding dye) [70] | qPCR |
| Low plateau phase | Limiting or degraded reagents [70] | qPCR |
| High false-positive rate in endpoint detection | Nonspecific and nontemplate amplification, carry-over contamination [68] [71] | LAMP |
Troubleshooting qPCR
Interpreting Abnormal Amplification Curves
The amplification curve is a primary source of diagnostic information for qPCR troubleshooting.
- Exponential Amplification in NTC: This indicates contamination from laboratory sources or reagent manufacture, or severe primer-dimer formation. Corrective actions include decontaminating work areas with 10% bleach, preparing reaction mixes in a clean, separated lab, and ordering new reagent stocks [70].
- High Background Noise or Early Cycle Looping: This can result from a baseline set too early or too much template. Viewing the raw data to reset the baseline and diluting input samples are effective strategies [70].
- Unexpected Cq Values and Poor Efficiency: This can be caused by inhibitors in the template, poor primer design (e.g., Tm differences >5°C), or suboptimal annealing temperature. Optimization of primer concentrations and annealing temperature, or primer redesign, is required [70].
Experimental Protocols for Optimization
1. Protocol for Primer Specificity and Efficiency Evaluation
- Primer Design: Design primers with a GC content between 30-50% and ensure melting temperatures (Tm) are within 2-5°C of each other. Avoid long stretches of complementary bases, especially at the 3' ends [70].
- In Silico Analysis: Use software tools to check for potential hairpin and dimer formation.
- Standard Curve Validation: Perform a dilution series of a carefully quantified control. A slope of -3.32 represents 100% efficiency. A slope significantly different from this, or an R² value less than 0.98, indicates poor efficiency or inaccurate dilutions [70].
- Analysis: Recalculate standard concentrations, make new stock solutions, and consider using a carrier during dilution.
2. Protocol for Addressing Suspected Primer-Dimers (Intercalating Dye-Based qPCR)
- Post-Amplification Melt Curve Analysis: Run a melt curve after amplification. A distinct, lower Tm peak separate from the main amplicon peak indicates primer-dimer formation.
- Optimization Steps:
- Annealing Temperature Gradient: Test a range of annealing temperatures (e.g., 55-65°C) to find the temperature that maximizes specific product yield while minimizing dimers.
- Primer Concentration Titration: Lowering primer concentration (e.g., from 500nM to 100-200nM) can reduce dimer formation.
- Touchdown PCR: Implement a protocol that starts with a higher annealing temperature and gradually decreases it in subsequent cycles.
Troubleshooting Isothermal Amplification (LAMP Focus)
Unique Challenges in LAMP
LAMP is particularly susceptible to non-specific amplification due to its use of multiple long primers and isothermal conditions. The inner primers (FIP and BIP), typically 40-45 bases, are especially prone to forming stable hairpin structures [2]. A high false-positive rate due to misamplification is one of the major limitations of the technique, often requiring reaction termination within 30-60 minutes to avoid misleading results with some primer sets [71].
Experimental Protocols for Mitigation
1. Protocol for Primer Redesign and Evaluation
- Rationale: Reducing the number of primers from six to five has been shown to dramatically reduce the false-positive rate by lowering the probability of primer interactions, without necessarily sacrificing sensitivity [71].
- Method: Design a standard six-primer set (F3, B3, FIP, BIP, LF, LB). Systematically remove one loop primer (LF or LB) and evaluate performance.
- Validation: A study on SARS-CoV-2 E gene primers demonstrated that a five-primer set (E-ID1) showed no misamplification even after 120 minutes, while six-primer sets showed false positivity in NTC at 40 minutes. The five-primer set achieved a sensitivity of 92.2% and a specificity of 99% in fluorometric detection [71].
2. Protocol for Incorporating Additives to Suppress Non-Specific Amplification
- Additive Preparation: Prepare stock solutions of additives like Dimethyl Sulfoxide (DMSO), betaine, or guanidine hydrochloride (GuHCl).
- Optimization Reaction: Set up LAMP reactions with a positive and no-template control, incorporating a range of additive concentrations (e.g., DMSO at 1-10%; GuHCl at 10-80 mM) [68] [71].
- Analysis: DMSO inhibits the annealing of primers within and between strands, reducing nonspecific amplification [68]. GuHCl acts as a primer binding enhancer, improving detection speed and efficiency. Research has shown GuHCl can improve detection time by approximately 22% [71].
- Selection: Choose the concentration that yields the fastest time-to-positive for valid samples while completely suppressing amplification in the NTC.
3. Protocol for Using Enzymatic Controls to Prevent Carry-over Contamination
- Enzyme Selection: Use Uracil-DNA-Glycosylase (UDG) in pre-amplification mixes.
- Reaction Setup: Incorporate dUTP instead of dTTP during the LAMP amplification reaction. In subsequent reactions, include UDG in the master mix, which will degrade any previously amplified uracil-containing products, preventing false positives from amplicon carry-over [68].
- Incubation: Incubate the reaction with UDG at room temperature or 37°C for a few minutes before the isothermal amplification step, which will inactivate the UDG.
Table 2: Advanced Strategies for False-Positive Reduction in LAMP
| Strategy | Mechanism of Action | Key Experimental Details | Reported Outcome |
|---|---|---|---|
| Five-Primer LAMP [71] | Reduces complexity and potential for primer interaction. | Remove one loop primer (LF or LB) from a standard six-primer set. | Specificity increased to 97.2-99%; no misamplification after 120 min [71]. |
| Organic Additives (DMSO, Betaine) [68] | Disrupts secondary structures; promotes strand separation. | Test at various concentrations (e.g., 1-10% v/v for DMSO). | Reduces nonspecific amplification; improves specificity [68]. |
| UDG Treatment [68] | Enzymatically degrades carry-over contamination from previous runs. | Use dUTP in amplification; add UDG to master mix pre-incubation. | Effectively eliminates false positives from amplicon carry-over [68]. |
| Hot-Start with Nanoparticles [68] | Inactivates polymerase at room temperature, preventing primer-dimer extension during setup. | Use gold nanoparticles or engineered hot-start Bst polymerase. | Reduces nonspecific amplification initiated during reaction setup [68]. |
The Scientist's Toolkit: Essential Research Reagents
Table 3: Key Reagent Solutions for Troubleshooting Amplification Assays
| Reagent / Material | Function / Application | Specific Example |
|---|---|---|
| Bst 2.0 / 3.0 DNA Polymerase | Enzyme with strand-displacement activity critical for LAMP. Bst 3.0 has intrinsic reverse transcriptase activity [71]. | Enables single-enzyme RT-LAMP; comparison required for optimal performance [71]. |
| Hot-Start DNA Polymerase | Reduces non-specific amplification during reaction setup by requiring thermal activation. | Available for both qPCR and isothermal assays (e.g., WarmStart Bst) [2]. |
| Guanidine Hydrochloride (GuHCl) | Primer binding enhancer that accelerates and improves LAMP efficiency [71]. | Adding 40 mM GuHCl improved detection time by 22% in a SARS-CoV-2 assay [71]. |
| UDG (Uracil-DNA-Glycosylase) | Enzyme used with dUTP to prevent carry-over contamination from previous amplifications [68]. | Incubated with master mix prior to amplification to degrade uracil-containing contaminants [68]. |
| SYTO Dyes (e.g., SYTO 9) | Cell-permeant, nucleic acid stains for real-time fluorescence monitoring of LAMP and qPCR [2]. | Used at 1-2 µM in a 10 µL RT-LAMP reaction volume for real-time monitoring [2]. |
| Betaine | Additive that reduces the stability of DNA secondary structures and can improve amplification efficiency [2] [68]. | Often included in standard LAMP buffer recipes to enhance specificity and yield [2]. |
Visualization of Workflows
The following diagram illustrates the logical decision-making process for diagnosing and addressing the most common amplification issues related to primer structures:
Diagram 1: Troubleshooting workflow for amplification issues.
Successful nucleic acid amplification relies on a meticulous approach to primer design and reaction optimization, with a constant focus on mitigating the effects of primer secondary structures. For qPCR, this involves careful in silico design, melt curve analysis, and cycling condition optimization. For LAMP, strategies such as simplifying primer sets, employing chemical enhancers, and implementing enzymatic controls are highly effective. The systematic application of the troubleshooting protocols and advanced strategies outlined in this guide will significantly reduce false-positive results and enhance the robustness, sensitivity, and reliability of both qPCR and isothermal amplification assays, thereby supporting their critical role in research and molecular diagnostics.
A Systematic Workflow for Resolving Persistent Non-Specific Amplification
Non-specific amplification represents a critical failure mode in polymerase chain reaction (PCR) and related amplification technologies, fundamentally rooted in the unintended biochemistry of primer secondary structures. It is defined as the amplification of non-target DNA sequences, which competes with and often obscures the intended target amplicon [72]. Within the context of advanced primer research, this phenomenon frequently manifests as two primary artifacts: primer dimers (including both self-dimers and cross-dimers) and self-amplifying hairpin loops [2] [59] [3].
The exponential nature of PCR means that even minor non-specific amplification events occurring early in the thermal cycling process can quickly outcompete target amplification, leading to failed experiments, untrustworthy results, or products unsuitable for downstream applications like sequencing [72]. In complex, multi-template PCR used in next-generation sequencing library preparation, even small sequence-specific differences in amplification efficiency can cause severe skewing of abundance data, compromising quantitative accuracy [73]. The research into these secondary structures is not merely about eliminating artifacts; it is about achieving the fundamental reproducibility and precision required in modern molecular diagnostics, drug development, and genomic research.
Recognizing Non-Specific Amplification: A Diagnostic Guide
Accurate diagnosis is the first step in remediation. Non-specific amplification is most readily identified through gel electrophoresis, where it appears in several characteristic forms [72].
- Primer Dimers: These appear as a bright band at the bottom of the gel, typically between 20-60 base pairs (bp), and consist of two primers that have hybridized to form an amplifiable unit. Primer multimers can also form, creating a ladder-like pattern of bands at 100 bp, 200 bp, and larger increments [72].
- PCR Smears: A continuous smear of DNA across a range of molecular weights indicates random, non-specific DNA amplification. This can be caused by highly fragmented template DNA, degraded primers, or excessively low annealing temperatures [72].
- Amplicons of Unexpected Sizes: Discrete bands at sizes other than the expected target indicate amplification from unintended, partially complementary sites on the template DNA [72].
- DNA Stuck in Wells: While not always due to non-specific amplification, this can be associated with the formation of extremely large or complex DNA amplicons that physically block the gel wells [72].
The table below summarizes these artifacts and their common causes for quick reference.
Table 1: Diagnostic Features of Non-Specific Amplification Artifacts
| Artifact Type | Typical Appearance on Gel | Common Underlying Causes |
|---|---|---|
| Primer Dimer | Bright band at 20-60 bp [72] | High primer concentration; primer self-complementarity; mispriming during setup [72] [3] |
| Primer Multimer | Ladder-like pattern (~100, 200 bp) [72] | Extension and concatenation of primer dimers [72] |
| PCR Smear | Continuous smear of DNA [72] | Fragmented DNA template; low annealing temperature; degraded primers; too much template DNA [72] |
| Unexpected Bands | Discrete bands at non-target sizes [72] | Partial complementarity of primers to non-target sites; low annealing stringency [72] |
A Systematic Workflow for Resolution
The following workflow provides a step-by-step methodology for identifying the root cause of non-specific amplification and implementing a targeted solution.
Step 1: In-silico Re-evaluation of Primer Design
The most robust solutions begin before the experiment is run. Scrutinize primer sequences using specialized software to evaluate key thermodynamic parameters.
- Self-Complementarity and 3'-Complementarity: These parameters should be minimized. High scores indicate a propensity for hairpin formation (self-complementarity) and primer-dimerization (self 3'-complementarity), as the 3' end is critical for extension by DNA polymerase [3].
- GC Content and Clamp: Maintain a GC content between 40% and 60%. Avoid more than three consecutive G or C bases at the 3' end (GC clamp), as this can promote non-specific binding [3].
- Melting Temperature (Tm): Ensure forward and reverse primers have similar Tm values, ideally within 2°C of each other, and within the range of 54°C to 65°C [3].
Table 2: Optimal Primer Design Parameters to Minimize Secondary Structures
| Parameter | Optimal Value/Range | Rationale |
|---|---|---|
| Length | 18 - 24 nucleotides [3] | Balances specificity with efficient annealing. |
| GC Content | 40% - 60% [3] | Prevents overly stable (high GC) or unstable (low GC) duplexes. |
| Melting Temp (Tm) | 54°C - 65°C; primers within 2°C [3] | Ensures synchronized and specific primer binding. |
| Self-Complementarity | As low as possible [3] | Minimizes hairpin loop formation. |
| Self 3'-Complementarity | As low as possible [3] | Minimizes primer-dimer formation. |
Recent research by Meagher et al. underscores the importance of this step, demonstrating that even minor sequence modifications to eliminate amplifiable primer dimers and hairpins can dramatically improve assay performance, especially in complex amplification techniques like RT-LAMP [2] [59].
Step 2: Wet-Lab Optimization and Troubleshooting
If non-specific amplification persists after in-silico optimization, proceed with empirical protocol adjustments.
- Employ Hot-Start Polymerases: These enzymes remain inactive until a high-temperature activation step, preventing low-temperature mispriming and primer-dimer extension during reaction setup [72].
- Optimize Annealing Temperature: Perform a temperature gradient PCR. Increase the annealing temperature in increments of 2-3°C to enhance stringency and favor only the perfect primer-template matches [72] [3].
- Titrate Reaction Components:
- Magnesium Ion (Mg2+) Concentration: Mg2+ is a cofactor for DNA polymerase and affects primer annealing. Titrate concentrations (e.g., 1.5 mM to 4 mM) to find the optimal level for specificity [2].
- Primer Concentration: Reduce primer concentration to lower the probability of primer-dimer formation. A standard starting range is 0.1-0.5 µM for each primer [72].
- Use Additives: Incorporate reagents like betaine, DMSO, or formamide to disrupt secondary structures that facilitate mispriming, particularly for GC-rich templates [2].
- Assess Template Quality: Re-extract template DNA if smearing is observed, as fragmentation can create unwanted priming sites. Diluting the template can also reduce the chance of non-specific self-priming [72].
The logical relationship between the observed artifact and the corresponding troubleshooting step is outlined in the workflow below.
Systematic troubleshooting workflow for common amplification artifacts.
Step 3: Validation and Mechanistic Confirmation
After implementing potential fixes, validate the results and confirm the mechanism.
- Run Control Reactions: Always include a no-template control (NTC) to confirm the amplification signal originates from the template and not from primer artifacts alone.
- Quantify Efficiency: Use quantitative PCR (qPCR) to precisely measure the amplification efficiency of your target versus non-specific products. Research shows that sequences with poor efficiency can be underrepresented by a factor of two after only 12 PCR cycles [73].
- Sequence the Artifact: If the non-specific band is persistent, gel-purify and sequence it. The sequence will often reveal the origin, such as the joined sequences of two primers in a primer-dimer.
Advanced Research and Future Directions
Cutting-edge research is moving beyond simple heuristic rules towards a predictive, mechanistic understanding of amplification bias.
- Deep Learning for Prediction: Convolutional neural networks (CNNs) can now predict sequence-specific amplification efficiency based on sequence information alone. These models have identified that the mechanism of "adapter-mediated self-priming" is a major cause of poor amplification efficiency in multi-template PCR, challenging long-standing design assumptions [73].
- Thermodynamic Modeling: The application of the nearest-neighbor model allows researchers to compute a single thermodynamic parameter that correlates with the probability of non-specific amplification, providing a more rigorous basis for primer selection [2].
The following diagram illustrates the core mechanism of adapter-mediated self-priming, a key cause of amplification bias identified by deep learning models.
Mechanism of adapter-mediated self-priming causing inefficient amplification.
The following table details key reagents and computational tools essential for implementing the workflow described in this guide.
Table 3: Research Reagent Solutions for Troubleshooting Non-Specific Amplification
| Reagent / Tool | Function / Application | Specific Example / Note |
|---|---|---|
| Hot-Start DNA Polymerase | Prevents enzymatic activity during reaction setup, reducing primer-dimer formation. | Available as standalone enzymes or pre-formulated in master mixes. |
| Betaine | Additive that destabilizes secondary structures, improving amplification efficiency of GC-rich targets and reducing mispriming [2]. | Used in RT-LAMP and PCR at concentrations such as 0.8 M [2]. |
| DMSO | Additive that helps denature DNA with high secondary structure, improving primer access. | Often used at 2-10% concentration. |
| SYTO Dyes | Intercalating dyes for real-time monitoring of amplification, allowing observation of rising baselines from non-specific products [2]. | Examples: SYTO 9, SYTO 82 [2]. |
| QUASR Technique | A probe-based detection method that provides bright, high-contrast endpoint signals, improving discrimination in complex assays like LAMP [2] [59]. | Involves a fluorescently labeled primer and a short quenching probe. |
| Thermodynamic Prediction Tools | Software for calculating stability of primer secondary structures (e.g., hairpins, dimers) using the nearest-neighbor model [2]. | Critical for advanced primer optimization. |
Ensuring Accuracy: Validation Techniques and Emerging Predictive Technologies
Post-amplification analysis is a critical step in validating PCR results and ensuring data integrity. This technical guide details the principles and methodologies of two cornerstone techniques: melt curve analysis and agarose gel electrophoresis. Framed within primer secondary structure and dimer research, this whitepaper provides drug development professionals with advanced protocols for identifying artifacts that compromise quantification accuracy and experimental conclusions. We present integrated workflows that combine these techniques to confirm amplicon specificity and diagnose primer-related pathologies.
The fidelity of any PCR-based experiment is fundamentally limited by the specificity of its primers. Primer-dimer artifacts and stable secondary structures such as hairpin loops constitute the most common pathologies leading to nonspecific amplification, false-positive signals, and reduced amplification efficiency [1]. These artifacts are not merely nuisances; they represent competitive reactions that deplete essential reagents like dNTPs and DNA polymerase, thereby skewing quantitative results and compromising detection sensitivity [1]. In the context of drug development and diagnostic assay validation, such inaccuracies can have significant downstream consequences. This guide focuses on two powerful post-run techniques that, when used in concert, provide a robust framework for identifying these issues and verifying that amplification corresponds to the intended target.
Melt Curve Analysis: Principles and Applications
Melt curve analysis (MCA) is a powerful, in-tube technique used primarily with intercalating dye chemistry (e.g., SYBR Green) to assess the specificity and identity of a PCR product.
Fundamental Principle
Following PCR amplification, the product is heated gradually from a low to a high temperature (e.g., 65°C to 95°C). As the temperature increases, the double-stranded DNA (dsDNA) denatures, releasing the intercalating dye and causing a decrease in fluorescence [74]. A plot of the negative derivative of fluorescence over temperature versus temperature (-dF/dT vs. T) produces a melting peak, the apex of which is the melting temperature (Tm) [75]. The Tm is a characteristic property determined by the amplicon's length, GC content, and sequence [76].
Diagnosing Primer-Related Artifacts
MCA is exceptionally valuable for detecting primer-related pathologies. Table 1 outlines the characteristic melt curve signatures for specific and nonspecific amplification products.
Table 1: Interpretation of Melt Curve Profiles in Primer Validation
| Observed Profile | Typical Interpretation | Indication for Primer Quality |
|---|---|---|
| Single, sharp peak [76] [74] | A single, uniform PCR product. | High specificity; no significant dimer formation. |
| Peak with a "shoulder" or secondary low-temperature peak [76] | Presence of primer-dimers or nonspecific products. | Primers are self-complementary; requires redesign. |
| Multiple distinct peaks [76] [77] | Multiple specific amplicons (e.g., in multiplex assays) or significant mis-priming. | Check primer specificity; may be acceptable in a validated multiplex assay. |
| Broad or shifted peak | Heterogeneous PCR products or inconsistent dye binding. | Possible secondary structure in the amplicon or suboptimal reaction conditions. |
A single, sharp peak typically indicates a pure, specific amplicon [76] [74]. However, the presence of a lower-temperature peak or a "shoulder" on the main peak is a classic signature of primer-dimer formation [76]. These dimers melt at lower temperatures due to their shorter length and lower stability. Furthermore, the shape of the curve can suggest the presence of hairpin loops or other secondary structures within the amplicon that cause deviations from a simple two-state (double-stranded to single-stranded) melting transition [74].
Advanced Application: High-Resolution Melt (HRM)
HRM is a more precise form of MCA that can discriminate sequence variations, including single-nucleotide polymorphisms (SNPs) [75]. It is so sensitive that it can distinguish genotyping profiles (wild-type, heterozygous, homozygous) based on subtle differences in melt curve shapes, providing a powerful tool for screening without the need for gels [75].
Agarose Gel Electrophoresis: A Gold Standard for Visualization
Agarose gel electrophoresis provides a physical separation of DNA fragments by size, serving as a direct method to confirm amplicon size and purity [78].
Core Mechanism
DNA fragments are separated by applying an electric field across an agarose gel matrix. Since DNA is negatively charged, it migrates towards the positive anode. Smaller fragments move through the pores of the gel more quickly than larger fragments [78]. The distance migrated is inversely proportional to the logarithm of the fragment size [78].
Protocol for Analysis of PCR Products
Table 2: Typical Agarose Gel Electrophoresis Protocol [79] [80] [78]
| Step | Parameters | Notes & Critical Points |
|---|---|---|
| Gel Preparation | 1-3% agarose in 1X TAE or TBE buffer. | Gel concentration depends on fragment size; higher % for smaller fragments. |
| Staining | SYBR Safe, Ethidium Bromide (EtBr), or alternatives. | EtBr is a known carcinogen; handle with care and proper PPE [78]. |
| Sample Loading | Mix DNA with 6X loading dye. | Dye contains glycerol to sink sample and tracking dyes to monitor migration. |
| Electrophoresis | 80-150 V for 30-60 minutes. | Lower voltages improve resolution for larger fragments. |
| Visualization | UV or blue light transilluminator. | Compare sample bands to a DNA ladder for size determination. |
Identifying Artifacts on a Gel
When analyzing PCR products for primer pathologies:
- Specific Product: A single, sharp band at the expected molecular weight.
- Primer-Dimer: A diffuse or fuzzy band typically between 30-50 bp [76] [1], visible even in the no-template control (NTC).
- Nonspecific Amplification: Multiple bands or smearing indicates mis-priming or the presence of secondary structures that hinder clean amplification.
Integrated Workflow for Comprehensive Validation
Relying on a single post-run method can be misleading. An integrated approach, leveraging the strengths of both MCA and gel electrophoresis, provides the most robust validation.
The Diagnostic Workflow
The following diagram illustrates the decision-making pathway for analyzing PCR results using a combination of melt curves and gel electrophoresis.
Resolving Ambiguous Melt Curves
A key advantage of this integrated approach is resolving ambiguous MCA results. For instance, a single peak in a melt curve is typically interpreted as a single, specific product. However, certain amplicons with AT-rich regions or internal secondary structures can melt in multiple phases, producing multiple peaks even from a single, pure product [74]. Conversely, two different amplicons with nearly identical Tm values may produce a single, broad peak.
In these cases, agarose gel electrophoresis serves as the gold standard for verification [74]. A single band on the gel confirms a single product, while multiple bands or a low molecular weight smear indicate nonspecific amplification or primer-dimer [76] [78]. For advanced troubleshooting, in-silico prediction tools like uMelt can model the expected melt profile of a given amplicon sequence, helping to distinguish between a complex-but-specific melt profile and true nonspecific amplification [76] [74].
Essential Research Reagent Solutions
The following table catalogs key reagents essential for executing the protocols and analyses described in this guide.
Table 3: Research Reagent Solutions for Post-Run Analysis
| Reagent / Kit | Primary Function | Application Notes |
|---|---|---|
| SYBR Green Dye | Fluorescent intercalating dye for qPCR and MCA. | Binds dsDNA; enables real-time monitoring and melt curve generation [76]. |
| EvaGreen Dye | Saturated DNA dye for HRM and digital MCA. | Higher specificity and lower background for high-resolution melt analysis [81] [75]. |
| Taq DNA Polymerase | Thermostable enzyme for PCR amplification. | Essential for robust PCR; fast polymerases (e.g., KAPA2G) reduce cycle times [75]. |
| dNTP Mix | Nucleotide building blocks for DNA synthesis. | High-quality dNTPs are critical for efficient amplification and minimizing errors. |
| Agarose | Polysaccharide matrix for gel electrophoresis. | Forms a porous gel for size-based separation of DNA fragments [78]. |
| DNA Ladder | Molecular weight standard for gel electrophoresis. | Contains DNA fragments of known sizes for calibrating sample band migration [79] [80]. |
| uMelt Software | Online tool for predicting melt curves. | Uses thermodynamic parameters to model amplicon melting behavior, aiding primer validation and troubleshooting [76] [74]. |
Within primer and assay development research, a rigorous post-run analysis strategy is non-negotiable. While melt curve analysis offers a rapid, high-throughput, and quantitative method for assessing reaction purity, agarose gel electrophoresis provides an indispensable, direct visualization of amplification products. The synergistic use of both techniques, as outlined in this guide, allows researchers and drug development professionals to confidently distinguish specific amplification from the artifacts caused by primer dimers and secondary structures, thereby ensuring the generation of reliable and reproducible data.
uMelt Analysis and Sequencing for Amplicon Verification
In molecular research and diagnostic assay development, the accuracy of polymerase chain reaction (PCR) and related amplification techniques is fundamentally dependent on the specificity of the primers used. A significant challenge in this domain is the formation of primer secondary structures, such as hairpin loops and primer dimers, which can severely compromise assay performance by promoting non-specific amplification, reducing amplification efficiency, and depleting reagent concentrations [2]. These artifacts are particularly problematic in quantitative PCR (qPCR) and isothermal amplification methods, where they can lead to false positives, inaccurate quantification, and reduced sensitivity [76] [2]. Consequently, rigorous verification of amplification products—confirming that the intended amplicon has been generated—is an essential step in validating molecular assays.
This guide focuses on two powerful, complementary techniques for amplicon verification: uMelt analysis and sequencing. uMelt, a bioinformatics tool that predicts DNA melting behavior, provides a computational approach to assess amplicon purity and identity based on thermodynamic principles [74]. When combined with direct sequencing methods, which provide definitive sequence confirmation, researchers gain a robust framework for ensuring the fidelity of their amplification products. Within the context of primer secondary structure research, these verification methods are indispensable for distinguishing specific amplification from artifacts generated by problematic primers, thereby ensuring the reliability of experimental results in fields ranging from basic research to drug development [2] [82].
The Problem: Primer Secondary Structures and Their Consequences
Types of Problematic Structures
Primer secondary structures represent a significant challenge in the design and implementation of robust amplification assays. The two most prevalent forms are hairpin loops and primer dimers:
Hairpin Loops: These occur when a single primer folds back upon itself, forming a stable double-stranded region with a single-stranded loop. This structure is particularly common in long primers, such as the 40-45 base inner primers used in loop-mediated isothermal amplification (LAMP), due to the increased probability of self-complementarity [2]. When these hairpins exhibit 3' end complementarity, they can become self-amplifying, leading to template-independent background amplification that consumes reagents and generates false-positive signals.
Primer Dimers: These form when two primers hybridize to each other instead of the target template, often through complementary regions at their 3' ends. DNA polymerase can then extend these hybridized primers, creating short, double-stranded artifacts that compete with the desired amplification for enzymes, nucleotides, and primers [76] [83]. The large number of primers employed in techniques like LAMP (six per target) further increases the likelihood of primer dimer formation [2].
Impact on Assay Performance
The formation of these secondary structures has direct, measurable consequences on assay performance:
- Reduced Efficiency: Primers sequestered in secondary structures are unavailable for target binding, effectively lowering the functional primer concentration and reducing amplification efficiency [2].
- Non-Specific Amplification: Self-amplifying hairpins and primer dimers generate amplification products even in no-template controls, leading to false positives and complicating result interpretation [2].
- Decreased Sensitivity: Background amplification consumes reaction components that would otherwise support target amplification, potentially reducing the ability to detect low-abundance targets [82].
- Inaccurate Quantification: In qPCR, non-specific products contribute to the total fluorescence signal, leading to underestimation of quantification cycle (Cq) values and erroneous quantification [76].
Table 1: Characteristics and Impacts of Common Primer Secondary Structures
| Structure Type | Formation Mechanism | Key Impacts on Assay Performance |
|---|---|---|
| Hairpin Loops | Self-complementarity within a single primer, especially in long primers (>40 bases) | • Self-amplification if 3' complementarity exists• Primer sequestration reducing effective concentration• Background fluorescence in probe-based assays |
| Primer Dimers | Inter-primer complementarity, particularly at 3' ends | • Non-specific amplification products• Depletion of enzymes and nucleotides• Competition with target amplification leading to reduced sensitivity |
uMelt Analysis: Principles and Applications
Theoretical Foundations
uMelt is a web-based bioinformatics tool that employs thermodynamic modeling to predict the melting behavior of DNA amplicons. The software utilizes the nearest-neighbor model, which accounts for the stability of base pair interactions based on the identity and orientation of adjacent nucleotide pairs [84] [2]. This model recursively calculates the helicity of an amplicon across a user-defined temperature range, considering factors such as stacking energies, loop entropy effects, and cation concentrations to generate predicted melting curves [74] [84].
A key advantage of uMelt is its ability to model DNA melting as a multi-state process rather than a simple two-state transition (double-stranded to single-stranded). This is particularly important because amplicons with heterogeneous sequence composition—such as those with AT-rich regions, secondary structures, or GC-rich domains—may melt in multiple phases, leading to complex melting profiles with multiple peaks that do not necessarily indicate multiple amplicons [74].
Advantages Over Traditional Melt Curve Analysis
Traditional melt curve analysis, commonly used with intercalating dye-based qPCR, measures the change in fluorescence as double-stranded DNA denatures with increasing temperature. While useful, this method operates on the often-incorrect assumption that a single peak invariably indicates a single amplicon [74]. uMelt addresses several limitations of this approach:
- Predictive Power: uMelt can forecast melting behavior during assay design, allowing researchers to identify potential multi-peak profiles before synthesizing primers and conducting wet lab experiments [74].
- Sequence-Level Interpretation: By modeling the contribution of specific sequence features to melting behavior, uMelt helps explain why certain amplicons produce complex melt curves, distinguishing between true non-specific amplification and expected multi-phasic melting of a single product [74].
- Parameter Flexibility: Users can adjust experimental conditions such as Na+, Mg2+, and DMSO concentrations to match their specific reaction conditions, improving the accuracy of predictions across different buffer systems [74] [84].
Table 2: Comparison of Amplicon Verification Methods
| Method | Principle | Advantages | Limitations |
|---|---|---|---|
| uMelt Analysis | Thermodynamic prediction of DNA melting behavior based on sequence | • In silico prediction before experimental work• Explains complex melting of single amplicons• Free and accessible web tool | • Prediction rather than direct confirmation• Accuracy depends on parameter settings |
| Traditional Melt Curve | Experimental measurement of fluorescence vs. temperature during DNA denaturation | • Real-time monitoring of actual reaction• Standard feature on qPCR instruments• No additional processing required | • Cannot distinguish multiple peaks in single amplicon from multiple products• Requires physical experiment with potential for artifact introduction |
| Agarose Gel Electrophoresis | Size-based separation of DNA fragments in an agarose matrix | • Visual confirmation of product size• Detection of primer dimers (typically 30-50 bp smears)• Low-cost and widely available | • Low resolution for similar-sized fragments• Requires physical handling of PCR products• Post-amplification processing increases contamination risk |
| Sanger Sequencing | Determination of nucleotide sequence through chain termination | • Definitive sequence confirmation• Identifies exact amplification product• Detects SNPs and minor sequence variations | • Higher cost and longer turnaround time• Typically requires gel extraction/purification• Lower sensitivity for mixed amplicons |
Experimental Protocols
uMelt Analysis Workflow
The following protocol provides a step-by-step methodology for using uMelt software to predict and interpret amplicon melting behavior:
Sequence Input: Navigate to the uMelt web interface and enter the complete amplicon sequence (typically 70-200 bp for qPCR assays) in FASTA format or as plain text [74] [84].
Parameter Configuration:
Temperature Range Definition:
- Set an appropriate temperature range that encompasses the expected melting transition (typically 60-95°C) [74].
- Use a temperature increment of 0.5°C or smaller for high-resolution predictions.
Calculation and Interpretation:
- Execute the calculation and examine the predicted melting curve.
- A single peak typically suggests a homogeneous amplicon, while multiple peaks may indicate either multiple amplicons or complex melting of a single product [74].
- Compare predicted curves for different primer sets during design phase to select amplicons with simpler predicted melting behavior.
Experimental Correlation:
- Compare uMelt predictions with experimental melt curves after running the assay.
- While absolute melting temperatures may vary slightly between prediction and experiment, the curve shape and number of peaks should correlate well [74].
Amplicon Sequencing Verification
Sequencing provides definitive confirmation of amplification products and should be used to validate uMelt predictions:
Amplicon Purification:
- Separate PCR products by agarose gel electrophoresis.
- Excise the band of expected size and purify using a gel extraction kit [76].
- Alternatively, use column-based purification for post-amplification cleanup without gel separation.
Library Preparation for Amplicon Sequencing:
- For Illumina platforms: Use targeted amplicon sequencing solutions such as AmpliSeq for Illumina, which enables multiplexing of hundreds to thousands of amplicons [85].
- Library preparation typically takes 5-7.5 hours and can be performed with integrated workflows like the Illumina DNA Prep kit [85].
- Incorporate barcodes if multiplexing samples to enable downstream demultiplexing.
Sequencing:
- Utilize benchtop sequencers such as the MiSeq i100 Series, which provides same-day results for targeted sequencing applications [85].
- Follow manufacturer recommendations for loading concentrations and cycle settings.
Data Analysis:
- Process raw sequencing data using platform-specific analysis tools such as the DNA Amplicon App in BaseSpace Sequence Hub [85].
- Align sequences to reference targets to verify amplification specificity.
- Identify any sequence variations that might explain unusual melting behavior predicted by uMelt.
Integrated Verification Approach
For comprehensive amplicon verification, uMelt analysis and sequencing should be employed as complementary techniques within a structured workflow:
Primary Screening with uMelt: During assay design, use uMelt to screen multiple candidate amplicons and select those with predicted simple melting behavior, minimizing the likelihood of complex melting profiles that complicate interpretation [74].
Experimental Validation: Conduct amplification with selected primers using intercalating dye chemistry (e.g., SYBR Green) and generate experimental melt curves.
Profile Comparison: Compare experimental curves with uMelt predictions. Discrepancies may indicate issues with reaction conditions or the presence of unexpected amplification products.
Sequencing Confirmation: For assays that will be used extensively (e.g., in diagnostic development), sequence amplification products to definitively confirm specificity, particularly when uMelt predicts complex melting behavior [74] [86].
Troubleshooting: When multiple peaks appear in experimental melt curves but sequencing confirms a single amplicon, use uMelt to determine whether the profile results from intrinsic sequence properties (e.g., AT-rich regions, secondary structure) rather than non-specific amplification [74].
Table 3: Essential Research Reagents and Resources for Amplicon Verification
| Category | Specific Products/Tools | Key Functions | Application Notes |
|---|---|---|---|
| Prediction Software | uMelt | Predicts DNA melting curves using thermodynamic parameters | Free web-based tool; ideal for screening amplicon designs before synthesis [74] [84] |
| Secondary Structure Prediction | mFold (IDT) | Predicts secondary structure formation in oligonucleotides | Useful for identifying hairpin potential in primers [2] |
| qPCR Reagents | SYTO dyes (SYTO 9, SYTO 82) | Intercalating dyes for real-time monitoring of amplification and melt curves | Compatible with melt curve analysis; lower background than SYBR Green in some applications [2] |
| Sequencing Library Prep | AmpliSeq for Illumina | Targeted amplicon sequencing panels | Enables multiplexing of hundreds to thousands of amplicons; 5-7.5 hour preparation [85] |
| Sequencing Systems | MiSeq i100 Series | Benchtop sequencing for targeted applications | Provides same-day results for amplicon verification [85] |
| Data Analysis | DNA Amplicon App (BaseSpace) | Analysis tool for targeted sequencing data | Streamlines variant identification in amplicon sequences [85] |
| Polymerase Systems | Bst 2.0 WarmStart DNA Polymerase | Isothermal amplification for LAMP assays | Used in applications prone to hairpin formation due to long primers [2] |
uMelt analysis and amplicon sequencing represent complementary pillars of a robust amplicon verification strategy, particularly crucial when investigating primer secondary structures such as hairpin loops and dimers. uMelt provides rapid, inexpensive predictive power during assay design, helping researchers select optimal amplicons and interpret complex melting behavior, while sequencing delivers definitive confirmation of amplification products. By integrating these methods into a systematic verification workflow, researchers can distinguish true specific amplification from artifacts generated by problematic primer interactions, ensuring the reliability of results in applications ranging from basic research to clinical diagnostic development. As amplification technologies continue to evolve and find new applications in research and medicine, these verification approaches will remain essential for maintaining assay quality and data integrity.
Quantitative PCR (qPCR) is a cornerstone technique in molecular biology, and the choice of detection chemistry critically influences assay specificity, particularly concerning the challenge of primer secondary structures. This technical analysis compares TaqMan probe-based and SYBR Green dye-based qPCR chemistries, with a focused examination of their mechanisms for mitigating non-specific amplification from primer-dimers and self-amplifying hairpin loops. While TaqMan chemistry inherently provides greater specificity through sequence-specific fluorogenic probes, well-optimized SYBR Green assays with rigorous validation can achieve comparable performance for some applications. This guide details experimental protocols and design strategies to maximize specificity within the context of primer secondary structure research.
Real-time PCR, or quantitative PCR (qPCR), monitors the amplification of DNA after each thermal cycle, unlike conventional PCR which analyzes products at the end of the process [87]. The detection of amplified DNA relies on fluorescent reporting systems, which fall into two primary categories: DNA-binding dyes and probe-based systems. The specificity of an assay—its ability to detect only the intended target sequence—is a paramount concern, as it directly impacts the accuracy and reliability of the data. This is particularly true when investigating primer secondary structures, such as hairpin loops and primer-dimers, which are common sources of non-specific amplification that can lead to false positive signals and inaccurate quantification [2].
The Minimum Information for Publication of Quantitative Real-Time PCR Experiments (MIQE) guidelines have been established to standardize the reporting of qPCR experimental conditions and assay characteristics, ensuring the validity and reproducibility of results [87].
Fundamental Principles and Mechanisms
SYBR Green Chemistry
SYBR Green I is a fluorescent dye that intercalates into the minor groove of double-stranded DNA (dsDNA) [88]. The fundamental principle is that the dye exhibits a dramatically increased fluorescence (over 1,000-fold) when bound to dsDNA compared to when it is free in solution [89]. During the qPCR extension phase, as the polymerase synthesizes new dsDNA amplicons, SYBR Green dye binds to all newly formed dsDNA, resulting in a fluorescent signal proportional to the total mass of dsDNA generated [88] [87].
A critical consequence of this mechanism is that the signal is dependent on the mass of dsDNA produced. Therefore, a longer amplicon will generate a stronger fluorescent signal than a shorter one for the same number of molecules, because it can bind more dye molecules [88]. More importantly, the dye binds to any dsDNA, including non-specific PCR products and primer-dimers, which is the primary source of its lower inherent specificity [88] [87].
TaqMan Chemistry
TaqMan chemistry, also known as fluorogenic 5' nuclease chemistry, relies on a sequence-specific oligonucleotide probe to confer high specificity [88]. The probe is labeled with a fluorescent reporter dye on its 5' end and a quencher dye on its 3' end. When the probe is intact, the proximity of the quencher to the reporter suppresses the reporter's fluorescence through Fluorescence Resonance Energy Transfer (FRET) [88].
During the PCR annealing step, the TaqMan probe binds to its specific target sequence downstream from one of the primer sites. During the subsequent extension phase, the 5' to 3' exonuclease activity of the Taq DNA polymerase cleaves the bound probe. This cleavage separates the reporter dye from the quencher, leading to a permanent increase in the reporter's fluorescent signal [88]. The process is detailed in the workflow below.
A key advancement is the TaqMan MGB (Minor Groove Binder) probe. These probes incorporate a non-fluorescent quencher and a minor groove binder moiety at the 3' end. The MGB increases the probe's melting temperature (Tm), allowing for the use of shorter probes, which provides greater specificity in discriminating between closely related sequences, such as in allelic discrimination assays [88].
Quantitative Comparison of Performance Characteristics
The fundamental differences in the mechanisms of SYBR Green and TaqMan chemistries translate into distinct performance profiles, particularly regarding specificity, sensitivity, and applicability.
Table 1: Key Performance Characteristics of SYBR Green vs. TaqMan Chemistries
| Characteristic | SYBR Green Chemistry | TaqMan Chemistry |
|---|---|---|
| Specificity | Lower* | Higher |
| Sensitivity (Low Copy Detection) | Variable* | 1-10 copies [88] |
| Reproducibility | Medium* | High [88] |
| Multiplexing Capability | No | Yes [88] |
| Primary Specificity Challenge | Binds to any dsDNA (non-specific products, primer-dimers) [88] | Requires synthesis of target-specific probes [88] |
| Specificity Validation Method | Melt Curve Analysis [76] | Probe specificity is inherent; assay validation required |
| Cost & Ease of Use | Lower cost, simpler setup [89] | Higher cost, requires probe design/synthesis [89] |
| Impact of Primer Secondary Structures | High susceptibility to false positives from primer-dimers [2] | Resistant to false positives from primer-dimers [88] |
*Depends heavily on template quality and primer design/optimization [88].
Empirical studies directly comparing the two chemistries have demonstrated that with high-performance primers and proper optimization, SYBR Green can yield data comparable to TaqMan. One study on adenosine receptor subtypes reported amplification efficiencies above 97% for both methods and found a significant positive correlation between the normalized gene expression data they produced [89].
Table 2: Experimental Gene Expression Data from a Comparative Study (n=20)
| Adenosine Receptor Subtype | Normalized Expression (SYBR Green) | Normalized Expression (TaqMan) | Correlation (Pearson) |
|---|---|---|---|
| A1 | 1.44 | 1.38 | Positive & Significant (P < 0.05) [89] |
| A2A | 2.38 | 2.43 | Positive & Significant (P < 0.05) [89] |
| A2B | 3.79 | 3.84 | Positive & Significant (P < 0.05) [89] |
| A3 | 3.55 | 3.58 | Positive & Significant (P < 0.05) [89] |
The Specificity Challenge: Primer Secondary Structures
A major threat to qPCR specificity is the formation of primer secondary structures, which can deplete reagents and generate non-specific amplification.
- Primer-Dimers: These form when primers hybridize to each other instead of the target template, often due to complementary sequences, especially at the 3' ends. The polymerase can then extend these hybridized primers, creating short, double-stranded DNA artifacts. SYBR Green dye will bind to these dimers, producing a false fluorescent signal [2].
- Self-Amplifying Hairpins: Particularly relevant for long primers (e.g., those used in LAMP assays, such as 40-45 base FIP/BIP primers), stable hairpin structures can form. If this hairpin has 3' complementarity, the polymerase can extend it, creating a "self-amplifying" structure that depletes the primer and generates background signal [2]. This is a separate phenomenon from the general "spontaneous amplification" sometimes seen in no-template controls.
The diagram below illustrates how these structures form and impact amplification.
The stability of these aberrant structures is governed by thermodynamics, specifically the change in Gibbs free energy (ΔG). More negative ΔG values indicate greater stability and a higher probability of non-specific amplification [2]. Therefore, during primer design, it is critical to screen for self-dimers, cross-dimers, and hairpins, aiming for ΔG values weaker (more positive) than -9.0 kcal/mol [44].
Experimental Protocols for Specificity Assessment
Melt Curve Analysis for SYBR Green Assays
Melt curve analysis is an indispensable validation step for SYBR Green qPCR to identify non-specific amplification [76] [87].
Protocol:
- Run the qPCR: Perform the SYBR Green qPCR assay using a standardized protocol (e.g., 40 cycles of denaturation, annealing, and extension).
- Post-Amplification Melting: After the final amplification cycle, the thermal cycler gradually increases the temperature (e.g., from 60°C to 95°C) while continuously monitoring the fluorescence.
- Data Analysis: As the temperature rises, dsDNA denatures into single strands, causing the SYBR Green to dissociate and the fluorescence to decrease. Plot the negative derivative of the fluorescence relative to the temperature (-dF/dT) against the temperature to generate a melt curve with distinct peaks [87].
Interpretation:
- A single, sharp peak indicates that a single, specific amplicon was generated.
- Multiple peaks or a shoulder on the main peak indicates the presence of multiple products, such as non-specific amplicons or primer-dimers [76]. In such cases, primer redesign is necessary.
Assay Efficiency and Standard Curve Generation
Determining amplification efficiency is crucial for both SYBR Green and TaqMan assays to ensure precise and accurate quantification, especially for relative gene expression analysis using the ΔΔCt or Pfaffl methods [87].
Protocol:
- Serial Dilution: Prepare a 5- or 10-fold serial dilution of a sample with a known concentration of the target nucleic acid.
- qPCR Run: Amplify each dilution in duplicate or triplicate.
- Standard Curve: Plot the log of the starting quantity of each dilution against the mean Ct value obtained. Perform linear regression analysis on the data points.
- Efficiency Calculation: Use the slope of the standard curve to calculate the amplification efficiency with the formula: Efficiency = (10^(-1/slope) - 1) x 100 [87]. Ideal reactions have efficiencies between 90-110%.
A Strategic Protocol to Enhance SYBR Green Specificity
Research has demonstrated that designing primers for hairpin loop formation can strategically increase the specificity of SYBR Green assays. This approach nullifies primer-dimer interference by stabilizing the primers in an inactive conformation until the initial denaturation step [90].
Methodology:
- Primer Design: Forward and reverse primers are specially designed to include self-complementary sequences at their ends, allowing them to form hairpin loops.
- Concentration Optimization: Test different primer concentrations (e.g., 200 nM and 400 nM) in a one-step, real-time RT-PCR procedure.
- Validation: Evaluate the specificity of the amplicons via melt curve analysis. This method has shown good reproducibility and can serve as a cost-effective alternative for applications like pathogen monitoring from environmental samples [90].
Table 3: Key Research Reagent Solutions for qPCR Assay Development
| Reagent / Resource | Function / Description | Example Use Case |
|---|---|---|
| SYBR Green Master Mix | Optimized buffer, enzymes, and dsDNA-binding dye [88] | Gene expression screening, amplicon validation with melt curves. |
| TaqMan Master Mix | Optimized buffer, enzymes, and uracil-N-glycosylase (UNG) for contamination control [88] | High-specificity applications: SNP genotyping, pathogen quantification. |
| TaqMan MGB Probes | Probes with a non-fluorescent quencher and a minor groove binder for enhanced Tm and specificity [88] | Allelic discrimination assays, especially for shorter probes. |
| Passive Reference Dye (e.g., ROX) | Inert fluorescent dye for well-to-well signal normalization, correcting for pipetting errors and plate artifacts [76] | Included in most commercial master mixes for improved reproducibility. |
| Reverse Transcriptase Kit | Enzyme for synthesizing complementary DNA (cDNA) from RNA templates [89] | Essential first step for gene expression analysis (RT-qPCR). |
| Predesigned Assays (TaqMan) | Commercially available, pre-validated primer and probe sets for specific gene targets [88] | Saves time on design and validation; ensures reliability for common targets. |
| Free In Silico Tools (e.g., IDT SciTools, mFold) | Online software for primer design, Tm calculation, and analysis of secondary structures (dimers, hairpins) [44] [2] | Critical first step in assay design to predict and avoid problematic primers. |
The choice between SYBR Green and TaqMan chemistry is fundamentally a trade-off between cost and inherent specificity. TaqMan chemistry, with its sequence-specific probe requirement, offers superior built-in resistance to non-specific amplification from primer secondary structures. However, SYBR Green chemistry remains a powerful and cost-effective tool when accompanied by rigorous primer design, empirical validation of amplification efficiency, and mandatory melt curve analysis to ensure specificity. For researchers focusing on the implications of primer dimers and hairpin loops, understanding these chemistries' distinct mechanisms provides a framework for developing robust, reliable, and accurate qPCR assays, regardless of the chosen method.
In the realm of molecular biology, the polymerase chain reaction (PCR) is a foundational technique, yet its success critically depends on the effective design of oligonucleotide primers. Traditional primer design relies on established thermodynamic principles to optimize specificity and binding efficiency. However, these methods often fail to predict complex sequence interactions that lead to amplification failure, primarily through the formation of secondary structures such as hairpin loops and primer-dimers [91] [2]. These structures sequester primers in inactive forms, promote non-specific amplification, and significantly deplete reagents, thereby compromising assay sensitivity and reliability, especially in diagnostic applications where false positives present a major problem [91] [2].
The limitations of conventional software, which are grounded in thermodynamic laws and empirical knowledge from the 1990s, have become increasingly apparent [91]. They are not designed to comprehensively evaluate the myriad of potential interactions between primer pairs and templates, particularly in predicting failure with "non-target" sequences. This gap is especially critical for pathogen detection and clinical diagnostics, where false positives can have significant consequences [91]. The integration of machine learning (ML), specifically Recurrent Neural Networks (RNNs), represents a paradigm shift, moving beyond rigid rules to data-driven prediction. This in-silico approach can potentially replace preliminary experimental trials, accelerating research and diagnostic development [91] [92].
RNNs: A Primer on the Technology and Its Application
Recurrent Neural Networks (RNNs) are a class of artificial neural networks designed to recognize patterns in sequences of data, such as text, speech, or genetic sequences. Unlike traditional models, RNNs possess an internal "memory" that captures information about what has been processed so far, making them exceptionally suited for tasks where context and order are important [93]. A powerful variant known as Long Short-Term Memory (LSTM) networks includes gating mechanisms that learn to regulate the flow of information, preventing the fading of important long-range dependencies within a sequence [94] [93]. This ability to model long-term dependencies is crucial for understanding the complex relationships in nucleotide sequences.
The application of RNNs to PCR prediction is a form of natural language processing (NLP). In this analogy, the nucleotide sequences of primers and templates are treated as sentences composed of a four-letter alphabet (A, T, G, C). The interactions between them—such as hybridization, dimer formation, and hairpin loops—are encoded as "pseudo-sentences" made of symbolic "words" [91]. By training on experimental data where the outcome (amplification success or failure) is known, the RNN learns the complex, multi-factorial patterns that lead to a specific PCR result, without being explicitly programmed with thermodynamic rules [91]. This approach comprehensively evaluates various relationships that are difficult to capture with traditional models.
Experimental Protocol: Implementing an RNN for PCR Prediction
Data Generation and Primer Design for Model Training
The foundation of a robust RNN model is a high-quality, experimentally validated dataset.
- Template Preparation: A study aiming to predict amplification for 16S rRNA sequences synthesized 31 double-stranded DNA templates (435–481 bases) representing 30 bacterial phyla. These templates serve as the target sequences for PCR experiments [91].
- Primer Design and PCR Amplification: A total of 126 primer sets (72 for initial learning and 54 for specific testing) were designed. Crucially, some primers were intentionally designed ignoring conventional indicators like annealing temperature or single-base repetition to ensure the dataset included both successful and failed amplification examples. This is vital for the model to learn the differences between them [91].
- Experimental Validation: Each of the 126 primer sets was used in a PCR reaction with all 31 templates, resulting in 3,906 individual PCRs. Reactions used a standard master mix (e.g., GoTaq Green Hot Master Mix) with 0.5 µM primer and 100,000 template copies. Thermal cycling consisted of denaturation at 95°C for 2 minutes, followed by 33 cycles of 95°C for 30s, 56°C for 30s, and 72°C for 30s [91].
- Result Determination: PCR products were analyzed via 1.5% agarose gel electrophoresis. The presence or absence of a band of the expected size was recorded as a binary outcome (success or failure) for each primer-template combination, forming the "ground truth" labels for supervised learning [91].
Feature Engineering: Encoding Biological Sequences for RNN Processing
To make primer-template relationships understandable to an RNN, the biological interactions must be translated into a numerical format.
- Symbol Generation: The key innovation is converting the physical interactions into a symbolic language. Each potential relationship—including hairpin structures, primer self-dimers, cross-dimers between forward and reverse primers, and partial complementarity between primer and template—is assigned a specific symbol [91].
- Creating Pseudo-Sentences: For a given primer pair and template, all possible interactions are comprehensively analyzed. The resulting symbols are assembled into a "pentacode" (a five-lettered word) and then ordered into a "pseudo-sentence" that represents the unique interaction profile for that specific combination [91]. This pseudo-sentence is the input for the RNN model.
Model Training and Validation
The experimental results (the binary outcomes) paired with the generated pseudo-sentences are used to train the RNN in a supervised learning framework. The model learns to map the complex patterns within the pseudo-sentences to the probability of successful PCR amplification. In one implementation, this approach achieved 70% accuracy in predicting PCR results from novel primer and template sequences [91]. A more recent platform, BioInnovate AI, which employs advanced ML models like Light Gradient Boosting Machine (LGBM), has reported even higher performance, with an Area Under the Curve (AUC) of 0.97, and sensitivity and specificity of 0.93 and 0.91, respectively [92].
Table 1: Key Performance Metrics of ML Models for PCR Prediction
| Model / Study | Reported Accuracy | Sensitivity | Specificity | AUC |
|---|---|---|---|---|
| RNN with Pseudo-Sentences [91] | 70% | Not Specified | Not Specified | Not Specified |
| BioInnovate AI (LGBM Model) [92] | High | 0.93 | 0.91 | 0.97 |
The Critical Role of Addressing Secondary Structures
A primary advantage of the RNN approach is its ability to implicitly learn the detrimental impact of primer secondary structures, which are a major source of assay failure.
- Hairpin Loops: These occur when a primer folds back on itself due to intramolecular complementarity, forming a stable structure that prevents it from binding to the template. This sequesters the primer and reduces the effective concentration for the intended reaction [2] [14]. The RNN learns the sequence patterns that lead to stable hairpin formation.
- Primer-Dimers: These are artifacts formed by the interaction between two primers (either two of the same, self-dimer, or forward and reverse, cross-dimer). When the 3' ends of these primers are complementary, they can act as templates for each other, leading to polymerase extension and the accumulation of short, non-target duplexes. This depletes primer reserves and generates background noise [2] [3].
Research on Loop-Mediated Isothermal Amplification (LAMP), a technique using even more primers than PCR, has quantitatively shown that eliminating amplifiable primer dimers and hairpins through minor primer modifications dramatically improves assay performance, reducing non-specific background and enhancing sensitivity [2]. The RNN's learning process inherently captures the thermodynamic instability caused by these structures, as represented in the feature set of the pseudo-sentences.
Table 2: Impact and Characteristics of Primer Secondary Structures
| Structure Type | Formation Mechanism | Impact on PCR | Traditional Avoidance Strategy |
|---|---|---|---|
| Hairpin Loop | Intramolecular complementarity within a single primer. | Primer sequestration; reduced efficiency; can self-amplify if 3' end is involved. | Screen for self-complementarity; avoid palindromic sequences. |
| Primer Self-Dimer | Intermolecular complementarity between two copies of the same primer. | Depletes primer concentration; can lead to non-specific amplification. | Keep "self-complementarity" parameter low. |
| Cross-Dimer | Intermolecular complementarity between forward and reverse primers. | Depletes both primers; generates short, non-target amplicons. | Keep "3'-complementarity" between primer pairs low. |
Implementing an RNN-based PCR prediction workflow requires a combination of standard laboratory reagents and specialized computational tools.
Table 3: Essential Research Reagent Solutions for RNN-PCR Workflows
| Item | Function / Description | Example(s) / Notes |
|---|---|---|
| DNA Polymerase Master Mix | Enzyme and buffer system for PCR amplification. | GoTaq Green Hot Master Mix [91]; Bst 2.0 WarmStart for isothermal amplification [2]. |
| Oligonucleotide Primers | Synthesized forward and reverse primers. | Designed via software (e.g., Primer3) and synthesized by commercial providers (e.g., Integrated DNA Technologies) [91] [2]. |
| Template DNA | The target nucleic acid to be amplified. | Can be genomic DNA, synthetic genes, or viral RNA (with reverse transcription) [91]. |
| Fluorescent Intercalating Dye | For real-time monitoring of amplification (qPCR). | SYTO 9, SYTO 82, SYTO 62 [2]. Allows quantification of amplification kinetics. |
| RNN Model Platform | The software environment for model training and prediction. | Can be built using Python with deep learning libraries (TensorFlow, PyTorch). Pre-trained platforms like BioInnovate AI also exist [92]. |
| Primer Analysis Tools | For in-silico validation of primer properties. | OligoAnalyzer (for dimer/hairpin checks), Primer-BLAST (for specificity) [14]. |
Workflow Visualization and Future Perspectives
The following diagram illustrates the integrated experimental and computational workflow for leveraging RNNs in PCR prediction:
RNN-PCR Prediction Workflow
The field of ML-guided assay design is rapidly evolving. The trend is moving towards the development of integrated platforms that significantly reduce development time. For instance, the BioInnovate AI platform claims to cut PCR assay development time by approximately 90% [92]. Furthermore, the broader adoption of AI and ML in drug discovery is set to expand from preclinical applications into clinical trials and diagnostic development, with regulatory bodies like the FDA increasingly adapting to review and approve AI-driven solutions [95]. As these tools become more sophisticated and user-friendly, they will transition from augmenting human scientists to becoming indispensable partners in molecular design and diagnostic preparedness.
The integration of Recurrent Neural Networks marks a significant advancement in the field of molecular biology. By moving beyond the limitations of traditional thermodynamic models, RNNs offer a powerful, data-driven framework for understanding and predicting the complex sequence interactions that determine PCR success. This approach directly addresses the long-standing challenge of primer secondary structures, enabling the design of more robust and reliable assays. As the technology matures and becomes more accessible, it holds the promise of drastically accelerating diagnostic development, optimizing drug discovery pipelines, and enhancing our overall preparedness for emerging biological threats.
Establishing a Rigorous Validation Protocol for Clinical and Diagnostic Assays
Clinical validation is a critical process in healthcare that ensures medical devices, diagnostic tests, or treatments are both effective and safe when applied in real-world clinical settings. This process involves rigorous evaluation to confirm that the intervention performs as intended and delivers expected clinical outcomes while maintaining patient safety and treatment efficacy [96]. For in vitro diagnostic (IVD) assays, particularly those based on polymerase chain reaction (PCR) methodologies, establishing a rigorous validation protocol is paramount for regulatory approval and clinical adoption.
The integration of artificial intelligence and automation is playing an increasingly important role in diagnostic validation. In 2025, industry experts identify automation and AI as dominant laboratory trends, driven by their capacity to handle increased workloads and improve patient care [97]. AI is revolutionizing efficiency and innovation in clinical laboratories, with AI-powered co-scientists transforming how labs automate complex workflows and optimize protocols autonomously.
Core Principles of Assay Validation
Key Validation Parameters
A robust validation protocol for clinical and diagnostic assays must comprehensively evaluate multiple performance characteristics to ensure reliability, accuracy, and reproducibility. The framework should address both analytical and clinical validation components.
Table 1: Essential Validation Parameters for Diagnostic Assays
| Validation Parameter | Definition | Acceptance Criteria |
|---|---|---|
| Analytical Sensitivity | Lowest detectable concentration of analyte | Typically ≤ LOD with 95% confidence |
| Analytical Specificity | Ability to detect only intended target | No cross-reactivity with closely related organisms |
| Precision | Reproducibility under defined conditions | CV < 10% for intra-assay; < 15% for inter-assay |
| Accuracy | Closeness to true reference value | > 95% correlation with gold standard method |
| Linearity/Range | Interval where results are proportional | R² > 0.98 across claimed measuring range |
| Robustness | Resistance to small procedural variations | Consistent performance with deliberate variations |
Regulatory Considerations
Effective clinical validation methods must adhere to regulatory standards set by agencies such as the U.S. Food and Drug Administration (FDA) or European Medicines Agency (EMA) [96]. The validation framework should demonstrate:
- Clinical utility: The assay provides information that informs medical decision-making
- Analytical reliability: Consistent performance across multiple operators, instruments, and locations
- Clinical sensitivity and specificity: Accurate detection of the intended clinical condition
- Reproducibility: Consistent results across the intended use settings
Regulatory compliance requires meticulous documentation of all validation procedures, results, and quality control measures throughout the assay development lifecycle.
Primer Design Considerations for Robust Assays
Fundamental Primer Parameters
In molecular diagnostic assays, primer design is a critical factor determining assay performance and reliability. Poorly designed primers with propensity for secondary structures can compromise assay sensitivity, specificity, and reproducibility.
Table 2: Critical Primer Design Parameters and Specifications
| Parameter | Optimal Specification | Rationale |
|---|---|---|
| Length | 18-24 nucleotides | Balances specificity with efficient hybridization [3] |
| Melting Temperature (Tm) | 54°C-65°C; forward/reverse primers within 2°C | Ensures synchronized binding during annealing [3] |
| GC Content | 40%-60% | Provides appropriate binding strength without misfolding [3] |
| GC Clamp | Max 3 G/C in last 5 bases at 3' end | Prevents non-specific binding while promoting complete primer binding [3] |
| Self-Complementarity | As low as possible | Minimizes hairpin formation and self-dimers [3] |
| 3'-Self-Complementarity | As low as possible | Prevents primer-dimer artifacts [3] |
Experimental Protocols for Evaluating Primer Structures
Protocol 1: In Silico Analysis of Secondary Structures
Purpose: Computational prediction of potential hairpin loops and dimer formations before synthesis.
Methodology:
- Utilize bioinformatics tools (e.g., OligoAnalyzer, Primer3) with the following parameters:
- Temperature: 55°C-60°C (approximate annealing temperature)
- Na+ concentration: 50 mM
- Mg++ concentration: 1.5-3.0 mM
- Oligonucleotide concentration: 0.2-0.5 μM
- Analyze each primer for:
- Hairpin formation: ΔG threshold > -3.0 kcal/mol acceptable
- Self-dimerization: ΔG threshold > -5.0 kcal/mol acceptable
- Cross-dimerization: ΔG threshold > -6.0 kcal/mol acceptable
- Flag primers with more stable secondary structures (more negative ΔG values) for redesign
Acceptance Criteria: Primers with predicted ΔG values above thresholds for all structure types proceed to synthesis.
Protocol 2: Empirical Validation of Primer Specificity
Purpose: Experimental confirmation of primer specificity and absence of secondary structure artifacts.
Methodology:
- Prepare reaction mix with primers at working concentration (typically 0.1-0.5 μM)
- Include no-template controls (NTC) to detect primer-dimer formation
- Run SYBR Green-based qPCR with the following cycling conditions:
- Initial denaturation: 95°C for 2-5 minutes
- 40-45 cycles of:
- Denaturation: 95°C for 10-30 seconds
- Annealing: Primer-specific Tm for 15-30 seconds
- Extension: 72°C for 20-30 seconds
- Analyze melt curves with high-resolution ramping (0.1°C/sec) from 65°C to 95°C
- Assess amplification efficiency using standard curves (10-fold serial dilutions)
Interpretation:
- Single peak in melt curve: Specific amplification
- Multiple peaks or early amplification in NTC: Potential secondary structures or primer-dimers
- Amplification efficiency: 90-110% acceptable range
Advanced Validation Workflows
The following diagram illustrates the comprehensive validation workflow for clinical diagnostic assays, integrating both computational and experimental components:
Diagram 1: Comprehensive assay validation workflow spanning design to regulatory submission
Primer Secondary Structure Analysis Protocol
The evaluation of primer secondary structures requires specialized experimental approaches to detect and quantify potential artifacts:
Diagram 2: Specialized workflow for evaluating primer secondary structures
Research Reagent Solutions for Validation Studies
Table 3: Essential Research Reagents for Assay Validation
| Reagent/Category | Function in Validation | Specification Guidelines |
|---|---|---|
| DNA Polymerase | Enzymatic amplification | High fidelity, hot-start capability, optimized buffer systems |
| dNTPs | Nucleotide substrates | PCR-grade, quality-controlled for consistent concentration |
| Buffer Components | Reaction environment | MgCl₂ concentration optimized, pH-stable formulations |
| Fluorescent Dyes | Detection/quantification | SYBR Green, hydrolysis probes, or intercalating dyes |
| Positive Controls | Assay performance verification | Quantified reference materials traceable to standards |
| Negative Controls | Specificity assessment | Molecular grade water, human genomic DNA (for IVDs) |
| Quality Metrics | Reagent QC | Endotoxin testing, sterility confirmation, performance validation |
Emerging Technologies and Future Directions
The field of clinical assay validation is rapidly evolving with several emerging trends:
AI and Machine Learning Integration: Artificial intelligence is playing an increasingly important role in assay validation processes. AI-powered systems can now autonomously optimize protocols and reagent use, while machine learning algorithms assist in predicting primer performance and potential secondary structures before synthesis [97]. These technologies are particularly valuable for identifying subtle patterns that might be missed by traditional analysis methods.
Automation and IoMT: The Internet of Medical Things (IoMT) enables enhanced machine-to-machine communication in the laboratory environment. Automated systems with collision-free navigation using advanced vision and LiDAR systems combined with deep learning algorithms are becoming more prevalent, reducing manual errors and improving reproducibility [97].
Advanced Biomarkers: Image-based and AI-powered biomarkers are transforming pathology and diagnostic assay development. By leveraging advanced machine learning algorithms and vast amounts of real-world data, these biomarkers can identify subtle patterns that were previously undetectable, driving the delivery of new precision therapies [97].
Establishing a rigorous validation protocol for clinical and diagnostic assays requires meticulous attention to both computational design parameters and experimental verification. The critical importance of addressing primer secondary structures—particularly hairpin loops and dimers—cannot be overstated, as these factors directly impact assay reliability, sensitivity, and specificity. By implementing the comprehensive framework outlined in this guide, researchers can develop robust, reproducible assays that meet regulatory standards and ultimately improve patient care through accurate diagnostics.
The integration of emerging technologies such as AI and automation will continue to enhance validation protocols, enabling more efficient and reliable assay development. However, the fundamental principles of rigorous experimental design, comprehensive performance characterization, and thorough documentation remain essential for successful clinical implementation.
Conclusion
Effectively managing primer secondary structures is not merely a technical detail but a fundamental requirement for robust and reproducible molecular research. By integrating a solid understanding of thermodynamic principles with practical design strategies, systematic troubleshooting, and rigorous validation, researchers can significantly mitigate the risks of false positives and failed assays. The future of primer design is being shaped by advanced computational approaches, including machine learning models that predict amplification success with high accuracy. As molecular diagnostics and drug development continue to advance, mastering the control of hairpins and dimers will remain critical for developing reliable tests and accelerating biomedical discoveries, ultimately ensuring the integrity of data that underpins clinical decisions.
References
- 1. Primer Dimer - an overview [https://www.sciencedirect.com/topics/biochemistry-genetics-and-molecular-biology/primer-dimer]
- 2. Impact of Primer Dimers and Self-Amplifying Hairpins on ... [https://pmc.ncbi.nlm.nih.gov/articles/PMC5922443/]
- 3. Primer design guide - 5 tips for best PCR results [https://the-dna-universe.com/2022/09/05/primer-design-guide-the-top-5-factors-to-consider-for-optimum-performance/]
- 4. PCR Primer Design Guidelines [http://www.premierbiosoft.com/tech_notes/PCR_Primer_Design.html]
- 5. Primer dimer [https://en.wikipedia.org/wiki/Primer_dimer]
- 6. How To Check For Primer-Dimers & Hairpins In Your Oligos [https://eu.idtdna.com/pages/support/faqs/how-do-i-use-the-oligoanalyzer-tool-to-analyze-possible-hairpins-and-dimers-formed-by-my-oligo]
- 7. Multiple Primer Analyzer | Thermo Fisher Scientific - US [https://www.thermofisher.com/us/en/home/brands/thermo-scientific/molecular-biology/molecular-biology-learning-center/molecular-biology-resource-library/thermo-scientific-web-tools/multiple-primer-analyzer.html]
- 8. Hairpin analysis - MFEprimer-3.1 - iGeneTech [https://mfeprimer3.igenetech.com/hairpin]
- 9. Troubleshooting primer dimer in PCR [https://www.minipcr.com/primer-dimer-pcr/]
- 10. Primer designing tool - NCBI - NIH [https://www.ncbi.nlm.nih.gov/tools/primer-blast/]
- 11. RNA Secondary Structure Thermodynamics [https://pubmed.ncbi.nlm.nih.gov/38780727/]
- 12. RNA secondary structure prediction using deep learning ... [https://www.nature.com/articles/s41467-021-21194-4]
- 13. Protein Secondary Structure Characterization: Principles ... [https://www.metwarebio.com/protein-secondary-structure-characterization/]
- 14. How to Design Primers for DNA Sequencing | Practical Lab ... [https://www.cd-genomics.com/resource-how-to-design-primers-for-dna-sequencing.html]
- 15. Molecular Modeling of Nucleic Acid Structure: Setup and ... [https://pmc.ncbi.nlm.nih.gov/articles/PMC4091932/]
- 16. Differential analysis of RNA structure probing experiments ... [https://www.nature.com/articles/s41467-022-31875-3]
- 17. Experimental methods for characterizing the secondary ... [https://pmc.ncbi.nlm.nih.gov/articles/PMC6425979/]
- 18. qPCR primer design revisited [https://www.sciencedirect.com/science/article/pii/S221475351730181X]
- 19. The thermodynamics of DNA structural motifs - PubMed - NIH [https://pubmed.ncbi.nlm.nih.gov/15139820/]
- 20. Influence of thermodynamically unfavorable secondary ... [https://pmc.ncbi.nlm.nih.gov/articles/PMC5778496/]
- 21. Influence of thermodynamically unfavorable secondary ... [https://pubmed.ncbi.nlm.nih.gov/29220504/]
- 22. Effects of secondary structures of DNA templates on the ... [https://pubmed.ncbi.nlm.nih.gov/30101656/]
- 23. Loop dependence of the stability and dynamics of nucleic acid ... [https://pmc.ncbi.nlm.nih.gov/articles/PMC2275088/]
- 24. Quantitative Experimental Determination of Primer-Dimer ... [https://pmc.ncbi.nlm.nih.gov/articles/PMC3416024/]
- 25. Trust your SYBR Green qPCR Data [https://www.thermofisher.com/blog/behindthebench/trust-your-sybr-green-qpcr-data/]
- 26. Online PCR primer software comparision [https://primerdigital.com/tools/soft.html]
- 27. A PCR primer bank for quantitative gene expression analysis [https://pmc.ncbi.nlm.nih.gov/articles/PMC291882/]
- 28. Loop-Mediated Isothermal Amplification [https://www.neb.com/en-us/applications/dna-amplification-pcr-and-qpcr/isothermal-amplification/loop-mediated-isothermal-amplification-lamp?srsltid=AfmBOopKdLAYtXXW12w_P5tAJLJwt0UOSYJnt_npFyQsn8b5QlD7IJBm]
- 29. Performance of Reverse Transcription Loop-Mediated ... [https://pmc.ncbi.nlm.nih.gov/articles/PMC10487735/]
- 30. Reverse transcription-loop-mediated isothermal ... [https://www.sciencedirect.com/science/article/pii/S2667038023000017]
- 31. A colorimetric RT-LAMP assay and LAMP-sequencing for ... [https://pmc.ncbi.nlm.nih.gov/articles/PMC7574920/]
- 32. Comparison of diagnostic performance of RT-qPCR, RT ... [https://pmc.ncbi.nlm.nih.gov/articles/PMC10170900/]
- 33. 2025 Guide: Detecting Secondary Structures - OligoPool.com [https://oligopool.com/resources/tutorials/detecting-secondary-structures]
- 34. Research Reverse transcription loop-mediated isothermal ... [https://www.sciencedirect.com/science/article/pii/S1687157X23011228]
- 35. Impact of primer and self-amplifying dimers on reverse... hairpins [https://pubmed.ncbi.nlm.nih.gov/29620773/]
- 36. Modeling the Amplification of Immunoglobulins through ... [https://www.nature.com/articles/s41598-019-47173-w]
- 37. Amplification of nonspecific products in quantitative ... [https://pmc.ncbi.nlm.nih.gov/articles/PMC5727009/]
- 38. Analysis Tool and Tm Calculator | IDT Primer [https://www.idtdna.com/pages/tools/oligoanalyzer]
- 39. Polymerase Chain Reaction: Basic Protocol Plus Troubleshooting and... [https://www.jove.com/t/3998/polymerase-chain-reaction-basic-protocol-plus-troubleshooting]
- 40. Analysis of qPCR reference gene stability determination ... [https://pmc.ncbi.nlm.nih.gov/articles/PMC4133071/]
- 41. Accurate normalization of real-time quantitative RT-PCR data ... [https://genomebiology.biomedcentral.com/articles/10.1186/gb-2002-3-7-research0034]
- 42. PCR Primer Design Tips - Behind the Bench [https://www.thermofisher.com/blog/behindthebench/pcr-primer-design-tips/]
- 43. 8 Basic Concepts for Designing Primers for a Standard PCR [https://bitesizebio.com/24608/designing-luck-8-basic-concepts-for-designing-primers-for-a-standard-pcr/]
- 44. Rules and Tips for PCR & qPCR Primer Design | IDT [https://www.idtdna.com/page/support-and-education/decoded-plus/how-to-design-primers-and-probes-for-pcr-and-qpcr/]
- 45. How to design PCR primers [https://www.minipcr.com/how-to-design-pcr-primers/]
- 46. How to Design PCR Primers in Geneious Prime [https://www.geneious.com/tutorials/primer-design]
- 47. Analyze Primer Sequences Using IDT [https://support.snapgene.com/hc/en-us/articles/10383980010900-Analyze-Primer-Sequences-Using-IDT]
- 48. Guide to Primer Design for PCR [https://www.benchling.com/primer-design-for-pcr]
- 49. PrimerROC: accurate condition-independent dimer ... [https://www.nature.com/articles/s41598-018-36612-9]
- 50. Proven tips for PCR primer design [https://www.neb.com/en-us/nebinspired-blog/proven-tips-for-pcr-primer-design?srsltid=AfmBOophHAvD0uaV-8euE4JMoxakelCvlywHz8IApGFS-EgI4jXqG5Nj]
- 51. PrimerQuest PCR & qPCR Primer Design Tool | IDT [https://www.idtdna.com/pages/tools/primerquest]
- 52. Primer Dimer Artifacts Are Due to Dimerization myth [https://www.dnasoftware.com/resources/news/primer-dimer-artifacts-are-due-to-dimerization-myth/]
- 53. Reducing amplification artifacts in high multiplex amplicon ... [https://bmcgenomics.biomedcentral.com/articles/10.1186/s12864-015-1806-8]
- 54. PCR-Induced Sequence Artifacts and Bias [https://pmc.ncbi.nlm.nih.gov/articles/PMC1317340/]
- 55. PCR Methods - Top Ten Strategies | Thermo Fisher Scientific - DE [https://www.thermofisher.com/de/de/home/life-science/cloning/cloning-learning-center/invitrogen-school-of-molecular-biology/pcr-education/pcr-reagents-enzymes/pcr-methods.html]
- 56. Optimization of PCR Conditions for Amplification of GC‐ ... [https://pmc.ncbi.nlm.nih.gov/articles/PMC6807403/]
- 57. Optimizing PCR amplification of GC-rich nicotinic ... [https://www.sciencedirect.com/science/article/pii/S2405580825001396]
- 58. Comparing methylation levels assayed in GC - rich regions with current... [https://pmc.ncbi.nlm.nih.gov/articles/PMC11289974/]
- 59. Impact of primer dimers and self-amplifying hairpins on ... [https://pubs.rsc.org/en/content/articlelanding/2018/an/c7an01897e]
- 60. Polymerase Chain Reaction (PCR) - StatPearls - NCBI - NIH [https://www.ncbi.nlm.nih.gov/books/NBK589663/]
- 61. Optimizing PCR Reaction Conditions for High Fidelity and ... [https://www.labx.com/resources/optimizing-pcr-reaction-conditions-for-high-fidelity-and-yield/5579]
- 62. PCR Optimization: Strategies To Minimize Primer Dimer [https://genemod.net/blog/pcr-optimization]
- 63. Investigating concentration effects on reaction efficiency ... [https://www.sciencedirect.com/science/article/abs/pii/S0003269725001472]
- 64. OPTIMIZATION OF ANNEALING TEMPERATURE AND ... [https://e-journal.unair.ac.id/JVHS/upcoming/view/48339]
- 65. Protocol - How to Design Primers [https://www.addgene.org/protocols/primer-design/]
- 66. Prediction of prime editing insertion efficiencies using ... [https://www.nature.com/articles/s41587-023-01678-y]
- 67. designing primers for site-directed mutagenesis [https://www.takarabio.com/about/bioview-blog/tips-and-troubleshooting/designing-primers-for-site-directed-mutagenesis?srsltid=AfmBOorgfq2cnFUVcRd-XF_FLglqEl93NwRju6-JV7y5HG-36YHKkvQ4]
- 68. Diverse methods of reducing and confirming false-positive ... [https://www.sciencedirect.com/science/article/abs/pii/S0003267023009145]
- 69. Loop Mediated Isothermal Amplification: Principles and ... [https://pmc.ncbi.nlm.nih.gov/articles/PMC7238132/]
- 70. Troubleshooting qPCR: Interpreting Amplification Curves [https://blog.biosearchtech.com/thebiosearchtechblog/bid/63622/qpcr-troubleshooting]
- 71. Development of loop-mediated isothermal amplification ... [https://www.nature.com/articles/s41598-023-31760-z]
- 72. Troubleshooting Non-Specific Amplification [https://bento.bio/resources/bento-lab-advice/troubleshooting-non-specific-amplification-with-bento-lab/]
- 73. Predicting sequence-specific amplification efficiency in ... [https://pmc.ncbi.nlm.nih.gov/articles/PMC12533003/]
- 74. Explaining multiple peaks in qPCR melt curve analysis | IDT [https://www.idtdna.com/page/support-and-education/decoded-plus/interpreting-melt-curves-an-indicator-not-a-diagnosis/]
- 75. Hold the Agarose! Advanced PCR Methods for Genotyping ... [https://www.jax.org/news-and-insights/jax-blog/2015/september/hold-the-agarose-advanced-pcr-methods-for-genotyping-mice]
- 76. Deep Dive: qPCR [https://blog.addgene.org/deep-dive-qpcr]
- 77. Design of a melting curve analysis (MCA) based on ... [https://pmc.ncbi.nlm.nih.gov/articles/PMC12261535/]
- 78. Agarose Gel Electrophoresis for the Separation of DNA ... [https://pmc.ncbi.nlm.nih.gov/articles/PMC4846332/]
- 79. Agarose Gel Electrophoresis - 2025 UBC iGEM Wiki [https://2025.igem.wiki/ubc-vancouver/protocols/agarose-gel-electrophoresis]
- 80. Agarose Gel Electrophoresis of PCR Products Using E- ... [https://www.thermofisher.com/us/en/home/life-science/dna-rna-purification-analysis/nucleic-acid-gel-electrophoresis/dna-electrophoresis/agarose-gel-electrophoreis/agarose-gel-electrophoresis-protocols-e-gel-ex-agarose-gel-and-ultrapure-agarose.html]
- 81. Digital Melting Curve Analysis for Multiplex Quantification ... [https://www.mdpi.com/2079-6374/15/1/36]
- 82. qPCR primer design revisited - PMC - PubMed Central - NIH [https://pmc.ncbi.nlm.nih.gov/articles/PMC5702850/]
- 83. Proven tips for PCR primer design [https://www.neb.com/en-us/nebinspired-blog/proven-tips-for-pcr-primer-design?srsltid=AfmBOoofpj-Qi9C7s51FdXMUwKDLntPf0bB_XHDiflU8TK1Sji2d6SzM]
- 84. repeats, secondary structure & melting temperature [https://molbiol-tools.ca/Repeats_secondary_structure_Tm.htm]
- 85. Amplicon Sequencing Solutions [https://www.illumina.com/techniques/sequencing/dna-sequencing/targeted-resequencing/amplicon-sequencing.html]
- 86. Applications of Amplicon Sequencing in Microbial and ... [https://www.cd-genomics.com/resource-applications-amplicon-sequencing-microbial-genetic.html]
- 87. How qPCR works: SYBR Green vs TaqMan | INTEGRA [https://www.integra-biosciences.com/united-states/en/blog/article/how-qpcr-works-sybrr-green-vs-taqmanr]
- 88. TaqMan vs. SYBR Chemistry for Real-Time PCR | Thermo Fisher Scientific - US [https://www.thermofisher.com/us/en/home/life-science/pcr/real-time-pcr/real-time-pcr-learning-center/real-time-pcr-basics/taqman-vs-sybr-chemistry-real-time-pcr.html]
- 89. Comparison of SYBR Green and TaqMan methods in quantitative real-time polymerase chain reaction analysis of four adenosine receptor subtypes - PMC [https://pmc.ncbi.nlm.nih.gov/articles/PMC3988599/]
- 90. A strategy to increase the specificity of Syber Green I qRT- ... [https://pubmed.ncbi.nlm.nih.gov/20954439/]
- 91. Prediction of PCR amplification from primer and template ... [https://www.nature.com/articles/s41598-021-86357-1]
- 92. BioInnovate AI: A Machine Learning Platform for Rapid PCR ... [https://pmc.ncbi.nlm.nih.gov/articles/PMC12191490/]
- 93. Recurrent neural networks enable design of multifunctional ... [https://elifesciences.org/articles/73870]
- 94. Detection of DNA base modifications by deep recurrent ... [https://pmc.ncbi.nlm.nih.gov/articles/PMC6547721/]
- 95. Tech, ML and AI: Industry predictions for 2025 [https://www.ddw-online.com/tech-ml-and-ai-industry-predictions-for-2025-33318-202501/]
- 96. Bridging AI innovation and healthcare: scalable clinical ... [https://www.frontiersin.org/journals/digital-health/articles/10.3389/fdgth.2025.1575753/full]
- 97. Experts See 17 Laboratory Trends Dominating 2025 [https://clpmag.com/diagnostic-technologies/experts-see-17-laboratory-trends-dominating-2025/]