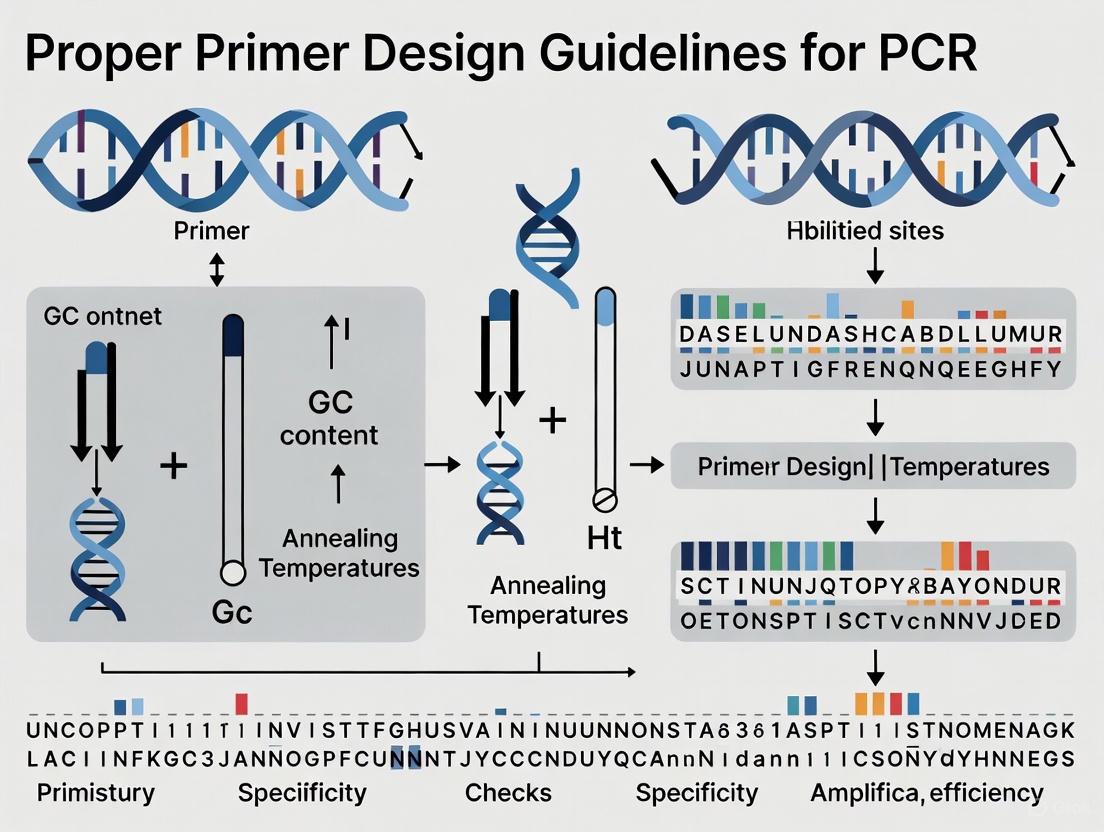
PCR Primer Design Master Guide: Foundational Rules to Advanced qPCR/dPCR Strategies
This article provides a comprehensive guide to PCR primer design, tailored for researchers, scientists, and drug development professionals.
PCR Primer Design Master Guide: Foundational Rules to Advanced qPCR/dPCR Strategies
Abstract
This article provides a comprehensive guide to PCR primer design, tailored for researchers, scientists, and drug development professionals. It covers foundational principles and sequence analysis, advanced methodologies for applications like cloning and SNP genotyping, systematic troubleshooting for common amplification failures, and validation techniques comparing qPCR and digital PCR. The content synthesizes current best practices to ensure the design of specific, efficient, and reliable primers for robust experimental results in biomedical and clinical research.
Core Principles of Primer Design: Building a Foundation for Successful Amplification
Optimal Primer Length and Melting Temperature (Tm) Ranges
Polymersase Chain Reaction (PCR) is a foundational technique in molecular biology, and its success critically depends on the design of oligonucleotide primers. Proper primer design ensures specific amplification, high yield, and efficiency in various PCR applications, from basic research to drug development. This document provides detailed application notes and protocols, focusing on the two most critical parameters: primer length and melting temperature (Tm). Adherence to these guidelines provides a robust framework for researchers to develop reliable and reproducible PCR-based assays.
Core Principles of Primer Design
Optimal Primer Length
Primer length directly influences both the specificity and the annealing efficiency of the PCR reaction. Excessively short primers can lead to non-specific binding, while overly long primers can reduce the hybridization rate and are unnecessary for most applications.
Table 1: Recommended Primer Length and Associated Specificity
| Primer Length (bases) | Key Characteristics and Applications |
|---|---|
| 18–24 bases [1] [2] | Considered the standard and optimal length; provides a strong balance between specificity and efficient annealing [3] [4]. |
| 18–30 bases [5] [6] | A commonly recommended range for general PCR purposes [3]. |
| 28–35 bases | Useful for amplifying sequences with a high degree of sequence heterogeneity [4]. |
| 15 bases | Can be used for mapping simple genomes, though shorter primers risk producing inaccurate, nonspecific products [4] [1]. |
Melting Temperature (Tm) and Annealing Temperature (Ta)
The melting temperature (Tm) is the temperature at which 50% of the primer-DNA duplex dissociates into single strands. It is a fundamental property that dictates the experimental annealing temperature (Ta).
Table 2: Guidelines for Tm and Ta
| Parameter | Optimal Range | Critical Considerations |
|---|---|---|
| Primer Tm | 55–65°C [2] [7] | A Tm of 60–64°C is often ideal for enzyme function [6]. The Tm for a pair of primers should be within 2–5°C of each other [3] [1] [6]. |
| Annealing Temperature (Ta) | ~5°C below the Tm of the primers [6] [2] | A Ta that is too low causes non-specific amplification; a Ta that is too high reduces reaction efficiency or prevents it entirely [6]. For primers >20 nt, specific polymerases may require a Ta 3°C higher than the lower Tm of the pair [8]. |
Figure 1: A logical workflow for designing PCR primers, integrating critical parameters like length, sequence composition, and temperature calculations to achieve specific amplification.
Detailed Experimental Protocol
Protocol: Primer Design and In Silico Validation
This protocol outlines the steps for designing and computationally validating PCR primers before synthesis.
1. Define Target Sequence and Amplification Region:
- Obtain the pure template DNA sequence in FASTA format.
- Identify the precise start and end points of the region to be amplified. The amplicon length should typically be between 70–150 bp for standard quantitative PCR (qPCR) and up to 1–10 kb for standard PCR [1] [6].
2. Select Primer Binding Sites:
- Choose sequences for the forward and reverse primers from the 5' and 3' ends of the amplicon, respectively.
- Apply the core principles from Section 2:
- Length: Select a sequence of 18–25 nucleotides [2].
- GC Content: Aim for 40–60%, with an ideal of 50% [3] [6].
- 3' End Clamp: Terminate the 3' end with one or two G or C bases to create a stable "GC clamp" [3] [2].
- Sequence Complexity: Avoid runs of 4 or more identical bases and dinucleotide repeats (e.g., ATATAT) to prevent mispriming [3] [4].
3. Calculate Tm and Evaluate Primer Pair Compatibility:
- Use an online Tm calculator (e.g., [9]). Input the primer sequence and your actual reaction conditions, including primer concentration and salt concentrations [8] [6].
- Verify that the Tm values for both forward and reverse primers are within 5°C of each other [3].
- Screen for self-dimers, heterodimers, and hairpin secondary structures. The free energy (ΔG) for any predicted structures should be weaker (more positive) than -9.0 kcal/mol [6]. Tools like the IDT OligoAnalyzer are suitable for this.
4. Verify Primer Specificity:
- Use the NCBI Primer-BLAST tool to ensure the primers are unique to your intended target [10].
- Select the appropriate organism and database (e.g., RefSeq mRNA) to check for off-target binding sites [10].
- For qPCR or reverse transcription PCR (RT-PCR), design primers to span an exon-exon junction to prevent amplification of genomic DNA [10] [6].
5. Determine Annealing Temperature and Plan Validation:
- Set the initial PCR annealing temperature to 5°C below the calculated Tm of your primers [6].
- If amplification fails, perform a gradient PCR, testing a range from the calculated Ta up to the extension temperature, to empirically determine the optimal temperature [8].
Protocol: Empirical Optimization of Annealing Temperature
Even well-designed primers may require experimental fine-tuning.
Materials:
- Thermocycler with gradient functionality.
- Prepared PCR master mix and template.
- Designed forward and reverse primers.
Method:
- Prepare Reaction Mix: Set up a standard PCR reaction mixture according to your polymerase's protocol.
- Set Gradient Parameters: Program the thermocycler with an annealing temperature gradient that spans a range, for example, from 50°C to 68°C.
- Run PCR and Analyze: Execute the PCR protocol. Analyze the results using agarose gel electrophoresis.
- Identify Optimal Ta: Select the annealing temperature that produces the highest yield of the correct amplicon with the absence of non-specific bands or primer-dimer.
The Scientist's Toolkit: Research Reagent Solutions
Table 3: Essential Reagents and Tools for PCR Primer Design and Validation
| Item | Function/Application |
|---|---|
| High-Fidelity DNA Polymerases (e.g., Phusion, Phire) | Enzymes for PCR requiring high accuracy and performance with complex templates; often require specific Tm calculation methods [8]. |
| Standard Taq DNA Polymerase | A robust and economical enzyme suitable for routine PCR amplification. |
| NCBI Primer-BLAST | A public tool that combines primer design with specificity checking against sequence databases [10]. |
| IDT OligoAnalyzer Tool | A web tool for analyzing Tm, hairpins, dimers, and mismatches of oligonucleotides [5] [6]. |
| Tm Calculator (Thermo Fisher) | A specialized tool for calculating Tm and annealing temperatures optimized for specific DNA polymerases [9]. |
| IDT PrimerQuest Tool | A tool for generating highly customized designs for PCR primers and qPCR assays [6]. |
| Nuclease-Free Water | A solvent for resuspending primers and preparing PCR reactions, free of contaminants that could degrade nucleic acids. |
Figure 2: An experimental workflow for a standard PCR reaction, highlighting the key reagent solutions and procedural steps from assembly to amplification.
Achieving Ideal GC Content and the Importance of a GC Clamp
In polymerase chain reaction (PCR) research, the design of oligonucleotide primers is a fundamental determinant of experimental success. Properly designed primers ensure efficient and specific amplification of target DNA sequences, which is critical for applications ranging from basic genetic research to advanced drug development. Among the most crucial parameters in primer design are GC content and the implementation of a GC clamp. These factors directly influence the thermodynamic stability of primer-template binding, thereby affecting the specificity and yield of the PCR amplification process. This application note provides a detailed framework for achieving optimal GC content and effectively utilizing GC clamps within the broader context of robust primer design guidelines, equipping researchers with proven strategies to enhance their molecular biology protocols.
Fundamental Principles of GC Content and GC Clamps
Optimal GC Content
GC content refers to the percentage of nitrogenous bases in a primer that are either guanine (G) or cytosine (C). These bases form three hydrogen bonds with their complementary bases on the target DNA, compared to the two hydrogen bonds formed by adenine (A) and thymine (T). This stronger bonding directly influences the stability of the primer-template duplex and its melting temperature (Tm).
The ideal GC content for PCR primers is generally recommended to be between 40% and 60%, with a sweet spot of around 50% [3] [6]. This range provides sufficient sequence complexity for unique targeting while maintaining a Tm that is compatible with standard PCR cycling conditions. Primers with GC content below this range may exhibit overly low Tm and reduced binding stability, leading to inefficient amplification. Conversely, primers with very high GC content can form exceptionally stable duplexes that promote non-specific binding and are prone to forming complex secondary structures.
The GC Clamp
A GC clamp is a strategic design feature involving the placement of G or C bases within the last five bases at the 3' end of a primer [3]. This region is critically important because DNA polymerase initiates synthesis from the 3' hydroxyl group. A stable 3' terminus ensures proper initiation of the amplification process.
The primary function of a GC clamp is to promote specific binding at the 3' end through the stronger hydrogen bonding of G and C bases [3] [11]. This enhanced stability is particularly important for securing the correct positioning of the primer for the polymerase enzyme. However, designers should avoid including more than three G or C bases in this region, as excessive stability can facilitate primer-dimer formation through non-specific interactions [3] [11].
Quantitative Design Parameters
The following table summarizes the key quantitative parameters for achieving ideal GC content and implementing an effective GC clamp, alongside other critical primer design characteristics.
Table 1: Comprehensive Primer Design Parameters and Guidelines
| Design Parameter | Optimal Value or Range | Functional Significance |
|---|---|---|
| GC Content | 40–60% (ideal: 50%) [3] [6] | Balances primer specificity and binding stability; avoids low or high Tm extremes. |
| GC Clamp | 1–3 G/C bases in the last 5 bases at the 3' end [3] [11] | Stabilizes the primer-template duplex at the critical point of polymerase initiation. |
| Primer Length | 18–30 bases [3] [6] | Determines specificity and annealing efficiency; shorter primers bind more efficiently. |
| Melting Temperature (Tm) | 60–75°C; forward and reverse primers within 5°C of each other [3] [6] | Ensures both primers anneal simultaneously and efficiently under a single cycling protocol. |
| Annealing Temperature (Ta) | ~5°C below the primer Tm [6] | Promotes specific binding while minimizing non-specific amplification. |
| Self-Complementarity | ΔG > -9.0 kcal/mol for hairpins and dimers [6] | Prevents intramolecular and intermolecular structures that compete with target binding. |
Experimental Protocol for Primer Design and Validation
In SilicoPrimer Design Workflow
The following diagram illustrates the systematic workflow for designing and validating primers with optimal GC properties.
Workflow Title: Primer Design and Validation Process
Step-by-Step Protocol
Target Sequence Analysis and Primer Selection
- Using software such as Primer3 or Primer-BLAST, identify candidate forward and reverse primer sequences that are 18-30 nucleotides in length and flank the target amplicon.
- Ensure the amplicon length is suitable for the application (e.g., 70-150 bp for qPCR, up to 500 bp for standard PCR) [6].
GC Content and Clamp Implementation
- Calculate the GC content for each candidate primer. If outside the 40-60% range, adjust the sequence by shifting the binding site or slightly modifying the length.
- Verify that the 3' end of the primer contains at least one G or C base. Ideally, include 2-3 G/C bases within the last five nucleotides, but avoid stretches of four or more consecutive G or C bases [3].
Thermodynamic Analysis
- Calculate the Tm for each primer using an online tool (e.g., OligoAnalyzer Tool) with your specific PCR buffer conditions (e.g., 50 mM K+, 3 mM Mg2+) [6].
- Adjust the primer sequences until the Tm of the forward and reverse primers is within 5°C of each other and falls within the 60-75°C range.
Specificity and Secondary Structure Checks
- Use analysis tools (e.g., IDT OligoAnalyzer) to screen for self-dimers, cross-dimers, and hairpin structures. Ensure the free energy (ΔG) for any such structures is more positive than -9.0 kcal/mol [6].
- Perform a BLAST search against the relevant genome database to confirm the primers are unique to the intended target sequence.
PCR Optimization and Troubleshooting
Even well-designed primers may require reaction optimization. The table below outlines key reagents and strategies for minimizing primer-dimer formation and non-specific amplification.
Table 2: Research Reagent Solutions for PCR Optimization
| Reagent / Strategy | Function / Purpose | Implementation Example |
|---|---|---|
| Hot-Start DNA Polymerase | Remains inactive at room temperature, preventing non-target primer extension during reaction setup [12] [13]. | Use commercial hot-start polymerase formulations. Activate at 95°C for 2-10 minutes before cycling. |
| Magnesium Chloride (MgCl₂) | Cofactor for DNA polymerase; concentration critically affects primer annealing and specificity [14]. | Perform a MgCl₂ titration (e.g., 1.5 mM to 3.0 mM in 0.5 mM increments) to find the optimal concentration. |
| Primer Concentration Gradient | Reduces primer-dimer formation by lowering the probability of primer-primer interactions [12] [15]. | Test primer concentrations from 0.1 µM to 0.5 µM to find the lowest concentration that yields robust amplification. |
| Annealing Temperature Gradient | Determines the highest temperature that permits specific primer binding while discouraging mispriming [12] [6]. | Perform a thermal gradient PCR with annealing temperatures from 5°C below to 5°C above the calculated Tm. |
| No-Template Control (NTC) | Critical control to detect contamination or primer-dimer formation independent of the target template [12]. | Include a reaction with molecular grade water instead of template DNA in every experiment. |
Advanced Applications and Mechanistic Insights
GC Clamping in Mutation Detection Techniques
The principle of the GC clamp is powerfully exploited in techniques like Denaturing High-Performance Liquid Chromatography (DHPLC) and Denaturing Gradient Gel Electrophoresis (DGGE) for mutation scanning [16]. In these methods, a long, artificially synthesized GC-rich sequence (e.g., 20-36 bp) is appended to one primer via synthesis. This creates a PCR amplicon with two distinct melting domains: a high-melting domain (the GC clamp) and a lower-melting domain (the target sequence). Under partially denaturing conditions, the clamp remains double-stranded while the target domain denatures. This allows the technique to separate DNA fragments based on subtle differences in their melt profiles, enabling the detection of single-base mutations within the target domain with high sensitivity [16].
Mechanistic Workflow of GC Clamp in DHPLC
The following diagram details the mechanism by which a GC clamp facilitates mutation detection.
Workflow Title: Mutation Detection Mechanism with GC Clamp
Emerging Trends: Predictive Modeling and Deep Learning
The field of PCR optimization is advancing beyond traditional empirical approaches. Recent research employs multivariate Taylor series expansion and thermodynamic integration to create highly accurate predictive models for optimal MgCl2 concentration and Tm, achieving R² values greater than 0.99 [14]. Furthermore, deep learning models, such as one-dimensional convolutional neural networks (1D-CNNs), are now being used to predict sequence-specific amplification efficiencies in complex multi-template PCR reactions [17]. These models can identify specific sequence motifs adjacent to priming sites that are associated with poor amplification, providing a data-driven foundation for future primer design rules and moving the field toward more predictable and efficient DNA amplification.
Within the framework of robust polymerase chain reaction (PCR) research, meticulous primer design is the cornerstone of success. Assays plagued by low yield, non-specific amplification, or complete failure can often trace their issues to overlooked pitfalls in the initial oligonucleotide sequences. While factors like melting temperature and GC content are routinely considered, a rigorous design protocol must also proactively address specific sequence features that sabotage reaction efficiency. This application note details three critical parameters to avoid—secondary structures, repeats, and regions of homology—providing researchers and drug development professionals with detailed methodologies to identify and circumvent these common obstacles, thereby ensuring specific and powerful DNA amplification.
Critical Parameter 1: Primer Secondary Structures
Definition and Impact on PCR
Primer secondary structures form when primers fold onto themselves or interact with each other instead of annealing to the template DNA. These structures, which include hairpins and primer-dimers (self-dimers and cross-dimers), are caused by intra- or inter-primer complementarity [18] [19]. When stable secondary structures form and persist at the reaction's annealing temperature, they sequester primers, dramatically reducing the availability of these primers for binding to the target DNA template [20]. This leads to reduced amplification efficiency, lower product yield, or in severe cases, complete PCR failure [21]. The stability of a secondary structure is quantitatively represented by its Gibbs Free Energy (ΔG), where a larger negative ΔG value indicates a more stable and problematic structure [19] [20].
Experimental Detection and Analysis
Detecting potential secondary structures is a critical in silico step prior to oligonucleotide synthesis. The following protocol outlines the procedure using commonly available tools:
Procedure:
- Sequence Input: Obtain the FASTA sequence for the designed forward and reverse primers.
- Tool Selection: Utilize a reliable oligonucleotide analysis tool such as the IDT OligoAnalyzer Tool [6] or the UNAFold Tool [6].
- Parameter Configuration: Input the primer sequence and set the reaction conditions to match your intended PCR buffer (e.g., 50 mM K+, 3 mM Mg2+, 0.8 mM dNTPs) for accurate ΔG and Tm predictions [6].
- Analysis Execution:
- For hairpins, analyze the primer for self-complementarity.
- For primer-dimers, analyze the forward primer against itself (self-dimer), the reverse against itself, and the forward against the reverse (cross-dimer).
- Result Interpretation: Examine the computed ΔG values for any predicted structures. Compare these values against the established stability thresholds.
Acceptance Criteria: The calculated ΔG for any secondary structure should be weaker (more positive) than -9.0 kcal/mol [6]. For hairpins, a 3' end hairpin with a ΔG of -2 kcal/mol and an internal hairpin with a ΔG of -3 kcal/mol are generally tolerated [20]. For dimers, a 3' end dimer with a ΔG of -5 kcal/mol and an internal dimer with a ΔG of -6 kcal/mol are typically acceptable [20].
Table 1: Summary of Secondary Structure Parameters and Thresholds
| Structure Type | Description | Stability (ΔG) | Common Cause |
|---|---|---|---|
| Hairpin | Intramolecular folding of a single primer [21] | > -3 kcal/mol (internal) [20] | Intra-primer homology; regions of 3+ complementary bases within the same primer [3] [19] |
| Self-Dimer | Intermolecular binding between two identical primers [19] | > -5 kcal/mol (3' end) [20] | Inter-primer homology between forward-forward or reverse-reverse primers [3] |
| Cross-Dimer | Intermolecular binding between forward and reverse primers [18] | > -5 kcal/mol (3' end) [20] | Complementary sequences between the forward and reverse primer [3] |
Critical Parameter 2: Repetitive Sequences
Definition and Impact on PCR
Repetitive sequences in primers include mononucleotide runs (e.g., a string of four or more identical bases) and dinucleotide repeats (e.g., alternating AT bases) [3] [2]. These sequences promote a phenomenon known as mispriming, where the primer binds to non-target sites on the template DNA that feature similar short repeats, rather than to its unique intended target sequence [20] [21]. This results in non-specific amplification, generating unwanted PCR products such as smears or multiple bands on a gel, which compromises the specificity and accuracy of the assay [19].
Experimental Detection and Analysis
Identification of repetitive sequences is a straightforward visual or script-based check.
- Procedure:
- Visual Inspection: Manually review the primer sequence for consecutive identical bases or dinucleotide repeats.
- Sequence Analysis Software: Use primer design software (e.g., Primer Premier, Benchling) which typically includes built-in checks for repeats and will flag violations according to user-defined parameters [20].
- Acceptance Criteria: A maximum of 3 consecutive identical bases (runs) is acceptable [2]. A maximum of 4 di-nucleotide repeats is generally tolerated [20]. For example, a sequence like "ACCCCC" or "ATATATAT" should be avoided [3] [21].
Critical Parameter 3: Inter- and Intra-Primer Homology
Definition and Impact on PCR
Homology refers to the complementarity between sequences. Intra-primer homology leads to the formation of hairpins, as discussed in Section 2.1. Inter-primer homology, specifically cross homology, has two distinct contexts: 1) complementarity between the forward and reverse primers, leading to cross-dimers, and 2) unintended complementarity between a primer and non-target regions within the genome [19] [21]. The latter is particularly detrimental as it causes the amplification of non-target genes or sequences, yielding false-positive results and rendering data biologically uninterpretable [22].
Experimental Detection and Analysis
Ensuring primer specificity requires verifying that the primer binds uniquely to the intended target.
Procedure:
- Sequence Preparation: Obtain the final forward and reverse primer sequences.
- BLAST Analysis: Use the NCBI BLAST algorithm (Basic Local Alignment Search Tool). This can be done directly through the NCBI website or via integrated tools in platforms like Benchling [19] or IDT OligoAnalyzer [6].
- Database Selection: Perform a search against the appropriate non-redundant nucleotide database (e.g., "nr" for general sequences, or a specific organism's RefSeq genome).
- Result Interpretation: Analyze the BLAST results for significant alignments. The top hit should be the intended target sequence. Examine other significant hits to determine if they could lead to off-target amplification.
Acceptance Criteria: The primer pair should exhibit significant homology only to the intended target locus over its entire length. Primers with significant alignment (e.g., >80% identity over more than 10 base pairs) to non-target genomic sites should be rejected and re-designed [20] [6]. It is critical to note that while BLAST is a powerful tool, it may not always correctly score gaps that create duplex bulges, and the effect of mismatches can be context-dependent [22]. Therefore, empirical validation remains essential.
Table 2: Summary of All Critical Parameters to Avoid in Primer Design
| Parameter | Specific Feature to Avoid | Consequence of Inclusion | Recommended Threshold |
|---|---|---|---|
| Secondary Structures | Hairpins | Reduced primer availability; no amplification [20] | ΔG > -3 kcal/mol (internal) [20] |
| Self- or Cross-Dimers | Primer-dimer artifacts; reduced yield [18] | ΔG > -5 kcal/mol (3' end) [20] | |
| Repetitive Sequences | Mononucleotide runs (e.g., AAAAA) | Mispriming; non-specific amplification [21] | Max of 3-4 consecutive bases [3] [2] |
| Dinucleotide repeats (e.g., ATATAT) | Mispriming; non-specific amplification [20] | Max of 4 dinucleotide repeats [20] | |
| Homology | Intra-primer homology | Hairpin formation (see above) | < 3 complementary bases within primer [3] |
| Inter-primer cross homology | Primer-dimer formation (see above) | < 3 complementary bases between primers [3] | |
| Cross homology to non-target genomic sequences | Amplification of wrong genes; false positives [19] | No significant BLAST hits to non-targets [6] |
Integrated Experimental Workflow for Primer Validation
The following workflow integrates the checks for the critical parameters described above into a coherent pre-synthesis validation protocol. This workflow is designed to be performed in silico after initial primer candidates have been generated but before they are ordered and synthesized.
Diagram 1: In-silico primer validation workflow. This workflow must be completed before ordering primers to avoid costly synthesis of ineffective oligonucleotides.
A successful primer design and validation process relies on a suite of computational and wet-lab reagents. The following table details key solutions.
Table 3: Research Reagent Solutions for Primer Design and Validation
| Tool / Reagent | Function / Description | Example Providers / Sources |
|---|---|---|
| Primer Design Software | Automates primer selection based on customizable parameters (length, Tm, GC); often includes checks for secondary structures and repeats. | Primer Premier [20], Benchling [19], IDT PrimerQuest [6] |
| Oligonucleotide Analysis Tool | Calculates melting temperature (Tm) under specific buffer conditions and analyzes potential for hairpins and dimer formation (ΔG). | IDT OligoAnalyzer [6], UNAFold Tool [6] |
| Specificity Check Tool | Verifies that primer sequences are unique to the intended target genome, preventing off-target amplification. | NCBI BLAST [19] [6] |
| Thermostable DNA Polymerase | Enzyme for PCR amplification; choice of polymerase (e.g., standard Taq vs. high-fidelity) can impact efficiency and specificity. | Various (e.g., Thermo Fisher, NEB) [3] |
| Gradient Thermal Cycler | Instrument essential for empirically determining the optimal primer annealing temperature (Ta) via a temperature gradient. | Various (e.g., Bio-Rad, Thermo Fisher) [21] |
| Gel Electrophoresis System | Standard method for analyzing PCR product yield, specificity, and size after amplification, confirming success of the design. | Various (e.g., miniPCR) [2] |
Utilizing Free Online Tools for Sequence Analysis and In Silico Validation
Within the framework of rigorous PCR research, proper primer design is a cornerstone of experimental success. In silico validation, the process of using computational tools to simulate and analyze experiments, is an indispensable step for de-risking wet-lab procedures. It allows researchers to verify primer specificity, predict amplification efficiency, and identify potential pitfalls before consuming valuable reagents and time. This application note provides a detailed protocol for leveraging freely available online tools to perform comprehensive sequence analysis and in silico validation of PCR primers, ensuring that the underlying primer design principles of a research thesis are robust and reliable.
Foundational Principles of Primer Design
Adherence to established biochemical principles during primer design is critical for efficient and specific DNA amplification. The following parameters are fundamental and should be evaluated for every primer pair.
Table 1: Key Parameters for PCR Primer Design
| Parameter | Ideal Range | Rationale & Impact |
|---|---|---|
| Primer Length | 18–30 nucleotides [3] [1] [6] | Balances specificity (longer) with binding efficiency (shorter). |
| GC Content | 40–60% [3] [1] [2] | Ensures stable priming; content outside this range can lead to non-specific binding or low Tm. |
| Melting Temperature (Tm) | 55–65°C; primers within 5°C of each other [1] [2] [23] | Critical for setting a single, effective annealing temperature for both primers. |
| GC Clamp | 1–2 G/C bases at the 3' end [3] [2] | Stabilizes the primer-template complex via stronger hydrogen bonding, crucial for polymerase initiation. |
| Self-Complementarity | Avoid runs of 4+ identical bases or dinucleotide repeats [3] [23] | Prevents formation of secondary structures (hairpins) and primer-dimers. |
| Inter-Primer Complementarity | No complementary regions, especially at 3' ends [1] [2] | Prevents primer-dimer formation that consumes reagents and reduces yield. |
A multitude of free, online tools are available to facilitate every stage of sequence analysis and primer validation. The following table catalogs key resources.
Table 2: Research Reagent Solutions: Key Free Online Tools
| Tool Name | Primary Function | Brief Description & Utility |
|---|---|---|
| NCBI BLAST [24] | Sequence Homology Search | Verifies primer pair specificity against genomic databases to ensure amplification of the intended target only. |
| Primer3/Primer3Plus [25] | Primer Design | A widely used, comprehensive tool for designing standard PCR primers based on user-defined parameters. |
| IDT OligoAnalyzer Tool [25] [6] | Oligo Characterization | Analyzes Tm, hairpins, self-dimers, and heterodimers using sophisticated algorithms and user-specific reaction conditions. |
| SnapGene Viewer / ApE [25] | Plasmid Mapping & Sequence Analysis | Visualizes plasmid maps, identifies features, and designs primers in a biological context. |
| NEB Tm Calculator [2] [23] | Melting Temperature Calculation | Determines the accurate Tm of primers, accounting for specific buffer ion concentrations that impact stability. |
| VectorBuilder Alignment Tool [26] | Sequence Alignment | Compares two sequences at the DNA or protein level, useful for checking primer homology to a template. |
Experimental Protocols for In Silico Validation
This section outlines a step-by-step methodology for designing and validating PCR primers using the aforementioned toolkit.
Protocol 1: Primary Primer Design and Specificity Check
Methodology:
- Sequence Acquisition: Obtain your target DNA sequence in FASTA or GenBank format from a database like NCBI Nucleotide or Addgene [25].
- Input into Design Tool: Navigate to a primer design tool such as Primer3Plus. Paste your target sequence into the input field.
- Parameter Setting: Configure the core parameters as defined in Table 1. Key settings include:
PRODUCT_SIZE_MIN=70, OPT=150, MAX=300(Aiming for an amplicon of 70-150 bp for high efficiency [6]).TM_MIN=55, TM_OPT=62, TM_MAX=65GC_PERCENT_MIN=40, GC_PERCENT_OPT=50, GC_PERCENT_MAX=60
- Run and Select: Execute the design tool. From the generated list, select a candidate forward and reverse primer pair for further validation.
- Specificity Validation with BLAST: a. Go to the NCBI BLAST nucleotide suite [24]. b. Select the "Primer-BLAST" tool. c. Input the candidate forward and reverse primer sequences into their respective fields. d. Set the appropriate source organism and database to refine the search. e. Run the tool. A specific primer pair will return a single, significant alignment matching your intended target amplicon. The absence of other high-scoring hits confirms specificity.
Protocol 2: Comprehensive Thermodynamic and Structural Analysis
Methodology:
- Oligo Characterization: a. Access the IDT OligoAnalyzer Tool [6]. b. Enter the forward primer sequence. c. Input your specific PCR reaction conditions (e.g., 50 mM K+, 3 mM Mg2+, 0.8 mM dNTPs) to obtain an accurate Tm value [6]. d. Repeat this process for the reverse primer. Confirm that their Tm values are within 5°C of each other.
- Secondary Structure Analysis: a. Within the same OligoAnalyzer Tool, use the "Hairpin" and "Self-Dimer" analysis functions for each primer. b. Inspect the results. The ΔG value for any predicted structure should be weaker (more positive) than –9.0 kcal/mol to be considered insignificant [6]. c. Use the "Hetero-Dimer" function to analyze interactions between the forward and reverse primer sequences. Again, ensure the ΔG value is above the –9.0 kcal/mol threshold to avoid primer-dimer formation.
The following workflow diagram illustrates the logical sequence of the entire in silico validation process, from initial design to final confirmation.
Data Presentation and Analysis
Upon successful completion of the protocols, the results should be synthesized for a final go/no-go decision. The following table provides a template for summarizing the validation data.
Table 3: In Silico Validation Results Summary for Candidate Primer Pair 'GeneX_001'
| Validation Step | Tool Used | Output Parameter | Result | Pass/Fail |
|---|---|---|---|---|
| Primary Design | Primer3Plus | Amplicon Size | 142 bp | Pass |
| Sequence Specificity | NCBI Primer-BLAST | Significant Hits | 1 (intended target) | Pass |
| Tm Matching | IDT OligoAnalyzer | Forward Tm: 60.1°CReverse Tm: 59.5°C | ΔTm = 0.6°C | Pass |
| Secondary Structures | IDT OligoAnalyzer | Hairpin ΔG (Fwd) | -2.3 kcal/mol | Pass |
| Primer-Dimer Potential | IDT OligoAnalyzer | Hetero-Dimer ΔG | -5.1 kcal/mol | Pass |
Integrating in silico validation into the primer design workflow is no longer optional for robust, reproducible PCR research. By systematically employing the curated suite of free online tools described in this application note, researchers can transform primer design from an uncertain art into a predictable, data-driven process. This rigorous computational approach aligns with the broader thesis of proper primer design guidelines, significantly increasing the probability of successful experimental outcomes in drug development and basic research while conserving time and valuable resources.
Advanced Design Strategies for Specific PCR Applications
Primer and Probe Design Guidelines for Quantitative Real-Time PCR (qPCR)
Quantitative Real-Time PCR (qPCR) is a powerful technique that enables the amplification and simultaneous quantification of specific DNA sequences with high sensitivity and specificity. The performance of any qPCR assay is fundamentally dependent on the design of its primers and probes, as their properties control the exquisite specificity and sensitivity that make this method uniquely powerful [27]. Poor design, combined with a failure to optimize reaction conditions, is likely to result in reduced technical precision and both false positive and false negative results [27]. Within the broader context of PCR research, proper primer and probe design represents the foundational step that determines the success of all subsequent experimental procedures and data interpretation.
The design process must balance multiple competing factors, including specificity, efficiency, and practical constraints related to the target sequence and intended application. This document provides comprehensive guidelines for designing primers and probes for qPCR assays, framed within the established best practices of the field, including the MIQE (Minimum Information for Publication of Quantitative Real-Time PCR Experiments) guidelines, which were developed to ensure the publication of qPCR data with scientific integrity [28]. By adhering to these guidelines, researchers can develop robust, reliable qPCR assays that yield reproducible and accurate results.
Core Design Parameters for qPCR Primers and Probes
Primer Design Specifications
The design of PCR primers is a critical first step in the design of a quality real-time PCR experiment [29]. Careful attention to the following parameters will minimize troubleshooting efforts downstream.
Table 1: Optimal Design Parameters for qPCR Primers
| Parameter | Optimal Range or Characteristic | Rationale and Notes |
|---|---|---|
| Length | 18-22 base pairs (bp) [29] or 28 bp or larger [30] | This length is sufficient for specificity while maintaining an appropriate melting temperature. Longer primers may reduce primer-dimer formation. |
| Melting Temperature (Tm) | 58°C–65°C [30]; primers in a pair should be within 1-2°C of each other [29] [31] | Ensures both forward and reverse primers bind to their complementary strands simultaneously. Tm can be calculated as: Tm = 2(A+T) + 4(G+C) [32] [29]. |
| GC Content | 40%-60% [30] [29] | Provides enough sequence complexity for optimal binding without promoting non-specific interactions. |
| 3' End Composition | Avoid runs of more than 3 G/C bases [30] [29]; minimize G/C repeats, especially at the 3' end [29] | The 3' end is critical for elongation. A stable end (ending in G or C) is beneficial, but long G/C runs can promote non-specific binding [33]. |
| Specificity | Check against host genome using BLAST [30] [29] [31]; avoid templates with strong secondary structures [27] | Prevents amplification of non-target sequences and ensures the accuracy of quantification. |
| Amplicon Length | 50-150 bp is ideal [31]; 70-140 bp is generally recommended [29] | Smaller fragments amplify more efficiently and are more tolerant of PCR conditions [30]. |
Probe Design Specifications
For probe-based qPCR assays (e.g., TaqMan), the probe must be designed with complementary, yet distinct, parameters to function correctly alongside the primers.
Table 2: Optimal Design Parameters for qPCR Probes (e.g., TaqMan)
| Parameter | Optimal Range or Characteristic | Rationale and Notes |
|---|---|---|
| Melting Temperature (Tm) | 68°C–70°C; should be 4-10°C higher than the primer Tm [30] [29] [31] | Ensures the probe is bound to the target before the primers begin elongation during the combined annealing/extension step. |
| Length | 20-25 bp [29] or between 9-40 bp [30] | The slightly longer length compared to primers helps maintain specificity and stable binding. |
| GC Content | 30%-70% [30] | Avoid extreme GC content to ensure proper hybridization kinetics. |
| 5' End | Avoid a guanine (G) base [29] [30] | Guanine can quench the fluorescence of the reporter dye, dampening the signal. |
| Positioning | Do not overlap with primer binding sites [29] | The probe must bind to a separate region between the forward and reverse primer sites. |
| Sequence Checks | Avoid G repeats; check for hairpins, self-dimers, and hetero-dimers [30] [29] | These secondary structures can interfere with probe binding and fluorescence emission. |
Diagram 1: The qPCR assay design and validation workflow, from target identification to a finalized assay.
Specialized Applications and Considerations
Reverse Transcription qPCR (RT-qPCR)
When designing primers for RT-qPCR to quantify mRNA expression, a key consideration is distinguishing the target from contaminating genomic DNA (gDNA). A highly effective strategy is to design primers over an exon-exon junction. Ideally, at least one primer should span a junction, with most of its 5' end on one exon and only 3-4 bases at the 3' end in the adjacent exon [29] [31]. This design ensures the primer pair can only efficiently amplify spliced cDNA and not gDNA, which contains introns. For non-intronic targets (e.g., from bacteria or viruses), rigorous RNA isolation techniques and DNase treatment of the RNA sample are necessary to minimize gDNA background [31].
Bisulfite PCR and Methylation Analysis
Bisulfite conversion treatment, which deaminates unmethylated cytosines to uracils, drastically reduces sequence complexity. This necessitates adjustments to standard primer design rules, as outlined in the table below.
Table 3: Primer Design Adjustments for Bisulfite PCR
| Parameter | Standard qPCR | Bisulfite PCR | Rationale |
|---|---|---|---|
| Primer Length | 18-22 bp | 26-30 bp [29] | Increased length is required to achieve sufficient specificity and Tm in the AT-rich converted sequence. |
| Amplicon Length | 50-150 bp | 70-300 bp [29] | Bisulfite treatment fragments DNA, making long amplicons challenging. Keeping them short increases success. |
| CpG Sites | Not a concern | Avoid in primer sequences. If unavoidable, place at 5' end and use degenerate base (Y) [29] | Prevents discrimination between methylated and unmethylated templates during amplification. |
| Cycles | ~40 | 35-40 cycles [29] | Compensates for DNA fragmentation and damage from the harsh bisulfite conversion process. |
| Annealing Temperature | Varies by Tm | 55-60°C [29] | A slightly lower, specific range helps increase specificity for the converted, AT-rich sequence. |
Experimental Protocol: qPCR Assay Optimization
A well-designed assay requires experimental optimization to achieve maximum efficiency and specificity. The following protocol provides a step-by-step methodology.
Sample Preparation and Quality Control
- Prepare samples adequately: For RT-qPCR, RNA samples must be of the same quantity and quality when comparing gene expression levels. Use qualified collection tools and isolation kits [30].
- Never skip the quality check: Assess the purity and integrity of the purified nucleic acid sample using a bioanalyzer (e.g., Implen N80) or gel electrophoresis [30]. High-quality input material is non-negotiable for reliable qPCR.
Primer and Probe Stock Preparation
- Resuspend oligonucleotides accurately. Measure spectrophotometric absorbance at 260 nm to ensure proper concentration [31].
- Prepare working stock solutions. A common range for primer working stocks is 10–100 µM, and for probes is 2–10 µM [31].
- Use nuclease-free water for all dilutions to prevent degradation.
Reaction Setup and Thermal Cycling Optimization
- Use a high-quality qPCR master mix and initially follow the manufacturer's protocol exactly [30]. A typical reaction setup for a SYBR Green assay is shown below.
- Optimize primer concentration. A final concentration of 0.2-0.5 µM per primer is a common starting point that balances yield and specificity [34] [33]. High concentrations can promote primer-dimer formation [32].
- Use a thermal cycler with a gradient function to optimize annealing temperatures efficiently across multiple reactions simultaneously [30] [32].
Table 4: Example Setup for a 50 µL SYBR Green qPCR Reaction
| Component | Final Concentration | Volume (µL) |
|---|---|---|
| 2x SYBR Green qPCR Master Mix | 1x | 25 |
| Forward Primer (10 µM) | 0.4 µM | 2 |
| Reverse Primer (10 µM) | 0.4 µM | 2 |
| Template DNA/cDNA | Variable | x |
| Nuclease-Free Water | - | to 50 µL |
- Optimize the thermocycler protocol one step at a time [30]:
- Initial Denaturation/Activation: Typically 95°C for 30 seconds for short templates, or 10-15 minutes for hot-start polymerase activation [30].
- Cycling (40 cycles is a standard start):
- Denaturation: 95°C for 5-15 seconds [30].
- Annealing/Extension: For a 2-step protocol, start at 60°C for 1 minute. Optimize this temperature in 0.1°C steps for detection [30]. If primers and probe require separate steps, set annealing 10°C below the probe Tm and extension at 72°C (rule of thumb: 1000 bp/min) [30].
- Melt Curve Analysis: Set as recommended by the instrument manufacturer to verify amplicon specificity [30].
Diagram 2: A standard two-step qPCR thermal cycling protocol with melt curve analysis.
Table 5: Key Research Reagent Solutions for qPCR
| Item | Function | Example(s) |
|---|---|---|
| Hot-Start DNA Polymerase | Reduces non-specific amplification and primer-dimer formation by remaining inactive until a high temperature is reached. | ZymoTaq DNA Polymerase [29], Hieff Ultra-Rapid II HotStart PCR Master Mix [33] |
| qPCR Master Mix | A pre-mixed solution containing buffer, dNTPs, polymerase, and fluorescent dye (SYBR Green) for simplified reaction setup. | biotechrabbit Capital qPCR Mix [30] |
| DNA/RNA Isolation Kits | For the rapid isolation of high-purity, inhibitor-free nucleic acids, which is critical for successful PCR. | Zymo Research Quick-DNA Kits [29], innuPREP isolation kits [30] |
| One-Step RT-qPCR Kits | Combine reverse transcription and qPCR amplification in a single tube, streamlining workflow and reducing contamination risk. | ZymoScript One-Step RT-qPCR Kit [29] |
| Bisulfite Conversion Kits | Chemically convert unmethylated cytosine to uracil for downstream methylation analysis. | Zymo Research Bisulfite Conversion Kits [29] |
| In Silico Design Tools | Software for designing and analyzing primers and probes, checking for secondary structures, and verifying specificity. | Primer3 [30], OligoAnalyzer (IDT) [32], NCBI BLAST [29] |
Advanced Topics and Future Directions
Recent advances in the field are leveraging deep learning to predict sequence-specific amplification efficiency directly from DNA sequence data. This is particularly relevant for multi-template PCR used in applications like metabarcoding and DNA data storage, where non-homogeneous amplification can severely skew quantitative results [17]. Studies using one-dimensional convolutional neural networks (1D-CNNs) have successfully identified specific sequence motifs adjacent to priming sites that are associated with poor amplification, challenging long-standing PCR design assumptions [17]. These tools hold the promise of enabling the in silico design of inherently homogeneous amplicon libraries, thereby reducing bias and improving the accuracy of quantitative results in complex multiplexed assays.
Seamless cloning techniques, such as recombineering and Homology-Directed Repair (HDR), have revolutionized genetic engineering by enabling precise modifications of DNA sequences without the constraints of traditional restriction enzyme-based methods. These methods rely on the cell's innate homologous recombination machinery to insert a DNA fragment into a specific target location. The precision of this insertion is directed by homology arms—sequences on the ends of the DNA fragment that are identical to the target site. The 5' homology arm, appended to the 5' end of a PCR primer, is particularly critical as it determines the initial recognition and alignment at the target site.
The design of primers incorporating these homology arms is a cornerstone of successful cloning. Properly designed arms ensure high recombination efficiency, reduce background, and facilitate the creation of "seamless" constructs that lack unwanted residual sequences, such as antibiotic resistance genes. This protocol details the strategic design of primers with 5' homology arms, providing a robust framework for applications ranging from bacterial genome engineering to CRISPR-mediated knock-ins in eukaryotic cells.
Strategic Planning and Homology Arm Design Considerations
Choosing the Appropriate Cloning Strategy
The optimal length for the 5' homology arm is not universal; it is dictated by the specific seamless cloning technique being employed. Researchers must first select a strategy based on their experimental goal, as this choice directly determines the required arm length. The two primary strategies are recombineering in prokaryotic systems and Homology-Directed Repair (HDR) commonly used with CRISPR-Cas9 in eukaryotic systems.
Table 1: Comparison of Seamless Cloning Strategies and Homology Arm Requirements
| Cloning Strategy | Typical Homology Arm Length | Key Applications | Required Enzymatic Machinery |
|---|---|---|---|
| Recombineering [35] | ~50 base pairs | Modifying BACs, viral genomes, and the E. coli genome | Lambda Red system (Red αβγ) |
| HDR with Plasmid Donor [36] | 500 - 1000 base pairs | Knock-in of large sequences (e.g., fluorescent reporters) in mammalian cells | CRISPR-Cas9, cellular repair machinery |
| In-Fusion Cloning [37] | 15 base pairs | Seamless gene fusions and plasmid construction | N/A (In-vitro method) |
The decision tree below outlines the strategic planning process for selecting a cloning method based on the desired modification. Recombineering is ideal for quick, marked modifications in prokaryotes, while two-step methods are necessary for seamless edits without selection markers.
Critical Parameters for 5' Homology Arm Design
Beyond length, several interdependent parameters must be optimized to ensure the functionality of the primer and the success of the recombination event.
- Homology Arm Sequence Fidelity: The 5' homology arm must be an exact match to the target genomic sequence. Even single-nucleotide discrepancies can drastically reduce recombination efficiency. Always use an annotated genomic sequence from a trusted database like FlyBase or NCBI for design, ensuring you retrieve the genomic DNA sequence (including introns and exons) and not the cDNA or mRNA sequence [36] [37].
- Primer Binding Site Design: The 3' portion of the primer (typically 18-30 bases) must be optimized for specific amplification of the insert. Key guidelines include [3] [38]:
- GC Content: Aim for 40-60%.
- Melting Temperature (Tm): Aim for 60-75°C, with forward and reverse primers within 5°C of each other.
- GC Clamp: The 3' end of the primer should end with a G or C base to strengthen binding.
- Specificity: Avoid runs of 4 or more identical bases, dinucleotide repeats, and self-complementary sequences that lead to primer-dimer formation.
- Disrupting the CRISPR Target Site (for HDR): When using CRISPR-Cas9, the donor plasmid template must be designed to disrupt the CRISPR target site after repair. This prevents the Cas9 nuclease from repeatedly cutting the successfully edited locus. This can be achieved by introducing silent mutations in the PAM sequence or the gRNA target sequence within the homology arm [36].
Experimental Protocol: Primer Design and Workflow for Recombineering
The following protocol provides a detailed methodology for designing primers and performing one-step recombineering, a robust technique for making marked insertions, replacements, or deletions in DNA maintained in E. coli [35].
Materials and Reagent Solutions
Table 2: Research Reagent Solutions for Recombineering
| Item | Function/Description | Source/Example |
|---|---|---|
| Target BAC | The large DNA construct to be modified. Must have a low-copy origin. | Supplied by the user |
| psc101-gbaA plasmid | Plasmid for inducing the expression of lambda Red recombineering genes (red αβγ). | Stewart Laboratory, TU Dresden [35] |
| Antibiotic Resistance Cassette | PCR template for amplifying the selection marker. | e.g., KanR, AmpR |
| High-Fidelity DNA Polymerase | For error-free amplification of the targeting cassette. | e.g., Q5, Phusion |
| Electrocompetent Cells | E. coli cells prepared for electroporation. |
Step-by-Step Procedure
Step 1: Design Primers with 5' Homology Arms
- Identify Target Site: On the template DNA (e.g., a BAC), identify the precise location for insertion, deletion, or replacement.
- Design Primer Overhangs: The 5' overhang of each primer will become the homology arm. For a typical 50 bp recombineering arm, design the forward primer with the structure:
[5' 50-nucleotide homology arm A] + [20-nucleotide binding site for antibiotic cassette]. Similarly, design the reverse primer as:[5' 50-nucleotide homology arm B] + [20-nucleotide binding site for antibiotic cassette][35]. Ensure the homology arms are in the same orientation as they appear in the target genome.
Step 2: Amplify the Selection Cassette
- Perform a PCR using a high-fidelity polymerase to amplify your antibiotic resistance gene (or other marker) using the primers designed in Step 1.
- Purify the resulting PCR product, which now has the 50 bp homology arms flanking the resistance gene.
Step 3: Perform Recombineering
- Transform the psc101-gbaA plasmid into E. coli cells harboring the target BAC and select on the appropriate antibiotic.
- Induce the expression of the lambda Red genes from the psc101-gbaA plasmid with L-arabinose.
- Make the induced cells electrocompetent and electroporate with the purified, linear targeting cassette from Step 2.
- Allow cells to recover and then plate on agar containing the antibiotic corresponding to your selection cassette.
Step 4: Screen for Recombinants
- Screen resulting colonies by colony PCR using primers external to the homology arms to verify correct integration of the cassette at the target locus.
- Sequence the modified region to confirm the seamless and precise modification.
The workflow below summarizes this multi-step experimental procedure from primer design to final validation.
Data Presentation and Analysis
Quantitative Design Parameters
Table 3: Summary of Key Primer and Homology Arm Parameters
| Parameter | Optimal Value/Range | Technical Rationale |
|---|---|---|
| Recombineering Arm Length | 50 bp [35] | Sufficient for efficient lambda Red-mediated recombination; can be incorporated as primer overhang. |
| HDR Plasmid Donor Arm Length | 500 - 1000 bp [36] | Required for efficient HDR efficiency in mammalian cells. |
| Total Primer Length | ~70-80 bp (for 50 bp arm + 20-30 bp binding site) | The total length is the sum of the homology arm and the gene-specific binding sequence. |
| Primer Tm (Binding Region) | 60°C - 75°C [3] | Ensures specific annealing during PCR amplification of the cassette. |
| GC Content (Entire Primer) | 40% - 60% [3] [38] | Balances primer stability and specificity; avoids extreme melting temperatures. |
| Distance from Cas9 Cut Site (for HDR) | Within 10 nucleotides [36] | HDR efficiency drops significantly as the distance from the double-strand break increases. |
Troubleshooting Common Issues
- Low Recombination Efficiency: Verify the sequence fidelity and length of the homology arms. Ensure the lambda Red genes are properly induced and that the electroporation efficiency is high. The target DNA must be in a low-copy BAC to prevent mixed plasmids within a single cell [35].
- No PCR Product from Cassette Amplification: Re-design the gene-specific binding portion of the primer using tools like NCBI Primer-BLAST to ensure specificity and optimal Tm [10] [38]. Check for secondary structures in the template.
- Unwanted Mutations: Use a high-fidelity polymerase during the PCR amplification step to minimize the introduction of errors in the selection cassette.
- False Positive Colonies in HDR: Always include a disruption of the gRNA target sequence in the donor template to prevent re-cleavage [36]. Use robust confirmation methods like colony PCR and Sanger sequencing.
The precise design of primers with 5' homology arms is a fundamental skill for modern genetic engineering. By understanding the strategic choice between methods like recombineering and HDR, and by meticulously applying the design parameters outlined in this application note—arm length, sequence fidelity, and primer biochemistry—researchers can reliably achieve seamless genetic modifications. The provided protocols and troubleshooting guides serve as a comprehensive roadmap for integrating this powerful technique into a drug development or basic research pipeline, enabling the precise manipulation of DNA essential for advanced molecular biology and therapeutic development.
Within the broader context of establishing robust primer design guidelines for PCR research, the amplification of challenging templates such as GC-rich sequences represents a significant technical hurdle. GC-rich DNA sequences (typically defined as having a GC content exceeding 65%) are prevalent in critical genomic regions, including gene promoters, enhancers, and most housekeeping and tumor suppressor genes [39]. However, their high thermodynamic stability promotes the formation of stable secondary structures (e.g., hairpins and loops) and results in a high melting temperature, which often leads to inefficient or failed PCR amplification [39] [40]. This application note details targeted strategies and protocols for the successful amplification of these difficult targets, focusing on a primer-centric design strategy supplemented by optimized reaction conditions.
Core Challenges with GC-Rich Templates
The primary challenge in amplifying GC-rich DNA is the propensity for these sequences to form intramolecular secondary structures. These structures, stabilized by the three hydrogen bonds of G:C base pairs, can prevent the complete denaturation of the DNA template and block primer annealing or polymerase progression during the extension phase [39] [40]. Conventional PCR protocols often fail under these conditions, resulting in no product, a smear of non-specific amplification, or primer-dimer formation. A common but misguided response is to use lower annealing temperatures to facilitate primer binding; however, this often exacerbates non-specific amplification and fails to resolve the underlying issue of template secondary structure [39].
A Primer Design-Led Strategy for Success
While numerous approaches, including the use of PCR additives and specialized polymerases, can aid amplification, a methodical primer design strategy is the most critical factor for success [39]. The foundational principle is to design primers with characteristics that favor highly specific and efficient binding at elevated temperatures, thereby outcompeting the formation of template secondary structures.
Key Principles for Primer Design
The following design parameters are essential for overcoming the challenges posed by GC-rich templates. These guidelines are summarized in Table 1 for easy reference.
Table 1: Key Primer Design Parameters for GC-Rich PCR
| Parameter | Recommended Value for GC-Rich Targets | Rationale |
|---|---|---|
| Primer Length | 18-30 nucleotides [6] [3] [41] | Ensures specificity and provides sufficient sequence for high Tm calculation. |
| Melting Temperature (Tm) | 65-75°C [39] [3] | Enables the use of high annealing temperatures to prevent template secondary structures. |
| Tm Difference (ΔTm) | ≤ 2°C between forward and reverse primers [39] | Ensures both primers anneal with similar efficiency at the same temperature. |
| GC Content | 40-60% [6] [41] [42] | Provides stability without excessive self-complementarity. A "GC Clamp" (a G or C base at the 3'-end) is recommended [3] [42]. |
| Secondary Structures | Avoid self-dimers, hairpins, and cross-dimers [6] [41] | Prevents primers from self-annealing or annealing to each other instead of the template. Software analysis (ΔG > -9.0 kcal/mol) is advised [6]. |
A pivotal study demonstrated that designing 15 primer pairs with a high Tm (>79.7°C) and a low ΔTm (<1°C) led to the successful amplification of 15 different GC-rich targets (66-84% GC) using standard Taq polymerase, without requiring specialized additives or techniques [39]. This highlights that precise primer design alone can often overcome the inherent difficulties of GC-rich amplification.
Workflow for Designing and Testing Primers
The following diagram outlines a systematic workflow for the design and validation of primers for challenging templates.
Experimental Protocols
Protocol 1: Standard PCR with Optimized Primer Design
This protocol is the first-line approach, relying on the primer design strategy outlined in Section 3.1.
Primer Design and Preparation:
- Using a design tool like NCBI Primer-BLAST [10], design primers according to the parameters in Table 1. The PrimerQuest Tool (IDT) or FastPCR software are also excellent options [43] [6].
- Specify that primers must span an exon-exon junction if the goal is to amplify cDNA without gDNA contamination [10].
- Resuspend primers in sterile TE buffer or nuclease-free water to a concentration of 100 µM, and prepare a 20 µM working stock.
Reaction Setup:
- Prepare a Master Mix on ice in the following order for a 50 µL reaction [42]:
- Component | Final Concentration | Volume for 50 µL Reaction Nuclease-free Water | Q.S. to 50 µL | 32.5 µL 10X PCR Buffer (without MgCl₂) | 1X | 5 µL dNTP Mix (10 mM each) | 200 µM | 1 µL MgCl₂ (25 mM) | 1.5 - 4.0 mM* | 1.2 - 4.0 µL Forward Primer (20 µM) | 0.4 µM | 1 µL Reverse Primer (20 µM) | 0.4 µM | 1 µL DNA Template | 1 - 1000 ng | Variable (e.g., 0.5 - 5 µL) DNA Polymerase (e.g., Taq) | 1.25 Units | 0.25 µL
- Note: The optimal Mg²⁺ concentration must be determined empirically, as it is a critical cofactor. Start with 1.5 mM if the buffer already contains Mg²⁺, or 3.0 mM if it does not [41] [42].
Thermal Cycling:
- Use the following cycling conditions in a thermal cycler:
- Step | Temperature | Time | Cycles Initial Denaturation | 95 °C | 2-5 min | 1 Denaturation | 95 °C | 30 sec | | Annealing | 65 - 72 °C* | 30 sec | 30-35 Extension | 72 °C | 1 min/kb | | Final Extension | 72 °C | 5-10 min | 1 Hold | 4 °C | ∞ | 1
- Note: The annealing temperature (Ta) should be set no more than 5°C below the calculated Tm of the primers. For high-Tm primers, start with an annealing temperature of 65°C or higher [39] [6].
Protocol 2: PCR with Additives for Difficult Templates
If Protocol 1 fails, this enhanced protocol incorporates chemical additives to destabilize secondary structures.
Reaction Setup Modifications:
- Prepare the reaction as in Protocol 1, but include one of the following additives in the Master Mix. Test additives individually before combining them [39] [42].
- Additive | Final Concentration | Function Betaine | 0.5 M - 1.5 M | Homogenizes the stability of AT- and GC-base pairs, preventing secondary structure. DMSO | 1 - 10% | Disrupts hydrogen bonding, aiding in DNA denaturation. Formamide | 1.25 - 10% | Lowers the overall melting temperature of the DNA.
- When using additives, the volume of nuclease-free water must be adjusted accordingly.
Thermal Cycling:
- A "Touchdown" or "Stepdown" PCR strategy can be combined with additives. Start with an annealing temperature 5-10°C above the expected Tm and decrease it by 0.5-1°C per cycle for the first 10-15 cycles, then continue at the final, lower temperature for the remaining cycles. This approach favors the accumulation of specific products in the early cycles [39].
Table 2: Research Reagent Solutions for GC-Rich PCR
| Item | Function & Application |
|---|---|
| Specialized DNA Polymerases | Enzymes like KOD Hot-Start or Platinum Taq High-Fidelity offer superior performance for GC-rich and long-template amplification due to high processivity and resistance to inhibitors [39] [41]. |
| PCR Enhancers (Betaine, DMSO) | Chemical additives that destabilize GC-rich secondary structures, thereby improving template accessibility and amplification yield [39] [42]. |
| OligoAnalyzer Tool (IDT) | A free online tool for analyzing oligonucleotide melting temperature, hairpins, self-dimers, and heterodimers to validate primer designs before synthesis [43] [6]. |
| NCBI Primer-BLAST | A critical tool for designing primers and simultaneously checking their specificity against a nucleotide database to minimize off-target amplification [42] [10]. |
| Magnesium Chloride (MgCl₂) | An essential cofactor for DNA polymerase activity. Its concentration must be optimized, as it significantly impacts primer annealing, enzyme fidelity, and product specificity [41] [42]. |
Successful amplification of GC-rich DNA templates is achievable through a disciplined, primer-design-led strategy. By prioritizing primers with high melting temperatures (>65°C), minimal Tm differences (<2°C), and careful avoidance of secondary structures, researchers can overcome the fundamental challenge of template stability. This foundational approach, complemented by systematic optimization of reaction components—notably Mg²⁺ concentration and the judicious use of destabilizing additives—provides a robust and reliable protocol for interrogating some of the most genetically significant regions of the genome.
Single nucleotide polymorphisms (SNPs) represent the most common form of genetic variation in genomes and are crucial for understanding gene function, disease etiology, and personalized medicine [44]. The detection and genotyping of SNPs rely heavily on polymerase chain reaction (PCR)-based methods, with Amplification Refractory Mutation System PCR (ARMS-PCR), Primer Introduced Restriction Analysis PCR (PIRA-PCR), and snapback primer methods emerging as powerful techniques. Each method possesses unique primer design requirements that significantly impact assay performance, specificity, and sensitivity. This application note provides detailed protocols and guidelines for proper primer design within the context of a broader thesis on PCR research methodologies, enabling researchers to select and implement the most appropriate genotyping strategy for their specific applications.
Primer Design Fundamentals and Methodologies
ARMS-PCR Primer Design
ARMS-PCR, also known as allele-specific PCR, exploits the principle that Taq DNA polymerase has reduced efficiency in amplifying from primers with mismatched 3' termini [45]. The core mechanism relies on allele-specific primers that only amplify DNA samples with the target allele and do not amplify DNA samples without the target allele [44]. In addition to the allele-specific mismatch at the 3' end, ARMS-PCR introduces additional deliberate mismatches near the 3' end of the allele-specific primers (typically at the -2 or -3 position from the 3' end) to further destabilize non-specific binding and priming on non-target alleles [44]. This modification significantly increases the specificity for SNP detection but also increases the complexity of PCR primer design.
For tetra-primer ARMS-PCR, which uses four primers in a single reaction, the system includes two locus-specific outer primers and two allele-specific inner primers that amplify only in the presence of a perfect match at the 3' end [46]. The presence of a band on the gel signifies the corresponding genotype (wild-type or mutant), allowing for simultaneous detection of both alleles in one reaction [46]. A modified tetra-primer ARMS-PCR approach incorporating 5' end random nucleotide and 3' terminus phosphorothioate linkages in the inner primers has demonstrated improved sensitivity and specificity, particularly for challenging applications such as botanical authentication [45].
Automated tools such as ARMSprimer3 significantly streamline the primer design process by automatically retrieving necessary genomic information, masking interfering SNP loci, and generating sequence variants with additional mutations at the -2 and -3 positions [44]. This automation reduces design time from approximately 13 hours manually to 20-50 seconds per target SNP while eliminating human error [44].
PIRA-PCR Primer Design
PIRA-PCR, or primer-introduced restriction analysis PCR, combines allele-specific amplification with restriction enzyme digestion [46]. The method works by introducing a deliberate mismatch near the 3' end of the primer adjacent to the mutation of interest, creating an artificial restriction fragment length polymorphism (RFLP) that can be easily detected [46]. This approach converts a single nucleotide change into a readily detectable length polymorphism through gel electrophoresis.
The key design consideration for PIRA-PCR primers is the strategic placement of the artificial mismatch to create or eliminate a restriction enzyme recognition site specific to either the wild-type or mutant allele. The mismatch must be positioned such that it differentially affects the restriction enzyme's ability to cleave the amplified products based on the allele present in the template DNA. While PIRA-PCR offers increased sensitivity compared to basic ARMS-PCR, it requires specific restriction enzymes, which increases cost and complexity [47]. The necessity for post-PCR processing also extends the hands-on time and increases the risk of contamination.
Snapback Primer Design
Snapback primers represent an advanced genotyping technology that enables high-resolution melting curve analysis for SNP discrimination [48]. These primers are characterized by a unique design featuring a 5' end sequence that folds back and hybridizes to the amplicon generated during PCR, forming an internal hairpin structure [46]. This secondary structure creates a distinct melting temperature profile compared to the full-length amplicon, enabling differentiation between wild-type and mutant sequences based on characteristic snapback peaks in the melting curve [46].
The snapback primer system comprises two parts: the snapback probe at the 5'-end and the conventional annealing primer at the 3'-end [49]. To prevent undesirable extension of the snapback probe during PCR, the 5'-terminal is typically blocked with nucleotides that mismatch the target sequence [49]. When applying the Linear-After-The-Exponential (LATE) PCR strategy, the melting temperature of the limiting primer should be 4-5°C higher than its paired snapback primer to ensure both primers achieve similar annealing efficiency during asymmetric amplification [49]. The snapback duplexes are designed to have melting temperatures approximately 10-15°C below the main amplicon melting temperature [48].
This system offers exceptional sensitivity, capable of detecting mutation loads as low as 0.1% with high reproducibility [49]. The closed-tube format minimizes contamination risk while providing rapid results, making it suitable for clinical diagnostics and large-scale screening applications.
Table 1: Comparative Analysis of SNP Genotyping Methods
| Method | Principle | Detection Format | Key Design Features | Advantages | Limitations |
|---|---|---|---|---|---|
| ARMS-PCR | Allele-specific amplification with 3' mismatch discrimination | Gel electrophoresis or real-time detection | Additional deliberate mismatches at -2/-3 positions from 3' end; Four primers for tetra-ARMS | Cost-effective; Simple setup; No special equipment required | Potentially lower sensitivity; Optimization intensive |
| PIRA-PCR | Artificial RFLP creation through primer mismatch | Restriction digestion + gel electrophoresis | Mismatch creates restriction site polymorphism; Single PCR primer pair | Increased sensitivity; Established methodology | Requires restriction enzymes; Post-PCR processing; Higher cost |
| Snapback Primer | Hairpin structure formation for melting analysis | High-resolution melting curve analysis | 5' snapback probe + 3' primer; Blocked 5' terminus; LATE-PCR principles | Ultra-sensitive (0.1% detection); Closed-tube; Multiplex capability | Complex design; Specialized optimization; Longer assays |
Experimental Protocols
ARMS-PCR Protocol for SNP Genotyping
The following protocol utilizes tetra-primer ARMS-PCR for Factor V Leiden mutation (rs6025) detection, adaptable to other SNPs with appropriate primer modifications [44].
Reagents and Materials:
- DNA template (15-25 ng/μL concentration)
- Hot start Taq DNA polymerase with appropriate buffer
- dNTP mix (10 mM each)
- Primer mix (5 μM each primer)
- MgCl₂ (25 mM)
- Nuclease-free water
- Agarose gel electrophoresis equipment
Primer Design Specifications:
- Outer forward primer: Locus-specific, ~20-25 nucleotides
- Outer reverse primer: Locus-specific, ~20-25 nucleotides
- Wild-type inner primer: Perfect match to wild-type allele at 3' end with additional deliberate mismatch at -2 or -3 position
- Mutant inner primer: Perfect match to mutant allele at 3' end with additional deliberate mismatch at -2 or -3 position
Procedure:
- Prepare PCR master mix in a total volume of 20 μL:
- 10 μL of 2× AmpliTaq Gold 360 Master Mix
- 2 μL primer mix (5 μM each of four primers)
- 2 μL DNA template (15-25 ng/μL)
- 6 μL nuclease-free water
Perform PCR amplification using the following thermal cycling conditions:
- Initial denaturation: 95°C for 3 minutes
- 28-40 cycles of:
- Denaturation: 95°C for 30 seconds
- Annealing: 60°C for 30 seconds
- Extension: 72°C for 30 seconds
- Final extension: 72°C for 3 minutes
Analyze PCR products by 2% agarose gel electrophoresis with appropriate DNA staining.
Interpret results: The presence of either wild-type or mutant inner band with the common outer band indicates the genotype.
Troubleshooting Notes:
- If non-specific amplification occurs, increase annealing temperature in 1°C increments or reduce MgCl₂ concentration.
- If signal is weak, increase cycle number to a maximum of 40 cycles or adjust primer concentrations.
- For problematic SNPs, test both -2 and -3 additional mismatch positions.
Snapback Primer Protocol for Mutation Detection
This protocol details the multiplex snapback primer system for simultaneous detection of JAK2 V617F and MPL W515L/K mutations, adaptable to other SNP targets [49].
Reagents and Materials:
- Genomic DNA (20 ng/μL)
- Ex Taq Hot Start Version Kit (Takara Bio)
- MgCl₂ (25 mM)
- Snapback primers and limiting primers (Table 2)
- Real-time PCR instrument with high-resolution melting capability
Table 2: Snapback Primer Sequences for JAK2 V617F and MPL W515L/K Detection
| Primer Name | Sequence (5'→3') | Modifications | Function |
|---|---|---|---|
| JAK2 V617F snapback | GGGAGTATGTgTCTGTGGAGACTGACACCTAGCTGTGATCCTG | 5' mismatch blocks extension | Mutation enrichment & detection |
| JAK2 V617F limiting | TGAAGCAGCAAGTATGATGAG | None | Limiting primer |
| MPL W515L/K snapback | ACCTGCTGAGGtggCAGTTTCCTGGGGTCACAGAGCGAACCAA | 5' mismatch blocks extension | Mutation enrichment & detection |
| MPL W515L/K limiting | AGCCTGGATCTCCTTGGTGAC | None | Limiting primer |
Procedure:
- Prepare asymmetric PCR reaction in 20 μL volume:
- 1 U TaKaRa Ex Taq HS
- 2 μL 10× Ex Taq buffer (Mg²⁺ free)
- 0.5 mM MgCl₂
- 0.25 μM JAK2 V617F snapback primer
- 0.25 μM MPL W515L/K snapback primer
- 0.025 μM JAK2 V617F limiting primer
- 0.025 μM MPL W515L/K limiting primer
- 0.2 mM dNTPs
- 2 μL DNA template
- Nuclease-free water to 20 μL
Perform amplification with rapid PCR protocol:
- Initial denaturation: 95°C for 3 minutes
- 40 cycles of:
- Denaturation: 95°C for 15 seconds
- Annealing/extension: 60°C for 60 seconds
Conduct melting curve analysis:
- Denature at 95°C for 30 seconds
- Anneal at 40°C for 30 seconds
- Slowly ramp from 40°C to 80°C with continuous fluorescence acquisition
Analyze melting curves: Distinct melting temperatures differentiate wild-type, heterozygous, and mutant genotypes.
Technical Notes:
- Low ionic strength buffer enhances selective amplification of mutant alleles
- Maintain limiting primer concentration at 10% of snapback primer concentration
- Melting curve acquisition rate of 0.1-0.3°C/second provides optimal resolution
Figure 1: Snapback primer assay workflow showing the process from DNA amplification to genotype calling through melting curve analysis.
Comparative Performance Analysis
A comprehensive comparison of five PCR-based genotyping methods for detecting a challenging T-to-A SNP (rs9939609) revealed significant performance differences [47] [46]. The study evaluated ARMS-PCR, PIRA-PCR, TaqMan qPCR, Competitive Amplification of Differentially Melting Amplicons (CADMA) with HRM, and HRM with snapback primers, using Sanger sequencing as the gold standard [46].
Table 3: Quantitative Performance Comparison of SNP Genotyping Methods
| Method | Cost per Reaction | Sensitivity | Specificity | Hands-on Time | Equipment Needs | Multiplex Capability |
|---|---|---|---|---|---|---|
| ARMS-PCR | Low (<$1) | Moderate | High with optimization | Moderate | Basic thermal cycler, gel equipment | Limited |
| PIRA-PCR | Low-Medium ($2-5) | High | High | High | Thermal cycler, restriction digestion, gel equipment | Limited |
| Snapback Primer | Medium ($3-7) | Very High (0.1%) | Very High | Low | Real-time PCR with HRM capability | High |
| TaqMan qPCR | High ($8-15) | High | High | Low | Real-time PCR instrument | Medium |
| CADMA with HRM | Medium ($3-8) | High | High | Low | Real-time PCR with HRM capability | Medium |
The analysis demonstrated that ARMS-PCR was the simplest and most cost-effective method but potentially less sensitive than other approaches [46]. PIRA-PCR offered increased sensitivity but required specific restriction enzymes, increasing both cost and complexity [47]. Snapback primer HRM provided high sensitivity but required longer assay times and careful optimization [46]. The CADMA assay emerged as the most balanced method, combining affordability with sensitivity comparable to sequencing and TaqMan qPCR [46].
For clinical applications, the multiplex snapback primer system achieved 0.1% mutation load sensitivity with <5% coefficient of variation for inter-/intra-assay reproducibility when testing JAK2 V617F and MPL W515L/K mutations [49]. The validated assay successfully analyzed 120 clinical samples with performance comparable to ARMS, qPCR, and Sanger sequencing methods [49].
Research Reagent Solutions
Table 4: Essential Research Reagents and Tools for Genotyping Assay Development
| Reagent/Tool | Function | Examples/Specifications |
|---|---|---|
| ARMSprimer3 | Automated ARMS-PCR primer design | Open-source Python program; inputs SNP ID; outputs primer sequences with additional mutations [44] |
| SNPgen Portal | Web-based primer design for multiple methods | Designs ARMS-PCR and mCADMA primers; visualizes amplicons; checks GC content and Tm [50] |
| Primer-BLAST | Primer specificity validation | Checks off-target binding; recommends organism-specific parameters [10] |
| Hot Start Taq Polymerase | PCR amplification with reduced non-specific amplification | Essential for complex primer mixtures; improves ARMS-PCR specificity |
| High-Resolution Melting Instrument | Snapback primer analysis | Requires precise temperature control (<0.1°C accuracy); compatible with saturating DNA dyes |
| Phosphorothioate-modified Primers | Nuclease resistance for modified ARMS-PCR | 3' terminus modifications prevent degradation; enhance specificity [45] |
The selection of an appropriate genotyping method and corresponding primer design strategy depends on multiple factors including required sensitivity, equipment availability, throughput needs, and budget constraints. ARMS-PCR provides the most accessible entry point for laboratories with basic PCR capabilities, while snapback primer methods offer superior sensitivity for detecting low-frequency mutations. PIRA-PCR serves as an intermediate option with established reliability but increased procedural complexity. Automated design tools such as ARMSprimer3 and SNPgen have significantly reduced the barrier to implementing these methods by automating the complex design process. Following the detailed protocols and design principles outlined in this application note will enable researchers to develop robust, reliable genotyping assays suitable for their specific research requirements in genetic studies, diagnostic development, and pharmacogenomic applications.
Diagnosing and Correcting Common Primer-Related PCR Failures
Within the framework of proper primer design guidelines for PCR research, successful amplification is fundamentally dependent on the integrity and specificity of the oligonucleotide primers used. Even meticulously planned experiments can fail due to subtle imperfections in primer design or reaction conditions, leading to two primary categories of failure: absence of the desired product or amplification of non-target sequences. This guide provides a systematic approach to diagnosing and resolving these common PCR challenges, with a specific focus on how primer characteristics influence amplification outcomes. Researchers and drug development professionals can utilize these structured protocols to optimize their PCR assays, ensuring reliable results for downstream applications including cloning, sequencing, and diagnostic assay development.
Core Principles of Primer Design
Proper primer design establishes the foundation for successful PCR amplification by ensuring specific and efficient binding to the target sequence. Adherence to these biochemical parameters minimizes the potential for non-specific binding and primer-dimer formation, which are common sources of PCR failure.
Fundamental Primer Properties
- Length: Primers should be 18-30 nucleotides long [3] [42]. This provides sufficient specificity while maintaining efficient binding.
- GC Content: Aim for 40-60% GC content [1] [42]. This balance prevents excessively high or low melting temperatures.
- GC Clamp: Include a G or C base at the 3' end [3] [42]. The stronger hydrogen bonding of GC pairs stabilizes primer binding and reduces "breathing" (fraying) at the terminus.
- Melting Temperature (T~m~): Maintain T~m~ between 65°C and 75°C [3], with forward and reverse primers within 5°C of each other [1] [42].
- Sequence Composition: Avoid runs of identical nucleotides (e.g., AAAAA) or dinucleotide repeats (e.g., ATATAT), as they can promote mispriming and secondary structure formation [3] [42].
Specificity Considerations
- 3' Complementarity: Ensure the 3' ends of primer pairs are not complementary to each other to prevent primer-dimer formation [42].
- Self-Complementarity: Avoid regions within a single primer that can anneal to itself, which leads to hairpin loop structures [42].
- Specificity Verification: Use tools like NCBI Primer-BLAST to check for unintended binding sites in the template genome [51] [42].
Systematic Troubleshooting of Common PCR Problems
No Amplification Product
Complete absence of the desired PCR product typically indicates fundamental issues with reaction components or cycling conditions. The following table outlines the primary causes and evidence-based solutions.
Table 1: Troubleshooting Guide for No PCR Product
| Possible Cause | Recommended Solutions |
|---|---|
| Poor Template Quality/Degradation [52] | - Minimize shearing during DNA isolation.- Evaluate integrity by gel electrophoresis.- Store DNA in TE buffer (pH 8.0) or molecular-grade water. |
| Insufficient Template Quantity [52] | - Examine input DNA amount and increase if necessary.- Choose DNA polymerases with high sensitivity.- Increase number of PCR cycles (up to 40). |
| Incorrect Annealing Temperature [53] | - Recalculate primer T~m~ values using an appropriate calculator.- Test an annealing temperature gradient, starting at 5°C below the lower primer T~m~. |
| Suboptimal Mg²⁺ Concentration [52] [53] | - Optimize Mg²⁺ concentration (typically 0.5-5.0 mM).- Ensure equimolar dNTP concentrations, as high dNTPs can chelate Mg²⁺. |
| Missing Reaction Component [53] | - Repeat reaction setup carefully.- Use a master mix to ensure consistency across samples. |
| Complex Template (GC-rich/Long) [52] | - Use a PCR additive (DMSO, betaine, GC enhancer).- Choose DNA polymerases with high processivity.- Increase denaturation time/temperature. |
Non-Specific Amplification and Multiple Bands
Amplification of non-target sequences produces multiple bands or smears on an electrophoresis gel, compromising the specificity of the assay. The causes and solutions are detailed in the table below.
Table 2: Troubleshooting Guide for Non-Specific Amplification
| Possible Cause | Recommended Solutions |
|---|---|
| Low Annealing Temperature [52] [53] | - Increase annealing temperature incrementally (1-2°C steps).- Use a gradient thermal cycler for optimization.- Ensure T~m~ is 3-5°C below the lowest primer T~m~. |
| Problematic Primer Design [52] | - Review primer design for specificity and secondary structures.- Avoid complementary sequences at 3' ends.- Use online primer design tools with validation. |
| Excess Primer Concentration [52] [54] | - Optimize primer concentration (usually 0.1-1 μM).- High concentrations promote primer-dimer formation. |
| Inappropriate DNA Polymerase [52] | - Use hot-start DNA polymerases to prevent non-specific amplification during reaction setup.- Set up reactions on ice or add polymerase last. |
| Excess Mg²⁺ Concentration [52] [53] | - Review and lower Mg²⁺ concentration.- Optimize for each primer-template system. |
| High Template Concentration [52] | - Lower the quantity of input DNA.- Excessive DNA can increase mispriming events. |
| Contamination with Exogenous DNA [53] | - Use dedicated work areas and equipment.- Use aerosol-resistant pipette tips.- Include negative controls. |
Primer-Dimers and Smears
Primer-dimers are short, artifactual amplification products formed by the annealing and extension of two primers [54]. They appear as a band of approximately 20-60 bp on a gel. Smears indicate non-specific amplification of random DNA fragments.
- Primer-Dimer Resolution: Reduce primer concentration [52], set up reactions on ice [53], use hot-start polymerase [52] [53], and ensure primers do not have complementary 3' ends [42].
- Smear Resolution: Dilute the DNA template to reduce the probability of non-specific priming [54], re-extract DNA to minimize fragmentation [54], replace old or degraded primers [52] [54], and increase annealing temperature [54].
Experimental Protocols for PCR Optimization
Standard PCR Reaction Setup Protocol
This protocol provides a methodology for setting up a conventional PCR experiment that will result in amplification of most target sequences [42].
- Design Primers adhering to the core principles outlined in Section 2.1 [42].
- Prepare Reagents:
- Arrange thawed reagents in an ice bucket: 10X PCR buffer, dNTPs, MgCl₂, primers, template DNA, DNA polymerase, and sterile water.
- If setting up multiple reactions, prepare a Master Mix of common components to ensure consistency [42].
- Assemble Reaction Mixture in a 0.2 ml thin-walled PCR tube on ice [42]:
Table 3: Standard 50 μl PCR Reaction Setup
Component Final Concentration/Amount Volume to Add (Example) Sterile Water Q.S. to 50 μl 33 μl 10X PCR Buffer 1X 5 μl dNTP Mix 200 μM (each) 1 μl of 10 mM mix MgCl₂ 1.5-4.0 mM (optimize) Variable (e.g., 0-8 μl of 25 mM) Forward Primer 20-50 pmol 1 μl of 20 μM Reverse Primer 20-50 pmol 1 μl of 20 μM Template DNA 1-1000 ng Variable (e.g., 0.5 μl) DNA Polymerase 0.5-2.5 units 0.5 μl Total Volume 50 μl - Mix the reaction gently by pipetting up and down 20 times. Do not vortex [42].
- Place tubes in a thermal cycler and begin the appropriate cycling program.
Thermal Cycling Optimization Protocol
Optimal thermal cycling conditions are critical for specific and efficient amplification. The standard three-step protocol is described below, with optimization guidelines.
- Initial Denaturation: 95°C for 2-5 minutes. This step fully denatures complex DNA and activates hot-start polymerases [51].
- Amplification Cycles (25-40 cycles):
- Denaturation: 95°C for 15-30 seconds.
- Annealing: Temperature must be optimized (see below) for 15-60 seconds.
- Extension: 72°C for 1 minute per 1 kb of product. Use DNA polymerases with high processivity for long targets to allow for shorter extension times [52].
- Final Extension: 72°C for 5-15 minutes to ensure all amplicons are fully extended [52].
Annealing Temperature Optimization:
- Calculate the T~m~ of both primers using an appropriate formula or software.
- Start with an annealing temperature 3-5°C below the lowest T~m~ [52] [42].
- If non-specific products occur, increase the temperature stepwise in 1-2°C increments [52].
- Use a gradient thermal cycler to test a range of annealing temperatures simultaneously [53].
The Scientist's Toolkit: Essential Research Reagents
The following table details key reagents and materials critical for successful PCR setup and troubleshooting.
Table 4: Essential Research Reagents and Materials for PCR
| Reagent/Material | Function/Purpose |
|---|---|
| Hot-Start DNA Polymerase [52] [53] | Reduces non-specific amplification and primer-dimer formation by remaining inactive until the first high-temperature denaturation step. |
| dNTP Mix [42] | Provides the essential nucleotide building blocks (dATP, dCTP, dGTP, dTTP) for DNA synthesis by the polymerase. |
| MgCl₂ or MgSO₄ Solution [52] [42] | Cofactor essential for DNA polymerase activity. Concentration requires optimization and is critical for reaction specificity and yield. |
| PCR Buffer [42] | Provides the optimal ionic environment and pH (typically Tris-HCl) for polymerase activity and DNA denaturation/annealing. |
| PCR Additives (DMSO, Betaine) [52] [42] | Aid in denaturing complex templates (e.g., GC-rich sequences) by reducing secondary structures, improving yield and specificity. |
| Template DNA (High-Quality) [52] | The target DNA to be amplified. Must be of sufficient purity (free of inhibitors like phenol or EDTA) and integrity. |
| Nuclease-Free Water [42] | Used to reconstitute primers and bring the reaction to its final volume. Must be sterile and nuclease-free to prevent degradation of reaction components. |
Decision Framework for PCR Troubleshooting
The following workflow diagram provides a logical, step-by-step guide for diagnosing and resolving common PCR problems, integrating the concepts and protocols detailed in this guide.
Diagram 1: Logical workflow for systematic PCR troubleshooting.
Optimizing Annealing Temperature and Mg2+ Concentration
Within the broader context of establishing proper primer design guidelines for polymerase chain reaction (PCR) research, the optimization of reaction conditions is a critical step that follows in silico primer design. Even with perfectly designed primers, the specificity, efficiency, and yield of a PCR amplification are profoundly influenced by two key physical and chemical parameters: the annealing temperature (Ta) and the concentration of magnesium ions (Mg2+). The annealing temperature directly controls the stringency of primer binding to the template DNA, while magnesium chloride (MgCl₂) acts as an essential cofactor for DNA polymerase activity and stabilizes nucleic acid interactions [55] [41]. This article provides detailed application notes and protocols for systematically optimizing these parameters, thereby enabling researchers and drug development professionals to achieve robust and reproducible PCR results.
The Scientist's Toolkit: Essential Reagents for PCR Optimization
Successful optimization relies on a set of key reagents, each fulfilling a specific role in the reaction mechanism. The table below details these essential components.
Table 1: Key Research Reagent Solutions for PCR Optimization
| Reagent | Function | Optimal Concentration Range |
|---|---|---|
| Primers [41] | Synthetic oligonucleotides that bind flanking sequences of the target DNA to initiate amplification. | 0.1 - 1.0 µM |
| DNA Polymerase [41] | Enzyme that catalyzes the template-directed synthesis of new DNA strands. | 1 - 2 units per 50 µL reaction |
| dNTPs [41] | Deoxynucleoside triphosphates (dATP, dCTP, dGTP, dTTP) serving as the building blocks for new DNA strands. | 0.2 mM of each dNTP |
| MgCl₂ [56] [57] | Essential cofactor for DNA polymerase activity; stabilizes the primer-template duplex and affects reaction specificity. | 1.5 - 4.5 mM (template-dependent) |
| Buffer Additives (e.g., DMSO, Betaine) [55] | Assist in amplifying challenging templates by reducing secondary structures or homogenizing DNA stability. | DMSO: 2-10%; Betaine: 1-2 M |
The Interplay of Primer Design, Annealing Temperature, and Mg2+
The core objective of PCR optimization is to find conditions that promote specific and efficient primer binding while supporting maximal enzyme activity. This involves a delicate balance between primer design, annealing temperature, and Mg2+ concentration. Well-designed primers with a matched melting temperature (Tm) form the foundation. The annealing temperature, typically set 3-5°C below the primer Tm, provides the stringency. Finally, the Mg2+ concentration fine-tunes the reaction thermodynamics and polymerase fidelity [55] [6] [41]. The following workflow outlines the logical sequence for a systematic optimization process.
Establishing the Optimal Annealing Temperature (Ta)
Theoretical Calculation
The annealing temperature is intrinsically linked to the primers' melting temperature (Tm), which is the temperature at which 50% of the primer-DNA duplexes are dissociated [2]. For standard primers with a length of 18-30 bases and a GC content of 40-60%, the Tm can be calculated using software tools that employ nearest-neighbor algorithms, which require input of the specific reaction conditions, particularly the Mg2+ concentration [6]. A common rule of thumb is to set the initial annealing temperature (Tainitial) 3-5°C below the calculated Tm of the primers [6] [58]. A more precise empirical formula is [58]: TaOpt = 0.3 x Tm(primer) + 0.7 x Tm(product) – 14.9 where Tm(primer) is the Tm of the less stable primer and Tm(product) is the melting temperature of the PCR product.
Experimental Optimization via Gradient PCR
Theoretical calculations provide a starting point, but experimental determination is crucial for optimal results. This is achieved using a gradient thermal cycler.
Table 2: Annealing Temperature Optimization Guide
| Parameter | Recommendation | Consequence of Deviation |
|---|---|---|
| Initial Ta Range [55] | Set a gradient spanning 5-10°C below to 2-3°C above the calculated Tm. | A range that is too narrow may miss the optimum. |
| Optimal Result [55] | The highest temperature that yields a strong, specific amplicon. | Maximizes specificity by discouraging off-target binding. |
| Ta Too Low [55] [58] | Permits non-specific primer binding and imperfect annealing. | Leads to smearing or multiple bands on a gel. |
| Ta Too High [55] [58] | Prevents efficient primer binding, even to the specific target. | Results in weak or no amplification. |
Protocol: Gradient PCR for Annealing Temperature Optimization
- Reaction Setup: Prepare a master mix containing all standard PCR components: template DNA, primers (0.2 µM each), dNTPs (0.2 mM each), DNA polymerase (1.25 U), MgCl₂ (start at 1.5 mM), and reaction buffer. Aliquot the master mix evenly into PCR tubes.
- Thermal Cycling: Program the thermal cycler with a gradient across the annealing step. A typical program includes:
- Initial Denaturation: 98°C for 2 minutes.
- Amplification Cycle (25-30 cycles):
- Denaturation: 98°C for 15 seconds.
- Annealing: GRADIENT from 55°C to 70°C for 30 seconds.
- Extension: 72°C for 1 minute per kb of amplicon.
- Final Extension: 72°C for 5 minutes.
- Product Analysis: Analyze the PCR products using agarose gel electrophoresis. Identify the well with the brightest band of the expected size and the highest annealing temperature that produced it. This temperature is the optimal Ta.
The Universal Annealing Buffer Approach
To circumvent the need for individual Ta optimization for every primer set, specially formulated PCR systems are available. These feature novel buffers with an isostabilizing component that allows for a universal annealing temperature of 60°C for a wide range of primers with different Tms, without compromising yield or specificity [59]. This innovation significantly simplifies protocol standardization, especially when amplifying multiple targets with different primer sets.
Optimizing Magnesium Ion (Mg2+) Concentration
The Critical Role of Mg2+
Magnesium chloride (MgCl₂) is an indispensable PCR component. It serves as a cofactor for DNA polymerase by facilitating the formation of phosphodiester bonds during nucleotide incorporation [41]. Furthermore, Mg2+ stabilizes the double-stranded structure of the primer-template duplex by neutralizing the negative charges on the DNA phosphate backbone, thereby influencing the observed Tm of the duplex [56] [41].
Determining the Optimal Concentration
The optimal MgCl₂ concentration must be determined empirically, as it is influenced by primer-template composition, dNTP concentration (which chelates Mg2+), and the presence of EDTA in the template solution [55] [41]. A meta-analysis of 61 studies identified an optimal range of 1.5 to 3.0 mM for efficient PCR performance, with every 0.5 mM increase raising the DNA melting temperature by approximately 1.2°C [56].
Table 3: Mg2+ Concentration Optimization Guide
| Condition | Recommended [MgCl₂] | Impact on PCR |
|---|---|---|
| General Optimal Range [56] [57] | 1.5 - 3.0 mM | Balances high efficiency with high specificity. |
| Low [MgCl₂] [55] [57] | < 1.5 mM | Reduced enzyme activity, weak or failed amplification. |
| High [MgCl₂] [55] [57] | > 3.0 - 4.5 mM | Non-specific amplification, primer-dimer formation, reduced fidelity. |
| Complex Templates (gDNA) [56] | Towards higher end of optimal range | Compensates for template complexity. |
| High dNTP Concentration [41] | Requires higher [MgCl₂] | dNTPs chelate free Mg2+, reducing its availability for the polymerase. |
Protocol: Mg2+ Titration at Fixed Annealing Temperature
- Reaction Setup: Prepare a series of identical PCR master mixes, varying only the concentration of MgCl₂. A standard titration series is: 0.5, 1.0, 1.5, 2.0, 2.5, 3.0, 3.5, 4.0, and 4.5 mM. Keep the concentration of all other components, especially dNTPs, constant.
- Thermal Cycling: Run the PCR using the optimized annealing temperature (Ta) determined in Section 4.2.
- Product Analysis: Analyze the results via agarose gel electrophoresis. The optimal Mg2+ concentration is the lowest concentration that produces a strong, specific amplicon with minimal to no non-specific products or primer-dimers.
Integrated Experimental Workflow
For a novel PCR assay, a sequential optimization strategy is most efficient. The following diagram illustrates the complete workflow, integrating the optimization of both annealing temperature and Mg2+ concentration.
Upon successful optimization, researchers can expect a single, clear band of the expected amplicon size on an agarose gel, indicating high specificity and yield. The systematic approach outlined in this protocol—beginning with sound primer design, followed by empirical determination of the annealing temperature via gradient PCR, and culminating in fine-tuning with Mg2+ titration—provides a robust framework for overcoming common PCR challenges. By investing time in this optimization process, scientists and drug developers can ensure that their PCR assays are reliable, reproducible, and capable of supporting high-stakes downstream applications such as cloning, sequencing, and diagnostic assay development.
In the realm of molecular biology, the polymerase chain reaction (PCR) serves as a foundational technique with applications spanning from basic research to clinical diagnostics and drug development [60]. The success and reproducibility of PCR experiments are critically dependent on the quality of one of its most fundamental components: the oligonucleotide primers. Proper primer design is undoubtedly crucial, but even well-designed primers can yield unreliable results if subsequent steps—purification, accurate concentration verification, and appropriate storage—are not rigorously followed. Failures in PCR can often be traced to issues in these areas, leading to non-specific amplification, reduced yield, or complete reaction failure [42]. This application note provides detailed protocols and guidelines for assessing and maintaining primer quality, framed within the broader context of ensuring reliable and reproducible PCR research.
Oligonucleotide Purification Methods
Following chemical synthesis, oligonucleotide preparations contain a mixture of full-length products and failure sequences (shorter truncations resulting from inefficient coupling reactions) [61]. The method chosen for purifying the full-length primer from these impurities directly impacts the performance and reliability of subsequent PCR experiments.
Purification Selection Guide
The choice of purification method depends on the oligonucleotide length, the presence of modifications, the scale of synthesis, and the required purity for the downstream application [61]. The table below summarizes the common purification methods, their characteristics, and typical applications.
Table 1: Oligonucleotide Purification Methods for PCR Applications
| Purification Method | Mechanism | Purity | Key Advantages | Key Limitations | Ideal PCR Applications |
|---|---|---|---|---|---|
| Desalting | Removal of small molecules and salts via precipitation or sizing resins [61]. | Does not remove failure sequences [61]. | Standard for most vendors; cost-effective; applicable to all scales and lengths [61]. | Does not remove failure sequences or deletion byproducts [61]. | Standard PCR, sequencing primers, microarrays, siRNA screening [61]. |
| Cartridge Purification | Hydrophobic separation of full-length oligos from failure sequences on a column [61]. | >80% [61]. | Removes failure sequences; useful for dye-labeled primers [61]. | Does not remove internal deletions; limited to specific scales and lengths (7–55 bp) [61]. | Fluorescent sequencing, gel shift assays [61]. |
| HPLC | High-resolution reversed-phase hydrophobic separation [61]. | >85% [61]. | Removes failure sequences and internal deletions; high purity; ideal for large scales [61]. | Not ideal for long oligonucleotides (>55 bp); secondary structures can complicate purification [61]. | cDNA library construction, specialty PCR, cloning, mutagenesis, antisense, NGS, therapeutics [61]. |
| PAGE | Denaturing polyacrylamide gel electrophoresis for size-based separation [61]. | >90% [61]. | Highest purity; removes failure sequences and deletions; works for a wide range of lengths (7–100 bp) [61]. | Time-consuming; significant yield reduction; not compatible with some modifications (e.g., fluorophores) [61]. | cDNA library construction, specialty PCR, cloning, mutagenesis, NGS [61]. |
Application-Based Purification Protocol
For applications requiring high precision, such as cloning, mutagenesis, or next-generation sequencing, the use of full-length primers is critical. Inefficient coupling during synthesis means that for a 30mer oligonucleotide with 99.9% coupling efficiency per base, the theoretical yield of full-length product is only 97% [61]. This percentage decreases as oligonucleotide length increases.
Protocol: Selecting Purification by Application
- Standard PCR and Sequencing: For routine amplification where the highest purity is not critical, desalted primers are generally sufficient and cost-effective [61].
- PCR with Critical 5' Modifications: For primers containing 5' additions such as restriction enzyme sites or RNA polymerase promoters, cartridge, HPLC, or PAGE purification is mandatory. Failure sequences will be missing these 5' sequences, leading to a population of PCR products without the intended modification [61].
- Site-Directed Mutagenesis: To achieve the highest efficiency of mutagenesis, especially if the mutation is near the 5' end of the primer, HPLC or PAGE-purified primers are recommended to ensure a homogeneous population of full-length primers [61].
- Quantitative PCR (qPCR) Probe Purification: Hydrolysis probes (e.g., TaqMan) labeled with fluorescent dyes and quenchers should be HPLC-purified to ensure optimal performance and accurate quantification [61] [6].
The following workflow diagram provides a guideline for selecting the appropriate purification method.
Concentration Verification of Primers and Probes
Accurate knowledge of primer and probe concentration is essential for achieving optimal PCR efficiency and reproducibility. Inconsistent primer concentrations are a common source of PCR failure and variability [62].
Spectrophotometric Quantification Protocol
This protocol describes how to determine the concentration of a primer or probe solution using UV spectrophotometry.
Materials:
- Spectrophotometer (e.g., NanoDrop)
- Cuvette or microvolume pedestal with a known path length (e.g., 0.4 cm)
- Nuclease-free water or TE buffer
- Purified oligonucleotide stock solution
Procedure:
- Dilution: Dilute the oligonucleotide stock solution to a suitable concentration for spectrophotometric analysis. A 1:50 to 1:100 dilution in nuclease-free water or TE buffer is typically appropriate. Record the dilution factor (DF).
- Measurement: Measure the absorbance of the diluted sample at 260 nm (A₂₆₀). Note the path length (L) of the cuvette or pedestal used.
Calculate Extinction Coefficient: Determine the theoretical extinction coefficient (ε) for the oligonucleotide based on its sequence. This is the sum of the extinction coefficients for each nucleotide in the sequence [62]. Table 2: Nucleotide Extinction Coefficients
Nucleotide Extinction Coefficient (M⁻¹cm⁻¹) Adenine (A) 15,200 Cytosine (C) 7,050 Guanine (G) 12,010 Thymine (T) 8,400 Example Calculation: For primer sequence CAAGACAAGAAAATCCCTGTGG:
- 9 As: 9 × 15,200 = 136,800
- 5 Cs: 5 × 7,050 = 35,250
- 5 Gs: 5 × 12,010 = 60,050
- 3 Ts: 3 × 8,400 = 25,200
- Total ε = 257,300 M⁻¹cm⁻¹ [62]
For dye-labeled probes, the extinction coefficients of the fluorophores must be added to the oligonucleotide's ε. For example, add 20,958 for FAM and 31,980 for TAMRA [62].
- Calculate Concentration: Use the following formula to calculate the concentration (C) of the diluted primer sample in Molarity (M): C (M) = (A₂₆₀ × DF) / (ε × L) Example: With A₂₆₀ = 0.135, DF = 100, ε = 257,300 M⁻¹cm⁻¹, and L = 0.4 cm: C = (0.135 × 100) / (257,300 × 0.4) = 13.5 / 102,920 ≈ 0.000131 M or 131 µM [62].
Primer Reconstitution Protocol
Lyophilized primers must be reconstituted to create a concentrated stock solution.
Materials:
- Lyophilized primer
- Nuclease-free water or TE buffer (10 mM Tris pH 8.0, 1 mM EDTA)
- Sterile microcentrifuge tubes
Procedure:
- Centrifuge: Briefly centrifuge the tube containing the lyophilized primer to collect the powder at the bottom.
- Calculate Volume: Determine the volume of buffer required to achieve your desired stock concentration (typically 100 µM). Use the formula: Volume (µL) = (Mass of primer in nmol) × 10 / Desired Concentration (µM) Example: To reconstitute 120,000 pmol (0.12 µmol) of primer to a 60 µM stock: Mass in µmol = 120,000 pmol / 1,000,000 = 0.12 µmol Volume (L) = 0.12 µmol / 60 µM = 0.002 L = 2 mL [62] [63].
- Reconstitute: Add the calculated volume of nuclease-free water or TE buffer to the tube. Vortex thoroughly and briefly centrifuge to ensure the pellet is fully dissolved.
- Create Working Aliquots: Dilute the stock solution to create a working stock (typically 10-100 µM for primers, 2-10 µM for probes). This prevents repeated freeze-thaw cycles of the concentrated stock [62] [63].
The process of verifying concentration and preparing working solutions is summarized below.
Primer Storage and Stability
Proper storage is critical for maintaining primer integrity and ensuring long-term reagent stability. Degraded primers are a common, yet often overlooked, source of PCR failure.
Storage Conditions Protocol
Materials:
- Nuclease-free water or TE buffer
- Freezer (-20°C)
- Refrigerator (4°C)
- Sterile, nuclease-free microcentrifuge tubes
Procedure:
Long-Term Stock Solutions:
- Resuspend lyophilized primers in nuclease-free water or TE buffer (10 mM Tris pH 8.0, 1 mM EDTA) to a high concentration (e.g., 100 µM) [63].
- Aliquot the stock solution into several tubes to minimize freeze-thaw cycles.
- Store aliquots at -20°C. Under these conditions, primers are stable for years [63].
Short-Term Working Solutions:
- Prepare working stocks by diluting the concentrated stock in nuclease-free water.
- Working stocks can be stored at 4°C for weeks to months without significant degradation [63].
Note: While TE buffer is preferred for long-term storage due to the stabilizing effect of Tris and the nuclease-inhibiting property of EDTA, primers for PCR can be resuspended in nuclease-free water if they will be used relatively quickly [63].
The Scientist's Toolkit
This table details essential reagents and materials required for the protocols described in this application note.
Table 3: Research Reagent Solutions for Primer Quality Assessment
| Item | Function/Description | Protocol Usage |
|---|---|---|
| TE Buffer (10 mM Tris pH 8.0, 1 mM EDTA) | Resuspension buffer for long-term primer storage; Tris stabilizes pH, EDTA chelates Mg²⁺ and inhibits nucleases [63]. | Primer Storage |
| Nuclease-Free Water | Solvent for reconstituting and diluting primers; free of RNases and DNases to prevent oligonucleotide degradation. | Concentration Verification, Primer Storage |
| UV Spectrophotometer | Instrument for measuring the absorbance of nucleic acids at 260 nm to determine concentration and assess purity (via A₂₆₀/A₂₈₀ ratio). | Concentration Verification |
| Thermal Cycler | Instrument that automates the temperature cycling required for PCR amplification. | Experimental Validation |
| Agarose Gel Electrophoresis System | Standard method for separating and visualizing DNA fragments by size to check amplicon specificity and the presence of primer dimers. | Experimental Validation |
Experimental Validation of Primer Performance
After verifying primer quality through the aforementioned methods, functional validation in a PCR reaction is a critical final step.
Protocol: Primer Performance Check via Endpoint PCR
- Reaction Setup: Set up a standard 50 µL PCR reaction [42]:
- 5 µL of 10X PCR Buffer (with MgCl₂ if not included)
- 1 µL of 10 mM dNTP Mix (200 µM final)
- 1 µL of 20 µM Forward Primer (20 pmol, 0.4 µM final)
- 1 µL of 20 µM Reverse Primer (20 pmol, 0.4 µM final)
- 0.5 µL of DNA Polymerase (e.g., Taq, 0.5-2.5 units)
- 1-1000 ng of DNA Template
- Nuclease-free water to 50 µL
- Thermal Cycling: Run the reaction in a thermal cycler using the following typical steps [60] [42]:
- Initial Denaturation: 95°C for 2-5 minutes.
- Amplification (25-40 cycles):
- Final Extension: 72°C for 5-10 minutes.
- Analysis: Analyze 5-10 µL of the PCR product by agarose gel electrophoresis. A single, sharp band of the expected size indicates specific amplification and successful primer function. A smear or multiple bands suggest non-specific binding, while a strong band very low in the gel may indicate primer-dimer formation, often associated with impurities or suboptimal concentrations [42].
Robust and reproducible PCR data is a cornerstone of reliable biological research and diagnostic development. This application note underscores that meticulous attention to primer quality beyond the design phase—through strategic purification, precise concentration verification, and disciplined storage practices—is not merely a procedural formality but a critical determinant of experimental success. By integrating these protocols for assessing primer quality into their standard workflows, researchers and drug development professionals can significantly reduce experimental variability, troubleshoot PCR failures more effectively, and generate data that meets the high standards of reproducibility required in modern science. Adherence to these guidelines, alongside the MIQE (Minimum Information for Publication of Quantitative Real-Time PCR Experiments) guidelines for qPCR, ensures the integrity and reliability of molecular data from the very first step of the process [64] [65].
Validating Primer Specificity with BLAST and Checking for Template Secondary Structures
Within the broader framework of establishing robust primer design guidelines for PCR research, two critical and often under-validated steps are ensuring primer specificity and assessing template secondary structures. Specific primers bind uniquely to the intended target sequence, thereby preventing amplification of non-target genes or regions, a phenomenon known as cross-homology [19]. Concurrently, stable secondary structures in the DNA template, such as hairpins, can significantly hinder primer annealing and polymerase progression, leading to reduced amplification efficiency or complete PCR failure [66] [67]. This protocol provides detailed methodologies for using NCBI's Primer-BLAST tool for in silico specificity validation and for evaluating template sequences for detrimental secondary structures, forming an essential pre-experimental workflow for researchers, scientists, and drug development professionals.
Primer Specificity Validation Using Primer-BLAST
The Basic Local Alignment Search Tool (BLAST) from the National Center for Biotechnology Information (NCBI) is a powerful algorithm for comparing nucleotide sequences against extensive databases. Primer-BLAST integrates this capability with primer design and checking features, allowing researchers to determine whether a primer pair will generate a PCR product only on the intended template or if it will also amplify unintended genomic targets [10] [68]. This in silico validation is crucial for minimizing false positives and ensuring data accuracy in applications like diagnostic assay development and gene expression analysis.
Step-by-Step Protocol for Primer-BLAST
- Access the Tool: Navigate to the NCBI Primer-BLAST website [68].
- Input Template Sequence (Optional but Recommended): In the "PCR Template" section, enter the target sequence using its NCBI accession number (e.g., an RefSeq mRNA ID) or in FASTA format. Providing a template allows Primer-BLAST to design primers de novo or verify the positioning of your pre-designed primers.
- Enter Pre-Designed Primer Sequences: In the "Primer Parameters" section, input the forward and reverse primer sequences in the 5' to 3' direction.
- The forward primer sequence should be provided as it is (5'->3' on the plus strand of the template).
- The reverse primer sequence should be provided as the actual sequence (5'->3' on the minus strand of the template) [10].
- Enter primer sequences only, without any additional characters.
- Set Specificity Checking Parameters: This is a critical step for obtaining meaningful results.
- Organism: Specify the source organism of the DNA (e.g., Homo sapiens). This restricts the specificity check to a relevant database, improving search speed and precision [10] [68].
- Database: Select the smallest database likely to contain your target. For standard mRNA targets,
Refseq mRNAis often suitable. For broadest coverage,Nucleotide collection (nr/nt)can be used, though it is slower [10] [68].
- Adjust Advanced Parameters (As Needed):
- To design primers that amplify mRNA but not genomic DNA, select
Primer must span an exon-exon junction[10]. - For pre-designed primers, you can use an alternative BLAST strategy by concatenating the two primer sequences with 5-10 'N's in between and using the
Somewhat similar sequences (blastn)program with a decreased word size (e.g., 7) [69].
- To design primers that amplify mRNA but not genomic DNA, select
- Execute and Analyze: Click "Get Primers". The results will display your primer pairs and a list of all predicted PCR targets (amplicons) in the selected database. A specific primer pair should produce a single, dominant amplicon corresponding to your intended target.
Table 1: Key Parameters for Primer-BLAST Specificity Validation
| Parameter | Recommended Setting | Purpose and Rationale |
|---|---|---|
| Organism | Source organism (e.g., Mus musculus) | Limits specificity check to a relevant taxonomic group, drastically improving speed and result relevance [10]. |
| Database | Refseq mRNA; Nucleotide collection (nr/nt) | Refseq mRNA is a curated, non-redundant set ideal for gene-specific work. nr/nt provides the broadest coverage for exhaustive checks [10] [68]. |
| Exon Junction | "Primer must span an exon-exon junction" | Ensures amplification is specific to spliced mRNA, preventing false positives from contaminating genomic DNA [10]. |
| Max Product Size | 1000-2000 bp (or higher) | Sets an upper limit for detecting off-target amplicons; very large non-specific products are less of a concern due to low PCR efficiency [10]. |
Workflow Diagram
The following diagram illustrates the logical workflow for the primer specificity validation process:
Diagram 1: Workflow for validating primer specificity with BLAST.
Checking for Template Secondary Structures
Impact of Secondary Structures
The DNA template itself can form stable secondary structures, such as hairpins, which involve intra-strand base pairing. These structures are particularly problematic when they form in the vicinity of primer-binding sites. Hairpins and other structures can competitively inhibit primer binding because the template sequence is already self-annealed [66]. Evidence indicates that when a hairpin is formed inside the amplicon, amplification is notably suppressed, with the magnitude of suppression increasing with longer stems and smaller loops [66]. In severe cases, such as with 20-bp stems, no targeted amplification products are formed. Furthermore, template secondary structure has been shown to promote polymerase jumping during amplification, leading to aberrant products that complicate analysis [67].
Protocol for In Silico Analysis of Template Structures
- Sequence Selection: Extract a sequence fragment of at least 60 bases upstream and downstream of each primer-binding site. This covers the region both inside and outside the amplicon where stable secondary structures could interfere with primer annealing or polymerase extension [66].
- Utilize Prediction Tools: Use oligonucleotide analysis software to predict secondary structure formation. Key tools include:
- Set Analysis Parameters: Run the analysis at your intended PCR annealing temperature (typically 55–65°C). Structures that remain stable at this temperature are most likely to interfere.
- Interpret Results: Assess the predicted structures for stability using the calculated Gibbs Free Energy (ΔG). A more negative ΔG indicates a more stable structure. Structures with highly negative ΔG values (e.g., < -9.0 kcal/mol) that form directly over primer-binding sites are a major concern and warrant sequence redesign [6].
Table 2: Guidelines for Assessing Template Secondary Structures
| Structure Type | Location of Concern | Acceptance Threshold | Consequence if Unstable |
|---|---|---|---|
| Hairpin | Within primer-binding site or amplicon | ΔG > -3 kcal/mol (internal); ΔG > -2 kcal/mol (3' end) [19] | Drastic suppression of amplification efficiency; potential for polymerase jumping and aberrant products [66] [67]. |
| Internal Loops | Anywhere within the ~120 bp analyzed region | Visually inspect for large, stable loops | Can impede polymerase processivity during extension, leading to truncated products and reduced yield. |
Workflow Diagram
The following diagram outlines the process for checking and addressing template secondary structures:
Diagram 2: Workflow for checking template secondary structures.
The Scientist's Toolkit: Research Reagent Solutions
Table 3: Essential Reagents and Tools for Primer Validation and PCR
| Reagent / Tool | Function / Purpose |
|---|---|
| NCBI Primer-BLAST | An online tool that combines primer design with BLAST search to check primer specificity against nucleotide databases [10] [68]. |
| IDT OligoAnalyzer Tool | A free web tool for analyzing oligonucleotide properties, including melting temperature (Tm), hairpins, self-dimers, and heterodimers [6]. |
| UNAFold Tool | A tool for predicting the secondary structure of nucleic acids, useful for assessing template folding [6]. |
| High-Fidelity DNA Polymerase | A thermostable enzyme with proofreading activity for accurate DNA amplification, often supplied with optimized reaction buffers. |
| DNase I, RNase-free | An enzyme used to treat RNA samples to remove residual genomic DNA before reverse transcription-qPCR, preventing false positives [6]. |
| qPCR Master Mix | An optimized ready-to-use solution containing DNA polymerase, dNTPs, salts, and buffers, often including inhibitors-tolerant formulations to improve efficiency [70]. |
Integrating in silico validation of primer specificity using Primer-BLAST and thorough checking of template secondary structures into the standard primer design workflow is fundamental for successful PCR experiments. These protocols provide a critical safety net, identifying potential causes of failure—such as non-specific amplification and primer-binding inhibition—before costly and time-consuming wet-lab experiments begin. For researchers in drug development and molecular biology, adherence to these guidelines enhances the reliability, reproducibility, and accuracy of PCR-based results, forming a cornerstone of proper primer design within the broader context of rigorous scientific research.
Ensuring Accuracy: qPCR, Digital PCR Validation, and Method Comparison
Internal Controls and Standard Curves for qPCR Assay Validation
Quantitative PCR (qPCR) is a powerful technique used extensively in research and drug development for quantifying nucleic acids. A core principle behind reliable qPCR data is thorough assay validation, which ensures that the results are accurate, reproducible, and fit for their intended purpose [71]. The noticeable lack of technical standardization has been a significant obstacle in translating qPCR-based tests from research to clinical applications [72]. Two fundamental components of this validation process are the use of internal controls and standard curves. Internal controls, often referred to as endogenous controls or reference genes, correct for variations in sample quality and loading, while standard curves are essential for determining the quantitative capabilities of the assay, such as its efficiency, dynamic range, and sensitivity [73]. For researchers and pharmaceutical scientists developing new therapies, a properly validated qPCR assay is not just a technical requirement; it is critical for making informed decisions during drug discovery and development, where erroneous data can lead to wasted resources and misdirected efforts [71] [74]. This document outlines the detailed protocols and application notes for incorporating these vital elements into a robust qPCR assay validation framework, situated within the broader context of proper primer design.
The Role of Internal Controls
Conceptual Framework and Definitions
In qPCR, an internal control (or endogenous control) is a gene that is constitutively and stably expressed across all test samples. Its primary function is to normalize the data for non-biological variations, such as differences in sample collection, nucleic acid extraction efficiency, sample quality, and cDNA synthesis efficiency [73]. This normalization is crucial for obtaining accurate relative quantification of the gene of interest. The conceptual relationship between the internal control and the target gene is summarized in the diagram below.
Selection and Validation of Internal Controls
The choice of an appropriate internal control is not one-size-fits-all; it must be empirically validated for the specific experimental conditions, including the tissue type, cell line, and treatment. Commonly used reference genes include ß-actin, glyceraldehyde-3-phosphate dehydrogenase (GAPDH), and ribosomal RNA (rRNA) [73]. However, their expression can vary under certain conditions.
Validation Protocol:
- Candidate Selection: Select 2-3 potential reference genes from literature or databases.
- Assay Design: Design qPCR assays for each candidate with high efficiency (90-110%) and specificity.
- Sample Testing: Run the candidate assays on a representative set of your experimental samples (e.g., including both control and treated groups).
- Stability Analysis: Calculate the expression stability of each candidate gene using specialized algorithms (e.g., geNorm, NormFinder). The gene with the highest stability (lowest variation) across all samples is the most suitable internal control.
- Final Application: Use the validated internal control to normalize the target gene data in all subsequent experiments using the comparative CT (ΔΔCT) method.
Utilizing Standard Curves for Quantification
Absolute vs. Relative Quantification
qPCR experiments can be broadly categorized into two quantification strategies, each with distinct purposes and requirements for standard curves. The following table compares these two primary methods.
Table 1: Comparison of Absolute and Relative Quantification Methods in qPCR
| Feature | Absolute Quantification (Standard Curve Method) | Relative Quantification |
|---|---|---|
| Overview | Determines the exact copy number or concentration of the target in a sample by comparing to a standard curve of known quantities [73]. | Analyzes changes in gene expression in a given sample relative to another reference sample (e.g., an untreated control) [73]. |
| Example Use Case | Determining the absolute number of viral copies in a patient sample [73]. | Measuring fold-change in gene expression in response to a drug treatment [73]. |
| Standard Curve | Mandatory. Requires a serial dilution of a standard with a known, absolute concentration (e.g., plasmid DNA, in vitro transcribed RNA) [73]. | Used in the standard curve method, but the units are relative. The comparative CT method does not require a standard curve [73]. |
| Internal Control | Not always required, but can be used to normalize for sample-to-sample variation. | Mandatory. An endogenous control is used to normalize all data to the reference sample [73]. |
| Key Output | Absolute copy number or concentration (e.g., copies/µL). | Fold-change in expression relative to a calibrator sample. |
| Advantages | Provides a concrete, absolute value for the target amount. | High throughput; the comparative CT method is efficient and eliminates dilution errors [73]. |
| Critical Guidelines | The standard must be a pure species (e.g., plasmid DNA without RNA contamination). Accurate pipetting for serial dilutions is critical. Diluted standards should be aliquoted and stored at -80°C [73]. | The amplification efficiencies of the target and endogenous control must be approximately equal for the comparative CT method to be valid [73]. |
Protocol for Generating a Standard Curve
A properly constructed standard curve is the cornerstone of a quantitative qPCR assay. The workflow below outlines the key steps and decision points in this process.
Detailed Methodology:
Preparation of Standard:
- For absolute quantification, use a standard of known concentration and purity, such as plasmid DNA or in vitro transcribed RNA. The concentration is measured by A260 and converted to copy number using the molecular weight [73].
- For relative quantification, any stock nucleic acid containing the target can be used, as the units are relative and will drop out during calculation [73].
Creating a Serial Dilution Series:
- Prepare a minimum of a 5-point, 10-fold serial dilution of the standard, spanning the expected concentration range of your experimental samples. A 7-point, 10-fold dilution series is recommended for a well-optimized assay [71].
- Pipette accurately, as errors in dilution will directly impact the accuracy of the standard curve and all subsequent quantifications.
Running the qPCR Assay:
- Run each dilution in triplicate on the same qPCR plate as your unknown samples.
- Record the CT value for each replicate.
Data Analysis and Acceptance Criteria:
- Plot the mean CT value for each standard dilution against the logarithm of its known concentration.
- Perform linear regression analysis on the plot. A robust standard curve should have:
- The linear dynamic range is the range of template concentrations over which these criteria are met. Your experimental samples should fall within this range for accurate quantification.
Integration with Primer Design Guidelines
The validity of internal controls and standard curves is entirely dependent on the quality of the qPCR assays themselves, which begins with proper primer and probe design. The guidelines for assay validation, as outlined in consensus documents like the MIQE guidelines, emphasize that the entire workflow—from sample acquisition to data analysis—must be controlled and standardized [72] [71]. The following table summarizes key design parameters that directly impact the accuracy of your validation data.
Table 2: Key Primer and Probe Design Parameters for qPCR Validation
| Parameter | Recommended Guideline | Impact on Validation |
|---|---|---|
| Primer Length | 18-30 bases; 18-22 bp is ideal [6] [75]. | Ensures specificity and an appropriate melting temperature. |
| GC Content | 35-65%; ideal is 40-60% [6] [1]. | Provides sufficient sequence complexity for specificity without promoting secondary structures. |
| Melting Temperature (Tm) | 60-64°C for primers; Tm of probe should be 5-10°C higher [6] [75]. | Ensures simultaneous primer binding and specific probe hybridization. |
| Amplicon Length | 70-150 bp for optimal amplification [6]. | Shorter amplicons are amplified more efficiently and are less affected by fragmented RNA. |
| Specificity Check | Use BLAST analysis to ensure primers are unique to the intended target [6] [75]. | Prevents off-target amplification and false positives, which would invalidate standard curves. |
| Secondary Structures | Check for and avoid hairpins, self-dimers, and hetero-dimers (ΔG > -9.0 kcal/mol) [6]. | Prevents primer-dimer formation and ensures efficient amplification, which is critical for an accurate standard curve. |
Additional Critical Considerations:
- Exon-Exon Junctions: When working with RNA and RT-qPCR, design primers to span an exon-exon junction. This ensures amplification from cDNA (mRNA) and not from potential contaminating genomic DNA [6] [75].
- Avoiding SNPs: Check that primer and probe binding sites do not contain common single nucleotide polymorphisms (SNPs), as these can interfere with binding and reduce efficiency in a subset of samples [75].
The Scientist's Toolkit: Essential Reagents and Materials
Table 3: Research Reagent Solutions for qPCR Assay Validation
| Item | Function / Application |
|---|---|
| High-Purity DNA/RNA Kits | Isolation of total nucleic acids free of PCR inhibitors is the first step to successful qPCR. Use kits designed for your sample type (e.g., Quick-DNA Kits, Direct-zol RNA Kits) [75]. |
| DNase I, RNase-free | Treatment of RNA samples to remove any contaminating genomic DNA before reverse transcription [6]. |
| Reverse Transcription Kits | For RT-qPCR, efficient conversion of RNA to cDNA is critical. Use kits that provide high yield and full-length cDNA synthesis (e.g., ZymoScript RT PreMix Kit) [75]. |
| Hot-Start DNA Polymerase | Reduces primer-dimer formation and nonspecific amplification at low temperatures, improving assay specificity and sensitivity (e.g., ZymoTaq Polymerase) [75]. |
| SYBR Green or TaqMan Probes | Detection chemistries for monitoring amplification in real-time. Double-quenched probes (e.g., with ZEN/TAO) are recommended for lower background and higher signal [6]. |
| Nuclease-Free Water | Used for all dilutions to prevent degradation of primers, probes, and templates by nucleases. |
| Optical Plates and Seals | Specifically designed for real-time PCR instruments to ensure optimal thermal conductivity and prevent evaporation during cycling. |
The integration of rigorously validated internal controls and precisely constructed standard curves is non-negotiable for generating reliable qPCR data, especially in a drug development context where decisions have significant financial and clinical implications [72] [74]. This process begins with meticulous primer and probe design, adhering to established guidelines for specificity and efficiency. By following the detailed protocols and considerations outlined in this document—from selecting a stable reference gene and creating a dilution series with impeccable technique, to analyzing the resulting data with strict acceptance criteria—research scientists can ensure their qPCR assays are accurate, reproducible, and truly fit-for-purpose. This level of technical standardization is essential for bridging the gap between research use and robust in vitro diagnostics, ultimately impacting the clinical management of patients through improved diagnosis, prognosis, and therapeutic monitoring [72].
The quantification of nucleic acids is a cornerstone of molecular biology, with real-time quantitative PCR (qPCR) long serving as the gold standard technique for gene expression analysis, pathogen detection, and genetically modified organism (GMO) quantification [76]. However, digital PCR (dPCR) has emerged as a powerful alternative technology that provides absolute quantification without requiring standard curves [77] [78]. This application note provides a detailed comparative analysis of transferring established qPCR assays to dPCR platforms, focusing on experimental protocols, performance validation, and practical implementation for researchers and drug development professionals. The fundamental principles of proper primer and probe design remain essential for both technologies and form the critical foundation for successful assay transfer [6] [79].
Technology Comparison: qPCR versus dPCR
Fundamental Principles and Workflow Differences
qPCR relies on monitoring PCR amplification in real-time, with quantification cycle (Cq) values used to determine initial template quantities relative to a standard curve [76]. In contrast, dPCR partitions samples into thousands of individual reactions, with endpoint detection of positive and negative partitions enabling absolute quantification through Poisson statistics [77] [80]. This fundamental difference in approach yields distinct advantages and considerations for each technology.
Comparative Performance Characteristics
Table 1: Performance comparison between qPCR and dPCR technologies
| Parameter | qPCR | dPCR |
|---|---|---|
| Quantification Type | Relative (requires standard curve) | Absolute (no standard curve needed) |
| Dynamic Range | Wider dynamic range [81] | High precision for fractional abundance [78] |
| Sensitivity | Lower sensitivity for low abundant targets [76] | Higher sensitivity, detects mutation rates ≥0.1% [78] |
| Precision | Lower precision, higher variability [81] [76] | Higher precision and reproducibility [78] [81] |
| Tolerance to Inhibitors | Prone to PCR inhibitors [78] [76] | Higher tolerance to inhibitors [77] [78] |
| Data Collection | Measures amplification at each cycle [78] | End-point measurement [78] |
| Multiplexing Capability | Limited by spectral overlap [77] | More suitable for multiplexing [77] |
The partitioning methodology in dPCR provides superior precision and sensitivity, particularly for applications requiring detection of small fold-changes or low-abundance targets [78] [76]. dPCR demonstrates robust quantification with high tolerance to PCR inhibitors, as it is less affected by changes in amplification efficiency due to sample partitioning and endpoint detection [78].
Experimental Design for Assay Transfer
Platform Selection Considerations
When transferring qPCR assays to dPCR, researchers typically choose between droplet-based systems (e.g., Bio-Rad QX200) and nanoplate-based systems (e.g., Qiagen QIAcuity). The QX200 system generates water-in-oil emulsion droplets with a typical reaction volume of 20μL [77] [80], while the QIAcuity system uses microfluidic nanoplates with integrated partitioning, thermocycling, and imaging capabilities, typically using 40μL reactions [77] [78]. Recent comparisons demonstrate that both platforms show similar detection and quantification limits with high precision across most analyses [80].
Workflow Comparison and Diagram
The following workflow illustrates the key steps in transferring a qPCR assay to dPCR platforms:
Detailed Experimental Protocols
Protocol 1: Direct Assay Transfer to QIAcuity Nanoplate dPCR
Materials:
- QIAcuity One dPCR Instrument (QIAGEN)
- QIAcuity Nanoplate 26k (24-well)
- Existing qPCR primer/probe set
- Template DNA
- QIAcuity Probe PCR Kit
Procedure:
Reaction Setup: Prepare 40μL reaction mixture containing:
- 1X QIAcuity Probe PCR Master Mix
- Primers at optimized concentration (typically 0.2-1.0 μM)
- Probe at optimized concentration (typically 0.1-0.3 μM)
- Template DNA (diluted in nuclease-free water)
- Nuclease-free water to final volume
Plate Loading: Pipette the reaction mixture into designated wells of the QIAcuity Nanoplate. Avoid introducing bubbles.
Sealing: Apply the optical seal properly to ensure complete sealing of all wells.
Instrument Run: Place the sealed nanoplate into the QIAcuity One instrument and run the integrated workflow that combines partitioning, thermocycling, and imaging in a single instrument.
Thermocycling Conditions: Use the standard thermocycling protocol:
- Initial activation: 95°C for 2 minutes
- 40 cycles of:
- Denaturation: 95°C for 15 seconds
- Annealing/Extension: 60°C for 30 seconds (optimize based on primer Tm)
- Final hold: 4°C
Data Analysis: Use the QIAcuity Software Suite to analyze results, which automatically provides target concentration in copies/μL [77] [78].
Protocol 2: Assay Transfer to QX200 Droplet Digital PCR
Materials:
- QX200 Droplet Digital PCR System (Bio-Rad)
- DG8 Cartridges and Gaskets
- Existing qPCR primer/probe set
- Template DNA
- ddPCR Supermix for Probes
Procedure:
Reaction Preparation: Prepare 20μL reaction mixture containing:
- 1X ddPCR Supermix for Probes
- Primers at optimized concentration (typically 0.2-1.0 μM)
- Probe at optimized concentration (typically 0.1-0.3 μM)
- Template DNA
- Nuclease-free water to final volume
Droplet Generation:
- Pipette 20μL of the reaction mixture into the middle wells of the DG8 Cartridge
- Add 70μL of Droplet Generation Oil to the lower wells
- Place a DG8 Gasket onto the cartridge
- Load the cartridge into the QX200 Droplet Generator
- After generation, carefully transfer the droplets (40μL) to a 96-well PCR plate
Thermocycling: Seal the plate with a foil heat seal and perform PCR amplification using the following conditions:
- Enzyme activation: 95°C for 10 minutes
- 40 cycles of:
- Denaturation: 94°C for 30 seconds
- Annealing/Extension: 60°C for 60 seconds (optimize based on primer Tm)
- Enzyme deactivation: 98°C for 10 minutes
- Hold at 4°C
Droplet Reading:
- Place the PCR plate into the QX200 Droplet Reader
- The reader will automatically analyze each droplet using a two-color detection system
Data Analysis: Use QuantaSoft software to analyze the data and obtain absolute target concentrations in copies/μL [77] [76].
Performance Validation and Optimization
Validation Parameters and Acceptance Criteria
Table 2: Key validation parameters for transferred dPCR assays
| Validation Parameter | Assessment Method | Acceptance Criteria |
|---|---|---|
| Specificity | Analyze non-target templates and no-template controls | Single distinct cluster separation, no false positives |
| Linearity | Serial dilutions of target DNA across expected concentration range | R² > 0.98, %CV < 25% across dilution series [77] |
| Limit of Detection (LOD) | Low concentration samples near detection limit | Consistent detection at target concentration [80] |
| Limit of Quantification (LOQ) | Precision and accuracy at low concentrations | %CV < 35% at LOQ [80] |
| Precision | Repeatability (intra-assay) and reproducibility (inter-assay) | %CV < 10% for copies/μL [77] [80] |
| Accuracy | Comparison with reference materials or qPCR | Bias < 25% from expected value [77] |
Quantitative Performance Comparison Across Platforms
Recent studies directly comparing dPCR platforms provide essential performance metrics for assay validation:
Table 3: Platform comparison data from recent studies
| Performance Metric | QIAcuity ndPCR | QX200 ddPCR | Experimental Context |
|---|---|---|---|
| LOD (copies/μL input) | 0.39 [80] | 0.17 [80] | Synthetic oligonucleotides |
| LOQ (copies/μL input) | 1.35 [80] | 4.26 [80] | Synthetic oligonucleotides |
| Dynamic Range | Up to 3000 copies/μL input [80] | Up to 3000 copies/μL input [80] | Serial dilutions |
| Precision (%CV) | 7-11% [80] | 6-13% [80] | Across dilution series |
| Inhibition Tolerance | Higher tolerance to inhibitors [77] [76] | Higher tolerance to inhibitors [77] [76] | RT mix contamination study |
Primer and Probe Design Guidelines for dPCR Transfer
Successful transfer of qPCR assays to dPCR platforms relies on proper primer and probe design principles that remain consistent across PCR technologies:
Core Design Parameters
- Primer Length: 18-30 bases [6] [79]
- GC Content: 40-60% [79], ideally 50% [6]
- Melting Temperature (Tm): 60-64°C for primers, with less than 2°C difference between forward and reverse primers [6]
- Probe Tm: 5-10°C higher than primers [6]
- Amplicon Length: 70-150 bp ideal, up to 500 bp possible [6]
Critical Design Considerations
- Avoid complementarity in the 2-3 bases at the 3' end of primer pairs [79]
- Avoid runs of 3 or more G or C residues at the 3' end [6] [79]
- Screen for self-dimers, heterodimers, and hairpins with ΔG > -9.0 kcal/mol [6]
- Ensure sequence uniqueness through BLAST analysis [6]
- For gene expression studies, design assays to span exon-exon junctions to reduce gDNA amplification [6]
Essential Research Reagent Solutions
Table 4: Key reagents and materials for successful dPCR assay transfer
| Reagent/Material | Function | Implementation Example |
|---|---|---|
| Digital PCR Master Mix | Provides optimal reaction chemistry for partitioning | QIAcuity Probe PCR Kit; ddPCR Supermix for Probes |
| Reference DNA Materials | Assay validation and standardization | ERM certified reference materials [77] |
| Partitioning Consumables | Creates nanoscale reaction chambers | QIAcuity Nanoplates; DG8 Cartridges for droplet generation |
| Nuclease-free Water | Diluent for reactions and standards | Prevents nucleic acid degradation |
| Restriction Enzymes | Improve DNA accessibility | HaeIII or EcoRI for complex genomes [80] |
| Positive Control Templates | Assay performance verification | Synthetic oligonucleotides or plasmid controls [80] |
Application-Specific Implementation
GMO Quantification
In GMO detection, dPCR provides accurate quantification near regulatory thresholds (e.g., 0.9% EU limit), with validated methods for soybean events MON-04032-6 and MON89788 showing performance parameters meeting acceptance criteria for specificity, dynamic range, and precision [77]. Duplex dPCR methods for GMO quantification have demonstrated equivalence to singleplex qPCR methods while providing cost efficiencies [77].
Viral Load Detection
For infectious bronchitis virus (IBV) detection, dPCR showed higher sensitivity and precision compared to qPCR, despite qPCR having a wider dynamic range [81]. The precision of quantification in terms of repeatability and reproducibility was higher with dPCR, making it particularly valuable for detecting low viral loads [81].
Gene Expression Analysis
For low abundant targets with small expression differences (2-fold or lower), ddPCR technology produces more precise, reproducible, and statistically significant results compared to qPCR, especially when sample/target combinations have low nucleic acid levels (Cq ≥ 29) and/or variable amounts of chemical and protein contaminants [76].
The transfer of qPCR assays to dPCR platforms provides significant advantages in precision, sensitivity, and robustness, particularly for applications requiring absolute quantification or dealing with challenging sample matrices. Following the optimized protocols and validation frameworks outlined in this application note will enable researchers to successfully implement dPCR methods that generate publication-quality data. The continuous evolution of dPCR technologies, including nanoplate-based systems that streamline workflows while maintaining precision, makes this technology increasingly accessible for routine laboratory applications.
In the realm of molecular biology, the polymerase chain reaction (PCR) and its quantitative counterpart (qPCR) stand as foundational techniques for genetic analysis, diagnostics, and drug development. The performance of these assays, however, is profoundly dependent on the quality of the oligonucleotide primers used. Proper primer design is not merely a preliminary step but a critical determinant of the reliability, accuracy, and reproducibility of experimental data. Within the context of a broader thesis on primer design guidelines, this application note focuses on three pivotal validation parameters: sensitivity, specificity, and dynamic range. These parameters collectively define an assay's ability to detect low-abundance targets, distinguish them from closely related non-targets, and provide accurate quantification over a wide concentration interval.
Failure to rigorously validate these parameters can lead to false positives, false negatives, and inaccurate quantification, ultimately compromising scientific conclusions and diagnostic outcomes. This document provides detailed protocols and application notes to guide researchers and drug development professionals through the process of evaluating these critical validation parameters, ensuring that their PCR assays meet the highest standards of quality and reliability.
The Scientist's Toolkit: Research Reagent Solutions
The following table details essential reagents and materials required for the experiments described in this protocol, along with their specific functions.
Table 1: Essential Research Reagents and Their Functions in PCR Validation
| Reagent/Material | Function |
|---|---|
| High-Fidelity DNA Polymerase | Enzyme for accurate DNA amplification; choice impacts efficiency and specificity [22]. |
| dNTPs | Deoxynucleotide triphosphates (dATP, dCTP, dGTP, dTTP) serving as the building blocks for DNA synthesis. |
| Optimal Buffer & Mg²⁺ Solution | Reaction buffer providing optimal pH and salt conditions; Mg²⁺ concentration is a critical cofactor for polymerase activity and must be defined for accurate Tm calculation [6]. |
| Template DNA (Sample & Control) | The target nucleic acid to be amplified. Includes both experimental samples and control templates (positive and negative). |
| Validated Primer/Probe Set | Oligonucleotides specifically designed to hybridize to the target sequence. Probes for qPCR (e.g., TaqMan) are often labeled with a 5' fluorophore and a 3' quencher [6]. |
| Double-Quenched Probes | qPCR probes incorporating an internal quencher (e.g., ZEN or TAO) in addition to the 3' quencher. This configuration lowers background fluorescence and increases signal-to-noise ratio, which is crucial for sensitivity [6]. |
| Nuclease-Free Water | Solvent that ensures the reaction mixture is not degraded by nucleases. |
| Reference DNA Strain | A well-characterized source of target DNA (e.g., Leishmania strain MCAO/BR/2010/M27840 [82]) used as a positive control and for generating standard curves. |
Core Principles of Primer Design for Assay Validation
The foundation of a robust PCR assay lies in the initial in silico design of the primers. Adherence to established design principles preemptively mitigates issues related to sensitivity, specificity, and dynamic range.
Key Design Parameters
- Primer Length: Primers should typically be 18–30 nucleotides long [6] [83]. This length provides a balance between specificity (which increases with length) and hybridization efficiency, which can decrease with excessively long primers [18].
- Melting Temperature (Tm): The optimal Tm for primers is generally between 60–64°C, with the forward and reverse primer Tms differing by no more than 2°C [6]. The Tm must be calculated using accurate nearest-neighbor thermodynamic parameters and the specific buffer conditions of the reaction, as cation concentration (especially Mg²⁺) significantly influences Tm [10] [6].
- GC Content: The guanine-cytosine content should be between 40–60%, with an ideal of 50% [18] [6] [83]. This avoids overly stable (high GC) or unstable (low GC) duplexes. A "GC clamp"—the presence of one or two G or C bases at the 3' end—can enhance specific binding, but runs of three or more consecutive Gs should be avoided [18] [6].
- Specificity and Secondary Structures: Primers must be screened for self-dimers, cross-dimers, and hairpin structures. The free energy (ΔG) of any such structures should be weaker (more positive) than -9.0 kcal/mol [6]. Furthermore, primers should be validated for target specificity using tools like NCBI Primer-BLAST [10] [6] to ensure they do not bind to unintended sequences in the relevant genome.
The Critical Distinction: Tm vs. Ta
A common source of assay failure is the confusion between melting temperature (Tm) and annealing temperature (Ta). The Tm is a theoretical calculation of the temperature at which 50% of the primer-DNA duplexes are dissociated. In contrast, the Ta is the experimental temperature used in the thermal cycler during the annealing step [22] [18]. The optimal Ta is often 2–5°C below the Tm of the primers [6] and must be determined empirically. An excessively low Ta permits non-specific priming, while a Ta that is too high reduces yield. A robust assay will perform well over a broad Ta range [22].
Experimental Protocol for Parameter Validation
This section provides a detailed, step-by-step methodology for validating the sensitivity, specificity, and dynamic range of a PCR or qPCR assay.
The diagram below outlines the logical workflow for the entire validation process, from initial preparation to final analysis.
Step-by-Step Procedures
Specificity Validation
Objective: To confirm that the primer pair amplifies only the intended target sequence and does not produce primer-dimers or non-specific amplicons.
- Reaction Setup: Perform a standard endpoint PCR reaction using your optimized primer set. Include a no-template control (NTC) containing nuclease-free water to check for contamination or primer-dimer formation.
- Gel Electrophoresis:
- Prepare a 1.5-2% agarose gel in 1x TAE or TBE buffer.
- Mix the PCR products with a DNA loading dye and load them onto the gel alongside a suitable DNA ladder.
- Run the gel at a constant voltage (e.g., 100-120V) until the dye front has migrated sufficiently.
- Stain the gel with an intercalating dye (e.g., ethidium bromide or SYBR Safe) and visualize under UV light.
- Analysis: A specific reaction will yield a single, sharp band of the expected amplicon size. The NTC should show no bands. The presence of multiple bands or a band in the NTC indicates non-specific amplification or primer-dimer formation, necessitating primer redesign or reaction re-optimization [22] [82].
- In Silico Confirmation: Use bioinformatics tools like Primer-BLAST [10] to verify that the primer sequences are unique to your target gene within the organism of interest. For mRNA targets, design primers to span an exon-exon junction to prevent amplification from genomic DNA contamination [10] [6].
Dynamic Range and Amplification Efficiency
Objective: To determine the range of template concentrations over which the assay can provide accurate quantification (dynamic range) and to calculate the efficiency of the amplification reaction, which is a critical metric for reliable qPCR.
- Standard Curve Preparation:
- Serially dilute a known quantity of the target template (e.g., a plasmid containing the insert or a genomic DNA sample) in nuclease-free water. Use at least 5, and preferably more, log dilutions (e.g., 1:10, 1:100, 1:1000, etc.) to cover a concentration range of 6-8 orders of magnitude.
- The template concentration in each dilution must be accurately determined (e.g., via spectrophotometry).
- qPCR Run:
- Run the diluted standards in triplicate or quadruplicate using your qPCR protocol.
- Ensure that the NTC is included.
- Data Analysis:
- The qPCR instrument's software will generate a standard curve by plotting the Cycle Threshold (Cq) values against the logarithm of the initial template concentration.
- The dynamic range is the concentration interval over which the Cq values show a linear relationship with the log of the input template.
- The amplification efficiency (E) is calculated from the slope of the standard curve using the formula: E = [10^(-1/slope)] - 1.
- An ideal reaction with 100% efficiency has a slope of -3.32. In practice, an efficiency between 90% and 110% (slope between -3.58 and -3.10) is generally acceptable [22].
Sensitivity and Limit of Detection (LoD)
Objective: To determine the lowest concentration of the target template that can be reliably detected by the assay.
- Dilution Series: Prepare a separate, fine-scale serial dilution of the template at very low concentrations, near the anticipated detection limit.
- Replication: Run a large number of replicates (e.g., 12-24) for each of these low-concentration dilutions.
- Analysis: The Limit of Detection (LoD) is defined as the lowest template concentration at which ≥95% of the replicates return a positive amplification result [22] [82]. This probabilistic approach is necessary due to the stochastic nature of PCR at target-limiting concentrations.
Data Interpretation and Acceptance Criteria
The following table summarizes the key performance metrics, their calculation methods, and the recommended acceptance criteria for a rigorously validated assay.
Table 2: Validation Parameters, Calculations, and Acceptance Criteria
| Parameter | Experimental Method | Calculation/Analysis | Optimal Acceptance Criterion |
|---|---|---|---|
| Specificity | Endpoint PCR + Gel Electrophoresis; Melt Curve Analysis (for SYBR Green); in silico BLAST. | Presence of a single band of expected size; single peak in melt curve. | No non-specific bands or secondary melt peaks. NTC is clean [22] [82]. |
| Amplification Efficiency | qPCR Standard Curve. | Efficiency (E) = [10^(-1/slope)] - 1. | 90–110% (Slope: -3.58 to -3.10) [22]. |
| Dynamic Range | qPCR Standard Curve. | Linear regression of Cq vs. log template concentration. | Linear range over at least 5-6 orders of magnitude with R² > 0.99 [22]. |
| Sensitivity (LoD) | Replicated qPCR at low concentrations. | Lowest concentration with ≥95% positive detection. | Defined based on application requirements; must be statistically validated [22] [82]. |
| Robustness | Annealing Temperature Gradient. | Amplification efficiency and specificity across a range of Ta. | Consistent performance over a Ta range of ≥4°C [22]. |
Troubleshooting Common Validation Issues
- Poor Efficiency or No Amplification: Verify primer design rules (Section 3). Check for secondary structures in the template at the primer binding sites. Ensure primer concentrations are optimal and that the template is of high quality. Empirically determine the optimal Ta using a temperature gradient [22].
- Non-Specific Amplification: Increase the annealing temperature. Use a hot-start polymerase. Check primers for self-complementarity and redesign if necessary. Optimize Mg²⁺ concentration, as high concentrations can reduce specificity [22] [6].
- Inconsistent Replicates at Low Concentrations (High Cq variability): This is a hallmark of operating near the LoD. Ensure thorough mixing of low-concentration samples and use an adequate number of replicates to determine the LoD statistically. The use of double-quenched probes can improve the signal-to-noise ratio at low target concentrations [6] [82].
Rigorous validation of sensitivity, specificity, and dynamic range is not an optional extra but a fundamental requirement for generating credible PCR and qPCR data. By adhering to the primer design guidelines and detailed experimental protocols outlined in this document, researchers can develop robust, reliable, and reproducible assays. This disciplined approach is essential for advancing scientific knowledge, ensuring the validity of diagnostic results, and accelerating the development of new therapeutics.
Comparative Analysis of PCR Methods for Sensitivity and Robustness in Complex Matrices
The accurate detection and quantification of nucleic acids in complex biological matrices is a cornerstone of molecular diagnostics and life sciences research. This application note provides a systematic comparison of Real-Time Quantitative PCR (qPCR) and Digital PCR (dPCR) methodologies, focusing on their performance characteristics in challenging sample types. We present experimental data demonstrating dPCR's superior accuracy for absolute quantification and enhanced robustness against inhibitors, particularly in samples with medium to high viral loads. Alongside this comparative analysis, we detail essential primer and probe design principles critical for assay success across both platforms. The protocols and guidelines provided herein serve as a comprehensive resource for researchers developing molecular assays for clinical diagnostics, pathogen detection, and biomarker validation where sample matrix effects may compromise analytical performance.
Molecular diagnostics and biomedical research increasingly rely on precise nucleic acid detection in complex sample matrices such as respiratory secretions, wastewater, and blood-derived liquids. The polymerase chain reaction (PCR) remains the gold standard for nucleic acid amplification, with Real-Time Quantitative PCR (qPCR) dominating routine applications due to its established workflows and relatively low cost [84]. However, Digital PCR (dPCR) has emerged as a powerful alternative that provides absolute quantification without requiring standard curves, offering potential advantages for sensitive detection in inhibitor-rich environments [85] [86].
The performance of any PCR-based assay is fundamentally dependent on robust primer and probe design. Optimal oligonucleotide design minimizes non-specific amplification and ensures efficient target detection, particularly in complex matrices where sample impurities may interfere with amplification efficiency [6] [87]. This technical note systematically compares qPCR and dPCR performance while establishing foundational primer design principles to maximize assay robustness across applications.
Comparative Performance Analysis of PCR Methodologies
Fundamental Technical Differences
The core distinction between qPCR and dPCR lies in their quantification approaches and reaction architectures. qPCR relies on monitoring fluorescence accumulation during amplification cycles, with quantification based on the cycle threshold (Ct) values relative to standard curves [88]. This relative quantification approach introduces potential variability from standard curve construction and amplification efficiency differences [84]. In contrast, dPCR employs sample partitioning into thousands of individual reactions, enabling absolute quantification via Poisson statistics based on the ratio of positive to negative partitions without external calibration [85] [86].
This fundamental architectural difference confers distinct advantages for applications requiring precise quantification, especially when analyzing samples with potential PCR inhibitors. The nanoscale reaction volumes in dPCR effectively dilute inhibitors, while the endpoint detection method eliminates dependence on amplification efficiency, making dPCR particularly suitable for challenging sample matrices [84] [86].
Quantitative Performance Comparison in Complex Matrices
Recent comparative studies directly evaluate qPCR and dPCR performance in clinically relevant sample types. A 2025 study analyzing respiratory viruses during the 2023-2024 "tripledemic" demonstrated dPCR's enhanced performance across different viral load categories [84].
Table 1: Comparative Sensitivity of dPCR vs. qPCR for Respiratory Virus Detection
| Virus Target | High Viral Load (Ct ≤25) | Medium Viral Load (Ct 25.1-30) | Low Viral Load (Ct >30) |
|---|---|---|---|
| Influenza A | dPCR superior | Comparable performance | Comparable performance |
| Influenza B | dPCR superior | Comparable performance | Comparable performance |
| RSV | Comparable performance | dPCR superior | Comparable performance |
| SARS-CoV-2 | dPCR superior | Comparable performance | Comparable performance |
Data adapted from PMC12474457 [84]
The same study reported dPCR demonstrated greater consistency and precision than Real-Time RT-PCR, particularly when quantifying intermediate viral levels, highlighting its value for applications requiring precise quantification across sample types [84].
Similar advantages extend to environmental surveillance applications. A study evaluating Japanese encephalitis virus (JEV) detection in piggery wastewater found that the optimal RT-qPCR assay (ACDP JEV G4) achieved a process limit of detection (PLOD) of 72-282 copies/10 mL wastewater with recovery efficiencies of just 14.9-26.6%, underscoring the significant impact of complex matrices on qPCR efficiency [89]. dPCR's partitioning approach typically demonstrates superior recovery efficiencies in such inhibitor-rich environments.
Practical Implementation Considerations
Despite its technical advantages, dPCR implementation faces practical constraints. Current dPCR systems entail higher per-sample costs and reduced automation compared to established qPCR workflows [84]. Additionally, dPCR has more limited multiplexing capabilities compared to modern qPCR systems, potentially restricting its utility in applications requiring simultaneous detection of multiple targets [86].
qPCR remains the more practical choice for high-throughput routine testing where extreme sensitivity is not critical, while dPCR excels in applications requiring absolute quantification, detection of rare variants, or analysis of inhibitor-rich samples [84] [85].
Primer and Probe Design Fundamentals
Robust assay design begins with optimized oligonucleotide selection, following these core principles:
Core Design Parameters
Table 2: Essential Primer and Probe Design Specifications
| Parameter | Primer Guidelines | Probe Guidelines | Rationale |
|---|---|---|---|
| Length | 18-30 bases (ideal: 18-24) [6] [87] | 20-30 bases (ideal: 20-25) [6] [87] | Balances specificity and binding efficiency |
| Melting Temperature (Tm) | 60-64°C (ideal: 62°C) [6] | 5-10°C higher than primers [6] [87] | Ensures simultaneous primer binding and probe specificity |
| Annealing Temperature (Ta) | 3-5°C below Tm [87] | N/A | Optimizes specific binding |
| GC Content | 35-65% (ideal: 50%) [6] | 35-60% [18] | Provides sequence complexity while minimizing secondary structures |
| GC Clamp | Avoid >3 G/C at 3' end [18] | Avoid G at 5' end [87] | Prevents non-specific binding and fluorophore quenching |
| Amplicon Length | 70-150 bp (qPCR) [6] | N/A | Optimizes amplification efficiency |
Specificity and Secondary Structure Considerations
Sequence specificity must be verified using tools such as NCBI Primer-BLAST to minimize off-target amplification [6] [90]. Self-complementarity should be minimized, with hairpin structures and primer-dimer formations assessed using tools like OligoAnalyzer [6]. The free energy (ΔG) of any predicted secondary structures should be weaker than -9.0 kcal/mol to prevent interference with binding [6].
For RNA targets (RT-qPCR), designing primers to span exon-exon junctions prevents amplification of contaminating genomic DNA [87]. When detecting rare variants or working with degraded samples, shorter amplicons (70-140 bp) improve detection efficiency by increasing the probability of amplifying intact targets [87].
Experimental Protocols
Sample Processing and Nucleic Acid Extraction
Protocol: Respiratory Sample Processing for Viral Detection
- Sample Collection: Collect nasopharyngeal swabs in appropriate transport media. Maintain cold chain during transport. [84]
- Nucleic Acid Extraction: Use automated extraction systems (e.g., KingFisher Flex, STARlet Seegene) with pathogen-specific kits (e.g., MagMax Viral/Pathogen kit). [84]
- Quality Assessment: Measure nucleic acid concentration and purity (A260/A280 ratio). Include internal extraction controls to monitor efficiency. [84]
- Storage: Store extracts at -80°C if not used immediately. Avoid repeated freeze-thaw cycles.
dPCR Workflow for Absolute Quantification
Protocol: Digital PCR Analysis Using QIAcuity System
- Reaction Setup: Prepare PCR mixture according to manufacturer specifications, including primers, probes, master mix, and template DNA (up to 20 μL total volume). [84]
- Partitioning: Load mixture into nanowell plate (8-well or 96-well format). The QIAcuity system generates approximately 26,000 partitions of uniform size using microfluidic technology. [84]
- Amplification: Perform endpoint PCR with optimized cycling conditions (e.g., 95°C for 2 min, 45 cycles of 95°C for 15s and 60°C for 30s). [84]
- Imaging and Analysis: Acquire fluorescence images of partitions using integrated imager. Analyze using instrument software (e.g., QIAcuity Suite v.0.1) to determine copies/μL based on Poisson statistics. [84]
qPCR Protocol with Standard Curve Quantification
Protocol: Real-Time qPCR with Standard Curve
- Reaction Setup: Prepare reactions in optical plates or strips containing primers, probe (if using probe-based chemistry), master mix, and template (typically 1-5 μL per reaction).
- Standard Curve Preparation: Serially dilute standard template of known concentration (typically 10-fold dilutions across 6-8 points). Include no-template controls. [88]
- Amplification: Run on real-time cycler with appropriate cycling parameters (e.g., 50°C for 15 min, 95°C for 10 min, 45 cycles of 95°C for 15s and 60°C for 1 min). [84]
- Data Analysis: Set baseline and threshold according to manufacturer guidelines. Generate standard curve from dilution series and interpolate sample concentrations. [88]
Diagram 1: Comparative Workflow for dPCR and qPCR Methodologies
The Scientist's Toolkit: Essential Research Reagents
Table 3: Key Reagents and Platforms for PCR-Based Detection
| Category | Specific Product/Platform | Application Notes |
|---|---|---|
| dPCR Systems | QIAcuity (Qiagen) [84] | Nanowell-based partitioning; integrated thermocycler and imager |
| Droplet Digital PCR (Bio-Rad) [85] | Water-in-oil emulsion technology; high partition count | |
| qPCR Systems | CFX96 (Bio-Rad) [84] | Standard thermal cycler with optical detection |
| QuantStudio (Applied Biosystems) | High-throughput capabilities | |
| Nucleic Acid Extraction | KingFisher Flex (Thermo Fisher) [84] | Automated magnetic bead-based purification |
| STARlet Seegene [84] | Automated extraction for high-throughput applications | |
| PCR Chemistry | MagMax Viral/Pathogen Kit [84] | Optimized for pathogen detection from complex samples |
| Allplex Respiratory Panels (Seegene) [84] | Multiplex detection of respiratory pathogens | |
| Design Tools | Primer-BLAST (NCBI) [10] | Validates primer specificity against database |
| CREPE Pipeline [90] | Large-scale primer design with off-target assessment | |
| OligoAnalyzer (IDT) [6] | Analyzes Tm, hairpins, and dimer formation |
The selection between dPCR and qPCR technologies depends on specific application requirements, with dPCR offering superior absolute quantification and enhanced robustness in complex matrices, while qPCR provides established, cost-effective solutions for routine applications. Proper primer and probe design remains fundamental to both platforms' performance, particularly when analyzing challenging sample types. As molecular diagnostics continues to advance toward detection of increasingly rare targets and analysis of more complex samples, the principles outlined in this application note provide a foundation for robust assay development across research and clinical applications.
Conclusion
Mastering PCR primer design is a critical, multi-stage process that integrates foundational rules, application-specific strategies, systematic troubleshooting, and rigorous validation. Adherence to core principles of length, Tm, and GC content establishes a foundation for specificity, while advanced designs enable complex applications from cloning to precise SNP genotyping. A methodical approach to optimization is essential for resolving common issues. Finally, validation through qPCR or the emerging adoption of digital PCR ensures quantitative accuracy and reliability, particularly for clinical and diagnostic applications. Future directions will likely see increased reliance on dPCR for absolute quantification and the development of more sophisticated in-silico tools to predict primer behavior in complex biological systems, further solidifying PCR's role in advancing personalized medicine and biomarker discovery.
References
- 1. Protocol - How to Design Primers [https://www.addgene.org/protocols/primer-design/]
- 2. How to design PCR primers [https://www.minipcr.com/how-to-design-pcr-primers/]
- 3. PCR Primer Design Tips - Behind the Bench [https://www.thermofisher.com/blog/behindthebench/pcr-primer-design-tips/]
- 4. 8 Basic Concepts for Designing Primers for a Standard PCR [https://bitesizebio.com/24608/designing-luck-8-basic-concepts-for-designing-primers-for-a-standard-pcr/]
- 5. What is the optimal length of a primer? | IDT [https://www.idtdna.com/pages/support/faqs/what-is-the-optimal-length-of-a-primer-]
- 6. Rules and Tips for PCR & qPCR Primer Design | IDT [https://www.idtdna.com/page/support-and-education/decoded-plus/how-to-design-primers-and-probes-for-pcr-and-qpcr/]
- 7. Primer selection guidelines | Yale Research [https://research.yale.edu/primer-selection-guidelines]
- 8. Optimizing PCR Primer's T m and Annealing Temperatures [https://www.thermofisher.com/us/en/home/brands/thermo-scientific/molecular-biology/molecular-biology-learning-center/molecular-biology-resource-library/spotlight-articles/optimizing-tm-and-annealing.html]
- 9. Tm Calculator for Primers [https://www.thermofisher.com/us/en/home/brands/thermo-scientific/molecular-biology/molecular-biology-learning-center/molecular-biology-resource-library/thermo-scientific-web-tools/tm-calculator.html]
- 10. Primer designing tool - NCBI - NIH [https://www.ncbi.nlm.nih.gov/tools/primer-blast/]
- 11. When designing primers how important is the GC clamp? [https://biology.stackexchange.com/questions/10843/when-designing-primers-how-important-is-the-gc-clamp]
- 12. Troubleshooting primer dimer in PCR [https://www.minipcr.com/primer-dimer-pcr/]
- 13. PCR Optimization: Strategies To Minimize Primer Dimer [https://genemod.net/blog/pcr-optimization]
- 14. Mathematical Modeling and Thermodynamic Integration for ... [https://pmc.ncbi.nlm.nih.gov/articles/PMC12620865/]
- 15. How can I avoid primer-dimer formation during PCR ... [https://www.qiagen.com/us/resources/faq/544]
- 16. Use of GC Clamps in DHPLC Mutation Scanning - PMC [https://pmc.ncbi.nlm.nih.gov/articles/PMC1069033/]
- 17. Predicting sequence-specific amplification efficiency in ... [https://www.nature.com/articles/s41467-025-64221-4]
- 18. Primer design guide - 5 tips for best PCR results [https://the-dna-universe.com/2022/09/05/primer-design-guide-the-top-5-factors-to-consider-for-optimum-performance/]
- 19. Guide to Primer Design for PCR [https://www.benchling.com/primer-design-for-pcr]
- 20. PCR Primer Design Guidelines [http://www.premierbiosoft.com/tech_notes/PCR_Primer_Design.html]
- 21. How to design primers for PCR - INTEGRA Biosciences [https://www.integra-biosciences.com/united-states/en/blog/article/how-design-primers-pcr]
- 22. qPCR primer design revisited - PMC - PubMed Central - NIH [https://pmc.ncbi.nlm.nih.gov/articles/PMC5702850/]
- 23. Proven tips for PCR primer design [https://www.neb.com/en-us/nebinspired-blog/proven-tips-for-pcr-primer-design?srsltid=AfmBOoo5di4blUVQcW8lLX9d0vL91apmgazyGk1CvPhEWUinhicrHaMN]
- 24. BLAST: Basic Local Alignment Search Tool [https://blast.ncbi.nlm.nih.gov/Blast.cgi]
- 25. Free Online Molecular Biology Tools [https://blog.addgene.org/free-online-molecular-biology-tools]
- 26. Sequence Alignment Tool [https://www.vectorbuilder.com/tool/sequence-alignment.html]
- 27. qPCR primer design revisited [https://www.sciencedirect.com/science/article/pii/S221475351730181X]
- 28. MIQE Guidelines [https://www.primerdesign.co.uk/us/learn/miqe-guidelines/?srsltid=AfmBOorl3lHhvI-F0jXdl1V32MASHhfjzmiKkEigFW8exWn8ThYlhxdH]
- 29. How to Design Primers for PCR Experiments [https://www.zymoresearch.com/blogs/blog/how-to-design-primers-for-pcr-experiments?srsltid=AfmBOoqwAuRo_WDP6DJtMODNlMrcu4bNJGMM9UETvV4N1iYFkS8qe0dG]
- 30. How to optimize qPCR in 9 steps? [https://westburg.eu/knowledge/pcr_qpcr/hate_optimizing_qpcr]
- 31. Top Ten Pitfalls in Quantitative Real-time PCR Primer ... [https://www.thermofisher.com/us/en/home/references/ambion-tech-support/rtpcr-analysis/general-articles/top-ten-pitfalls-in-quantitative-real-time-pcr-primer.html]
- 32. Faster PCR Optimization [https://bitesizebio.com/31937/optimizing-your-pcr-faster/]
- 33. Free Guide: Top 5 PCR Optimization Tips - Yeasen [https://www.yeasenbio.com/blogs/molecular-biology/free-guide-top-5-pcr-optimization-tips]
- 34. PCR Optimization: Factors Affecting Reaction Specificity ... [https://www.mybiosource.com/learn/pcr-optimization-factors-affecting-reaction-specificity-and-efficien/]
- 35. Genetic Engineering by DNA Recombineering - PMC [https://pmc.ncbi.nlm.nih.gov/articles/PMC6727988/]
- 36. Homology-directed repair with a plasmid donor [https://www.revvity.com/blog/homology-directed-repair-plasmid-donor-considerations-successful-hdr-experimental-design]
- 37. Protocol for generation of CRISPR-Cas9-mediated specific ... [https://pmc.ncbi.nlm.nih.gov/articles/PMC11388652/]
- 38. qPCR Primer Design: A Handy Step-by-Step Guide [https://bitesizebio.com/10041/designing-qpcr-primers/]
- 39. A primer design strategy for PCR amplification of GC-rich ... [https://www.sciencedirect.com/science/article/abs/pii/S0009912011000634]
- 40. Our Tips to Help You Survive a Difficult PCR [https://bitesizebio.com/37205/how-to-survive-a-difficult-pcr/]
- 41. PCR Setup—Six Critical Components to Consider [https://www.thermofisher.com/us/en/home/life-science/cloning/cloning-learning-center/invitrogen-school-of-molecular-biology/pcr-education/pcr-reagents-enzymes/pcr-component-considerations.html]
- 42. Polymerase Chain Reaction: Basic Protocol Plus ... [https://pmc.ncbi.nlm.nih.gov/articles/PMC4846334/]
- 43. Online PCR primer software comparision [https://primerdigital.com/tools/soft.html]
- 44. ARMSprimer3: An open-source primer design Python program ... [https://pmc.ncbi.nlm.nih.gov/articles/PMC12104711/]
- 45. Application of a modified tetra-primer ARMS–PCR assay ... [https://www.nature.com/articles/s41598-023-39940-7]
- 46. PCR-based SNP genotyping [https://www.sciencedirect.com/science/article/abs/pii/S0003267025003885]
- 47. PCR-based SNP genotyping: A comprehensive ... [https://pubmed.ncbi.nlm.nih.gov/40253069/]
- 48. Fast SARS-CoV-2 Variant Detection Using Snapback Primer ... [https://pmc.ncbi.nlm.nih.gov/articles/PMC8534650/]
- 49. A Multiplex Snapback Primer System for the Enrichment and ... [https://pmc.ncbi.nlm.nih.gov/articles/PMC3960525/]
- 50. A portal of innovative automated tools for genotyping assay ... [https://www.sciencedirect.com/science/article/pii/S2665963824000721]
- 51. Real-Time Quantitative PCR: Primer Design, Reference ... [https://pmc.ncbi.nlm.nih.gov/articles/PMC10384377/]
- 52. PCR Troubleshooting Guide | Thermo Fisher Scientific - US [https://www.thermofisher.com/us/en/home/life-science/cloning/cloning-learning-center/invitrogen-school-of-molecular-biology/pcr-education/pcr-reagents-enzymes/pcr-troubleshooting.html]
- 53. PCR Troubleshooting Guide [https://www.neb.com/en-us/tools-and-resources/troubleshooting-guides/pcr-troubleshooting-guide?srsltid=AfmBOorNLlYf-cjg5XyximjFPfHfglPsu_JNUcGqdEWoao5XCsC3jErn]
- 54. Troubleshooting Non-Specific Amplification [https://bento.bio/resources/bento-lab-advice/troubleshooting-non-specific-amplification-with-bento-lab/]
- 55. Optimizing PCR Reaction Conditions for High Fidelity and ... [https://www.labx.com/resources/optimizing-pcr-reaction-conditions-for-high-fidelity-and-yield/5579]
- 56. Investigating concentration effects on reaction efficiency ... [https://www.sciencedirect.com/science/article/pii/S0003269725001472]
- 57. How does magnesium concentration affect PCR? [https://www.aatbio.com/resources/faq-frequently-asked-questions/how-does-magnesium-concentration-affect-pcr]
- 58. How to Calculate Annealing Temperature for PCR | IDT [https://www.idtdna.com/pages/support/faqs/how-do-you-calculate-the-annealing-temperature-for-pcr-]
- 59. How to Simplify PCR Optimization Steps for Primer Annealing [https://www.thermofisher.com/us/en/home/brands/thermo-scientific/molecular-biology/molecular-biology-learning-center/molecular-biology-resource-library/spotlight-articles/pcr-annealing-optimization-universal-annealing.html]
- 60. Polymerase Chain Reaction (PCR) - StatPearls - NCBI - NIH [https://www.ncbi.nlm.nih.gov/books/NBK589663/]
- 61. Oligonucleotide Purification Methods for Your Research [https://www.thermofisher.com/us/en/home/brands/thermo-scientific/molecular-biology/molecular-biology-learning-center/molecular-biology-resource-library/spotlight-articles/oligonucleotide-purification-methods.html]
- 62. Calculating Primer and Probe Concentrations [https://www.thermofisher.com/us/en/home/life-science/pcr/real-time-pcr/real-time-pcr-learning-center/real-time-pcr-basics/calculating-primer-probe-concentrations.html]
- 63. How to store and use PCR primers [https://www.minipcr.com/store-and-use-pcr-primers/]
- 64. MIQE Guidelines [https://www.primerdesign.co.uk/eu/learn/miqe-guidelines/?srsltid=AfmBOorEYtI6LWgTya_KrSX_rPPwG9JHBtg560kAaYTaf-dTsoJ0brs2]
- 65. Defining the Quality Standards to Use and Cite PCR ... [https://medscidiscovery.com/index.php/msd/article/view/1206]
- 66. Effects of secondary structures of DNA templates on the ... [https://pubmed.ncbi.nlm.nih.gov/30101656/]
- 67. Template secondary structure promotes polymerase jumping ... [https://pubmed.ncbi.nlm.nih.gov/10489610/]
- 68. Design PCR primers and check them for specificity - NCBI - NIH [https://www.ncbi.nlm.nih.gov/guide/howto/design-pcr-primers]
- 69. Using Primer-BLAST to find PCR primers-tips from IDT [https://www.idtdna.com/page/support-and-education/decoded-plus/tips-for-using-blast-to-locate-pcr-primers/]
- 70. Understanding qPCR Efficiency and Why It Exceeds 100% [https://biosistemika.com/blog/qpcr-efficiency-over-100/]
- 71. Quantitative PCR validation for research scientists: Part 1 of 2 [https://virologyresearchservices.com/2023/01/13/quantitative-pcr-validation-part-1-of-2/]
- 72. Consensus guidelines for the validation of qRT-PCR ... [https://pmc.ncbi.nlm.nih.gov/articles/PMC8792405/]
- 73. Absolute vs. Relative Quantification for qPCR [https://www.thermofisher.com/us/en/home/life-science/pcr/real-time-pcr/real-time-pcr-learning-center/real-time-pcr-basics/absolute-vs-relative-quantification-real-time-pcr.html]
- 74. What Do Pharmaceutical Scientists Do? 6 Responsibilities [https://bouve.northeastern.edu/news/what-do-pharmaceutical-scientists-do/]
- 75. How to Design Primers for PCR Experiments [https://www.zymoresearch.com/blogs/blog/how-to-design-primers-for-pcr-experiments?srsltid=AfmBOopdCZSYdct9cXKpIXYajVvsrDQcX4zV2iYIOib3BE5pZejDoAoM]
- 76. Droplet Digital PCR versus qPCR for gene expression ... [https://www.nature.com/articles/s41598-017-02217-x]
- 77. Comparison of two digital PCR platforms for quantification ... [https://pmc.ncbi.nlm.nih.gov/articles/PMC12622311/]
- 78. dPCR vs qPCR [https://www.qiagen.com/us/applications/digital-pcr/beginners/dpcr-vs-qpcr]
- 79. PCR primer design [https://www.qiagen.com/us/knowledge-and-support/knowledge-hub/bench-guide/pcr/introduction/pcr-primer-design]
- 80. Comparing the precision of two digital PCR applications for ... [https://www.nature.com/articles/s41598-025-13143-8]
- 81. Comparison of quantitative PCR and digital PCR assays ... [https://pubmed.ncbi.nlm.nih.gov/38061673/]
- 82. Specificity of Primers and Probes for Molecular Diagnosis ... [https://pmc.ncbi.nlm.nih.gov/articles/PMC12566895/]
- 83. Primer Design Tool [https://en.vectorbuilder.com/tool/primer-design.html]
- 84. Comparative Performance of Digital PCR and Real-Time RT ... [https://pmc.ncbi.nlm.nih.gov/articles/PMC12474457/]
- 85. Digital PCR: from early developments to its future application ... [https://pubs.rsc.org/en/content/articlehtml/2025/lc/d5lc00055f]
- 86. Analytical techniques for nucleic acid and protein detection ... [https://www.nature.com/articles/s12276-025-01453-w]
- 87. How to Design Primers for PCR Experiments [https://www.zymoresearch.com/blogs/blog/how-to-design-primers-for-pcr-experiments?srsltid=AfmBOopukaECc43mL98UX_oJ6kUtn9VRutr6lU-6g6gMbkTCaIMcrtT3]
- 88. PCR/qPCR Data Analysis [https://www.sigmaaldrich.com/US/en/technical-documents/technical-article/genomics/qpcr/data-analysis?srsltid=AfmBOooDvZpyYOV7xeMK8KUWCxOxe0jeeIQySmIQS58JErzLqfQ9D2Dh]
- 89. Comparative Analysis of RT-qPCR Assay Sensitivity and ... [https://www.sciencedirect.com/science/article/pii/S016609342500165X]
- 90. A Computational Tool for Large-Scale Primer Design and ... [https://pmc.ncbi.nlm.nih.gov/articles/PMC12469620/]