No PCR Amplification: A Scientist's Complete Guide to Diagnosis and Solution
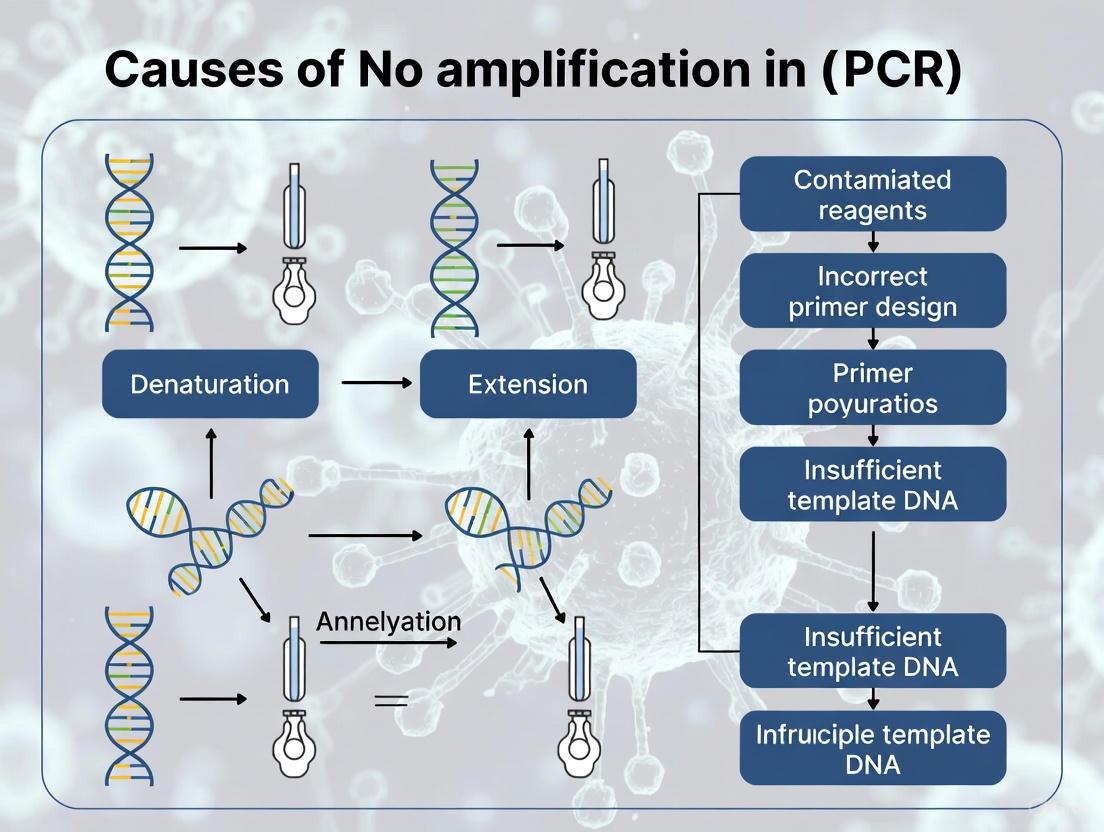
This article provides a comprehensive guide for researchers and drug development professionals facing the common yet frustrating issue of no amplification in PCR experiments.
No PCR Amplification: A Scientist's Complete Guide to Diagnosis and Solution
Abstract
This article provides a comprehensive guide for researchers and drug development professionals facing the common yet frustrating issue of no amplification in PCR experiments. It systematically explores the fundamental causes, from template quality and primer design to reagent integrity and cycling conditions. The content delivers actionable, step-by-step troubleshooting protocols, advanced optimization strategies for complex targets, and essential validation techniques to ensure robust, reproducible results in biomedical research and clinical assay development.
Understanding the Core Principles: Why Your PCR Reaction Fails at the Most Basic Level
In polymerase chain reaction (PCR) experiments, the DNA template serves as the essential blueprint for amplification. Despite careful optimization of primers, enzymes, and cycling conditions, many researchers encounter the frustrating outcome of no amplification, often tracing the root cause back to the template itself. The integrity, purity, and concentration of the DNA template collectively form a critical triad that dictates PCR success or failure [1] [2]. Within the context of a broader thesis on what causes no amplification in PCR experiments, understanding template-related failures becomes paramount for reliable results in research and drug development.
The exquisite sensitivity of PCR, while being its greatest strength, also renders it vulnerable to subtle template deficiencies [2]. Degraded templates lack the complete sequences necessary for primer binding and extension, while impurities co-purified during nucleic acid extraction can inhibit polymerase activity [3] [4]. Similarly, inappropriate template concentrations—either too high or too low—can lead to complete amplification failure or nonspecific results [1]. This technical guide examines the role of DNA template quality in PCR amplification failures, providing researchers with comprehensive methodologies for assessment, troubleshooting, and optimization to overcome these common challenges.
DNA Template Integrity: Preserving Structural Completeness
Template integrity refers to the structural completeness of the DNA molecules. Intact DNA maintains full-length sequences necessary for successful primer binding and polymerase extension, while degraded DNA fragments lack these essential regions, leading to amplification failure or partial products [4].
Mechanisms of Template Degradation
- Nuclease Contamination: DNases introduced during sample preparation or handling can progressively fragment DNA templates [4]. These enzymes remain active under inappropriate storage conditions and can destroy templates before PCR initiation.
- Physical Shearing: Vigorous pipetting, vortexing, or repeated freeze-thaw cycles can create shear forces that break DNA strands, particularly affecting long targets [5] [4].
- Chemical Degradation: Acidic conditions or exposure to reactive oxygen species can cause depurination and strand breakage. DNA is most stable at pH 7–8 in buffered solutions rather than pure water [5].
Assessment and Preservation Methods
Gel Electrophoresis Analysis: Evaluate template DNA integrity by agarose gel electrophoresis [4]. Intact genomic DNA appears as a tight, high-molecular-weight band with minimal smearing downward, while degraded DNA exhibits a pronounced smear toward lower molecular weights.
Proper Storage Conditions: Store DNA in molecular-grade water or TE buffer (pH 8.0) to prevent degradation by nucleases [4]. Avoid repeated freeze-thaw cycles by creating single-use aliquots, and store at -20°C for long-term preservation.
Handling Techniques: Minimize shearing and nicking of DNA during isolation by using wide-bore pipette tips and gentle mixing techniques [4]. For long targets (>10 kb), extra care must be taken during extraction and handling to maintain integrity.
DNA Template Purity: Eliminating PCR Inhibitors
Template purity encompasses the absence of substances that interfere with PCR amplification. Common inhibitors include salts, proteins, organic compounds, and previous amplification products that can reduce efficiency or cause complete reaction failure [2] [4].
Table 1: Common PCR Inhibitors, Their Sources, and Mechanisms of Action
| Inhibitor Category | Specific Examples | Common Sources | Mechanism of Inhibition |
|---|---|---|---|
| Chemical Chelators | EDTA, Citrate | Lysis buffers, anticoagulants | Chelates Mg²⁺ ions, essential cofactor for DNA polymerases [5] [4] |
| Organic Compounds | Phenol, Humic Acid | Nucleic acid extraction, soil/plant samples | Bind to DNA polymerase or template, interfering with enzymatic activity [6] [4] |
| Biological Molecules | Hemoglobin, Immunoglobulin | Blood samples, serum | Bind to single-stranded DNA or inhibit polymerase directly [2] |
| Detergents | SDS, Sarkosyl | Lysis buffers | Disrupt enzyme function at high concentrations [2] |
| Carryover Contaminants | Previous PCR amplicons | Laboratory contamination | Compete with target DNA for reagents, causing false positives [7] [8] |
Purification and Decontamination Strategies
Chemical Decontamination: Work surfaces should be cleaned with 10% sodium hypochlorite (bleach), which causes oxidative damage to nucleic acids, followed by ethanol to remove residual bleach [7] [8]. For equipment that cannot tolerate bleach, commercially available DNA-destroying decontaminants or UV irradiation can be used.
Physical Separation: Implement strict unidirectional workflow through physically separated rooms: reagent preparation area → sample preparation area → amplification and product detection area [8]. Each area requires dedicated equipment, laboratory coats, and consumables to prevent cross-contamination [7] [8].
Enzymatic Contamination Control: For carryover contamination prevention, incorporate uracil-N-glycosylase (UNG) with dUTP substituted for dTTP in PCR mixes [1] [7]. UNG hydrolyzes uracil-containing contaminants from previous amplifications before thermal cycling begins, while leaving native thymine-containing templates unaffected.
DNA Template Concentration: Finding the Optimal Range
Template concentration represents a critical balancing act in PCR setup. Insufficient template provides too few copies for detection, while excess template can introduce inhibitors or promote nonspecific amplification [1] [5].
Table 2: Optimal Template Concentration Ranges for Various DNA Sources
| Template Type | Optimal Amount | Copy Number Equivalent | Special Considerations |
|---|---|---|---|
| Genomic DNA | 5–50 ng in 50 µL reaction [1] | ~10⁴–10⁵ copies for human gDNA [5] | 30–100 ng sufficient for most applications; 10 ng for high-copy targets [5] |
| Plasmid DNA | 0.1–1 ng [1] | ~10⁷–10⁸ copies | Lower complexity requires less input material |
| Bacterial Genomic DNA | 100 pg–1 ng [5] | ~10⁵–10⁶ copies for E. coli | Higher copy number targets require less input |
| Lambda DNA | ~100 pg [5] | ~10⁷ copies | Standard for optimized systems |
| cDNA | 10 pg RNA equivalent [5] | Varies with transcript abundance | Depends on target expression level |
Concentration Optimization Strategies
Theoretical Considerations: Approximately 10⁴ copies of the target DNA are required to detect amplification products in 25–30 PCR cycles [5]. The required input amount depends on template complexity, with higher-complexity templates generally requiring more input material.
Empirical Testing: When experiencing no amplification, perform template titration experiments using serial dilutions (e.g., 1:10, 1:100, 1:1000) to identify the optimal concentration range [4]. This approach simultaneously dilutes potential inhibitors while identifying the concentration window that supports amplification.
Quality Assessment Integration: Combine quantification with quality assessment through spectrophotometric (A260/A280 and A260/A230 ratios) or fluorometric methods to ensure accurate concentration measurements free from contaminating influences [3].
Integrated Assessment Workflow for DNA Templates
A systematic approach to template evaluation combines integrity, purity, and concentration assessment into a coherent workflow that reliably predicts PCR success.
Diagram 1: DNA Template Assessment Workflow. This workflow outlines a systematic approach to diagnosing template-related PCR failures through sequential assessment of integrity, purity, and concentration.
The Scientist's Toolkit: Essential Reagents and Materials
Table 3: Research Reagent Solutions for DNA Template Quality Control
| Reagent/Material | Primary Function | Application Notes |
|---|---|---|
| Agarose | Matrix for electrophoretic separation | Assess DNA integrity through gel electrophoresis [4] |
| TE Buffer (pH 8.0) | DNA storage medium | Prevents degradation by nucleases; maintains optimal pH [4] |
| Sodium Acetate & Ethanol | DNA precipitation | Removes impurities and concentrates dilute samples [4] |
| Commercial Purification Kits | Nucleic acid isolation | Designed to maximize yield while removing specific inhibitors [4] |
| UNG Enzyme | Carryover prevention | Hydrolyzes uracil-containing contaminants from previous PCRs [1] [7] |
| Spectrophotometer/Nanodrop | Nucleic acid quantification | Assesses concentration and purity via A260/A280 ratios [3] |
| Fluorometric Assays | Accurate quantification | DNA-specific dyes provide more accurate concentration measurements [3] |
Successful PCR amplification requires meticulous attention to DNA template quality across multiple parameters. Integrity ensures the structural completeness necessary for primer binding and extension, purity eliminates enzymatic inhibitors that compromise reaction efficiency, and appropriate concentration provides the optimal copy number for robust amplification. By implementing systematic assessment protocols and maintaining strict contamination control measures, researchers can eliminate template-related causes of amplification failure, thereby enhancing experimental reproducibility and reliability in both basic research and drug development applications. Future directions in PCR diagnostics will continue to emphasize template quality as a foundational element in assay validation and standardization.
In polymerase chain reaction (PCR) experiments, the phenomenon of no amplification represents a significant experimental hurdle that can halt research progress. Within the context of a broader thesis on PCR failure, successful amplification is fundamentally dictated by the strategic design of oligonucleotide primers. Primers are the foundational components that guide DNA polymerase to the specific target sequence, and their sequence composition and structural characteristics directly determine the efficiency, specificity, and success of the entire amplification process [9]. Failures in amplification often stem from inadequacies in primer design that prevent proper annealing, facilitate nonspecific binding, or promote the formation of unproductive secondary structures [10]. This guide examines the core principles of primer design, establishing how sequence and structural elements dictate experimental outcomes and providing a systematic framework for troubleshooting amplification failure.
Core Principles of Primer Sequence Design
The molecular success of PCR is governed by several non-negotiable parameters concerning primer sequence. Adherence to these quantitative guidelines maximizes the probability of specific amplification while minimizing common failure modes.
Length, Melting Temperature, and GC Content
The table below summarizes the three most critical parameters for functional primer design:
| Design Parameter | Optimal Range | Impact on PCR Performance | Consequence of Deviation |
|---|---|---|---|
| Primer Length | 18–24 nucleotides [9] | Determines specificity and hybridisation rate [9] | Short primers: non-specific binding; Long primers: slow hybridisation, reduced yield [9] |
| Melting Temperature (Tm) | 54°C–65°C; Tm of paired primers should be within 5°C [9] [1] | Determines annealing temperature (Ta) for specific binding [9] [11] | Low Tm: non-specific annealing; High Tm: no primer binding [11] |
| GC Content | 40%–60% [9] [1] | Affects duplex stability via G≡C bonds (3 H-bonds) versus A=T bonds (2 H-bonds) [9] | Low GC: weak binding; High GC: non-specific binding and primer-dimer formation [9] |
The relationship between these core parameters and PCR success can be visualized as an interdependent system.
The 3' End and GC Clamp
The 3' end of a primer is critically important because DNA polymerase extends the new DNA strand from this point. To ensure efficient initiation of synthesis, the 3' end should ideally terminate in a C or G nucleotide—a feature known as a "GC clamp"—because the stronger triple hydrogen bond of a G≡C base pair promotes more stable primer binding [1]. However, this should not consist of a run of more than three G or C bases, as this can promote non-specific binding and false-positive results [9]. Furthermore, the 3' end must be free of significant self-complementarity to prevent the formation of secondary structures like hairpins, which can cause the polymerase to extend the primer into itself, halting amplification [9].
Structural Considerations and Problematic Interactions
Beyond linear sequence, the three-dimensional conformation of primers and their interactions present major pitfalls that lead to amplification failure.
Secondary Structures and Primer-Dimer Formation
The following flowchart illustrates the pathways through which faulty primer design leads to common PCR artefacts and, ultimately, experimental failure.
- Hairpins: Caused by intramolecular complementarity, where regions within a single primer (typically 3 or more nucleotides) bind to each other, forming a loop structure [9]. This prevents the primer from binding to the template DNA.
- Primer-Dimers: Formed via intermolecular complementarity. In a self-dimer, two forward or two reverse primers hybridize. In a cross-dimer, the forward and reverse primers anneal to each other [9] [10]. These structures are then amplified in place of the target, consuming reagents and yielding a short, unwanted product visible as a low molecular weight band (~20-60 bp) on a gel [10].
Computational Prediction and Machine Learning Approaches
Traditional primer design relies on applying the thermodynamic guidelines outlined above. However, a novel approach uses machine learning to predict PCR success directly from primer and template sequences. One study employed a Recurrent Neural Network (RNN) trained on experimental PCR results [12]. The relationships between primers and templates (complementarity, dimer potential, etc.) were converted into symbolic "pseudo-sentences." The RNN learned from these pseudo-sentences and was able to predict the success of PCR amplification with 70% accuracy, providing a powerful tool to pre-emptively flag primer pairs likely to fail [12]. This represents a significant shift from purely theory-based design to empirical, data-driven prediction.
Experimental Optimization and Troubleshooting Protocols
Even well-designed primers require optimized reaction conditions. A key finding from recent research is that a multivariate model can predict optimal MgCl₂ concentration with high accuracy (R² = 0.9942), highlighting that mathematical optimization can replace traditional trial-and-error [13].
Optimizing Critical Reaction Components
The following table details the key reagents that require optimization for a successful PCR, along with their typical functions and optimal ranges.
| Reagent Solution | Function in PCR | Recommended Concentration | Optimization Consideration |
|---|---|---|---|
| Magnesium Ions (MgCl₂) | Essential cofactor for DNA polymerase; stabilizes DNA duplexes [1] [14] | Typically 1.5 - 2.5 mM (concentration is buffer-dependent) [15] | Concentration too high: nonspecific products; too low: reduced yield [14]. A predictive model exists: (MgCl₂) ≈ 1.5625 + (-0.0073 × Tm) + (-0.0629 × GC%) + ... [13] |
| dNTPs | Building blocks (A, T, C, G) for new DNA strands [1] | 0.2 mM of each dNTP [1] | High concentrations can inhibit PCR; Mg²⁺ concentration must be balanced as it binds to dNTPs [1]. |
| DNA Polymerase | Enzyme that synthesizes new DNA strands [1] | 1 - 2 units per 50 µL reaction [1] | Increased amounts may help with difficult templates but can also cause nonspecific products [1]. |
| Template DNA | The target DNA to be amplified [1] | 5 - 50 ng genomic DNA; 0.1 - 1 ng plasmid DNA [1] | Too much template increases nonspecific amplification; too little reduces yield [1]. |
Protocol for Annealing Temperature Optimization
The annealing temperature (Ta) is the most common parameter requiring optimization.
- Calculate Melting Temperatures: Use the formula Tm = 4(G + C) + 2(A + T) for a preliminary estimate of each primer's Tm [9]. For a more accurate calculation that accounts for salt concentration, use the formula: Tm = 81.5 + 16.6(log[Na+]) + 0.41(%GC) – 675/primer length [9].
- Initial Annealing Temperature: Begin with a Ta that is 5°C below the calculated Tm of the lower-melting primer [11]. A more sophisticated calculation is: Ta Opt = 0.3 x (Tm of primer) + 0.7 x (Tm of product) – 14.9 [11].
- Empirical Optimization: Perform a gradient PCR, testing a range of temperatures (e.g., 2°C steps) centered on the calculated Ta [16]. Analyze the results by gel electrophoresis to identify the temperature that produces the highest yield of the specific product with the least background [16].
- Universal Annealing Buffer Alternative: To circumvent tedious optimization, use novel DNA polymerases with specialized buffers containing isostabilizing components. These allow for a universal annealing temperature of 60°C for many primer sets, simplifying protocol development and enabling the co-cycling of different PCR targets [16].
Successful PCR amplification is a direct consequence of meticulous primer design that respects the fundamental relationships between sequence, structure, and stability. The avoidance of no-amplification outcomes hinges on a systematic approach that integrates established thermodynamic principles—governing length, Tm, and GC content—with rigorous checks for detrimental secondary structures. Furthermore, the emerging potential of machine learning to predict PCR success from sequence data [12] and advanced mathematical models to precisely define reaction conditions [13] marks a significant evolution in primer design methodology. For the researcher investigating the root causes of PCR failure, this comprehensive framework, which spans from core design rules to sophisticated computational tools, provides a definitive pathway to diagnostic troubleshooting and guaranteed experimental success.
In polymerase chain reaction (PCR) experiments, the phenomenon of no amplification represents a critical failure point that can halt research progress. This issue is frequently rooted not in gross errors, but in the subtle and complex interplay between the core reaction components. Among these, DNA polymerase, deoxynucleoside triphosphates (dNTPs), and magnesium ions (Mg2+) form an indispensable triad, where each element's function is deeply dependent on the others. The absence or suboptimal concentration of any single component can collapse the entire amplification process. This guide provides an in-depth examination of how these three essential factors interact synergistically to drive successful DNA amplification, framing this understanding within the practical context of diagnosing and resolving the pervasive problem of no amplification in PCR. A precise understanding of this interplay is fundamental for researchers aiming to develop robust, reproducible PCR-based assays in fields from basic research to drug development.
The Core Components and Their Functions
DNA Polymerase: The Enzymatic Engine
DNA polymerase is the central enzyme responsible for synthesizing new DNA strands by incorporating nucleotides complementary to the template. Its activity and fidelity are paramount to PCR success.
Function and Types: DNA polymerases catalyze the template-directed addition of nucleotides to the 3'-end of a primer. While Taq DNA polymerase is a well-known standard with a half-life of ~40 minutes at 95°C, newer engineered enzymes offer enhanced performance, including higher thermostability, increased processivity (the number of nucleotides added per binding event), and improved fidelity (accuracy of nucleotide incorporation) [1]. For applications requiring high accuracy, such as cloning, proofreading polymerases (e.g., Pfu) are preferred.
Concentration Considerations: A typical 50 µL reaction uses 1–2 units of DNA polymerase [1]. While increasing the enzyme amount can sometimes help overcome inhibitors present in the sample, excess polymerase can also lead to the generation of nonspecific PCR products. The choice between standard and specialized polymerases (e.g., hot-start for reduced primer-dimer formation, or high-processivity for long or difficult templates) is a critical first step in experimental design [4] [3].
Deoxynucleoside Triphosphates (dNTPs): The Building Blocks
dNTPs (dATP, dCTP, dGTP, dTTP) provide the essential nucleoside precursors for the de novo synthesis of DNA strands.
Concentration and Balance: The recommended final concentration for each dNTP is typically 0.2 mM in a standard PCR [1]. It is crucial that these four nucleotides are present in equimolar amounts; unbalanced dNTP concentrations increase the error rate of DNA polymerase and can lead to misincorporation, potentially stalling polymerization [17]. The dNTP concentration is also intimately linked to Mg2+ availability, as described in the interplay section.
Special Considerations: Modified nucleotides, such as deoxyuridine triphosphate (dUTP), can be used in place of dTTP as part of a carryover prevention strategy involving Uracil-DNA Glycosylase (UDG) [1]. However, the incorporation efficiency of modified nucleotides varies between polymerases, and their use can sometimes reduce PCR efficiency and sensitivity, requiring optimization of the dTTP-to-dUTP ratio [1].
Magnesium Ions (Mg2+): The Essential Cofactor
Magnesium ions serve as a critical cofactor for DNA polymerase activity and facilitate the primer-template interaction.
Dual Role: Mg2+ has two primary functions. First, it is directly involved in the catalytic reaction at the polymerase's active site, enabling the formation of the phosphodiester bond between the primer's 3'-OH group and the phosphate of an incoming dNTP [1]. Second, it stabilizes the double-stranded structure by neutralizing the negative charges on the phosphate backbones of both the DNA template and the primers [1].
Concentration Range: The optimal concentration of Mg2+ is highly variable and must be determined empirically, often tested in increments of 0.2 mM to 1 mM [17]. It is most commonly supplied as MgCl2, though some proofreading polymerases perform better with MgSO4 [4]. The Mg2+ concentration is a key determinant of PCR specificity, stringency, and yield.
Table 1: Summary of Core PCR Components and Their Roles in No Amplification
| Component | Primary Function | Typical Concentration in 50 µL Reaction | Effect of Deficiency | Effect of Excess |
|---|---|---|---|---|
| DNA Polymerase | Catalyzes DNA synthesis by adding dNTPs to the growing strand. | 1–2 units [1] | No or low yield [4] | Nonspecific amplification and products [1] |
| dNTPs | Building blocks for new DNA strands. | 0.2 mM each dNTP [1] | No or low yield; reduced fidelity [1] | Inhibition of PCR; increased error rate [1] [17] |
| Mg2+ | Essential cofactor for polymerase activity; stabilizes DNA binding. | Varies (e.g., 1.5-2.5 mM); requires optimization [17] | No or low yield [4] | Nonspecific amplification; increased error rate [4] [17] |
The Interplay: A Systems View of PCR Biochemistry
The components of the PCR triad do not function in isolation; they exist in a tightly coupled biochemical equilibrium. The relationship between Mg2+ and dNTPs is particularly critical. Mg2+ binds to dNTPs in the reaction mixture to form the actual substrate (Mg-dNTP) that the polymerase recognizes and incorporates. Consequently, the concentration of free Mg2+ available for the polymerase is the total Mg2+ minus the Mg2+ bound to dNTPs. If the dNTP concentration is too high, it can chelate nearly all available Mg2+, effectively starving the polymerase of its essential cofactor and leading to failed amplification [1]. This interdependence makes balancing their concentrations paramount.
Furthermore, the choice of DNA polymerase influences the optimal conditions for both dNTPs and Mg2+. For instance, the fidelity of non-proofreading polymerases can be improved by using lower dNTP concentrations (0.01–0.05 mM), which then requires a proportional reduction in Mg2+ [1]. Proofreading polymerases may have different salt preferences, such as MgSO4 over MgCl2 [4]. This systems view underscores that troubleshooting one component inevitably involves checking the status of the other two. The diagram below illustrates this core interdependence and the consequences of its disruption.
Troubleshooting No Amplification: An Integrated Experimental Protocol
When faced with no amplification, a systematic approach that investigates the interplay of all three core components is required. The following integrated protocol provides a methodology for diagnosing and resolving this issue.
Diagnostic and Optimization Workflow
The path to resolving "no amplification" requires a logical sequence of checks and optimizations, moving from the most common and easily adjustable factors to more complex ones. The flowchart below outlines this systematic troubleshooting workflow.
Detailed Methodologies for Key Optimization Experiments
1. Magnesium Titration Protocol:
- Objective: To empirically determine the optimal Mg2+ concentration for a specific primer-template combination.
- Procedure: Prepare a master mix containing all standard PCR components except Mg2+. Aliquot this master mix into multiple PCR tubes. Then, add MgCl2 or MgSO4 to each tube to create a concentration series (e.g., 0.5, 1.0, 1.5, 2.0, 2.5, 3.0, 4.0 mM). Run the PCR using standard cycling conditions and analyze the products by agarose gel electrophoresis [17].
- Expected Outcome: A specific Mg2+ concentration window will yield a strong, specific amplicon with minimal background. Both lower and higher concentrations may result in no product or nonspecific bands, respectively.
2. dNTP Quality and Balance Check:
- Objective: To rule out dNTP degradation or improper mixing as a cause of failure.
- Procedure: Prepare a fresh, equimolar dNTP working solution from separate stock solutions. Verify the pH of the stock dNTPs (should be ~7.0); acidic dNTPs can degrade DNA. Test the fresh dNTP mix in a previously failed reaction, ensuring the final concentration for each dNTP is 0.2 mM [1] [17].
- Expected Outcome: The use of fresh, balanced dNTPs often restores amplification if the original stocks were degraded or unbalanced, which increases PCR error rates and can halt polymerization.
3. Polymerase Suitability and 'Spike-in' Test:
- Objective: To confirm that the DNA polymerase is active and appropriate for the template.
- Procedure: If amplification fails after optimizing Mg2+ and dNTPs, perform a 'spike-in' test. Set up two identical reactions: one with your target DNA and a second control reaction containing a known, easy-to-amplify template (e.g., a control plasmid provided with the polymerase). Use the same master mix for both.
- Expected Outcome: If the control reaction amplifies successfully but your target does not, the issue likely lies with the template quality or specificity (e.g., secondary structure, inhibitors). If both reactions fail, the polymerase or a core reagent is likely inactive or compromised.
Table 2: Troubleshooting Guide for No Amplification Scenarios
| Observed Problem | Root Cause Related to Core Components | Recommended Solution |
|---|---|---|
| Complete PCR Failure | - Inactive DNA polymerase (denatured or old).- Extremely low free Mg2+ (e.g., due to high dNTP or EDTA carryover).- Missing dNTPs or severely degraded dNTPs. | - Use fresh enzyme aliquots; verify storage conditions.- Titrate Mg2+ concentration; re-purify template to remove EDTA [4] [17].- Use a fresh, equimolar dNTP mix [17]. |
| Very Faint Product Band | - Suboptimal Mg2+ concentration (slightly too low or high).- Insufficient dNTPs for efficient extension.- Marginal polymerase activity (inhibitors present). | - Perform a fine-scale Mg2+ titration [17].- Ensure each dNTP is at 0.2 mM; avoid freeze-thaw cycles of dNTP stocks [1].- Increase polymerase amount slightly (e.g., by 25%); use polymerases with high inhibitor tolerance [1] [4]. |
| Failure with Complex Templates (GC-rich/Long) | - Standard polymerase lacks processivity for difficult templates.- Mg2+ concentration not optimized for challenging secondary structures. | - Switch to a high-processivity or specialized polymerase [4] [17].- Combine Mg2+ titration with PCR additives like betaine or DMSO [3] [17]. |
The Scientist's Toolkit: Essential Research Reagent Solutions
Successful PCR, especially when troubleshooting difficult reactions, often relies on using specialized reagents and formulations designed to address specific challenges. The following table details key solutions utilized by researchers.
Table 3: Key Research Reagent Solutions for PCR Troubleshooting
| Reagent / Solution | Function / Purpose | Application Note |
|---|---|---|
| Hot-Start DNA Polymerase | Remains inactive at room temperature to prevent non-specific priming and primer-dimer formation before the initial denaturation step. | Critical for improving specificity and yield in multiplex PCR or with low-copy-number templates [3] [18]. |
| High-Processivity Polymerase Blends | Engineered for high affinity to the template, enabling amplification of long targets (>10 kb) or templates with complex secondary structures (e.g., high GC content). | Preferred for difficult templates where standard polymerases fail [4] [17]. |
| PCR Master Mix | A pre-mixed, optimized solution containing Taq polymerase, dNTPs, MgCl2, and reaction buffers. | Saves time, reduces pipetting errors, and improves reproducibility; ideal for high-throughput applications [18]. |
| dNTP Mix (Equimolar, 10mM) | A ready-to-use mixture of all four dNTPs at equal concentrations (typically 10 mM total), ensuring balanced incorporation. | Prevents errors from manual mixing and ensures fidelity; fresh batches help rule out dNTP degradation as a failure cause [1] [17]. |
| Mg2+ Stock Solution (25mM MgCl2) | A separate, standardized magnesium chloride solution for fine-tuning Mg2+ concentration independent of other buffer components. | Essential for empirical optimization of reactions, particularly with new primer sets or problematic templates [17]. |
| PCR Additives (e.g., DMSO, Betaine, BSA) | Co-solvents that help denature GC-rich templates, destabilize secondary structures, or bind inhibitors present in the DNA sample. | Used as a last resort for stubborn reactions; concentration must be optimized as they can inhibit PCR if used in excess [4] [3]. |
The problem of no amplification in PCR is frequently a biochemical puzzle centered on the delicate balance between DNA polymerase, dNTPs, and Mg2+. A deep understanding of their individual roles and, more importantly, their interdependencies—such as the chelation of Mg2+ by dNTPs—is fundamental to effective troubleshooting. By adopting a systematic, integrated optimization strategy that includes titrating Mg2+, verifying dNTP quality and concentration, and selecting the appropriate polymerase for the task, researchers can reliably diagnose and resolve amplification failures. Mastering this core interplay is not merely a troubleshooting exercise but a critical step in ensuring the robustness, specificity, and success of PCR-based assays in scientific research and drug development.
The polymerase chain reaction (PCR) is a foundational technique in molecular biology, yet achieving efficient and specific amplification remains a common challenge. This technical guide examines the critical influence of thermal cycler parameters—temperature and time—on PCR amplification efficiency, with a specific focus on mitigating the pervasive issue of no amplification. Framed within broader thesis research on PCR failure, we delineate how the precise optimization of denaturation, annealing, and extension steps is paramount for successful DNA amplification. Through a synthesis of recent deep learning insights, established troubleshooting protocols, and empirical data, this whitepaper provides researchers and drug development professionals with advanced methodologies to diagnose amplification failures and establish robust, reliable PCR protocols.
In the context of investigating the root causes of no amplification in PCR experiments, understanding the exponential nature of the reaction is crucial. Even minor inefficiencies in thermal cycling parameters are compounded exponentially over cycles, potentially leading to complete amplification failure or significantly skewed results. Amplification efficiency is the cornerstone of a successful PCR, and it is governed directly by the instrument's control over temperature and time during cycling. While reagent quality and primer design are vital, the thermal profile acts as the executioner of the reaction plan. This guide focuses on these critical instrumental parameters, providing a framework for systematic optimization to address the central research problem of amplification failure.
The Core Thermal Cycling Parameters
The PCR process comprises three fundamental steps repeated over 25-40 cycles: denaturation, annealing, and extension. Each step demands precise control of temperature and duration for optimal efficiency [19].
Denaturation
Purpose: To separate double-stranded DNA into single strands, making them accessible for primer binding.
- Temperature: The standard range is 94–98°C [19]. Incomplete denaturation, often due to a temperature that is too low, can cause the DNA strands to "snapback," drastically reducing product yield [20].
- Time: An initial denaturation of 1–3 minutes is common. For complex templates like genomic DNA or sequences with high GC content (>65%), longer incubation or higher temperatures may be required for complete strand separation [19].
Table 1: Denaturation Optimization Guidelines
| Template Type | Recommended Temperature | Recommended Time | Key Considerations |
|---|---|---|---|
| Standard Templates | 94-95°C | 30 seconds - 1 minute | Suitable for most plasmids and PCR products. |
| High GC Content | 98°C | 1-3 minutes | Longer times or higher temperatures prevent incomplete denaturation. |
| Complex Genomic DNA | 94-98°C | 1-3 minutes (initial) | Longer initial denaturation ensures complete separation of complex DNA. |
Annealing
Purpose: To allow primers to bind specifically to their complementary sequences on the single-stranded DNA template. This is the most critical parameter for reaction specificity [21].
- Temperature: Determined by the primer melting temperature (Tm). A common starting point is 3–5°C below the calculated Tm of the primers [19]. An excessively high temperature prevents primer binding, leading to no amplification, while a too-low temperature causes non-specific binding and spurious products [22].
- Time: Typically 0.5–2 minutes is sufficient for primer annealing [19]. The enzyme Taq DNA polymerase retains some activity even at these lower temperatures, meaning primer extension can begin during the annealing step [20].
Table 2: Effects of Incorrect Annealing Temperature
| Condition | Impact on Amplification Efficiency | Observed Result |
|---|---|---|
| Too High | Primers cannot bind to the template. | No amplification or very low yield [22]. |
| Too Low | Primers bind to mismatched sequences. | Non-specific amplification, multiple bands, or primer-dimer [22]. |
| Optimized | Specific primer-template binding. | Specific amplification of the target DNA. |
Extension
Purpose: For the DNA polymerase to synthesize a new DNA strand by extending the primer.
- Temperature: Generally set to 70–75°C, the optimal temperature for activity of many thermostable polymerases [19].
- Time: Directly proportional to the length of the amplicon and the synthesis rate of the polymerase. For instance, Taq DNA polymerase typically requires 1 minute per kilobase, whereas slower, high-fidelity enzymes like Pfu may need 2 minutes per kilobase [19]. Insufficient extension time results in incomplete products.
Advanced Considerations and Mechanisms of Failure
Beyond the basic parameters, several advanced factors can dictate the success or failure of an amplification reaction.
Sequence-Dependent Amplification Efficiency
Recent research demonstrates that amplification efficiency is intrinsically sequence-specific, independent of traditional confounding factors like GC content. Deep learning models trained on synthetic DNA pools have predicted sequence-specific amplification efficiencies with high performance (AUROC: 0.88), identifying that around 2% of sequences in a pool have very poor efficiency (<80% relative to the mean) [23]. This means certain templates are systematically lost during amplification, which can manifest as no amplification for those specific targets in a multi-template assay. The primary mechanism identified for this failure is adapter-mediated self-priming, where specific motifs near the primer-binding sites cause the reaction to abort [23].
The Impact of Cycle Number
The number of PCR cycles must be aligned with the starting concentration of the target DNA. Typically, 25–35 cycles are run [19]. If the template copy number is very low (e.g., <10 copies), up to 40 cycles may be required to generate a detectable yield [19]. However, exceeding approximately 45 cycles is not recommended, as by-product accumulation and reagent depletion lead to a plateau phase and can increase non-specific background [19].
Primer and Template Specific Issues
- Primer-Binding Site Mutations: A single-nucleotide variant in the primer-binding region can cause allelic dropout, where one allele fails to amplify. This has been documented in forensic analysis of the amelogenin gene, where an A→G mutation 7 bp downstream from the 3' end led to a complete failure to amplify the X homolog [24].
- Complex Template Challenges: Templates with mononucleotide or dinucleotide repeats longer than 11 bp are amplified with decreasing accuracy, often resulting in repeat contraction. This effect is observed with both Taq and high-fidelity polymerases like Pfu and can be mistaken for a true biological variant [25].
Experimental Protocols for Optimization and Troubleshooting
A systematic approach to optimization is essential for diagnosing and resolving amplification failure.
Protocol 1: Annealing Temperature Optimization Using a Gradient Thermal Cycler
Gradient thermal cyclers are indispensable for efficiently determining the optimal annealing temperature (Ta) by testing a range of temperatures in a single run [21].
Methodology:
- Calculate Tm: Determine the melting temperature (Tm) for your primers using the formula:
Tm = 4(G + C) + 2(A + T)or a more accurate nearest-neighbor method [19]. - Define Gradient Range: Set the thermal cycler's gradient to span a range of ~10°C, centered on the calculated Tm. For example, for a Tm of 60°C, set a gradient from 55°C to 65°C [21].
- Run PCR: Prepare a master mix with all reaction components, aliquot it across the gradient block, and execute the PCR program. Apply the temperature gradient only during the annealing step.
- Analyze Results: Use gel electrophoresis to assess the results. The optimal Ta is identified as the temperature that produces the brightest, single band of the correct size with minimal non-specific products or primer-dimer [21].
The workflow for this systematic optimization is outlined below.
Protocol 2: Diagnostic Framework for "No Amplification"
When faced with no amplification, a structured diagnostic workflow is required to identify the root cause.
Methodology:
- Verify Reagent Integrity: Confirm that all reagents, especially the DNA polymerase, dNTPs, and primers, are fresh and have been stored correctly. Run a positive control reaction with a known, well-amplifying template and primer set.
- Check Template Quality and Quantity: Assess the template DNA for degradation via gel electrophoresis and quantify it accurately. Re-purify the template if inhibitors are suspected [3].
- Employ a Gradient Thermal Cycler: Perform a gradient PCR as described in Protocol 1. The pattern of results across the temperature range provides critical diagnostic information [21]:
- No product at any temperature: Suggests a fundamental issue unrelated to Ta, such as failed reagents, template degradation, or potent inhibition [21].
- Products only at low temperatures: Indicates poor reaction specificity; the true optimal Ta is likely higher than the tested range.
- Smeared bands at low temperatures, clean product at higher temperature: Confirms that the annealing temperature was too low. The Ta should be set to the highest temperature that still yields a strong, specific product.
The Scientist's Toolkit: Essential Research Reagents and Materials
The following table details key reagents and their critical functions in ensuring efficient amplification under optimized thermal cycling conditions.
Table 3: Essential Reagents for Robust PCR
| Reagent / Material | Function | Consideration for Amplification Efficiency |
|---|---|---|
| Thermostable DNA Polymerase | Enzymatically synthesizes new DNA strands. | Choice impacts speed (sec/kb), fidelity, and tolerance to inhibitors. "Hot-start" versions prevent non-specific amplification at room temperature [3]. |
| Primers | Short, single-stranded DNA sequences that define the target region. | Design is critical. Must be specific, have appropriate Tm, and avoid secondary structures or self-complementarity to prevent primer-dimer and no amplification [26]. |
| dNTPs | Deoxynucleotide triphosphates (dATP, dCTP, dGTP, dTTP); the building blocks of DNA. | Quality and concentration are vital. Degraded dNTPs or incorrect concentration can lead to no yield or misincorporation. |
| Magnesium Chloride (MgCl₂) | A cofactor essential for DNA polymerase activity. | Concentration is a key optimization variable. Too little reduces enzyme activity; too much promotes non-specific binding [26]. |
| Reaction Buffer | Provides the optimal chemical environment (pH, salts) for the polymerase. | Buffer composition (e.g., isostabilizing components) can enable universal annealing temperatures and improve yield and specificity [19]. |
| PCR Additives | Compounds like betaine, DMSO, or BSA. | Can enhance specificity and yield for difficult templates (e.g., high GC content) or help overcome inhibitors in the sample [19]. |
The parameters of temperature and time in thermal cycling are not merely procedural settings but are fundamental determinants of PCR success. As research into the causes of amplification failure advances, it is clear that a combination of factors—from the precise molecular kinetics governed by annealing stringency to the intrinsic sequence-dependent efficiency recently uncovered by deep learning—must be considered. The systematic optimization and troubleshooting protocols detailed in this guide, supported by the strategic use of essential reagents, provide a clear path for researchers to diagnose and rectify the problem of no amplification. By meticulously controlling these parameters, scientists can ensure the reliability, specificity, and efficiency of their PCR assays, thereby underpinning the integrity of downstream applications in genomics, diagnostics, and drug development.
Polymerase chain reaction (PCR) is a cornerstone technique in molecular biology, but its sensitivity and specificity make it highly vulnerable to interference from various substances known as PCR inhibitors. These inhibitors are a common cause of amplification failure, leading to false-negative results, reduced sensitivity, and inaccurate quantification [27] [28]. Understanding the sources, mechanisms, and strategies to overcome these inhibitors is crucial for researchers, scientists, and drug development professionals aiming to ensure the reliability of their PCR-based assays. This guide provides an in-depth examination of common PCR inhibitors and outlines practical, evidence-based strategies to mitigate their effects.
What are PCR Inhibitors?
PCR inhibitors are a heterogeneous class of substances that originate from the sample itself, the sample matrix, or reagents used during sample preparation and nucleic acid extraction [27] [28]. They interfere with the efficiency of the in vitro DNA polymerization process through various mechanisms, including:
- Direct interaction with DNA polymerase, leading to enzyme degradation or blockage of its active site.
- Indirect interference by chelating co-factors like magnesium ions.
- Interaction with the nucleic acid template, preventing denaturation or primer annealing.
- Degradation or modification of nucleic acids by nucleases.
- Fluorescence quenching in real-time PCR or digital PCR, which disrupts signal detection [27] [28] [29].
The impact of these inhibitors can range from partial reduction in amplification efficiency, causing an underestimation of the target nucleic acid amount, to complete amplification failure [28].
PCR inhibitors are present in a wide variety of sample types relevant to clinical, environmental, and food testing. The table below summarizes common sources and their specific inhibitory substances.
Table 1: Common Sources and Types of PCR Inhibitors
| Source Category | Example Sources | Specific Inhibitors |
|---|---|---|
| Clinical Samples | Blood, serum, plasma, urine, stool | Hemoglobin, Immunoglobulin G (IgG), Lactoferrin, Heparin, Urea, Bile salts [27] [28] [29] |
| Food & Plants | Milk, berries, tomatoes, seafood, corn leaf | Polysaccharides, Polyphenols, Pectin, Calcium ions, Proteases, Glycogen [28] [30] [31] |
| Environmental Samples | Soil, sediment, wastewater, humic material | Humic acids, Fulvic acids, Tannic acid, Metal ions, Melanin, Collagen [27] [32] [28] |
| Sample Preparation | DNA/RNA extraction, laboratory reagents | Phenol, Ethanol, Isopropanol, Ionic detergents (SDS), Chaotropic salts, EDTA [28] [29] [31] |
Mechanisms of PCR Inhibition
PCR inhibitors disrupt amplification by targeting specific components or steps in the reaction. The following diagram illustrates the key mechanisms and sites of interference.
The mechanisms can be broken down as follows:
- Inhibition of DNA Polymerase: Many inhibitors, such as humic acids, phenol, and polysaccharides, directly interact with the DNA polymerase. They can degrade the enzyme (e.g., via proteases), denature it, or block its active site, reducing its activity [28] [29]. For instance, IgG in blood has a high affinity for single-stranded DNA, preventing polymerase access [28].
- Cofactor Chelation: Magnesium ions (Mg²⁺) are essential cofactors for DNA polymerase activity. Substances like EDTA, humic acids, and tannins chelate Mg²⁺, making it unavailable for the enzyme and drastically reducing amplification efficiency [28] [31].
- Interaction with Nucleic Acids: Inhibitors such as humic acids can bind directly to the DNA template, preventing its denaturation or the annealing of primers [27] [28]. Melanin has been shown to form a reversible complex with the DNA polymerase and also bind to nascent DNA chains, causing premature termination of reverse transcription [28] [29].
- Fluorescence Interference: In real-time qPCR and digital PCR (dPCR), some inhibitors can quench the fluorescence of the probes or dyes used for detection, or cause excessive background fluorescence. This leads to an underestimation of the target concentration or false-negative readings [27] [33].
Strategies to Overcome PCR Inhibition
A multi-faceted approach is often required to effectively mitigate PCR inhibition. The workflow below outlines a systematic strategy from sample preparation to data analysis.
Sample Purification and Dilution
The first line of defense is efficient sample preparation.
- Enhanced Purification: Using purification kits with advanced chemistries, such as magnetic beads with proprietary coatings designed to bind inhibitors, can effectively remove humic acids, polyphenols, and other contaminants [32] [29].
- Sample Dilution: A simple and effective method is to dilute the nucleic acid extract. This reduces the concentration of inhibitors to a sub-inhibitory level. A common approach is a 10-fold dilution, though this also dilutes the target DNA and may reduce assay sensitivity, making it unsuitable for low-abundance targets [32] [28].
Use of Inhibitor-Tolerant DNA Polymerases
The choice of DNA polymerase is critical. Wild-type Taq polymerase is highly susceptible to many inhibitors. Several solutions exist:
- Engineered Polymerases: Directed evolution and protein engineering have created mutant Taq polymerases with superior resistance to inhibitors found in blood, soil, and plant extracts [27] [30]. For example, the mutant Taq C-66 (E818V) shows high resistance to diverse inhibitors like hemoglobin and humic acid [30].
- Specialized Polymerase Blends: Many commercial master mixes are specifically formulated for inhibitor tolerance. These often include polymerases with enhanced stability and buffer systems containing enhancers [33].
PCR Enhancers and Additives
Adding specific compounds to the PCR reaction can counteract inhibitors.
- Proteins: Bovine Serum Albumin (BSA) acts as a "decoy" by binding to inhibitors like phenolics, humic acids, and proteinases, preventing them from interfering with the polymerase [3] [32] [28]. T4 gene 32 protein (gp32) is a single-stranded DNA-binding protein that stabilizes DNA and has proven highly effective in mitigating inhibition in complex matrices like wastewater [32].
- Other Enhancers:
Table 2: Common PCR Enhancers and Their Applications
| Enhancer | Common Working Concentration | Primary Function & Application |
|---|---|---|
| BSA (Bovine Serum Albumin) | 0.1 - 0.5 μg/μL | Binds to inhibitors like phenols and humic acids; useful for blood, plant, and soil samples [3] [32] |
| T4 gp32 Protein | 0.2 μg/μL | Binds single-stranded DNA, stabilizes reaction; highly effective for wastewater and environmental samples [32] |
| DMSO | 1 - 5% | Reduces secondary structure; good for GC-rich templates and plant extracts [32] [28] |
| Betaine | 0.5 - 1.5 M | Equalizes base stability, prevents secondary structure; helpful for plant and genomic DNA [3] |
Digital PCR (dPCR) as a Robust Solution
Digital PCR has been demonstrated to be more tolerant to inhibitors than quantitative PCR (qPCR) [27] [34]. The reasons for this increased resilience are two-fold:
- End-point Quantification: dPCR does not rely on amplification kinetics or cycle threshold (Cq) values for quantification. Instead, it uses an end-point measurement and Poisson statistics to provide an absolute count of target molecules. Inhibitors that merely delay amplification (a major problem in qPCR) do not affect the final count in dPCR, as long as amplification occurs [27].
- Sample Partitioning: The partitioning of the reaction into thousands of nanoliter-sized droplets can isolate inhibitor molecules from the PCR components, effectively reducing their local concentration within positive droplets and allowing amplification to proceed [27] [34].
The Scientist's Toolkit: Key Reagents for Inhibition Management
Table 3: Essential Reagents and Kits for Overcoming PCR Inhibition
| Tool Category | Example Products / Components | Function & Rationale |
|---|---|---|
| Inhibitor-Tolerant Polymerases | GoTaq Endure, OmniTaq, Terra PCR Direct | Engineered enzymes or blends with intrinsic resistance to inhibitors in blood, soil, and plant extracts [33] [30] [31] |
| PCR Enhancers | BSA, T4 gp32 Protein, DMSO, Betaine | Additives that neutralize inhibitors, stabilize enzymes, or improve nucleic acid accessibility [3] [32] [28] |
| Specialized Purification Kits | BcMag PCR Inhibitor Removal Kit, Silica column/bead-based kits | Designed to specifically bind and remove common inhibitors (humic acids, polyphenols, heparin) during nucleic acid isolation [32] [29] |
| Digital PCR (dPCR) | QIAcuity, Absolute Q | Platform choice that offers inherent tolerance to inhibitors through partitioning and end-point analysis [27] [34] |
Experimental Protocol: Evaluating PCR Enhancers for Wastewater Analysis
The following protocol, adapted from a study on SARS-CoV-2 detection in wastewater, provides a methodology to systematically evaluate different enhancers for relieving inhibition [32].
Objective: To test the efficacy of various PCR enhancers in restoring amplification efficiency in inhibited samples.
Materials:
- Inhibited nucleic acid sample (e.g., extracted from wastewater).
- Standard qPCR or RT-qPCR master mix.
- Primers and probes for a target of interest.
- Putative enhancers: e.g., BSA, T4 gp32, DMSO, formamide, Tween-20, glycerol.
- Nuclease-free water.
- Real-time PCR instrument.
Method:
- Prepare Reaction Mixtures: Create a master mix containing the polymerase, buffer, dNTPs, primers, and probe. Aliquot this master mix into separate tubes.
- Add Enhancers: To each aliquot, add a different enhancer at its optimal concentration. For example:
- BSA: 0.1 - 0.5 μg/μL final concentration.
- T4 gp32: 0.2 μg/μL final concentration.
- DMSO: 1-5% final concentration. Include a negative control (no enhancer) and a positive control (sample diluted 10-fold, if applicable).
- Add Template: Add the same volume of the inhibited nucleic acid extract to each reaction mixture.
- Run PCR: Perform qPCR amplification using the standard cycling conditions for your assay.
- Analyze Results: Compare the Cq values and amplification curves across the different reactions. A significant decrease in Cq (e.g., >2 cycles) in the enhancer-containing reactions compared to the negative control indicates successful mitigation of inhibition. The enhancer yielding the lowest Cq and a robust amplification curve is the most effective for that sample type.
PCR inhibition is a pervasive challenge that can derail molecular experiments and diagnostic assays. A deep understanding of inhibitor sources and mechanisms is the foundation for developing effective countermeasures. By implementing a strategic combination of optimized sample preparation, inhibitor-tolerant enzymes, chemical enhancers, and potentially leveraging the inherent robustness of digital PCR, researchers can overcome these obstacles. This ensures the generation of reliable, reproducible, and accurate data, which is fundamental to progress in research and drug development.
Robust PCR Setup and Optimization: A Methodical Approach for Reliable Amplification
In the context of polymerase chain reaction (PCR) research, the problem of "no amplification" represents a significant experimental hurdle. This failure can often be traced back to the initial stages of primer design and validation. Properly designed primers are the cornerstone of any successful PCR experiment, as they dictate the exquisite specificity and sensitivity that make this method uniquely powerful [35]. When primers are poorly designed or insufficiently validated, researchers face not just failed experiments but also the risk of false positives or negatives, compromising the integrity of scientific findings. This guide provides a comprehensive framework for designing and validating primers with a focus on achieving maximum specificity, thereby addressing a fundamental cause of amplification failure in molecular biology research.
Foundational Rules for Effective Primer Design
Core Primer Parameters
The following parameters form the foundation of effective primer design. Adherence to these guidelines significantly increases the likelihood of successful amplification while reducing common artifacts like primer-dimer formation and non-specific binding.
Table 1: Core Design Parameters for PCR Primers
| Parameter | Optimal Range | Rationale | Citations |
|---|---|---|---|
| Length | 18-30 nucleotides | Balances specificity with adequate binding energy | [36] [37] |
| Melting Temperature (Tm) | 60-64°C (ideal: 62°C) | Optimal for standard PCR enzyme function | [36] |
| Tm Difference Between Primers | ≤2°C | Ensures simultaneous binding of both primers | [36] |
| GC Content | 35-65% (ideal: 50%) | Provides sequence complexity while maintaining specificity | [36] [37] |
| 3' End Design | Avoid >2 consecutive G or C bases | Prevents overly strong binding and non-specific amplification | [37] |
| Annealing Temperature (Ta) | 5°C below primer Tm | Optimizes specificity and efficiency of primer binding | [36] |
Avoiding Common Structural Pitfalls
Primer secondary structures and interactions represent a major cause of amplification failure. These issues can prevent primers from binding to their intended targets, instead forming unproductive structures that consume reaction components.
- Self-Dimers and Cross-Dimers: Screen designs to ensure the ΔG value of any self-dimers or heterodimers is weaker (more positive) than -9.0 kcal/mol [36]. Positive values indicate the secondary structure will not form under standard reaction conditions.
- Hairpin Formation: Avoid primers with extensive secondary structures, particularly those stable at the reaction annealing temperature. Hairpins can form when a primer folds back on itself, interfering with its availability for target binding [37].
- Complementarity Checks: Use tools like the OligoAnalyzer Tool to analyze potential for dimer formation between forward and reverse primers, which can lead to primer-dimer artifacts that compete with target amplification [36].
Advanced Considerations for Specificity and Efficiency
Amplicon Design and Target Selection
The characteristics of the amplified product significantly impact PCR success. Careful consideration of amplicon properties ensures efficient amplification while addressing common experimental requirements.
- Amplicon Length: For standard PCR, target amplicons of 70-150 base pairs, which allow sufficient sequence space for designing primers and probes with appropriate Tm while maintaining efficient amplification under standard cycling conditions [36]. Longer amplicons up to 500 bases are possible but require modified cycling conditions with increased extension times.
- Genomic DNA Exclusion: When analyzing gene expression, design assays to span an exon-exon junction to reduce the possibility of genomic DNA amplification [36]. This approach creates an inherent size difference between cDNA and gDNA products or prevents amplification of gDNA entirely when the junction spans a large intron.
- Template-Specific Considerations: For mRNA templates, utilize tools that allow specifying that "Primer must span an exon-exon junction" to direct the program to return at least one primer that spans such a junction, limiting amplification to mRNA rather than genomic DNA [38].
Specificity Validation Through In Silico Analysis
Computational specificity checking represents a critical step in primer validation that significantly reduces experimental failure. This process involves bioinformatic screening to ensure primers will amplify only the intended target.
- Database Selection: NCBI Primer-BLAST allows selecting from specialized databases including RefSeq mRNA, RefSeq representative genomes, and core_nt (which excludes eukaryotic chromosomal sequences for faster searching) [38]. For most applications, restricting the search to a specific organism dramatically improves search speed and relevance.
- Mismatch Tolerance: Configure tools to require at least one primer (within a pair) to have a specified number of mismatches to unintended targets, particularly toward the 3' end where extension is initiated [38]. This ensures primers will not efficiently amplify off-target sequences.
- Comprehensive Screening: Effective specificity checking evaluates not just forward-reverse primer pairs but also forward-forward and reverse-reverse combinations to prevent primer-dimer amplification on non-target sequences [38].
Table 2: Specificity Checking Parameters in Bioinformatics Tools
| Tool | Specificity Features | Recommended Databases | Key Parameters | |
|---|---|---|---|---|
| NCBI Primer-BLAST | Automatic specificity checking against selected databases | RefSeq mRNA, Refseq representative genomes, core_nt | Organism restriction, max amplicon size, exon junction span | [38] [39] |
| Geneious Specificity Testing | Tests against user-defined off-target sequences | Custom sequence lists, whole genomes | Mismatch count and location, 3' end weighting | [40] |
| IDT OligoAnalyzer | BLAST analysis integration with secondary structure prediction | Standard NCBI databases | Self-dimer and hairpin detection with ΔG values | [36] |
Experimental Validation and Troubleshooting
Systematic Validation Protocols
Despite rigorous in silico design, experimental validation remains essential. The following protocol provides a systematic approach to verifying primer performance in the laboratory.
Protocol 1: Primer Specificity and Efficiency Validation
Initial Specificity Check: Run PCR with standard cycling conditions and analyze products by agarose gel electrophoresis. A single sharp band of the expected size indicates specific amplification [3].
Gradient PCR Optimization: If non-specific products are observed or yield is low, perform a temperature gradient PCR, testing annealing temperatures from 5°C below to 2°C above the calculated Tm of your primers [36] [3].
Mg²⁺ Concentration Titration: Prepare reactions with Mg²⁺ concentrations ranging from 1.5 mM to 4 mM in 0.5 mM increments, as Mg²⁺ affects polymerase activity and reaction stringency [3].
Standard Curve Analysis (for qPCR): For quantitative applications, run a dilution series of template to determine amplification efficiency. Ideal primers will provide efficiency between 90-110% with R² > 0.99 [36].
Sequencing Verification: Purify the PCR product and sequence to confirm it matches the intended target, providing definitive validation of specificity [37].
Troubleshooting Common Amplification Failures
When faced with no amplification or poor yield, systematic troubleshooting can identify and resolve the underlying issues, which often relate to primer design or reaction conditions.
- No Amplification: Confirm template quality and concentration, then optimize PCR conditions by adjusting annealing temperature, Mg²⁺ concentration, and reaction buffer composition [3]. Verify that primer binding sites are present in the template and check for secondary structures that might prevent primer access.
- Non-Specific Products: Increase annealing temperature incrementally (1-2°C steps) or use hot-start polymerases to prevent primer extension during reaction setup [3]. Re-evaluate primer design for specificity, particularly at the 3' ends.
- Primer-Dimer Formation: Reduce primer concentration (typically 50-500 nM final concentration), ensure 3' ends lack complementarity, and increase annealing temperature [36] [3]. Consider using specialized polymerase formulations designed to minimize dimer formation.
Essential Tools and Reagents for Primer Design and Validation
A successful primer design and validation workflow relies on both computational tools and laboratory reagents. The following table summarizes key resources that support this process.
Table 3: Research Reagent Solutions for Primer Design and Validation
| Category | Tool/Reagent | Primary Function | Key Features | |
|---|---|---|---|---|
| Design Tools | NCBI Primer-BLAST | Primer design with specificity checking | Integration with NCBI databases, exon junction targeting | [38] [39] |
| IDT PrimerQuest | Custom primer and probe design | ~45 customizable parameters, batch processing | [41] | |
| Eurofins PCR Primer Design Tool | Optimal primer pair selection | Uses Prime+ of GCG Wisconsin Package | [42] | |
| Analysis Tools | IDT OligoAnalyzer | Oligonucleotide property analysis | Tm calculation, secondary structure prediction, BLAST integration | [36] |
| VectorBuilder Primer Design | Specific primer design for multiple applications | User-friendly interface with customization options | [37] | |
| Reagents | Hot-Start Polymerase | Reduction of non-specific amplification | Activated at high temperatures to prevent premature extension | [3] |
| PCR Additives (BSA, Betaine) | Overcoming inhibition and improving specificity | Reduces effects of inhibitors, destabilizes secondary structures | [3] | |
| dNTPs | DNA synthesis | Building blocks for polymerase extension | [36] |
Proper primer design and validation represent the most effective strategy for preventing amplification failure in PCR experiments. By adhering to established design rules, utilizing computational tools for specificity checking, and implementing systematic experimental validation, researchers can significantly reduce the incidence of false results and failed reactions. The integration of these best practices into standard laboratory protocols ensures that primer-related issues are addressed proactively rather than reactively, saving valuable time and resources while enhancing the reliability of experimental outcomes. As PCR continues to evolve as a foundational technology in molecular biology and diagnostic applications, rigorous attention to primer design remains paramount for generating robust, reproducible, and meaningful scientific data.
Accurate DNA Template Quantification and Quality Assessment Protocols
The failure of polymerase chain reaction (PCR) experiments, specifically the phenomenon of no amplification, frequently originates from inadequacies in the initial stages of DNA template preparation and quantification. Within the context of broader research into PCR failure mechanisms, accurate DNA template quantification and rigorous quality assessment emerge as fundamental prerequisites for successful amplification. Errors in these initial steps can introduce PCR inhibitors, lead to incorrect template concentrations, or compromise nucleic acid integrity, ultimately resulting in complete amplification failure [43]. This technical guide provides researchers and drug development professionals with detailed protocols for reliable DNA template quantification and quality assessment, thereby addressing a principal root cause of no amplification in PCR experiments.
Core Quantification Methodologies
Absolute Quantification Methods
Digital PCR (dPCR): This method provides absolute quantification without requiring a standard curve. dPCR works by partitioning a sample into numerous individual real-time PCR reactions; some reactions contain the target molecule (positive) while others do not (negative). Following PCR analysis, the fraction of negative reactions is used to generate an absolute count of target molecules in the sample [44]. This technique is highly tolerant to inhibitors and capable of analyzing complex mixtures, with precision determined by the number of digital PCR replicates [44]. Key applications include quantifying copies of rare alleles in heterogeneous mixtures, counting cell equivalents by targeting genomic DNA, and determining the absolute number of viral copies present in a sample without reference to a standard [44].
Standard Curve Method: This absolute quantification approach requires standards with known concentrations. The DNA or RNA used for standards must be a single, pure species. For example, plasmid DNA prepared from E. coli is often contaminated with RNA, which increases the A260 measurement and inflates the copy number determined for the plasmid [44]. Accurate pipetting is critical because standards must be diluted over several orders of magnitude. Concentrated plasmid DNA or in vitro transcribed RNA must be diluted 10^6–10^12-fold to reach concentrations similar to targets in biological samples. Diluted standards must be stabilized in small aliquots stored at –80°C and thawed only once before use [44].
Relative Quantification Methods
Comparative CT Method (ΔΔCT): This approach analyzes changes in gene expression in a given sample relative to another reference sample, such as an untreated control. The method compares the CT value of a target gene to an internal control or reference gene (e.g., a housekeeping gene) in a single sample using the formula 2^–ΔΔCT [44]. This method eliminates the need for a standard curve, increases throughput, and allows amplification of target and endogenous control in the same tube, providing normalization against variables such as RNA integrity and reverse transcription efficiencies [44]. A critical requirement is that the efficiencies of the target and endogenous control amplifications must be approximately equal, which must be validated experimentally [44].
Standard Curve Method for Relative Quantification: In this method, quantity is expressed relative to a basis sample called a calibrator. For all experimental samples, the target quantity is determined from the standard curve and divided by the target quantity of the calibrator. The calibrator becomes the 1× sample, and all other quantities are expressed as an n-fold difference relative to the calibrator [44]. This method is particularly useful for correlating viral copy number with disease states or measuring gene expression in response to stimuli like drug treatments [45].
Table 1: Comparison of DNA Quantification Methods
| Method | Principle | Applications | Critical Requirements |
|---|---|---|---|
| Digital PCR [44] | Partitions sample into many reactions; counts positive vs. negative partitions | Absolute quantification of rare alleles, viral copies, cell equivalents | Low-binding plastics to prevent sample loss; optimal digital concentration |
| Standard Curve (Absolute) [44] | Quantitates unknowns based on known standard curve | Absolute quantification when known standards are available | Pure DNA/RNA species; accurate pipetting for serial dilutions; stable diluted aliquots |
| Standard Curve (Relative) [44] [45] | Quantity expressed relative to calibrator sample | Gene expression studies; viral load relative to calibrator | Five 2-fold, 5-fold, or 10-fold serial dilutions of known cDNA; R² ≥ 0.99 |
| Comparative CT (ΔΔCT) [44] | Compares CT values of target vs. reference gene using 2^–ΔΔCT | Gene expression changes relative to control | Equal amplification efficiencies of target and reference; validation experiment required |
Quality Assessment Techniques
Spectrophotometric Analysis
UV spectrophotometry provides critical information about DNA concentration and purity. High-quality DNA should exhibit an A260/A280 ratio close to 2.0. A reading of 1.8 suggests approximately 70–80% protein contamination in the sample, which can inhibit both PCR and reverse transcription reactions [43]. The A260/A230 ratio further indicates contamination from compounds such as guanidinium, sodium acetate (>5mM), or other reagents that can absorb at 230nm [43]. The use of a NanoDrop spectrophotometer or equivalent instrument allows for rapid assessment of sample quality and concentration with minimal sample consumption.
Assessment of PCR Inhibitors
Various substances can act as potent PCR inhibitors, affecting DNA polymerase directly or indirectly. Common inhibitors include:
- Heparin (>0.15 mg/mL)
- Proteins such as hemoglobin (>1 mg/mL)
- Polysaccharides, chlorophylls, melanin, and humic acids
- SDS (>0.01% w/v)
- Phenol (>0.2% w/v)
- Ethanol (>1%)
- Guanidinium salts [43]
Inhibition plots (semi-log standard curves) can characterize whether inhibition is occurring at levels that cause spurious results. When the most concentrated sample of a standard curve occurs at a later C_T value than expected, this typically indicates the presence of PCR inhibitors [43].
Integrity Analysis
The integrity of extracted nucleic acids is crucial for successful PCR amplification. For RNA samples, contamination with ribonuclease represents a major source of failure in any attempt to produce quality RNA. Even minimal amounts of RNase in an RNA preparation will cause severe problems, necessitating strict laboratory practices to avoid contamination [46]. Amplification of an endogenous control, such as a housekeeping gene, can establish the integrity of the extracted nucleic acid and standardize the amount of sample RNA or DNA added to a reaction [46].
Experimental Protocols
Standard Curve Protocol for Absolute Quantification
- Standard Preparation: Begin with DNA or RNA of known concentration, accurately measured by A260. Convert concentration to copy number using the molecular weight of the DNA or RNA [44].
- Serial Dilution: Prepare a 10-fold serial dilution series spanning at least 5 orders of magnitude. Use accurate pipetting techniques and ensure proper mixing at each dilution step [43].
- qPCR Setup: Amplify each dilution in duplicate or triplicate alongside experimental samples and no-template controls (NTCs).
- Data Analysis: Plot CT values against the logarithm of the initial template concentration. The slope of the standard curve should be between -3.6 and -3.1, corresponding to PCR efficiencies of 30–110% [43]. An ideal efficiency of 100% corresponds to a slope of -3.32, with CT values of a 10-fold dilution series being 3.3 cycles apart [43].
- Quality Assessment: Ensure the correlation coefficient (R²) is ≥0.99. Check that NTCs are negative or negligible, and verify the absence of outliers, particularly at low concentrations where stochastic variations are more common [43].
Inhibition Testing Protocol
- Sample Preparation: Dilute the sample to various concentrations (e.g., 1:10, 1:100, 1:1000) [43].
- qPCR Analysis: Amplify each dilution using a target with known efficiency.
- Result Interpretation: Observe the ΔCT between consecutive dilutions. A ΔCT of approximately 3.3 indicates no inhibition, while a smaller ΔC_T suggests the presence of inhibitors in the sample [43].
- Remedial Action: If inhibition is detected, further purify samples using phenol-chloroform extraction, LiCl precipitation, or additional washing steps to remove residual salts and contaminants [43].
Diagram 1: DNA Quality Assessment Workflow
The Scientist's Toolkit: Essential Research Reagents
Table 2: Key Research Reagent Solutions for DNA Quantification and Quality Assessment
| Reagent/Kit | Function | Application Notes |
|---|---|---|
| dPCR Master Mix [44] | Enables absolute quantification without standards | Use low-binding plastics to prevent sample loss; determine optimal digital concentration |
| UNG Enzyme [46] | Prevents carryover contamination; degrades uracil-containing DNA | Critical for avoiding false positives; effective against contamination from previous PCRs |
| Hot-Start Polymerase [3] | Reduces non-specific amplification; increases specificity | Activated at high temperatures; prevents primer-dimer formation and mispriming |
| Nucleic Acid Purification Kits [43] | Isolate high-quality DNA/RNA from various sample types | Select based on sample type; remove inhibitors like hemoglobin, heparin, or SDS |
| BSA (Bovine Serum Albumin) [3] | PCR additive; binds inhibitors | Reduces effects of inhibition by preventing inhibitor binding to DNA polymerase |
| RNA Extraction Kits with DNase [46] | Isolate RNA free of DNA contamination | Essential for RT-PCR; include DNase treatment to remove genomic DNA contamination |
| Endogenous Control Assays [46] | Standardize sample amount; assess nucleic acid integrity | Targets include β-actin, GAPDH, rRNA; validates extraction quality and quantity |
Troubleshooting Common Quantification and Quality Issues
Addressing Poor PCR Efficiency
Poor PCR efficiency, indicated by a standard curve slope below -3.6, can stem from multiple factors. The most frequent causes include PCR inhibitors in samples, suboptimal primer and/or probe design, inaccurate sample and reagent pipetting, or improper standard curve analysis [43]. To address these issues:
- Verify Sample Quality: Analyze RNA samples with a UV spectrophotometer, bioanalyzer, or NanoDrop spectrophotometer to assess quantity and quality. Samples with A260/A280 ratios significantly below 2.0 should be further purified [43].
- Optimize Primer Design: Perform bioinformatic evaluation of primer sequences using BLAST to ensure uniqueness, RepeatMasker to mask low-complexity regions, and SNP databases to avoid polymorphic sites [43].
- Calibrate Pipetting: Use regularly calibrated pipettors accurate for low volumes (<5 µL). Briefly spin down sealed plates prior to running on the instrument using low-speed centrifugation [43].
- Validate Standard Curves: Use Auto CT or Auto Baseline features. Ensure R² values ≥0.99 and check for outliers, particularly at high CT values where stochastic variations are common [43].
Overcoming PCR Inhibition
When inhibition is suspected, several strategies can restore PCR efficiency:
- Sample Dilution: Test samples at lower template concentrations where inhibitors may be diluted to non-inhibitory levels [43].
- Alternative Purification: Perform RNA purification using a different purification method optimized for the specific sample type. Refer to RNA isolation kit decision trees to select appropriate reagents [43].
- Additive Incorporation: Incorporate PCR enhancers such as bovine serum albumin (BSA) to help overcome the effects of inhibition by reducing inhibitor binding to DNA polymerase [3].
- Inhibition Plots: Use real-time PCR data from standard curve plots to characterize inhibition levels. Omit points showing inhibition and reanalyze data [43].
Diagram 2: PCR Failure Troubleshooting Pathway
Quality Control in the Molecular Laboratory
Implementing rigorous quality control measures is essential for maintaining the accuracy and reliability of DNA quantification and quality assessment. Key considerations include:
- Laboratory Design: Establish separate designated areas for sample extraction, PCR setup, and post-PCR manipulation to prevent contamination [46]. Maintain separate laboratory coats for each area and handle reagents only with gloves [46].
- Reagent Validation: Compare new reagent batches with old ones using the same run and assay. While not every assay can be tested due to economic considerations and batch size limitations, test a representative selection to ensure consistent performance across applications [47].
- Control Experiments: Include known positive and negative controls with each run. For relative quantification, use a calibrator sample on every plate to standardize results across multiple experiments [46].
- Preventing Carryover Contamination: Implement uracil-N-glycosylase (UNG) treatment to avoid false positives from amplification products from previous PCRs [46]. Never open reagent tubes outside of the designated clean area, and use aerosol-resistant pipette tips for all liquid handling [46].
By implementing these accurate DNA template quantification and quality assessment protocols within a comprehensive quality control framework, researchers can significantly reduce instances of PCR failure due to template-related issues, thereby enhancing the reliability and reproducibility of their molecular analyses.
In the context of investigating the root causes of no amplification in Polymerase Chain Reaction (PCR) experiments, the formulation and use of a master mix is a critical first line of defense. PCR is a highly sensitive technique fundamental to research, diagnostics, and drug development [48]. However, its success hinges on the precise and consistent combination of multiple reagents. A PCR master mix is a batch mixture of these essential reagents—typically including DNA polymerase, dNTPs, MgCl₂, and reaction buffer—prepared at optimal concentrations and divided among many reaction tubes [49]. This practice of standardization is paramount for eliminating experimental variability, reducing contamination risk, and preempting pipetting errors that frequently lead to complete amplification failure [49] [48]. For researchers troubleshooting no-amplification issues, a properly formulated master mix ensures that reagent inconsistency and concentration errors can be systematically ruled out, allowing investigation to focus on more complex variables such as template quality or primer design.
Core Components of a PCR Master Mix
A master mix consolidates the essential components for DNA amplification into a single, homogeneous solution. Understanding the function and optimal concentration of each reagent is vital for troubleshooting no-amplification events, as a deficiency in any single component can halt the reaction entirely [3].
Enzyme: DNA Polymerase: The workhorse of the reaction, Taq DNA polymerase is a thermostable enzyme that synthesizes new DNA strands. Its activity is directly influenced by the reaction buffer and co-factor concentrations. Inadequate enzyme activity, whether due to low quantity, improper storage, or the presence of inhibitors, is a primary cause of no amplification [3] [50]. Hot-start polymerases, which remain inactive until a high-temperature step, are particularly valuable for preventing non-specific amplification and primer-dimer formation that can deplete reagents before the main amplification begins [3] [49].
Cofactor: Magnesium Chloride (MgCl₂): Magnesium ions (Mg²⁺) are an essential cofactor for DNA polymerase activity [49]. The concentration of MgCl₂ in the reaction is one of the most critical factors to optimize. If the concentration is too low, the polymerase exhibits little to no activity, resulting in no product. If it is too high, non-specific products and primer-dimer artifacts may form, reducing the yield of the desired amplicon [3]. The Mg²⁺ concentration affects the annealing of primers to the template and the melting temperature of the DNA, making its optimization crucial for assay specificity and efficiency.
Building Blocks: Deoxynucleotides (dNTPs): dNTPs (dATP, dCTP, dGTP, and dTTP) are the fundamental building blocks for new DNA strands. An imbalance or insufficient concentration of dNTPs can lead to no amplification or a low yield of the target product [3]. Furthermore, dNTPs can chelate Mg²⁺, effectively reducing the free magnesium concentration available for the polymerase. Therefore, the concentrations of dNTPs and MgCl₂ must be balanced carefully during master mix formulation.
Reaction Buffer: The reaction buffer provides a stable chemical environment for the PCR, typically at a slightly basic pH (8.0-9.5). It contains salts that influence the ionic strength of the solution, which directly affects the melting temperature of the DNA and the efficiency of primer annealing [3]. A suboptimal buffer can destabilize the polymerase or prevent proper primer-template binding.
Primers: While often added separately, primers are a key component of the reaction system. These short, single-stranded DNA sequences are designed to be complementary to the boundaries of the target DNA region. High primer concentrations can promote non-specific binding and primer-dimer formation, while low concentrations can result in no amplification or low yield [3]. Their design, specificity, and concentration are frequent suspects in troubleshooting failed PCRs.
Template DNA: The quality and quantity of the template DNA are paramount. The DNA must be free of inhibitors, such as phenol, heparin, or EDTA, which can directly inhibit DNA polymerase [3]. The recommended amount of template is typically 1 pg–10 ng for plasmid DNA and 1 ng–1 µg for genomic DNA [48]. Degraded DNA or samples with low purity (assessed by A260/A280 ratio) are common causes of amplification failure.
Table 1: Core Components of a PCR Master Mix and Their Role in Preventing Amplification Failure
| Component | Primary Function | Consequence of Deficiency/Error | Typical Final Concentration |
|---|---|---|---|
| DNA Polymerase | Catalyzes DNA synthesis | No amplification or low yield [3] | 0.5-2.5 Units/50 µL reaction [50] |
| MgCl₂ | Essential polymerase cofactor | No amplification; altered specificity [3] | 1.5-2.5 mM (requires titration) [48] |
| dNTPs | DNA building blocks | No amplification; misincorporation [3] | 0.2 mM each dNTP [48] |
| Reaction Buffer | Optimal pH and ionic strength | Reduced polymerase efficiency [3] | 1X concentration [48] |
| Primers | Define target sequence boundaries | No amplification; non-specific products [3] | 0.1-0.5 µM each [48] |
| Template DNA | Source of target sequence | No amplification | 1 pg - 1 µg [48] |
Master Mix Formulation Protocol and Calculations
A standardized protocol for calculating and preparing the master mix is fundamental to achieving consistent results. The following methodology ensures accuracy and controls for the pipetting errors that often lead to failed experiments.
Calculation Table and Example Formulation
The first step is to create a detailed calculation table. This is best practice for scaling reactions correctly and avoiding the wastage of expensive reagents. For a high-throughput experiment, the total number of reactions must include all test samples, positive controls, negative controls (no template), and an additional aliquot to account for pipetting loss due to evaporation or adherence to tips [48].
Table 2: Example Calculation for a 50 µL PCR Master Mix (for a single reaction)
| Reagent | Stock Concentration | Final Concentration (CF) | Dilution Factor | Volume per Reaction (µL) |
|---|---|---|---|---|
| Buffer | 10X | 1X | 10 | 5.0 |
| MgCl₂ | 25 mM | 1.5 mM | 16.66 | 3.0 |
| dNTPs | 10 mM | 0.2 mM | 50 | 1.0 |
| Forward Primer | 10 µM | 250 nM | 40 | 1.25 |
| Reverse Primer | 10 µM | 250 nM | 40 | 1.25 |
| Polymerase | 5 U/µL | 1.25 U | - | 0.25 |
| Template DNA | 1 µg/µL | - | - | 0.5 |
| PCR-Grade Water | - | - | - | 37.75 |
| Total Volume | 50.0 µL |
Source: Adapted from INTEGRA Biosciences [48].
Workflow for Master Mix Preparation and Sample Setup
The following diagram illustrates the logical workflow for preparing and dispensing a PCR master mix, highlighting steps critical for preventing contamination and ensuring consistency—key factors in avoiding no-amplification results.
Best Practices for Pipetting and Contamination Control
Adhering to strict pipetting protocols is non-negotiable for successful master mix formulation.
- Pipetting Order: Add master mix components in order of their price, starting with the least expensive reagent (e.g., water, buffer, salts, dNTPs). This minimizes financial loss if a pipetting error occurs and the mix must be discarded [48].
- Electronic Pipettes: For superior accuracy and precision, use electronic single-channel or multichannel pipettes. Their motor-controlled piston movement minimizes user variability and reduces pipetting fatigue, which is crucial for high-throughput workflows [48].
- Physical Separation: To prevent amplicon contamination, physically separate the laboratory areas for master mix preparation, template addition, and PCR product analysis. Use dedicated equipment and lab coats in each area, and never transfer reagents or tools between them [3] [48].
- Use of Filter Tips: Always use sterile, filter-containing pipette tips to prevent aerosol contamination from reaching the pipette shaft, which can contaminate subsequent reactions and cause false positives or amplification inhibition [48].
Troubleshooting No Amplification: A Systematic Approach
When faced with no amplification, a systematic investigation starting with the master mix and its components is essential. The following diagnostic framework helps researchers efficiently identify the root cause.
Diagnostic Framework for Amplification Failure
The relationship between master mix formulation and no-amplification outcomes can be complex. The following diagram maps common formulation errors to their potential causes and solutions, providing a logical pathway for troubleshooting.
Troubleshooting Guide and Solutions
Table 3: Troubleshooting No Amplification in PCR
| Observed Problem | Potential Root Cause | Recommended Solution |
|---|---|---|
| No Amplification | Low DNA template quality/quantity | Repurify template; check concentration and purity (A260/A280) [3]. |
| Insufficient polymerase or dNTPs | Increase enzyme concentration; ensure fresh, balanced dNTPs are used [3]. | |
| Incorrect Mg²⁺ concentration | Titrate MgCl₂ in 0.5 mM increments to find optimum [3]. | |
| PCR inhibitors present | Use additives like BSA (Bovine Serum Albumin) to bind inhibitors; dilute template [3]. | |
| Non-Specific Bands | Annealing temperature too low | Increase annealing temperature incrementally [3]. |
| Excessive Mg²⁺ concentration | Reduce MgCl₂ concentration in the master mix [3]. | |
| Non-specific primer binding | Switch to a hot-start polymerase [3] [49]. | |
| Primer-Dimer Formation | High primer concentration | Reduce primer concentration in the master mix [3]. |
| Low annealing temperature | Increase annealing temperature [3]. | |
| Primers with 3'-complementarity | Redesign primers to minimize self-complementarity [3]. |
Essential Research Reagent Solutions
The following toolkit comprises key reagents and materials that are fundamental to standardized master mix formulation and robust PCR performance.
Table 4: Research Reagent Solutions for Consistent PCR
| Item | Function/Description |
|---|---|
| Hot-Start DNA Polymerase | Enzyme activated only at high temperatures, preventing non-specific amplification and primer-dimer formation during reaction setup [3] [49]. |
| PCR-Grade dNTPs | High-purity, balanced solutions of deoxynucleotides to ensure efficient and accurate DNA synthesis without introducing contaminants [48]. |
| Optimized Reaction Buffer | A pre-tested buffer system, often supplied with the polymerase, providing the ideal pH and salt conditions for maximum enzyme activity and specificity. |
| Nuclease-Free Water | Purified water certified to be free of nucleases and other contaminants that could degrade reaction components or inhibit the PCR [48]. |
| Electronic Pipettes | Motor-driven pipettes that improve accuracy and reproducibility, reducing human error during master mix assembly—a key source of failed experiments [48]. |
| Low-Retention Filter Tips | Pipette tips with a hydrophobic polymer barrier that minimizes liquid retention and includes a filter to prevent aerosol contamination of the pipette [48]. |
| Bovine Serum Albumin (BSA) | A common PCR additive that binds to and neutralizes common inhibitors found in biological samples, restoring amplification efficiency [3]. |
Systematic Optimization of Mg2+ Concentration and Buffer Conditions
The failure of the polymerase chain reaction (PCR) to amplify a target DNA sequence, a problem known as "no amplification," is a significant hurdle in molecular biology research and drug development. Within the context of a broader thesis investigating the root causes of PCR failure, the systematic optimization of reaction components, specifically magnesium ion (Mg2+) concentration and buffer conditions, emerges as a critical factor. Mg2+ is an essential cofactor for DNA polymerase activity, and the ionic environment established by the PCR buffer profoundly influences primer annealing specificity and enzyme processivity [14]. Incorrect concentrations of these components are a primary cause of experimental failure, leading to non-specific products, primer-dimer formation, or a complete absence of the desired amplicon [3]. This guide provides an in-depth technical framework for researchers to methodically optimize these parameters, thereby diagnosing and resolving the underlying causes of amplification failure.
The Critical Role of Mg2+ and Buffer in PCR
Magnesium Ions: The Essential Cofactor
Magnesium ions (Mg2+) are a fundamental component of any PCR reaction, serving as a crucial cofactor for thermostable DNA polymerases like Taq polymerase. The enzyme requires Mg2+ to form a catalytically active complex with the DNA template and the incoming deoxynucleoside triphosphates (dNTPs) [14]. The concentration of Mg2+ is typically maintained at a level higher than that of the dNTPs in the reaction to ensure the enzyme functions efficiently [14].
However, the optimal concentration is not universal and can vary significantly depending on the specific template DNA and primer sequences used. A concentration that is too high can stabilize non-specific binding between primers and the template, leading to the amplification of unwanted products and the appearance of smeared bands on an agarose gel. Conversely, a concentration that is too low can drastically reduce polymerase activity, resulting in low yield or a complete failure of amplification [14] [3]. Therefore, the careful titration of Mg2+ is not merely a recommendation but a necessity for tailoring PCR conditions to a specific assay, ensuring both the reliability and specificity of the results, which is paramount in sensitive applications like diagnostic testing [14].
PCR Buffer: Creating the Ionic Environment
The PCR buffer provides the stable chemical environment required for the DNA polymerase to function adequately [51]. While it contains salts that stabilize the enzyme and maintain the correct pH, its most critical function in the context of optimization is often related to its Mg2+ content. PCR buffers are frequently supplied with or without a pre-defined concentration of MgCl2, giving the researcher control over this variable [52].
The success of PCR is largely dependent on maintaining a high ratio of specific to nonspecific primer annealing. This annealing is primarily influenced by the cations in the PCR buffer and the annealing temperature [14]. Specialized cation combinations in some commercial buffers can maintain high primer annealing specificity across a broad range of temperatures, which can eliminate the need for laborious optimization for each new primer pair and facilitate the setup of complex assays with multiple primers [14].
Systematic Optimization Approaches
Mg2+ Concentration Titration
A systematic titration of Mg2+ concentration is the first and most crucial step in troubleshooting no-amplification issues. The goal is to identify the narrow concentration window that maximizes the yield of the specific product while minimizing nonspecific artifacts.
Table 1: Mg2+ Titration Experiment Setup and Outcomes
| MgCl2 Concentration (mM) | Expected Effects on PCR | Typical Outcomes & Troubleshooting |
|---|---|---|
| Low (0.5 - 1.5) | - Severely reduced DNA polymerase activity.- Unstable primer-template complexes.- Greatly decreased efficiency. | - No amplification or very low yield.- Solution: Increase concentration in increments of 0.5 mM. |
| Optimal (1.5 - 3.0) | - High DNA polymerase activity.- Specific primer annealing.- Efficient DNA synthesis. | - Strong, specific amplification of the target band.- Clear background on agarose gel. |
| High (3.5 - 5.0+) | - Stabilization of nonspecific primer-template binding.- Increased enzyme error rate. | - Non-specific products (multiple bands).- Primer-dimer formation.- Smeared bands on a gel.- Solution: Decrease concentration in increments of 0.5 mM. |
Experimental Protocol for Mg2+ Titration:
- Prepare a Master Mix: Create a master mix containing all standard PCR components except for MgCl2 and the template DNA. Use a high-purity, nuclease-free water.
- Aliquot the Mix: Dispense equal volumes of the master mix into a series of thin-walled PCR tubes (e.g., 8 tubes).
- Spike with MgCl2: Add a variable volume of MgCl2 stock solution (e.g., 25 mM) to each tube to create a final concentration gradient. A recommended range is 1.0 mM to 4.0 mM in 0.5 mM increments.
- Add Template: To each tube, add the template DNA. It is critical to use a consistent quantity and quality of template across all reactions.
- Run PCR: Place the tubes in a thermal cycler and run the standard or suspected optimal PCR program.
- Analyze Results: Separate the PCR products by agarose gel electrophoresis. Identify the tube with the strongest intensity of the correct-sized band and the cleanest background.
Buffer Condition and Additive Optimization
While Mg2+ is a key component of the buffer, other additives can be introduced to overcome specific challenges that cause amplification failure, particularly with difficult templates.
Table 2: Common PCR Additives and Their Functions
| Additive | Common Concentration | Mechanism of Action | Ideal for Troubleshooting |
|---|---|---|---|
| Dimethyl Sulfoxide (DMSO) | 1 - 10% | Disrupts secondary DNA structures by reducing the template's melting temperature. | - GC-rich templates (>60%).- Templates with strong hairpins. |
| Betaine | 0.5 - 1.5 M | Equalizes the contribution of GC and AT base pairs, homogenizing DNA melting. | - Very GC-rich templates.- Long amplicons. |
| Bovine Serum Albumin (BSA) | 0.1 - 0.8 μg/μL | Binds to and neutralizes inhibitors in the reaction (e.g., phenols, salts); stabilizes the enzyme. | - Reactions with impure template DNA.- Inhibited PCRs [3]. |
| Formamide | 1 - 5% | Increases stringency, promoting more specific primer annealing. | - Reactions with persistent non-specific bands [52]. |
| Glycerol | 5 - 10% | Stabilizes DNA polymerase and can help lower DNA melting temperature. | - General enzyme stability.- Long or complex templates [14]. |
Experimental Protocol for Testing Additives:
- Baseline Reaction: Establish a PCR reaction with the optimized Mg2+ concentration that shows some, but not ideal, amplification.
- Single Additive Test: To individual reaction tubes, add one of the additives from Table 2 at its common starting concentration.
- Combination Approach: If single additives show partial improvement, test combinations (e.g., DMSO with BSA). However, always include a no-additive control.
- Re-optimize Annealing: The use of additives like DMSO effectively lowers the template's melting temperature. It may be necessary to concurrently lower the annealing temperature by 2-5°C in a gradient to find the new optimum.
Integrated Experimental Workflow and Reagent Toolkit
Logical Workflow for Systematic Optimization
The following diagram outlines a step-by-step decision-making process for diagnosing and resolving "no amplification" issues through the systematic optimization of Mg2+ and buffer conditions.
The Scientist's Toolkit: Essential Research Reagent Solutions
Table 3: Key Reagents for Mg2+ and Buffer Optimization Experiments
| Reagent / Solution | Function / Purpose | Critical Considerations for Optimization |
|---|---|---|
| MgCl2 Stock Solution | Provides the essential cofactor for DNA polymerase. | Use a high-purity, nuclease-free stock. Titration is mandatory for each new primer-template system. |
| 10X PCR Buffer (without Mg2+) | Provides the core ionic environment and pH stability. | Using a Mg2+-free buffer is ideal for optimization, as it gives full control over Mg2+ concentration. |
| Hot-Start DNA Polymerase | Reduces non-specific amplification and primer-dimer formation by remaining inactive at room temperature. | Critical for improving specificity, especially when lower annealing temperatures are used [3]. |
| PCR Additives (DMSO, BSA, etc.) | Modifies nucleic acid melting behavior or neutralizes inhibitors. | Add one agent at a time to determine its effect. Be aware that they may require re-optimization of annealing temperature. |
| dNTP Mix | The building blocks (dATP, dCTP, dGTP, dTTP) for new DNA strand synthesis. | Concentration must be consistent; [Mg2+] must be higher than total [dNTP]. Degraded dNTPs are a common cause of failure. |
| Nuclease-Free Water | The solvent for all reactions. | Using low-quality water can introduce nucleases or PCR inhibitors that ruin the experiment. |
Within the investigative framework of a thesis on PCR failure, the systematic optimization of Mg2+ concentration and buffer conditions is a definitive and often conclusive chapter. The "no amplification" result is frequently not a dead end but a symptom of a suboptimal ionic environment. As detailed in this guide, a methodical approach—beginning with a clean, confirmed template, followed by a rigorous Mg2+ titration, and culminating in the strategic use of PCR additives—can diagnose and correct the underlying issue. For researchers and drug development professionals, mastering this systematic process is not just a troubleshooting skill but a fundamental practice for developing robust, reliable, and specific PCR assays that are critical for advancing scientific discovery and diagnostic applications.
Polymerase chain reaction (PCR) failure represents a significant bottleneck in molecular biology research and diagnostic applications. When amplification fails, researchers encounter a spectrum of outcomes—from complete absence of product to non-specific amplification or smeared DNA bands on gels. Understanding the root causes of these failures is essential for developing effective countermeasures, particularly for challenging templates such as GC-rich sequences, long amplicons, and low-copy targets. The fundamental mechanisms underlying PCR failure often involve secondary structure formation, polymerase stalling, inadequate primer binding, or enzymatic inefficiency. These challenges are compounded in complex applications like next-generation sequencing (NGS) library preparation and clinical diagnostics, where reliability and reproducibility are paramount. This guide synthesizes current optimization strategies to overcome these persistent obstacles, with a focus on practical, evidence-based solutions for research and drug development professionals.
Technical Challenges and Optimization Strategies
GC-Rich Templates
GC-rich templates, defined as sequences with >60% guanine-cytosine content, present particular challenges due to the strong hydrogen bonding between G and C bases (three bonds versus two in A-T pairs) and their propensity to form stable secondary structures like hairpins [53] [54]. These characteristics lead to several problems: incomplete denaturation of DNA strands, polymerase stalling at complex structures, and premature termination of extension [54]. These challenges are clinically relevant as GC-rich regions are frequently found in gene promoters, including those of housekeeping and tumor suppressor genes [54].
Optimization Strategies:
Polymerase Selection: Standard Taq polymerase often struggles with GC-rich templates. Polymerases specifically optimized for GC-rich amplification, such as Q5 High-Fidelity DNA Polymerase or OneTaq DNA Polymerase, demonstrate superior performance [54]. These specialized enzymes are frequently supplied with GC enhancers containing proprietary additive mixtures that help inhibit secondary structure formation [54].
Additive Incorporation: Organic additives significantly improve GC-rich amplification. DMSO (dimethyl sulfoxide) helps denature DNA by reducing melting temperature and disrupting secondary structures [53] [55]. Betaine (also known as trimethylglycine) distributes water molecule organization, effectively equalizing the thermodynamic stability of GC-rich and AT-rich regions [53]. Glycerol and formamide can also assist in template denaturation and increase primer stringency, respectively [54] [55]. Recommended concentrations typically range from 1-10% for DMSO and 0.5-2 M for betaine [55].
Thermal Cycling Modifications: Increasing denaturation temperature to 98°C (from standard 94-95°C) ensures complete separation of DNA strands [56] [54]. Implementing touchdown PCR, where the annealing temperature starts high and decreases incrementally in subsequent cycles, promotes specific amplification during early cycles [57]. Keeping annealing times short (5-15 seconds) reduces mispriming opportunities [56].
Magnesium Concentration Optimization: Magnesium chloride (MgCl₂) concentration significantly impacts polymerase activity and primer binding. While standard concentrations range from 1.5-2.0 mM, GC-rich templates may require fine-tuning. Testing a gradient from 1.0-4.0 mM in 0.5 mM increments can identify optimal conditions [54].
Table 1: Optimization Strategies for GC-Rich Templates
| Parameter | Standard Condition | GC-Rich Optimization | Mechanism of Action |
|---|---|---|---|
| Polymerase | Standard Taq | GC-optimized enzymes (Q5, OneTaq) | Reduced stalling at secondary structures |
| Additives | None | DMSO (1-10%), Betaine (0.5-2 M) | Disrupts secondary structures, equalizes base stability |
| Denaturation Temperature | 94-95°C | 98°C | Improved strand separation |
| Annealing Time | 30 seconds | 5-15 seconds | Reduced mispriming |
| MgCl₂ Concentration | 1.5-2.0 mM | Gradient 1.0-4.0 mM | Optimized polymerase activity and primer binding |
Long Amplicons
Long-range PCR, typically defined as amplification of targets longer than 5 kilobases, introduces challenges related to template integrity, polymerase processivity, and DNA damage accumulation during cycling [56]. The probability of introducing single-strand breaks or encountering depurination sites increases with template length, leading to truncated amplification products and reduced yield. Successful long-range amplification requires addressing these limitations through specialized enzymes and modified reaction conditions.
Optimization Strategies:
Polymerase Blends and Specialized Enzymes: Long-range PCR benefits from polymerases with high processivity (number of nucleotides incorporated per binding event) and proofreading activity (3'→5' exonuclease activity) [55]. Enzyme blends often combine a non-proofreading polymerase (like Taq) for fast elongation with a proofreading enzyme (like Pfu) for enhanced accuracy and processivity [55]. PrimeSTAR GXL DNA Polymerase has demonstrated robust performance in amplifying targets up to 53 kb [58].
Template Quality and Integrity: DNA integrity is paramount for long-range amplification. Template damage—including strand breaks during isolation or depurination at elevated temperatures—results in partial products and decreased overall yield [56]. DNA should be purified using gentle methods and stored in buffered solutions at pH 7-8 to minimize acid-catalyzed depurination [56].
PCR Condition Modifications: Denaturation time should be minimized to reduce depurination events [56]. Extension times must be adjusted according to polymerase capability—highly processive enzymes may require only 10-20 seconds per kb, while standard polymerases need approximately 1 minute per kb [56]. Lower extension temperatures (68°C instead of 72°C) dramatically improve yields of longer amplification products by reducing the depurination rate [56].
Primer Design Considerations: Primers for long-range PCR should have higher melting temperatures (>68°C) to facilitate specific binding under two-step PCR conditions [56]. Primer length of 25-30 nucleotides provides enhanced specificity for unique targeting in complex genomes.
Table 2: Long-Range PCR Enzyme Performance Comparison
| Enzyme | Maximum Amplification Length | Proofreading Activity | Key Features |
|---|---|---|---|
| PrimeSTAR GXL | Up to 53 kb [58] | Yes | High success with GC/AT-rich targets under identical conditions [59] |
| SequalPrep | >12.9 kb [59] | No | Successfully amplified all three test amplicons (12.9, 9.7, 5.8 kb) [59] |
| LA Taq Hot Start | >12.9 kb [59] | No | Required specific GC buffer for optimal performance [59] |
| KAPA Long Range HotStart | ~5.8 kb [59] | No | Failed to amplify larger test amplicons (12.9, 9.7 kb) [59] |
| QIAGEN LongRange | ~5.8 kb [59] | No | Similar performance to KAPA enzyme [59] |
Low-Copy Targets
Amplification of low-copy targets (<100-200 copies) presents challenges related to stochastic effects, inhibition susceptibility, and background amplification. At extremely low template concentrations, the random distribution of molecules can lead to inconsistent amplification between replicates. Additionally, the impact of inhibitors present in clinical samples (hemoglobin, heparin, urea) becomes more pronounced when working with limited template.
Optimization Strategies:
Increased Cycle Number: Raising amplification cycles from standard 28-30 to 34-40 increases sensitivity for low-abundance targets [55]. This approach must be balanced against potential increased background signal and non-specific amplification.
Hot-Start PCR: Hot-start methods employ enzyme modifiers (antibodies, aptamers, or chemical modifications) that inhibit polymerase activity at room temperature [57]. This prevents nonspecific amplification and primer-dimer formation during reaction setup, preserving reagents for specific amplification during thermal cycling [57]. Activation occurs during initial denaturation at 90°C or higher.
Nested PCR: This two-round approach uses an outer primer pair in the first PCR, followed by a second primer pair that binds within the first amplicon [57]. This significantly enhances specificity and sensitivity, as it's unlikely that non-specific products from the first round would be amplified by the second primer set [57]. The method is particularly valuable for detecting minimal residual disease in oncology applications.
Inhibition Resistance: Some polymerases demonstrate superior resistance to common inhibitors present in direct sample amplification. For blood samples, specialized formulations like Q5 Blood Direct 2X Master Mix enable amplification directly from dried blood spots or up to 30% whole human blood, skipping DNA purification [54].
Reduced Reaction Volume and Master Mix Formulations: Moving to smaller reaction volumes increases template concentration while conserving precious samples. Master mixes ensure reagent consistency and minimize pipetting errors, which is critical for low-copy work where small variations have magnified effects.
Integrated Experimental Design
Success with challenging templates often requires a multifaceted approach that addresses multiple parameters simultaneously. The following workflow provides a systematic method for troubleshooting difficult PCR amplifications:
Research Reagent Solutions
Selecting appropriate reagents is fundamental to successful amplification of difficult templates. The following table summarizes key solutions for common PCR challenges:
Table 3: Essential Research Reagents for Difficult PCR Templates
| Reagent Category | Specific Examples | Function & Application |
|---|---|---|
| GC-Optimized Polymerases | OneTaq DNA Polymerase with GC Buffer, Q5 High-Fidelity DNA Polymerase with GC Enhancer [54] | Superior amplification of GC-rich templates (>65% GC) through reduced stalling at secondary structures |
| Long-Range Enzyme Blends | PrimeSTAR GXL DNA Polymerase, LA Taq Polymerase with GC Buffer [56] [59] | High processivity and proofreading capability for amplicons >5 kb, some effective up to 53 kb [58] |
| Hot-Start Polymerases | Platinum II Taq Hot-Start DNA Polymerase, antibody-modified polymerases [57] | Room-temperature stability prevents nonspecific amplification during reaction setup; essential for low-copy targets |
| PCR Additives | DMSO (1-10%), Betaine (0.5-2 M), 7-deaza-2'-deoxyguanosine [54] [55] | Disrupt secondary structures, equalize base stability, and improve yield for GC-rich templates |
| Specialized Buffers | GC Enhancer, Direct PCR Buffers [54] | Proprietary formulations that enhance amplification of difficult templates and provide inhibitor resistance |
Detailed Methodologies
Optimized Protocol for GC-Rich Templates
This protocol is adapted from successful amplification of nicotinic acetylcholine receptor subunits with 65% GC content [53]:
Reaction Setup:
- 1X GC-rich optimized PCR buffer (commercial or prepared)
- 200 μM each dNTP
- 2.5-3.0 mM MgCl₂ (optimize for specific target)
- 10% DMSO or 1 M betaine
- 0.5 μM each forward and reverse primer
- 1-2 units GC-optimized DNA polymerase (e.g., Q5 High-Fidelity)
- 50-100 ng genomic DNA or 10-100 pg plasmid DNA
- Nuclease-free water to 50 μL
Thermal Cycling Conditions:
- Initial denaturation: 98°C for 2 minutes
- 35 cycles of:
- Denaturation: 98°C for 10-20 seconds
- Annealing: Temperature gradient 65-72°C for 15 seconds (determine optimal)
- Extension: 72°C for 30-60 seconds per kb
- Final extension: 72°C for 5 minutes
- Hold at 4°C
Analysis:
- Resolve 5-10 μL product on agarose gel
- Expect single discrete band of expected size
- For nonspecific bands, increase annealing temperature in 2°C increments
- For no product, test additive combinations or reduce annealing temperature
Long-Range PCR Protocol for Sequences >10 kb
Based on successful amplification of BRCA1 and BRCA2 genes (83-84 kb) using PrimeSTAR GXL polymerase [59]:
Template Preparation:
- Use high-quality, intact genomic DNA with A260/A280 ratio of 1.8-2.0
- Avoid repeated freeze-thaw cycles; store in TE buffer (pH 8.0)
- Verify integrity by pulse-field gel electrophoresis if possible
Reaction Components:
- 1X PrimeSTAR GXL buffer (or equivalent long-range buffer)
- 200 μM each dNTP
- 1.0-2.5 mM MgCl₂ (optimize for specific target)
- 0.3 μM each forward and reverse primer (Tm >68°C)
- 2.5 units PrimeSTAR GXL DNA Polymerase
- 100-500 ng genomic DNA
- Nuclease-free water to 50 μL
Thermal Cycling Conditions:
- Initial denaturation: 94°C for 1 minute
- 30 cycles of:
- Denaturation: 98°C for 10 seconds
- Annealing/Extension: 68°C for 1 minute per kb (15 minutes for 15 kb target)
- Final extension: 72°C for 10 minutes
- Hold at 4°C
Troubleshooting:
- If no product: Add DMSO to 2-3% final concentration [59]
- If smeared product: Reduce template amount to 100 ng
- If multiple bands: Optimize Mg²⁺ concentration or use touchdown PCR
Successful PCR amplification of challenging templates requires a systematic approach that addresses the fundamental causes of failure. GC-rich templates benefit from specialized polymerases, additives that disrupt secondary structures, and elevated denaturation temperatures. Long amplicons demand high-fidelity, processive enzymes with optimized cycling conditions that minimize DNA damage. Low-copy targets necessitate techniques that enhance sensitivity while maintaining specificity, such as hot-start protocols and increased cycle numbers. By understanding these principles and implementing the detailed methodologies presented herein, researchers can overcome the most persistent PCR challenges, advancing both basic research and drug development applications. The integrated troubleshooting workflow and reagent selection guide provide a comprehensive framework for optimizing amplification of even the most recalcitrant templates.
The Systematic Troubleshooting Protocol: Diagnosing and Solving No-Amplification Problems
Within the broader thesis of polymerase chain reaction (PCR) failure research, the complete absence of amplified product—"no amplification"—represents a critical and frequent challenge that halts progress in fields from basic research to clinical diagnostics and drug development. This phenomenon occurs when the complex biochemical reaction of PCR is disrupted, preventing the exponential amplification of the target DNA sequence. The underlying causes are multifaceted, often involving subtle interactions between template quality, reagent integrity, primer design, and instrumental parameters [3] [4]. This guide establishes a rigorous, methodical framework for diagnosing the root causes of PCR failure, transforming a potentially frustrating process of trial and error into a efficient, systematic investigation. By adopting this structured diagnostic approach, researchers can not only resolve immediate experimental hurdles but also develop a deeper understanding of reaction mechanics, thereby enhancing the robustness and reproducibility of their molecular assays.
Core Principles of PCR Failure
The failure of a PCR reaction to yield any detectable product is predominantly attributable to a fundamental breakdown in one or more of its essential core components. Understanding the role and failure modes of each component is crucial for effective troubleshooting.
- Template DNA Integrity and Purity: The DNA template must be not only present in sufficient quantity but also intact and free of inhibitors. Degraded DNA, which appears as a smear on an agarose gel, provides no viable binding sites for primers [4]. Common laboratory contaminants such as phenol, EDTA, or heparin can chelate magnesium ions or inhibit polymerase activity directly, effectively shutting down the reaction [3] [4].
- Primer Design and Binding Efficiency: Primers are the cornerstone of specificity in PCR. Poorly designed primers—those with low melting temperatures ((Tm)), high self-complementarity (leading to hairpins or primer-dimers), or misalignment with the target sequence—will fail to initiate synthesis [60] [26]. The annealing temperature is critical; if set too high (e.g., above the primer's (Tm)), stable primer-template binding cannot occur, while too low a temperature promotes non-specific binding and primer-dimer formation [22].
- Reaction Component Integrity and Balance: Each component of the master mix must be present at an optimal concentration and fully functional. Suboptimal magnesium concentration (a crucial cofactor for polymerase activity), degraded or imbalanced dNTPs, or an inappropriate or inactivated DNA polymerase will lead to reaction failure [4] [61]. The use of hot-start polymerases is often recommended to prevent non-specific amplification at lower temperatures during reaction setup [3].
- Instrumentation and Thermal Cycling Parameters: The thermal cycler must accurately and reliably achieve the programmed temperatures. An uncalibrated block may not denature the template properly, prevent efficient primer annealing, or inactivate the enzyme [61]. Similarly, insufficient denaturation time or temperature, too few cycles for low-abundance targets, or an incorrectly set extension time can all result in no product [4].
The Diagnostic Flowchart: A Systematic Path to Resolution
The following flowchart provides a visual, step-by-step guide for diagnosing a PCR reaction that has yielded no amplification product. It begins with the most straightforward and common issues before progressing to more complex troubleshooting.
Diagnostic Flowchart for PCR 'No Amplification'
Flowchart Narrative Explanation
The diagnostic journey begins at the endpoint: "No PCR Product Detected" [3]. The first critical action is to "Check Gel & Negative Control" to rule out a false negative caused by gel loading errors or, more importantly, to identify contamination indicated by bands in the negative control [26]. If the negative control is clean, the investigation proceeds to the foundation of the reaction: the "Verify Template DNA Quality & Quantity" [4]. This involves assessing DNA integrity via gel electrophoresis (looking for a sharp, high-molecular-weight band instead of a smear) and quantifying purity using a spectrophotometer (A260/280 ratio of ~1.8) [4] [61]. If the template is degraded or contaminated, the reaction will fail, and a new sample must be prepared.
Assuming the template is viable, the next step is "Check Primer Design & Concentration" [60]. This involves recalculating primer melting temperatures ((Tm)) using the formula (Tm = 4(G+C) + 2(A+T)) and ensuring the annealing temperature is set 3–5°C below this value [22] [60]. Primer sequences should be checked for self-complementarity and secondary structures using design tools. If primers are poorly designed, the path leads to failure, necessitating new primer synthesis.
With sound primers and template, the focus shifts to "Verify Reaction Components & Concentrations" [4] [61]. This includes confirming the activity of the DNA polymerase, ensuring MgCl₂ concentration is optimized (typically starting at 1.5 mM), verifying dNTPs are not degraded, and using the correct reaction buffer [26]. The use of a hot-start polymerase can prevent pre-amplification mis-priming [3].
Subsequently, the "Check Thermal Cycler Program & Calibration" is essential [61]. The program should be verified for correct denaturation (e.g., 94–98°C), annealing, and extension times and temperatures. The instrument's block calibration should be checked if errors are suspected.
Finally, if all individual components check out, the most powerful empirical step is to "Perform Gradient PCR to Optimize Annealing" [22] [62]. This tests a range of annealing temperatures (e.g., 50–65°C) simultaneously to pinpoint the optimal condition for specific primer binding. A successful amplification at this stage confirms the diagnosis. If this final step fails, it indicates a more complex issue, requiring a return to the systematic troubleshooting of each component, potentially investigating inhibitor carryover or exceptionally complex templates (e.g., high GC-content) [4].
Essential Experimental Protocols for Diagnosis and Optimization
Protocol 1: Template DNA Quality Assessment
Purpose: To determine if the DNA template is intact and pure enough for PCR amplification. Methodology:
- Gel Electrophoresis: Mix 1 µL of DNA sample with 6X loading dye and load onto a 1% agarose gel containing a fluorescent intercalating dye. Include a DNA molecular weight marker. Run the gel at 5-8 V/cm for 30-60 minutes and visualize under UV light. Intact genomic DNA should appear as a single, tight high-molecular-weight band, while degraded DNA will appear as a smear toward the lower molecular weight region [4].
- Spectrophotometric Analysis: Measure the absorbance of the DNA sample at 230 nm, 260 nm, and 280 nm using a spectrophotometer. Calculate the A260/A280 ratio (ideal is ~1.8) and the A260/A230 ratio (ideal is >2.0). Low A260/A280 indicates protein contamination, while low A260/A230 suggests residual salts or solvents [4].
Protocol 2: Gradient PCR for Annealing Temperature Optimization
Purpose: To empirically determine the optimal annealing temperature for a primer pair in a single experiment. Methodology:
- Reaction Setup: Prepare a standard PCR master mix containing all components (buffer, dNTPs, polymerase, primers, template) and aliquot it equally across several tubes or wells.
- Thermal Cycling: Program the thermal cycler to run a gradient across the block during the annealing step. Set the gradient to cover a range of approximately 5–7°C below to 5°C above the calculated (Tm) of the primers. For example, if the (Tm) is 60°C, set a gradient from 55°C to 65°C [22] [62].
- Analysis: Run the products on an agarose gel. The well(s) with the strongest specific band and the absence of non-specific products indicate the optimal annealing temperature for future experiments [61].
Protocol 3: Magnesium Concentration Titration
Purpose: To optimize the concentration of magnesium chloride (MgCl₂), a critical cofactor for DNA polymerase activity. Methodology:
- Reaction Setup: Prepare a master mix without Mg²⁺. Aliquot the master mix into a series of tubes.
- Titration: Add MgCl₂ to each tube to create a concentration series, typically from 0.5 mM to 4.0 mM in 0.5 mM increments. A common starting point is 1.5 mM [61] [26].
- Amplification and Analysis: Perform PCR under standard cycling conditions. Analyze the products by agarose gel electrophoresis. The condition with the highest yield of the specific product and minimal non-specific amplification or primer-dimer formation indicates the optimal Mg²⁺ concentration [4].
The Scientist's Toolkit: Essential Reagents and Materials
Successful PCR troubleshooting relies on a foundation of high-quality reagents and materials. The following table details key components for reliable experiments.
Table: Essential Research Reagent Solutions for PCR Troubleshooting
| Reagent/Material | Function & Importance | Optimization Notes |
|---|---|---|
| Hot-Start DNA Polymerase | Enzyme engineered to be inactive at room temperature, preventing non-specific priming and primer-dimer formation before thermal cycling begins. Crucial for enhancing specificity and yield [3] [4]. | Choose based on application: high-fidelity for cloning, standard for routine PCR. Follow manufacturer's activation step (often 95°C for 2-10 min). |
| Magnesium Chloride (MgCl₂) | Essential cofactor for DNA polymerase activity. Concentration directly affects primer annealing, template denaturation, and product specificity [4] [61]. | Requires titration (e.g., 0.5-4.0 mM). Excess causes non-specific bands; insufficient leads to low/no yield. Note that dNTPs chelate Mg²⁺. |
| PCR Nucleotides (dNTPs) | The building blocks (dATP, dCTP, dGTP, dTTP) for new DNA strand synthesis. Quality and balance are critical for efficient amplification and polymerase fidelity [4]. | Use balanced equimolar mixtures. Unbalanced concentrations increase error rate. Prepare small aliquots to avoid freeze-thaw degradation. |
| PCR Buffers | Provides the optimal chemical environment (pH, ionic strength) for polymerase activity and stability. Often includes KCl and Triton X-100 [4] [26]. | Always use the buffer specified for the polymerase. Avoid mixing brands. Some buffers are supplied with or without MgCl₂. |
| Nuclease-Free Water | The solvent for all reaction components. Must be free of nucleases and PCR inhibitors to prevent reaction degradation or failure [26]. | A dedicated source of high-purity water is mandatory. Autoclaving is insufficient to remove all potential PCR inhibitors. |
| PCR Additives (e.g., BSA, Betaine, DMSO) | Assist in amplifying difficult templates (e.g., GC-rich regions) by reducing secondary structure or stabilizing the polymerase [4] [61]. | Use judiciously. DMSO and formamide can inhibit polymerization at high concentrations. Titrate to find the optimal level (e.g., 1-10%). |
Optimization often requires adjusting numerical parameters. The following table consolidates key quantitative data from published guidelines to inform experimental design.
Table: Optimal Ranges for Key PCR Parameters
| Parameter | Recommended Range or Value | Impact of Deviation | Citation |
|---|---|---|---|
| Annealing Temperature ((T_a)) | 3–5°C below primer (T_m) [22] [60]. | Too High: No primer binding; Too Low: Non-specific binding. | [22] |
| Primer Length | 18–30 base pairs [60]. | Shorter primers may be less specific; longer primers may have impractically high (T_m). | [60] |
| Primer GC Content | 40–60% [62] [60]. | Lower GC content may reduce specificity; higher GC content can cause overly stable secondary structures. | [62] |
| Mg²⁺ Concentration | 1.5–2.5 mM (starting point; requires titration) [61] [26]. | Too Low: Reduced or no yield; Too High: Non-specific products and increased error rate. | [61] |
| Cycle Number | 25–40 cycles [4]. | Too Few: Insufficient product from low-copy templates; Too Many: Plateau phase, accumulation of non-specific products. | [4] |
| Template Quantity (Genomic DNA) | 1 ng–1 µg per 50 µL reaction [61]. | Too Little: No product; Too Much: Inhibition, non-specific amplification. | [61] |
Resolving the challenge of "no amplification" in PCR is not a matter of luck but of applying a rigorous, systematic diagnostic approach. This guide has outlined a logical flowchart for problem-solving, detailed essential protocols for optimization, and provided reference tables for key reagents and parameters. By methodically investigating each component of the reaction—from template quality and primer design to reagent concentrations and instrument calibration—researchers can efficiently identify the root cause of failure. Adopting this disciplined framework not only saves valuable time and resources but also fosters a deeper, more intuitive understanding of the PCR process itself. This systematicity is the foundation of robust, reproducible, and successful molecular biology, which is fundamental to the progress of scientific research and drug development.
In polymerase chain reaction (PCR) experiments, the failure to produce a specific amplicon—a result known as no amplification—is a frequent obstacle that can halt research progress. A primary cause of this issue is a suboptimal annealing temperature (Ta) [16] [63]. The annealing temperature is critical for reaction specificity; if it is too high, primers cannot bind to the template DNA, resulting in no product. If it is too low, primers may bind non-specifically to incorrect sites, leading to unintended amplification products or no desired product at all [63] [64].
The melting temperature (Tm) of a primer, which is the temperature at which 50% of the primer-DNA duplexes are dissociated, serves as an initial guide [63]. However, the theoretically calculated Tm is an imperfect predictor of the optimal experimental Ta, as it can be influenced by reagent concentration, pH, and salt concentration in the reaction buffer [63]. Consequently, empirical optimization is often necessary. Gradient PCR is a powerful and efficient method for this optimization, allowing researchers to systematically test a range of annealing temperatures in a single experiment to find the "sweet spot" for specific primer-template combinations [63]. This guide details how to use gradient PCR to overcome amplification failure, within the broader context of PCR troubleshooting.
The Science of Annealing and Its Impact on Specificity
Primer-Template Binding Dynamics
The annealing step in PCR involves the binding of single-stranded oligonucleotide primers to their complementary sequences on the denatured DNA template. The stability of this primer-template duplex is predominantly determined by its GC content and length [64]. Guanine-cytosine (G-C) base pairs, with three hydrogen bonds, form more stable duplexes than adenine-thymine (A-T) pairs, which have only two [64]. Therefore, primers with higher GC content have a higher melting temperature (Tm).
The goal is to find an annealing temperature that is high enough to permit only the perfectly matched primer-template binding, yet not so high that it prevents any binding from occurring. Using an annealing temperature too low for a given primer pair can result in the binding of primers to partially homologous sequences, yielding non-specific amplification and a smear or multiple bands on a gel [16] [64]. Conversely, an excessively high Ta can lead to a complete absence of product due to failed primer binding [64].
The Challenge of Differing Primer Melting Temperatures
Another common challenge arises when the forward and reverse primers in a pair have significantly different Tm values. A difference of more than 5°C is considered problematic [63]. In a standard PCR with a single annealing temperature, the primer with the higher Tm could bind to unintended targets, while the primer with the lower Tm might not bind effectively, drastically reducing yield and specificity, or causing complete PCR failure [16]. Gradient PCR is the most efficient solution for finding a compromise temperature that works effectively for both primers.
Gradient PCR as a Solution
What is Gradient PCR?
Gradient PCR is a technique that enables the empirical determination of the optimal annealing temperature for a primer set in a single run. A thermal cycler with a gradient function is used to create a temperature profile across the block, meaning different wells of the PCR plate experience different, precisely controlled annealing temperatures. This allows an researcher to test, for example, a range from 55°C to 70°C simultaneously using the same template and reagent mixture [63].
By comparing the results across the temperature gradient—assessing both the yield and specificity of the amplification—the researcher can identify the temperature that produces the strongest amplification of the correct product with the least background.
When to Use Gradient PCR
Gradient PCR should be employed in the following scenarios:
- New Primer Sets: Whenever a new primer pair is used for the first time.
- PCR Failure: When a standard PCR reaction results in no amplification or non-specific amplification.
- Suboptimal Results: When a reaction produces low yield or multiple bands.
- GC-Rich Templates: When amplifying difficult templates, such as GC-rich sequences, which are prone to forming stable secondary structures that impede polymerase progression [64].
Experimental Protocol: Optimizing with Gradient PCR
Reagent Setup and Master Mix
For reliable results, set up your PCR reactions using a master mix to ensure consistency across all tubes.
- Calculate and Prepare Master Mix: Determine the number of reactions (e.g., 12 for a thermal gradient across a 96-well plate). Multiply the volume of each common reagent by the number of reactions, adding an extra 10% to account for pipetting error [51].
- Combine Reagents: In a single 1.5 mL tube, combine the following for a standard Taq polymerase reaction [51]:
- Sterile dH₂O
- 10X Taq PCR Buffer (with MgCl₂)
- dNTP Mix (10 mM each)
- Template DNA
- Taq DNA Polymerase
- Aliquot Master Mix: Gently mix the master mix by pipetting. Dispense equal volumes into individual PCR tubes or wells.
- Add Primers: Add forward and reverse primers to their respective tubes. To prevent omissions, it is helpful to pipet the forward primer onto one side of the tube wall and the reverse primer onto the other before adding the master mix [51].
Table 1: Example Master Mix for 12 Gradient PCR Reactions
| Component | Volume per Reaction (µL) | Number of Reactions | 10% Extra | Total Volume (µL) |
|---|---|---|---|---|
| 10X Taq Buffer (with MgCl₂) | 5.0 | 12 | 6.0 | 66.0 |
| dNTP Mix (10 mM each) | 1.0 | 12 | 1.2 | 13.2 |
| Template DNA | 2.0 | 12 | 2.4 | 26.4 |
| Taq Polymerase | 0.2 | 12 | 0.24 | 2.64 |
| Sterile dH₂O | 36.8 | 12 | 44.16 | 485.76 |
| Master Mix per tube | 45.0 | - | - | - |
| Forward Primer (10 µM) | 2.5 | - | - | (added separately) |
| Reverse Primer (10 µM) | 2.5 | - | - | (added separately) |
| Final Volume | 50.0 |
Thermal Cycler Programming
Program your thermal cycler with a standard three-step PCR protocol, activating the gradient function for the annealing step.
- Initial Denaturation: 94°C for 2 minutes [51].
- Amplification Cycles (25-35 cycles):
- Final Extension: 72°C for 5-10 minutes [51].
- Hold: 4°C to 12°C indefinitely.
Analyzing Results
After the PCR run is complete, analyze the products to determine the optimal annealing temperature.
- Gel Electrophoresis: Separate the PCR products from each temperature well using agarose gel electrophoresis [51].
- Visualization: Stain the gel with an intercalating dye like ethidium bromide or a safer alternative and visualize under UV light [51].
- Identification of Optimal Ta: The optimal annealing temperature is the highest temperature that yields a strong, specific band of the expected size. This temperature provides the best stringency, minimizing the potential for non-specific binding in future experiments. The results of a successful gradient optimization will look similar to the conceptual diagram below.
Advanced Optimization and Troubleshooting
Addressing Persistent Amplification Failure
If gradient PCR fails to yield a specific product, the problem may lie with factors beyond just annealing temperature. Consider these advanced troubleshooting steps:
- Mg²⁺ Concentration: Magnesium chloride (MgCl₂) is a crucial cofactor for Taq polymerase. Its concentration can affect primer binding, reaction specificity, and enzyme activity. Test a concentration gradient of MgCl₂, typically between 1.0 mM and 4.0 mM in 0.5 mM increments, to find the optimal concentration [64].
- PCR Additives: For difficult templates, such as GC-rich sequences, additives can be invaluable. They work by reducing secondary structures or increasing primer annealing stringency [64].
- DMSO (1-10%): Disrupts base pairing, helping to denature GC-rich secondary structures.
- Betaine (0.5-1.5 M): Equalizes the stability of AT and GC bonds, aiding in the amplification of GC-rich regions.
- Formamide (1-5%): Increases stringency, reducing non-specific priming.
- Polymerase Choice: Standard Taq polymerase may struggle with complex templates. Consider using specialized enzymes, such as Q5 High-Fidelity DNA Polymerase or OneTaq DNA Polymerase, which are often supplied with specialized GC buffers or GC enhancers designed to improve amplification of difficult targets [64].
Table 2: Troubleshooting Common PCR Amplification Problems
| Symptom | Possible Cause | Solution |
|---|---|---|
| No amplification | Ta too high | Lower the annealing temperature using a gradient. |
| Insufficient Mg²⁺ | Titrate MgCl₂ concentration (1.0-4.0 mM). | |
| Complex template | Use a specialized polymerase (e.g., Q5) or additives (DMSO, Betaine). | |
| Non-specific bands/smear | Ta too low | Increase the annealing temperature using a gradient. |
| Excess Mg²⁺ | Titrate MgCl₂ concentration downwards. | |
| Primer-dimer formation | Increase Ta; use hot-start polymerase; improve primer design. | |
| Weak band of correct size | Ta slightly suboptimal | Fine-tune Ta based on gradient results; increase cycle number. |
| Inefficient polymerase | Ensure polymerase is active; use a polymerase with higher processivity. |
The Scientist's Toolkit: Essential Research Reagents
The following reagents are critical for successful PCR optimization.
Table 3: Key Research Reagent Solutions for PCR Optimization
| Reagent | Function in PCR Optimization |
|---|---|
| Taq DNA Polymerase | The standard thermostable enzyme for routine PCR amplification [51]. |
| High-Fidelity Polymerases (e.g., Q5) | Polymerases with proofreading activity for long or difficult amplicons, often supplied with GC Enhancers [64]. |
| dNTP Mix | The building blocks (dATP, dCTP, dGTP, dTTP) for DNA synthesis [51]. |
| 10X PCR Buffer (with MgCl₂) | Provides an optimal chemical environment (pH, salts) for the polymerase. The included MgCl₂ acts as a essential cofactor [51] [64]. |
| GC Enhancer / Additives | Proprietary mixes or specific chemicals (DMSO, Betaine) that help denature secondary structures in GC-rich templates [64]. |
| Nuclease-Free Water | The solvent for the reaction, ensuring no enzymatic degradation of primers or template. |
Within the broader investigation of PCR failure, the annealing temperature stands out as a factor that is both highly critical and readily adjustable. The systematic use of gradient PCR provides a direct experimental path to identify the optimal annealing temperature, transforming a reaction plagued by no amplification or non-specific products into a robust and reliable assay. By integrating this empirical method with an understanding of primer biochemistry and the strategic use of specialized reagents, researchers can effectively overcome one of the most common hurdles in molecular biology, ensuring the success and reproducibility of their experiments.
Addressing Primer-Dimer Formation and Non-Specific Amplification
In polymerase chain reaction (PCR) experiments, the failure to amplify a target DNA sequence—a result known as "no amplification"—is a significant obstacle that can stall research and development projects. Within the context of a broader thesis on the causes of amplification failure in PCR, this guide addresses two of the most prevalent technical challenges: primer-dimer formation and non-specific amplification. These artifacts compete with the desired product for reaction components, can inhibit detection of the target amplicon, and are a major reason for failed or unreliable experiments [65] [10]. For researchers and drug development professionals, understanding and mitigating these issues is crucial for generating robust, reproducible, and accurate data, particularly in sensitive applications like diagnostic assay development and validation.
Primer dimers are short, double-stranded DNA fragments that form when PCR primers anneal to each other via complementary regions instead of binding to the intended target DNA template. These structures are typically 20-60 base pairs (bp) in length and are extended by the DNA polymerase, effectively competing with the target amplification [65] [66]. Non-specific amplification, a broader category, refers to the amplification of any non-target DNA. This can manifest on an electrophoresis gel as multiple unexpected bands, smears, or ladder-like patterns, and occurs when primers bind to regions of the template DNA with low homology [10]. Both phenomena drain the reaction of essential dNTPs, primers, and enzyme activity, which can lead to a complete absence of the desired product or render the results unquantifiable and unsuitable for downstream applications [65] [10].
Understanding the Mechanisms and Causes
To effectively troubleshoot amplification failure, it is essential to understand the underlying mechanisms that lead to primer-dimer formation and non-specific amplification. The core problem is the unintended hybridization of oligonucleotides, which is influenced by primer design, reaction conditions, and template quality.
Mechanisms of Primer-Dimer Formation
Primer dimers form through two primary mechanisms: self-dimerization and cross-dimerization. Self-dimerization occurs when a single primer has regions that are complementary to itself, leading to intra-primer annealing and creating a free 3' end that can be extended by the DNA polymerase [66]. Cross-dimerization involves the forward and reverse primers annealing to each other due to inter-primer homology, particularly at their 3' ends [9] [67]. Once formed, these duplexes are amplified very efficiently throughout the PCR cycles. If they arise during the early stages of the reaction, they can outcompete the target amplicon, especially if the target is long or present in low copy numbers [10]. The following diagram illustrates these formation pathways and their consequences.
Causes of Non-Specific Amplification
Non-specific amplification shares some common causes with primer-dimer formation but often involves mispriming on the template DNA itself. Key contributing factors include:
- Suboptimal Annealing Temperature: An annealing temperature that is too low is a primary cause, as it allows primers to bind to sequences with partial complementarity [10] [55].
- Excessive Primer Concentration: High primer concentrations increase the likelihood of primers binding to off-target sites and to each other [55].
- Poor Primer Design: Primers with low complexity, long runs of a single base, or significant self-complementarity are prone to forming secondary structures like hairpins or binding to multiple genomic locations [9] [67].
- Template-Related Issues: The presence of contaminants, degraded DNA, or an excessively high amount of template DNA can promote random priming and the amplification of non-specific fragments [10] [55].
Experimental studies have quantitatively defined the conditions that foster stable primer-dimer formation. One key investigation using capillary electrophoresis found that more than 15 consecutive base pairs between primers were sufficient to create stable dimers. Notably, the study also revealed that even 20 out of 30 possible base pairs did not lead to stable dimerization if the bonding was non-consecutive, highlighting the critical importance of the spatial arrangement of complementary regions [68]. Furthermore, dimerization was shown to be inversely correlated with temperature, reinforcing the value of using higher annealing and electrophoresis temperatures to disrupt these non-specific interactions [68].
Optimization Strategies and Experimental Protocols
A systematic approach to PCR optimization, focusing on primer design and reaction conditions, can effectively suppress primer-dimer formation and non-specific amplification. The following sections provide detailed, actionable protocols.
Primer Design and In Silico Analysis
The most effective strategy to prevent amplification artifacts is meticulous primer design. Adhering to established design principles is the first and most critical line of defense.
Table 1: Optimal Parameters for PCR Primer Design
| Parameter | Optimal Value/Range | Rationale |
|---|---|---|
| Primer Length | 18–30 nucleotides [9] [67] | Balances specificity and binding efficiency. |
| Melting Temperature (T~m~) | 55–72°C; difference between primer pairs ≤5°C [55] [67] | Ensures both primers anneal efficiently at the same temperature. |
| GC Content | 40–60% [9] [67] | Provides sufficient binding strength without promoting mispriming. |
| 3'-End Sequence | Avoid >3 G/C bases; no self-complementarity [9] [67] | Prevents stable primer-dimer initiation by the polymerase. |
| Self-Complementarity | ≤3 contiguous bases [67] | Minimizes hairpin formation and self-dimerization. |
Experimental Protocol 1: In Silico Primer Analysis and Design
- Sequence Retrieval: Obtain the target DNA sequence from a reliable database like NCBI Nucleotide.
- Primer Design Tool: Use specialized software such as Primer3 (Whitehead Institute), Oligo, or the combined NCBI Primer-BLAST tool [67]. These tools incorporate thermodynamic "nearest neighbor" calculations to predict annealing temperatures and potential primer interactions.
- Parameter Setting: Input the desired product size (e.g., 80–150 bp for qPCR) and set the algorithmic parameters according to the values in Table 1 [67].
- Specificity Check: Use the BLAST function integrated into Primer-BLAST to ensure the selected primer sequences are unique to the intended target, thereby minimizing the risk of amplifying non-specific genomic regions [67].
- Dimer Risk Assessment: Analyze the final candidate primers for self- and cross-dimer formation using tools like Netprimer (Premier Biosoft), which evaluates hairpin loops, internal self-dimerization, and cross primer-dimer formation [67].
Optimization of Reaction Conditions and Components
Even well-designed primers can produce artifacts under suboptimal reaction conditions. The following protocol outlines a stepwise optimization procedure.
Experimental Protocol 2: Empirical Optimization of PCR Conditions
- Employ Hot-Start PCR:
- Use a hot-start DNA polymerase (inactivated by antibodies, affibodies, or chemical modifications) [57] [55].
- Set up reactions at room temperature. The polymerase remains inactive, preventing primer-dimer formation during setup [57].
- Include a prolonged initial denaturation step (e.g., 2–5 minutes at 95°C) to fully activate the enzyme before cycling begins [57].
Optimize Annealing Temperature via Touchdown PCR:
- Program the thermal cycler to start with an annealing temperature 5–10°C above the calculated T~m~ of the primers [57].
- Decrease the annealing temperature by 1°C every cycle for the first 10–15 cycles until it reaches the calculated optimal T~m~ [57].
- Complete the remaining 20–25 cycles at this optimal temperature. This approach selectively enriches the specific target in the early cycles while suppressing non-specific amplification [57].
Titrate Reaction Components:
- Magnesium Concentration: Test a range of MgCl₂ concentrations (e.g., 0.5 mM to 5.0 mM in 0.5 mM increments). Mg²⁺ is a critical cofactor, but excess amounts can stabilize non-specific primer-template interactions [55] [67].
- Primer Concentration: Titrate primer concentrations from 0.1 μM to 1.0 μM. Lowering the primer concentration reduces the chance of primer-dimer formation and mispriming [66] [55].
Incorporate Additives (for difficult templates):
The strategic relationships between different optimization techniques and their specific goals are summarized in the workflow below.
Advanced Techniques and Quantitative Analysis
For persistent problems or highly multiplexed applications, advanced methodological and analytical techniques are required.
Advanced PCR Methods
- Nested PCR: This method uses two sets of primers in two sequential amplification rounds. The first round uses "outer" primers to amplify a larger region that contains the target. The product of this reaction is then used as a template for a second round with "inner" or nested primers. This dramatically increases specificity because it is highly improbable that a non-specific product from the first round would be amplified by the second, target-specific primer set [57].
- Tail-PCR for Primer-Dimer Suppression: This technique involves adding a non-complementary "tail" sequence to the 5' end of the primers used in early PCR cycles. In subsequent cycles, a single "tag" primer matching the tail is used for amplification. For non-specific small products like primer-dimers, the complementary tails on the same single strand can anneal to form a pan-handle structure, which outcompetes the tag primer and prevents their amplification, while the desired longer amplicon is efficiently amplified [69].
Quantitative Analysis of Primer-Dimer
Advanced analytical techniques allow for precise quantification of dimerization risk. One study employed Free-Solution Conjugate Electrophoresis (FSCE) with a synthetic poly-N-methoxyethylglycine (NMEG) "drag-tag" to precisely separate and quantify primer-dimer formation under different temperatures [68]. The key quantitative findings from this study are summarized below.
Table 2: Experimentally Determined Parameters for Stable Primer-Dimer Formation [68]
| Experimental Variable | Impact on Dimerization | Experimental Finding |
|---|---|---|
| Number of Consecutive Base Pairs | Directly correlated | >15 consecutive base pairs resulted in stable dimer formation. |
| Number of Non-Consecutive Base Pairs | Weakly correlated | 20 out of 30 non-consecutive base pairs did not form stable dimers. |
| Temperature | Inversely correlated | Dimerization decreased as temperature increased from 18°C to 62°C. |
| Electrophoresis Method | Enables quantification | FSCE with a drag-tag allowed precise separation and analysis of ssDNA and ds primer-dimer conformations. |
The Scientist's Toolkit: Essential Research Reagents
Successful troubleshooting of PCR amplification requires a set of reliable reagents and tools. The following table details key solutions for addressing primer-dimer and non-specificity issues.
Table 3: Research Reagent Solutions for PCR Optimization
| Reagent / Tool | Function / Purpose | Key Considerations |
|---|---|---|
| Hot-Start DNA Polymerase | Inhibits polymerase activity at low temperatures during reaction setup, drastically reducing primer-dimer formation [65] [57]. | Available as antibody-based, affibody, or chemically modified enzymes. Activation time/temperature varies. |
| High-Fidelity Polymerase | Contains 3'→5' exonuclease (proofreading) activity to correct misincorporated bases, improving accuracy for cloning and sequencing [55]. | Often has slower extension rates than Taq. Sometimes used in blends with non-proofreading enzymes. |
| MgCl₂ Solution | Essential cofactor for DNA polymerase. Concentration optimization is critical for specificity [55] [67]. | Typically tested in 0.5-5.0 mM range. Excess Mg²⁺ stabilizes non-specific binding. |
| PCR Additives (DMSO, BSA) | DMSO disrupts DNA secondary structures in GC-rich templates. BSA binds inhibitors present in complex samples [55]. | DMSO (1-10%) lowers the effective T~m~, requiring annealing temperature adjustment. |
| Primer Design Software (e.g., Primer3, Oligo) | Uses thermodynamic models to design primers with optimal T~m~, minimize self-complementarity, and check for dimer risk [67]. | Integrated BLAST analysis (e.g., in Primer-BLAST) is essential for verifying primer specificity. |
| No-Template Control (NTC) | Critical control reaction containing all PCR components except the DNA template. | The presence of a band in the NTC confirms primer-dimer formation or contaminating DNA [66]. |
Within the investigation of causes for PCR amplification failure, primer-dimer formation and non-specific amplification stand out as pervasive, controllable technical challenges. Addressing them requires a holistic strategy that begins with rigorous in silico primer design, followed by systematic wet-lab optimization of reaction components and cycling conditions. The use of advanced methods like hot-start polymerases, touchdown PCR, and quantitative analysis techniques provides powerful tools to suppress these artifacts. For researchers in drug development and diagnostics, where assay reliability is paramount, mastering these optimization principles is not merely a technical exercise but a fundamental requirement for generating valid, reproducible data that can accelerate scientific discovery and innovation.
The polymerase chain reaction (PCR) is a foundational technique in molecular biology, yet researchers frequently encounter the frustrating problem of amplification failure, particularly when working with challenging DNA templates [70]. Failed amplification can result from various factors including complex secondary structures in GC-rich regions, the presence of PCR inhibitors in samples, or suboptimal reaction conditions that promote non-specific priming [70] [71]. Within this context, PCR additives and enhancers serve as crucial tools for overcoming these barriers by modifying the physical chemistry of the amplification reaction to favor specific product formation [70] [72].
This technical guide provides an in-depth examination of four key PCR enhancers—DMSO, BSA, betaine, and formamide—detailing their mechanisms of action, optimal usage conditions, and application in resolving specific amplification challenges. By understanding how these additives interact with reaction components and DNA templates, researchers can strategically select and optimize enhancers to rescue failed amplifications and improve PCR performance across diverse applications.
Mechanisms of PCR Failure and Enhancer Action
Primary Causes of Amplification Failure
PCR amplification can fail for several well-characterized reasons, each requiring specific intervention strategies:
GC-rich sequences and stable secondary structures: DNA templates with high GC content (>70%) form stable secondary structures that resist complete denaturation at standard temperatures, preventing primer access and polymerase progression [70] [71]. These structures include hairpins, G-quadruplexes, and other complex conformations that present physical barriers to amplification.
Co-purified PCR inhibitors: Common laboratory samples may contain residual substances that inhibit polymerase activity, including phenolic compounds from DNA extraction, heparin from blood samples, hematin, IgG, EDTA, or polysaccharides from plant and microbial samples [73] [71]. These inhibitors can chelate essential cofactors, degrade enzymes, or compete for binding sites.
Non-specific amplification: At lower annealing temperatures, primers may bind to partially complementary sequences, leading to amplification of non-target products that compete with the desired amplicon for reaction components [74] [75]. This is particularly problematic when using degenerate primers or amplifying from complex templates.
Long amplicon synthesis: Amplification of long DNA fragments (>5 kb) presents challenges related to polymerase processivity, depurination at elevated temperatures, and the cumulative effects of secondary structures across extended sequences [70].
How PCR Enhancers Modulate Reaction Dynamics
PCR enhancers address these challenges through distinct biochemical mechanisms that alter the reaction environment:
Destabilization of DNA secondary structures: Additives like DMSO, betaine, and formamide interfere with hydrogen bonding and base stacking interactions, reducing the melting temperature (Tm) of DNA and facilitating denaturation of difficult templates [73] [74]. This action is particularly beneficial for GC-rich regions that would otherwise remain double-stranded under standard PCR conditions.
Polymerase stabilization and protection: Enhancers such as BSA and betaine protect DNA polymerase from inhibitors and thermal denaturation, maintaining enzymatic activity throughout thermal cycling [76] [74]. This stabilization is crucial for amplifying long targets or when using problematic sample types.
Modification of hybridization kinetics: Certain additives increase the stringency of primer binding, reducing non-specific amplification by promoting perfect match hybridization while destabilizing mismatched primer-template interactions [74] [72].
Alteration of solution properties: Enhancers can change the effective concentration of water, reduce electrostatic repulsion between DNA strands, or shield charged groups, creating a more favorable environment for specific amplification [73] [76].
The following diagram illustrates the decision-making pathway for selecting appropriate PCR enhancers based on specific amplification challenges:
Figure 1: Decision pathway for selecting PCR enhancers based on specific amplification challenges. Researchers should systematically evaluate failed reactions to identify the most probable cause and select enhancers accordingly.
Comprehensive Analysis of Key PCR Additives
Dimethyl Sulfoxide (DMSO)
Mechanism of Action: DMSO enhances PCR primarily by reducing the formation of DNA secondary structures through disruption of hydrogen bonding networks between DNA strands and surrounding water molecules [73]. This interaction lowers the melting temperature (Tm) of DNA, facilitating strand separation at lower temperatures and preventing reassociation of GC-rich sequences during annealing and extension steps [70] [74]. Additionally, DMSO improves base-pairing specificity by increasing the stringency of primer-template interactions, though it simultaneously reduces Taq polymerase activity through partial denaturation of the enzyme [73] [74].
Optimal Concentration and Applications: The effective concentration range for DMSO is typically 2-10%, with 5% being most commonly employed for GC-rich templates [77] [73]. In a systematic study evaluating ITS2 DNA barcode amplification from plants, 5% DMSO achieved a 91.6% success rate compared to 42% without enhancers [77]. For long-range PCR, DMSO is often used in combination with other enhancers, particularly betaine, to address both secondary structure and polymerase processivity challenges [70]. Researchers should note that DMSO concentration requires careful optimization, as excessive amounts (>10%) can severely inhibit polymerase activity and reduce overall yield [76].
Betaine
Mechanism of Action: Betaine (N,N,N-trimethylglycine) enhances PCR through two primary mechanisms: equalization of base-pair stability and disruption of secondary structures [70] [76]. As a zwitterionic osmoprotectant, betaine reduces the differential stability between GC and AT base pairs by eliminating base pair composition dependence during DNA melting, creating more uniform denaturation and annealing conditions [73] [78]. Additionally, betaine interacts with DNA backbone charges to reduce electrostatic repulsion between strands, further facilitating denaturation of difficult templates [73]. Unlike DMSO, betaine generally does not inhibit polymerase activity and may even stabilize enzymes against thermal denaturation [76].
Optimal Concentration and Applications: Betaine is typically used at concentrations of 1-1.7 M, with 1 M being effective for most applications [77] [74]. For exceptionally challenging GC-rich targets (>70% GC content), concentrations up to 1.7 M may be required [78]. In comparative studies, betaine has demonstrated superior performance in amplifying GC-rich fragments compared to other enhancers, with one study showing it outperformed DMSO, formamide, and 7-deaza-dGTP in thermostabilizing Taq polymerase and providing inhibitor tolerance [76]. Betaine is particularly valuable in touchdown PCR protocols for GC-rich genes, where it significantly improves specificity and yield [78]. Researchers should use betaine or betaine monohydrate rather than betaine hydrochloride, as the hydrochloride form can alter reaction pH and inhibit polymerase activity [74].
Bovine Serum Albumin (BSA)
Mechanism of Action: BSA enhances PCR primarily through its capacity to bind and neutralize common PCR inhibitors present in biological samples [73] [74]. As a non-specific binding protein, BSA sequesters phenolic compounds, humic acids, heparin, and other inhibitors that would otherwise interfere with polymerase activity or chelate essential magnesium cofactors [71]. Additionally, BSA stabilizes reaction components by preventing adhesion to tube walls and providing a protective protein matrix that reduces enzyme denaturation during thermal cycling [74].
Optimal Concentration and Applications: BSA is typically used at concentrations of 0.1-0.8 mg/mL, with 0.8 mg/mL being most common for inhibitory samples [74]. The effectiveness of BSA is particularly evident when amplifying targets from complex sample types such as blood, soil, plant extracts, or forensic samples where complete purification of DNA may be difficult [71]. Unlike other enhancers that directly modify DNA thermodynamics, BSA addresses sample-specific challenges rather than template-specific issues, making it a valuable addition to reactions where inhibitor presence is suspected rather than template complexity [73].
Formamide
Mechanism of Action: Formamide functions as a duplex destabilizing agent by binding to the major and minor grooves of DNA, disrupting hydrogen bonding and hydrophobic interactions between strands [73] [72]. This interaction lowers the melting temperature of DNA approximately 0.6°C for each 1% formamide added, facilitating strand separation at lower temperatures and reducing the formation of secondary structures [72]. Additionally, formamide increases hybridization stringency by promoting more specific primer-template interactions, thereby reducing non-specific amplification [74].
Optimal Concentration and Applications: Formamide is typically used at concentrations of 1-5%, with higher concentrations within this range providing greater destabilization but potentially inhibiting polymerase activity [73] [74]. In amplification studies comparing enhancers, 3% formamide achieved a 16.6% success rate with ITS2 barcodes, significantly lower than the 91.6% achieved with 5% DMSO [77]. Formamide is particularly valuable when using degenerate primers or when non-specific amplification is the primary challenge rather than template secondary structure [74]. Researchers should note that formamide can reduce overall reaction efficiency and is often more effective when used in combination with other enhancers [72].
Quantitative Comparison of PCR Enhancers
Table 1: Performance comparison of common PCR enhancers across different template types
| Enhancer | Optimal Concentration | GC-Rich Enhancement | Inhibitor Resistance | Specificity Improvement | Primary Mechanism |
|---|---|---|---|---|---|
| DMSO | 2-10% (typically 5%) | High [77] | Low to moderate | Moderate [73] | Reduces DNA secondary structure by disrupting hydrogen bonding [74] |
| Betaine | 1-1.7 M (typically 1 M) | Very high [76] | High [76] | High [78] | Equalizes base-pair stability and disrupts secondary structures [70] |
| Formamide | 1-5% | Moderate [77] | Low | High [74] | Destabilizes DNA duplex by binding grooves and lowering Tm [72] |
| BSA | 0.1-0.8 mg/mL | None | Very high [74] | Moderate [74] | Binds and neutralizes inhibitors; stabilizes polymerase [73] |
Table 2: Effect of enhancer concentration on amplification efficiency of DNA fragments with different GC content
| Enhancer | Concentration | 53.8% GC (Ct value) | 68.0% GC (Ct value) | 78.4% GC (Ct value) |
|---|---|---|---|---|
| Control | - | 15.84±0.05 | 15.48±0.22 | 32.17±0.25 |
| DMSO | 5% | 16.68±0.01 | 15.72±0.03 | 17.90±0.05 |
| Formamide | 5% | 18.08±0.07 | 15.44±0.03 | 16.32±0.05 |
| Betaine | 1 M | 16.03±0.03 | 15.08±0.10 | 16.97±0.10 |
| Sucrose | 0.4 M | 16.39±0.09 | 15.03±0.04 | 16.67±0.08 |
| Trehalose | 0.4 M | 16.43±0.16 | 15.15±0.08 | 16.91±0.14 |
Data adapted from PLOS ONE 2024 study showing cycle threshold (Ct) values for fragments with varying GC content. Lower Ct values indicate better amplification efficiency [76].
Experimental Protocols for Enhanced PCR
Standardized Protocol for Testing Enhancer Efficacy
Objective: To systematically evaluate the effects of different PCR enhancers on amplification efficiency and specificity.
Reaction Setup:
- Prepare a master mix containing the following components per reaction:
- 1X PCR buffer (10 mM Tris-HCl, pH 8.3, 50 mM KCl)
- 1.5 mM MgCl₂ (optimization range: 1.0-4.0 mM)
- 0.2 mM each dNTP
- 0.2 μM forward and reverse primers
- 0.04 U/μL Taq DNA polymerase
- Template DNA (10-100 ng genomic DNA or 1-10 ng plasmid)
Aliquot the master mix into five tubes and add enhancers:
- Tube 1: No enhancer (control)
- Tube 2: 5% DMSO
- Tube 3: 1 M betaine
- Tube 4: 0.8 mg/mL BSA
- Tube 5: 3% formamide
Thermal cycling conditions:
- Initial denaturation: 95°C for 2 minutes
- 35 cycles of:
- Denaturation: 95°C for 30 seconds
- Annealing: Temperature gradient from 50-65°C for 30 seconds
- Extension: 72°C for 1 minute per kb
- Final extension: 72°C for 5 minutes
Analysis:
- Separate PCR products by agarose gel electrophoresis
- Compare band intensity, specificity, and yield across conditions
- For quantitative assessment, use real-time PCR to determine Ct values [76]
Specialized Protocol for GC-Rich Templates Using Betaine-Enhanced Touchdown PCR
Objective: To amplify challenging GC-rich targets (>70% GC content) using a combination of betaine and touchdown PCR.
Reaction Composition:
- 1X PCR buffer with 2.0 mM MgCl₂
- 1 M betaine
- 0.2 mM each dNTP
- 0.4 μM each primer
- 2.5 U of high-fidelity DNA polymerase
- 100 ng template DNA
- Total reaction volume: 25 μL
Thermal Cycling Profile:
- Initial denaturation: 95°C for 5 minutes
- 20 touchdown cycles:
- Denaturation: 95°C for 30 seconds
- Annealing: Start at 1.5°C below primer Tm, decrease by 0.2°C per cycle
- Extension: 72°C for 1 minute per kb
- 15 standard cycles:
- Denaturation: 95°C for 30 seconds
- Annealing: Use final touchdown temperature
- Extension: 72°C for 1 minute per kb
- Final extension: 72°C for 10 minutes
This protocol has been successfully applied to amplify GC-rich regions such as the IRS2 gene (74.5% GC content) that failed to amplify with conventional methods [78].
Advanced Applications and Strategic Implementation
Enhancer Combinations for Challenging Targets
For exceptionally difficult amplifications, strategic combinations of enhancers may be more effective than single additives. However, combinations require careful optimization as enhancers can have antagonistic effects:
Betaine + DMSO: This combination is particularly effective for long-range PCR of GC-rich templates, as betaine equalizes base-pair stability while DMSO further reduces secondary structure formation [70]. A typical combination uses 0.5 M betaine with 5% DMSO, though concentrations should be empirically determined.
Betaine + sucrose: Recent research indicates that 0.5 M betaine combined with 0.2 M sucrose effectively promotes GC-rich region amplification while minimizing negative effects on normal fragments [76].
BSA + detergent: For samples with high inhibitor content, combining BSA (0.8 mg/mL) with non-ionic detergents such as 0.1-1% Tween-20 can provide enhanced protection against inhibitors like SDS carryover from DNA extraction [74].
When developing enhancer cocktails, systematic testing using a matrix approach is essential to identify optimal combinations and concentrations for specific applications.
Integration with Polymerase Selection
The effectiveness of PCR enhancers is influenced by the choice of DNA polymerase, with different enzyme properties interacting with additives in distinct ways:
Hot-start polymerases: These enzymes are particularly beneficial when using enhancers like betaine or DMSO, as they prevent non-specific amplification during reaction setup, complementing the specificity enhancements provided by the additives [75].
High-fidelity polymerases: Proofreading enzymes with 3'→5' exonuclease activity often have lower processivity and may benefit more from betaine and DMSO when amplifying difficult templates [71].
Engineered polymerases: Modern polymerases with enhanced processivity or inhibitor resistance may require lower concentrations of enhancers or respond differently to specific additives [75].
Researchers should consider polymerase-enhancer interactions when designing amplification strategies, as optimal enhancer concentrations may vary depending on the polymerase used.
The Scientist's Toolkit: Research Reagent Solutions
Table 3: Essential reagents for PCR enhancement experiments
| Reagent | Function | Storage Conditions | Usage Notes |
|---|---|---|---|
| DMSO (Molecular biology grade) | Secondary structure destabilizer | Room temperature, desiccated | Use anhydrous grade; protect from moisture absorption |
| Betaine (Betaine monohydrate) | GC-rich template enhancer | 4°C | Prepare fresh 5M stock solution; avoid betaine-HCl |
| Molecular biology grade BSA | Inhibitor neutralization | -20°C | Use acetylated BSA for best results in PCR |
| Ultrapure formamide | Stringency enhancer | 4°C, protected from light | Use deionized formamide for consistent results |
| Hot-start DNA polymerase | Specificity enhancement | -20°C | Enables room-temperature setup with enhancers |
| dNTP mix | PCR substrate | -20°C | Concentration affects Mg²⁺ optimization |
| MgCl₂ solution | Polymerase cofactor | -20°C | Fully thaw and vortex before use to avoid gradients |
PCR enhancers represent powerful tools for overcoming the persistent challenge of amplification failure in molecular biology research. Through their distinct mechanisms of action—ranging from destabilization of DNA secondary structures to neutralization of inhibitors—DMSO, betaine, BSA, and formamide each address specific barriers to successful amplification. The strategic selection and optimization of these enhancers, guided by systematic experimental approaches and an understanding of their interactions with reaction components, can rescue otherwise failed amplifications and extend the capabilities of PCR across diverse applications.
As PCR technologies continue to evolve, including the development of novel polymerase formulations and specialized amplification techniques, the role of enhancers remains crucial for pushing the boundaries of what can be successfully amplified. Future directions will likely include the development of novel enhancer cocktails tailored to specific application niches and a deeper understanding of enhancer-polymerase interactions at the molecular level. By integrating the systematic use of PCR enhancers with appropriate experimental design and polymerase selection, researchers can maximize success rates even with the most challenging templates and sample types.
Polymerase chain reaction (PCR) is a foundational technique in molecular biology, yet it is susceptible to a range of issues that can result in complete amplification failure. Within the context of broader research into what causes no amplification in PCR experiments, troubleshooting requires a systematic approach to identify and rectify problems stemming from reagent quality, reaction components, and cycling parameters. The exquisite sensitivity of PCR, while a primary advantage, also makes it vulnerable to contamination from exogenous DNA and enzymatic inhibitors, which can obliterate amplification efficiency [79] [7]. Similarly, suboptimal cycling conditions or miscalculated reagent concentrations can silence the reaction entirely. This guide presents structured case studies and detailed protocols to diagnose and resolve the most common and debilitating causes of PCR failure, enabling researchers to restore amplification success and ensure the reliability of their experimental data.
Core Principles of PCR and Common Failure Points
A successful PCR amplification relies on the precise coordination of template DNA, primers, DNA polymerase, nucleotides, and cofactors within a thermally cycled environment. The process involves repeated cycles of denaturation (separating DNA strands), annealing (primers binding to complementary sequences), and extension (DNA synthesis), resulting in the exponential amplification of a specific target [19] [80]. Failure at any of these stages can lead to no product, weak product, or non-specific amplification.
Common failure points can be categorized as follows:
- Template Issues: Poor quality, insufficient quantity, or the presence of inhibitors [4].
- Primer Problems: Poor design, degradation, or suboptimal concentration [80] [55].
- Enzyme and Buffer Conditions: Inactive polymerase, incorrect magnesium concentration, or unbalanced nucleotides [81] [4].
- Thermal Cycling Parameters: Incorrect denaturation, annealing, or extension temperatures and times [19].
- Contamination: Carryover of amplicons from previous reactions or exogenous DNA in reagents [79] [7].
The following diagram illustrates a systematic troubleshooting workflow for diagnosing a failed PCR with no amplification.
Case Study 1: Contaminated Reagents and False Positives
Background and Problem Identification
In a diagnostic laboratory setting, a universal 16S rRNA real-time PCR assay for bacterial detection began producing consistent false-positive results in negative control samples. The assay was designed to be highly sensitive, targeting a conserved, multi-copy gene, which exacerbated the impact of even trace contamination [79]. The problem was identified when water template controls demonstrated amplification curves identical to true positive clinical samples, rendering the assay results unreliable and threatening the validity of patient diagnoses.
Investigation and Root Cause Analysis
A systematic investigation was launched to pinpoint the contamination source:
- Reagent Testing: Individual reaction components were tested in isolation. The amplification signal was traced to the Taq DNA polymerase reagent.
- Polymerase Source Analysis: Comparison of Taq polymerases from different manufacturers revealed that the enzyme itself was contaminated with bacterial genomic DNA, a known byproduct of its production in E. coli [79].
- Environmental Monitoring: Surfaces and equipment were swabbed and tested, revealing widespread amplicon contamination from previous, high-yield PCRs. A single aerosolized droplet could contain as many as 10^6 copies of amplification product, creating a significant contamination burden [7].
Detailed Experimental Protocol for Decontamination
Several decontamination strategies were evaluated for their efficacy in eliminating the contaminating DNA while preserving PCR sensitivity [79] [7].
Protocol: Evaluating Decontamination Methods
UV Irradiation:
- Procedure: Expose the complete PCR master mix (excluding template DNA and primers) to UV light (254-300 nm) at an energy of 1-12 J/cm² for 5-20 minutes. Add template and primers after irradiation.
- Rationale: UV light induces thymidine dimers and other covalent modifications in DNA, rendering it non-amplifiable.
- Limitations: Efficacy is reduced for short (<300 bp) or GC-rich amplicons. It can also damage primers and reduce Taq polymerase activity [7].
Enzymatic Inactivation with Uracil-N-Glycosylase (UNG):
- Procedure:
- Incorporate dUTP in place of dTTP in all PCR master mixes.
- Add UNG enzyme to the master mix.
- Incubate the complete reaction mix (with template) at 25-37°C for 10 minutes before thermal cycling. This allows UNG to cleave uracil-containing contaminating amplicons from previous runs.
- Inactivate UNG by heating to 95°C at the start of PCR cycling. New, uracil-containing amplicons are generated in the current reaction but are susceptible to UNG cleavage in future setups [7].
- Rationale: UNG selectively hydrolyzes DNA containing uracil, leaving native thymine-containing template DNA intact.
- Procedure:
Psoralen Treatment:
- Procedure: Add a furocoumarin compound (e.g., psoralen) to the reaction tube prior to PCR. After amplification, but before opening the tube, expose it to long-wave UV light (300-400 nm) to activate the psoralen, which forms interstrand cross-links in the amplicons.
- Rationale: The cross-linked amplification products are rendered unamplifiable in subsequent reactions, preventing carryover contamination [7].
DNase Treatment:
- Procedure: Treat the master mix (without template) with DNase I, then heat-inactivate the DNase before adding the template DNA.
- Rationale: DNase degrades double-stranded DNA contaminants. The enzyme is then inactivated to prevent degradation of the target template.
Table 1: Efficacy of Different Contamination Control Methods
| Method | Procedure | Reduction in Sensitivity | Key Advantages | Key Limitations |
|---|---|---|---|---|
| UNG (dUTP) | Pre-PCR incubation with UNG enzyme; dUTP in master mix | Minimal | Highly effective; integrated into workflow | Less effective for GC-rich targets; may need dTTP/dUTP mix |
| Psoralen + UV | Post-PCR UV exposure of closed tubes with psoralen | None | Sterilizes products post-amplification | Requires post-PCR handling and UV equipment |
| UV Irradiation | Pre-PCR UV exposure of master mix | 4-log reduction | Simple, inexpensive | Damages enzymes/primers; poor for short/GC-rich DNA |
| DNase Treatment | Pre-PCR DNase treatment, then heat inactivation | 1.66-log reduction | Targets all DNA contaminants | Requires precise inactivation step |
Resolution and Preventative Measures
The laboratory adopted a multi-pronged approach to resolve the issue:
- Primary Strategy: Implementation of UNG carryover prevention as a standard practice in all PCR setups [7].
- Laboratory Workflow: Enforcement of strict unidirectional workflow through physically separated pre- and post-PCR rooms, with dedicated equipment, lab coats, and supplies for each area [7].
- Environmental Control: Routine decontamination of work surfaces and equipment with 10% sodium hypochlorite (bleach), which causes oxidative damage to DNA [7].
The following diagram illustrates the mechanism of the highly effective UNG decontamination method.
Case Study 2: Suboptimal Cycling Conditions and Primer Design
Background and Problem Identification
A research project aimed to clone a GC-rich (~70%) DNA fragment from human genomic DNA consistently resulted in no amplification product. Initial attempts used a standard three-step PCR protocol with an annealing temperature estimated from basic primer Tm calculations. The failure was hypothesized to stem from a combination of the complex template and suboptimal thermal cycling parameters that prevented efficient primer binding and polymerase extension [4] [19].
Investigation and Root Cause Analysis
The investigation focused on template, primer, and cycling conditions:
- Template Complexity: The GC-rich sequence was prone to forming stable secondary structures and incomplete denaturation, which physically blocked polymerase progression [4] [55].
- Primer Annealing Temperature: The initial annealing temperature was too low, leading to non-specific primer binding, or too high, preventing any primer binding at all. Accurate Tm calculation is critical [81] [19].
- Denaturation Efficiency: Standard denaturation times and temperatures were insufficient to fully melt the GC-rich template [19].
Detailed Experimental Protocol for Optimization
A sequential optimization protocol was implemented to overcome the amplification failure.
Protocol: Optimizing PCR for Difficult Templates
Verify Primer Design:
- Use software (e.g., NCBI Primer-BLAST) to check for specificity and secondary structures [80].
- Ensure primers are 15-30 nucleotides long with a GC content of 40-60%. The 3' end should ideally be a G or C to enhance binding stability [80] [55].
- Calculate Tm using the nearest-neighbor method, which accounts for salt and primer concentration, for greater accuracy [19].
Employ PCR Additives:
- Prepare a panel of master mixes, each containing a different additive [80] [55]:
- DMSO: Final concentration of 1-10%.
- Formamide: Final concentration of 1.25-10%.
- Betaine: Final concentration of 0.5 M to 2.5 M.
- GC Enhancer: Use proprietary solutions as recommended by polymerase manufacturers [4].
- Additives help denature stable secondary structures and lower the effective Tm of the primer-template duplex.
- Prepare a panel of master mixes, each containing a different additive [80] [55]:
Optimize Thermal Cycling Parameters:
- Initial Denaturation: Increase the temperature to 98°C and/or extend the time to 3-5 minutes for GC-rich genomic DNA [19].
- Cycle Denaturation: Use a higher denaturation temperature (98°C) and a longer time (30-60 seconds) [19].
- Annealing Temperature: Perform a gradient PCR across a range of temperatures (e.g., 55°C to 70°C) to determine the optimal annealing temperature for the specific primer-template pair empirically (see Table 2) [81] [19].
- Extension: Use a polymerase with high processivity and ensure the extension time is sufficient (e.g., 1-2 minutes/kb for standard polymerases) [19] [55].
Table 2: Troubleshooting Guide for No Amplification or Non-Specific Products [81] [4]
| Observation | Possible Cause | Recommended Solution |
|---|---|---|
| No Product | Incorrect annealing temperature | Recalculate primer Tm; use a gradient thermal cycler to test a range of temperatures 5°C below to 5°C above the Tm [81]. |
| Poor primer design or specificity | Check for self-complementarity; verify specificity to target; increase primer length [81] [80]. | |
| Poor template quality or inhibitors | Repurify template; assess integrity by gel electrophoresis; use polymerases resistant to inhibitors [81] [4]. | |
| Insufficient number of cycles | Increase cycles to 35-40 for low copy number templates [19]. | |
| Missing reaction component | Set up a fresh master mix, ensuring all components are added. | |
| Non-Specific Bands/Smearing | Annealing temperature too low | Increase annealing temperature in 2-3°C increments [81] [19]. |
| Excess Mg²⁺ concentration | Optimize Mg²⁺ concentration in 0.2-1 mM increments [81] [4]. | |
| Excess primer | Lower primer concentration (range: 0.05–1 µM) [81]. | |
| Enzyme activity at low temps | Use a hot-start DNA polymerase to prevent primer-dimer formation and mispriming during reaction setup [81] [4]. |
Resolution and Preventative Measures
The project was successfully rescued by implementing the following optimized conditions:
- Additive: Inclusion of 5% DMSO in the reaction mix.
- Polymerase: Switching to a high-fidelity, proofreading polymerase with high processivity and GC bias.
- Thermal Cycling: Using an extended initial denaturation of 5 minutes at 98°C and an empirically determined annealing temperature of 67°C via gradient PCR.
This case highlights that a systematic, empirical approach to optimization is essential for amplifying challenging targets.
Successful PCR troubleshooting and optimization depend on having the right reagents and tools. The following table details key solutions and materials used in the featured case studies and general practice.
Table 3: Key Research Reagent Solutions for PCR Troubleshooting
| Reagent/Material | Function in PCR | Application in Troubleshooting |
|---|---|---|
| Hot-Start DNA Polymerase | Remains inactive until high-temperature activation step. | Prevents non-specific amplification and primer-dimer formation during reaction setup [4] [55]. |
| UNG Enzyme & dUTP | dUTP incorporated into amplicons; UNG degrades uracil-containing DNA in pre-PCR steps. | The primary method for preventing amplicon carryover contamination between reactions [7]. |
| PCR Additives (DMSO, Betaine) | Reduce secondary structure formation in template DNA; lower melting temperature. | Essential for amplifying GC-rich templates or those with complex secondary structures [4] [55]. |
| MgCl₂/MgSO₄ Solution | Essential cofactor for DNA polymerase activity. | Concentration must be optimized (0.5-5.0 mM); imbalances are a common cause of failure [81] [80]. |
| Gradient Thermal Cycler | Allows different wells to run at different temperatures simultaneously. | Crucial for empirically determining the optimal annealing temperature for a primer set [81] [19]. |
| Nucleic Acid Gel Electrophoresis System | Separates DNA fragments by size for visualization. | Used to analyze PCR products for specificity, yield, and the presence of primer-dimers [82]. |
| Molecular-Grade Water | Solvent for all reaction components. | Guaranteed nuclease-free and devoid of DNA contaminants that can cause false positives [79]. |
Troubleshooting PCR failures requires a methodical investigation of both reagent integrity and reaction parameters. As demonstrated in the case studies, contamination from amplicons or reagents can be systematically eliminated using enzymatic and procedural controls like UNG and physical workflow separation. Furthermore, suboptimal cycling conditions and poor primer design, especially for difficult templates, can be overcome through empirical optimization of annealing temperatures and the strategic use of additives. The integration of high-quality reagents, particularly high-fidelity and hot-start polymerases, forms the foundation of a robust PCR. By adhering to the detailed protocols and frameworks outlined in this guide, researchers can effectively diagnose and resolve the root causes of amplification failure, thereby ensuring the generation of reliable, reproducible data critical for scientific research and diagnostic applications.
Validation, Controls, and Comparative Analysis: Ensuring Accuracy and Reproducibility
In polymerase chain reaction (PCR) experiments, the absence of amplification presents a fundamental challenge for researchers, scientists, and drug development professionals. A negative result can stem from two vastly different scenarios: the legitimate absence of the target sequence or a technical failure within the assay itself. Without proper controls, this critical distinction becomes impossible to make, potentially leading to false conclusions in diagnostic, research, and development settings. Controls such as Positive Controls, Negative Controls, and specifically No-Template Controls (NTCs) form the bedrock of reliable PCR experimentation. They are not merely supplementary; they are indispensable for validating results, troubleshooting failures, and ensuring the integrity of the amplification process. This guide details the critical role of these controls within the broader context of diagnosing what causes no amplification in PCR experiments, providing detailed methodologies and frameworks for their implementation.
Core Principles of PCR Controls
The No-Template Control (NTC)
The No-Template Control (NTC) is a pivotal reaction used to detect contamination within the PCR reagents [83]. It contains all real-time PCR components—master mix, primers/probes, and water—except for the template nucleic acid [83]. Any amplification signal observed in the NTC indicates that one or more of the reagents have been contaminated with nucleic acids, which could lead to false positive results in the experimental samples.
Interpreting NTC results is a key troubleshooting step. The pattern of amplification can help identify the source of contamination:
- Reagent Contamination: If all NTC replicates show amplification with similar Ct values, it suggests a systematic contamination of one or more reagents, as the same amount of contaminant is present in each reaction [84].
- Random Contamination: If amplification occurs randomly in only some NTCs and at varying Ct values, it typically points to sporadic contamination, often introduced during plate loading or sample handling [84].
- Primer-Dimer Formation: In SYBR Green-based assays, amplification in the NTC with a low Ct value (<40) may indicate primer-dimer formation rather than specific contamination. This can be confirmed by analyzing the dissociation curve, where primer-dimers typically appear as a peak at a low melting temperature [84].
To address contamination identified by the NTC, several solutions are recommended. These include using clean working practices and physical separation of pre- and post-PCR areas [84]. Furthermore, incorporating an enzymatic step such as Uracil N-Glycosylase (UNG) prior to PCR can reduce carryover contamination from previous PCRs [84]. For primer-dimer issues, optimizing primer concentrations is an effective strategy [84].
The Positive Control
A Positive Control serves to verify that the primer set and the entire PCR process are functioning correctly [83]. It is essential when establishing a new assay or when troubleshooting a reaction that shows no amplification.
There are two primary types of positive controls:
- Absolute Standard: This is a nucleic acid template of known copy number (such as from a cell line, plasmid, or in vitro transcribed RNA) that provides a quantitative benchmark [83]. It allows for the assessment of amplification efficiency and can be used to generate a standard curve.
- Known Positive Sample: This is typically a sample previously confirmed to contain the target sequence and is used primarily to test for the presence or absence of the target [83].
In the context of no amplification, a properly functioning positive control that amplifies as expected indicates that the reaction mix and thermal cycler conditions are correct. This points the cause of failure in the experimental samples towards issues with the sample itself, such as low target concentration, poor nucleic acid quality, or the presence of inhibitors.
The Internal Positive Control and the No-RT Control
Two other critical controls are the Internal Positive Control (IPC) and the No-RT Control, each addressing specific failure points.
Internal Positive Control (IPC) An IPC is used to test for the presence of PCR inhibitors within the sample itself [83]. It involves a duplex reaction where the target sequence and a control sequence are amplified simultaneously using different primer-probe sets. The IPC is spiked into the sample at a defined concentration. If the IPC is detected but the target is not, it confirms that the amplification chemistry was successful and the target is genuinely absent or below the detection limit. Conversely, if neither amplifies, it indicates a failure of the amplification reaction, most commonly due to inhibition [83]. Internal controls can be exogenous (added to the sample) or endogenous (naturally present, like a host gene). Exogenous heterologous ICs, which use their own primer sets, are often preferred as they avoid competition with the target and offer greater design flexibility [83].
No-RT Control The No Reverse Transcriptase (No-RT) control is specific to reverse transcription PCR (RT-PCR). This reaction contains all components for the RT and PCR steps, except the reverse transcriptase enzyme [83]. Its primary function is to assess RNA sample purity by revealing the presence of contaminating genomic DNA. If amplification occurs in the No-RT control, it signifies that DNA contamination is present, which could be mistaken for cDNA derived from RNA, thus leading to false positive interpretations in gene expression or viral load studies [83].
Table 1: Summary of Key PCR Controls and Their Roles in Diagnosing No Amplification
| Control Type | Purpose | Composition | Interpretation of No Amplification in Control | Interpretation of Amplification in Control |
|---|---|---|---|---|
| No-Template Control (NTC) | Detect reagent contamination [83] | All reagents except template [83] | Reagents are free of contaminating nucleic acids. | Contamination of reagents with nucleic acids [83] [84]. |
| Positive Control | Verify primer and reaction efficiency [83] | All reagents including a known functional template [83] | Assay failure: faulty reagents, incorrect thermal cycler conditions, or inactive enzyme. | The primer set and core reaction components are functional. |
| Internal Positive Control (IPC) | Detect PCR inhibitors in the sample [83] | Sample spiked with a control sequence; amplified with target. | Unclear; could be successful reaction (target absent) or complete inhibition. | The amplification reaction was successful; target is likely absent [83]. |
| No-RT Control | Detect DNA contamination in RNA samples [83] | All RT-PCR components except reverse transcriptase. | RNA sample is free of significant DNA contamination. | RNA sample is contaminated with DNA [83]. |
Experimental Protocol: Implementing Controls
Standard Protocol for Setting Up a Diagnostic PCR Run
A robust PCR setup includes the controls detailed below to systematically rule out causes of amplification failure.
Materials:
- Template DNA/cDNA from test samples
- Nuclease-free water
- PCR master mix (containing buffer, dNTPs, MgCl₂, and DNA polymerase)
- Target-specific primer and probe sets
- Positive control template (e.g., plasmid with cloned target sequence)
- Internal positive control (IPC) template and primer/probe set
- Equipment: Microcentrifuge, pipettes, sterile tips, and a real-time PCR thermal cycler.
Procedure:
- Preparation: Thaw all reagents on ice and briefly centrifuge to collect contents at the bottom of the tube. Prepare reactions in a clean, dedicated pre-PCR area to prevent contamination.
- Master Mix Formulation: For each reaction, calculate and combine the following components in a master mix to minimize pipetting error and ensure consistency:
- X µL Nuclease-free water
- 10 µL 2x PCR master mix
- 1 µL Forward primer (10 µM)
- 1 µL Reverse primer (10 µM)
- 0.5 µL Target-specific probe (10 µM)
- 0.5 µL IPC probe (10 µM)
- 1 µL IPC template (at a predetermined, non-competitive concentration)
- Aliquot Master Mix: Dispense the appropriate volume of master mix into each PCR tube or well.
- Add Template and Controls:
- Test Samples: Add 5 µL of template DNA/cDNA from each test sample.
- No-Template Control (NTC): Add 5 µL of nuclease-free water.
- Positive Control: Add 5 µL of the positive control template.
- No-RT Control (for RT-PCR only): For a separate reaction, add 5 µL of RNA sample to a master mix prepared without reverse transcriptase.
- Run PCR: Seal the plate, briefly centrifuge, and place it in the thermal cycler. Initiate the optimized cycling conditions. A standard qPCR protocol might be: 50°C for 2 minutes (UNG incubation, if used), 95°C for 10 minutes (initial denaturation/activation), followed by 40 cycles of 95°C for 15 seconds (denaturation) and 60°C for 1 minute (annealing/extension).
- Data Analysis: After the run, analyze the amplification plots and Ct values for the target, IPC, and all controls as outlined in the interpretation table.
Workflow for Troubleshooting No Amplification
The following diagram illustrates a logical decision-making process for diagnosing the cause of no amplification in experimental samples, leveraging the results from the various controls.
The Scientist's Toolkit: Essential Reagents and Materials
Table 2: Key Research Reagent Solutions for PCR Controls
| Reagent/Material | Function in Controls |
|---|---|
| Cloned Plasmid DNA | Serves as an absolute quantitative standard or positive control template of known copy number [83]. |
| Universal Master Mix | Provides core components (buffer, dNTPs, polymerase) for amplification. Hot-start formulations reduce nonspecific amplification [85]. |
| Exogenous Heterologous IPC | A non-competitive internal control spiked into samples to detect inhibition; uses its own primer/probe set [83]. |
| UNG (Uracil-N-Glycosylase) | Enzyme incorporated into master mixes to prevent carryover contamination by degrading PCR products from previous reactions [84]. |
| Nuclease-Free Water | Critical for preparing reagent stocks and as the template substitute in the NTC to ensure no nucleic acid background. |
| Reverse Transcriptase (e.g., M-MLV) | Enzyme for cDNA synthesis in RT-PCR; its omission defines the No-RT control [85]. |
The systematic implementation of Positive, Negative, and No-Template Controls is not an optional best practice but a fundamental requirement for rigorous PCR experimentation. These controls provide the diagnostic power to decipher the ambiguous "no amplification" result, differentiating between a true negative, a failed assay, reagent contamination, or the presence of inhibitors. By adhering to the detailed protocols and troubleshooting frameworks outlined in this guide, researchers and drug development professionals can uphold the highest standards of data integrity, ensure the reproducibility of their results, and draw accurate conclusions from their PCR experiments.
In the context of investigating causes of no amplification in Polymerase Chain Reaction (PCR) experiments, the fidelity of the DNA polymerase—its accuracy in copying a DNA template—is a critical but often overlooked factor. While reaction failure is an immediate and obvious problem, the insidious accumulation of errors during amplification can compromise the entire validity of downstream applications, from cloning to next-generation sequencing. Low-fidelity polymerases can introduce mutations during early amplification cycles that may inhibit proper primer binding in subsequent cycles or generate a population of amplicons too diverse for efficient replication. This technical guide provides researchers and drug development professionals with a comprehensive framework for understanding PCR fidelity, quantifying error rates, and selecting appropriate high-fidelity enzymes to ensure experimental reliability and reproducibility.
Understanding DNA Polymerase Fidelity
Defining Fidelity and Error Rates
Polymerase fidelity refers to the accuracy with which a DNA polymerase copies a template sequence during DNA replication. This accuracy is fundamental to maintaining sequence integrity in newly synthesized DNA strands [86]. Fidelity is typically expressed as an error rate, representing the number of mistakes a polymerase makes per base incorporated per doubling event. These rates can span several orders of magnitude between different enzymes, from approximately 1 error per 300 nucleotides for some standard polymerases to 1 error per 1,000,000 nucleotides or more for ultra-high-fidelity enzymes [86].
The mechanisms governing polymerase accuracy involve multiple steps where the enzyme must read the template base, select the correct nucleoside triphosphate, and insert the appropriate nucleotide while maintaining proper Watson-Crick base pairing. The geometry of the polymerase active site plays a crucial role in selecting the correct incoming nucleotide and aligning catalytic groups for efficient incorporation. When an incorrect nucleotide binds, incorporation is slowed due to sub-optimal architecture of the active site complex, increasing the opportunity for the incorrect nucleotide to dissociate before polymerization proceeds [86].
Mechanisms Ensuring Replication Accuracy
DNA polymerases have evolved sophisticated mechanisms to prevent and correct incorporation errors:
Nucleotide Selection: The polymerase active site is geometrically constrained to favor correct Watson-Crick base pairs, providing an initial fidelity check before phosphodiester bond formation [86].
Proofreading Activity: Many high-fidelity DNA polymerases possess an associated 3'→5' exonuclease domain that confers proofreading capability. This domain detects and excises misincorporated nucleotides from the 3' end of the growing DNA strand before further elongation. The perturbation caused by mispaired bases triggers translocation of the 3' end into the proofreading domain, where the incorrect nucleotide is removed, allowing the polymerase to then insert the correct nucleotide [86].
The contribution of proofreading to overall fidelity can be substantial. Comparative studies between exonuclease-proficient and deficient polymerases have demonstrated that proofreading activity can improve fidelity by over 100-fold. For example, Deep Vent DNA Polymerase with proofreading capability exhibits a 125-fold decrease in error rate compared to its exonuclease-deficient variant [86].
Quantitative Analysis of Polymerase Error Rates
Comparative Error Rates Across Polymerases
The fidelity landscape of commercially available DNA polymerases varies significantly, with error rates spanning several orders of magnitude. The table below summarizes the error rates and relative fidelity of commonly used PCR enzymes, providing a reference for informed polymerase selection.
Table 1: Error rates and fidelity of selected DNA polymerases
| DNA Polymerase | Substitution Rate (errors/base/doubling) | Accuracy (bases per error) | Fidelity Relative to Taq | Proofreading Activity |
|---|---|---|---|---|
| Q5 | 5.3 × 10⁻⁷ | 1,870,763 | 280X | Yes |
| Phusion | 3.9 × 10⁻⁶ | 255,118 | 39X | Yes |
| Deep Vent | 4.0 × 10⁻⁶ | 251,129 | 44X | Yes |
| Pfu | 5.1 × 10⁻⁶ | 195,275 | 30X | Yes |
| PrimeSTAR GXL | 8.4 × 10⁻⁶ | 118,467 | 18X | Yes |
| KOD | 1.2 × 10⁻⁵ | 82,303 | 12X | Yes |
| Taq | 1.5 × 10⁻⁴ | 6,456 | 1X | No |
| Deep Vent (exo-) | 5.0 × 10⁻⁴ | 2,020 | 0.3X | No |
Data sourced from PacBio SMRT sequencing studies [86]
This quantitative comparison reveals that ultra-high-fidelity enzymes like Q5 DNA Polymerase can provide nearly 300-fold greater accuracy than standard Taq polymerase. The presence of 3'→5' proofreading exonuclease activity consistently correlates with improved fidelity, though the degree of improvement varies among different enzyme families.
Impact on Experimental Outcomes
The practical consequences of these differing error rates become apparent when considering the percentage of product molecules containing errors after a typical PCR amplification. The following table illustrates how polymerase selection and template length influence error accumulation during 30 cycles of PCR amplification.
Table 2: Percentage of product molecules containing errors after 30 PCR cycles
| Polymerase | 1 kb Template | 3 kb Template |
|---|---|---|
| Phusion High-Fidelity DNA Polymerase (HF Buffer) | 1.32% | 3.96% |
| Phusion High-Fidelity DNA Polymerase (GC Buffer) | 2.85% | 8.55% |
| Pyrococcus furiosus DNA polymerase | 8.4% | 25.2% |
| Taq DNA polymerase | 68.4% | 205.2% |
Data from Thermo Fisher Scientific PCR Fidelity Calculator [87]
Notably, with Taq polymerase amplifying a 3 kb template, the percentage exceeds 100%, indicating that each product molecule contains an average of two errors [87]. This error burden has direct implications for downstream applications, potentially necessitating extensive sequencing to identify correct clones or leading to misinterpretation of sequence variants in diagnostic applications.
Methodologies for Assessing PCR Fidelity
Established Fidelity Assay Systems
Several experimental approaches have been developed to quantify DNA polymerase fidelity, each with distinct advantages and limitations:
lacZα-based Assays: Pioneered by Thomas Kunkel, these assays utilize portions of the lacZα gene in M13 bacteriophage to correlate host bacterial colony color changes with errors in DNA synthesis. While high-throughput, these assays depend on phenotypic selection and cannot resolve single-base errors with precision [86].
Barnes Assay Modification: This approach amplifies the entire lacZ gene and portions of drug resistance genes with subsequent ligation, cloning, transformation, and blue/white colony color determination. Most errors in the lacZ-encoding β-galactosidase gene cause a loss-of-function inability to utilize the X-gal substrate, resulting in white colonies that indirectly measure fidelity [86].
Sanger Sequencing of Cloned Products: As sequencing costs decreased, direct sequencing of individual cloned PCR products offered the advantage of detecting all mutation types across the entire amplified region. However, this method is limited in throughput, typically analyzing only hundreds of clones, which may be insufficient for accurately quantifying the error rates of high-fidelity polymerases [86].
Next-Generation Sequencing Approaches
The development of next-generation sequencing platforms has revolutionized fidelity assessment by providing vast sequencing data on the order of millions to billions of nucleotides:
Illumina Sequencing: While offering high throughput, the lower threshold for determining polymerase error rates with barcoded Illumina sequencing is approximately 1 × 10⁻⁶ errors/base, which is still within range of the error rate for high-fidelity polymerases, potentially limiting accuracy for the most faithful enzymes [86].
PacBio SMRT Sequencing: Single Molecule, Real-Time (SMRT) sequencing enables direct sequencing of PCR products without molecular indexing or an intermediary amplification step. Accuracy is achieved by sequencing the same molecule multiple times and deriving a highly accurate consensus sequence for each read. This method has demonstrated a background error rate of 9.6 × 10⁻⁸ errors/base, making it appropriate for quantifying the fidelity of proofreading polymerases [86].
SMRT sequencing can identify all errors associated with template replication, including substitutions, indels, template switching, cruciform structures intrinsic to the amplicon, PCR-mediated sequence recombination, and non-enzymatic DNA damage induced during thermal cycling [86].
Experimental Workflow for Fidelity Assessment
The following diagram illustrates a comprehensive workflow for assessing polymerase fidelity using modern sequencing approaches:
Diagram 1: Fidelity assessment workflow
Practical Implications for PCR Experimental Design
Polymerase Selection Guide
Choosing an appropriate DNA polymerase requires balancing fidelity requirements with other experimental needs:
Ultra-High-Fidelity Applications: For cloning, site-directed mutagenesis, and next-generation sequencing library preparation, enzymes like Q5, Phusion, or other proofreading polymerases are essential to minimize introduced errors [86].
Standard PCR Applications: For routine amplification where sequence accuracy is less critical, such as genotyping or gel analysis, standard non-proofreading polymerases may be sufficient and more cost-effective.
Long Amplicon PCR: For amplification of long targets (>5 kb), polymerases with high processivity and proofreading activity are recommended to maintain accuracy over extended regions [4].
Challenging Templates: For GC-rich templates or sequences with secondary structures, specialized polymerases with enhanced capacity to denature difficult regions may be necessary, though fidelity should still be considered [4].
The Scientist's Toolkit: Essential Reagents
Table 3: Key research reagents for PCR fidelity assessment
| Reagent/Category | Function/Description | Examples/Specific Notes |
|---|---|---|
| High-Fidelity DNA Polymerases | Catalyze DNA synthesis with minimal errors; often include proofreading 3'→5' exonuclease activity | Q5, Phusion, Pfu; Error rates range from 10⁻⁷ to 10⁻⁶ [86] |
| Standard DNA Polymerases | General-purpose amplification with moderate fidelity; lack proofreading activity | Taq DNA polymerase; Error rate ~1.5×10⁻⁴ [86] |
| Cloning Vectors | Enable isolation and analysis of individual PCR products for sequencing | pGEM plasmid vector systems [88] |
| Sequencing Platforms | Determine actual sequence of amplified products to identify polymerase errors | PacBio SMRT sequencing, Illumina, Sanger sequencing [86] |
| Fidelity Calculation Tools | Compute expected error rates based on polymerase and cycling parameters | Online PCR fidelity calculators [87] |
Additional Factors Influencing PCR Accuracy
Beyond polymerase selection, several experimental parameters can impact overall PCR fidelity:
Mg²⁺ Concentration: Excessive Mg²⁺ concentrations can increase misincorporation of nucleotides by DNA polymerases. Optimization of Mg²⁺ levels is recommended for high-fidelity applications [4].
dNTP Balance: Unbalanced deoxynucleoside triphosphate concentrations increase PCR error rates. Ensure equimolar concentrations of dATP, dCTP, dGTP, and dTTP in reactions [4].
Cycle Number: Higher numbers of amplification cycles increase the cumulative incorporation of mismatched nucleotides. Use the minimum number of cycles necessary to produce sufficient product [4].
Template Quality: UV-damaged DNA can introduce sequence errors independent of polymerase fidelity. Use long-wavelength UV light for gel visualization and limit exposure time [4].
The selection of an appropriate DNA polymerase with suitable fidelity characteristics is a critical consideration in PCR experimental design that directly impacts the reliability and interpretation of results. While high-fidelity enzymes are essential for applications requiring sequence accuracy, understanding the quantitative error rates, measurement methodologies, and experimental factors influencing fidelity enables researchers to make informed decisions. As downstream applications become increasingly sensitive to sequence variations, particularly in clinical diagnostics and therapeutic development, rigorous assessment and reporting of PCR fidelity parameters will grow in importance. By implementing the principles and methods outlined in this guide, researchers can optimize their PCR workflows to minimize introduced errors and ensure the validity of their experimental outcomes.
In the realm of molecular diagnostics and research, Polymerase Chain Reaction (PCR) has established itself as the gold standard for detecting and quantifying nucleic acids due to its exceptional sensitivity and specificity [89]. However, even the most meticulously designed PCR assays can suffer from inexplicable failures, including poor amplification efficiency, loss of sensitivity, or complete amplification failure. While often attributed to primer design, template quality, or instrument calibration, batch-to-batch reagent variability represents a frequently overlooked yet critical source of experimental inconsistency. This technical guide examines how lot-to-lot differences in core PCR components—from enzyme fidelity to buffer composition—can compromise assay performance and provides researchers with systematic protocols to identify, quantify, and mitigate these variability sources within the broader context of PCR failure investigation.
The complexity of modern PCR reagents, which typically include enzymes like Taq polymerase, nucleotides (dNTPs), buffer solutions, and specific primers and probes, creates multiple potential failure points [90]. This variability is particularly problematic in regulated environments where assay reproducibility is paramount for diagnostic accuracy and therapeutic development. Recent market analyses indicate that the global Real-Time PCR Reagents & Kits market is characterized by significant innovation focused on enhanced sensitivity and multiplexing capabilities, yet inherent variability between production lots remains a challenge for manufacturers and end-users alike [90]. Understanding and controlling for this variability is thus essential for any rigorous PCR-based research or diagnostic program.
Batch-to-batch variability in PCR reagents stems from multiple sources within the manufacturing and supply chain. Even with advanced manufacturing protocols, subtle differences can significantly impact PCR performance:
Enzyme Fidelity and Activity Variations: Different polymerase enzymes exhibit inherent variations in error rates and processivity. Studies comparing various DNA polymerases have demonstrated substantial differences in accuracy, with high-fidelity enzymes like Q5 DNA polymerase making a base substitution error approximately once every 1.9 million bases compared to Taq polymerase, which errs approximately once every 6,000 bases—a 280-fold difference in accuracy [91]. These error rates can vary between production lots due to differences in enzyme purification, formulation, or storage conditions.
Buffer Composition Fluctuations: The chemical environment provided by PCR buffers, including pH, salt concentrations (especially MgCl₂), and stabilizing agents, is critical for optimal enzyme activity and specificity. Minor variations in buffer composition between lots can alter amplification efficiency, particularly affecting assays with suboptimal primer design or challenging templates [89].
Primer and Probe Synthesis Inconsistencies: The quality and concentration of oligonucleotides can vary between synthesis batches, affecting hybridization efficiency and reaction kinetics. Incomplete synthesis, inefficient purification, or degradation during shipping and storage can all contribute to performance differences [92].
dNTP Quality and Stability: Nucleotide purity and concentration are fundamental to efficient amplification. Degradation of dNTPs or variations in quality control between lots can introduce stochastic amplification failures, particularly in late-cycle amplification or with limited template [91].
Quantitative Evidence of Variability Impact
Recent studies have provided compelling quantitative evidence of how reagent variability impacts PCR performance. A 2025 systematic investigation evaluating thirty independent RT-qPCR standard curve experiments for seven different viruses revealed significant inter-assay variability despite optimal efficiency rates (>90%) [89]. The findings demonstrated that:
- "NoVGII was the virus that presented the higher inter-assay variability in terms of efficiency while showing better sensitivity."
- "In terms of heterogeneity in results, the two targets of SARS-CoV-2 showed the highest rates, being N2 the gene that presented the largest variability (CV 4.38–4.99%) and the lowest efficiency (90.97%)."
These findings underscore that variability affects different targets unequally, suggesting complex interactions between reagent composition and assay chemistry. The study conclusively recommended that "including a standard curve in every experiment is recommended to obtain reliable results" [89], highlighting the necessity of continuous monitoring for batch-related performance shifts.
Table 1: Quantitative Assessment of Inter-Assay Variability in Viral Targets
| Viral Target | Efficiency (%) | Inter-Assay Variability (CV%) | Key Observation |
|---|---|---|---|
| NoVGII | >90 | Highest | Better sensitivity despite high variability |
| SARS-CoV-2 N2 | 90.97 | 4.38-4.99% | Largest variability and lowest efficiency |
| SARS-CoV-2 N1 | >90 | High | Significant heterogeneity in results |
| Hepatitis A & E | >90 | Moderate | Adequate efficiency with intermediate variability |
| Human Astrovirus | >90 | Moderate | Stable performance across experiments |
| Rotavirus | >90 | Moderate | Consistent efficiency with manageable variability |
Comparative platform studies further illuminate how reagent and method choices influence variability. Research comparing digital PCR platforms found that precision differs significantly depending on experimental conditions, with the QX200 droplet digital PCR system showing coefficient of variation (CV) values between 2.5% and 62.1% depending on cell numbers and restriction enzyme usage [93]. This highlights how batch-to-batch differences in restriction enzymes or other supplementary reagents can dramatically impact quantification accuracy.
Table 2: Precision Comparison Between Digital PCR Platforms Using Different Restriction Enzymes
| Platform | Restriction Enzyme | CV Range | Precision Observation |
|---|---|---|---|
| QX200 ddPCR | EcoRI | 2.5% - 62.1% | Highly variable precision; extreme values with 50-cell samples |
| QX200 ddPCR | HaeIII | <5% | Greatly improved and consistent precision across all cell numbers |
| QIAcuity One ndPCR | EcoRI | 0.6% - 27.7% | Moderate variability with some outliers |
| QIAcuity One ndPCR | HaeIII | 1.6% - 14.6% | Improved precision and reduced variability range |
Detection and Troubleshooting Methodologies
Systematic Quality Control Protocols
Implementing robust quality control protocols is essential for detecting and quantifying batch-to-batch variability. The following step-by-step methodology provides a framework for systematic reagent validation:
Protocol 1: External Quality Control (EQC) Implementation [92]
Step 1: Select Validated EQC Materials
- Choose control materials matched to your assay targets, such as synthetic RNA/DNA fragments, plasmid-based controls, or inactivated viral particles.
- Ensure EQC materials are traceable, consistent across lots, and stable under your workflow conditions.
Step 2: Establish Control Range and Acceptance Limits
- For each EQC material, establish mean Ct values across 10+ runs using a validated reagent lot.
- Define acceptable variation limits (e.g., ±1 Ct) based on historical performance data.
- Document amplification curves and melt peak characteristics for reference.
Step 3: Include Controls in Every Run
- In each qPCR plate, include at least one EQC, one no-template control (NTC), and an internal positive control (if applicable).
- Process all controls through the entire workflow alongside test samples.
Step 4: Continuous Data Recording and Analysis
- Record Ct values, instrument identification, date, operator, and reagent lot numbers for each run.
- Monitor performance using Levey-Jennings plots or Z-score tracking to identify shifts or trends.
Step 5: Deviation Interpretation and Response
- Investigate any EQC failure (e.g., no amplification or out-of-range Ct) by checking for degraded reagents, pipetting errors, or contamination.
- Do not report associated sample data from failed runs until the issue is resolved and documented.
Protocol 2: Standard Curve Validation for Amplification Efficiency [89]
- Generate a standard curve using serial dilutions of known template concentrations with each new reagent lot.
- Perform thirty independent experiments to establish baseline variability as demonstrated in viral quantification studies.
- Calculate efficiency using the formula:
Efficiency = [10^(-1/slope)] - 1 - Compare slope, y-intercept, and efficiency values between reagent lots.
- Accept reagent lots demonstrating efficiency between 90-110% with R² values >0.985, falling within established historical ranges.
Protocol 3: Statistical Analysis Using ANCOVA [94]
- Replace the conventional 2−ΔΔCT method with Analysis of Covariance (ANCOVA) for comparing amplification efficiency across reagent lots.
- ANCOVA provides greater statistical power and robustness against efficiency variability.
- Implement using R scripts or similar statistical platforms for rigorous comparison of regression parameters between reagent lots.
Troubleshooting Guide for Reagent-Related Amplification Failure
The following workflow provides a systematic approach to identify and address reagent-related PCR failures:
Mitigation Strategies and Best Practices
Laboratory Management Solutions
Implementing strategic laboratory practices can significantly reduce the impact of batch-to-batch variability on PCR results:
Reagent Qualification and Sourcing:
- Establish relationships with reputable manufacturers who provide comprehensive certificate of analysis (CoA) documentation for each lot [92].
- Purchase reagents in quantities sufficient for extended project timelines to minimize lot transitions.
- Implement rigorous incoming quality control checks before putting new reagent lots into production.
Proper Storage and Handling:
- Maintain consistent storage conditions according to manufacturer specifications, with particular attention to enzyme stability.
- Aliquot reagents to minimize freeze-thaw cycles and reduce the risk of contamination or degradation [89].
- Document storage conditions and expiration dates systematically.
Process Standardization:
- Standardize protocols across operators and instruments to reduce technical variation.
- Implement master mix preparation techniques to minimize pipetting variability.
- Establish standardized threshold setting protocols, as variations in threshold setting can significantly impact Ct values [89].
Statistical and Computational Approaches
Advanced analytical methods can help compensate for and identify reagent-related variability:
Batch Effect Correction Algorithms:
- Implement computational batch correction methods such as Harmony, Mutual Nearest Neighbors (MNN), or Seurat Integration when analyzing large datasets affected by reagent lot variations [95].
- These algorithms help remove technical variation while preserving biological signals, though they should complement rather than replace wet-lab optimization.
Quality-by-Design (QbD) Frameworks:
- Adopt QbD principles that define a "design space" for acceptable batch profiles, enabling flexible adjustments while maintaining quality standards [96].
- Implement latent-variable model predictive control (LV-MPC) strategies that dynamically update reference trajectories within predefined quality boundaries [96].
Enhanced Data Transparency:
- Share raw qPCR fluorescence data with detailed analysis scripts to improve reproducibility and enable post-hoc analysis of reagent effects [94].
- Adopt FAIR (Findable, Accessible, Interoperable, Reproducible) data principles to enhance methodological transparency.
The Scientist's Toolkit: Essential Reagent Solutions
Table 3: Key Research Reagent Solutions for Managing Batch Variability
| Tool/Reagent | Primary Function | Implementation Guidance |
|---|---|---|
| Synthetic RNA/DNA Controls | External quality control materials for monitoring PCR efficiency | Use across multiple runs to establish baseline performance and detect deviations [92] |
| Restriction Enzymes (HaeIII) | Improve access to tandemly repeated genes in digital PCR | Select enzymes that enhance precision; HaeIII showed superior performance over EcoRI in precision studies [93] |
| High-Fidelity Polymerases | Reduce replication errors during amplification | Q5 polymerase demonstrates 280-fold higher accuracy than Taq polymerase [91] |
| PreCR Repair Mix | Correct DNA damage from thermocycling | Repairs cytosine deamination artifacts caused by heating/cooling cycles [91] |
| Digital PCR Platforms | Absolute quantification without standard curves | Provides alternative when batch variability affects qPCR standard curves; useful for orthogonal verification [93] |
| Lyophilized Reagents | Enhanced stability and reduced lot-to-lot variation | Minimize degradation risks and improve shelf-life for consistent performance [90] |
Batch-to-batch reagent variability represents a significant yet addressable challenge in PCR-based research and diagnostics. The evidence presented demonstrates that this variability can substantially impact amplification efficiency, quantification accuracy, and ultimately, experimental conclusions and diagnostic results. By implementing systematic quality control protocols, adopting statistical rigor in data analysis, and applying strategic reagent management practices, researchers can significantly mitigate these effects.
The path forward requires a cultural shift toward greater transparency and rigor in reagent validation. As emphasized in recent methodological reviews, "sharing raw qPCR fluorescence data along with detailed analysis scripts" dramatically improves the community's ability to identify and correct for technical variability [94]. Furthermore, adherence to established guidelines such as MIQE (Minimum Information for Publication of Quantitative Real-Time PCR Experiments) ensures critical parameters like amplification efficiency, standard curve variability, and reagent lot information are reported, enabling proper evaluation of results [89] [94].
As PCR technologies continue to evolve with advancements in multiplexing, sensitivity, and quantitative precision, the fundamental importance of reagent consistency remains. By recognizing batch-to-batch variability as a legitimate and manageable source of PCR failure, the scientific community can develop more robust methodologies, ultimately enhancing the reliability of molecular diagnostics and research findings.
The selection of an appropriate DNA polymerase is a critical determinant in the success of polymerase chain reaction (PCR) experiments, particularly when troubleshooting issues such as no amplification or non-specific amplification. This technical guide provides an in-depth comparative analysis of Taq, High-Fidelity, and Hot-Start DNA polymerases. We examine the fundamental biochemical properties—including fidelity, processivity, thermostability, and specificity—that define enzyme performance and directly impact PCR outcomes. Within the context of broader research on PCR failure, this review synthesizes current data to guide researchers and drug development professionals in selecting optimal enzymes for their specific applications, thereby minimizing experimental failure and ensuring reliable amplification results.
DNA polymerase serves as the core enzymatic component in PCR, catalyzing the template-directed synthesis of new DNA strands. Since the introduction of Taq DNA polymerase from Thermus aquaticus in early PCR protocols, significant advancements have led to the development of specialized enzymes engineered for enhanced performance characteristics [75]. These improvements have primarily focused on four key properties: specificity, thermostability, fidelity, and processivity, which collectively determine the enzyme's efficiency and suitability for various applications [75].
The problem of amplification failure in PCR experiments can frequently be traced to suboptimal polymerase selection. Nonspecific amplification, primer-dimer formation, and erroneous nucleotide incorporation represent major hurdles that can drastically impact target yield and sensitivity, thereby compromising experimental results and downstream applications [75] [10]. A comprehensive understanding of polymerase characteristics enables researchers to match enzyme properties with experimental requirements, forming a critical foundation for successful PCR-based research and diagnostic applications.
Key Characteristics of DNA Polymerases
Fidelity: Accuracy in DNA Replication
Fidelity refers to the accuracy with which a DNA polymerase replicates a template sequence, a property crucial for applications where the correct DNA sequence is imperative, such as cloning, sequencing, and site-directed mutagenesis [75] [97]. Polymerase fidelity is primarily governed by two mechanisms: nucleotide selection and proofreading activity [98].
The initial fidelity mechanism involves the polymerase's ability to read the template strand, select the appropriate nucleoside triphosphate, and insert the correct nucleotide while maintaining Watson-Crick base pairing. High-fidelity polymerases exhibit a strong binding preference for correct versus incorrect nucleotides [97] [98]. When an incorrect nucleotide binds in the active site, incorporation is slowed due to suboptimal geometry, allowing the incorrect nucleotide to dissociate before polymerization proceeds [98].
The second fidelity mechanism involves proofreading activity, mediated by a dedicated 3′→5′ exonuclease domain separate from the polymerase active site [75]. When a mismatched nucleotide is incorporated, synthesis stalls due to unfavorable base-pairing kinetics. This delay allows the incorrect nucleotide to be excised and replaced with the correct one [75]. Polymerases with robust proofreading capabilities can reduce error rates by several orders of magnitude compared to non-proofreading enzymes.
Table 1: DNA Polymerase Fidelity Measurements Using Different Methodologies
| DNA Polymerase | Substitution Rate (per base per doubling) | Accuracy (bases per error) | Fidelity Relative to Taq |
|---|---|---|---|
| Taq DNA Polymerase | 1.5 × 10⁻⁴ | 6,456 | 1× |
| Q5 High-Fidelity | 5.3 × 10⁻⁷ | 1,870,763 | 280× |
| Phusion | 3.9 × 10⁻⁶ | 255,118 | 39× |
| Pfu | 5.1 × 10⁻⁶ | 195,275 | 30× |
| Deep Vent | 4.0 × 10⁻⁶ | 251,129 | 44× |
| KOD | 1.2 × 10⁻⁵ | 82,303 | 12× |
| Deep Vent (exo-) | 5.0 × 10⁻⁴ | 2,020 | 0.3× |
Data obtained via PacBio SMRT sequencing, which provides a background error rate of 9.6 × 10⁻⁸ errors/base, making it suitable for quantifying proofreading polymerase fidelity [98].
Processivity: Efficiency of DNA Synthesis
Processivity is defined as the number of nucleotides incorporated per polymerase binding event [75]. This characteristic directly impacts synthesis rate, amplification speed, and the enzyme's affinity for its substrate. Highly processive DNA polymerases are particularly beneficial for amplifying long templates, sequences with secondary structures, GC-rich regions, and in the presence of PCR inhibitors commonly found in biological samples such as blood and plant tissues [75].
Early-generation high-fidelity DNA polymerases often exhibited low processivity due to their strong exonuclease activity, which slowed polymerization rates [75]. For instance, proofreading Pfu DNA polymerase has approximately 7× the fidelity of Taq polymerase but less than half its synthesis rate [75]. A significant breakthrough in enhancing processivity came from engineering DNA polymerases with additional DNA-binding domains. Fusion polymerases, such as those incorporating the Sso7d dsDNA-binding protein, demonstrate 2- to 5-fold enhanced processivity without compromising polymerase activity [75] [97].
The Sso7d protein (from Sulfolobus solfataricus) is a 7 kDa, sequence-independent dsDNA-binding protein that stabilizes the fusion polymerase on the template [97]. This stabilization allows for reduced PCR extension times, limits nonspecific amplification, and permits the use of less enzyme, making the process more cost-effective [97]. For example, while native Pfu polymerase exhibits a processivity score of 0.84 with an average primer extension length of 6 nucleotides, the Pfu-Sso7d fusion protein shows enhanced processivity with a score of 0.98 and an average extension length of 55 nucleotides [97].
Thermostability: Withstanding Denaturing Temperatures
Thermostability refers to the ability of DNA polymerase to withstand the high temperatures required during PCR, particularly the repeated denaturation steps typically conducted at 94-98°C [75]. While Taq DNA polymerase, derived from a thermophilic bacterium, can endure relatively high temperatures, its half-life shortens significantly above 90°C, posing challenges when prolonged high temperatures are needed to denature DNA with secondary structures or GC-rich sequences [75].
Archaeal DNA polymerases from hyperthermophilic organisms have addressed these limitations. For example, Pfu DNA polymerase from Pyrococcus furiosus, found in hydrothermal environments, is approximately 20 times more stable than Taq polymerase at 95°C [75]. Other popular hyperthermostable DNA polymerases include KOD and GBD from archaeal Thermococcus and Pyrococcus species [75]. Despite their exceptional thermostability, archaeal polymerases may have limitations in certain scenarios, such as an inability to amplify uracil-containing DNA templates due to a uracil-binding pocket that functions as a DNA repair mechanism [75]. This limitation is particularly relevant for applications involving PCR carryover prevention and locus methylation analysis by bisulfite conversion [75].
Specificity: Targeted Amplification
Specificity in PCR refers to the exclusive amplification of the intended target sequence, minimizing non-target amplification such as misprimed products and primer-dimers [75]. Nonspecific amplification can drastically reduce the yield and sensitivity of target amplification, compromising interpretation of results and the success of downstream applications [75] [10].
One significant advancement in enhancing PCR specificity is Hot-Start technology, which inhibits DNA polymerase activity during reaction setup at lower temperatures [75] [99]. Conventional DNA polymerases can exhibit activity at room temperature, leading to the extension of misprimed targets and primer-dimers during reaction preparation [75]. Hot-Start modifications temporarily inhibit polymerase activity until the initial high-temperature denaturation step is reached, preventing nonspecific amplification [99].
Table 2: Comparison of Hot-Start Technologies
| Hot-Start Technology | Mechanism of Action | Benefits | Considerations |
|---|---|---|---|
| Antibody-based | Specific antibodies bind to polymerase active sites | Short activation time, full enzyme activity after activation | Animal-origin components, higher exogenous proteins |
| Chemical modification | Polymerases covalently linked with chemical groups | Stringent inhibition, animal-origin component free | Longer activation time, affects long target amplification |
| Affibody molecule | Alpha-helical peptides bind active sites | Less protein than antibody, short activation time | Less stringent than antibody, limited bench stability |
| Aptamer | Oligonucleotides bind active sites | Short activation time, animal-origin component free | Less stringent, reversible activation, low Tm primer issues |
Hot-Start DNA polymerases significantly improve specificity by preventing extension of primers binding to template sequences with low homology and preventing primer-dimer formation during reaction setup [99]. This technology increases sensitivity and yield of desired target fragments and enables PCR setup on high-throughput or automated liquid-handling platforms without compromising specificity [99].
Comparative Analysis of DNA Polymerase Types
Taq DNA Polymerase: The Standard for Routine PCR
Taq DNA polymerase, isolated from the thermophilic bacterium Thermus aquaticus, has served as the workhorse enzyme for PCR since its introduction. While it revolutionized molecular biology by eliminating the need to add fresh enzyme after each denaturation cycle, Taq polymerase has several well-documented limitations that can contribute to amplification failure or unreliable results [100].
The primary limitations of Taq polymerase include:
- Low specificity: Taq DNA polymerase has a tendency to extend misprimed sequences, leading to nonspecific amplification products that compete with the target amplicon [100].
- Low fidelity: Without 3′ to 5′ exonuclease proofreading activity, Taq cannot correct mismatched nucleotides, resulting in relatively high error rates estimated at approximately 1 × 10⁻⁴ errors per base per doubling [100] [98].
- Moderate thermostability: While thermostable compared to mesophilic polymerases, Taq's half-life decreases significantly above 90°C, limiting its effectiveness with templates requiring prolonged high-temperature incubation [75].
- Cofactor requirements: Taq polymerase requires Mg²⁺ ions as essential cofactors, making it sensitive to buffer conditions that can affect performance [100].
Despite these limitations, Taq polymerase remains suitable for routine PCR applications where ultimate sequence accuracy is not critical, such as colony screening, genotyping, and applications where the PCR product will be directly sequenced without cloning [97] [101].
High-Fidelity DNA Polymerases: Precision Applications
High-fidelity DNA polymerases are engineered for applications requiring accurate DNA sequence replication, such as cloning, protein expression, SNP analysis, and next-generation sequencing [97]. These enzymes typically incorporate proofreading activity and enhanced nucleotide selection mechanisms to achieve error rates up to 280 times lower than Taq polymerase [98].
Q5 High-Fidelity DNA Polymerase represents a state-of-the-art high-fidelity enzyme with an ultra-low error rate of less than 1 error per million bases due to its strong 3′→5′ proofreading exonuclease activity [97]. Additionally, Q5 polymerase is fused to the processivity-enhancing Sso7d DNA-binding domain, improving speed, fidelity, and reliability while enabling amplification of longer templates (up to 10 kb from genomic DNA and 20 kb from plasmid DNA) [97]. This combination of high accuracy and processivity makes it particularly suitable for amplifying difficult templates with high AT or GC content [97].
Other notable high-fidelity polymerases include Phusion High-Fidelity DNA Polymerase (39-50× fidelity relative to Taq), Pfu DNA Polymerase (30× fidelity relative to Taq), and KOD DNA Polymerase (12× fidelity relative to Taq) [98]. Each of these enzymes offers different balances of fidelity, speed, and processivity, allowing researchers to select the optimal enzyme for their specific application requirements.
Hot-Start DNA Polymerases: Enhancing Specificity
Hot-Start DNA polymerases address one of the most common causes of PCR failure: nonspecific amplification during reaction setup. These enzymes remain inactive during PCR preparation at room temperature, preventing the extension of misprimed sequences and primer-dimer formation [75] [99].
The mechanism of Hot-Start activation varies by technology. Antibody-based Hot-Start enzymes (e.g., Platinum II Taq DNA Polymerase) utilize specific antibodies bound to the polymerase to inhibit activity at room temperature [75] [99]. During the initial high-temperature denaturation step (typically >90°C), the antibodies are denatured and degraded, releasing fully active polymerase [75]. This approach provides rapid activation and maintains the native characteristics of the unmodified enzyme [99].
Chemically modified Hot-Start enzymes (e.g., AmpliTaq Gold DNA Polymerase) feature covalent modifications to the polymerase's active site that block activity at lower temperatures [99]. These modifications are gradually removed during the initial heating steps, activating the enzyme. While generally more stringent than antibody-based methods, chemical activation may require longer activation times and can affect amplification of longer targets [99].
Alternative Hot-Start technologies include Affibody molecules (alpha-helical peptides that block the active site) and aptamers (oligonucleotides that bind to the polymerase) [99]. Each technology offers distinct advantages and considerations regarding stringency, activation time, stability at room temperature, and compatibility with different primer systems [99].
Experimental Protocols for Polymerase Evaluation
Fidelity Assessment Using Next-Generation Sequencing
Accurate determination of DNA polymerase fidelity requires sensitive methods capable of detecting rare replication errors. Next-generation sequencing approaches, particularly PacBio Single Molecule, Real-Time (SMRT) sequencing, provide the necessary sensitivity and throughput to quantify error rates of high-fidelity polymerases [98].
Protocol:
- Template Preparation: Use plasmid DNA (e.g., containing LacZ gene) virtually devoid of nucleotide errors as amplification template [98].
- PCR Amplification: Perform PCR with the test polymerase using optimized cycling conditions. Include sufficient cycles (typically 25-30) to generate adequate product while maintaining exponential amplification [98].
- Product Purification: Clean PCR products using magnetic bead-based purification or column purification to remove primers, dNTPs, and polymerase [98].
- Library Preparation and Sequencing: Prepare sequencing libraries according to PacBio SMRT sequencing protocols. This technology sequences the same molecule multiple times to derive a highly accurate consensus sequence for each read [98].
- Error Analysis: Compare consensus sequences to the known template sequence to identify true replication errors (substitutions, insertions, deletions). Calculate error rates per base per doubling event using appropriate statistical methods [98].
This method provides a background error rate of approximately 9.6 × 10⁻⁸ errors/base, making it suitable for quantifying the fidelity of proofreading polymerases with error rates as low as 10⁻⁷ [98].
Specificity Analysis Using Problematic Templates
Evaluating polymerase specificity requires testing with challenging templates prone to nonspecific amplification, such as those with high GC content, secondary structures, or complex genomic DNA [75] [10].
Protocol:
- Template Selection: Use human genomic DNA with amplification targets of varying lengths (e.g., 0.5 kb, 2 kb, 5 kb) and GC content [75].
- Reaction Setup: Prepare PCR reactions with test polymerases under identical conditions. For Hot-Start evaluation, include room temperature incubation (0-72 hours) before thermal cycling to assess specificity maintenance [75].
- Thermal Cycling: Use standardized cycling parameters with appropriate annealing temperatures for the primer sets [75].
- Product Analysis: Separate PCR products by agarose gel electrophoresis. Score specificity based on the presence of a single band of expected size versus multiple bands indicating nonspecific amplification [75] [10].
- Yield Quantification: Use quantitative methods (e.g., fluorometry) to measure target amplification yield, as nonspecific products often reduce target yield through competition for reagents [75].
This protocol allows direct comparison of polymerase specificity and enables identification of enzymes capable of maintaining specificity despite challenging reaction conditions [75].
The Scientist's Toolkit: Essential Research Reagents
Table 3: Key Research Reagents for DNA Polymerase Studies
| Reagent/Category | Specific Examples | Function/Application |
|---|---|---|
| High-Fidelity Polymerases | Q5 High-Fidelity DNA Polymerase, Phusion High-Fidelity DNA Polymerase | Cloning, sequencing, mutagenesis, NGS library prep |
| Hot-Start Polymerases | Platinum II Taq Hot-Start DNA Polymerase, DreamTaq Hot Start DNA Polymerase | High-specificity applications, high-throughput setups |
| Specialty Polymerases | LongAmp Taq DNA Polymerase, Hemo KlenTaq, Epimark Hot Start Taq | Long range PCR, direct blood amplification, bisulfite-converted DNA |
| Fidelity Assessment Tools | PacBio SMRT sequencing, lacZ fidelity assay systems | Quantifying polymerase error rates |
| Inhibitor Resistance Additives | BSA, betaine | Overcoming PCR inhibition in complex samples |
The selection of an appropriate DNA polymerase is fundamental to successful PCR experiments and represents a critical variable in troubleshooting amplification failure. Taq DNA polymerase, while suitable for routine applications, presents limitations in fidelity and specificity that can compromise results in demanding applications. High-fidelity polymerases with proofreading capabilities offer superior accuracy for cloning, sequencing, and mutagenesis applications, while Hot-Start enzymes provide enhanced specificity by preventing nonspecific amplification during reaction setup.
Understanding the four key characteristics of DNA polymerases—fidelity, processivity, thermostability, and specificity—enables researchers to make informed decisions when selecting enzymes for specific applications. The continuing evolution of DNA polymerase engineering, including fusion technologies that enhance processivity and novel Hot-Start activation methods, continues to expand the capabilities of PCR for challenging research and diagnostic applications. By matching polymerase properties to experimental requirements, researchers can optimize amplification success rates and generate more reliable, reproducible results in their molecular biology workflows.
The translation of Polymerase Chain Reaction (PCR) from a research tool to a reliable clinical diagnostic method hinges on rigorous validation. In clinical and diagnostic applications, the consequences of PCR failure—such as false negatives or false positives—extend beyond the laboratory, directly impacting patient diagnosis, treatment decisions, and public health monitoring. A foundational challenge often encountered in this process is the complete absence of amplification, a problem that can undermine the entire assay. This guide details the essential validation techniques required to ensure that PCR assays, particularly those developed in-house, are reproducible, accurate, and fit-for-purpose in a clinical setting, while also providing a framework for troubleshooting fundamental issues like no amplification.
The Pillars of PCR Assay Validation
Validation is a comprehensive process that confirms an assay consistently performs according to its intended use. For clinical research assays, which fill the critical gap between Research Use Only (RUO) and fully certified In Vitro Diagnostics (IVD), a structured approach is non-negotiable [102]. The process begins with defining the Context of Use (COU)—a precise statement describing the test's appropriate application, whether for diagnosis, prognosis, prediction, or monitoring therapeutic response [102]. The level of validation must then be aligned with this COU following the "fit-for-purpose" (FFP) principle, concluding that the rigor of validation is sufficient to support its specific context [102].
The validation framework rests on two main pillars: analytical performance and clinical performance.
Analytical Performance relates to the assay's inherent technical accuracy. Key parameters include:
- Analytical Sensitivity (Limit of Detection, LOD): The lowest concentration of the analyte that can be reliably detected [103] [102].
- Analytical Specificity: The ability of the assay to distinguish the target from non-target analytes, including the assessment of cross-reactivity [103] [102].
- Precision: The closeness of agreement between independent results under specified conditions, encompassing repeatability (within-lab, same operator) and reproducibility (between labs, operators, or over time) [102].
- Trueness (Accuracy): The closeness of agreement between the average value obtained from a large series of results and an accepted reference value [102].
Clinical Performance evaluates the assay's ability to correctly identify a clinical condition.
Table 1: Core Analytical Validation Parameters for Clinical PCR Assays
| Validation Parameter | Description | Common Validation Method |
|---|---|---|
| Analytical Sensitivity (LOD) | Lowest analyte concentration reliably detected | Probit analysis on serial dilutions of standard; lowest concentration detected in ≥95% of replicates [103] |
| Analytical Specificity | Ability to detect only the target sequence | Testing against near-neighbor species or common contaminants; no amplification should occur [103] [102] |
| Precision / Reproducibility | Closeness of results under defined conditions | Repeated testing of the same sample across different runs, days, and operators; calculation of CV (%) [102] |
| Efficiency | Reaction efficacy per cycle, ideally 90-110% | Slope of the standard curve; Efficiency = (10(-1/slope) - 1) × 100% [104] |
| Dynamic Range | Interval over which analyte can be quantified | Serial dilutions of a known standard; must demonstrate linearity [103] |
Critical Experimental Protocols for Validation
Determining the Limit of Detection (LOD)
The LOD is crucial for diagnosing infections where the pathogen load may be low.
- Obtain Standard Material: Use a well-characterized standard, such as synthetic RNA, plasmid DNA, or genomic DNA, with a known concentration (e.g., copies/µL) [105].
- Prepare Serial Dilutions: Create a dilution series in the same matrix as the patient sample (e.g., negative serum, nuclease-free water) to mimic the actual testing conditions. A 5- or 10-fold dilution series is typical [105].
- Amplification: Run each dilution in a high number of replicates (at least 20 replicates are recommended for a robust LOD) across multiple independent runs [103].
- Data Analysis: Use statistical methods like probit analysis to determine the concentration at which the target is detected in ≥95% of the replicates [103].
Establishing Analytical Specificity
This protocol ensures the assay does not generate false positives through cross-reactivity.
- Source Non-Target Templates: Collect nucleic acids from organisms genetically related to the target, as well as from samples that may be present in the same clinical matrix (e.g., common commensal flora, other pathogens causing similar symptoms) [103].
- Run Cross-Reactivity Testing: Perform the PCR assay using these non-target templates. The use of a no-template control (NTC) and a positive target control is essential in this experiment.
- Analyze Results: No amplification should occur in the non-target samples. Any signal detected should be investigated, and the primer/probe sequences should be re-evaluated for specificity [102].
Assessing Precision and Reproducibility
This evaluates the assay's robustness and consistency in a real-world laboratory environment.
- Select Sample Panels: Choose at least two samples (e.g., one low-positive and one high-positive) for testing [102].
- Design the Experiment: Test the selected samples across multiple runs, on different days, using different instruments, and with different operators if possible.
- Quantify Variability: Calculate the mean, standard deviation, and coefficient of variation (CV) for the quantitative results (e.g., Cq values or copy numbers) [102]. A low CV indicates high precision.
Connecting Validation to "No Amplification" in PCR
A thoroughly validated assay provides a systematic roadmap for troubleshooting fundamental failures like no amplification. This problem can be framed within the core components of the PCR reaction, each of which is scrutinized during validation.
Template DNA and Sample Quality
The absence of a product can often be traced directly to the template.
- Template Integrity and Purity: Degraded DNA or the presence of PCR inhibitors carried over from the sample (e.g., hemoglobin, heparin, phenol, or EDTA) can prevent amplification [106] [4]. Validation protocols that include sample dilution or clean-up can identify and resolve this. A 10-fold dilution of the template can reduce inhibitor concentration enough to allow amplification, confirming the issue [106].
- Template Absence: Simply adding a volume from a tube labeled "template DNA" is not sufficient. The target sequence must be present. When using cDNA, ensure the gene is expressed under the conditions studied. A genomic DNA control can help determine if the issue is with the template or another reaction component [106].
Primer Design and Specificity
Primer design is both an art and a science, and flawed primers are a primary cause of failed PCR [107].
- Sequence Accuracy: A critical validation step is to verify that the forward primer matches the 5'->3' sense strand sequence and the reverse primer is the reverse complement of the 5'->3' antisense strand. An error here will guarantee no amplification [106].
- Secondary Structures: Primers must be designed to be free of secondary structures like hairpins or significant self-dimers, which can prevent them from binding to the template [106] [4]. Using validated primer design algorithms and tools like Oligoanalyzer to check for homodimers and heterodimers (aiming for a ΔG ≤ -9 kcal/mol) is a standard part of assay development [104].
Reaction Components and Cycling Conditions
Suboptimal reaction conditions, which are optimized during validation, are a common source of failure.
- Mg²⁺ Concentration: This is a critical co-factor for DNA polymerase. Insufficient Mg²⁺ can lead to no product, while excess can promote non-specific amplification [4].
- DNA Polymerase Selection: The choice of polymerase is critical. For clinical applications, a hot-start polymerase is recommended to prevent non-specific priming and primer-dimer formation at low temperatures during reaction setup, which can consume reagents and lead to failed amplification of the target [107] [4].
- Cycling Conditions: The annealing temperature is paramount. If it is too high, primers cannot bind; if too low, non-specific binding occurs. Using a gradient PCR to determine the optimal annealing temperature is a fundamental validation step [106] [4]. Similarly, insufficient denaturation time or temperature, especially for GC-rich templates, can prevent strand separation.
Table 2: Research Reagent Solutions for Robust PCR Assays
| Reagent / Material | Function in Validation & Troubleshooting |
|---|---|
| Hot-Start DNA Polymerase | Chemically modified to be inactive at room temperature, preventing non-specific amplification and primer-dimer formation during reaction setup, thereby increasing specificity and yield [107] [4]. |
| Synthetic RNA/DNA Standards | Used for generating standard curves for quantification. Crucial for determining LOD, efficiency, and dynamic range. Different standards (plasmid DNA, synthetic RNA) can impact absolute quantification, highlighting the need for harmonization [105]. |
| Inhibitor-Tolerant Master Mix | Contains additives like BSA (Bovine Serum Albumin) that help polymerase function in the presence of common PCR inhibitors found in complex clinical samples (e.g., blood, stool) [107] [4]. |
| UDG/UNG Enzyme | Prevents carryover contamination from previous PCR products. It degrades uracil-containing DNA before PCR begins, ensuring that only the intended template is amplified [107] [108]. |
| Standardized Reference Materials | Well-characterized samples (e.g., from the Joint Research Centre) used across laboratories to verify analytical and clinical performance, ensuring reproducibility and comparability of results [105] [102]. |
The Critical Role of Standardization and Contamination Control
Reproducibility across laboratories and over time requires meticulous standardization and contamination control, which are integral to the validation process.
- Adherence to Reporting Guidelines: Following guidelines like the MIQE (Minimum Information for Publication of Quantitative Real-Time PCR Experiments) ensures that all critical experimental conditions are documented, allowing for proper evaluation and replication of the assay [103] [102].
- Standard Material Selection: The choice of standard material (plasmid DNA, synthetic RNA) used for quantification can significantly influence the measured copy number in a sample. Validation must account for this, and for multi-center studies, the use of a common standard is essential for comparability [105].
- Rigorous Contamination Control: False positives from contamination can invalidate clinical results. A strict unidirectional workflow, segregating pre- and post-PCR areas, is mandatory [108]. The consistent and correct use of negative controls is non-negotiable for detecting contamination [108] [84]. Incorporating UDG/UNG into the master mix provides a biochemical barrier against amplicon carryover contamination [107] [108].
Validation is not a one-time event but a continuous process that underpins the credibility of PCR in clinical and diagnostic applications. By establishing a rigorous foundation through the systematic determination of analytical and clinical performance parameters, laboratories ensure their assays are reproducible and reliable. Furthermore, a well-validated assay provides a powerful diagnostic tool in its own right—when "no amplification" occurs, the extensive characterization of the assay's components allows for swift and targeted troubleshooting. As molecular diagnostics continue to evolve, a commitment to thorough validation and standardization remains the cornerstone for generating data that clinicians can trust to make critical patient-care decisions.
Conclusion
Successfully diagnosing and resolving PCR amplification failure requires a systematic, knowledge-based approach that addresses the intricate interplay between template quality, primer design, reagent integrity, and cycling parameters. By mastering both foundational principles and advanced troubleshooting methodologies, researchers can transform a failed experiment into a reliable, reproducible assay. The future of PCR in biomedical research and clinical diagnostics hinges on this rigorous validation and optimization, paving the way for more accurate genetic analysis, robust diagnostic tests, and accelerated drug development pipelines. Embracing a culture of meticulous troubleshooting and validation is paramount for generating trustworthy, publication-quality data.
References
- 1. PCR Setup—Six Critical Components to Consider [https://www.thermofisher.com/us/en/home/life-science/cloning/cloning-learning-center/invitrogen-school-of-molecular-biology/pcr-education/pcr-reagents-enzymes/pcr-component-considerations.html]
- 2. Polymerase Chain Reaction (PCR) - StatPearls - NCBI - NIH [https://www.ncbi.nlm.nih.gov/books/NBK589663/]
- 3. PCR Troubleshooting: Common Problems and Solutions [https://www.mybiosource.com/learn/pcr-troubleshooting-common-problems-and-solutions/]
- 4. PCR Troubleshooting Guide | Thermo Fisher Scientific - US [https://www.thermofisher.com/us/en/home/life-science/cloning/cloning-learning-center/invitrogen-school-of-molecular-biology/pcr-education/pcr-reagents-enzymes/pcr-troubleshooting.html]
- 5. Optimizing your PCR [https://www.takarabio.com/learning-centers/pcr/faq/optimization?srsltid=AfmBOoqqMnnKcgspa0t1fMAe3SmBMNmI5cEwSFPgQz86wKNKqAJJwFkO]
- 6. Optimizing PCR Reaction Conditions for High Fidelity and ... [https://www.labx.com/resources/optimizing-pcr-reaction-conditions-for-high-fidelity-and-yield/5579]
- 7. Preventing PCR Amplification Carryover Contamination in ... [https://www.annclinlabsci.org/content/34/4/389.long]
- 8. The Devil in the Details: Contamination in a PCR Lab [https://www.rapidmicrobiology.com/news/the-devil-in-the-details-contamination-in-a-pcr-lab]
- 9. Primer design guide - 5 tips for best PCR results [https://the-dna-universe.com/2022/09/05/primer-design-guide-the-top-5-factors-to-consider-for-optimum-performance/]
- 10. Troubleshooting Non-Specific Amplification [https://bento.bio/resources/bento-lab-advice/troubleshooting-non-specific-amplification-with-bento-lab/]
- 11. How to Calculate Annealing Temperature for PCR | IDT [https://www.idtdna.com/pages/support/faqs/how-do-you-calculate-the-annealing-temperature-for-pcr-]
- 12. Prediction of PCR amplification from primer and template ... [https://www.nature.com/articles/s41598-021-86357-1]
- 13. Mathematical Modeling and Thermodynamic Integration for ... [https://pmc.ncbi.nlm.nih.gov/articles/PMC12620865/]
- 14. PCR conditions | Primer annealing specificity | PCR buffers [https://www.qiagen.com/us/knowledge-and-support/knowledge-hub/bench-guide/pcr/introduction/pcr-conditions]
- 15. Standard PCR Protocol [https://www.sigmaaldrich.com/US/en/technical-documents/protocol/genomics/pcr/standard-pcr?srsltid=AfmBOoq8UR-Vec84CKHmpRCiQepfdY2mhL-weMN-qcqM04KIa2mF-26y]
- 16. How to Simplify PCR Optimization Steps for Primer Annealing [https://www.thermofisher.com/us/en/home/brands/thermo-scientific/molecular-biology/molecular-biology-learning-center/molecular-biology-resource-library/spotlight-articles/pcr-annealing-optimization-universal-annealing.html]
- 17. PCR Troubleshooting Guide [https://www.neb.com/en-us/tools-and-resources/troubleshooting-guides/pcr-troubleshooting-guide?srsltid=AfmBOopuvvKwhkyICnLf0pFsez5rLHp7TaG5OZNrxuzifC7OisrsHv5I]
- 18. PCR Master Mix [https://www.sigmaaldrich.com/US/en/technical-documents/technical-article/genomics/pcr/pcr-master-mix?srsltid=AfmBOopim3oMA5LKEIuZ8zpYZWNWbqLtPsyQS1RKwTpUV0NnbVSF0R83]
- 19. PCR Cycling Parameters—Six Key Considerations for ... [https://www.thermofisher.com/us/en/home/life-science/cloning/cloning-learning-center/invitrogen-school-of-molecular-biology/pcr-education/pcr-reagents-enzymes/pcr-cycling-considerations.html]
- 20. Thermal Cycling Optimization [https://www.aatbio.com/resources/application-notes/thermal-cycling-optimization]
- 21. Gradient Thermal Cyclers: When and How to Use Them [https://www.labx.com/resources/gradient-thermal-cyclers-when-and-how-to-use-them/5580]
- 22. PCR Failure Due to Incorrect Annealing Temperature [https://www.letstalkacademy.com/pcr-failure-annealing-temperature/]
- 23. Predicting sequence-specific amplification efficiency in ... [https://www.nature.com/articles/s41467-025-64221-4]
- 24. Amplification Failure of the Amelogenin X Gene Caused by ... [https://www.mdpi.com/2073-4425/14/11/1986]
- 25. PCR amplification introduces errors into mononucleotide ... [https://pmc.ncbi.nlm.nih.gov/articles/PMC1187094/]
- 26. Why Did My PCR Fail? 10 Common Problems and Fixes [https://synapse.patsnap.com/article/why-did-my-pcr-fail-10-common-problems-and-fixes]
- 27. PCR inhibition in qPCR, dPCR and MPS—mechanisms and ... [https://pmc.ncbi.nlm.nih.gov/articles/PMC7072044/]
- 28. Inhibit inhibition: PCR inhibition and how to prevent it [https://www.bioecho.com/blog/inhibit-inhibition-pcr-inhibition-and-how-to-prevent-it]
- 29. PCR Inhibitors: Effects on PCR Reactions and Removal ... [https://bioclone.net/technology-pcr-inhibitors/?srsltid=AfmBOoqmq2dmx9iKHPwN-lMsA-1Ljx_irUXwJD4RdKrVMCT_k84TJZjh]
- 30. Live culture-based qPCR screening of Taq DNA ... [https://www.frontiersin.org/journals/bioengineering-and-biotechnology/articles/10.3389/fbioe.2025.1624735/full]
- 31. Troubleshooting your PCR [https://www.takarabio.com/learning-centers/pcr/faq/troubleshooting?srsltid=AfmBOoqeYX3J6_vwJVLlxI8UdvwkyoKNnOVYAxKEhBC5HnmfTzzE4U7x]
- 32. Evaluation of PCR-enhancing approaches to reduce ... [https://www.sciencedirect.com/science/article/abs/pii/S0048969724069250]
- 33. Overcoming qPCR Inhibitors: Strategies for Reliable ... [https://www.promegaconnections.com/overcoming-qpcr-inhibitors-strategies-for-reliable-quantification/]
- 34. Digital PCR: from early developments to its future application ... [https://pubs.rsc.org/en/content/articlehtml/2025/lc/d5lc00055f]
- 35. qPCR primer design revisited [https://www.sciencedirect.com/science/article/pii/S221475351730181X]
- 36. Rules and Tips for PCR & qPCR Primer Design | IDT [https://www.idtdna.com/page/support-and-education/decoded-plus/how-to-design-primers-and-probes-for-pcr-and-qpcr/]
- 37. Primer Design Tool [https://en.vectorbuilder.com/tool/primer-design.html]
- 38. Primer designing tool - NCBI - NIH [https://www.ncbi.nlm.nih.gov/tools/primer-blast/]
- 39. Design PCR primers and check them for specificity - NCBI - NIH [https://www.ncbi.nlm.nih.gov/guide/howto/design-pcr-primers]
- 40. How to perform specificity testing during Primer Design [https://help.geneious.com/hc/en-us/articles/10726174523796-How-to-perform-specificity-testing-during-Primer-Design]
- 41. PrimerQuest PCR & qPCR Primer Design Tool | IDT [https://www.idtdna.com/pages/tools/primerquest]
- 42. PCR Primer Design Tool [https://eurofinsgenomics.eu/en/ecom/tools/pcr-primer-design/]
- 43. Poor PCR Efficiency [https://www.thermofisher.com/us/en/home/life-science/pcr/real-time-pcr/real-time-pcr-learning-center/real-time-pcr-basics/real-time-pcr-troubleshooting-tool/gene-expression-quantitation-troubleshooting/poor-pcr-efficiency.html]
- 44. Absolute vs. Relative Quantification for qPCR [https://www.thermofisher.com/us/en/home/life-science/pcr/real-time-pcr/real-time-pcr-learning-center/real-time-pcr-basics/absolute-vs-relative-quantification-real-time-pcr.html]
- 45. What is the standard curve method for qPCR assay data ... [https://www.qiagen.com/us/resources/faq/2691]
- 46. Quality-control issues for PCR-based assays in the ... [https://www.sciencedirect.com/science/article/abs/pii/S0968605302000960]
- 47. Pitfalls in PCR troubleshooting: Expect the unexpected? [https://pmc.ncbi.nlm.nih.gov/articles/PMC4822207/]
- 48. PCR tips and tricks (incl. master mix calculations) | INTEGRA [https://www.integra-biosciences.com/united-states/en/blog/article/pcr-tips]
- 49. PCR Master Mix [https://www.sigmaaldrich.com/US/en/technical-documents/technical-article/genomics/pcr/pcr-master-mix?srsltid=AfmBOoq5POoGniA7Wy9YAYFD9cngDgYqehpUuOWGTSeGGx_3ELlrl6Hl]
- 50. Standard PCR Protocol [https://www.sigmaaldrich.com/US/en/technical-documents/protocol/genomics/pcr/standard-pcr?srsltid=AfmBOoqPeSkT2kFrL1k-7BMZeqwpYxgiRfrhoUHOOzgRpHjENr8x6Jmo]
- 51. What is Polymerase Chain Reaction (PCR) [https://www.addgene.org/protocols/pcr/]
- 52. Standard PCR Protocol [https://www.sigmaaldrich.com/US/en/technical-documents/protocol/genomics/pcr/standard-pcr?srsltid=AfmBOophHVF8swR9oYX6kzhgMQdXpbCZ-9BgMXCa7wSKwUcCCnHVtcTU]
- 53. Optimizing PCR amplification of GC-rich nicotinic ... [https://www.sciencedirect.com/science/article/pii/S2405580825001396]
- 54. Four tips for PCR amplification of GC-rich sequences [https://www.neb.com/en-us/nebinspired-blog/four-tips-for-pcr-amplification-of-gc-rich-sequences?srsltid=AfmBOorrbIIEGk1cJaEzHmQiwgM806YwZF_WlF9rZ2kSNVD5uM7S7jle]
- 55. Optimizing PCR: Proven Tips and Troubleshooting Tricks [https://www.the-scientist.com/optimizing-pcr-proven-tips-and-troubleshooting-tricks-71660]
- 56. Optimizing your PCR [https://www.takarabio.com/learning-centers/pcr/faq/optimization?srsltid=AfmBOor7IaJqe-G51boZlg6lMfx8fd-MYsYyMN9dlWr6AdmY-CEnh7E2]
- 57. PCR Methods - Top Ten Strategies [https://www.thermofisher.com/us/en/home/life-science/cloning/cloning-learning-center/invitrogen-school-of-molecular-biology/pcr-education/pcr-reagents-enzymes/pcr-methods.html]
- 58. Long-range PCR up to 53 kb and reliable multiplexing of ... [https://www.linkedin.com/pulse/long-range-pcr-up-53-kb-reliable-multiplexing-gcat-rich-repetitive-vpvdc]
- 59. Long-range PCR in next-generation sequencing [https://www.nature.com/articles/srep05737]
- 60. How to Design Primers | ZYMO RESEARCH [https://www.zymoresearch.com/blogs/blog/how-to-design-primers-for-pcr-experiments]
- 61. PCR Troubleshooting Guide [https://www.neb.com/en-us/tools-and-resources/troubleshooting-guides/pcr-troubleshooting-guide?srsltid=AfmBOooeMCbyt2xui4FT6wlUDhp2trXsoIqtZQzTh1gAsuoWEt2zRjjJ]
- 62. How to optimize qPCR in 9 steps? [https://westburg.eu/knowledge/pcr_qpcr/hate_optimizing_qpcr]
- 63. Gradient PCR for Optimization [https://www.eppendorf.com/us-en/lab-academy/life-science/molecular-biology/gradient-pcr-for-optimization/]
- 64. Four tips for PCR amplification of GC-rich sequences [https://www.neb.com/en-us/nebinspired-blog/four-tips-for-pcr-amplification-of-gc-rich-sequences?srsltid=AfmBOorZIi1LESw8o8569xY4sy8U9OEqO1Kkee2gh3SnLETg03ptzsjH]
- 65. PCR Optimization: Strategies To Minimize Primer Dimer [https://genemod.net/blog/pcr-optimization]
- 66. Troubleshooting primer dimer in PCR [https://www.minipcr.com/primer-dimer-pcr/]
- 67. Primer Dimer - an overview [https://www.sciencedirect.com/topics/neuroscience/primer-dimer]
- 68. Quantitative Experimental Determination of Primer-Dimer ... [https://pmc.ncbi.nlm.nih.gov/articles/PMC3416024/]
- 69. The elimination of primer-dimer accumulation in PCR - PMC [https://pmc.ncbi.nlm.nih.gov/articles/PMC146890/]
- 70. Types, mechanisms, and applications in long-range PCR [https://www.sciencedirect.com/science/article/abs/pii/S0300908422000499]
- 71. Modified DNA polymerases for PCR troubleshooting [https://link.springer.com/article/10.1007/s13353-016-0371-4]
- 72. The enhancement of PCR amplification by low molecular ... [https://pmc.ncbi.nlm.nih.gov/articles/PMC55707/]
- 73. Enhancement of DNA amplification efficiency by using ... [https://www.bocsci.com/blog/enhancement-of-dna-amplification-efficiency-by-using-pcr-additives/?srsltid=AfmBOopgUyUPqCfsX7CtwdeRG8wqhmYLc8DSIfummnqABsT5IJEKnVqs]
- 74. Just What Do All These Additives Do? [https://bitesizebio.com/19420/just-what-do-all-these-additives-do/]
- 75. DNA Polymerase—Four Key Characteristics for PCR [https://www.thermofisher.com/us/en/home/life-science/cloning/cloning-learning-center/invitrogen-school-of-molecular-biology/pcr-education/pcr-reagents-enzymes/dna-polymerase-characteristics.html]
- 76. Sweet enhancers of polymerase chain reaction - PMC [https://pmc.ncbi.nlm.nih.gov/articles/PMC11521273/]
- 77. DMSO and betaine significantly enhance the PCR ... [https://pubmed.ncbi.nlm.nih.gov/32433893/]
- 78. A new approach to touch down method using betaine as co ... [https://www.sciencedirect.com/science/article/abs/pii/S0378111912000741]
- 79. Contamination and Sensitivity Issues with a Real-Time ... [https://pmc.ncbi.nlm.nih.gov/articles/PMC86577/]
- 80. Polymerase Chain Reaction: Basic Protocol Plus ... [https://pmc.ncbi.nlm.nih.gov/articles/PMC4846334/]
- 81. PCR Troubleshooting Guide [https://www.neb.com/en-us/tools-and-resources/troubleshooting-guides/pcr-troubleshooting-guide?srsltid=AfmBOoru41lrjh6AAtbmupGKzktYQUG4gkjBeryBINfRD4xavPGveSwk]
- 82. Troubleshooting PCR and RT-PCR Amplification [https://www.sigmaaldrich.com/US/en/technical-documents/technical-article/genomics/pcr/troubleshooting-pcr-and-rt-pcr-amplification?srsltid=AfmBOoobPH2jcX_FmTGPMpNb65OMgUxUisA1WYV14gjO6YU1NAOL3sok]
- 83. PCR controls [https://www.qiagen.com/us/knowledge-and-support/knowledge-hub/bench-guide/pcr/reference-genes-and-controls/pcr-controls]
- 84. Amplification of the No Template Control (NTC) [https://www.thermofisher.com/us/en/home/life-science/pcr/real-time-pcr/real-time-pcr-learning-center/real-time-pcr-basics/real-time-pcr-troubleshooting-tool/gene-expression-quantitation-troubleshooting/amplification-no-template-control.html]
- 85. PCR Amplification | An Introduction to PCR Methods [https://www.promega.com/resources/guides/nucleic-acid-analysis/pcr-amplification/]
- 86. What does DNA polymerase fidelity mean? [https://www.neb.com/en-us/tools-and-resources/feature-articles/polymerase-fidelity-what-is-it-and-what-does-it-mean-for-your-pcr?srsltid=AfmBOorM35SbNvVBkruWCrz_H1rZKNpLaoMmBP8RY3jrnmWGV85f0_OX]
- 87. PCR Fidelity Calculator | Thermo Fisher Scientific - US [https://www.thermofisher.com/us/en/home/brands/thermo-scientific/molecular-biology/molecular-biology-learning-center/molecular-biology-resource-library/thermo-scientific-web-tools/pcr-fidelity-calculator.html]
- 88. Fidelity of DNA polymerases in the detection ... [https://pmc.ncbi.nlm.nih.gov/articles/PMC7720943/]
- 89. The Impact of the Variability of RT-qPCR Standard Curves ... [https://pmc.ncbi.nlm.nih.gov/articles/PMC12029521/]
- 90. Real-Time PCR Reagents & Kits Analysis Report 2025 [https://www.archivemarketresearch.com/reports/real-time-pcr-reagents-kits-351165]
- 91. Behind the paper Examining Sources of Error in PCR ... [https://www.neb.com/en-us/tools-and-resources/video-library/behind-the-paper-examining-sources-of-error-in-pcr-by-single-molecule-sequencing?srsltid=AfmBOoo-LjSF-BlwpIkJqNoK0KM7sd7PAHrfvlyoqfDv1URgo0MqZ1_A]
- 92. Implementing External Quality Control in PCR Workflows [https://www.mapi-research.fr/implementing-external-quality-control-in-pcr-workflows-a-step-by-step-laboratory-guide/]
- 93. Comparing the precision of two digital PCR applications for ... [https://www.nature.com/articles/s41598-025-13143-8]
- 94. Analyzing qPCR data: Better practices to facilitate rigor and ... [https://www.sciencedirect.com/science/article/pii/S2405580825004431]
- 95. Batch Effect Correction [https://www.10xgenomics.com/analysis-guides/introduction-batch-effect-correction]
- 96. Implementing quality-by-design latent-variable model ... [https://www.sciencedirect.com/science/article/abs/pii/S0959152425002045]
- 97. What are the advantages of using Q5® High-Fidelity DNA ... [https://www.neb.com/en-us/faqs/2023/07/24/what-are-the-advantages-of-using-q5-high-fidelity-dna-polymerase?srsltid=AfmBOoogzyiHgflzfu1BhX6QlE3AkyfzsTwk61nYJ0PVnYx1Ry_orJvq]
- 98. What does DNA polymerase fidelity mean? [https://www.neb.com/en-us/tools-and-resources/feature-articles/polymerase-fidelity-what-is-it-and-what-does-it-mean-for-your-pcr?srsltid=AfmBOoptYydCoMxc-bQC7eU7WG9uh_Iy1aKNY6BhQ1XdjUeOLxY8fWWM]
- 99. How is Hot-Start Technology Beneficial For Your PCR [https://www.thermofisher.com/us/en/home/brands/thermo-scientific/molecular-biology/molecular-biology-learning-center/molecular-biology-resource-library/spotlight-articles/hot-start-technology-benefits-PCR.html]
- 100. What are the limitations of Taq polymerase? [https://www.aatbio.com/resources/faq-frequently-asked-questions/What-are-the-limitations-of-Taq-polymerase]
- 101. DNA Polymerase Selection Chart [https://www.neb.com/en-us/tools-and-resources/selection-charts/dna-polymerase-selection-chart?srsltid=AfmBOorWM2wwej3Uschl7FoZslhnDBr_RUSeGLZvIzZ7gbu-8ovvrD7z]
- 102. Consensus guidelines for the validation of qRT-PCR ... [https://pmc.ncbi.nlm.nih.gov/articles/PMC8792405/]
- 103. Validating Real-Time Polymerase Chain Reaction (PCR) Assays [https://pmc.ncbi.nlm.nih.gov/articles/PMC7834634/]
- 104. Amplification of nonspecific products in quantitative ... [https://pmc.ncbi.nlm.nih.gov/articles/PMC5727009/]
- 105. The effects of RT-qPCR standards on reproducibility and ... [https://pmc.ncbi.nlm.nih.gov/articles/PMC11513023/]
- 106. No PCR Product! What Now? [https://nordicbiosite.com/blog/no-pcr-product-what-now]
- 107. Challenges and Solutions in PCR Assay Design [https://www.genengnews.com/topics/translational-medicine/challenges-and-solutions-in-pcr-assay-design/]
- 108. How to prevent PCR contamination [https://www.minipcr.com/how-to-prevent-pcr-contamination/]