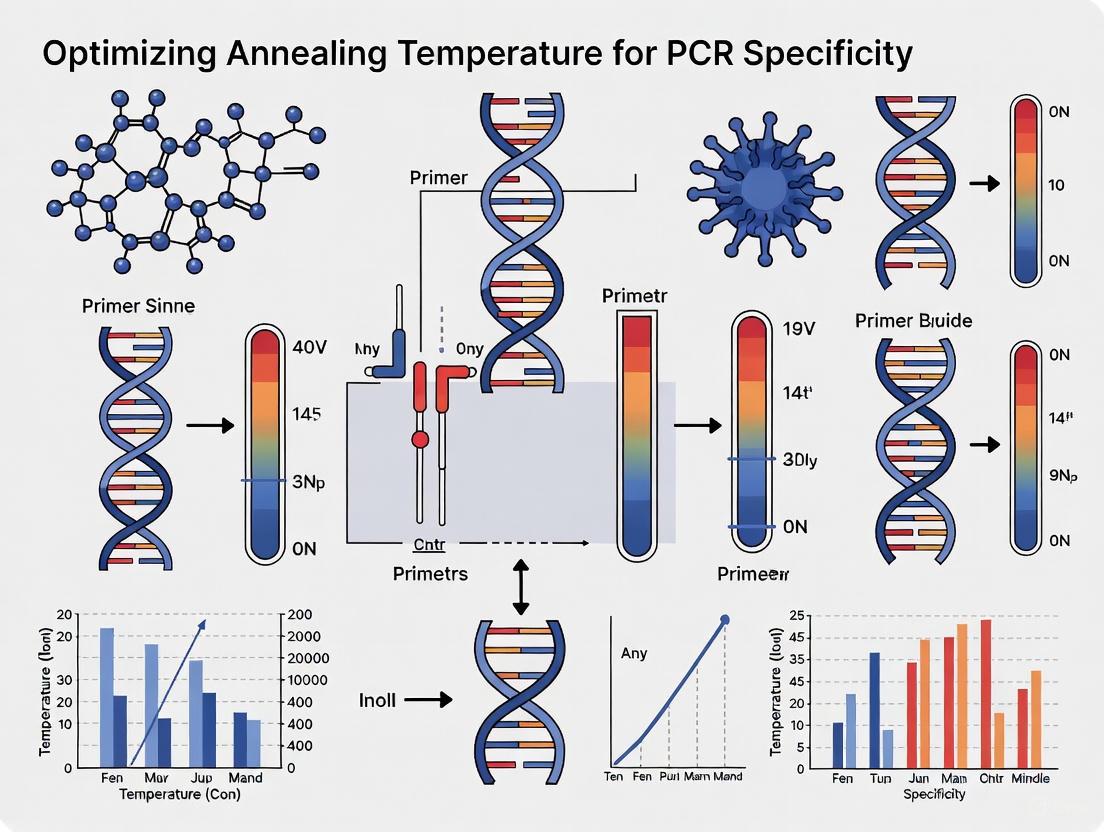
Mastering PCR Specificity: A Comprehensive Guide to Annealing Temperature Optimization
This article provides a systematic guide for researchers, scientists, and drug development professionals on optimizing annealing temperature to maximize Polymerase Chain Reaction (PCR) specificity and yield.
Mastering PCR Specificity: A Comprehensive Guide to Annealing Temperature Optimization
Abstract
This article provides a systematic guide for researchers, scientists, and drug development professionals on optimizing annealing temperature to maximize Polymerase Chain Reaction (PCR) specificity and yield. It covers foundational principles exploring the critical role of annealing temperature in primer-template binding, methodological approaches for calculation and experimental determination, advanced troubleshooting strategies for common amplification issues, and validation techniques using quantitative and digital PCR. The protocol emphasizes practical, stepwise optimization to ensure robust, reproducible results in diagnostic, clinical, and research applications, highlighting recent innovations that streamline the optimization process.
The Science of Specificity: Understanding How Annealing Temperature Governs PCR Success
Troubleshooting Guide: Annealing-Related PCR Issues
This section addresses common problems related to the PCR annealing step, their causes, and evidence-based solutions to help you achieve optimal amplification specificity and efficiency.
Q1: My PCR reaction produces multiple non-specific bands or a smeared background on the gel. What annealing-related issues could be causing this, and how can I fix them?
Possible Causes:
- Annealing temperature is too low: This reduces reaction stringency, allowing primers to bind to non-complementary sequences [1] [2] [3].
- Primer concentration is too high: Excess primer can promote non-specific binding and primer-dimer formation [2] [4].
- Suboptimal Mg²⁺ concentration: High Mg²⁺ concentration can stabilize non-specific primer-template duplexes [1] [2].
Recommended Solutions:
- Increase the annealing temperature: Optimize by testing a temperature gradient, starting at 3–5°C below the lowest primer Tm [1] [2] [5]. For high-GC templates, the optimal temperature may be significantly higher than the calculated Tm [6].
- Use a Hot-Start DNA polymerase: This prevents enzyme activity during reaction setup at low temperatures, thereby reducing non-specific amplification [1] [3].
- Optimize primer and Mg²⁺ concentrations: Titrate primer concentrations typically between 0.1–1 µM [2] [5] and adjust Mg²⁺ concentration in 0.5 mM increments [7] [2].
Q2: I am getting no PCR product or a very low yield. How can I adjust the annealing conditions to improve this?
Possible Causes:
- Annealing temperature is too high: Excessive stringency can prevent primers from binding to the template at all [1] [2].
- Poor primer design: Primers may have secondary structures (e.g., hairpins) or excessive length that hinder efficient binding [1] [8].
- Insufficient template quality or quantity: Degraded DNA or low copy numbers can prevent detection [1] [3].
Recommended Solutions:
- Lower the annealing temperature: Begin optimization 5°C below the lower Tm of the primer pair and test a gradient [2].
- Verify primer design: Ensure primers are 20-30 nucleotides long, have a GC content of 40-60%, and lack self-complementarity [8] [4]. Use software tools for design validation [8].
- Check template DNA: Use high-quality, purified DNA. Recommended amounts are 1 pg–10 ng for plasmid DNA and 1 ng–1 µg for genomic DNA [7].
Q3: What is a definitive step-by-step method to experimentally determine the optimal annealing temperature for a new primer set?
- Protocol: Gradient PCR Optimization [6] [1]
- Reaction Setup: Prepare a master mix containing all standard PCR components: template, primers, dNTPs, Mg²⁺, buffer, and DNA polymerase.
- Thermal Cycler Programming: Use a thermal cycler with a gradient function. Set a temperature range that spans at least 10°C, centered 5°C below the calculated Tm of your primers. For example, if the average Tm is 60°C, test a gradient from 55°C to 65°C [6].
- Cycling Conditions:
- Product Analysis: Analyze the PCR products on an agarose gel. The optimal annealing temperature yields a single, bright band of the expected size with minimal to no non-specific products or primer-dimers [6].
Quantitative Data for Annealing Optimization
The following tables summarize critical parameters and reagent concentrations to consider when optimizing the PCR annealing step.
Table 1: Key Reaction Components for Annealing Optimization [7] [8] [5]
| Component | Typical Optimal Concentration or Range | Function in Annealing | Optimization Tips |
|---|---|---|---|
| Primers | 0.1 - 1.0 µM (each) | Binds specifically to flanking sequences of the target DNA. | High concentrations cause non-specific binding; low concentrations reduce yield [5] [4]. |
| MgCl₂ | 1.5 - 2.0 mM | Cofactor for DNA polymerase; stabilizes primer-template duplex. | Critical for specificity. Titrate in 0.5 mM increments. Too high: non-specific products; too low: no product [7] [2]. |
| dNTPs | 50 - 200 µM (each) | Provides nucleotides for DNA synthesis. | High concentrations can increase yield but may reduce fidelity and specificity [5] [4]. |
| Template DNA | Plasmid: 1 pg–10 ngGenomic: 1 ng–1 µg | The target DNA to be amplified. | Too much template can decrease specificity and cause smearing [7] [5]. |
Table 2: Thermal Cycling Parameters for Annealing [1] [7] [4]
| Parameter | Standard Conditions | Impact on Annealing & Specificity |
|---|---|---|
| Annealing Temperature | 3-5°C below primer Tm (often 55-65°C) | The most critical parameter for specificity. Must be optimized for each primer set [1] [4]. |
| Annealing Time | 15 - 60 seconds | Sufficient for primer binding. Excessively long times can promote non-specific binding [1] [7]. |
| Denaturation Temperature | 95°C for 15-30 seconds | Crucial for completely separating DNA strands so primers can access the template in the next cycle [1]. |
| Number of Cycles | 25 - 40 cycles | More cycles can increase yield but also amplify non-specific products accumulated in earlier cycles [1] [2]. |
Advanced Experimental Protocols
Protocol: Touchdown PCR for Enhanced Specificity [5]
Touchdown PCR is a powerful technique to increase amplification specificity by progressively lowering the annealing temperature during initial cycles. This ensures that the first products amplified are the most specific ones.
- Step 1: Reaction Setup. Prepare a standard PCR master mix.
- Step 2: Thermal Cycler Programming.
- Initial Denaturation: 95°C for 2 minutes.
- Initial Annealing Temperature: Set the starting annealing temperature 5-10°C above the estimated Tm of the primers.
- Cycling Phase 1 (Touchdown): For the first 10-15 cycles, decrease the annealing temperature by 1°C every one or two cycles.
- Cycling Phase 2 (Main Amplification): For the remaining 20-25 cycles, use a constant annealing temperature, which should be 3-5°C below the final calculated Tm.
- Extension: 72°C for 1 minute per kb.
- Final Extension: 72°C for 5-10 minutes.
- Step 3: Analysis. Analyze products via agarose gel electrophoresis.
Protocol: Optimizing PCR for GC-Rich Templates [6]
GC-rich regions (>65% GC) form stable secondary structures that impede polymerase progression, requiring specialized optimization.
- Step 1: Use PCR Additives. Include 5% DMSO in the reaction mix. DMSO helps denature stable GC-rich duplexes during the annealing step, facilitating primer binding [6].
- Step 2: Optimize Mg²⁺ Concentration. Titrate MgCl₂ concentration, often finding an optimum between 1.5 and 2.0 mM [6].
- Step 3: Increase Annealing Temperature. For the EGFR promoter (GC content ~88%), the optimal annealing temperature was found to be 7°C higher than the calculated Tm [6].
- Step 4: Ensure Sufficient Template. Use a DNA concentration of at least 2 µg/ml for successful amplification of difficult templates [6].
Workflow and Strategy Visualization
Annealing Optimization Strategy
Touchdown PCR Process
The Scientist's Toolkit: Research Reagent Solutions
Table 3: Essential Reagents for PCR Annealing Optimization
| Reagent / Kit | Function in Annealing Optimization |
|---|---|
| Hot-Start DNA Polymerase (e.g., OneTaq Hot Start, Platinum Taq) | Prevents enzymatic activity during reaction setup, dramatically reducing non-specific priming and primer-dimer formation at low temperatures [2] [3]. |
| Universal Annealing Buffer Systems (e.g., with Platinum DNA Polymerases) | Contains isostabilizing components that allow primers with different Tms to work efficiently at a universal temperature (e.g., 60°C), simplifying optimization for multiple targets [9]. |
| PCR Additives (DMSO, Betaine, BSA) | DMSO and betaine help denature complex secondary structures in the template (e.g., GC-rich regions) during annealing, improving primer access and specificity [6] [1] [8]. BSA can help overcome PCR inhibition [3]. |
| Gradient Thermal Cycler | An instrument that allows a single PCR run to test a range of annealing temperatures simultaneously, drastically speeding up the optimization process [6] [5]. |
| MgCl₂ Solution | A separate, titratable source of magnesium ions, essential for fine-tuning reaction stringency and polymerase activity, as Mg²⁺ concentration critically affects primer-template binding [7] [2]. |
FAQs: Understanding Tm and Its Role in PCR
What is Melting Temperature (Tm) and why is it critical for PCR specificity?
The melting temperature (Tm) is the temperature at which 50% of the DNA duplex dissociates into single strands [10]. In PCR, this refers specifically to the temperature at which a primer dissociates from its complementary template DNA sequence.
Tm is a critical theoretical parameter because it directly determines the stringency of primer binding during the annealing step of a PCR cycle [11]. Using an annealing temperature (Ta) too far below the primer Tm can lead to non-specific binding and amplification of off-target sequences, as the primer can tolerate mismatches. Conversely, an annealing temperature too high can reduce reaction efficiency because the primer may not bind to the template at all [12]. Properly calculating and applying the Tm is therefore foundational to achieving specific and efficient DNA amplification [4].
How is the Tm for a PCR primer accurately calculated?
Tm can be calculated using several formulas, but for modern PCR applications, the nearest-neighbor method is the most accurate [11]. This sophisticated model accounts for the sequence of the primer by considering the stability of each dinucleotide step in the DNA helix, not just the base count.
Most current online Tm calculators, like those offered by IDT or Thermo Fisher Scientific, use this method [11] [13]. For a reliable result, you must input your specific PCR reaction conditions because the Tm is dependent on the buffer chemistry [11].
Key factors influencing Tm calculation:
- Primer Sequence (Nearest-Neighbor Parameters): The order of nucleotides affects duplex stability [11].
- Primer Concentration: Higher concentrations can slightly increase the observed Tm.
- Salt Concentrations: The concentration of monovalent ions (K⁺) and, crucially, divalent ions (Mg²⁺) significantly stabilizes the DNA duplex and raises the Tm [11]. Standard calculation parameters often assume 50 mM K⁺ and 3 mM Mg²⁺.
- dNTP Concentration: dNTPs can chelate Mg²⁺, so their concentration is also a factor [11].
What is the relationship between primer Tm and PCR annealing temperature (Ta)?
The annealing temperature (Ta) is the experimental parameter you set on the thermal cycler, and it is strategically chosen based on the calculated Tm of your primers. The standard recommendation is to set the Ta approximately 5°C below the Tm of the primers [11] [12].
A more precise formula for calculating the optimal annealing temperature (Ta Opt) is: Ta Opt = 0.3 x Tm(primer) + 0.7 x Tm(product) – 14.9 where Tm(primer) is the melting temperature of the less stable primer-template pair, and Tm(product) is the melting temperature of the PCR product [12].
The following workflow outlines the logical process for moving from theoretical Tm calculation to optimized experimental conditions:
What are the common PCR problems related to Tm, and how are they troubleshooted?
Many common PCR issues can be traced back to suboptimal Tm and annealing conditions.
| Observation | Possible Cause Related to Tm | Solution |
|---|---|---|
| Multiple or Non-Specific Products | Annealing temperature is too low [14]. | Increase the annealing temperature in 1-2°C increments. Use a hot-start polymerase [14] [15]. |
| No Product or Low Yield | Annealing temperature is too high [14] [12]. | Decrease the annealing temperature. Recalculate Tm and verify primer specificity [14]. |
| Primer-Dimer Formation | Tm too low; primers have complementary regions, especially at 3' ends [4] [10]. | Redesign primers to avoid 3' complementarity. Optimize primer concentration. Use a hot-start polymerase [15]. |
| Inefficient Amplification of GC-Rich Targets | High Tm and stable secondary structures prevent primer binding [14]. | Use a specialized polymerase blend. Add co-solvents like DMSO or betaine [15] [16]. |
Experimental Protocols for Tm Determination and Optimization
Protocol 1: Empirical Determination of Optimal Annealing Temperature Using Gradient PCR
This protocol is the gold standard for moving from a theoretical Tm to an empirically verified optimal annealing temperature [14].
- Calculate Tm: Use an online calculator (e.g., IDT SciTools, NEB Tm Calculator) with your specific primer sequences and reaction buffer conditions to get the estimated Tm [11] [13].
- Set Up Reactions: Prepare a standard PCR master mix containing your template, primers, polymerase, dNTPs, and buffer. Aliquot the mix into multiple PCR tubes.
- Program Thermal Cycler:
- Use the gradient function on your thermal cycler.
- Set the annealing temperature gradient to span a range, typically from 5°C below to 5°C above the calculated Tm of your primers [13].
- Example: If the calculated Tm is 62°C, set a gradient from 57°C to 67°C.
- Run PCR: Execute the full PCR cycle.
- Analyze Results: Separate the PCR products on an agarose gel. The optimal annealing temperature is the one that produces the strongest band of the correct size with the absence of non-specific bands or primer-dimer [14].
Protocol 2: Utilizing Touchdown PCR for Enhanced Specificity
Touchdown PCR is a powerful technique to increase specificity, especially when the exact Tm is unknown or when dealing with complex templates [15].
- Initial Cycles: Program the thermocycler to start with an annealing temperature 5–10°C above the calculated Tm of the primers.
- Decrement Temperature: Over the next 10–15 cycles, decrease the annealing temperature by 1°C per cycle.
- Final Cycles: Once the temperature "touches down" to the calculated Tm (or about 5°C below it), continue for another 15–20 cycles at this constant temperature.
- Mechanism: The initial high annealing temperature ensures that only the most specific primer-template binding occurs. Any specific product amplified in these early cycles is then preferentially amplified in the subsequent cycles, effectively outcompeting non-specific products [15].
Research Reagent Solutions for Tm-Based Assays
The following reagents and tools are essential for experiments focused on melting temperature and annealing optimization.
| Reagent / Tool | Function in Tm Context |
|---|---|
| High-Fidelity DNA Polymerase (e.g., Q5, Phusion, Pfu) | Engineered for high specificity and fidelity, often used with specialized buffers for robust performance at optimized annealing temperatures [4] [14]. |
| Hot-Start DNA Polymerase | Remains inactive until initial high-temperature step, preventing non-specific priming and primer-dimer formation during reaction setup at low temperatures, which is crucial for Tm-specificity [14] [15]. |
| MgCl₂ Solution | The Mg²⁺ cofactor is critical for polymerase activity and stabilizes primer-template binding. Its concentration must be optimized as it directly affects the observed Tm and reaction fidelity [4] [16]. |
| PCR Additives (DMSO, Betaine, Formamide) | Help lower the effective Tm of the DNA duplex, which is especially useful for denaturing high-GC templates and disrupting secondary structures that can interfere with primer binding [15] [16]. |
| Online Tm Calculators (e.g., IDT OligoAnalyzer, Thermo Fisher Tm Calculator) | Essential tools that use the nearest-neighbor method to compute theoretical Tm based on primer sequence and user-defined buffer conditions, providing the starting point for experimental design [11] [13]. |
| Gradient Thermal Cycler | Instrumental for empirically determining the optimal annealing temperature by running simultaneous reactions across a range of temperatures [14]. |
Advanced Concepts: The Impact of Reaction Components on Observed Tm
The theoretical Tm of a primer is a starting point, but the actual behavior in a PCR tube is modulated by the reaction buffer. Key components include:
- Mg²⁺ Ions: This divalent cation is essential for polymerase activity and is a major stabilizer of the DNA duplex. An increase in Mg²⁺ concentration will raise the observed Tm. It is often necessary to titrate Mg²⁺ concentrations (e.g., from 1.5 mM to 4 mM) to find the optimal specificity and yield [4] [16].
- dNTPs: Deoxynucleotides can chelate Mg²⁺ ions. Therefore, the concentration of dNTPs must be balanced with the Mg²⁺ concentration to ensure free Mg²⁺ is available for duplex stabilization [4].
- Monovalent Cations: Potassium ions (K⁺) from the PCR buffer also help stabilize the DNA duplex and are factored into accurate Tm calculations [11].
This relationship between reaction components and successful amplification is summarized below:
The annealing temperature (Ta) is a critical parameter in the Polymerase Chain Reaction (PCR) that directly controls the specificity of primer binding to the target DNA sequence. It is defined as the temperature used during the primer annealing step of PCR and is dependent on the primer melting temperature (Tm)—the temperature at which 50% of the primer is bound to its perfect complement and 50% is free in solution [17]. When this temperature is not optimally set, it leads to various amplification issues that compromise experimental results, including non-specific binding, primer-dimer formation, and reduced product yield. For researchers, scientists, and drug development professionals, understanding these consequences is essential for developing robust, reproducible PCR-based assays in diagnostic and research applications.
FAQ: Troubleshooting Common PCR Issues
Q1: What are the primary consequences of using an annealing temperature that is too low?
- Non-Specific Amplification: Low annealing temperatures reduce the stringency of primer binding, allowing primers to anneal to similar but off-target sequences throughout the DNA template. This results in multiple unwanted amplification products visible as smearing or multiple bands on an agarose gel [17] [16].
- Primer-Dimer Formation: At low temperatures, primers can anneal to each other via complementary sequences, especially at their 3' ends. These short, double-stranded fragments are then amplified efficiently, consuming reaction reagents and competing with the target amplification [1] [18].
- Reduced Target Yield: As reaction components (dNTPs, enzymes) are diverted to amplify non-specific products and primer-dimers, the yield of the desired specific PCR product is significantly decreased [9].
Q2: What problems occur when the annealing temperature is set too high?
- Failed or Inefficient Amplification: Excessively high annealing temperatures prevent primers from forming stable hybrids with the template DNA, even at the specific target site. This leads to a dramatic reduction in product yield or complete PCR failure, as the polymerase cannot initiate DNA synthesis [17] [16].
- Low Signal Intensity: When amplification does occur, the product yield is often substantially lower because the primer-binding efficiency is compromised. This can lead to weak bands on a gel or high Cq values in quantitative PCR [18].
Q3: How can I quickly determine the optimal annealing temperature for my primers?
The most efficient method is to perform a gradient PCR [17] [16]. Set up identical reactions and use a thermal cycler with a gradient function to test a range of annealing temperatures (e.g., from 55°C to 65°C) in a single run. The optimal temperature is identified as the one that produces the highest yield of the desired specific product with the absence of non-specific bands and primer-dimers [1]. Using the NEB Tm Calculator or similar tools that account for buffer chemistry provides a reliable starting point for this gradient [17].
Q4: My PCR shows multiple bands. How can I increase specificity?
- Increase Annealing Temperature: Raise the temperature in small increments (1-2°C) to increase stringency [1] [19].
- Use Hot-Start DNA Polymerases: These enzymes remain inactive until the initial denaturation step, preventing non-specific priming and primer-dimer formation that can occur during reaction setup at lower temperatures [1] [16].
- Optimize Mg²⁺ Concentration: Excess Mg²⁺ can reduce fidelity and promote non-specific amplification. Titrate Mg²⁺ concentration in 0.5 mM increments, typically between 1.5-4.0 mM, to find the optimal level [20] [19].
- Check Primer Design: Ensure primers are specific, have closely matched Tm values, and lack self-complementarity or long stretches of G/C residues at the 3' end [20] [8].
Q5: What is a universal annealing temperature, and when can it be used?
Some modern PCR systems, such as Invitrogen Platinum DNA polymerases with specialized buffers, are designed to work effectively at a universal annealing temperature of 60°C for a wide range of primers [9]. These buffers contain isostabilizing components that modulate the stability of the primer-template duplex, allowing specific binding even when primer Tm values differ from the set annealing temperature. This innovation simplifies protocol standardization and enables co-cycling of different PCR targets in the same run, saving significant optimization time [9].
Troubleshooting Guide: Diagnosing PCR Problems
The flowchart below outlines a systematic approach to diagnose and resolve common PCR issues related to annealing temperature.
Diagram: A diagnostic flowchart for troubleshooting common PCR issues related to annealing temperature.
Experimental Protocol: Optimizing Annealing Temperature via Gradient PCR
Background and Principle
Gradient PCR is the most reliable empirical method for determining the optimal annealing temperature (Ta) for a specific primer-template combination. It allows simultaneous testing of a temperature range across different tubes in the same run, identifying the Ta that provides the best balance between specificity and yield [16] [18].
Materials and Reagents
Research Reagent Solutions
| Reagent | Typical Final Concentration | Function & Importance |
|---|---|---|
| DNA Polymerase | 0.5–2.5 units/50 µL | Catalyzes DNA synthesis. Hot-Start versions are preferred to prevent pre-cycling activity [20] [1]. |
| 10X Reaction Buffer | 1X | Provides optimal pH and salt conditions (e.g., KCl) for polymerase activity [21]. |
| MgCl₂ or MgSO₄ | 1.5–2.0 mM (initial) | Essential polymerase cofactor. Concentration must be optimized as it stabilizes primer-template binding [20] [21]. |
| dNTP Mix | 200 µM each | Building blocks for new DNA strands. Higher concentrations can reduce fidelity [20]. |
| Forward/Reverse Primers | 0.1–0.5 µM each | Specifically define the target region to be amplified. Well-designed primers (Tm within 5°C of each other) are crucial [20] [8]. |
| Template DNA | 1 pg–1 µg | The DNA containing the target sequence. Quality and quantity must be high and pure [20] [21]. |
| Nuclease-Free Water | Q.S. to volume | Maintains reaction volume and ionic strength without introducing nucleases. |
Step-by-Step Methodology
- Calculate Theoretical Tm: Use a reliable Tm calculator (e.g., NEB Tm Calculator) that considers your specific polymerase and buffer. This provides the estimated Tm for your primer pair [17].
- Define the Gradient Range: Set the thermal cycler's gradient to span approximately 5°C below to 5°C above the calculated lower Tm of your primer pair. For example, if the lower Tm is 58°C, set a gradient from 53°C to 63°C [1] [19].
- Prepare Master Mix: Combine all reaction components except the template in a single tube on ice to ensure homogeneity. Include a negative control (water instead of template).
- Example 50 µL Reaction:
- Aliquot and Run PCR: Dispense the master mix into PCR tubes, add template, and place them in the thermal cycler. Use the cycling conditions below, applying the annealing temperature gradient.
Standard Three-Step Cycling Conditions [20]
| Cycle Step | Temperature | Duration | Notes |
|---|---|---|---|
| Initial Denaturation | 95°C | 2 minutes | Fully denatures complex DNA. |
| Denaturation | 95°C | 15–30 seconds | 25–35 cycles. |
| Annealing | Gradient (e.g., 53–63°C) | 15–30 seconds | This step uses the gradient. |
| Extension | 68°C (for Taq) | 1 min/kb | |
| Final Extension | 68°C | 5 minutes | Ensures all amplicons are fully extended. |
- Analyze Results: Separate the PCR products by agarose gel electrophoresis. Identify the annealing temperature that produces a single, strong band of the expected size with minimal to no non-specific products or primer-dimers [18].
Additional Optimization Parameters
While annealing temperature is crucial, other factors interact with it and can be co-optimized for perfect results.
Summary of Key Optimization Parameters [20] [1] [21]
| Parameter | Recommended Range | Effect of Low/High Concentration | Optimization Strategy |
|---|---|---|---|
| Mg²⁺ Concentration | 1.5 - 2.0 mM (initial) | Low: No product. High: Non-specific bands, lower fidelity. | Titrate in 0.5 mM increments from 1.0 to 4.0 mM. |
| Primer Concentration | 0.1 - 0.5 µM each | Low: Low yield. High: Non-specific binding, primer-dimers. | Test concentrations from 0.05 to 1 µM. |
| dNTP Concentration | 200 µM each | Low: Reduced yield, higher fidelity. High: Increased yield but can reduce fidelity. | Use balanced dNTP solutions; adjust for long or fidelity-critical PCR. |
| Template Quantity | 10 pg - 1 µg | Low: No product. High: Non-specific products. | Dilute or concentrate template based on complexity (genomic vs. plasmid). |
| Cycle Number | 25 - 35 cycles | Low: Insufficient product. High: Accumulation of errors & non-specific products. | Use the minimum cycles needed for adequate yield. |
| Extension Time | 1 min/kb | Too Short: Incomplete products. Too Long: Can promote non-specificity. | Increase for longer targets (>3 kb) or when using high cycle numbers. |
Using PCR Additives: For difficult templates (e.g., high GC content), additives can be incorporated to improve results. DMSO (2-10%) helps denature GC-rich secondary structures [16] [21]. Betaine (0.5 M - 2.5 M) can homogenize the melting stability of DNA, making amplification of GC-rich regions more efficient [16]. Note that these additives can lower the effective Tm of the primers, which may necessitate a slight adjustment of the optimized annealing temperature [1].
FAQs and Troubleshooting Guides
Frequently Asked Questions (FAQs)
Q1: What is the most common reason for non-specific amplification in a standard PCR assay? The most common cause is an annealing temperature (Ta) that is set too low, which reduces the stringency of primer-template binding and allows primers to anneal to off-target sites, producing unintended products. [16] An incorrect annealing temperature is also a primary cause of no or low amplification yield. [1]
Q2: How does GC content affect PCR amplification, and what can be done to amplify GC-rich templates? GC-rich sequences (e.g., >60-65%) form strong hydrogen bonds and stable secondary structures that hinder DNA denaturation and primer annealing. [22] To overcome this, use buffer additives like DMSO (typically 2-10%) or betaine (1-2 M), which help denature these structures. [22] [16] Additionally, increasing denaturation temperature and time, and using DNA polymerases with high processivity are recommended. [23] [1]
Q3: Why is Mg2+ concentration so critical for PCR, and what are the consequences of an incorrect concentration? Magnesium ions (Mg2+) are an essential cofactor for all thermostable DNA polymerases. [16] The typical optimal concentration ranges from 1.5 to 2.0 mM, but this requires optimization. [16]
- Low Mg2+: Results in reduced enzyme activity and poor reaction yield. [16]
- High Mg2+: Promotes non-specific amplification and lowers reaction fidelity by reducing the polymerase's specificity for correct base pairing. [1] [16]
Q4: When should I use a hot-start DNA polymerase? Hot-start DNA polymerases are recommended to enhance specificity. [1] They remain inactive until a high-temperature activation step, thereby preventing non-specific amplification and primer-dimer formation that can occur during reaction setup at lower temperatures. [16]
Q5: How does primer length impact PCR success? Primer length is a key determinant of specificity. [16] Optimal primers are generally 18-30 bases long. [24] Shorter primers may reduce specificity, while longer primers can reduce annealing efficiency. [16] The 3' end of the primer should be stable; a "GC clamp" where the last five bases are rich in G and C can enhance stability and efficient extension initiation. [16] [24]
Troubleshooting Common PCR Problems
| Problem | Possible Causes | Recommendations |
|---|---|---|
| No/Low Amplification Yield | - Suboptimal Annealing Temperature: Too high for primer binding.- Poor Template Quality/Purity: Degraded DNA or presence of inhibitors (e.g., phenol, EDTA).- Insufficient Mg2+ Concentration: Limits polymerase activity.- Complex Template: GC-rich regions or secondary structures.- Insufficient Number of Cycles: If starting template copy number is very low. | - Lower annealing temperature in 2-3°C increments. [23] [1]- Re-purify template DNA; dilute to reduce inhibitors. [1] [16] Use polymerases with high inhibitor tolerance. [1]- Optimize Mg2+ concentration. [16]- Use additives (DMSO, betaine) and increase denaturation time/temperature. [23] [1] [22]- Increase cycle number up to 40 for low-copy templates. [23] [1] |
| Non-Specific Amplification / Multiple Bands | - Suboptimal Annealing Temperature: Too low, allowing off-target binding.- Excess Mg2+ Concentration: Reduces enzyme fidelity and stringency.- Excess Primers or DNA Polymerase.- High Number of Cycles.- Problematic Primer Design: e.g., primers with complementary sequences. | - Increase annealing temperature in 2-3°C increments. [23] [1] Use a gradient thermal cycler. [23]- Reduce Mg2+ concentration. [1]- Optimize primer and enzyme concentrations. [1]- Reduce number of cycles. [1]- Redesign primers to avoid inter-primer homology and secondary structures. [1] [24] Use hot-start DNA polymerase. [1] [16] |
| Poor Fidelity (High Error Rate) | - Low-Fidelity DNA Polymerase.- Excess Mg2+ Concentration.- Unbalanced dNTP Concentrations.- High Number of Cycles. | - Use high-fidelity polymerases with proofreading (3'→5' exonuclease) activity (e.g., Pfu, KOD). [16]- Optimize and potentially lower Mg2+ concentration. [1]- Ensure equimolar concentrations of all four dNTPs. [1]- Reduce number of cycles and/or increase input DNA. [1] |
Experimental Protocols for Optimization
Protocol 1: Optimizing Annealing Temperature Using Gradient PCR
Background: The annealing temperature (Ta) is critical for specificity. The optimal Ta is often 3-5°C below the calculated melting temperature (Tm) of the primers, but empirical testing is required. [23] [16] Gradient PCR allows testing a range of temperatures in a single run.
Materials:
- Thermal cycler with gradient functionality. [23] [25]
- Standard PCR reagents: DNA template, primers, DNA polymerase, dNTPs, buffer.
- Gel electrophoresis equipment for analysis.
Method:
- Calculate Primer Tm: Use the formula or software provided with your polymerase. A simple formula is:
Tm = 4(G + C) + 2(A + T). [23] - Set Up Reaction: Prepare a master mix containing all PCR components and aliquot into tubes or a plate.
- Program Thermal Cycler: Set the denaturation and extension steps per your protocol. For the annealing step, set the gradient to span a range, for example, from 5°C below to 5°C above the calculated Tm. [23] [25]
- Run PCR and Analyze: After amplification, separate products by gel electrophoresis. The optimal annealing temperature produces a single, intense band of the expected size with minimal to no non-specific products or primer-dimers. [23]
Protocol 2: Amplifying GC-Rich Templates
Background: This protocol provides a systematic, multi-pronged approach to overcome challenges posed by templates with GC content >60%. [22]
Materials:
- DNA polymerases with high processivity, tested for GC-rich amplification. [1] [22]
- PCR additives: DMSO, betaine. [22] [16]
- Optional: GC Enhancer solution (commercially available with some polymerase systems). [1]
Method:
- Polymerase Selection: Begin with a DNA polymerase known for robust performance on GC-rich or difficult templates. [22]
- Incorporate Additives: Add DMSO at a final concentration of 2-10% (v/v) or betaine at 1-2 M. [22] [16] Note: High concentrations of additives can weaken primer binding, so annealing temperature may need to be lowered slightly, and polymerase amount may need to be increased. [1]
- Adjust Thermal Profile:
- Increase Denaturation Temperature/Time: Use a denaturation temperature of 98°C and/or extend the denaturation time to ensure complete strand separation. [23] [1]
- Use a Two-Step PCR: Combine the annealing and extension steps into one, performed at 68-72°C, which can shorten the time the template has to re-form secondary structures. [23]
- Optimize Primer Design: If possible, design longer primers (e.g., 24-30 bases) with a Tm close to 65-75°C to promote specific binding despite the challenging template. [24]
Table 1: Optimal Ranges for Key Primer Design Parameters
| Parameter | Optimal or Recommended Range | Rationale & Consequences of Deviation |
|---|---|---|
| Length | 18 - 30 bases [16] [24] | Shorter primers reduce specificity; longer primers may reduce annealing efficiency. [16] |
| GC Content | 40% - 60% [16] [24] | Lower GC: weak binding; Higher GC: promotes secondary structures and non-specific binding. [16] [24] |
| Melting Temperature (Tm) | 55°C - 75°C; primers within 1-2°C of each other [16] [24] | Ensures both forward and reverse primers anneal efficiently at the same temperature. |
| GC Clamp | 3' end should end with G or C (or have 3/5 G/C in last 5 bases) [16] [24] | G and C bases form stronger hydrogen bonds, increasing priming efficiency and stability at the critical 3' end. |
Table 2: Recommended Concentrations for Common PCR Additives
| Additive | Typical Final Concentration | Primary Function & Application |
|---|---|---|
| DMSO (Dimethyl Sulfoxide) | 2% - 10% (v/v) [16] | Lowers DNA Tm and disrupts secondary structures, especially beneficial for GC-rich templates. [22] [16] |
| Betaine | 1.0 M - 2.0 M [16] | Homogenizes the thermodynamic stability of DNA; equalizes the melting of GC- and AT-rich regions, improving amplification of GC-rich and long targets. [16] |
Signaling Pathways and Workflow Visualizations
PCR Troubleshooting Decision Tree
GC-Rich PCR Optimization Workflow
The Scientist's Toolkit: Research Reagent Solutions
Table 3: Essential Reagents for PCR Optimization
| Reagent / Tool | Function & Application in Optimization |
|---|---|
| High-Fidelity DNA Polymerase (e.g., Pfu, KOD) | Possesses 3'→5' proofreading (exonuclease) activity, significantly reducing error rates for applications like cloning and sequencing. [16] |
| Hot-Start DNA Polymerase | Remains inactive until a high-temperature activation step, preventing non-specific amplification and primer-dimer formation during reaction setup. [1] [16] |
| Gradient Thermal Cycler | A vital instrument that allows simultaneous testing of multiple different annealing or denaturation temperatures across the thermoblock in a single run, drastically reducing optimization time. [23] [25] |
| PCR Additives (DMSO, Betaine) | Chemical tools to assist in denaturing complex templates. DMSO lowers DNA Tm, while betaine homogenizes DNA stability, both crucial for amplifying GC-rich sequences. [22] [16] |
| Magnesium Salt Solutions (MgCl2, MgSO4) | The essential cofactor for DNA polymerases. Its concentration must be titrated for each primer-template system as it critically affects enzyme activity, specificity, and fidelity. [1] [16] |
| FTA Cards | A solid-phase system for rapid, simple nucleic acid extraction and purification from complex samples (e.g., bacteria), suitable for integration into point-of-care workflows. [26] |
Core Concepts: Specificity and Sensitivity in PCR
What is the fundamental trade-off between specificity and sensitivity in PCR optimization?
In PCR, specificity refers to the assay's ability to amplify only the intended target sequence, while sensitivity is the lowest amount of target sequence that can be reliably detected. These two parameters exist in a delicate balance, often influenced by reaction components and cycling conditions. The annealing temperature (Ta) is one of the most critical factors managing this balance. If the annealing temperature is too low, primers may bind to non-target sequences, generating nonspecific products and reducing specificity. If the annealing temperature is too high, primer binding efficiency decreases, reducing sensitivity and overall yield [27] [4] [1].
Why is finding the "optimal window" crucial for assay performance?
The "optimal window" is the range of conditions, primarily annealing temperature, where both high specificity and sufficient sensitivity are achieved. Operating within this window ensures that your assay produces a strong, correct signal without false positives from nonspecific amplification or false negatives from inefficient priming. This is especially critical for diagnostic applications, SNP detection, and quantitative PCR, where results must be both accurate and reproducible [27] [4]. Proper optimization and validation provide the data to demonstrate that an assay performs with the required specificity and sensitivity for its intended purpose [27].
The Optimization Workflow
The following diagram illustrates the systematic approach to balancing specificity and sensitivity in your PCR assay.
Key Optimization Parameters and Their Effects
The table below summarizes the primary parameters you can adjust to shift the balance between specificity and sensitivity in your assay.
| Parameter | Effect on Specificity | Effect on Sensitivity | Recommended Adjustment |
|---|---|---|---|
| Annealing Temperature (Ta) | Higher Ta increases specificity | Lower Ta increases sensitivity | Optimize in 1-2°C increments; start 3-5°C below primer Tm [27] [1] |
| Primer Concentration | High concentration decreases specificity (increases primer-dimer risk) | Low concentration decreases sensitivity | Titrate from 50-500 nM; use lowest concentration giving good yield [27] [8] |
| Mg²⁺ Concentration | High concentration decreases specificity (promotes non-specific binding) | Low concentration decreases sensitivity (reduces polymerase activity) | Optimize in 0.2-1.0 mM increments; typically 1.5-2.0 mM [28] [1] |
| Cycle Number | High cycle number decreases specificity (accumulates non-specific products) | Low cycle number decreases sensitivity | Use minimum cycles needed for detection (typically 25-35) [1] |
| Polymerase Type | Hot-start enzymes increase specificity | Enzymes with high processivity increase sensitivity | Choose based on primary need: fidelity vs. yield [28] [1] |
| Template Quality | Poor quality can decrease specificity | Poor quality severely decreases sensitivity | Verify 260/280 ratio; ensure no inhibitors present [1] |
Troubleshooting Common Scenarios
What should I do when I see multiple bands or smears on my gel?
Multiple bands or smears indicate low specificity, often due to non-specific priming. To address this:
- Increase the annealing temperature in 1-2°C increments [1] [29]
- Use a hot-start DNA polymerase to prevent enzyme activity during reaction setup [28] [1]
- Reduce primer concentration (try 100-200 nM) to minimize mispriming [27]
- Optimize Mg²⁺ concentration downward, as excess Mg²⁺ promotes non-specific binding [28] [1]
- Shorten extension time to favor amplification of the specific target over longer non-specific products [4]
How can I improve signal strength when my target amplification is weak?
Weak target signal indicates low sensitivity. To enhance sensitivity:
- Decrease annealing temperature in 2-3°C increments to improve primer binding efficiency [1] [29]
- Increase primer concentration within the 200-500 nM range [27]
- Add PCR enhancers such DMSO (1-10%), formamide (1.25-10%), or Betaine (0.5-2.5 M) for difficult templates [8]
- Increase template amount within the recommended range (1-100 ng genomic DNA) [1]
- Increase cycle number by 5-10 cycles for low-copy targets [1] [29]
My negative control shows amplification. What could be causing this?
Amplification in negative controls indicates contamination:
- Use new reagents, particularly polymerase and buffer [29]
- Prepare fresh primer dilutions from stock solutions [28]
- Set up reactions in a dedicated, UV-treated workspace [30] [1]
- Use sterile technique with filtered tips and clean gloves [30] [29]
- Include uracil-N-glycosylase (UNG) in reactions to carryover contamination from previous amplifications [1]
Experimental Protocol: Annealing Temperature Optimization
Gradient PCR Optimization Method
This protocol provides a systematic approach to determine the optimal annealing temperature for your specific primer-template system.
Materials Needed:
- Thermal cycler with gradient functionality
- PCR reagents: buffer, dNTPs, MgCl₂, primers, DNA polymerase, template DNA
- Gel electrophoresis equipment or real-time PCR system for analysis
Procedure:
- Prepare Master Mix: Combine all reaction components except template in a single tube according to your standard protocol. Include a positive control template if available.
- Set Up Gradient: Program your thermal cycler with an annealing temperature gradient spanning approximately 10°C (e.g., 55-65°C). The exact range should be based on your primers' calculated Tm values [27].
- Run PCR: Aliquot the master mix into individual tubes and run the gradient PCR program.
- Analyze Results:
- For conventional PCR: Run products on an agarose gel. The optimal temperature typically produces a single, intense band of the expected size without smearing or multiple bands [27] [8].
- For qPCR: Examine amplification curves and melting curves. The optimal temperature shows early Cq values with a single peak in the melt curve [27].
- Refine if Necessary: If the optimal window is broad, run a finer gradient (1-2°C increments) around the best temperature from the initial test.
Validation:
- Confirm product identity by sequencing or restriction digest
- Test assay sensitivity with serial dilutions of template
- Verify specificity against negative templates (closely related but non-target sequences)
Research Reagent Solutions
The table below outlines essential reagents and their roles in achieving the specificity-sensitivity balance.
| Reagent Category | Specific Examples | Function in Optimization |
|---|---|---|
| DNA Polymerases | Taq polymerase, Q5 High-Fidelity, Phusion, Hot-start variants | Catalyze DNA synthesis; high-fidelity enzymes increase specificity; hot-start enzymes prevent non-specific amplification during setup [28] [1] |
| Buffer Systems | Mg²⁺-free buffers, GC-rich buffers, proprietary enhancer systems | Provide optimal ionic environment; allow precise Mg²⁺ titration; specialized buffers help with difficult templates [1] [8] |
| Enhancer Additives | DMSO, Betaine, Formamide, BSA, commercial enhancer solutions | Reduce secondary structure in template; improve amplification efficiency of GC-rich targets; stabilize reaction components [1] [8] |
| Magnesium Salts | MgCl₂, MgSO₄ | Cofactor for DNA polymerase; concentration critically affects both primer annealing and enzyme activity [28] [8] |
| Detection Chemistries | SYBR Green, TaqMan probes, EvaGreen, molecular beacons | Enable real-time monitoring; probe-based chemistries increase specificity; dye-based methods offer flexibility [30] [27] |
Advanced Techniques for Challenging Assays
When should I consider touch-down PCR?
Touch-down PCR is particularly valuable when:
- You have limited information about the optimal annealing temperature
- Your primer set has varying Tm values
- You're working with degenerate primers
- Standard optimization fails to yield sufficient specificity
In this technique, the annealing temperature starts high (for maximum specificity) and gradually decreases in subsequent cycles (to maintain sensitivity). This approach preferentially enriches the desired specific product early in the amplification process [1].
How can High-Resolution Melting (HRM) analysis help with specificity assessment?
HRM is a powerful post-PCR analysis method that detects sequence variations based on dissociation curves of amplified products. In a recent study comparing diagnostic methods for malaria, HRM analysis successfully differentiated Plasmodium species with high sensitivity and specificity, demonstrating complete agreement with sequencing results in tested samples [31]. HRM provides a closed-tube method for assessing amplification specificity without additional gel electrophoresis or processing.
From Theory to Bench: A Step-by-Step Protocol for Determining Optimal Annealing Temperature
The melting temperature (Tm) of a primer is the temperature at which 50% of the DNA duplex dissociates into single strands. Accurate Tm calculation is a cornerstone of polymerase chain reaction (PCR) optimization, directly influencing the specificity and efficiency of amplification by determining the optimal annealing temperature [23] [32]. For research aimed at optimizing annealing temperature for PCR specificity, selecting the appropriate Tm calculation method is a critical first step. This guide provides a detailed comparison of the three primary methods for calculating primer Tm, enabling researchers to choose and apply the right tool for their experimental needs.
FAQ: Primer Melting Temperature (Tm)
What is primer melting temperature (Tm) and why is it critical for PCR specificity?
The melting temperature (Tm) is a fundamental property of a DNA primer, defined as the temperature at which half of the primer molecules are hybridized to their complementary sequence and half are in a single-stranded state [33]. In PCR, the annealing temperature is set based on the Tm to promote specific binding of primers to the target DNA sequence. Using an annealing temperature too close to or below the actual Tm can lead to non-specific binding and amplification of off-target sequences, compromising experimental results [23] [1]. Accurate Tm calculation is therefore essential for designing highly specific PCR assays.
What are the main methods for calculating primer Tm?
The three most common methods for calculating primer Tm are the Rule-of-Thumb (Wallace Rule), the Salt-Adjustment method, and the Nearest-Neighbor method. These methods vary significantly in their complexity and the factors they consider, leading to different levels of accuracy suitable for various applications [32] [33].
How do I know which Tm calculation method to use for my experiment?
The choice of method depends on your application's requirement for accuracy and the nature of your PCR experiment. The table below provides a clear guideline for method selection.
Table 1: Guidelines for Selecting a Tm Calculation Method
| Method | Best Used For | When to Avoid |
|---|---|---|
| Rule-of-Thumb | Quick estimations, initial primer screening, simple PCR with standard conditions. | Complex templates (GC-rich), reactions with additives (DMSO), or when high accuracy is critical. |
| Salt-Adjusted | Routine PCR where buffer ion concentration is a key variable. | When divalent cations (e.g., Mg²⁺) are present or for maximum possible accuracy. |
| Nearest-Neighbor | Critical applications like qPCR, cloning, mutagenesis, and with difficult templates (GC-rich). | When a quick, simple calculation is needed and reaction conditions are standard and simple. |
My PCR results show non-specific bands. Could an inaccurate Tm be the cause?
Yes, non-specific amplification is a classic symptom of a suboptimal annealing temperature often stemming from an inaccurate Tm estimate [1] [4]. If non-specific bands are observed, the annealing temperature should be increased stepwise by 2–3°C to enhance stringency and specificity [23]. This problem is more common when using simpler Tm calculation methods for complex reactions. Verifying your Tm using the more accurate Nearest-Neighbor method and ensuring your primer sequences are specific to your target are recommended troubleshooting steps [34] [1].
Methods for Calculating Primer Tm
Rule-of-Thumb (Wallace Rule) Method
This is the simplest and most straightforward method for estimating Tm, based solely on the primer's length and base composition [32].
- Formula:
Tm = 2 °C * (A + T) + 4 °C * (G + C)[32] Where A, T, G, and C represent the count of each respective nucleotide in the primer. - Example Calculation:
For a primer with 6 A, 6 T, 3 G, and 3 C bases:
Tm = 2°C * (6 + 6) + 4°C * (3 + 3) = 2°C * (12) + 4°C * (6) = 24°C + 24°C = 52°C[32] - Typical Annealing Temperature: Typically 3–5°C below the calculated Tm [23].
Salt-Adjustment Method
This method improves upon the Wallace Rule by accounting for the concentration of monovalent ions (like Na⁺ or K⁺), which stabilize the DNA duplex and thereby increase the Tm [32] [33].
- Formula:
Tm = Tm (Wallace) + 16.6 * log([Na⁺])[32] - Key Consideration: While this method includes salt correction, Dr. Richard Owczarzy and colleagues note that divalent cations like magnesium (Mg²⁺) have an even more profound effect on Tm. Changes in Mg²⁺ concentration in the millimolar range can be significant, and sophisticated models are often needed for accurate prediction [33].
Nearest-Neighbor Method
This is the most sophisticated and accurate method for calculating Tm. It uses thermodynamic parameters to account for the stability of each base pair relative to its neighbors (base stacking), as well as the concentrations of both primers and salts [23] [33].
- Basis: Considers the enthalpy (ΔH°) and entropy (ΔS°) changes for the helix-coil transition of each dinucleotide pair in the sequence [33].
- Calculation: Due to its complexity, this calculation is almost always performed using specialized algorithms found in online tools and software (e.g., IDT's OligoAnalyzer, NCBI Primer-BLAST) [23] [33] [8].
- Advantage: Provides the most reliable Tm estimate for critical applications and is less of a "rule of thumb" and more of a precise prediction [33].
Table 2: Comparison of Primer Tm Calculation Methods
| Feature | Rule-of-Thumb | Salt-Adjusted | Nearest-Neighbor |
|---|---|---|---|
| Formula | Tm = 2(A+T) + 4(G+C) |
Tm (Wallace) + 16.6log[Na⁺] |
Based on thermodynamic parameters |
| Factors Considered | Primer length, GC content | Primer length, GC content, monovalent salt | Sequence context, salt concentration, primer concentration [33] |
| Ease of Use | Very easy, can be done manually | Moderate, requires knowledge of buffer | Difficult, requires software or online tools [33] |
| Accuracy | Low, a rough estimate | Moderate | High [33] |
| Best For | Initial primer design, simple PCR | Standard PCR with defined buffers | Critical applications (qPCR, cloning), difficult templates [23] [34] |
The relationships and selection logic between these methods can be visualized in the following workflow:
Troubleshooting Guide: Common Primer Tm and Annealing Issues
Problem: No PCR Product or Low Yield
- Potential Cause: Annealing temperature is too high, preventing the primer from binding to the template [23] [1].
- Solution:
- Verify Tm Calculation: Recalculate the Tm using the Nearest-Neighbor method for higher accuracy [33].
- Lower Annealing Temperature: Decrease the annealing temperature in increments of 2–3°C. A general starting point is 3–5°C below the calculated Tm [23].
- Check Primer and Template Quality: Ensure primers have not degraded and the template DNA is of sufficient quality and concentration [1].
Problem: Non-Specific Amplification (Multiple Bands or Smear)
- Potential Cause: Annealing temperature is too low, allowing primers to bind to non-target sequences with partial complementarity [23] [4].
- Solution:
- Increase Annealing Temperature: Raise the temperature in increments of 2–3°C to increase stringency [23] [1].
- Use a Hot-Start DNA Polymerase: This prevents enzyme activity at low temperatures, reducing non-specific amplification during reaction setup [1].
- Optimize Mg²⁺ Concentration: High Mg²⁺ concentrations can stabilize non-specific primer-template binding. Titrate Mg²⁺ to find the optimal concentration [6] [1].
- Apply Touchdown PCR: Start with an annealing temperature higher than the estimated Tm and gradually decrease it over subsequent cycles. This enriches the desired target early in the reaction [1].
Problem: PCR Results are Not Reproducible
- Potential Cause: Inconsistent Tm calculation or failure to account for all reaction components.
- Solution:
- Standardize the Calculation Method: Use the same, most accurate method (preferably Nearest-Neighbor) for all primer designs [33].
- Account for Additives: Be aware that co-solvents like DMSO and formamide lower the effective Tm. For example, 10% DMSO can decrease Tm by approximately 5.5–6.0°C, and the annealing temperature must be adjusted downward accordingly [23] [6].
- Ensure Homogeneous Reagents: Mix all stock solutions and the final reaction mixture thoroughly to avoid concentration gradients [1].
The Scientist's Toolkit: Essential Reagents for PCR Optimization
Table 3: Key Research Reagent Solutions for PCR Optimization
| Reagent / Material | Function / Role in PCR Optimization |
|---|---|
| Thermostable DNA Polymerase | Enzyme that synthesizes new DNA strands. Choice depends on need for fidelity (e.g., Pfu) versus speed (e.g., Taq) [23] [4]. |
| dNTPs | Deoxynucleoside triphosphates (dATP, dCTP, dGTP, dTTP) are the building blocks for DNA synthesis. Use balanced equimolar concentrations to minimize errors [1]. |
| MgCl₂ or MgSO₄ | Magnesium ions are essential cofactors for DNA polymerase activity. Concentration must be optimized as it profoundly affects specificity and yield [6] [1]. |
| PCR Buffer | Provides the optimal pH and salt conditions (e.g., K⁺) for polymerase activity. Some specialized buffers allow for universal annealing temperatures [23]. |
| DMSO | Additive that helps denature DNA secondary structures, particularly useful for amplifying GC-rich templates [23] [6]. |
| Betaine | Additive that can help amplify GC-rich regions by equalizing the stability of AT and GC base pairs [23]. |
| Gradient Thermal Cycler | Instrument that allows testing a range of annealing temperatures simultaneously in a single run, drastically speeding up optimization [23]. |
What is Gradient PCR and how does it work?
Gradient PCR is a specialized technique that allows you to simultaneously test a range of annealing temperatures in a single polymerase chain reaction (PCR) run [35]. Unlike conventional thermal cyclers that maintain one uniform temperature across all wells during the annealing step, a gradient thermal cycler applies a precise temperature differential across its block [36]. For example, if you set a gradient from 55°C to 65°C across a 96-well block, the instrument will calculate and maintain a unique, precise temperature for each column of wells [35] [36]. This enables researchers to rapidly identify the optimal annealing temperature for a primer-template pair without performing multiple sequential experiments, saving significant time and reagents [35] [36].
The technology behind gradient thermal cyclers relies on sophisticated Peltier elements and thermal sensing systems that establish and maintain the set temperature differential across the block [36]. However, traditional gradient blocks with heating/cooling elements only at each end may produce a sigmoidal temperature curve rather than a perfectly linear gradient [37]. More advanced systems feature multiple independently controlled blocks (e.g., VeriFlex technology with three or more segmented blocks) for more precise temperature control across different zones [37].
Why is annealing temperature optimization critical for PCR specificity?
The annealing temperature is arguably the most critical variable in PCR optimization as it dictates the stringency of primer-template hybridization [36]. When the annealing temperature is too low, primers may bind non-specifically to partially homologous sequences, leading to multiple amplification products or primer-dimers [1] [38]. Conversely, if the annealing temperature is too high, primer binding may be insufficient, resulting in low yield or complete PCR failure [1] [39].
The melting temperature (Tm) of a primer—the temperature at which 50% of the primer-template duplex dissociates—provides a theoretical starting point for annealing temperature selection [40] [23]. However, the actual optimal annealing temperature (Ta) often differs from the calculated Tm due to influences from reagent concentrations, pH, salt conditions, and the presence of additives like DMSO [40] [23]. Gradient PCR empirically determines this optimal temperature by testing a practical range in a single experiment, ensuring maximum specificity and yield [35] [36].
Table 1: Common PCR Problems Related to Annealing Temperature and Their Solutions
| Problem | Possible Causes | Recommended Solutions |
|---|---|---|
| No PCR product | Annealing temperature too high [1] [38] | Lower Ta by 2-5°C or use gradient PCR to find optimal temperature [39] |
| Multiple non-specific bands | Annealing temperature too low [1] [38] | Increase Ta by 2-5°C or use gradient PCR [39]; Use hot-start polymerase [1] |
| Primer-dimer formation | Low Ta causing primer self-annealing [1] | Increase Ta; optimize primer concentration [1]; Use hot-start polymerase [1] |
| Weak band intensity | Suboptimal Ta [1] | Use gradient PCR to find Ta giving maximum yield [35] |
| Smearing | Excessively low Ta [36] | Increase Ta incrementally; optimize Mg2+ concentration [1] [39] |
How do I set up a gradient PCR experiment?
Step 1: Calculate Primer Melting Temperatures
Begin by calculating the Tm for both forward and reverse primers using appropriate software or the nearest-neighbor method [23]. Ensure both primers have Tms within 5°C of each other [40].
Step 2: Determine the Gradient Range
Set your initial gradient range to approximately 5°C below and above the calculated Tm of your primers [41] [36]. For example, if your primer Tm is 60°C, set a gradient from 55°C to 65°C.
Step 3: Prepare Reaction Mixture
Prepare a master mix containing all PCR components: buffer, dNTPs, DNA polymerase, template DNA, and primers [35]. Distribute equal aliquots across the wells that will be subjected to different temperatures in your gradient block.
Step 4: Program Thermal Cycler
Program your thermal cycler with standard denaturation and extension steps, but select the gradient option for the annealing step. Input your desired high and low temperature limits [35] [36]. The instrument will automatically calculate and apply the temperature gradient across the designated wells.
Step 5: Analyze Results
After PCR completion, analyze the products by gel electrophoresis. Identify the temperature that produces the strongest, cleanest band of the expected size with minimal non-specific amplification [35].
Table 2: Key Thermal Cycling Parameters for Gradient PCR
| Parameter | Typical Settings | Special Considerations |
|---|---|---|
| Initial Denaturation | 94-98°C for 1-3 minutes [23] | Longer times (up to 5 min) for GC-rich templates [1] [23] |
| Denaturation Cycle | 94-98°C for 15-30 seconds [23] | Higher temperatures (98°C) for GC-rich templates [23] |
| Annealing Gradient | 30-60 seconds [23] | Range typically spans 10-12°C across the block [36] |
| Extension | 68-72°C; 1 min/kb for Taq polymerase [23] | 2 min/kb for high-fidelity enzymes like Pfu [23] |
| Cycle Number | 25-35 cycles [1] [23] | Up to 40 cycles for low copy number targets [1] [23] |
| Final Extension | 5-15 minutes at 68-72°C [1] [23] | Essential for complete amplification and A-tailing for TA cloning [23] |
What are the essential reagents and equipment for successful gradient PCR?
Research Reagent Solutions
Table 3: Essential Materials for Gradient PCR Experiments
| Reagent/Equipment | Function/Purpose | Optimization Tips |
|---|---|---|
| High-quality DNA polymerase | Catalyzes DNA synthesis; hot-start versions reduce non-specific amplification [1] | Choose based on fidelity, speed, and template requirements [1] [39] |
| Primers with appropriate Tm | Specifically anneal to flanking regions of target DNA [1] | Design primers with Tms within 5°C of each other [40]; avoid self-complementarity [1] |
| Magnesium chloride (MgCl₂) | Cofactor for DNA polymerase activity [1] [38] | Optimize concentration (typically 1.5-2.5 mM); excess causes non-specificity [1] [38] |
| PCR additives (DMSO, betaine) | Improve amplification of difficult templates (GC-rich regions) [1] | Use lowest effective concentration; DMSO decreases Tm by 5-6°C [23] |
| Gradient thermal cycler | Applies precise temperature gradient across sample block [36] | Verify temperature uniformity; consider units with multiple independent blocks [41] [37] |
| Template DNA | Source of target sequence for amplification [1] | Use 1 pg-10 ng for plasmid DNA; 1 ng-1 μg for genomic DNA [39] |
| dNTP mixture | Building blocks for DNA synthesis [1] | Use balanced equimolar concentrations to maintain fidelity [1] [39] |
What troubleshooting approaches can help with gradient PCR problems?
Problem: Inconsistent Results Across Gradient Columns
Possible Cause: Uneven temperature distribution across the thermal block [41]. Solution: Verify your thermal cycler's temperature calibration using a temperature verification kit [37]. Ensure the instrument is properly maintained and calibrated regularly.
Problem: Poor Amplification Across All Temperatures
Possible Causes:
- Primer design issues [1] [39]
- Insufficient template quality or quantity [1] [38]
- Inhibitors in the reaction [1] [39] Solutions:
- Verify primer specificity and design using appropriate software [1]
- Check template DNA integrity by gel electrophoresis [1] [38]
- Repurify template DNA to remove potential inhibitors [1] [39]
Problem: Non-specific Amplification Persists at All Temperatures
Possible Causes:
- Primer concentration too high [1] [39]
- Magnesium concentration excessive [1] [38]
- Insufficiently stringent conditions [1] Solutions:
- Optimize primer concentration (typically 0.1-1 μM) [1]
- Titrate Mg2+ concentration in 0.2-1 mM increments [1] [39]
- Consider using hot-start DNA polymerase [1] [39]
- Add adjuncts like DMSO or formamide to enhance specificity [1]
Can I use gradient PCR for applications beyond annealing temperature optimization?
While primarily used for annealing temperature optimization, gradient PCR has several advanced applications:
Extension Temperature Optimization
Some DNA polymerases perform differently at various extension temperatures. A gradient can help identify the optimal extension temperature for specific enzyme-template combinations, particularly important for long or complex amplicons [36].
Denaturation Temperature Optimization
For templates with extreme GC content or secondary structures, a denaturation temperature gradient can help identify the minimal temperature needed for complete strand separation while maintaining enzyme activity [36].
Enzyme Compatibility Testing
When evaluating new DNA polymerases or master mixes, a gradient experiment can quickly assess performance across a thermal range, helping to establish optimal cycling conditions for specific applications [36].
Multiplex PCR Optimization
Gradient PCR is invaluable for optimizing multiplex reactions where multiple primer pairs with different Tms must function efficiently under a single annealing temperature [36].
Are there alternatives to gradient PCR for annealing temperature optimization?
While gradient PCR is highly efficient for annealing temperature optimization, several alternatives exist:
Universal Annealing Temperature Systems
Some specialized DNA polymerases (e.g., Invitrogen Platinum enzymes) feature reaction buffers with isostabilizing components that allow primer-template annealing at a universal temperature of 60°C, even with primers of different melting temperatures [9]. This innovation can circumvent the need for extensive annealing temperature optimization.
Traditional Sequential Testing
Before gradient thermal cyclers were available, researchers performed multiple individual PCR reactions, each with a different annealing temperature [36]. This approach is significantly more time-consuming and reagent-intensive but can be used if gradient capability is unavailable.
Touchdown PCR
Touchdown PCR begins with an annealing temperature higher than the estimated Tm and gradually decreases it in subsequent cycles. This method preferentially amplifies specific products early in the reaction before non-specific binding can occur [1].
FAQs
How wide should my initial temperature gradient be?
For initial optimization, a gradient spanning 10-12°C (typically 5°C above and below the calculated Tm) is recommended [41] [36]. Once you identify a promising range, a subsequent narrower gradient (2-3°C range) can pinpoint the optimal temperature more precisely [36].
Can I test other parameters alongside temperature in gradient PCR?
Yes, gradient PCR can simultaneously optimize multiple parameters. For example, you can test different Mg2+ concentrations in rows of the plate while applying a temperature gradient across columns [35] [41]. This multidimensional approach can significantly accelerate optimization.
What are the limitations of gradient PCR?
The primary limitation is the constrained gradient range of some instruments, typically allowing no more than 5°C difference between adjacent columns in traditional gradient cyclers [35]. Additionally, temperature distribution may not be perfectly linear in all instruments, potentially requiring verification of actual well temperatures [37].
How does gradient PCR save time in experimental setup?
Instead of running 8-12 separate PCR reactions to test different annealing temperatures, gradient PCR allows simultaneous testing of the entire range in a single run, reducing optimization time from weeks to days [36]. This efficiency also conserves valuable reagents and samples [35] [36].
This technical support center provides troubleshooting guides and FAQs for scientists utilizing universal annealing temperatures in high-throughput PCR workflows. The content is framed within the broader research context of optimizing annealing temperature for PCR specificity.
Understanding Universal Annealing Technology
Mechanism of Action
Universal annealing buffers incorporate isostabilizing components that increase the stability of primer-template duplexes during the annealing step. This innovation enables specific primer binding at a standardized temperature of 60°C, even when primer melting temperatures (Tms) differ from this annealing temperature [9].
The technology allows researchers to circumvent the traditional requirement for calculating and optimizing the annealing temperature for each primer set individually. This is particularly valuable in high-throughput workflows where multiple primer sets and targets are processed simultaneously [9].
Experimental Protocol: Implementing Universal Annealing
Methodology for utilizing universal annealing temperature of 60°C:
- Reagent Selection: Use a DNA polymerase system specifically formulated for universal annealing, such as the Invitrogen Platinum DNA polymerases with specialized reaction buffers [9].
- Reaction Setup: Prepare master mixes according to manufacturer specifications, ensuring the universal annealing buffer is properly incorporated.
- Thermal Cycling Protocol:
- Denaturation: Standard initial denaturation at 94-95°C for 2-5 minutes
- Cycling: 25-40 cycles of:
- Denaturation: 94-95°C for 15-30 seconds
- Annealing: 60°C for 15-30 seconds
- Extension: 68-72°C (time determined by amplicon length)
- Final Extension: 68-72°C for 5-10 minutes
- Co-cycling Adaptation: For amplifying multiple targets of different lengths, use the extension time required for the longest amplicon without compromising specificity [9].
Frequently Asked Questions (FAQs)
What are the primary benefits of using a universal annealing temperature?
Implementing a universal annealing temperature of 60°C provides three key advantages:
- Reduced Optimization Time: Eliminates the need for extensive optimization of primer annealing temperatures for each new primer set [9]
- Protocol Standardization: Enables use of a single, standardized thermal cycling protocol across multiple projects and primer sets [9]
- Workflow Efficiency: Allows co-cycling of different PCR targets with varying amplicon lengths in the same run, significantly increasing throughput [9]
Can I use universal annealing with any DNA polymerase?
No, universal annealing capability requires specialized buffer formulations containing isostabilizing components. These are specifically designed for compatible polymerase systems such as Invitrogen Platinum DNA polymerases. Conventional DNA polymerases without these specialized buffers will not provide the same benefits and still require individual annealing temperature optimization for each primer set [9].
How does universal annealing maintain specificity with diverse primer Tms?
The isostabilizing components in the specialized buffer increase the stability of primer-template duplexes during annealing. This enables specific binding of primers to the DNA template even when their calculated melting temperatures differ from the standardized 60°C annealing temperature. The buffer composition effectively narrows the practical Tm range of diverse primers, allowing uniform annealing conditions [9].
What are the limitations of universal annealing technology?
While highly beneficial for most applications, consider that:
- Extremely challenging templates (e.g., high GC content, complex secondary structures) may still require some optimization
- Primers with extremely divergent Tms (outside the typical 55-70°C range) may not perform optimally
- Initial validation is still recommended when implementing a new primer set
Troubleshooting Guides
No or Weak Amplification
| Possible Cause | Solution |
|---|---|
| Insufficient number of cycles | Increase cycles by 3-5 increments, up to 40 cycles [42]. |
| PCR inhibitors in template | Dilute template or purify using cleanup kit; use polymerases with higher impurity tolerance [1] [42]. |
| Excessively stringent conditions | Verify annealing at exactly 60°C; ensure specialized universal annealing buffer is used [9]. |
| Insufficient template quantity | Increase template amount within recommended guidelines [1]. |
| Primer quality issues | Reconstitute fresh primer aliquots; verify primer concentration (0.1-1 μM) [1]. |
Nonspecific Amplification or Multiple Bands
| Possible Cause | Solution |
|---|---|
| Primer design issues | Use BLAST to check primer specificity; redesign if 3' ends complement non-target sites [42]. |
| Excessive template amount | Reduce template quantity by 2-5 fold [42]. |
| Insufficiently stringent conditions | Ensure universal annealing buffer is fresh and properly formulated [9]. |
| Excessive cycle number | Reduce number of PCR cycles without drastically compromising yield [1]. |
| Long annealing time | Use shorter annealing times (5-15 seconds) during three-step PCR [42]. |
Smear or High Background on Gel
| Possible Cause | Solution |
|---|---|
| Contamination | Run no-template control; establish separate pre- and post-PCR areas; decontaminate workstations [42]. |
| Overcycling | Reduce number of cycles; avoid excessive template input [42]. |
| Poor primer design | Redesign primers; consider using nested primers for re-amplification [42]. |
| Long extension times | For some enzymes, excessively long extensions cause smearing; follow manufacturer guidelines [42]. |
Inconsistent Results Between Runs
| Possible Cause | Solution |
|---|---|
| Buffer preparation errors | Prepare fresh buffers; avoid diluting concentrated stock pH-adjusted solutions [43]. |
| Inconsistent thermal cycling | Calibrate thermal cycler; ensure uniform tube placement [1]. |
| Reagent degradation | Prepare fresh aliquots; avoid repeated freeze-thaw cycles [1]. |
| Variable template quality | Standardize template isolation methods; assess DNA integrity by gel electrophoresis [1]. |
Research Reagent Solutions
| Reagent | Function in Universal Annealing Workflows |
|---|---|
| Platinum DNA Polymerases | Specifically formulated with specialized buffers for universal annealing at 60°C [9]. |
| Universal Annealing Buffer | Contains isostabilizing components that stabilize primer-template duplexes [9]. |
| Hot-Start DNA Polymerases | Increase specificity by preventing non-specific amplification during reaction setup [1]. |
| High-Fidelity Polymerases | Essential for applications requiring low error rates, such as cloning and sequencing [1]. |
| GC Enhancer Additives | Improve amplification efficiency for difficult templates with high GC content [1]. |
Advanced Workflow Integration
High-Throughput Implementation
Universal annealing temperature protocols are particularly suited for high-throughput real-time PCR systems. These systems can process thousands of nanoliter-volume reactions simultaneously, with the universal annealing temperature significantly simplifying experimental design and thermal cycling protocols [44].
The technology enables flexible assay configurations where different sample and primer combinations can be tested using the same standardized thermal cycling conditions, dramatically reducing optimization time in large-scale screening projects [44].
Automated Workflow Integration
Automated liquid handling systems further enhance the benefits of universal annealing temperatures by:
- Reducing Pipetting Errors: Minimizing volume differences that can affect reaction efficiency [45]
- Decreasing Contamination Risk: Limiting manual handling of samples and reagents [45]
- Increasing Throughput: Enabling processing of 96- to 384-well plates with minimal hands-on time [45]
The combination of universal annealing protocols with automated workflow solutions represents the current state-of-the-art for high-throughput PCR applications in drug development and diagnostic settings.
Universal Annealing Workflow Comparison
Buffer Mechanism Comparison
Multiplex Polymerase Chain Reaction (PCR) enables the simultaneous amplification of multiple distinct nucleic acid targets in a single reaction, significantly enhancing diagnostic throughput and efficiency. However, this technique introduces substantial challenges for maintaining reaction specificity, particularly when co-cycling numerous amplicons. The presence of multiple primer pairs increases the potential for spurious amplification products through mispriming and primer-dimer formation [46]. Furthermore, preferential amplification of certain targets can occur due to PCR drift (stochastic fluctuations in early cycles) or PCR selection (inherent properties favoring specific templates) [46]. Within the broader context of annealing temperature optimization research, this technical guide addresses these critical challenges through proven strategies and systematic troubleshooting to ensure uniform amplification across complex panels.
Frequently Asked Questions (FAQs) and Troubleshooting Guides
Common Experimental Problems and Solutions
FAQ: Why am I getting no amplification products for some targets in my multiplex panel?
- Potential Causes and Solutions:
- Primer-Binding Inhibition by Secondary Structure: The target DNA or the primers themselves may form secondary structures (e.g., hairpins) that prevent efficient primer binding. This is a major cause of false negatives and uneven amplification [47]. Solution: Utilize software that can predict secondary structure and solve for the amount of primer bound, or incorporate additives like DMSO (1-10%) or formamide (1.25-10%) to help denature these structures [48].
- PCR Inhibition: Inhibitors co-extracted with the template DNA (e.g., polysaccharides, hemoglobin, heparin, urea) can degrade the polymerase or interfere with the enzymatic reaction [49]. Solution: Dilute the template DNA 100-fold to reduce inhibitor concentration, or purify it using a commercial clean-up kit. Using a DNA polymerase with high processivity and tolerance to inhibitors can also be beneficial [15].
- Overly Stringent Conditions: The annealing temperature may be too high for some primers in the mix. Solution: Lower the annealing temperature in increments of 2°C, or employ a touchdown PCR protocol that starts with a higher annealing temperature to enhance specificity and gradually lowers it to ensure efficient amplification of all targets [15] [49].
- Potential Causes and Solutions:
FAQ: I see nonspecific bands (smearing) or primer-dimers in my gel. How can I improve specificity?
- Potential Causes and Solutions:
- Non-Optimal Annealing Temperature: The temperature may be too low, allowing primers to bind to non-target sequences. Solution: Increase the annealing temperature in 2°C increments [49]. Use a hot-start DNA polymerase, which remains inactive until the initial denaturation step, preventing nonspecific amplification and primer-dimer formation during reaction setup [15] [46].
- Excess Primers or Template: Too much primer can increase primer-dimer formation, while too much template can raise the chance of non-specific binding. Solution: Optimize primer concentrations (typically 0.1-1.0 µM) and reduce the template amount by 2- to 5-fold [49] [48].
- Too Many Cycles: Overcycling can amplify low-level nonspecific products. Solution: Reduce the number of PCR cycles [49].
- Potential Causes and Solutions:
FAQ: Why are some targets in my panel amplifying efficiently while others are weak or absent (preferential amplification)?
- Potential Causes and Solutions:
- Primer-Amplicon Interactions: A primer for one target might bind to and extend from an amplicon of a different target, generating a shorter, unexpected product and depleting reagents [47]. Solution: Meticulously design primers using specialized software to check for cross-homology between all primers and all amplicons.
- Varying Primer Efficiencies: Different primer pairs inherently have different amplification efficiencies. Solution: Redesign primers to have nearly identical optimum annealing temperatures (length 18-30 bp, GC content 35-60%) and validate each primer set in a singleplex reaction before multiplexing [46].
- GC-Rich Targets: Templates with high GC content (>65%) form strong secondary structures that are difficult for polymerases to read through. Solution: Use a polymerase blend formulated for GC-rich templates, increase the denaturation temperature to 98°C, and include GC-enhancers like DMSO or betaine [15] [49].
- Potential Causes and Solutions:
Advanced Strategy: Overcoming Overlap in Tiled Amplicon Panels
A significant challenge in designing panels for next-generation sequencing (NGS), where amplicons tile across a genomic region, is the preferential amplification of short overlapping regions. When all primers are in one tube, the short fragments generated from the overlap between adjacent amplicons can be amplified more efficiently, dominating the reaction and causing drop-outs in the coverage of the intended, longer targets [50] [51].
Experimental Protocol: SLIMamp (Stem-Loop Inhibition Mediated Amplification)
The SLIMamp method provides a robust solution for single-tube multiplex PCR of overlapping amplicons [50] [51].
- Primer Design: Design gene-specific primers for all amplicons. Tag the 5'-ends of the forward and reverse primers for each amplicon with different universal tag sequences (e.g., t1 and t2).
- Inhibitor Sequence Incorporation: For two overlapping amplicons (Amplicon 1 and Amplicon 2), the reverse primer of the upstream amplicon (R1) is modified. A sequence (F2^) derived from the 5'-end of the forward primer of the downstream amplicon (F2) is inserted between the gene-specific sequence of R1 and its 5' tag.
- Mechanism: During PCR, the amplicon generated from the modified R1 primer contains the F2^ sequence. This allows the 5' end of the strand to fold back and hybridize to itself, forming a stem-loop structure. This structure physically blocks the binding of the primer that would normally amplify the short, problematic overlapping fragment, thereby inhibiting its amplification and allowing uniform coverage of the full-length targets.
The following diagram illustrates the logical workflow for optimizing a multiplex PCR assay, integrating standard and advanced techniques.
Diagram 1: A logical workflow for troubleshooting and optimizing a multiplex PCR assay. This diagram integrates standard approaches with advanced strategies like SLIMamp to address uniformity issues caused by overlapping amplicons.
Research Reagent Solutions for Multiplex PCR
The following table details key reagents and their optimized roles in ensuring successful co-cycling of multiple amplicons.
Table 1: Essential Reagents for Multiplex PCR Optimization
| Reagent Category | Specific Example | Function in Multiplex PCR | Optimization Guidelines |
|---|---|---|---|
| DNA Polymerase | Hot-Start Taq Polymerase [15] [49] | Inhibits enzyme activity until initial denaturation, preventing nonspecific priming and primer-dimer formation at room temperature. | Use antibody-based, affibody, or chemically modified hot-start enzymes. Combine initial denaturation and enzyme activation in one step. |
| Polymerase for Complex Templates | Highly Processive/GC-Rich Enzyme Blends [15] | Strong binding to template for direct PCR from crude samples; read-through of GC-rich secondary structures with higher denaturation temps (98°C). | Use for direct PCR (from cells/tissue) or templates with >65% GC content. Often includes a thermostable proofreading enzyme. |
| PCR Additives | DMSO (1-10%) [48] | Destabilizes DNA duplexes, lowers Tm, and helps denature GC-rich secondary structures. | Lower the annealing temperature by 2-5°C to compensate for Tm reduction. |
| Betaine [46] | Equalizes the melting temperature of DNA strands, improving amplification efficiency of GC-rich targets. | Typical concentration is 0.5-1.5 M. | |
| BSA (400 ng/µL) [48] | Binds to inhibitors present in biological samples (e.g., polyphenols, humic acids), stabilizing the polymerase. | Essential for direct PCR from complex samples like blood, soil, or plant material. | |
| Magnesium Ions (Mg²⁺) | Magnesium Chloride (MgCl₂) [4] [48] | Essential cofactor for DNA polymerase; concentration critically affects primer annealing, specificity, and yield. | Titrate concentration between 0.5-5.0 mM (start at 1.5 mM). High Mg²⁺ can reduce specificity. |
| Primers | Optimized Oligonucleotides [46] [48] | Bind specifically to intended targets to initiate amplification. Poor design is a major source of failure. | Length: 18-30 nt. GC: 40-60%. Tm within 5°C for all primers. Avoid 3'-end complementarity. Concentration: 0.1-1.0 µM. |
Annealing Temperature Optimization: Core Experimental Protocols
The annealing temperature is a critical parameter that balances the specificity and efficiency of all primers in a multiplex reaction. The following protocol provides a systematic approach for its optimization.
Gradient PCR Protocol
Objective: To empirically determine the optimal annealing temperature for a multiplex PCR assay.
Materials:
- Thermal cycler with gradient functionality
- Multiplex PCR master mix (including hot-start polymerase, dNTPs, MgCl₂ in optimized buffer)
- Primer mix (all primers at a predetermined concentration)
- Template DNA
- Nuclease-free water
Method:
- Prepare Master Mix: Calculate the total number of reactions (n) including a no-template control (NTC). Prepare a master mix containing all components except the template. Aliquot the master mix into n-1 tubes. Add template to the test reactions and an equal volume of water to the NTC tube [48].
- Set Up Gradient: Program the thermal cycler. Set the annealing step to a gradient range spanning 4-10°C (e.g., from 50°C to 60°C). The denaturation and extension steps should remain constant [49].
- Run PCR: Place the reaction tubes in the thermal cycler and start the program.
- Analyze Results: Use agarose gel electrophoresis to analyze the PCR products. The optimal annealing temperature is the highest temperature that produces bright, specific bands for all intended targets and a clear background without nonspecific bands or primer-dimers [49].
Touchdown PCR Protocol
For assays with primers of varying Tms or persistent specificity issues, Touchdown PCR is highly effective [15].
Method:
- Program Cycling: The initial annealing temperature should be set 5-10°C above the calculated average Tm of the primers.
- Decrease Temperature: In the subsequent cycles, decrease the annealing temperature by 1°C every cycle or every second cycle until the "touchdown" temperature is reached (typically 3-5°C below the lowest primer Tm).
- Final Cycles: Continue with 10-15 additional cycles at this final, lower touchdown temperature.
Visualization of Strategy: The following diagram contrasts the standard fixed-temperature annealing approach with the more specific Touchdown PCR strategy.
Diagram 2: A comparison of thermal cycling strategies for annealing. Touchdown PCR starts with a high, specific annealing temperature that is gradually lowered to a more efficient temperature, enriching the reaction for the desired target.
Successfully co-cycling multiple amplicons requires a holistic strategy that integrates meticulous primer design, strategic reagent selection, and empirical cycling optimization. The use of hot-start polymerases is non-negotiable for specificity, while touchdown protocols and gradient PCR are indispensable tools for finding the annealing temperature sweet spot. For the most challenging applications, such as NGS panels with tiled amplicons, advanced techniques like SLIMamp overcome the fundamental problem of preferential amplification. By systematically applying these strategies and troubleshooting methodologies, researchers can develop robust, specific, and efficient multiplex PCR assays capable of detecting numerous targets simultaneously, thereby accelerating diagnostics and discovery.
How do PCR additives functionally modulate the effective annealing temperature?
PCR additives like DMSO, BSA, and betaine do not change the literal temperature of the thermal cycler block; instead, they alter the biochemical environment of the reaction, which changes the effective annealing temperature at the molecular level. They achieve this by directly influencing the stability of the DNA double helix and the behavior of the primers [52] [53]. This modulation is crucial for enhancing specificity, particularly for difficult templates like GC-rich sequences, by promoting correct primer binding while discouraging non-specific interactions.
The following workflow outlines a systematic approach to optimizing your PCR using these additives:
Troubleshooting Guides
FAQ 1: My PCR fails with a GC-rich template (>65% GC). Which additive should I try first and why?
Answer: For GC-rich templates, your primary challenge is the formation of stable secondary structures that prevent efficient primer binding and polymerase elongation. Betaine and DMSO are the most effective first-line additives.
Recommended First Additive: Betaine (at 1.0-1.7 M).
- Mechanism: Betaine is an isostabilizer that equalizes the contribution of GC and AT base pairs to DNA duplex stability. It penetrates the DNA helix and disrupts the base-stacking forces, effectively reducing the melting temperature (Tm) of GC-rich regions without significantly affecting AT-rich regions. This promotes uniform and complete denaturation of the template, facilitating primer access [52] [53].
- Protocol:
- Prepare a 5M stock solution of betaine (monohydrate, not hydrochloride).
- Add betaine to your standard PCR master mix to achieve a final concentration of 1.0 M, 1.3 M, and 1.7 M in separate reactions.
- Run the reactions on a gradient thermal cycler, testing annealing temperatures from 3°C below to 3°C above your calculated Tm.
- Analyze results on an agarose gel. The optimal condition will show a single, bright band of the expected size.
Alternative/Complementary Additive: DMSO (at 2-10%).
- Mechanism: DMSO reduces the secondary structure stability of DNA by interfering with hydrogen bonding and base stacking. This also lowers the overall Tm of the DNA template, helping it denature at lower temperatures [52] [6] [53]. However, it can inhibit Taq polymerase activity at higher concentrations, so titration is critical.
- A study amplifying an extremely GC-rich EGFR promoter region (75.45% GC) found that 5% DMSO was necessary for successful amplification, and the optimal annealing temperature was 7°C higher than the calculated Tm [6].
FAQ 2: I see multiple non-specific bands or a smear, even after optimizing the annealing temperature. How can additives help?
Answer: Non-specific amplification occurs when primers bind to partially complementary sites. Additives that increase reaction stringency can help.
Recommended Additive: DMSO (at 2-5%).
- Mechanism: By destabilizing the DNA double helix, DMSO requires a more perfect primer-template match for stable hybridization. This increases the effective stringency of the annealing step, reducing off-target binding [52] [53].
- Protocol: Titrate DMSO from 2% to 5% in 1% increments while using your standard annealing temperature. Often, a lower concentration (e.g., 3%) can enhance specificity without significant yield loss.
Alternative Additive: Formamide (at 1-5%).
- Mechanism: Similar to DMSO, formamide binds to the grooves of DNA, destabilizing the double helix and lowering its Tm. This promotes specific primer binding and reduces non-specific amplification [52].
- Note: Its effectiveness is often template-specific and concentration-dependent, requiring careful optimization [54].
FAQ 3: My template is from a complex source (e.g., FFPE tissue, plant extract) and seems to contain inhibitors. What is the best additive strategy?
Answer: Inhibitors in complex samples can bind to or denature the DNA polymerase. Bovine Serum Albumin (BSA) is highly effective in these scenarios.
- Recommended Additive: BSA (at 0.1-0.8 mg/mL).
- Mechanism: BSA acts as a "competitive" protein. It binds to phenolic compounds and other inhibitors present in the sample, preventing them from interacting with and inhibiting the DNA polymerase. It also stabilizes the polymerase and can prevent reaction components from adhering to tube walls [54] [52] [53].
- Protocol:
- Add BSA to your PCR master mix to a final concentration of 0.1 mg/mL, 0.4 mg/mL, and 0.8 mg/mL.
- Use your standard cycling conditions.
- Advanced Strategy: For particularly stubborn GC-rich templates with inhibitors, a combination of BSA with an organic solvent is powerful. Research shows that BSA acts as a co-enhancer with DMSO or formamide, producing significantly higher yields of GC-rich targets than solvents alone. The enhancing effect of BSA is most pronounced in the initial PCR cycles [54].
Quantitative Data & Experimental Protocols
Table 1: Additive Compendium for Annealing Temperature Modulation
| Additive | Recommended Concentration Range | Primary Mechanism | Effect on Effective Annealing Temperature | Best For |
|---|---|---|---|---|
| DMSO | 2-10% [6] [53] | Disrupts secondary structure; reduces DNA Tm [52] [53]. | Lowers | GC-rich templates; reducing non-specific bands [6]. |
| Betaine | 1.0 - 1.7 M [53] | Equalizes GC/AT stability; reduces DNA secondary structure [52]. | Lowers | Very GC-rich templates (>80%); promotes uniform amplification [52]. |
| BSA | 0.1 - 0.8 mg/mL (10-100 μg/mL) [8] [53] | Binds inhibitors; stabilizes polymerase [54] [52]. | Minimal direct effect | Complex templates (FFPE, plants, blood); used with solvents [54]. |
| Formamide | 1-5% [52] [53] | Destabilizes DNA double helix; lowers Tm [52]. | Lowers | Increasing specificity; can be combined with BSA [54]. |
| Glycerol | 5-15% [55] | Stabilizes enzymes; alters DNA Tm [55]. | Slightly lowers | Enhancing yield; often used in combination [55]. |
Detailed Protocol: Systematic Optimization of Additives and Annealing Temperature
This protocol is designed to empirically determine the best combination of additives and annealing temperature for your specific assay.
I. Research Reagent Solutions
| Item | Function & Specification |
|---|---|
| Thermostable DNA Polymerase | Use a standard Taq polymerase for initial optimization. For high fidelity, switch to a proofreading enzyme after conditions are established. |
| dNTP Mix | Use a balanced 10 mM stock solution. High dNTP concentrations can chelate Mg²⁺. |
| 10X Reaction Buffer | Use the buffer supplied with your polymerase, which may or may not contain MgCl₂. |
| MgCl₂ Solution (25 mM) | A required cofactor for polymerase activity. Must be titrated alongside additives [52] [56]. |
| Primers | Resuspended in nuclease-free water or TE buffer to a stock concentration of 10-100 μM. |
| Template DNA | The DNA sample you are trying to amplify. Use the purest preparation possible. |
| Molecular Biology Grade Water | Nuclease-free, sterile water. |
| Additive Stock Solutions | DMSO (100%), Betaine (5M), BSA (10-20 mg/mL). Aliquot and store as recommended. |
II. Experimental Procedure
Prepare Master Mixes with Additive Titration:
- For each additive you are testing (e.g., DMSO, Betaine, BSA), prepare a separate master mix series. A typical 50 μL reaction contains [8]:
- 1X PCR Buffer
- 200 μM of each dNTP
- 1.5 mM MgCl₂ (start here, then optimize)
- 0.2-1.0 μM of each primer
- 1-2.5 Units DNA Polymerase
- Varying concentrations of the additive (see Table 1 for ranges)
- Nuclease-free water to 49 μL
- Example for DMSO: Prepare four tubes with master mix enough for 5 reactions each. Add DMSO to final concentrations of 0%, 3%, 5%, and 7%.
- Include Controls: A "no additive" control and a "no template" control (NTC) for each condition are essential.
- For each additive you are testing (e.g., DMSO, Betaine, BSA), prepare a separate master mix series. A typical 50 μL reaction contains [8]:
Aliquot and Add Template:
- Aliquot 49 μL of each master mix into PCR tubes.
- Add 1 μL of your template DNA to each tube. Add 1 μL of water to the NTC tubes.
- Mix gently by pipetting and briefly centrifuge.
Run Gradient PCR:
- Place your tubes in a thermal cycler with a gradient annealing function.
- Use a cycling program similar to:
- Initial Denaturation: 94-98°C for 2-5 minutes.
- Amplification (35 cycles):
- Denaturation: 94-98°C for 20-30 seconds.
- Annealing: Gradient from 55°C to 70°C for 20-40 seconds.
- Extension: 72°C for 1 minute per kb.
- Final Extension: 72°C for 5-10 minutes.
- Hold: 4-10°C.
Analyze Results:
- Run the PCR products on an agarose gel with an appropriate DNA ladder.
- Identify the condition (additive concentration and annealing temperature) that produces a single, intense band of the correct size with the cleanest background (no primer dimers or smearing).
Advanced Applications & Synergistic Combinations
For the most challenging PCR applications, single additives may be insufficient. A synergistic combination often yields the best results.
BSA with Organic Solvents: As demonstrated in a 2012 study, combining BSA with DMSO or formamide significantly enhanced the amplification yield of GC-rich DNA targets (0.4 kb to 7.1 kb) compared to using the solvent alone. BSA's enhancing effect is most active in the initial PCR cycles [54]. This suggests that for long or difficult amplifications, BSA's protective role is crucial.
Betaine with DMSO: This is a classic combination for amplifying extremely GC-rich sequences. While our search results did not explicitly detail this combination, it is a well-established practice in the field. The betaine disrupts secondary structures, while DMSO further reduces DNA stability. If using this combination, titrate both additives independently to find the optimal balance, as high concentrations of both can be inhibitory.
The following diagram summarizes the molecular mechanisms by which DMSO, BSA, and Betaine modulate the PCR reaction to improve outcomes:
Solving Specificity Challenges: Advanced Troubleshooting for Pristine PCR Results
In the context of optimizing annealing temperature for PCR specificity research, the accurate interpretation of gel electrophoresis results is paramount. Non-specific artifacts such as primer-dimers, smears, and spurious bands are frequent indicators of suboptimal reaction conditions, with annealing temperature being a primary variable. These artifacts compete with the target amplicon for reaction components, thereby reducing yield, compromising assay sensitivity, and potentially leading to erroneous conclusions in both diagnostic and research settings. This guide provides a systematic approach for researchers and drug development professionals to diagnose and remediate these common PCR complications, forming a critical component of a robust PCR optimization strategy.
A Visual Guide to Common PCR Artifacts
Interpreting agarose gel electrophoresis is the first critical step in troubleshooting. The diagram below outlines a diagnostic workflow for identifying common amplification artifacts.
Diagram Summary: A diagnostic workflow for identifying common PCR artifacts on an agarose gel. Red nodes indicate problematic results, while the green node indicates a successful reaction. Dashed arrows link artifacts to their common underlying causes for systematic troubleshooting.
The table below details the characteristic appearance and primary composition of each artifact type for accurate identification.
Table 1: Identification of Common PCR Artifacts on Agarose Gels
| Artifact Type | Typical Size Range | Visual Appearance on Gel | Main Composition |
|---|---|---|---|
| Primer-Dimer [57] [58] | 20-100 bp | Fuzzy or smeary band at the very bottom of the gel | Two primers that have annealed to each other and been extended. |
| Smear [59] [58] [60] | Broad range, often from low to high molecular weight | A continuous, hazy background or spread of DNA | A mixture of non-specific DNA fragments of random lengths. |
| Non-Specific Bands [59] [58] | Variable, but discrete | One or multiple discrete bands at sizes other than the target | Specific, unintended amplification products from off-target priming. |
Systematic Troubleshooting and Optimization
Once artifacts are identified, a systematic approach to rectifying the reaction conditions is required. The following table provides targeted solutions for each artifact type.
Table 2: Troubleshooting Guide for Common PCR Artifacts
| Artifact | Primary Solutions | Secondary & Tertiary Solutions |
|---|---|---|
| Primer-Dimer | • Increase annealing temperature in 2°C increments. [57] [1] • Use a hot-start DNA polymerase to prevent activity during setup. [57] [1] • Lower primer concentration (e.g., 0.1-0.5 µM). [57] [1] | • Redesign primers to avoid 3'-end complementarity. [57] [1] • Increase denaturation time/temperature. [57] |
| Smear | • Increase annealing temperature. [59] [58] • Reduce the number of PCR cycles (e.g., by 3-5 cycles). [59] [60] • Reduce amount of template DNA or DNA polymerase. [59] [60] | • Check for contamination using a no-template control (NTC). [59] [58] • Use touchdown PCR. [59] • Re-purify template DNA to remove inhibitors or contaminants. [59] [1] |
| Non-Specific Bands | • Increase annealing temperature (primary fix). [59] [1] [61] • Optimize Mg²⁺ concentration (reduce in 0.2-1 mM increments). [1] [61] • Reduce template amount. [59] | • Use a two-step PCR protocol. [59] • Shorten annealing time. [59] • Redesign primers and check specificity with BLAST. [59] [1] |
Special Considerations for Complex Templates
Amplification of GC-rich sequences presents unique challenges, often manifesting as smearing or total amplification failure. For such templates, a specialized optimization strategy is required [6]:
- PCR Additives: Include 5-10% DMSO or a proprietary GC-enhancer in the reaction mixture to help denature stable secondary structures. [1] [6]
- Modified Thermal Profile: Increase the denaturation temperature and/or time. The optimal annealing temperature may be significantly higher (e.g., 7°C or more) than the calculated Tm. Using a gradient thermal cycler is highly recommended. [6]
- Enzyme Selection: Use DNA polymerases specifically engineered for high processivity and GC-rich amplification. [59] [1]
Experimental Protocol: Annealing Temperature Gradient and Re-optimization
A key experimental method for resolving the artifacts discussed above is the execution of an annealing temperature gradient.
Step-by-Step Guide to Annealing Temperature Optimization
- Calculate Tm Values: Determine the melting temperature (Tm) for each primer. Use the formula Tm = 4(G + C) + 2(A + T) for a preliminary estimate. [6]
- Set Gradient Range: Program your thermal cycler with an annealing temperature gradient. The range should typically span from 3–5°C below the lowest primer Tm to 3–5°C above it. [1] [61]
- Run Gradient PCR: Perform the amplification using the same reaction mixture across all gradient temperatures.
- Analyze Results: Resolve the products on an agarose gel. The optimal temperature is the highest one that produces a strong, specific target band with minimal to no artifacts. [59] [1]
- Fine-Tune Other Parameters: If specificity is not achieved, iteratively optimize Mg²⁺ concentration (test 1.5-4.0 mM in 0.5 mM steps) and primer concentration (0.1-0.5 µM) around the best annealing temperature. [1] [61] [60]
Research Reagent Solutions
The following table lists key reagents and their functions in troubleshooting PCR artifacts.
Table 3: Essential Reagents for PCR Troubleshooting and Optimization
| Reagent / Tool | Primary Function in Troubleshooting |
|---|---|
| Hot-Start DNA Polymerase | Suppresses enzyme activity before thermal cycling, drastically reducing primer-dimer formation and non-specific amplification during reaction setup. [57] [1] |
| Gradient Thermal Cycler | Empirically determines the optimal annealing temperature for a specific primer-template pair in a single run, which is critical for specificity. [1] [61] |
| PCR Additives (e.g., DMSO) | Aids in the amplification of complex templates (GC-rich, secondary structures) by reducing DNA melting stability and preventing enzyme blockage. [1] [6] |
| Mg²⁺ Solution (MgCl₂/MgSO₄) | Cofactor for DNA polymerase; its concentration is critical for fidelity, specificity, and yield, and requires precise optimization. [1] [61] |
| No-Template Control (NTC) | Diagnostic control to detect DNA contamination in reagents, which is a common cause of smearing and spurious bands. [59] [57] |
Frequently Asked Questions (FAQs)
Q1: My negative control (NTC) shows a primer-dimer band but my sample has a strong target band. Is this a problem? A primer-dimer in the NTC alone is generally not a critical issue for applications like gel confirmation, as it indicates the primers are amplifying each other in the absence of template. However, it signifies suboptimal conditions that can reduce the efficiency of your target amplification. For quantitative applications (qPCR), it is essential to eliminate primer-dimer formation. [57]
Q2: I have optimized the annealing temperature and still get a smear. What should I investigate next? First, confirm the integrity of your template DNA by running it on a gel; degraded DNA appears as a smear and will cause a smeared PCR product. [1] Second, titrate the amount of template and DNA polymerase, as excess of either can cause smearing. [60] Finally, ensure you are not simply running too many PCR cycles, which can lead to over-amplification and smearing. [59] [60]
Q3: How can I prevent PCR contamination that leads to smeared or false-positive results? Physically separate pre- and post-PCR work areas, using dedicated equipment, lab coats, and filtered pipette tips for each. [59] Always include an NTC. If contamination is suspected, decontaminate surfaces and pipettes with 10% bleach and expose them to UV light. Prepare and aliquot reagents in a dedicated clean area. [59]
Q4: What are the most common primer design flaws that lead to artifacts? The most common issues are: 1) Self-complementarity, especially at the 3' ends, which promotes primer-dimer formation. 2) Complementarity between forward and reverse primers, leading to primer-dimer. 3) Low sequence specificity, allowing primers to bind to multiple genomic locations, causing non-specific bands. Always analyze primers using software tools like BLAST and OligoAnalyzer. [59] [57] [1]
Within the broader context of research dedicated to optimizing annealing temperature for polymerase chain reaction (PCR) specificity, the meticulous tuning of reaction components is equally critical. While selecting the correct annealing temperature prevents nonspecific primer binding, the concentrations of magnesium ions (Mg2+), deoxynucleoside triphosphates (dNTPs), and primers form the fundamental chemical environment that dictates the efficiency and accuracy of the amplification process [62] [8]. This guide provides a systematic, troubleshooting-oriented approach to optimizing these key components, enabling researchers to achieve high specificity and yield in their experiments.
Troubleshooting FAQs
Q1: What are the primary symptoms of suboptimal Mg2+ concentration in my PCR?
- Low or No Yield: Mg2+ is an essential cofactor for DNA polymerase activity. If the concentration is too low, the enzyme cannot function efficiently, leading to poor or no amplification [63] [62].
- Nonspecific Amplification: Excessively high Mg2+ concentrations stabilize non-specific primer-template interactions, resulting in multiple extraneous bands or a smear on an agarose gel [1] [62]. High Mg2+ can also reduce fidelity by increasing misincorporation of nucleotides [1].
Q2: How do dNTP concentrations influence PCR fidelity and what indicates unbalanced dNTPs?
Unbalanced dNTP pools (non-equimolar concentrations of dATP, dCTP, dGTP, and dTTP) increase the error rate of DNA polymerases [1]. This can lead to a heterogeneous population of PCR products containing unintended mutations, which is particularly critical for downstream applications like cloning and sequencing. Furthermore, dNTPs chelate Mg2+; therefore, high dNTP concentrations can effectively reduce the free Mg2+ available for the polymerase, thereby inhibiting amplification [56] [63].
Q3: My PCR shows primer-dimer formation. How can primer concentration adjustments help?
High primer concentrations are a primary driver of primer-dimer formation [1] [3]. When primers are overly abundant, they are more likely to anneal to each other via complementary sequences, especially at their 3' ends, rather than to the template DNA. These short, double-stranded artifacts are then efficiently amplified by the DNA polymerase, competing with the target amplicon for reagents and reducing your product yield [3]. Lowering the primer concentration within the standard range of 0.1–1 µM often mitigates this issue [1] [56].
Q4: Why is optimizing component concentrations crucial even when using a "universal" PCR buffer?
Specialized buffers, like those enabling a universal annealing temperature, contain isostabilizing components that widen the optimal annealing range [9]. However, the optimal concentrations of Mg2+, dNTPs, and primers can still vary with specific template characteristics (e.g., GC-content, secondary structure) and primer sequences [62]. Systematic optimization ensures that the universal system performs at its best for your unique assay, maximizing yield and specificity.
Optimization Data Tables
Table 1: Optimal Concentration Ranges and Effects of Key PCR Components
This table summarizes the standard working concentrations and the effects of deviations from these ranges for Mg2+, dNTPs, and primers [1] [56] [63].
| Component | Standard Concentration Range | Symptoms of Low Concentration | Symptoms of High Concentration |
|---|---|---|---|
| Mg2+ | 1.5 - 2.0 mM (may require optimization from 0.5 to 5 mM) [63] [8] | No or low amplification; reduced polymerase activity [63] | Nonspecific amplification; smeared bands; increased error rate [1] [62] |
| dNTPs | 200 µM of each dNTP (50-100 µM for enhanced fidelity) [63] | Reduced yield; PCR failure when depleted [56] | Increased misincorporation (low fidelity); chelation of Mg2+ leading to inhibition [1] [63] |
| Primers | 0.1 - 1.0 µM each (typically 0.1 - 0.5 µM) [56] [63] | Low yield or no amplification [56] | Nonspecific binding; primer-dimer formation [1] [56] |
Table 2: Systematic Optimization Approach for PCR Components
This protocol outlines a stepwise method for optimizing Mg2+, dNTP, and primer concentrations. Begin with a standard 50 µL reaction and adjust a single variable at a time [1] [63] [8].
| Optimization Step | Variable Tested | Suggested Range/Increments | Protocol Adjustment |
|---|---|---|---|
| 1. Baseline Setup | - | - | Use standard concentrations: 1.5 mM Mg2+, 200 µM each dNTP, 0.5 µM each primer. |
| 2. Mg2+ Titration | Mg2+ concentration | 1.0 mM to 4.0 mM in 0.5 mM increments [63] | Prepare a master mix constant in all components except MgCl2 or MgSO4. Aliquot, then supplement with Mg2+ to the desired final concentration. |
| 3. dNTP Optimization | dNTP concentration | 50 µM to 200 µM each dNTP [63] | After identifying the optimal Mg2+, test different dNTP concentrations. Note that lowering dNTPs can enhance fidelity but may require a proportional reduction in Mg2+ [1]. |
| 4. Primer Titration | Primer concentration | 0.1 µM to 1.0 µM for each primer [56] | Using the optimized Mg2+ and dNTP conditions, test a range of primer concentrations to find the balance that gives the strongest specific signal with the least primer-dimer. |
Experimental Workflow and Relationships
The following diagram illustrates the systematic workflow and the logical relationships between components during the PCR optimization process.
The Scientist's Toolkit: Research Reagent Solutions
Table 3: Essential Reagents for PCR Optimization
| Reagent | Function & Importance in Optimization |
|---|---|
| Magnesium Salt (MgCl2/MgSO4) | Essential cofactor for DNA polymerase activity. Its concentration is the most frequently optimized parameter as it directly affects enzyme processivity, primer annealing, and product specificity [1] [62]. |
| dNTP Mix (dATP, dCTP, dGTP, dTTP) | The building blocks for new DNA strands. Provided in equimolar concentrations to prevent misincorporation. The total concentration affects both yield and fidelity and interacts with Mg2+ availability [56] [63]. |
| Synthetic Oligonucleotide Primers | Short, single-stranded DNA sequences that define the start and end of the amplification target. Their concentration is critical for ensuring specific binding to the intended template sequence and avoiding primer-dimer artifacts [1] [56]. |
| DNA Polymerase (e.g., Taq, Hot-Start) | The enzyme that catalyzes DNA synthesis. Hot-start versions are recommended for optimization as they remain inactive at room temperature, preventing nonspecific priming during reaction setup [1] [3]. |
| PCR Buffer with Additives | Provides the optimal chemical environment (pH, salts). Specialized buffers may contain additives like DMSO or betaine to aid in denaturing complex templates, and isostabilizing agents to allow for universal annealing temperatures [9] [62]. |
Leveraging Hot-Start Polymerases to Suppress Low-Temperature Mishybridization
In the context of optimizing annealing temperature for PCR specificity, suppressing non-specific amplification is a fundamental research challenge. Mishybridization, or the erroneous binding of primers to non-target sequences at low temperatures, is a primary source of such artifacts. This technical support article details how Hot-Start polymerases serve as a critical tool to mitigate this issue, enabling cleaner and more reliable results for research and drug development applications.
FAQ: Hot-Start Polymerases and Mishybridization
What is low-temperature mishybridization, and how does it affect my PCR?
Mishybridization occurs when PCR primers bind to incorrect, partially complementary sequences on the DNA template during the annealing phase [64]. This is particularly problematic at lower temperatures, where binding is less stringent. When a standard DNA polymerase is active at these temperatures, it can extend these misprimed sequences, leading to:
- Non-specific amplification: Multiple unwanted bands or a smeared background on a gel [1].
- Reduced yield: Precious enzyme and reagents are wasted on amplifying non-target products [65].
- Primer-dimer formation: Primers anneal to each other and are extended, creating short, spurious products that compete with the target amplification [65].
How do Hot-Start polymerases prevent this specific type of error?
Hot-Start polymerases are engineered to be inactive at the temperatures used for reaction setup (room temperature to ~40°C) [66] [65]. This inactivity is achieved by blocking the enzyme's active site with an inhibitor (e.g., an antibody, aptamer, or chemical modifier) [66] [65]. Since the enzyme cannot function, any mishybridization events that occur at low temperatures are not extended. The inhibitor is released only during the initial high-temperature denaturation step (typically >90°C), activating the enzyme. By this point, the reaction temperature is elevated, and primer annealing is far more specific, thereby suppressing the amplification of non-target sequences [65].
What are the main types of Hot-Start technologies, and how do I choose?
The primary difference lies in the method used to inhibit the polymerase. The table below summarizes the key technologies [65].
Table 1: Comparison of Hot-Start Polymerase Technologies
| Technology | Mechanism | Benefits | Considerations |
|---|---|---|---|
| Antibody-based | An antibody binds the active site [65]. | Rapid activation; full enzyme activity restored; performance mirrors non-hot-start version [65]. | May contain animal-origin components [65]. |
| Aptamer-based | An oligonucleotide binds the active site [66] [65]. | Rapid activation; animal-origin free [66] [65]. | May be less stringent; reversible inhibition may not be ideal for room-temperature setups [65]. |
| Chemical Modification | A chemical group is covalently attached to the enzyme [65]. | Highly stringent inhibition; animal-origin free [65]. | Requires longer initial activation time; may not achieve full enzyme activity [65]. |
| Affibody-based | A small alpha-helical peptide binds the active site [65]. | Less exogenous protein than antibody; rapid activation [65]. | May be less stringent than antibody-based methods [65]. |
Can I use Hot-Start polymerases with my existing PCR protocol?
Yes, in most cases. However, you can optimize your protocol to maximize the benefits. The initial denaturation step must be long enough to fully activate the specific Hot-Start polymerase you are using (refer to the manufacturer's instructions) [65]. Furthermore, because Hot-Start polymerases enhance specificity, you may have the flexibility to lower your annealing temperature slightly without incurring non-specific amplification, which can be beneficial for primers with lower melting temperatures [64].
Troubleshooting Guide: Resolving Mishybridization
Symptom: Non-specific PCR products (multiple bands or smearing) even after using a Hot-Start polymerase.
Table 2: Troubleshooting Non-specific Amplification
| Possible Cause | Recommended Solution |
|---|---|
| Suboptimal Annealing Temperature | The single most important parameter to optimize. Increase the annealing temperature in 1-2°C increments using a gradient thermal cycler. The optimal temperature is typically 3-5°C below the primer Tm [1]. |
| Excessive Primer Concentration | High primer concentrations promote mispriming. Titrate primer concentrations between 0.1–1 μM, starting at the lower end of this range [1] [56]. |
| Excess Mg2+ | High Mg2+ concentrations stabilize DNA duplexes, including non-specific ones. Optimize the Mg2+ concentration (e.g., test 1.5 mM - 4 mM); reducing it can dramatically improve specificity [1]. |
| Template Quality or Quantity | Degraded template or excessive DNA input can increase background. Re-purify DNA to remove inhibitors and ensure you are using the recommended amount (e.g., 5-50 ng genomic DNA) [1]. |
Symptom: Low yield of the desired product after switching to a Hot-Start enzyme.
- Check the activation step: Ensure the initial denaturation is at the correct temperature and duration as specified in the manufacturer's protocol [65].
- Optimize enzyme amount: If the reaction contains inhibitors or additives like DMSO, a slight increase in polymerase concentration may be necessary [1].
- Verify primer design: Ensure primers are specific, have appropriate Tm, and lack secondary structures or self-complementarity [67].
Experimental Protocol: Validating Hot-Start Efficacy
This protocol provides a methodology to experimentally demonstrate the suppression of low-temperature mishybridization by comparing a standard polymerase with its Hot-Start counterpart.
Objective
To visually quantify the reduction in non-specific amplification and primer-dimer formation achieved by using a Hot-Start DNA polymerase under suboptimal, low-temperature annealing conditions.
Materials
- DNA Template: A well-characterized control DNA (e.g., genomic DNA, plasmid).
- Primers: A primer pair specific to your target. For a more challenging test, also include a primer pair known to have a tendency for mispriming or primer-dimer formation.
- Polymerases: The standard version and the Hot-Start version of the same DNA polymerase.
- PCR Reagents: dNTPs, MgCl₂ or MgSO₄, appropriate reaction buffer.
- Thermal Cycler and Gel Electrophoresis system.
Table 3: Research Reagent Solutions
| Item | Function in the Experiment |
|---|---|
| Hot-Start DNA Polymerase | The key experimental variable; engineered to remain inactive until the first denaturation step to prevent low-temperature mishybridization [66] [65]. |
| Standard DNA Polymerase | The control variable; exhibits enzymatic activity at room temperature, allowing for the extension of primers that are mishybridized during reaction setup [65]. |
| Gradient Thermal Cycler | Essential for testing a range of annealing temperatures (Ta) simultaneously to determine the optimal specificity window for a given primer set [1]. |
| dNTP Mix | The building blocks for DNA synthesis; using balanced, high-quality dNTPs is crucial for efficient and accurate amplification [56]. |
Methodology
Reaction Setup:
- Prepare two identical master mixes containing buffer, dNTPs, Mg²⁺, primers, template, and nuclease-free water.
- Aliquot the master mix into two tubes. To one tube, add the standard polymerase. To the other, add the Hot-Start polymerase.
- For a comprehensive analysis, set up multiple reactions to be run with an annealing temperature gradient (e.g., from 45°C to 65°C).
Thermal Cycling:
- Use the following cycling parameters, adjusting the annealing temperature according to your gradient:
- Initial Denaturation/Activation: 95°C for 2-5 minutes (ensure this step meets the Hot-Start enzyme's activation requirement).
- Amplification (30-35 cycles):
- Denature: 95°C for 15-30 seconds.
- Anneal: Variable (e.g., 45°C - 65°C) for 15-30 seconds. Using a low annealing temperature here will exacerbate mishybridization in the non-Hot-Start reactions.
- Extend: 72°C for 1 minute per kb.
- Final Extension: 72°C for 5-10 minutes.
- Use the following cycling parameters, adjusting the annealing temperature according to your gradient:
Analysis:
- Analyze the PCR products using agarose gel electrophoresis.
- Compare the banding patterns between the standard and Hot-Start polymerases at each annealing temperature.
Workflow Diagram
Diagram 1: Experimental workflow to compare polymerase performance.
Expected Results
- At low annealing temperatures, reactions with the standard polymerase will show a significant amount of non-specific amplification, including multiple bands and primer-dimer formation.
- Reactions with the Hot-Start polymerase will show a dramatic reduction in these artifacts, yielding a single, bright band corresponding to the target amplicon, even at suboptimal annealing temperatures.
Advanced Strategy: Combining Hot-Start with Blocker Strands
For applications requiring extreme specificity, such as distinguishing between highly homologous sequences or suppressing amplification of contaminating DNA, Hot-Start polymerases can be used in conjunction with blocker strands (also known as clamping oligonucleotides) [64] [68].
Mechanism of Action
Blocker strands are designed to be perfectly complementary to known non-target (e.g., mutant or contaminant) sequences. They bind tightly to these sequences and both energetically destabilize and create a kinetic barrier to primer binding at the mishybridization site, thus "blocking" the polymerase from initiating extension [64]. When combined with a Hot-Start polymerase, which prevents any spurious extension during reaction setup, the two methods work synergistically to achieve unparalleled specificity.
Logical Relationship Diagram
Diagram 2: Synergistic relationship between Hot-Start and blocker methods.
Within the broader research on optimizing annealing temperature for PCR specificity, addressing the challenges of complex DNA templates is a critical area of investigation. GC-rich regions (typically defined as >60% GC content) and stable secondary structures pose significant obstacles to efficient amplification by promoting non-specific binding and impeding polymerase progression [69] [70]. This technical support resource provides targeted troubleshooting and methodologies to overcome these challenges, ensuring high specificity and yield in PCR applications critical to research and drug development.
Troubleshooting Guide: Common Issues and Solutions
Encountering problems during PCR amplification of complex templates is common. The table below outlines frequent issues, their probable causes, and recommended solutions.
| Observation | Possible Cause | Solution |
|---|---|---|
| No Product [71] | Poor primer design for complex template | Check primer design; avoid GC-rich 3' ends; increase primer length [16] [72]. |
| Excessively high annealing temperature | Recalculate primer Tm; use a temperature gradient to find optimal Ta [71] [5]. | |
| Enzyme inhibited by secondary structures | Use a specialized polymerase (e.g., Q5 High-Fidelity, OneTaq) and appropriate GC enhancers [71] [16]. | |
| Low concentration of active enzyme due to GC-rich template | Increase the concentration of the DNA polymerase in the reaction [70]. | |
| Multiple or Non-Specific Bands [71] | Annealing temperature too low | Increase annealing temperature for greater stringency [71] [16]. |
| Non-specific binding from poor primer design | Verify primers have no complementary regions; avoid GC clamps at the 3' end [71] [72]. | |
| Premature replication at low temperatures | Use a hot-start polymerase to inhibit activity until first denaturation [16] [48]. | |
| Smear of Non-Specific Products | Mispriming due to low stringency | Increase annealing temperature; use touchdown PCR [16] [5]. |
| Excessive cycle number leading to background | Reduce the number of PCR cycles [71]. | |
| Magnesium concentration too high | Titrate Mg2+ concentration in 0.2-1 mM increments to find optimum [71] [48]. |
Optimization Strategies and Experimental Protocols
Chemical Additives and Enhancers
Organic additives can significantly improve the amplification of GC-rich templates by destabilizing secondary structures and homogenizing DNA melting behavior [16] [70]. The following table summarizes key reagents and their use.
| Additive | Recommended Final Concentration | Primary Function | Considerations |
|---|---|---|---|
| DMSO [69] [48] | 2% - 10% | Lowers the Tm of DNA, helping to resolve strong secondary structures. | High concentrations can destabilize the polymerase. |
| Betaine [16] [70] | 1 M - 2 M | Homogenizes the thermodynamic stability of GC- and AT-rich regions. | Particularly useful for long-range PCR and very high GC content. |
| Formamide [69] [48] | 1.25% - 10% | Weakens base pairing, increasing primer annealing specificity. | Can inhibit polymerase activity at higher concentrations. |
| BSA [48] | ~400 ng/µL | Binds to inhibitors present in biological samples, stabilizing the reaction. | Useful when sample purity is a concern. |
Experimental Protocol for Testing Additives:
- Prepare a master PCR mix without the additive.
- Aliquot the master mix into separate tubes.
- Add a different additive (or combination) to each tube at its recommended starting concentration.
- Run the PCR and analyze the results via gel electrophoresis. The optimal additive will show a strong, specific band with minimal background.
Polymerase Selection
The choice of DNA polymerase is fundamental for challenging amplifications. High-fidelity polymerases with proofreading activity (3'→5' exonuclease) are often preferred for complex templates due to their lower error rates [16] [48].
Experimental Protocol for Polymerase Comparison:
- Select a set of polymerases (e.g., standard Taq, a high-fidelity enzyme like Q5 or Pfu, and a polymerase marketed for GC-rich templates).
- Using the same primer set, template, and buffer system (optimized for each enzyme), set up identical PCR reactions.
- Run the reactions with a standardized thermal cycling protocol.
- Compare the yield, specificity, and fidelity (e.g., via sequencing) of the amplified products to select the best-performing enzyme for your specific template [16].
Advanced Thermal Cycling Techniques
Touchdown PCR is a highly effective technique for increasing specificity, especially when optimal annealing temperature is unknown [5].
Experimental Protocol for Touchdown PCR:
- Calculate Tm: Determine the melting temperature (Tm) of your primers.
- Initial Cycles: Set the initial annealing temperature 5-10°C above the calculated Tm of your primers.
- Temperature Decrease: Program the thermocycler to decrease the annealing temperature by 1-2°C every second cycle for a total of 10-16 cycles.
- Final Cycles: Continue with an additional 15-25 cycles at an annealing temperature 2-5°C below the calculated Tm.
- This method ensures that the first, most specific amplifications occur at high stringency, and these specific products are then preferentially amplified in later cycles [5].
Frequently Asked Questions (FAQs)
Q1: What is the most common reason for non-specific amplification in a standard PCR assay? The most common cause is an annealing temperature (Ta) that is too low, which reduces the stringency of primer-template binding and allows primers to anneal to off-target sites [16].
Q2: How does a high-fidelity polymerase differ from standard Taq polymerase? High-fidelity polymerases possess 3'→5' exonuclease (proofreading) activity, which allows them to correct base mismatches during amplification. This results in an error rate up to 50 times lower than that of non-proofreading enzymes like standard Taq [16].
Q3: When should I use a buffer additive like DMSO? Buffer additives like DMSO should be considered when attempting to amplify templates with high GC content (above 65%) or those prone to forming stable secondary structures, as it helps denature these structures by lowering the DNA's melting temperature [69] [16].
Q4: Why is Mg2+ concentration optimization critical for PCR? Magnesium ions (Mg2+) are an essential cofactor for DNA polymerase activity. Its concentration must be carefully controlled: too low, and the enzyme is inactive, leading to no product; too high, and the polymerase loses specificity, resulting in non-specific amplification and reduced fidelity. The optimal concentration is typically between 1.5 and 2.0 mM, but titration is recommended [16] [48].
The Scientist's Toolkit: Research Reagent Solutions
The following table details key reagents and their functions for optimizing PCR with complex templates.
| Reagent / Material | Function / Explanation |
|---|---|
| High-Fidelity DNA Polymerase (e.g., Q5, Pfu) | Engineered for high processivity and proofreading activity, enabling efficient amplification through difficult templates with low error rates [16] [48]. |
| Hot-Start Polymerase | Remains inactive until the initial high-temperature denaturation step, preventing non-specific amplification and primer-dimer formation during reaction setup [16] [48]. |
| Betaine (PCR Enhancer) | A chemical chaperone that equalizes the contribution of GC and AT base pairs to DNA stability, facilitating the denaturation of GC-rich regions during cycling [16] [70]. |
| DMSO | Disrupts hydrogen bonding and base stacking, effectively lowering the melting temperature of DNA and helping to unwind secondary structures [69] [48]. |
| Gradient Thermocycler | Instrumental for empirical optimization, allowing simultaneous testing of a range of annealing temperatures in a single run to determine the optimal condition [71] [5]. |
| Specialized Cloning Vector | For cloning difficult sequences, using a low-copy number or non-expression vector can mitigate toxicity issues the insert may cause in the host [71]. |
Frequently Asked Questions
What is the 2D-gradient PCR method and why is it used? The 2D-gradient method is an advanced PCR optimization technique that simultaneously tests a range of annealing temperatures (Ta) and denaturation temperatures (Td) in a single run. It uses a thermal cycler with a 2D-gradient function that creates one temperature gradient along the x-axis and another along the y-axis of the thermoblock [25]. This allows researchers to quickly identify the optimal temperature combination for maximizing product yield and amplification specificity, eliminating the need for multiple, separate optimization experiments [25].
When should I consider using a 2D-gradient approach for PCR optimization? This method is particularly valuable in the following scenarios [25] [73]:
- When amplifying difficult templates, such as those with high GC-content, strong secondary structure, or long sequences.
- When standard optimization of the annealing temperature fails to eliminate unspecific amplification products.
- When you need to quickly obtain a large amount of specific product for downstream applications like cloning or sequencing.
- When a PCR assay needs to be finely tuned for either maximum yield or highest specificity.
What are the advantages of a 2D-gradient over a standard (1D) temperature gradient? A standard 1D-gradient is typically used to optimize only one variable, most commonly the annealing temperature. In contrast, a 2D-gradient provides a systematic and efficient way to optimize two critical variables at once [25]. By testing 96 different temperature combinations in a single run, it dramatically reduces the time, effort, and consumables required to find the ideal conditions, a process that would be prohibitively laborious using sequential 1D optimizations [25].
How does optimizing the denaturation temperature improve my PCR? While a denaturation temperature of 95°C is commonly used, it may not be sufficient for all templates. Insufficient denaturation, especially in the early cycles, can significantly reduce PCR efficiency [73]. Optimizing the denaturation temperature ensures that the DNA template is fully separated into single strands, making it accessible for primer binding. This can be the key to achieving a high yield for difficult assays. However, excessively high temperatures can damage the polymerase, so finding the optimal balance is crucial [73].
Troubleshooting Guide
| Problem Description | Possible Causes | Recommended Solutions |
|---|---|---|
| Low or No Product Yield | • Denaturation temperature too low for template (e.g., high GC-content) [73]• Annealing temperature too high for primer pair [74]• Suboptimal magnesium concentration [74] | • Use 2D-gradient to increase denaturation temperature [73]• Use 2D-gradient to find a lower annealing temperature [25]• Supplement Mg²⁺ concentration in 0.5 mM increments up to 4 mM [74] |
| Non-specific Bands (Multiple Bands) | • Annealing temperature too low [74] [75]• Denaturation temperature is suboptimal for the template [73] | • Use 2D-gradient to find a higher, more stringent annealing temperature [25]• Optimize denaturation temperature to improve specificity [73] |
| Smearing on Gel | • Excessive enzyme activity leading to non-specific priming [74]• Too many cycles [74] | • Ensure polymerase concentration is 0.5–2.0 units/50 µL reaction [74]• Reduce number of cycles; 25 is often sufficient for a 500 bp amplicon [74] |
Experimental Protocol: 2D-Gradient PCR Optimization
This protocol provides a methodology for simultaneously optimizing annealing and denaturation temperatures using a thermal cycler equipped with a 2D-gradient function.
1. Reaction Setup
- Master Mix: Assemble reactions on ice. A typical 50 µL reaction contains [74]:
- 1X Reaction Buffer
- 1.5–2.0 mM MgCl₂ (initial concentration)
- 200 µM of each dNTP
- 0.1–0.5 µM of each primer
- 1–10 ng of genomic DNA template (or 1 pg–10 ng of plasmid)
- 1.25 units of Taq DNA Polymerase
- Controls: Include a positive control with known working temperatures and a no-template control.
2. Thermocycling Conditions Configure your thermal cycler's 2D-gradient function according to the manufacturer's instructions. The program below is a representative example.
- Initial Denaturation: 95°C for 2 minutes [74].
- PCR Cycles (25–35 cycles):
- Denaturation: Use a gradient of temperatures for 15–30 seconds. A suggested range is 90°C to 100°C, testing in 2°C increments across the block [25] [73].
- Annealing: Use a gradient of temperatures for 15–30 seconds. A suggested range is 5°C above and below the calculated Tm of your primers [74] [9].
- Extension: 68°C for 1 minute per 1000 base pairs [74].
- Final Extension: 68°C for 5 minutes [74].
- Hold: 4–10°C [74].
3. Results Analysis
- Analyze the PCR products using agarose gel electrophoresis.
- Identify the well that produces a single, sharp band of the expected size with the highest intensity.
- The location of this well corresponds to the optimal combination of denaturation and annealing temperatures for your assay.
Research Reagent Solutions
| Item | Function in 2D-Gradient PCR |
|---|---|
| Thermal Cycler with 2D-Gradient | Instrument capable of generating independent temperature gradients along two axes (X and Y) of the thermoblock, allowing for simultaneous testing of multiple temperature pairs in one run [25]. |
| Taq DNA Polymerase | A thermostable enzyme that catalyzes DNA synthesis. Standard enzyme for routine PCR. Concentration should be optimized, typically 0.5–2.0 units per 50 µL reaction [74]. |
| dNTPs | Deoxynucleoside triphosphates (dATP, dCTP, dGTP, dTTP) are the building blocks for new DNA strands. Typical final concentration is 200 µM of each dNTP [74]. |
| Magnesium Chloride (MgCl₂) | Cofactor essential for Taq DNA polymerase activity. Concentration is critical and often requires optimization; 1.5–2.0 mM is a standard starting point [74]. |
| Universal Annealing Buffer | Specialized buffer (e.g., from Platinum DNA polymerases) containing isostabilizing components that allow primers with different Tms to work efficiently at a universal annealing temperature (e.g., 60°C), simplifying one variable [9]. |
Workflow and Temperature Relationships
The following diagrams illustrate the logical workflow for applying the 2D-gradient method and the relationship between temperature and PCR outcomes.
PCR Optimization Workflow
Temperature Impact on PCR
Beyond the Gel: Validating Assay Specificity and Comparing Quantitative Platforms
Analyzing Amplification Curves and Melt Curves in qPCR for Specificity Assessment
FAQs: Interpreting Amplification Curves for Specificity Assessment
Q1: What are the key phases of a normal qPCR amplification curve, and what do they indicate about reaction specificity?
A normal qPCR amplification curve exhibits three distinct phases that indicate a specific and efficient reaction [76] [77]:
- Baseline Phase: The initial cycles where fluorescence remains at background levels. The fluorescence is below the detection threshold.
- Exponential Phase: The region where fluorescence increases exponentially with each cycle, indicating specific amplification of the target. This phase is used for determining the Cq (quantification cycle) value.
- Plateau Phase: The final phase where amplification slows and fluorescence stabilizes due to reagent depletion or enzyme inactivation.
The smooth, sigmoidal shape of a normal curve with a clear exponential phase suggests specific amplification with minimal non-specific products [78].
Q2: What does exponential amplification in my No Template Control (NTC) indicate, and how should I address it?
Exponential amplification in your NTC indicates contamination or primer-dimer formation [76] [79]:
Potential Causes:
- Contamination from laboratory exposure to the target sequence
- Contamination carried over from reagent manufacture
- Primer-dimer formation, especially when using intercalating dyes like SYBR Green
Corrective Steps:
- Decontaminate work areas with 10% bleach and nuclease-free water
- Prepare reaction mix in a clean area separated from template sources
- Order new reagent stocks
- Use hot-start polymerase to minimize primer-dimer formation
- Redesign primers if primer-dimer formation persists
Q3: Why do my technical replicates show variable Cq values (>0.5 cycles difference), and how can I improve reproducibility?
Scattered replicates with Cq variations >0.5 cycles indicate technical issues affecting reproducibility [76]:
Potential Causes:
- Pipetting errors, especially with small volumes
- Insufficient mixing of reaction components
- Poor thermal calibration across the thermocycler block
- Low template concentration leading to stochastic effects
- Incorrectly set baseline
Corrective Steps:
- Calibrate pipettes and use positive-displacement pipettes with filtered tips
- Mix all solutions thoroughly during preparation
- Hold pipettes vertically when aspirating solutions (sterile technique alone doesn't ensure reproducibility with small volumes)
- Check thermocycler block temperature uniformity
- Increase template amount if Cq values are high (>30 cycles)
- Manually adjust baseline settings if incorrectly set by software
Q4: What does an unusually shaped amplification curve with a delayed Cq value indicate about my reaction efficiency?
Unusually shaped curves with delayed Cq often indicate poor reaction efficiency [76] [80]:
Potential Causes:
- Sample inhibitors (phenol, heparin, hemoglobin)
- Poor primer design with significant Tm differences (>5°C)
- Annealing temperature too low or too high
- Unanticipated variants within the target sequence
- Primers binding to SNP sites
Corrective Steps:
- Dilute sample to reduce inhibitor concentration
- Redesign primers with similar Tm values (within 2-5°C)
- Optimize annealing temperature using gradient PCR
- Check primer sequences for known SNPs in your target region
- Use primer design software to ensure optimal characteristics
Q5: Why does my amplification curve show a jagged signal throughout the plot instead of a smooth curve?
A jagged or noisy amplification signal indicates detection issues [76]:
Potential Causes:
- Poor amplification or weak probe signal
- Insufficient probe concentration
- Mechanical instrument error
- Low concentration of passive reference dye (e.g., ROX)
- Buffer-nucleotide instability
Corrective Steps:
- Ensure sufficient probe concentration is used
- Try a fresh batch of probe or primer
- Mix primer/probe/master solution thoroughly during setup
- Verify appropriate ROX concentration (platform-dependent)
- Contact equipment technician for instrument calibration
Troubleshooting Abnormal Amplification Curves
The table below summarizes common amplification curve abnormalities, their potential causes, and solutions for maintaining PCR specificity:
Table 1: Troubleshooting Guide for Abnormal qPCR Amplification Curves
| Observation | Potential Causes | Corrective Actions |
|---|---|---|
| No Amplification | Lack of target in sample [76]; assay design failure [80]; sample degradation [79]; incorrect instrument settings [80] | Run positive control; redesign assay; check RNA quality with bioanalyzer; verify instrument dye calibration [76] [79] |
| Early Cq (<15 cycles) | Too much template [76] [80]; genomic DNA contamination [76]; automatic baseline failure [80] | Dilute template; DNase treatment; use primers spanning exon-exon junctions; manually adjust baseline [76] [79] |
| Low Plateau Phase | Limiting reagents [76]; degraded reagents (dNTPs or master mix) [76]; inefficient reaction [76]; incorrect probe concentration [76] | Check master mix calculations; repeat with fresh stock; compare endpoint fluorescence; optimize probe concentration [76] |
| Baseline Drift | Degradation of probe [76]; bubble in well [76]; reduction of azo bonds in BHQ quencher [76]; presence of DTT [76] | Check baseline without subtraction; inspect wells for bubbles; remove DTT from RT step; check for reducing agents [76] |
| Multiple Amplification Peaks in Melt Curve | Non-specific products [79]; primer-dimer formation [79]; multiple amplicons with different Tm values [31] | Optimize annealing temperature; redesign primers; use gradient PCR; increase annealing temperature [79] [1] |
Experimental Protocols for Curve Analysis
Protocol 1: Systematic Approach to Amplification Curve Analysis
Examine Raw Data: Before analysis, view the raw fluorescence data to identify any instrumentation artifacts or well-specific issues [81].
Set Proper Baseline: Determine the baseline from cycles where fluorescence is stable and linear, typically 2 cycles before the earliest amplification begins. Avoid the first 3-5 cycles which may contain reaction stabilization artifacts [81] [80].
Establish Correct Threshold: Set the threshold within the exponential phase of all amplifications, where curves are parallel. Use logarithmic view to identify the true exponential phase [81] [80].
Check Cq Values: Ensure Cq values fall within the validated range of your standard curve. Cq values >35 may indicate low specificity unless validated for low copy number detection [76] [81].
Verify Reaction Efficiency: Calculate efficiency from the slope of your standard curve: Efficiency = 10^(-1/slope) - 1. Ideal efficiency ranges from 90-110% (slope of -3.6 to -3.1) [79].
Protocol 2: Melt Curve Analysis for Amplicon Specificity
Acquisition Parameters:
- After amplification, slowly ramp temperature from 60°C to 95°C with continuous fluorescence monitoring
- Use small temperature increments (0.2-0.5°C) for high-resolution data [31]
Data Analysis:
- Plot the negative derivative of fluorescence (-dF/dT) versus temperature
- Identify sharp, single peaks indicating homogeneous amplicon population
- Note broad or multiple peaks suggesting non-specific amplification or primer-dimer [79]
Interpretation:
- Compare melting temperatures (Tm) between samples and controls
- Expect <0.5°C variation in Tm for technical replicates
- For SYBR Green assays, ensure melt curve Tm matches validated control [79]
Workflow Diagram for Specificity Assessment
Diagram 1: Specificity Assessment Workflow
Research Reagent Solutions for Optimal Specificity
Table 2: Essential Reagents for qPCR Specificity Assessment
| Reagent/Kit | Function in Specificity Assessment | Key Considerations |
|---|---|---|
| Hot-Start DNA Polymerase | Prevents non-specific amplification during reaction setup by requiring heat activation [82] [1] | Choose polymerases with high fidelity and tolerance to inhibitors; enables specific primer binding only at elevated temperatures [82] |
| Passive Reference Dye (ROX) | Normalizes for well-to-well variations in reaction volume and optical properties [78] [79] | Concentration must be optimized for different instrument platforms; improves threshold setting accuracy [79] |
| Double-Quenched Probes | Reduces background fluorescence and increases signal-to-noise ratio for clearer amplification curves [80] | Internal quencher (e.g., ZEN) with 3' quencher provides lower background than single-quenched probes [80] |
| qPCR Master Mix with Optimized Buffer | Provides optimal Mg2+ concentration, dNTPs, and stabilizers for specific amplification [79] | Look for mixes with efficiency >90% and designed for your application (gene expression, genotyping) [79] |
| DNA/RNA Stabilization Solutions | Prevents sample degradation that can lead to variable amplification and non-specific products [79] | Essential for preserving sample integrity from collection through analysis; use RNAlater for RNA samples [79] |
Technical Support Center
This technical support center provides troubleshooting guidance for researchers working on establishing robust standard curves for qPCR, within the context of optimizing annealing temperature for PCR specificity.
Troubleshooting Guides
Problem: Poor Standard Curve Linearity (R² < 0.99)
- Q: What are the primary causes of a low R² value in my standard curve?
- A: A low R² value indicates high variability and poor predictability in your dilution series. Common causes include:
- Pipetting Inaccuracy: This is the most frequent cause. Inconsistent serial dilution leads to inaccurate data points.
- Template Degradation or Contamination: Degraded nucleic acid templates or contaminating inhibitors (e.g., salts, phenol) can cause inconsistent amplification across dilutions.
- Insufficient Mixing: Failure to mix the dilution series thoroughly before loading the plate.
- Fluorescence Threshold Setting: An improperly set baseline or threshold can skew Cq values.
- A: A low R² value indicates high variability and poor predictability in your dilution series. Common causes include:
Problem: Suboptimal PCR Efficiency (<95% or >105%)
- Q: My PCR efficiency is outside the acceptable range (100 ± 5%). How can I troubleshoot this?
- A: PCR efficiency is calculated from the slope of the standard curve. An abnormal slope indicates reaction inhibition or optimization issues.
- Efficiency >105%: Suggests the presence of inhibitors in the sample or primer-dimer formation, leading to artificially early Cq values at high template concentrations.
- Efficiency <95%: Suggests reaction inhibition, poor primer annealing, or suboptimal reaction conditions. This is a key parameter to monitor when optimizing annealing temperature for specificity.
- A: PCR efficiency is calculated from the slope of the standard curve. An abnormal slope indicates reaction inhibition or optimization issues.
FAQs
Q: How do I calculate PCR efficiency from my standard curve?
- A: PCR efficiency (E) is calculated using the formula: E = [10^(-1/slope) - 1] * 100%. An ideal slope of -3.32 corresponds to 100% efficiency, meaning the PCR product doubles every cycle.
Q: How many points and what dilution factor should I use for my standard curve?
- A: A minimum of 5 points in a 10-fold serial dilution is standard. A 5-fold dilution can also be used for a more concentrated dynamic range. Including more points increases the robustness of the curve.
Q: How does annealing temperature optimization affect my standard curve?
- A: The annealing temperature directly impacts specificity and efficiency. A temperature that is too low can cause non-specific amplification and primer-dimer artifacts, inflating efficiency. A temperature that is too high can reduce yield and efficiency. The optimal temperature, determined through a gradient PCR, should be used when generating the standard curve to ensure it reflects true, specific amplification.
Data Presentation
Table 1: Interpretation of Standard Curve Parameters
| Parameter | Ideal Value | Out-of-Range Indication | Common Cause |
|---|---|---|---|
| R² (Coefficient of Determination) | ≥ 0.99 | High variability, poor linearity | Pipetting error, degraded template, contamination |
| Slope | -3.32 | > -3.10 = Low Efficiency< -3.60 = High Efficiency | Inhibition, suboptimal conditionsInhibitors, primer-dimer |
| Efficiency (E) | 100% ± 5% | < 95% or > 105% | Reaction inhibition or non-specific amplification |
Experimental Protocols
Protocol: Generating a qPCR Standard Curve
- Template Preparation: Purify the target DNA sequence (e.g., a plasmid containing the insert or a PCR amplicon) and quantify it accurately using a spectrophotometer.
- Serial Dilution: Perform a 10-fold serial dilution of the template in nuclease-free water or TE buffer. Prepare at least 5 dilution points, covering the expected concentration range of your unknown samples.
- qPCR Setup: For each dilution, set up a minimum of 3 replicate reactions. Include a no-template control (NTC). Use a master mix to ensure consistency.
- Run qPCR: Perform the run using the cycling conditions optimized for your assay, including the determined optimal annealing temperature.
- Data Analysis: The qPCR software will generate a standard curve by plotting the Log of the starting quantity against the Cq value. The software will report the Slope, Y-Intercept, R², and calculated Efficiency.
Mandatory Visualization
Title: qPCR Standard Curve Workflow
Title: Annealing Temp Impact on Efficiency
The Scientist's Toolkit
Table 2: Essential Reagents for qPCR Standard Curve Establishment
| Reagent / Material | Function |
|---|---|
| High-Purity DNA Template | The standard used for serial dilution. Must be pure and accurately quantified. |
| qPCR Master Mix | A pre-mixed solution containing DNA polymerase, dNTPs, salts, and buffer. Provides reaction consistency. |
| Sequence-Specific Primers | Designed for high specificity and efficiency. Their quality is paramount. |
| Nuclease-Free Water | Used for dilutions to prevent degradation of nucleic acids and reagents. |
| Optical qPCR Plates & Seals | Ensure clear optical reading during amplification and prevent well-to-well contamination. |
| High-Accuracy Micropipettes | Critical for performing precise serial dilutions and setting up reproducible reactions. |
Digital PCR (dPCR) represents the third generation of PCR technology, enabling absolute quantification of nucleic acids without the need for a standard curve. This is achieved by partitioning a PCR reaction into thousands of individual reactions, so that each partition contains either 0, 1, or a few nucleic acid targets. After end-point amplification, the fraction of positive partitions is counted and the target concentration is calculated using Poisson statistics [83].
Two major partitioning methods have emerged: droplet-based digital PCR (ddPCR) uses water-in-oil emulsion to create nanoliter-sized droplets, while nanoplate-based dPCR employs solid chips with microfabricated wells for partition [83]. This technical support article compares these platforms within the context of optimizing annealing temperature for PCR specificity research, providing troubleshooting guides and FAQs for researchers and scientists.
Technology Comparison: Key Parameters and Performance Metrics
Technical Specifications and Performance Comparison
Table 1: Platform Comparison Based on Recent Comparative Studies
| Parameter | Droplet-based (QX200) | Nanoplate-based (QIAcuity) |
|---|---|---|
| Partitioning Mechanism | Water-in-oil emulsion droplets | Nanoscale chambers in solid plate |
| Partition Count | ~20,000 droplets/reaction [84] | ~26,000 partitions/reaction (26k plates) [85] |
| Reaction Volume | 20µL reaction volume [86] | 40µL reaction volume [86] |
| Limit of Detection (LOD) | 0.17 copies/µL input [86] | 0.39 copies/µL input [86] |
| Limit of Quantification (LOQ) | 4.26 copies/µL input [86] | 1.35 copies/µL input [86] |
| Precision with Restriction Enzymes | Improved significantly with HaeIII vs. EcoRI (CV <5% with HaeIII) [86] | Less affected by enzyme choice (CV 1.6-14.6%) [86] |
| Dynamic Range | High linearity (R²adj = 0.99) [86] | High linearity (R²adj = 0.98) [86] |
| Multiplexing Capability | Well-established | Suitable for multiplex detection [85] |
Table 2: Comparative Performance in Recent Applications (2025 Studies)
| Application | Droplet-based Performance | Nanoplate-based Performance |
|---|---|---|
| DNA Methylation Analysis | Specificity: 100%, Sensitivity: 98.03% [87] | Specificity: 99.62%, Sensitivity: 99.08% [87] |
| Periodontal Pathogen Detection | N/A in cited study | Low intra-assay variability (median CV%: 4.5%) [85] |
| Copy Number Analysis in Protists | Good precision, enzyme-dependent [86] | High precision across most analyses [86] |
| Correlation Between Platforms | Strong correlation (r = 0.954) with nanoplate for methylation analysis [87] | Strong correlation with droplet platform [87] |
Platform Selection Workflow
Troubleshooting Common Experimental Challenges
FAQ: Platform Selection and Setup
Q: What are the key practical considerations when choosing between droplet and nanoplate systems? A: Selection should be based on sensitivity requirements, sample throughput, and sample type. Droplet systems may be preferred for ultra-sensitive detection, while nanoplate systems offer easier workflow and higher throughput. Consider that droplet systems show higher precision with optimal restriction enzymes, while nanoplate systems demonstrate more consistent performance across different conditions [86]. Additional factors include workflow time and complexity, instrument requirements, and the possibility for temperature gradient or reanalysis [87].
Q: How does sample type affect platform performance? A: Environmental samples with complex compositions often present challenges for both platforms, but droplet systems may show more variability. Soil and root samples can exhibit significant "rain" (intermediate fluorescence) due to inhibitors like humic acids, though ddPCR is generally more robust to inhibitors than qPCR [84]. Sample purity is critical - contaminants such as alcohols, salts, humic acids, urea, and phenol can impair annealing properties or denature polymerases [88].
Q: What is the optimal sample input for dPCR experiments? A: The average number of copies per partition should ideally be between 0.5-3 to ensure accurate quantification [88]. For genomic DNA, calculate input using this formula: Genome size (bp) × 1.096 × 10⁻²¹ g/bp = mass per copy. For example, 10 ng of human gDNA (3.3×10⁹ bp) contains approximately 3,000 copies of a single-copy gene [88].
Troubleshooting Guide: Experimental Artifacts and Solutions
Table 3: Troubleshooting Common dPCR Issues
| Problem | Possible Causes | Solutions |
|---|---|---|
| "Rain" (Intermediate Fluorescence) | • Inhibitors in sample [84]• Suboptimal annealing temperature [84]• Degraded DNA [84]• Variable droplet size [84] | • Improve DNA purity [88]• Optimize annealing temperature [84]• Use restriction enzymes [88]• Adjust cycling conditions [84] |
| Poor Precision Between Replicates | • Improper mixing [88]• Pipetting errors [88]• Partition volume variability• Inhibitors | • Use duplicates/triplicates [88]• Ensure homogeneous reagents [1]• Use restriction enzymes (especially for ddPCR) [86] |
| Inaccurate Quantification | • Target concentration too high [88]• Linked gene copies [88]• Uneven partitioning of large DNA [88] | • Dilute sample appropriately [88]• Use restriction digestion [88]• Fragment large DNA templates [88] |
| Low Signal Intensity | • Poor PCR efficiency• Inhibitors• Suboptimal primer/probe concentrations | • Optimize primer/probe concentrations (0.5-0.9μM primers, 0.25μM probes) [88]• Check reagent quality [1]• Use high-purity templates [88] |
Annealing Temperature Optimization Protocol
Within the context of PCR specificity research, annealing temperature optimization is critical for both platform types. The following protocol is adapted from current research:
Initial Temperature Gradient: Set a gradient spanning 5-10°C below to 5°C above the calculated Tm of your primers [84].
Evaluation Metrics: Assess results based on:
- Separation between positive and negative partitions
- Minimal "rain" between clusters
- CV values between replicates
- Amplification efficiency
Temperature Adjustment: Lower annealing temperatures can reduce bias caused by primer mismatches, as demonstrated in traditional PCR [89]. However, balance this with specificity requirements.
Platform-Specific Considerations:
- Droplet systems: May require tighter temperature control due to emulsion stability
- Nanoplate systems: Benefit from more uniform thermal transfer
Validation: Confirm optimal temperature with known positive and negative controls, including:
The Scientist's Toolkit: Essential Materials and Reagents
Table 4: Research Reagent Solutions for dPCR Experiments
| Reagent/Category | Function/Application | Notes & Selection Criteria |
|---|---|---|
| Restriction Enzymes | Separate linked gene copies; reduce viscosity; improve quantification accuracy [88] | HaeIII showed better performance than EcoRI in copy number analysis [86]; Select enzymes that don't cut within amplicon [88] |
| DNA Polymerase | Amplification of target sequences; determines efficiency and specificity | Hot-start polymerases recommended to prevent non-specific amplification [1]; Consider inhibitor-resistant versions for environmental samples [1] |
| Probe-Based Detection | Specific target detection in multiplex assays; reduces non-specific signal | Higher concentrations (0.25μM) often needed vs. qPCR [88]; Avoid reporter-quencher combinations with overlapping emissions [88] |
| Sample Preparation Kits | Nucleic acid purification; critical for sample purity | Specific kits available for different templates (gDNA, plasmid, RNA) [88]; Specialized protocols for FFPE samples [88] |
| Partitioning Oil/Stabilizers | Create stable emulsion (ddPCR); prevent coalescence during thermal cycling | Proper surfactants essential for droplet stability during temperature variations [83] |
| Positive/Negative Controls | Validate assay performance; distinguish true signals from background | Include: organismal positive control, environmental positive/negative controls, no-template control [84] |
Advanced Experimental Design Considerations
Restriction Enzyme Application Workflow
Sample Preparation Best Practices
Sample Integrity Assessment:
Input Amount Optimization:
Inhibition Management:
Both droplet-based and nanoplate-based dPCR platforms offer robust solutions for absolute quantification in research and diagnostic applications. The choice between systems should be guided by specific application requirements, with droplet systems potentially offering slightly higher sensitivity and nanoplate systems providing easier workflow and more consistent performance across varying conditions. Proper experimental design, including appropriate controls and optimization of key parameters like annealing temperature and restriction enzyme use, is essential for generating reliable, reproducible data regardless of platform selection.
The Role of Reference Genes in Validation and Data Normalization for Gene Expression Studies
Frequently Asked Questions (FAQs)
1. What is a reference gene and why is it critical for qPCR? A reference gene, or housekeeping gene, is a gene involved in basic cellular processes that is assumed to maintain a constant expression level across different tissues, developmental stages, and experimental conditions. In reverse transcription quantitative polymerase chain reaction (RT-qPCR) studies, it serves as an internal control to normalize the expression data of target genes. Normalization is essential to correct for variations in sample amount, RNA quality, reverse transcription efficiency, and pipetting errors, making the results reliable and reproducible [90] [91].
2. Is there a universal reference gene that works for all experiments? No. Numerous studies have confirmed that no single internal control gene is universal for all experiments [92] [91]. The expression stability of a reference gene can vary significantly depending on the species, tissue type, developmental stage, and specific experimental conditions (e.g., stress treatments). Therefore, a gene that is stable in one setting may be unstable in another, making it necessary to validate potential reference genes for each unique experimental condition [90] [93] [92].
3. How many reference genes should I use for normalization? It is generally recommended to use multiple reference genes for normalization. Software like geNorm can help determine the optimal number. Often, the combination of two or three of the most stable genes is sufficient for accurate normalization, though this should be validated for your specific experimental set [92].
4. What are some common mistakes when selecting and using reference genes? A common mistake is selecting a reference gene based solely on tradition or literature from a different experimental system without proper validation. Other pitfalls include:
- Using a single reference gene without checking its stability.
- Using a reference gene that is regulated by the experimental treatment.
- Not performing a proper stability analysis using specialized algorithms [91].
5. How does PCR optimization, specifically annealing temperature, relate to reference gene validation? While reference gene validation ensures biological relevance, PCR optimization ensures technical accuracy. An optimal and stringent annealing temperature is crucial for reaction specificity, preventing the amplification of non-specific products and primer-dimers [4] [16]. If the annealing temperature is too low, primers may bind non-specifically, leading to inaccurate quantification of both target and reference genes, thereby compromising the entire normalization process.
Troubleshooting Guides
Problem 1: Inconsistent Results in Target Gene Expression
Possible Cause: Unstable reference gene.
- Solution: Validate your reference genes for stability under your specific experimental conditions.
- Protocol: Candidate Gene Stability Analysis
- Select Candidates: Choose 4-6 candidate reference genes from literature and transcriptome data. Common candidates include
ACTB,GAPDH,18S rRNA,HPRT1, andB2M, but these are not universally stable [90] [93]. - Run qPCR: Amplify candidate genes in all your test samples (e.g., different tissues, treatments, time points).
- Analyze Stability: Use dedicated algorithms to rank the genes by their expression stability.
- geNorm: Calculates a stability measure (M); lower M values indicate greater stability. Sequentially excludes the least stable gene [93] [94] [92].
- NormFinder: Another algorithm that ranks candidate genes based on their expression stability and can also evaluate variation between sample subgroups [90] [93] [92].
- Select Candidates: Choose 4-6 candidate reference genes from literature and transcriptome data. Common candidates include
Problem 2: Poor PCR Efficiency or Specificity
Possible Cause: Suboptimal reaction components or cycling conditions.
- Solution: Systematically optimize the PCR protocol.
- Protocol: PCR Optimization for Specificity and Efficiency
- Primer Design:
- Annealing Temperature (Ta) Optimization:
- Perform a gradient PCR, testing a range of temperatures (e.g., 55°C to 65°C) to identify the temperature that yields the highest yield of the specific product and the lowest non-specific amplification [16].
- MgCl₂ Concentration:
- Magnesium is a critical cofactor for DNA polymerase. Test a range of concentrations (e.g., 1.5 mM to 3.0 mM) to find the optimum for your specific primer-template system [95] [4]. A meta-analysis suggests 1.5-3.0 mM as an optimal starting range, with every 0.5 mM increase raising the DNA melting temperature by approximately 1.2°C [95].
- Use of Additives:
- For difficult templates (e.g., high GC-content), additives like DMSO (2-10%) or Betaine (1-2 M) can help reduce secondary structures and improve specificity and yield [16].
Problem 3: High Variation in Reference Gene Cq Values
Possible Cause: The reference gene is not stable across your sample set.
- Solution: Re-evaluate your candidate genes and select a more stable one.
- Protocol: Assessing Expression Level Variation
- Calculate Basic Statistics: For the quantification cycle (Cq) values of each candidate gene across all samples, calculate the mean Cq, standard deviation (SD), and coefficient of variation (CV).
- Calculate Maximum Fold Change (MFC): Determine the ratio of the maximum and minimum expression values observed in your dataset [90].
- Interpret Results: Genes with a low CV and MFC are more stable. A study on thyroid tissues, for example, found
ACTBto be more stable thanGAPDH,HPRT1, andB2M, which showed higher variability [90].
Experimental Protocols
Detailed Methodology for Reference Gene Validation
This protocol outlines the steps for validating reference genes, as performed in studies on peanut, cassava, and other species [93] [94] [92].
1. Plant Material and Treatments:
- Grow plants under controlled conditions.
- Collect samples representing the diversity of your study (e.g., different organs, developmental stages, stress treatments like drought or cold). Immediately freeze in liquid nitrogen and store at -80°C.
2. Nucleic Acid Extraction and Reverse Transcription:
- Homogenize tissue samples mechanically in Trizol reagent.
- Extract total RNA according to the manufacturer's protocol.
- Assess RNA concentration and purity using a spectrophotometer (e.g., NanoDrop).
- Reverse-transcribe 1 μg of total RNA to cDNA using random and oligo-dT primers and reverse transcriptase.
3. Quantitative PCR:
- Primers: Use previously validated primer sequences or design new ones with software, checking for specificity.
- Reaction Mix: Use a SYBR Green PCR master mix. A typical 20 μL reaction contains: 1x SYBR Green mix, forward and reverse primers (200 nM each), and cDNA template.
- Cycling Conditions on a Real-Time PCR System:
- Initial denaturation: 95°C for 10 min.
- 40 cycles of:
- Denaturation: 95°C for 15 s.
- Annealing/Extension: 60°C for 45 s.
- Melting Curve Analysis: Acquire a melting curve after amplification to confirm the specificity of the PCR product (a single peak indicates a single amplicon).
4. Data Analysis:
- Export Cq Values.
- Run Stability Algorithms: Input the Cq values into geNorm and NormFinder software to rank the candidate genes by stability.
- Select Reference Genes: Choose the top-ranked, most stable genes for your subsequent gene expression studies.
Workflow for Integrated PCR and Reference Gene Optimization
The following diagram illustrates the critical steps for ensuring reliable gene expression data, combining both biological (reference gene) and technical (PCR) optimization.
The Scientist's Toolkit: Key Research Reagent Solutions
Table: Essential reagents and materials for reference gene validation and PCR optimization.
| Item | Function/Benefit |
|---|---|
| SYBR Green PCR Mix | A fluorescent dye that binds double-stranded DNA, allowing real-time monitoring of amplicon accumulation during qPCR [90]. |
| High-Fidelity DNA Polymerase (e.g., Pfu, KOD) | Possesses 3'→5' exonuclease (proofreading) activity, which significantly reduces the error rate during amplification, crucial for cloning and sequencing applications [16]. |
| Hot-Start DNA Polymerase | Requires heat activation, preventing polymerase activity before the first denaturation step. This reduces non-specific amplification and primer-dimer formation, improving assay specificity [16]. |
| DMSO (Dimethyl Sulfoxide) | An additive used at 2-10% concentration to help resolve strong secondary structures in templates with high GC content, improving amplification efficiency [16]. |
| Betaine | An additive used at 1-2 M concentration to homogenize the thermodynamic stability of GC- and AT-rich regions, often improving the yield and specificity of long-range PCR [16]. |
| MgCl₂ Solution | An essential cofactor for all DNA polymerases. Its concentration must be optimized (typically 1.5-3.0 mM) as it directly affects enzyme activity, primer-template annealing, and reaction fidelity [95] [4]. |
| Trizol Reagent | A ready-to-use monophasic solution of phenol and guanidine isothiocyanate for the effective isolation of high-quality total RNA from cells and tissues [90]. |
| NanoDrop Spectrophotometer | An instrument for quickly assessing the concentration and purity (A260/A280 ratio) of nucleic acid samples, a critical QC step before cDNA synthesis [90]. |
Quantitative Data from Key Studies
Table: Summary of stable reference genes identified in various organisms and conditions from cited studies.
| Study Organism | Experimental Condition | Most Stable Reference Gene(s) | Method of Validation |
|---|---|---|---|
| Human Thyroid [90] | Normal vs. Goiter Tissues | ACTB | NormFinder, Mean Cq, MFC |
| Peanut [92] | Diverse tissues & abiotic stresses | ADH3, G6PD, ELF1B | geNorm, NormFinder |
| Cassava [94] | Various developmental stages & drought stress | cassava4.1017977 & cassava4.1006391 (for major samples) | geNorm, NormFinder |
| Codonopsis pilosula [93] | Developmental stages | PP2A59γ, CPY20-1, UBCE32, RPL5B, UBC18 | ΔCt, geNorm, NormFinder, BestKeeper |
| Codonopsis pilosula [93] | Cold stress | RPL5B, RPL13, PP2A59γ | ΔCt, geNorm, NormFinder, BestKeeper |
Optimization is not merely a recommended step but an essential prerequisite for developing robust and reliable quantitative PCR (qPCR) assays, especially when using SYBR Green chemistry. Even well-designed assays require optimization and validation to ensure they possess the required sensitivity and specificity for their intended diagnostic purpose [96]. This process becomes particularly crucial for assays targeting rare transcripts or requiring high specificity, such as in pathogen detection or SNP genotyping [96]. This case study outlines a comprehensive workflow from initial SYBR Green assay optimization through to final diagnostic validation, providing researchers with a structured framework to enhance assay performance and reliability.
Foundational Principles of SYBR Green Assay Optimization
Primer Design and Validation
The foundation of any successful SYBR Green qPCR assay lies in meticulous primer design. Properly designed primers are the most significant determinant of reaction specificity and efficiency [16]. Key design parameters include:
- Primer Length: Optimal primers typically range from 18-30 bases, with 18-24 bases being ideal for most applications [16] [8].
- Melting Temperature (Tm): Primers should have a Tm between 55-65°C, with forward and reverse primers matched within 1-2°C [16] [8].
- GC Content: Aim for 40-60% GC content to balance binding stability and minimize secondary structure formation [16] [8].
- 3' End Stability: The last five bases at the 3' end should be rich in G or C bases to enhance stability and ensure efficient polymerase extension initiation, but avoid single base runs or di-nucleotide repeats [16] [8].
Computational tools should be used to analyze potential secondary structures such as primer dimers and hairpins, which can sequester primers and reduce amplification efficiency [16]. For genes with homologs in the genome, primer design should be based on single-nucleotide polymorphisms (SNPs) present in all homologous sequences to ensure specificity [97].
Reaction Component Optimization
The concentration of each reaction component must be systematically optimized to achieve maximum specificity and efficiency:
Table 1: Optimization Ranges for Key SYBR Green qPCR Components
| Component | Recommended Range | Optimization Guidelines | Impact on Performance |
|---|---|---|---|
| Primers | 50-800 nM [96] | Test combinations (e.g., 50-600 nM); choose lowest concentration giving lowest Cq [96] | High concentrations promote primer-dimers; low concentrations reduce sensitivity [96] [4] |
| Mg²⁺ | 0.5-5.0 mM [4] | Titrate in 0.2-1.0 mM increments [98] | Affects enzyme activity, primer-template stability, and fidelity [16] |
| dNTPs | 50-200 μM of each [8] | Use balanced equimolar concentrations [1] | Unbalanced concentrations increase error rate [1] |
| DNA Polymerase | 0.5-2.5 units/50 μL [8] | Follow manufacturer's recommendations | Insufficient enzyme reduces yield; excess may increase non-specific products [1] |
| Template DNA | 1 pg-1 μg/50 μL reaction [98] | Optimize based on template complexity [98] | Too much template can cause non-specific amplification; too little reduces sensitivity [1] |
Thermal Cycling Conditions
Thermal cycling parameters directly control reaction stringency and efficiency:
- Denaturation: Typically 10-15 seconds at 95°C; may require increase for GC-rich templates [1].
- Annealing Temperature: The most critical parameter for specificity [16]. Use gradient PCR to test a range (typically 55-65°C) [96]. The optimal temperature is usually 3-5°C below the primer Tm [1].
- Extension: Typically 20-30 seconds at 72°C for conventional polymerases; duration depends on amplicon length [96] [1].
- Cycle Number: Generally 35-40 cycles; increased cycles may be needed for low-abundance targets but can promote non-specific product accumulation [1].
Stepwise Optimization Workflow
The following workflow diagram illustrates the systematic approach to SYBR Green assay optimization:
Primer Concentration Optimization
Begin by optimizing primer concentrations using a fixed annealing temperature (often 60°C) [96]. Test a range of concentrations from 50-800 nM in various combinations of forward and reverse primers [96]. The optimal concentration combination is identified as the lowest primer concentration that produces the earliest Cq value while maintaining a sigmoidal amplification curve and negative no-template control (NTC) [96]. For SYBR Green assays, slightly lower primer concentrations (200-400 nM) often help minimize non-specific amplification [96].
Annealing Temperature Optimization
Using the optimized primer concentration, determine the optimal annealing temperature using a gradient thermal cycler [96]. Test a temperature range spanning 55-65°C [96]. The optimal annealing temperature produces the lowest Cq value, highest amplification efficiency, and a single peak in melt curve analysis indicating specific product amplification [96]. If the annealing temperature is too low, reactions will be non-specific; if too high, stringency may impair reaction efficiency, resulting in high Cq values and poor reproducibility [96].
Magnesium Concentration Optimization
Magnesium ion concentration significantly influences polymerase activity, primer-template annealing, and reaction fidelity [16]. Titrate Mg²⁺ concentration in 0.2-1.0 mM increments around the starting concentration recommended for the polymerase [98]. The optimal concentration produces maximum specific product yield with minimal non-specific amplification [16]. Note that EDTA or other chelators in the template preparation may sequester Mg²⁺, potentially requiring higher concentrations [1].
Assessment of Amplification Efficiency
Following optimization of key parameters, construct a standard curve using serial dilutions of template to calculate amplification efficiency [96] [97]. The ideal assay should demonstrate a linear standard curve with R² ≥ 0.99 and efficiency between 90-105% [97]. The efficiency (E) is calculated from the slope of the standard curve using the formula: E = [10^(-1/slope) - 1] × 100% [97].
Diagnostic Assay Validation
Once optimized, the assay must undergo rigorous validation to ensure fitness for diagnostic purpose. The following diagram outlines the key validation steps:
Analytical Validation Parameters
Comprehensive assay validation should assess multiple performance characteristics:
Table 2: Key Parameters for Diagnostic Assay Validation
| Validation Parameter | Assessment Method | Acceptance Criteria |
|---|---|---|
| Amplification Efficiency | Standard curve with serial template dilutions [97] | 90-105% [97]; R² ≥ 0.99 [97] |
| Analytical Sensitivity | Limit of detection (LOD) determination with replicate dilution series [99] | Consistent detection at target concentration (e.g., 1 copy/μL) [99] |
| Analytical Specificity | Melt curve analysis; testing against related species/non-target templates [96] [99] | Single peak in melt curve; no amplification of non-targets [99] |
| Dynamic Range | Quantification across expected target concentrations [96] | Linear detection across clinically relevant range [100] |
| Reproducibility | Inter and intra-assay variation assessment [100] | Low coefficient of variation (<5%) between runs and operators [100] |
| Robustness | Performance under varying conditions (template quality, reagent lots) [100] | Consistent results across expected operational variations [100] |
Case Study: Validation of a Diagnostic SYBR Green Assay
A recent study developing a SYBR Green assay for detection of Oncomelania hupensis quadrasi snails demonstrated comprehensive validation [99]. The researchers achieved a detection limit of one copy number per microliter with 99.4% efficiency and R² = 0.999 [99]. The assay showed 100% positive and negative predictive values when validated on environmental water samples, confirming its diagnostic utility for schistosomiasis surveillance [99].
Similarly, a multiplex qPCR array for bladder cancer biomarkers demonstrated robust performance across different sample types (FFPE and fresh-frozen tissues), RNA input levels (5-100 ng), and operators, highlighting the importance of assessing robustness during validation [100].
Troubleshooting Guide and FAQs
Common SYBR Green Assay Issues and Solutions
Table 3: Troubleshooting Common SYBR Green qPCR Problems
| Problem | Possible Causes | Solutions |
|---|---|---|
| No Amplification | Poor template quality, incorrect annealing temperature, missing components [98] | Verify template integrity, optimize annealing temperature, check reaction setup [98] |
| Multiple Peaks in Melt Curve | Non-specific amplification, primer-dimer formation, contaminated template [96] | Increase annealing temperature, optimize primer concentration, use hot-start polymerase [96] [98] |
| Low Efficiency | Suboptimal primer concentration, inhibitor presence, poor primer design [96] | Optimize primer concentration, purify template, redesign primers [96] |
| High Background | Too much primer, low annealing temperature, excess Mg²⁺ [98] | Reduce primer concentration, increase annealing temperature, optimize Mg²⁺ [98] |
| Poor Reproducibility | Inconsistent pipetting, template degradation, thermal cycler calibration [98] | Use master mixes, check template quality, verify instrument calibration [98] |
Frequently Asked Questions
Q: What is the most common reason for non-specific amplification in SYBR Green assays? A: The most common cause is an annealing temperature that is too low, which reduces the stringency of primer-template binding and allows primers to anneal to off-target sites [16]. Increasing the annealing temperature in 1-2°C increments typically improves specificity.
Q: How can I improve amplification of GC-rich targets in SYBR Green qPCR? A: For GC-rich templates (over 65%), use additives such as DMSO (2-10%) or betaine (1-2 M) to help resolve secondary structures [1] [16]. Also consider using polymerases specifically formulated for difficult templates [1].
Q: What criteria should I use to select an optimal annealing temperature? A: The optimal annealing temperature produces the lowest Cq value, highest reaction efficiency, and a single peak in melt curve analysis [96]. It is typically 3-5°C below the calculated Tm of the primers [1].
Q: How important is Mg²⁺ concentration optimization? A: Mg²⁺ concentration is critical as it affects polymerase activity, primer-template stability, and reaction fidelity [16]. Too little Mg²⁺ reduces enzyme activity, while too much promotes non-specific amplification and reduces fidelity [16].
Q: What amplification efficiency is acceptable for diagnostic assays? A: Ideally, efficiency should be between 90-105% with R² ≥ 0.99 [97]. These parameters ensure accurate quantification across the dynamic range of the assay.
Essential Research Reagent Solutions
Table 4: Key Reagents for SYBR Green qPCR Optimization and Validation
| Reagent Category | Specific Examples | Function and Application |
|---|---|---|
| DNA Polymerases | Standard Taq, Q5 High-Fidelity, Phusion Hot Start [98] [1] | DNA amplification; choice depends on need for speed, fidelity, or specificity [1] |
| Buffer Additives | DMSO, Betaine, BSA, GC Enhancers [1] [16] | Improve amplification of difficult templates, stabilize reaction components [16] |
| Quantification Kits | SsoAdvanced Universal SYBR Green Supermix [99] | Provide optimized master mixes for consistent performance [99] |
| Nucleic Acid Purification Kits | DNeasy Blood and Tissue Kit [99] | Ensure high-quality template free of inhibitors [99] |
| Reference Materials | Synthetic oligonucleotides, control templates [97] | Standard curve generation, assay quality control, validation [97] |
A systematic approach to SYBR Green qPCR optimization and validation is essential for developing robust diagnostic assays. This workflow—beginning with careful primer design, progressing through sequential optimization of reaction components and cycling conditions, and culminating in comprehensive analytical validation—provides a framework for achieving assays with high specificity, efficiency, and reliability. The troubleshooting guidelines and reagent solutions presented here offer practical resources for researchers navigating this process. Properly optimized and validated SYBR Green assays represent powerful tools for molecular diagnostics, combining the advantages of cost-effectiveness, flexibility, and robust performance needed for both research and clinical applications.
Conclusion
Optimizing annealing temperature is not a one-time calculation but an iterative process fundamental to achieving specific, efficient, and reliable PCR amplification. By systematically integrating foundational knowledge, methodological rigor, proactive troubleshooting, and rigorous validation, researchers can develop robust assays capable of detecting rare targets, discriminating between homologous sequences, and yielding reproducible quantitative data. The continued development of specialized polymerases, intelligent buffer systems, and integrated digital platforms promises to further streamline this process, enhancing the accuracy of molecular diagnostics, accelerating drug discovery, and solidifying PCR's role as an indispensable tool in modern biomedical research.
References
- 1. PCR Troubleshooting Guide | Thermo Fisher Scientific - US [https://www.thermofisher.com/us/en/home/life-science/cloning/cloning-learning-center/invitrogen-school-of-molecular-biology/pcr-education/pcr-reagents-enzymes/pcr-troubleshooting.html]
- 2. PCR Troubleshooting Guide [https://www.neb.com/en-us/tools-and-resources/troubleshooting-guides/pcr-troubleshooting-guide?srsltid=AfmBOoqeDQnUMFgXdpEIaj4YtuuD-m0Tf3OcYE0B_IS5_XUL9tGp-QD2]
- 3. PCR Troubleshooting: Common Problems and Solutions [https://www.mybiosource.com/learn/pcr-troubleshooting-common-problems-and-solutions/]
- 4. PCR Optimization: Factors Affecting Reaction Specificity ... [https://www.mybiosource.com/learn/pcr-optimization-factors-affecting-reaction-specificity-and-efficien/]
- 5. Faster PCR Optimization [https://bitesizebio.com/31937/optimizing-your-pcr-faster/]
- 6. Optimization of PCR Conditions for Amplification of GC‐ ... [https://pmc.ncbi.nlm.nih.gov/articles/PMC6807403/]
- 7. Guidelines for PCR Optimization with Taq DNA Polymerase [https://www.neb.com/en-us/tools-and-resources/usage-guidelines/guidelines-for-pcr-optimization-with-taq-dna-polymerase?srsltid=AfmBOoptLe0weCp6lqmFxF-7U6-ICJ73Afr2TF2DVCdJvpslRoldDAWc]
- 8. Polymerase Chain Reaction: Basic Protocol Plus ... [https://pmc.ncbi.nlm.nih.gov/articles/PMC4846334/]
- 9. How to Simplify PCR Optimization Steps for Primer Annealing [https://www.thermofisher.com/us/en/home/brands/thermo-scientific/molecular-biology/molecular-biology-learning-center/molecular-biology-resource-library/spotlight-articles/pcr-annealing-optimization-universal-annealing.html]
- 10. Proven tips for PCR primer design [https://www.neb.com/en-ca/nebinspired-blog/proven-tips-for-pcr-primer-design?srsltid=AfmBOoo2ftb0Y1cdOxNx-mbExlm0kTMPZgim7q_CTvE8mVTvkmoLjOUN]
- 11. Rules and Tips for PCR & qPCR Primer Design | IDT [https://www.idtdna.com/page/support-and-education/decoded-plus/how-to-design-primers-and-probes-for-pcr-and-qpcr/]
- 12. How to Calculate Annealing Temperature for PCR | IDT [https://www.idtdna.com/pages/support/faqs/how-do-you-calculate-the-annealing-temperature-for-pcr-]
- 13. Tm Calculator for Primers [https://www.thermofisher.com/us/en/home/brands/thermo-scientific/molecular-biology/molecular-biology-learning-center/molecular-biology-resource-library/thermo-scientific-web-tools/tm-calculator.html]
- 14. PCR Troubleshooting Guide [https://www.neb.com/en-us/tools-and-resources/troubleshooting-guides/pcr-troubleshooting-guide?srsltid=AfmBOoq7vtIU6LAc8Mb500L4QUp6Bsho-OMYtm2sU0iWX6Iumn-11CVS]
- 15. PCR Methods - Top Ten Strategies [https://www.thermofisher.com/us/en/home/life-science/cloning/cloning-learning-center/invitrogen-school-of-molecular-biology/pcr-education/pcr-reagents-enzymes/pcr-methods.html]
- 16. Optimizing PCR Reaction Conditions for High Fidelity and ... [https://www.labx.com/resources/optimizing-pcr-reaction-conditions-for-high-fidelity-and-yield/5579]
- 17. FAQ: How should I determine the appropriate annealing ... [https://www.neb.com/en-us/faqs/2023/07/27/how-should-i-determine-the-appropriate-annealing-temperature-for-my-reaction?srsltid=AfmBOoqQs01XoLAPyNbBE10FVwwKxBBisC5Dw6XO4xU7A69ELPKQ4yH1]
- 18. PCR Assay Optimization and Validation [https://www.sigmaaldrich.com/US/en/technical-documents/technical-article/genomics/pcr/assay-optimization-and-validation?srsltid=AfmBOorvKXrXrBOhWENlhHiYH4_rzweNqLCI6tSD43DSzZigigVtezJ2]
- 19. PCR Troubleshooting Guide [https://www.neb.com/en-us/tools-and-resources/troubleshooting-guides/pcr-troubleshooting-guide?srsltid=AfmBOoqUpAHxcUJMJ3vlji3UJ6myQ-7KGEohNIluxNnHGo7fYdbXDfl0]
- 20. Guidelines for PCR Optimization with Taq DNA Polymerase [https://www.neb.com/en-us/tools-and-resources/usage-guidelines/guidelines-for-pcr-optimization-with-taq-dna-polymerase?srsltid=AfmBOopjeTZUCLUtjalumTlBI_5TaGFELxi99-eion8lcvc67ZUO0lPV]
- 21. Optimizing your PCR [https://www.takarabio.com/learning-centers/pcr/faq/optimization?srsltid=AfmBOorB82dfRM09K3Hu1RRMuuIjgNY8ZoGjEjE_vlwQ99oJ8AFNxD-r]
- 22. Optimizing PCR amplification of GC-rich nicotinic ... [https://www.sciencedirect.com/science/article/pii/S2405580825001396]
- 23. PCR Cycling Parameters—Six Key Considerations for ... [https://www.thermofisher.com/us/en/home/life-science/cloning/cloning-learning-center/invitrogen-school-of-molecular-biology/pcr-education/pcr-reagents-enzymes/pcr-cycling-considerations.html]
- 24. PCR Primer Design Tips - Behind the Bench [https://www.thermofisher.com/blog/behindthebench/pcr-primer-design-tips/]
- 25. Improve Yield and Specificity of Your PCR Using the 2D- ... [https://www.eppendorf.com/it-en/lab-academy/life-science/molecular-biology/improve-yield-and-specificity-of-your-pcr-using-the-2d-gradient-function/]
- 26. Rapid detection of drug-resistant nosocomial bacteria [https://www.sciencedirect.com/science/article/abs/pii/S0039914024015728]
- 27. PCR Assay Optimization and Validation [https://www.sigmaaldrich.com/US/en/technical-documents/technical-article/genomics/pcr/assay-optimization-and-validation?srsltid=AfmBOorz6TkQ7U-ZPrg8jZVya-vYScooyv6EQ_Z_OEu6mIB5z_vIHSc2]
- 28. PCR Troubleshooting Guide [https://www.neb.com/en-us/tools-and-resources/troubleshooting-guides/pcr-troubleshooting-guide?srsltid=AfmBOopbuIV4OeaQ1q6yeqIDyjZo_SmNKH7A0Fzvhe4AVfFXZR1Sj8PL]
- 29. PCR Troubleshooting Guide & Solutions [https://www.bosterbio.com/protocol-and-troubleshooting/pcr-troubleshooting?srsltid=AfmBOooeAbQydWc4Lq07TaT5amSTWR3Dgw1dtXOXieXCGl8YmAfNMdIO]
- 30. Polymerase Chain Reaction (PCR) - StatPearls - NCBI - NIH [https://www.ncbi.nlm.nih.gov/books/NBK589663/]
- 31. Optimization of the real-time PCR platform method using ... [https://www.nature.com/articles/s41598-025-16972-9]
- 32. How to Calculate the Melting Temperature (Tm) of a PCR Primer [https://www.letstalkacademy.com/how-to-calculate-the-melting-temperature-tm-of-a-pcr-primer/]
- 33. How to Calculate DNA Melting Temperature (Tm) | IDT [https://www.idtdna.com/page/support-and-education/decoded-plus/understanding-melting-temperature-t-sub-m-sub/]
- 34. Top Ten Pitfalls in Quantitative Real-time PCR Primer ... [https://www.thermofisher.com/us/en/home/references/ambion-tech-support/rtpcr-analysis/general-articles/top-ten-pitfalls-in-quantitative-real-time-pcr-primer.html]
- 35. What is Gradient PCR and How to Use it? [https://geneticeducation.co.in/what-is-gradient-pcr-and-how-to-use-it/]
- 36. Gradient Thermal Cyclers: When and How to Use Them [https://www.labx.com/resources/gradient-thermal-cyclers-when-and-how-to-use-them/5580]
- 37. Six Key Considerations for Selecting a PCR Thermal Cycler [https://www.thermofisher.com/us/en/home/brands/thermo-scientific/molecular-biology/molecular-biology-learning-center/molecular-biology-resource-library/spotlight-articles/six-thermal-cycler-considerations.html]
- 38. Why Did My PCR Fail? 10 Common Problems and Fixes [https://synapse.patsnap.com/article/why-did-my-pcr-fail-10-common-problems-and-fixes]
- 39. PCR Troubleshooting Guide [https://www.neb.com/en-us/tools-and-resources/troubleshooting-guides/pcr-troubleshooting-guide?srsltid=AfmBOops0FDtZIs5D-P9GPTxXO7Vh-6KvH_zpdsgae6KHh6cY5fieiLP]
- 40. Gradient PCR for Optimization [https://www.eppendorf.com/us-en/lab-academy/life-science/molecular-biology/gradient-pcr-for-optimization/]
- 41. 5 Essential Tips for Successful Gradient PCR [https://www.4esci.com/5-essential-tips-for-successful-gradient-pcr.html?srsltid=AfmBOor6BS0kQHXqxrtOQBDICXOhd0vc04mpEyhMqbiPJdBKbiqR6Y59]
- 42. Troubleshooting your PCR [https://www.takarabio.com/learning-centers/pcr/faq/troubleshooting?srsltid=AfmBOop4Q7MeHzyIDCe-ocPFaiotgIsGaT9-XCAWu-cr5jflBifsaaKE]
- 43. Buffer Preparation — Hints, Tips and Common Errors [https://www.chromatographyonline.com/view/buffer-preparation-hints-tips-and-common-errors-0]
- 44. High-throughput real-time PCR [https://www.takarabio.com/applications/molecular-diagnostics/solutions/high-throughput-real-time-pcr?srsltid=AfmBOoq9BgDrWrGQmO-Ap5wqtaXfOcQrS3z-LVaEuRF-fVCcTl0K5_-I]
- 45. How Automation is Transforming PCR Accuracy, Efficiency, ... [https://www.brandtech.com/about-us/news-and-events/how-automation-is-transforming-pcr-accuracy-efficiency-and-scalability]
- 46. Multiplex PCR: Optimization and Application in Diagnostic Virology - PMC [https://pmc.ncbi.nlm.nih.gov/articles/PMC88949/]
- 47. The Four Most Common Problems in Multiplex pcr Design [https://www.dnasoftware.com/common-problems-in-multiplex-panel-design/]
- 48. Optimizing PCR: Proven Tips and Troubleshooting Tricks [https://www.the-scientist.com/optimizing-pcr-proven-tips-and-troubleshooting-tricks-71660]
- 49. Troubleshooting your PCR [https://www.takarabio.com/learning-centers/pcr/faq/troubleshooting?srsltid=AfmBOoqoY1oLaz07HqfdiExq07ANVufHWXlfRBiEHUlC1yXRHrxQsEON]
- 50. Amplification of overlapping DNA amplicons in a single-tube multiplex PCR for targeted next-generation sequencing of BRCA1 and BRCA2 | PLOS One [https://journals.plos.org/plosone/article?id=10.1371/journal.pone.0181062]
- 51. Amplification of overlapping DNA amplicons in a single-tube multiplex PCR for targeted next-generation sequencing of BRCA1 and BRCA2 - PMC [https://www.ncbi.nlm.nih.gov/pmc/articles/PMC5507532/]
- 52. Enhancement of DNA amplification efficiency by using ... [https://www.bocsci.com/blog/enhancement-of-dna-amplification-efficiency-by-using-pcr-additives/?srsltid=AfmBOooQn9Do16U4Tilv01aWU6ipC4Y5Z8sApeZytF1CS2usmFcS_scB]
- 53. Just What Do All These Additives Do? [https://bitesizebio.com/19420/just-what-do-all-these-additives-do/]
- 54. Bovine serum albumin further enhances the effects of organic ... [https://pmc.ncbi.nlm.nih.gov/articles/PMC3466135/]
- 55. Effects of DMSO, glycerol, betaine and their combinations ... [https://www.sciencedirect.com/science/article/abs/pii/S0731708516302473]
- 56. PCR Setup—Six Critical Components to Consider [https://www.thermofisher.com/us/en/home/life-science/cloning/cloning-learning-center/invitrogen-school-of-molecular-biology/pcr-education/pcr-reagents-enzymes/pcr-component-considerations.html]
- 57. Troubleshooting primer dimer in PCR [https://www.minipcr.com/primer-dimer-pcr/]
- 58. Troubleshooting Non-Specific Amplification [https://bento.bio/resources/bento-lab-advice/troubleshooting-non-specific-amplification-with-bento-lab/]
- 59. Troubleshooting your PCR [https://www.takarabio.com/learning-centers/pcr/faq/troubleshooting?srsltid=AfmBOopHG3AgaVU4lJ-DT0WKcbatb9QPPqbgDN2josbhz6wdAhrZ0wAj]
- 60. Why do I get smeared PCR products? [https://www.qiagen.com/us/resources/faq/87]
- 61. PCR Troubleshooting Guide [https://www.neb.com/en-us/tools-and-resources/troubleshooting-guides/pcr-troubleshooting-guide?srsltid=AfmBOoqy8FqprK5yWpc-u4smOwbSXMGyjTXA5SewIdqiRQHCqc4qgsy7]
- 62. PCR conditions | Primer annealing specificity | PCR buffers [https://www.qiagen.com/us/knowledge-and-support/knowledge-hub/bench-guide/pcr/introduction/pcr-conditions]
- 63. Guidelines for PCR Optimization with Taq DNA Polymerase [https://www.neb.com/en-us/tools-and-resources/usage-guidelines/guidelines-for-pcr-optimization-with-taq-dna-polymerase?srsltid=AfmBOoqLAubvlO1FPzwz_uhiQjTbzqEhaxSKkFNqGszL_o8LZMmoZaix]
- 64. Error-suppression mechanism of PCR by blocker strands - PMC [https://pmc.ncbi.nlm.nih.gov/articles/PMC10111364/]
- 65. How is Hot-Start Technology Beneficial For Your PCR [https://www.thermofisher.com/br/en/home/brands/thermo-scientific/molecular-biology/molecular-biology-learning-center/molecular-biology-resource-library/spotlight-articles/hot-start-technology-benefits-PCR.html]
- 66. FAQ: What are Hot Start and WarmStart ® polymerases ... [https://www.neb.com/en/faqs/2023/08/02/what-are-hot-start-and-warmstart-polymerases-and-when-would-i-use-them?srsltid=AfmBOoqoQZy7nLZBVjNchU4gupfdzcDEZ0blv-eoQJXHMU_fIu3k6uJc]
- 67. Guide to Primer Design for PCR [https://www.benchling.com/primer-design-for-pcr]
- 68. Blocking uncertain mispriming errors of PCR - PMC [https://pmc.ncbi.nlm.nih.gov/articles/PMC11494492/]
- 69. How to optimize PCR conditions for GC-rich regions? [https://synapse.patsnap.com/article/how-to-optimize-pcr-conditions-for-gc-rich-regions]
- 70. Optimizing PCR amplification of GC-rich nicotinic ... [https://pubmed.ncbi.nlm.nih.gov/40486497/]
- 71. PCR Troubleshooting Guide [https://www.neb.com/en-us/tools-and-resources/troubleshooting-guides/pcr-troubleshooting-guide?srsltid=AfmBOopFjsEU78yIcYERbsPKLfERP1Znh8oST3zmqR7-Du7TOPy-ReDr]
- 72. Primer design guide - 5 tips for best PCR results [https://the-dna-universe.com/2022/09/05/primer-design-guide-the-top-5-factors-to-consider-for-optimum-performance/]
- 73. PCR Optimization 2.0—The Denaturation Temperature [https://www.genengnews.com/insights/pcr-optimization-2-0/]
- 74. Guidelines for PCR Optimization with Taq DNA Polymerase [https://www.neb.com/en-us/tools-and-resources/usage-guidelines/guidelines-for-pcr-optimization-with-taq-dna-polymerase?srsltid=AfmBOor6KAVY036WpaU73jZgaDAgkoZThtaIL0_iHQAxqnmumwY6beR-]
- 75. Optimization of the annealing temperature for DNA ... [https://pmc.ncbi.nlm.nih.gov/articles/PMC332522/]
- 76. Troubleshooting qPCR: Interpreting Amplification Curves [https://blog.biosearchtech.com/thebiosearchtechblog/bid/63622/qpcr-troubleshooting]
- 77. : interpreting qPCR and... troubleshooting amplification curves [https://www.linkedin.com/pulse/qpcr-troubleshooting-interpreting-amplification-]
- 78. | IDT Troubleshooting qPCR Amplification Curves [https://www.idtdna.com/page/support-and-education/decoded-plus/a-quick-guide-for-troubleshooting-qpcr-data/]
- 79. Ten Tips for Successful qPCR - Behind the Bench [https://www.thermofisher.com/blog/behindthebench/ten-tips-for-successful-qpcr/]
- 80. : What Are My Troubleshooting Telling... qPCR Amplification Curves [https://www.slideshare.net/slideshow/troubleshooting-qpcr-what-are-my-amplification-curves-telling-me-33646672/33646672]
- 81. PCR/qPCR Data Analysis [https://www.sigmaaldrich.com/US/en/technical-documents/technical-article/genomics/qpcr/data-analysis?srsltid=AfmBOoqZl2Cw7hqAcPfwcxGsItdInExR74qwGFnsTwrEf1EAOISfW73V]
- 82. PCR Troubleshooting Guide [https://www.neb.com/en-us/tools-and-resources/troubleshooting-guides/pcr-troubleshooting-guide?srsltid=AfmBOooYnYg_nSGDvVM7ugSQ8DfqqaD7CX0tcpPGeFouWogAAtxF6vUO]
- 83. Digital PCR: from early developments to its future application ... [https://pubs.rsc.org/en/content/articlehtml/2025/lc/d5lc00055f]
- 84. Challenges Using Droplet Digital PCR for Environmental ... [https://www.mdpi.com/2673-8007/1/1/7]
- 85. Digital PCR outperforms quantitative real-time PCR for the ... [https://pmc.ncbi.nlm.nih.gov/articles/PMC12288185/]
- 86. Comparing the precision of two digital PCR applications for ... [https://www.nature.com/articles/s41598-025-13143-8]
- 87. Comparative Analysis of Two Digital PCR Platforms for ... [https://pubmed.ncbi.nlm.nih.gov/40826981/]
- 88. dPCR assay development | Digital PCR troubleshooting [https://www.qiagen.com/us/applications/digital-pcr/beginners/dpcr-guide/setup-and-troubleshooting]
- 89. Optimization of Annealing Temperature To Reduce Bias ... [https://pmc.ncbi.nlm.nih.gov/articles/PMC93085/]
- 90. Validation of Reference Genes for Normalization ... [https://pmc.ncbi.nlm.nih.gov/articles/PMC4037571/]
- 91. Reference genes in real-time PCR - PMC [https://pmc.ncbi.nlm.nih.gov/articles/PMC3825189/]
- 92. Evaluation and Validation of Reference Genes for ... [https://journals.plos.org/plosone/article?id=10.1371/journal.pone.0078555]
- 93. Selection and Validation of Reference Genes for ... [https://www.nature.com/articles/s41598-020-58328-5]
- 94. Validation of Reference Genes for Relative Quantitative ... [https://www.frontiersin.org/journals/plant-science/articles/10.3389/fpls.2016.00680/full]
- 95. Investigating concentration effects on reaction efficiency ... [https://www.sciencedirect.com/science/article/abs/pii/S0003269725001472]
- 96. PCR Assay Optimization and Validation [https://www.sigmaaldrich.com/US/en/technical-documents/technical-article/genomics/pcr/assay-optimization-and-validation?srsltid=AfmBOoqIanI0TFnv7KO2YRXg8iW1TTsNrh5vhQvtgwIr5_789fM7kVcR]
- 97. An optimized protocol for stepwise optimization of real-time ... [https://www.nature.com/articles/s41438-021-00616-w]
- 98. PCR Troubleshooting Guide [https://www.neb.com/en-us/tools-and-resources/troubleshooting-guides/pcr-troubleshooting-guide?srsltid=AfmBOopgG0ABNZmPo5GACA5s2WNNru0jXxK3ASCaS1zBSe690V1sL8bV]
- 99. Development of a SYBR Green-Based Real-Time PCR ... [https://pmc.ncbi.nlm.nih.gov/articles/PMC12115604/]
- 100. Development and analytical validation of a multiplex ... [https://www.sciencedirect.com/science/article/pii/S1936523325002591]