Mastering Aseptic Technique: A Comprehensive Guide for Reliable Microbial Culture and Cell Line Handling
This article provides a complete guide to aseptic techniques for researchers, scientists, and drug development professionals handling microbial cultures and cell lines.
Mastering Aseptic Technique: A Comprehensive Guide for Reliable Microbial Culture and Cell Line Handling
Abstract
This article provides a complete guide to aseptic techniques for researchers, scientists, and drug development professionals handling microbial cultures and cell lines. It covers the foundational principles of contamination prevention, step-by-step methodological protocols for transfers and handling, advanced troubleshooting for identifying and rectifying contamination, and validation through Good Microbiological Laboratory Practices (GMLP) and biosafety standards. The content is designed to ensure experimental reproducibility, protect valuable samples, and maintain a safe laboratory environment, directly addressing the core challenges faced in biomedical and clinical research settings.
The Principles of Asepsis: Defining Your First Line of Defense Against Contamination
In microbial culture handling and pharmaceutical research, the precise distinction between "aseptic" and "sterile" is fundamental to experimental validity and product safety. While often used interchangeably in casual context, these terms describe distinct concepts with specific applications in controlled environments. Aseptic techniques comprise a set of procedures designed to prevent contamination of sterile materials by excluding pathogenic microorganisms, whereas sterile techniques refer to validated processes that completely eliminate all viable microorganisms, including spores. This whitepaper delineates the critical differences between these two concepts, frames them within the context of microbial culture handling research, and provides detailed methodologies for their implementation in laboratory and drug development settings. Understanding this distinction is crucial for maintaining pure stock cultures, ensuring the reliability of microbiological experiments, and complying with stringent regulatory requirements for sterile pharmaceutical products.
In the realm of microbiology and pharmaceutical development, precision in terminology directly correlates with experimental integrity and patient safety. The terms "aseptic" and "sterile" represent hierarchal levels of microbial control essential for different aspects of research and production.
Sterile describes a state of being completely free from all viable microorganisms, including bacteria, viruses, fungi, and spores [1] [2] [3]. Achieving sterility is an absolute and validated endpoint, often described statistically by a Sterility Assurance Level (SAL) of 10⁻⁶, which denotes a probability of no more than one non-sterile unit in one million [4] [2]. Sterility is a quality attributed to an environment, instrument, or product after it has undergone a definitive sterilization process.
Aseptic, by contrast, refers to the procedural efforts and techniques used to maintain sterility by preventing the introduction of contaminants into a product or environment that is already sterile [1] [5] [3]. Aseptic technique is not a method to achieve sterility but to preserve it. It is the practical application of practices and behaviors that minimize the risk of contamination during complex handling procedures, such as transferring cultures or preparing sterile media [5].
The relationship is symbiotic: sterile techniques create the initial condition of non-viability, and aseptic techniques sustain that condition throughout subsequent operations. For researchers handling microbial cultures, this distinction is operationalized daily. The goal is to use aseptic technique to maintain the sterility of sterile equipment and media, thereby ensuring that only the intended organisms are present in pure cultures.
Comparative Analysis: Aseptic versus Sterile in Practice
The following table synthesizes the core distinctions between aseptic and sterile techniques, highlighting their unique objectives, methods, and applications within a research and development context.
Table 1: Core distinctions between aseptic and sterile techniques
| Feature | Aseptic Technique | Sterile Technique |
|---|---|---|
| Primary Objective | To prevent contamination during procedures and maintain sterility [3] | To completely eliminate all viable microorganisms, including spores [1] [3] |
| State vs. Process | A process and a set of behaviors [1] | A state or condition of an item or environment [1] |
| Scope of Microbial Control | Minimizes the introduction, growth, and transfer of pathogens [5] | Total destruction or removal of all microbial life [2] |
| Common Methods | Laminar flow hoods, Bunsen burners, flawless manipulative skills [5] [3] | Autoclaving (steam sterilization), filtration, gamma irradiation, ethylene oxide gas [4] [3] |
| Key Applications in Research | Inoculating media, transferring cultures, handling sensitive reagents [5] | Preparing sterile media, decontaminating instruments and waste, sterilizing heat-labile solutions via filtration [4] [6] |
| Validation & Measurement | Monitored via environmental controls (settle plates, air samplers) and process simulation (media fills) [4] | Validated by achieving a defined Sterility Assurance Level (SAL), often 10⁻⁶ [4] [2] |
The selection between employing aseptic technique alone or in conjunction with a full sterilization process depends entirely on the procedural requirements. Many research and manufacturing workflows integrate both: materials are first rendered sterile via autoclaving or filtration, and then they are handled using aseptic technique to prevent contamination during the experiment or production process.
The Critical Role in Microbial Culture Handling
For researchers working with pure cultures, the failure of aseptic technique can compromise months of work. Contamination from airborne spores, non-sterile surfaces, or the operator can overgrow the target microbe, consume nutrients, produce metabolites that alter the environment, or lead to incorrect conclusions [5]. Proper aseptic technique is, therefore, a compulsory laboratory skill.
The core objectives of aseptic technique in a microbiological context are [5]:
- To avoid contaminating cultures with exogenous microbes from the environment, lab surfaces, or the investigator.
- To prevent the culture from contaminating the laboratory environment or the investigator, especially when handling pathogens.
- To enable the successful transfer and subculturing of isolates while maintaining purity.
Table 2: Aseptic practices for different biosafety levels
| Biosafety Level (BSL) | Risk Profile | Example Agents | Required Aseptic and Containment Practices |
|---|---|---|---|
| BSL-1 | Low risk, unlikely to cause disease | E. coli K-12, Pseudomonas | Standard microbiological practices; basic aseptic technique; no special containment equipment [5] |
| BSL-2 | Moderate risk, associated with human disease | Salmonella, Hepatitis viruses | BSL-1 plus lab coats, gloves, biohazard signs; procedures that minimize aerosol generation; use of Class I or II Biosafety Cabinets (BSCs) for aerosol-producing activities [5] |
| BSL-3 | High individual risk, low community risk; can be transmitted via aerosols | Mycobacterium tuberculosis, Bacillus anthracis | BSL-2 plus enhanced PPE, controlled lab access, physical separation, mandatory use of BSCs for all open manipulations, and laboratory exhaust air not recirculated [5] |
The following diagram illustrates the logical decision-making process a researcher must follow to determine the necessary level of containment and technique when handling biological materials.
Diagram: Decision pathway for biosafety level and technique selection
Essential Research Reagents and Materials
The successful implementation of aseptic and sterile techniques relies on specific reagents, equipment, and materials. The following table details key items in a researcher's toolkit.
Table 3: Essential research reagents and materials for aseptic work and sterilization
| Item | Function & Application | Technical Notes |
|---|---|---|
| Sterilizing-Grade Filter | Removal of microorganisms from heat-labile solutions (e.g., serum, antibiotics, buffers) [4] [6] | Pore size of 0.22 µm or less; must be validated via a Bacterial Challenge Test with Brevundimonas diminuta at 10⁷ CFU/cm² [4] [6] |
| Culture Media | Nutrient source for growth of microorganisms. | Must be sterilized, typically by autoclaving, prior to use in experiments to ensure no background growth. |
| Autoclave | Steam sterilization of media, glassware, and other heat-stable items using saturated steam under pressure [4] | Typical validated cycle: 121°C, 15 psi, 15-20 minutes [5]. Effectiveness is quantified by the F-value [4]. |
| Biosafety Cabinet (BSC) | Provides a sterile working environment via HEPA-filtered laminar airflow; protects user and product [5] | Class II BSCs are standard for BSL-2 work; must be certified annually; unidirectional airflow velocity of ~0.45 m/s [4] |
| Disinfectants | Chemical agents used on surfaces and equipment to reduce microbial load (e.g., 70% ethanol, quaternary ammonium compounds) [2] | Used for pre- and post-work surface decontamination. Distinct from sterilants, which destroy all microbial life [2]. |
| Integrity Test Fluid | Used for post-filtration integrity testing of membrane filters via bubble point or pressure hold tests [6] | Confirms the filter was intact and functioned correctly during the filtration process. |
Experimental Protocols for Validation
Validation is the cornerstone that differentiates a claim of sterility from a scientifically and regulatorily supported fact. The following section outlines core validation methodologies.
Validation of Sterile Filtration
For solutions that cannot be terminally sterilized, filtration through a sterilizing-grade membrane is the method of choice. The validation of this process is critical.
- Objective: To demonstrate that a specific filter will produce a sterile effluent when processing a specific product under defined process conditions [6].
- Critical Parameter: Bacterial Retention.
- Methodology - Bacterial Challenge Test (BCT) [4] [6]:
- Viability Test (VT): First, determine if the product formulation itself is bactericidal or bacteriostatic. The test organism (Brevundimonas diminuta, ATCC 19146, at a challenge level of 10⁷ CFU per cm² of filter surface) is exposed to the product for the duration of the process. If the product affects viability, the test may need to be modified, for instance, by using a product placebo [6].
- Challenge Test: The product, inoculated with the challenge organism, is filtered through the test filter under worst-case process conditions (e.g., maximum filtration time, pressure, and volume).
- Analysis: The filtrate is collected and analyzed for the presence of the challenge organism. The filter must produce a sterile filtrate to pass. The filter's integrity is then verified post-use with a validated method, such as a bubble point test [4].
- Success Criteria: No growth of the challenge organism in the filtrate, demonstrating a log reduction value (LRV) greater than 7 for the organism, corresponding to an SAL of 10⁻⁶ [6].
The workflow for validating a sterile filtration process is multi-staged and rigorous, as shown in the following diagram.
Diagram: Sterile filter validation workflow
Validation of the Aseptic Process (Media Fill)
In pharmaceutical production, the entire aseptic process is validated through a "media fill" or process simulation, which is directly analogous to a researcher's procedure for handling sterile culture media.
- Objective: To demonstrate that the aseptic process, performed by personnel in the actual environment using the same procedures, can consistently produce a sterile product [4].
- Critical Parameter: Sterility of the final simulated product.
- Methodology [4]:
- A sterile growth medium, such as Tryptic Soy Broth (TSB), which supports the growth of a wide range of microorganisms, is used instead of the actual product.
- The medium is subjected to all the same steps the product would undergo—filtration (if applicable), transfer, filling, and sealing—by the same operators using the exact same aseptic techniques and equipment.
- The filled units are then incubated to encourage the growth of any contaminating microorganisms that may have been introduced during the process.
- Success Criteria: The number of contaminated units must be within a pre-defined, statistically justified limit. For initial validation, a zero-growth result from a large number of units (e.g., several thousand) is typically required to provide a high confidence level in the aseptic process.
The distinction between "aseptic" and "sterile" is not merely semantic but foundational to quality and safety in microbiological research and pharmaceutical development. Sterile defines the absolute, validated condition of being free from viable microorganisms, a state achieved through rigorous physical or chemical processes. Aseptic describes the dynamic process of protecting that sterile state from contamination during handling. For the researcher at the bench, this means that sterilization methods like autoclaving and filtration create the foundational sterile tools and media, while aseptic technique is the daily practiced discipline that preserves their integrity. Mastering both concepts, and understanding their interdependence, is essential for ensuring the reliability of experimental data, the safety of biopharmaceutical products, and the prevention of healthcare-associated infections. As regulatory frameworks like the EU MDR continue to emphasize usability and risk mitigation, the rigorous application and validation of these principles will only grow in importance [7].
In microbial culture handling research, the core objectives of preventing contamination and ensuring safety are foundational to data integrity, experimental reproducibility, and personnel protection. Contamination compromises the validity of research findings and can lead to erroneous conclusions, while lapses in safety pose significant risks to researchers and the environment. Aseptic technique encompasses the totality of procedures and practices designed to achieve these dual objectives, creating a controlled framework for the manipulation of pure cultures without introducing extraneous microbes or compromising safety [8] [9]. This guide details the technical protocols, environmental controls, and material specifications essential for maintaining sterility and safety within the context of modern microbiological research and drug development.
Foundational Principles and Quantitative Standards
Adherence to established standards is critical for creating a validated research environment. The following tables summarize key quantitative parameters for environmental control and testing.
Table 1: Environmental Control Standards for Aseptic Manipulation
| Parameter | Standard Requirement | Rationale & Reference |
|---|---|---|
| Airborne Particulate Cleanliness | Class 100 (ISO 5) in the direct manipulation zone (e.g., inside a biosafety cabinet or超净工作台). | Minimizes the number of airborne particles that can act as carriers for microorganisms. [9] |
| Background Environment Cleanliness | Class 10,000 (ISO 7) for the room housing the Class 100 zone. | Provides a clean buffer area to support the integrity of the critical zone. [9] |
| Microbiological Environmental Monitoring | Regular monitoring via settle plates, active air sampling, and surface samples. | Validates the effectiveness of cleaning, disinfection, and aseptic practices. [9] |
| Incubator Temperature Control | Typically 30°C - 37°C for common mesophiles, with humidity control to prevent desiccation. | Provides a stable and optimal growth environment for the target microbe, discouraging contaminants. [10] |
| Media Sterilization (Autoclaving) | 121°C for a minimum of 15-30 minutes, depending on load volume. | Validated process to achieve a Sterility Assurance Level (SAL) of 10⁻⁶. [9] |
| Dry Heat Sterilization (Oven) | 160°C for 120 minutes or 170°C for 60 minutes. | Suitable for moisture-impermeable items like metal instruments and glassware. [9] |
Table 2: Key Reagent Solutions for Contamination Control and Testing
| Reagent / Material | Primary Function | Key Considerations |
|---|---|---|
| Liquid Growth Media (e.g., Tryptic Soy Broth) | Supports the growth and proliferation of the target microorganisms. | Must undergo growth promotion testing (also known as fertility testing) to demonstrate it can support growth of low-inoculum microbes. [9] [11] |
| Selective Media | Suppresses the growth of non-target microbes while permitting the growth of desired organisms. | Used for the isolation and identification of specific pathogens or microbes from mixed samples. [11] |
| Neutralizers & Inactivators | Added to dilution blanks or rinse fluids to neutralize the effects of residual disinfectants or antimicrobials on samples or equipment. | Critical for accurate microbial recovery; effectiveness must be validated. Common agents include lecithin, polysorbate, and histidine. [9] |
| Chemical Disinfectants (e.g., 70% Alcohol, quaternary ammonium compounds) | Used for surface decontamination and hand sanitization within the lab. | 70% alcohol is preferred for its efficacy and rapid evaporation; surfaces must be cleaned of organic matter before application. [8] |
| Sterile Water for Injection | Used in media preparation and as a diluent in microbiological tests. | Its high purity ensures no introduction of interfering substances or contaminants. [10] |
Detailed Experimental Protocols
Protocol for Aseptic Transfer via Streak Plate Method
This protocol is fundamental for isolating individual bacterial colonies from a mixed culture or stock.
Key Materials:
- Sterile Tryptic Soy Agar (TSA) plates [9]
- Inoculating loop (metal or disposable)
- Bunsen burner or Bacti-Cinerator
- Target microbial culture (e.g., Escherichia coli)
- 70% ethanol for surface disinfection [8]
- Biohazard waste container
Methodology:
- Preparation: Disinfect the work surface with 70% ethanol. Place all required materials in the超净工作台 or near the Bunsen burner and turn on the UV light for at least 30 minutes prior to use. [8]
- Inoculating Loop Sterilization: Flame the inoculating loop from the base to the tip until it is red-hot throughout. Allow it to cool for 10-15 seconds without placing it down or blowing on it. [8]
- Sample Collection: Hold the stock culture tube in one hand. Use the little finger of the hand holding the loop to remove the cap of the tube. Briefly pass the lip of the tube through the flame to create an air current that prevents contamination. Gently dip the cooled loop into the culture broth or a single colony.
- Streaking: Lift the lid of the agar plate just enough to allow the loop to enter. Streak the inoculum in a defined pattern (e.g., four-quadrant method) to sequentially dilute the bacteria across the plate. Between quadrants, re-flame and cool the loop. [8]
- Incubation: Replace the lid, and secure it with parafilm if necessary. Invert the plate and incubate at the appropriate temperature (e.g., 35°C) for 24-48 hours. [9]
- Waste Disposal: Sterilize all used metal loops by re-flaming. Dispose of all plastic consumables and cultures in a biohazard bag for autoclaving before disposal. [9]
Protocol for Method Suitability Testing (无菌检验方法适用性试验)
This test is mandatory to demonstrate that a product or sample itself does not inhibit the growth of microorganisms during sterility testing, thereby preventing false negatives. [9]
Key Materials:
- Test sample (the product to be tested for sterility)
- Culture media: Tryptic Soy Broth (for bacteria) and Sabouraud Dextrose Broth (for fungi) [9]
- Challenge microorganisms (as per pharmacopoeia, typically <100 CFU):
- Membrane filtration apparatus or direct inoculation tubes
- Incubators set at 30-35°C (for bacteria) and 20-25°C (for fungi)
Methodology:
- Sample Preparation: Prepare the test sample according to the defined protocol, which may involve dissolving, diluting, or otherwise processing it.
- Inoculation: Divide the prepared sample into two portions.
- Test Group: Inoculate the first portion with a small number (fewer than 100 CFU) of one of the challenge microorganisms.
- Control Group: The second portion is not inoculated and serves as a negative control to confirm the initial sterility of the sample and media.
- Incubation & Observation: Incubate all containers for no less than 14 days. [9] Observe them periodically for visual evidence of microbial growth (turbidity).
- Results Interpretation: The test is valid only if the control group remains sterile and the test group shows clear growth of the challenge microorganism. Growth in the test group must be comparable to a growth control (microbe in media without product) and occur within the specified time frame. If the test sample inhibits growth in the test group, the method must be modified (e.g., by increasing dilution, adding a larger volume of rinse fluid in membrane filtration, or using a specific neutralizer) and the test repeated until no inhibition is observed. [9]
Workflow Visualizations
Aseptic Technique Core Logic
This diagram outlines the fundamental decision-making process and dual objectives underpinning all aseptic techniques.
Sterility Test Method Suitability Workflow
This flowchart details the step-by-step procedure for validating a sterility test method, a critical GMP requirement.
Advanced Techniques: Leveraging Microfluidic Platforms
Modern research employs advanced engineering solutions to enhance control and throughput. Droplet microfluidic technology involves generating and manipulating picoliter-to-nanoliter volume droplets within microchannels, serving as isolated micro-reactors. [12]
Key Materials:
- Microfluidic device (PDMS or glass)
- Oil phase (carrier fluid, e.g., fluorinated oil with surfactant)
- Aqueous phase (containing cells, culture media, and reagents)
- Precision syringe pumps
- Microscopy setup for incubation and monitoring
Methodology:
- Droplet Generation: The aqueous phase containing a highly diluted suspension of microbial cells and nutrients is injected alongside the oil phase into a microfluidic device. At the junction, highly monodisperse water-in-oil droplets are generated at high frequencies (up to 20,000 Hz). [12]
- Incubation: The droplets are collected in a capillary tube or off-chip reservoir and incubated. Each droplet functions as a miniature, isolated bioreactor. [12]
- Analysis & Sorting: After incubation, droplets can be reinjected into a microfluidic sorter. Based on an optical signal (e.g., fluorescence from a reporter gene or a metabolic dye), droplets containing cells with desired traits (e.g., high growth, specific enzyme activity) are electrically or piezoelectrically deflected and collected for further culture or genomic analysis (e.g., MaPS-seq, Microbe-seq). [12]
This platform's inherent containment drastically reduces cross-contamination risks and enables high-resolution, single-cell analysis, pushing the boundaries of aseptic investigation in complex microbiomes. [12]
Within the critical field of microbial culture handling, the integrity of research and drug development hinges on the purity of cell cultures. Contamination by bacteria, fungi, and mycoplasma represents a pervasive threat, capable of compromising experimental data, jeopardizing product safety, and invalidating years of research [13]. This technical guide provides an in-depth examination of these common contaminants, framing their identification and control within the essential context of aseptic technique. For researchers and scientists, understanding these adversaries is the first line of defense in ensuring the reliability and reproducibility of their work. The following sections will detail the sources and detection methods for each contaminant, provide structured protocols for monitoring, and visualize the workflows integral to maintaining uncontaminated cultures.
Understanding the specific profiles of common contaminants is fundamental to their control. The table below summarizes the core characteristics of bacteria, fungi, and mycoplasma.
Table 1: Characteristics of Common Cell Culture Contaminants
| Contaminant | Common Examples | Primary Sources | Key Detection Methods | Visible & Morphological Clues |
|---|---|---|---|---|
| Bacteria | Escherichia coli, Bacillus species, Staphylococcus epidermis [14] | Lab personnel, unfiltered air, contaminated water baths, non-sterile reagents [13] [14] | Microbial culture, Gram's stain, visual turbidity, pH change (acidic) [13] | Cloudy (turbid) culture medium; rapid color change (yellow) of phenol red pH indicator [13] [14] |
| Fungi | Yeasts (e.g., Candida), Molds (e.g., Aspergillus, Penicillium) [14] | Airborne spores, lab personnel, humidified incubators, cellulose products [13] [14] | Microbial culture, visual observation of mycelia or turbidity, odor [13] | Fuzzy, filamentous patches (molds); oval, budding particles smaller than cells (yeasts) [14] |
| Mycoplasma | M. fermentans, M. orale, M. arginini, M. hyorhinis [15] [14] | Contaminated cell lines, animal-derived reagents (e.g., serum), lab personnel [13] [14] | PCR, Hoechst staining, specialized mycoplasma detection kits, microbial culture [13] [15] | No visible change under standard microscope; subtle effects like altered cell growth rates, morphology, and metabolism [14] |
Bacterial Contamination
Bacterial contamination is a prevalent issue characterized by its rapid growth. The nutrients in cell culture media provide an ideal environment for bacteria to proliferate, often leading to visible turbidity and a sharp drop in media pH, turning it yellow [13] [14]. These contaminants are typically introduced through lapses in aseptic technique, such as from laboratory personnel, unfiltered air, or contaminated equipment like water baths used for warming media [13].
Fungal Contamination
Fungal contamination encompasses both yeasts and molds. Yeasts, such as Candida, are single-celled eukaryotes that reproduce by budding and can cause turbidity in the media without an immediate color change [14]. Molds, like Aspergillus, form multicellular, filamentous structures (hyphae) that appear as fuzzy dots or patches [14]. Their spores are ubiquitous in the environment and can be introduced through airborne transmission or contaminated surfaces [13].
Mycoplasma Contamination
Mycoplasma contamination is particularly insidious. As some of the smallest self-replicating organisms lacking a cell wall, they are resistant to many common antibiotics and can pass through standard microbiological filters [15] [14]. They do not cause visible turbidity or immediate cell death, making them difficult to detect without specific testing [14]. However, they profoundly affect cellular functions, altering gene expression, protein synthesis, and metabolism, which can severely impact the quality and reliability of research data [14]. It is estimated that 15–35% of continuous cell lines are infected with mycoplasma, often originating from contaminated reagents or operator cross-contamination [14].
Experimental Protocols for Contaminant Identification
Routine monitoring is critical for early contaminant detection. The following protocols outline standard methodologies for identifying bacterial, fungal, and mycoplasma contamination.
Visual and Microscopic Inspection
Daily visual inspection of cultures is the first line of defense.
- Procedure: Examine culture flasks under a light microscope for changes in cell morphology, adherence, and the presence of foreign particles [14]. Look for media turbidity (bacteria, yeast), filamentous structures (mold), or unexpected pH changes indicated by phenol red [13] [14].
- Note: Mycoplasma will not be visible with this method.
Microbial Culture for Bacteria and Fungi
This method confirms the presence of cultivable microbes.
- Procedure:
- Under aseptic conditions, take a small aliquot (e.g., 100 µL) from the suspect culture.
- Inoculate onto nutrient-rich agar plates (e.g., blood agar, tryptic soy agar).
- Incubate plates at 37°C for 24-48 hours and observe for bacterial or fungal colony formation [13].
- Interpretation: The growth of distinct colonies indicates contamination. Further identification can be performed via Gram staining or other microbiological tests.
Hoechst Staining for Mycoplasma Detection
Mycoplasma, while invisible under standard microscopy, can be detected using DNA-binding fluorescent stains like Hoechst 33258.
- Procedure:
- Grow cells on a sterile coverslip in a culture dish.
- Fix the cells with a fixative such as acetic acid/ethanol or methanol.
- Stain with Hoechst stain according to the manufacturer's protocol.
- Mount the coverslip and observe under a fluorescence microscope [13].
- Interpretation: The nuclei of the host cells will fluoresce brightly. Mycoplasma contamination appears as a fine, particulate or filamentous fluorescence in the cytoplasm and surrounding the cell membranes [13]. Uncontaminated cells will show clean nuclear staining without this extranuclear fluorescence.
Polymerase Chain Reaction (PCR) for Mycoplasma
PCR is a highly sensitive and specific method for detecting mycoplasma DNA.
- Procedure:
- Interpretation: The presence of a band of the expected size indicates mycoplasma contamination. Commercial mycoplasma detection kits based on PCR are widely available and provide robust protocols [15].
Workflow Visualization for Contaminant Identification
The following diagram illustrates the logical decision-making process for identifying and responding to potential contamination in cell culture, integrating the protocols described above.
Diagram 1: Contaminant identification and response workflow.
The Scientist's Toolkit: Essential Reagents and Materials
Effective contamination control relies on a suite of specialized reagents and materials. The following table details key items essential for prevention, detection, and decontamination.
Table 2: Key Research Reagent Solutions for Contamination Control
| Item | Function/Application | Key Considerations |
|---|---|---|
| 70% Ethanol (EtOH) | Surface and glove disinfection; works by denaturing proteins and dissolving lipids [15]. | Most effective concentration; 100% EtOH is less effective as it causes rapid surface protein coagulation [15]. |
| Antibiotics (e.g., Penicillin/Streptomycin) | Added to media to suppress bacterial growth [13]. | Not effective against mycoplasma; overuse can mask lapses in aseptic technique [15]. |
| Antimycotics | Added to media to suppress fungal and yeast growth [13]. | Used as a preventive measure, not a cure for established contamination. |
| Mycoplasma Detection Kits | Commercial kits for routine testing via PCR, ELISA, or enzymatic methods [15] [14]. | Essential for quarantining new cell lines and regular monitoring of established cultures. |
| Hoechst 33258 Stain | Fluorescent DNA stain used to detect mycoplasma contamination under a microscope [13]. | Reveals characteristic extranuclear fluorescence pattern of mycoplasma. |
| Gamma-Irradiated Serum | Animal serum treated to inactivate viruses, mycoplasma, and other contaminants [13]. | Critical for preventing introduction of contaminants from animal-derived reagents. |
Vigilance against contamination is a non-negotiable aspect of rigorous scientific practice. As detailed in this guide, bacteria, fungi, and mycoplasma each present unique challenges that require specific detection strategies, from simple visual checks to sophisticated molecular tests. However, the cornerstone of effective contamination control remains unwavering adherence to strict aseptic technique. By integrating the profiling, protocols, and workflows outlined herein, researchers and drug development professionals can fortify their defenses, safeguard their cultures, and ensure the integrity of their critical work in microbial culture handling.
In microbial culture handling, the integrity of research and drug development outcomes hinges on the rigorous application of aseptic techniques. This whitepaper provides an in-depth technical analysis of two cornerstone tools for maintaining sterility: the Bunsen burner and the laminar flow hood. We delineate their fundamental principles, distinct roles, and operational protocols within a modern microbiology laboratory. While the Bunsen burner creates a localized sterile environment through convection currents and direct flaming, laminar flow hoods offer a controlled, HEPA-filtered workspace for more sensitive or hazardous procedures. This guide details explicit methodologies for their use, supported by comparative data and workflow visualizations, to empower researchers in selecting and implementing the appropriate aseptic strategy for their specific applications.
Aseptic technique comprises a set of carefully designed procedures to prevent contamination of pure cultures, sterile media stocks, and other solutions by unwanted microorganisms (i.e., sepsis) [16] [17]. It simultaneously acts as a critical biosafety measure, reducing the potential for transmission of microorganisms to researchers, which is paramount when working with pathogens [18]. These techniques are fundamental to the accuracy and reproducibility of experiments in microbiology, biotechnology, and pharmaceutical development [19] [20].
It is crucial to distinguish aseptic technique from sterile technique. Sterile technique refers to the complete elimination or destruction of all microorganisms, including bacteria, viruses, and spores, and is applied to create a sterile starting state, often through methods like autoclaving, dry heat, or filtration [21] [20]. Aseptic technique, conversely, is a continuous practice focused on maintaining that sterility by preventing the introduction of contaminants during experimental procedures [21] [20]. In essence, sterile techniques provide the initial clean slate, while aseptic techniques preserve it throughout the research process.
The Bunsen Burner: Principle and Applications
The Bunsen burner, a staple of microbiology laboratories for over a century, provides a pragmatic and effective means of establishing a localized aseptic work area on an open bench [17].
Core Mechanism and Function
The primary aseptic function of a lit Bunsen burner is the creation of a convection current of hot air above and around the laboratory bench [22] [19] [17]. This upward airflow draws ambient air and any suspended dust or microbial particles upward and away from the immediate work zone, thereby reducing their viability and the likelihood of them settling into open cultures or media [19] [17]. Furthermore, the intensely hot flame serves as an immediate and effective method for sterilizing tools such as inoculating loops and the necks of glass bottles and test tubes [22] [17].
Detailed Experimental Protocol: Inoculating an Agar Plate
The following protocol is a standard procedure for transferring microorganisms using a Bunsen burner.
Workflow Overview:
Materials:
- Bunsen burner connected to gas source
- Inoculating loop (metal)
- Source culture (e.g., in a broth or on an agar slant)
- Sterile agar plate
- Striker or lighter
- Lab coat, gloves, and safety goggles [18]
Methodology:
- Preparation: Disinfect the work surface with 70% ethanol and ensure all materials are within immediate reach [17]. Light the Bunsen burner to create a sterile convection zone [19].
- Sterilize the Loop: Hold the inoculating loop in the Bunsen burner flame. Begin with the tip in the cooler, light blue cone of the flame, then slowly draw the rest of the wire upward into the hottest region (immediately above the blue cone) until the entire wire is glowing red hot [17]. This gradual heating prevents culture residue from sputtering and forming an aerosol.
- Cool the Loop: Allow the sterilized loop to cool for a few seconds in the air near the burner. Do not wave it around or place it on a non-sterile surface [17].
- Obtain Inoculum: With your free hand, pick up the source culture tube. Using the little finger of the hand holding the loop, remove the cap or cotton plug of the tube. Briefly pass the neck of the tube through the Bunsen burner flame to create an airflow outward [17]. Insert the cooled loop into the tube to pick up a small sample of the culture.
- Inoculate the Plate: Lift the lid of the sterile agar plate just enough to allow the loop to enter, angling the lid to shield the agar surface from airborne contaminants [22] [17]. Gently streak the sample onto the surface of the agar using a standard streaking pattern to isolate colonies.
- Final Sterilization: After streaking, remove the loop and re-sterilize it completely in the Bunsen burner flame before setting it down. This destroys any remaining microorganisms, preventing environmental contamination [17].
- Incubation: Seal the agar plate with parafilm or tape and place it in an incubator set to the appropriate temperature for the microorganism.
The Laminar Flow Hood: Principle and Applications
Laminar flow hoods (or cabinets) provide a sophisticated, enclosed workspace that offers a higher degree of sterility and, in the case of Class II cabinets, operator protection [22] [23] [21].
Core Mechanism and Function
A laminar flow hood maintains sterility by generating a continuous, unidirectional stream of HEPA-filtered air across the work surface [19] [17]. A certified High-Efficiency Particulate Air (HEPA) filter is capable of capturing a minimum of 99.97% of airborne particles larger than 0.3 μm, including dust, pollen, mold, and bacteria [17]. This creates an ultraclean environment for handling sensitive biological materials, protecting both the experiment (product protection) and, in specific cabinet types, the researcher from exposure to hazardous agents (operator protection) [24] [23] [21]. It is critical to note that the use of a Bunsen burner within a laminar flow hood is generally not recommended, as the heat can disrupt the laminar airflow, potentially cause damage to the HEPA filter, and compromise the cabinet's ability to provide sterility and safety [23] [21].
Detailed Experimental Protocol: Aseptic Media Transfer
This protocol outlines the procedure for transferring sterile liquid media within a laminar flow hood.
Workflow Overview:
Materials:
- Class II Laminar Flow Hood (or similar)
- Sterile media in a bottle
- Sterile recipient flask or Petri dishes
- Sterile disposable serological pipettes and a pipettor
- 70% Ethanol spray and lint-free wipes
- Waste container for used pipettes
- Appropriate Personal Protective Equipment (PPE) [21]
Methodology:
- Preparation and Sterilization: Turn on the laminar flow hood and allow it to run for at least 15 minutes to purge airborne contaminants. Wipe down all interior surfaces, including the back and side walls, with 70% ethanol [21]. Some protocols include ultraviolet (UV) light sterilization of the exposed work surface before beginning [21].
- Introduction of Materials: Place all necessary materials into the cabinet after wiping their exteriors with 70% ethanol [21]. Arrange them in a logical, uncluttered workflow, ensuring they do not block airflow grilles. Keep the work area free of unnecessary items [21].
- Aseptic Transfer: Work slowly and deliberately to minimize turbulence. To transfer media, uncap the sterile media bottle and the recipient vessel. Use a sterile serological pipette and pipettor to aspirate the required volume. Avoid touching the tip of the pipette against the non-sterile threads of the bottle or any other non-sterile surface [21] [17]. Dispense the media into the recipient vessel and promptly recap both containers. Each sterile pipette should be used only once to prevent cross-contamination [21].
- Completion: Once the procedure is complete, immediately remove all equipment, including any waste (e.g., used pipettes), from the work area. Wipe down the interior surfaces of the hood with 70% ethanol once more. Leave the hood running for several minutes to clear any particulates before shutting it off [21].
Comparative Analysis: Bunsen Burner vs. Laminar Flow Hood
The choice between a Bunsen burner and a laminar flow hood depends on the specific requirements of the procedure, the nature of the biological agents, and available resources.
Table 1: Tool Comparison for Aseptic Technique
| Feature | Bunsen Burner | Laminar Flow Hood |
|---|---|---|
| Primary Mechanism | Creates upward convection currents of hot air [19] [17] | Provides a continuous stream of HEPA-filtered, particulate-free air [19] [17] |
| Sterilization Method | Direct flaming (e.g., loops, needle, glass necks) [22] [17] | Surface disinfection (e.g., with 70% ethanol); no open flames recommended [23] [21] |
| Level of Protection | Protects the experiment (product) only; no operator protection [23] | Class II cabinets offer both product and operator protection [23] [21] |
| Ideal for | Routine microbiology on non-pathogenic cultures (e.g., inoculation, streaking) [16] | Handling sensitive, hazardous, or expensive biological materials; cell culture; pharmaceutical prep [19] [21] |
| Cost & Complexity | Low cost, simple setup and operation [17] | High initial and maintenance cost; requires regular certification [19] |
| Flaming in Hood | N/A | Not recommended; disrupts airflow, risks HEPA filter damage, and is unsafe with plasticware [23] [21] |
Essential Research Reagent Solutions and Materials
Successful aseptic work relies on a suite of supporting reagents and materials. The following table details key items essential for experiments in this field.
Table 2: Essential Materials for Aseptic Microbial Culture
| Item | Function in Aseptic Technique |
|---|---|
| Personal Protective Equipment (PPE) | Protects the operator and prevents the introduction of contaminants from skin and clothing. Includes lab coats, gloves, and safety goggles [24] [21] [18]. |
| 70% Ethanol | A fast-acting disinfectant used to wipe down work surfaces, gloved hands, and the exteriors of containers before they are placed in the sterile work area [19] [21] [17]. |
| Autoclave | A sterilization device that uses pressurized steam at 121°C to eliminate all microorganisms, including resistant spores. Used to sterilize glassware, media, and solutions before use [22] [24] [20]. |
| Inoculating Loops/Needles | Tools for transferring and streaking microorganisms. Metal loops are sterilized by flaming, while disposable plastic loops are pre-sterilized [22] [17]. |
| Sterile Serological Pipettes | Used for accurate, aseptic transfer of liquid media and reagents. Designed for single use to prevent cross-contamination [22] [21] [17]. |
| Agar Plates & Culture Media | Provide the nutritional environment for microbial growth. Must be pre-sterilized and handled aseptically to prevent contamination [22] [19]. |
Both the Bunsen burner and the laminar flow hood are indispensable tools in the microbiologist's arsenal, each serving a distinct purpose in the overarching framework of aseptic technique. The Bunsen burner remains a cost-effective and reliable method for establishing a sterile field for basic microbiological procedures on the open bench. In contrast, the laminar flow hood offers a superior, controlled environment for handling sensitive, valuable, or potentially hazardous biological materials while ensuring researcher safety. The informed selection and correct application of these tools, in conjunction with disciplined aseptic practices, are fundamental to ensuring data integrity, reproducibility, and safety in microbial research and drug development.
Within microbiological research and pharmaceutical development, the accurate study of microorganisms hinges on the ability to work with uncontaminated, well-defined biological systems. The triad of pure culture, sterilization, and disinfection forms the cornerstone of all aseptic techniques, ensuring the integrity of experimental data and the safety of both personnel and products [25] [26]. A pure culture, defined as a laboratory culture containing only a single species of organism, is a prerequisite for characterizing physiology, identifying pathogens, and producing consistent, reproducible results in both research and industrial applications like antibiotic and vaccine production [25] [27]. The processes of sterilization and disinfection are the critical barriers that protect these pure cultures from contamination and prevent environmental release [28] [26]. This guide details the core principles, methods, and practical protocols that underpin these foundational concepts, framed within the essential context of aseptic technique for advanced research and drug development.
Core Concepts and Definitions
Pure Culture
A pure culture is a population of microorganisms that arises from a single precursor cell and is therefore genetically identical [25]. In practical laboratory terms, it contains only one species or strain of microbe, free from any contaminating organisms [27]. The isolation and maintenance of pure cultures are fundamental to microbiology, as they allow for the precise study of an organism's characteristics, its role in disease, its metabolic pathways, and its potential industrial applications [29] [25]. Obtaining a pure culture is the first critical step in fulfilling Koch's postulates to establish the cause of an infectious disease and is equally vital in drug development for ensuring the consistent quality of cell-based therapies and fermentation products [25].
Aseptic Technique
Aseptic technique is the overarching set of procedures and protocols designed to prevent the introduction of contaminating microorganisms into pure cultures, sterile media, and the laboratory environment [29] [26]. The term "aseptic" literally means "without contamination" [26]. The goals are two-fold: to prevent environmental microbes from contaminating the cultures being studied and to prevent the cultured microbes from escaping into the environment [29]. Proper aseptic technique is non-negotiable in a research setting, as contaminated cultures yield unreliable and worthless data, compromising experimental validity and diagnostic accuracy [29]. These techniques encompass all actions in the lab, from flame sterilization and proper tube transfer to the use of personal protective equipment (PPE) and the management of the workspace [29] [30].
Sterilization vs. Disinfection
While both sterilization and disinfection are decontamination processes, they differ fundamentally in their objectives and outcomes. Understanding this distinction is critical for applying the correct level of microbial control.
Sterilization is an absolute process that aims to completely destroy or eliminate all forms of microbial life, including highly resistant bacterial endospores and viruses [28] [26] [31]. An item is either sterile or it is not; there is no middle ground. Sterilization is typically achieved by physical methods such as steam autoclaving, dry heat, radiation, or filtration [26] [31]. It is essential for all culture media, surgical instruments, and any item that must be completely free of viable microbes [31].
Disinfection is a relative process that reduces the number of pathogenic microorganisms on inanimate objects or surfaces to a level considered safe for public health [28] [31]. It does not necessarily eliminate all microbial forms, particularly bacterial spores [28]. Disinfection is usually accomplished using chemical agents like chlorine, alcohol, or iodine-based solutions [28] [31].
Table 1: Key Differences Between Sterilization and Disinfection
| Characteristic | Sterilization | Disinfection |
|---|---|---|
| Objective | Achieve absolute sterility; eliminate all microbial life [28] [31] | Reduce pathogens to a safe level [31] |
| Target Microorganisms | All microorganisms, including bacterial spores and viruses [28] [26] | Primarily vegetative bacteria, fungi, and viruses; generally not spores [28] |
| Method Examples | Autoclaving (steam under pressure), dry heat ovens, ethylene oxide gas, gamma radiation [26] [31] | Chemical disinfectants (e.g., bleach, alcohol), boiling, UV radiation [28] [31] |
| Application Context | Preparation of culture media, surgical instruments, pharmaceutical products [26] [31] | Decontaminating laboratory benches, clinical surfaces, non-critical patient care equipment [28] [26] |
| Status of Item | Sterile [26] | Disinfected, but not sterile [28] |
Essential Methods and Protocols
Methods for Obtaining a Pure Culture
The transition from a mixed population in a natural sample to a pure culture in the laboratory requires specific isolation techniques, primarily involving mechanical dilution on a solid surface.
Streak Plate Method
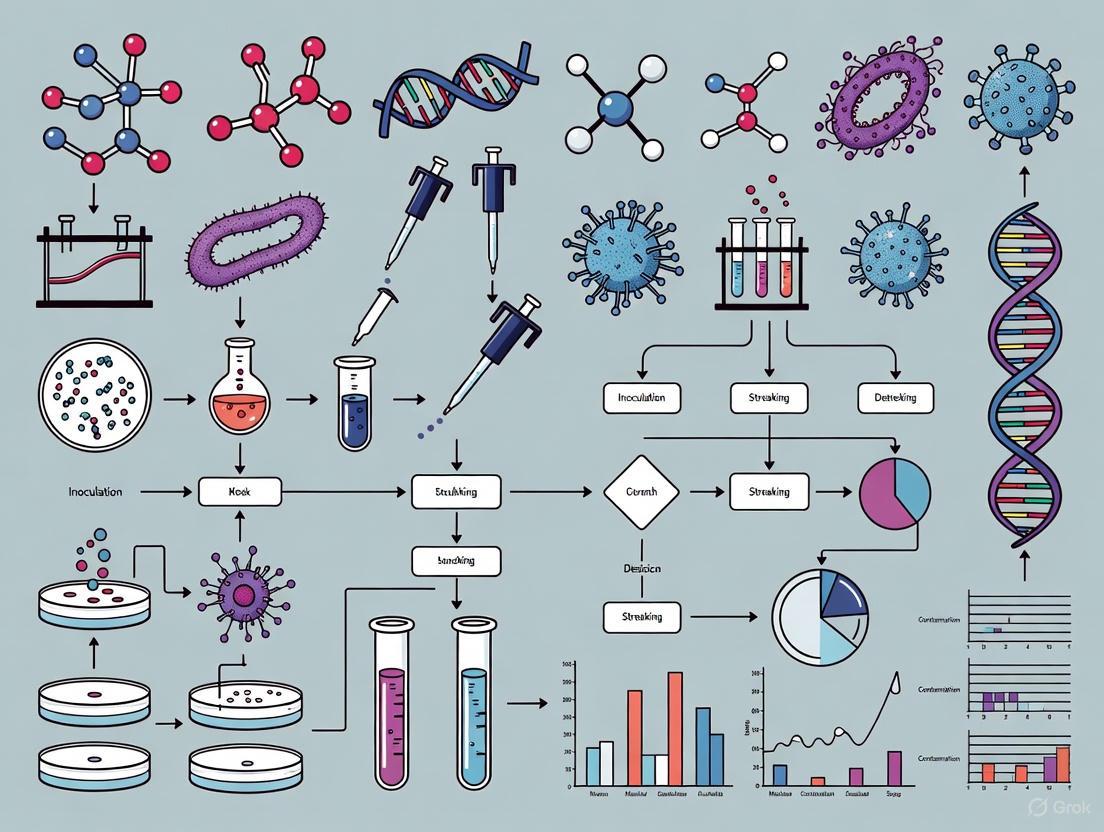
The streak plate method is a rapid, simple, and widely used technique for mechanically diluting a concentrated sample of microorganisms across the surface of an agar plate to obtain isolated colonies [29] [25]. The goal is to reduce the microbial population with each successive streak series until individual cells are separated and can grow into discrete, well-isolated colonies presumed to arise from a single cell [29].
Detailed Protocol: Three-Phase Streak Plate
- Step 1: Flame an inoculating loop until it is red-hot to sterilize it. Allow the loop to cool for 15-30 seconds to avoid killing the sample microbes [29].
- Step 2: Lift the lid of the source plate (e.g., a mixed culture) just enough to insert the loop. Pick up a small amount of the microbial growth or a loopful of a broth culture. Avoid digging into the agar. Immediately replace the lid [29].
- Step 3: Position a fresh, sterile agar plate in front of you. Lift its lid slightly and smear the inoculum in a small area (the "first phase" or "initial streak") over approximately one-quarter of the plate surface [29].
- Step 4: Re-flame the loop to sterilize it and let it cool. Rotate the plate about 90 degrees. Drag the loop through the edge of the first phase a few times and then streak into the adjacent, untouched agar surface (the "second phase") in a continuous pattern, further diluting the sample [29].
- Step 5: Re-flame and cool the loop again. Rotate the plate another 90 degrees. Drag the loop through the edge of the second phase and streak into the final untouched quadrant (the "third phase") [29].
- Step 6: Replace the plate lid, and flame the loop to sterilize it. Incubate the plate under appropriate conditions. After incubation, well-isolated colonies in the third phase should be pure and available for subculturing [29].
Pour Plate and Spread Plate Methods
Two other common techniques for isolation and enumeration are the pour plate and spread plate methods [29] [25].
- Pour Plate Method: A sample (typically serially diluted) is mixed with molten, cooled agar and poured into an empty, sterile petri dish. Colonies grow both within the agar and on its surface [25].
- Spread Plate Method: A small volume of a diluted liquid sample is pipetted onto the surface of a pre-poured, solid agar plate and then spread evenly using a sterile, L-shaped glass or plastic rod (spreader). Colonies grow only on the agar surface [25].
Sterilization Techniques
Sterilization is achieved through physical and chemical methods that are lethal to all microbial life.
- Autoclaving (Moist Heat Sterilization): This is the most common and effective method for sterilizing culture media, aqueous solutions, and laboratory glassware. An autoclave uses saturated steam under pressure (typically 15 psi at 121°C) for a minimum of 20 minutes to ensure destruction of all vegetative cells and endospores [26]. The critical factor is the direct contact of the steam with all surfaces of the items to be sterilized [26].
- Dry Heat Sterilization: Performed in a hot-air oven, this method (e.g., 160-170°C for 2-4 hours) is used for materials that might be damaged by moist heat or are impervious to steam, such as powders, oils, and sharp instruments [31].
- Chemical Sterilants: Heat-sensitive materials (e.g., some plastics, optical devices) can be sterilized using chemical gases like ethylene oxide or liquids like glutaraldehyde [31]. These are highly effective but require careful handling and aeration.
- Filtration: Fluids that would be degraded by heat (e.g., serum, antibiotic solutions) can be sterilized by passage through a membrane filter with pores small enough (typically 0.22 µm) to physically retain bacteria and larger microorganisms [31].
Disinfection Practices
Disinfection in the laboratory is primarily chemical-based and targeted at work surfaces and non-critical equipment.
- Surface Decontamination: Laboratory benches are routinely disinfected before and after work using a 10% bleach solution or commercial disinfectants like chlorine-based compounds or quaternary ammonium compounds [26] [32].
- Antiseptics: While disinfectants are for inanimate surfaces, antiseptics are lower-toxicity antimicrobial chemicals (e.g., chlorhexidine, iodine, 70% alcohol) applied to living tissue, such as a researcher's skin, to prevent infection [28] [30].
The Scientist's Toolkit: Essential Research Reagents and Materials
Successful microbial culture handling relies on a suite of specialized materials and reagents. The following table details key items essential for maintaining asepsis and performing core techniques.
Table 2: Key Research Reagent Solutions and Essential Materials
| Item | Function/Application |
|---|---|
| Agar | A polysaccharide extracted from red algae; used as a solidifying agent for culture media because it is not metabolized by most microbes and provides a transparent, solid surface for colony growth [26]. |
| Growth Media (Broth & Agar) | Nutrient-rich substances, either liquid (broth) or solidified with agar, designed to support microbial growth. Can be general-purpose or selective/differential for specific organisms [26]. |
| Autoclave | A high-pressure device that uses steam to achieve temperatures above the boiling point of water (typically 121°C) for the sterilization of media, solutions, and labware [26] [31]. |
| Chemical Disinfectants | Solutions such as chlorine bleach, alcohol, and hydrogen peroxide used to decontaminate non-living surfaces like laboratory benches to reduce the microbial load [28] [26] [32]. |
| Bunsen Burner | Used for flame sterilization of inoculating loops and needles, and to create a convective updraft that reduces airborne contamination in the immediate work area [29] [32]. |
| Inoculating Loop/Needle | Tools, typically metal or disposable plastic, used to transfer and inoculate microbial samples. They are sterilized by flaming before and after each transfer [29]. |
| Personal Protective Equipment (PPE) | Gloves, lab coats, masks, and safety glasses worn to protect the researcher from microbial exposure and to prevent personal contaminants from entering the cultures [30] [32]. |
| Aseptic Connectors | Devices like MicroCNX connectors used in advanced systems (e.g., bioreactors) to maintain a sterile fluid path between components, which is critical for automated sampling in cell therapy manufacturing [33]. |
Advanced Application: Aseptic Technique in Cell Therapy Manufacturing
The principles of asepsis are pushed to their technological limits in the production of advanced therapy medicinal products (ATMPs) like Chimeric Antigen Receptor (CAR) T-cell therapies [33]. In these processes, autologous cells are expanded ex vivo and infused back into a patient, making the prevention of contamination paramount for patient safety. Manual sampling from microbioreactors for process monitoring introduces risks of operator variability and contamination [33]. This has driven the development of automated, closed systems.
The Automated Cell Culture Sampling System (Auto-CeSS) exemplifies the integration of foundational aseptic principles with modern engineering [33]. This system addresses the challenge of small-volume sampling (as low as 30 µL) from scaled-down microbioreactors with limited starting material. It maintains sterility through defined aseptic points (APs), such as sterile connectors, and uses automated pinch valves and peristaltic pumps to transfer samples without exposing the culture to the open environment [33]. This application demonstrates how core concepts of asepsis are adapted to ensure sterility, consistency, and regulatory compliance in cutting-edge pharmaceutical manufacturing.
Workflow and Procedural Visualization
The following diagram illustrates the logical workflow for isolating and working with a pure culture, integrating the core concepts and techniques discussed.
Diagram 1: Pure Culture Isolation Workflow. This flowchart outlines the key steps for obtaining a pure culture from a mixed sample, highlighting the cyclical nature of purity assessment and the constant role of disinfection.
The foundational concepts of pure culture, sterilization, and disinfection are inextricably linked and form the non-negotiable basis of all rigorous microbiological research and biopharmaceutical development. Mastering the theoretical principles and practical protocols outlined in this guide—from performing a flawless streak plate and understanding the absolute nature of sterilization to implementing aseptic technique in both manual and automated systems—is essential for any researcher or scientist. The integrity of experimental data, the safety of novel therapeutics like CAR-T cells, and the reliability of diagnostic outcomes all depend on the consistent and correct application of these core techniques. As the field advances with increased automation and complexity, these foundational principles remain the constant bedrock upon which scientific progress and product quality are built.
Procedures in Practice: A Step-by-Step Guide to Aseptic Microbial Transfers and Cell Culture
In microbiological and cell culture research, aseptic technique is the cornerstone of reliable and reproducible results. This comprehensive set of practices is designed to prevent microbial contamination of cultures and protect researchers from potential infection [34] [35]. Within a laboratory context, aseptic technique encompasses all aspects of environmental control, including personal hygiene, equipment and media sterilization, workspace disinfection, and associated quality control procedures [35]. The constant challenge of microbial contamination necessitates rigorous protocols, particularly when working with mammalian cell cultures, which are highly susceptible to contamination by bacteria, fungi, and viruses [36].
The consequences of contamination are far-reaching, leading to wasted resources, compromised experimental data, and potential biological hazards [36] [37]. In industrial settings such as pharmaceuticals and biotechnology, contamination can compromise product quality and pose significant health risks [37]. Therefore, a robust aseptic technique, centered on proper workspace disinfection and the correct use of laminar flow containment devices, is not merely a best practice but an essential requirement for any research involving microbial or cell cultures [36] [34] [35].
This guide details the critical procedures for preparing a sterile workspace, with a specific focus on the management and disinfection of laminar flow hoods—one of the most important pieces of equipment in a cell culture lab [36].
Laminar Flow Hoods: Types and Principles
Fundamental Principles and Components
A laminar flow hood is an enclosed workspace designed to provide a sterile environment through the constant, unidirectional flow of HEPA-filtered air [36] [38]. The High-Efficiency Particulate Air (HEPA) filter is the core component, capable of trapping and removing 99.97% of airborne particles that are 0.3 micrometers or larger, including dust, microbes, and other contaminants [36] [39]. This creates an ISO Class 5 environment, which contains no more than 3,520 particles (≥0.5 µm) per cubic meter of air [39].
The fundamental components of a horizontal laminar flow hood include:
- Work Surface: The stainless-steel surface where all procedures are performed [40].
- Prefilter: Located at the front or top of the hood, it captures large particles of dust and debris to extend the life of the more expensive HEPA filter [40].
- Blower/Fan: Sealed within the cabinet, it draws room air through the prefilter and pushes it through the HEPA filter [40].
- HEPA Filter: Positioned at the rear, it traps microscopic contaminants to create sterile air for the workspace [40].
Selecting the Appropriate Containment Device
It is critical to distinguish between different types of laminar flow hoods, as they offer varying levels of protection. The table below summarizes the key classes and their appropriate applications.
Table: Classification and Selection of Laminar Flow Hoods and Biosafety Cabinets
| Class/Type | Airflow Principle | Protection Offered | Typical Biosafety Level | Suitability for Cell Culture |
|---|---|---|---|---|
| Clean Bench (Horizontal/Vertical) | HEPA-filtered air blown from back/across work surface toward user [36] [38]. | Product only; exposes user to aerosols [36] [38]. | N/A | Not suitable for mammalian cell culture or handling of potentially hazardous materials [36] [38]. |
| Class I Biosafety Cabinet | Unfiltered lab air flows inward over the product; HEPA-filtered exhaust [36] [38]. | Personnel and environment; does not protect cultures from contamination [36] [38]. | BSL-1, 2, 3 [36] | Not suitable for cell and tissue culture work [36] [38]. |
| Class II Biosafety Cabinet | HEPA-filtered air flows downward (inflow) and across work surface (laminar flow); HEPA-filtered exhaust [36] [38]. | Personnel, environment, and the culture [36] [38]. | BSL-1, 2, 3 [36] | The standard for most cell culture work (e.g., primate-derived, virally infected cultures) [36] [38]. |
| Class III Biosafety Cabinet | Gas-tight; supply and exhaust air are HEPA filtered; operators use attached gloves [36]. | Maximum protection for personnel, environment, and culture [36]. | BSL-4 [36] | Required for work involving known human pathogens [36]. |
For most cell culture applications involving moderate-risk agents, a Class II Biosafety Cabinet (BSC) is recommended [36] [38]. The following decision diagram outlines the selection logic based on the biological agents being handled.
Disinfection and Cleaning Protocols
Pre-Work Preparation and Personal Hygiene
Contamination control begins before approaching the laminar flow hood. Researchers must adhere to strict personal hygiene and garbing procedures:
- Apparel: No eating, drinking, or smoking in the laboratory. Wear a dedicated lab coat or disposable gown to protect your clothing and the workspace [34].
- Hand Hygiene: Always wash hands thoroughly with a suitable cleansing agent (e.g., chlorhexidine gluconate) before and after handling cultures and upon removing gloves [34] [40].
- Personal Protective Equipment (PPE): Wear disposable gloves and safety goggles. In clean rooms, don additional PPE such as shoe covers, hair covers, and face masks in the anteroom before entering [34] [37] [40].
Hood Cleaning Procedure: A Step-by-Step Protocol
Proper cleaning of the laminar flow hood is vital to maintaining sterility. The following protocol, based on USP Chapter <797> guidelines and manufacturer recommendations, should be performed at the beginning of every shift, before every batch compounding session, and every 30 minutes during continuous compounding activities [40].
Table: Essential Supplies for Laminar Flow Hood Cleaning
| Supply Item | Specification | Primary Function |
|---|---|---|
| Cleaning Wipes | Lint-free, non-shedding, and aseptic (e.g., sterile gauze) [40] [41]. | To apply disinfectants without introducing fibers or contaminants. |
| Sterile 70% IPA | Supplied in a pour bottle that can be recapped [40] [41]. | Primary disinfectant; kills or inhibits microorganisms [40]. |
| Sterile Water | Purified and sterilized [40]. | Removes sticky residues insoluble in IPA [40]. |
| Disinfectant Spray | e.g., 70% Ethanol [41]. | To neutralize airborne charges and disinfect surfaces before wiping. |
The workflow for the cleaning procedure is methodical and must be followed precisely to ensure all surfaces are decontaminated.
Detailed Cleaning Steps:
- Gather and Transport Supplies: In the anteroom, gather all essential hood-cleaning supplies. Wipe down the exterior surfaces of all supply containers (e.g., alcohol and water bottles) with a presaturated cleaning wipe and allow them to dry before transporting them into the clean room [40].
- Prepare in Clean Room: After donning appropriate sterile gowning and gloves, place the supplies inside the hood. Wipes should be placed at least six inches inside the hood, as the outer six-inch edge of the work surface is considered a contaminated zone [40].
- Systematic Wiping Procedure [41]:
- Spray Surfaces: Immediately before working, spray all interior surfaces with a cleaning solution such as 70% ethanol or 70% isopropanol.
- Wipe Methodically: Using a lint-free wipe, start with the cleanest area and progress to the dirtiest to avoid spreading contamination.
- For a vertical laminar flow hood or Biosafety Cabinet: Clean the back wall first, then the side walls (moving side-to-side, from top to bottom), and always clean the floor panel last [41].
- For a horizontal laminar flow hood: Clean the ceiling panel first, then the back wall, side walls, and finally the work surface [41].
- Use a new cloth or tissue for each wall or whenever it looks dirty.
- Do not attempt to clean the HEPA filter itself; this requires professional certification [40].
- Final Documentation: The hood-cleaning process is an official procedure that must be documented on a checklist for review by regulatory and compliance organizations [40].
UV Sterilization
Many laminar flow hoods and biosafety cabinets are equipped with an ultraviolet (UV) light for supplemental sterilization. UV light inactivates microorganisms by altering their DNA [41]. Safety is paramount: UV light is harmful to human skin and eyes and should only be used to prepare the workspace when the hood is unoccupied. The light must always be turned off during use [41]. UV sterilization is not a substitute for manual cleaning, as dust and debris can shield microorganisms from the light.
Maintenance, Monitoring, and Contamination Control
Routine Maintenance Schedule
A laminar flow hood is a precision instrument that requires regular maintenance to function correctly. The following table outlines the critical maintenance tasks and their frequency.
Table: Laminar Flow Hood Maintenance Schedule
| Component | Maintenance Task | Frequency | Reference |
|---|---|---|---|
| Work Surface & Interior | Thorough cleaning with disinfectant | Before and after every use; every 30 mins during long sessions [40] [41]. | [40] [41] |
| Prefilter | Replacement | Every 30 days, or as per manufacturer's instructions [40]. | [40] |
| HEPA Filter | Integrity Recertification | Every 6 months, and anytime the hood is moved [40]. | [40] |
| UV Light | Check intensity and function | As per manufacturer's specifications. | - |
| Overall Hood | Contamination test (e.g., settle plates) | Periodically, or when contamination is suspected [41]. | [41] |
Experimental Protocol: Monitoring Contamination Levels
To quantitatively assess the cleanliness of your laminar flow hood, you can perform a simple contamination test using nutrient agar plates.
Objective: To determine the level of microbial contamination within the laminar flow hood workspace. Principle: Exposing growth media to the air inside the hood and then incubating it will allow any viable contaminants to form visible colonies [41].
Materials:
- Peptone agar plates or other suitable culture media (e.g., malt extract agar for fungi) [41].
- Incubator.
Methodology:
- Turn on the hood and allow it to run for at least 15-20 minutes to purge airborne particles.
- Perform the standard cleaning procedure as outlined in Section 3.2.
- Place several prepared, sterile agar plates in different locations within the hood, including the center, front, and sides.
- Remove the lids and expose the agar surfaces to the hood environment for time intervals relevant to your work (e.g., 30 minutes, 1 hour) [41].
- Replace the lids and collect the plates.
- Incubate the plates for 1–3 days at an appropriate temperature (e.g., 30-35°C for mesophilic bacteria and fungi) [41].
- Count the number of colony-forming units (CFUs) on each plate.
Interpretation: A clean environment is indicated by no colony growth after a 1-hour exposure [41]. The presence of colonies suggests contamination. If contamination is confirmed, thoroughly clean the hood, replace sterile materials, and if the problem persists, consider replacing the HEPA filter [41].
The Scientist's Toolkit: Essential Reagents and Materials
Table: Key Research Reagent Solutions for Aseptic Work
| Item | Function / Application | Technical Notes |
|---|---|---|
| 70% Isopropanol (IPA) | Primary surface disinfectant [40] [41]. | More effective than higher concentrations; water content is crucial for cell wall penetration. |
| 70% Ethanol | Alternative surface disinfectant [41]. | Effective and commonly used; can be sprayed as a fine mist to settle airborne particles [41]. |
| Chlorhexidine Gluconate | Surgical scrub for hand hygiene [40]. | Provides persistent antimicrobial activity on skin. |
| Sterile Water | Diluent and for removing water-soluble residues [40]. | Used after IPA to remove sticky residues that alcohol cannot dissolve [40]. |
| Lint-Free Wipes | Application of disinfectants without shedding fibers [40] [41]. | Critical for preventing introduction of particulate contaminants. |
| HEPA Filter | Air filtration to create an ISO Class 5 environment [36] [39]. | Traps 99.97% of particles ≥0.3 µm; requires regular recertification [40]. |
Meticulous workspace preparation, centered on the disciplined management of the laminar flow hood, is a non-negotiable aspect of successful aseptic technique. This involves selecting the correct Class II Biosafety Cabinet for cell culture, adhering to a strict and systematic cleaning protocol before, during, and after work, and implementing a routine schedule for maintenance and environmental monitoring. By integrating these practices into daily laboratory routines, researchers and drug development professionals can safeguard the integrity of their cultures, ensure the validity of their experimental data, and protect their own safety in the process.
Personal Protective Equipment (PPE) and Personal Hygiene
This technical guide details the critical role of Personal Protective Equipment (PPE) and personal hygiene within the framework of aseptic techniques for microbial culture handling. It provides researchers and drug development professionals with the protocols and knowledge necessary to ensure sample integrity, personal safety, and experimental reproducibility.
Aseptic technique comprises a set of specialized procedures and routine practices designed to prevent contamination of samples and cultures throughout microbiological analysis [42]. These techniques are foundational to producing accurate and reliable research data, as contamination can lead to false or misleading results, ultimately compromising research findings and conclusions [42]. The principle is twofold: to protect the valuable microbial cultures from introduced contaminants and to shield the researcher and environment from potential exposure to pathogens.
The implementation of aseptic technique is critical in various settings, including research laboratories and pharmaceutical manufacturing facilities. In controlled environments like cleanrooms, where the concentration of airborne particles is meticulously regulated, contamination control is paramount [43]. Contaminants can be solid, liquid, gaseous, or microbial, and even minimal human presence is a significant source, as a human body can shed millions of skin particles per minute [43]. Therefore, a rigorous combination of personal hygiene and appropriate PPE is non-negotiable for maintaining the aseptic field.
Personal Protective Equipment (PPE): A Component of the Aseptic Barrier
PPE serves as a primary physical barrier between the researcher and the experimental materials. Its correct use minimizes the transfer of microorganisms, particulate matter, and chemical hazards, safeguarding both the personnel and the product.
The selection of PPE is determined by a risk assessment of the specific procedures and agents being handled. The following table summarizes the essential PPE components and their functions in a microbial research context.
Table 1: Personal Protective Equipment for Microbial Culture Handling
| PPE Category | Specific Types | Primary Function & Application | Key Specifications |
|---|---|---|---|
| Body Protection | Lab Coat, Gown, Coverall, Apron | Protects personal clothing and skin from stains, dyes, blood, dust, and contaminants; minimizes cross-contamination [44] [45]. | 65% cotton/35% polyester blend (semi-fire retardant) [44]; Tyvek for particulate and biological agent protection in cleanrooms [43]. |
| Hand Protection | Gloves (Nitrile, Latex, Vinyl) | Creates a barrier against contagious samples and hazardous chemicals; minimizes chemical exposure risks [44] [46]. | Disposable nitrile is minimum standard; checked for tears before use; not reused or disinfected [44]. |
| Eye & Face Protection | Safety Goggles, Face Shields | Protects from chemical liquid splashes and flying objects [44] [47]. | Goggles with baffled vents for splash protection; close-fitting to prevent lateral entry [47]. |
| Respiratory Protection | Surgical Mask, N95 Respirator | Surgical masks resist fluid and protect from large droplets; N95 respirators are tight-fitting and filter ≥95% of airborne particles for protection against small-particle aerosols [44] [48]. | N95 requires fit-testing for proper seal and optimal protection [48]. |
| Head & Footwear Protection | Hair/Beard Covers, Shoe Covers | Hair covers prevent loose strands from contaminating the environment [45]. Shoe covers prevent tracking dirt and microorganisms into clean areas [45]. | Well-fitting, comfortable, closed-toe shoes are a minimum requirement [44]. |
PPE for Specific Hazard Levels: Transmission-Based Precautions
When working with documented or suspected pathogens, standard PPE is augmented with transmission-based precautions. These are categorized based on the route of transmission and are directly applicable to handling specific microbial cultures in a research setting.
Table 2: Transmission-Based Precautions and Corresponding PPE
| Precaution Type | Implementation Context | Required PPE & Additional Measures |
|---|---|---|
| Contact Precautions | Known or suspected infections with epidemiologically important organisms (e.g., MRSA, VRE, C-diff), or draining wounds [48] [46]. | Gloves and Gown are required. Dedicated patient equipment is also used [48] [46]. |
| Droplet Precautions | Pathogens transmitted by large respiratory droplets from coughing, sneezing, or talking (e.g., influenza, pertussis) [48] [46]. | Mask and Goggles or a Face Shield are required [48] [46]. |
| Airborne Precautions | Pathogens transmitted by small respiratory droplets (e.g., tuberculosis, measles) [48] [46]. | Fit-tested N-95 respirator or PAPR is required. An airborne infection isolation room (single room with closed door) is also necessary [48] [46]. |
Foundational Protocols for Personal Hygiene
Personal hygiene, particularly hand hygiene, is the single most important practice for reducing the transmission of infectious agents in healthcare and research settings [48] [49].
Hand Hygiene Techniques and Protocols
Indications for Hand Hygiene (The Five Moments): Healthcare and research personnel should perform hand hygiene at these five key moments [48] [46]:
- Immediately before touching a patient or handling culture samples.
- Before performing an aseptic task or handling invasive devices.
- Before moving from a soiled body site to a clean body site on a patient or sample.
- After touching a patient, culture samples, or their immediate environment.
- After contact with blood, body fluids, or contaminated surfaces (with or without glove use).
Hand Hygiene Methods: There are two primary methods, each with specific indications and techniques.
Table 3: Hand Hygiene Protocol Comparison
| Parameter | Alcohol-Based Hand Rub | Handwashing with Soap and Water |
|---|---|---|
| Indications | Preferred method unless hands are visibly soiled [48] [46]. Routine decontamination after most patient or sample contact. | Hands are visibly soiled, contaminated with blood/body fluids, after restroom use, or potential exposure to spore-forming organisms (e.g., C. difficile, B. anthracis) [49] [46]. |
| Technique | 1. Apply product to palm (3-5 mL) [49].2. Rub over all surfaces: palms, backs, between fingers, fingertips, thumbs, and wrists.3. Continue until dry (~20 seconds) [48] [46]. | 1. Wet hands with water.2. Apply soap.3. Lather and scrub all surfaces thoroughly for at least 20 seconds [49].4. Rinse well under running water.5. Dry with clean towel.6. Use towel to turn off faucet [48] [46]. |
| Additional Considerations | Generally less irritating to skin and associated with improved compliance [48]. | Physically removes spores and visible dirt that alcohol-based rubs cannot eliminate [49]. |
Additional Personal Hygiene Considerations
- Jewelry and Nails: Artificial nails and nail extensions are discouraged as they can harbor pathogens in subungual spaces [49]. The WHO recommends keeping natural nails less than 0.5cm long [49]. Jewelry should be removed before hand hygiene and donning gloves.
- Training and Compliance: Regular training and auditing are essential to ensure adherence to hygiene protocols. Compliance should be monitored to uphold the highest standards of aseptic practice [45].
Integrated Experimental Protocols for Aseptic Technique
The following workflows integrate PPE and hygiene into standard microbiological procedures.
General Aseptic Workflow in a Biological Safety Cabinet (BSC)
Diagram 1: Aseptic technique core workflow.
Detailed Methodology:
- Preparation: All media, pipette tips, tubes, and bottles must be sterile prior to use. The working bench or BSC should be sprayed with a decontaminant like alcohol and wiped clean [42].
- Personal Preparation: Perform hand hygiene and don the required PPE [42].
- Creating the Aseptic Field: A BSC uses a constant flow of sterile air (HEPA-filtered) to create a sterile environment for handling samples and is the preferred location for aseptic manipulations [42]. If a BSC is unavailable, a Bunsen burner can be used in an open lab environment. The burner creates an upward air current, reducing the bacteria in the immediate surrounding air [42].
- Aseptic Manipulation:
- All transferring work must be done near the Bunsen burner or within the BSC [42].
- Flame the inoculating loop until red-hot before and after transfers [42].
- Flame the neck of bottles and tubes after opening and before closing them to create a convection current that prevents airborne contamination [42].
- Work quickly and efficiently to limit the exposure of sterile inner surfaces of petri dishes and vessels to the open environment [42].
- Use sterile pipettes and avoid touching the sample with bare hands [42].
- Post-Procedure: Decontaminate surfaces, properly dispose of or sterilize materials, and remove PPE safely followed by hand hygiene.
PPE Donning and Doffing Sequence
The order of putting on (donning) and taking off (doffing) PPE is critical to prevent self-contamination.
Diagram 2: PPE donning and doffing sequence.
Detailed Doffing Methodology:
- Gloves: Peel one glove off by grasping the palm of the other gloved hand. Hold the removed glove in the gloved hand, then slide fingers under the wrist of the remaining glove to peel it off over the first glove. Discard immediately [44] [46].
- Goggles/Face Shield: Remove from the back by lifting the headband or earpieces without touching the front [44].
- Gown: Unfasten ties and pull the gown away from the neck and shoulders, touching only the inside. Turn the gown inside out, fold or roll into a bundle, and discard [44].
- Mask/Respirator: Grasp the bottom ties or elastics, then the top ones, and remove without touching the front of the mask [44].
- Hand Hygiene: Must be performed immediately after removing all PPE, and also if hands become contaminated during the doffing process [44] [46].
The Scientist's Toolkit: Essential Reagents and Materials
Table 4: Key Research Reagent Solutions for Aseptic Technique
| Reagent / Material | Function in Aseptic Technique & Microbial Culture |
|---|---|
| Alcohol-Based Disinfectants (e.g., Ethanol, Isopropanol) | Used for surface decontamination and skin antisepsis. Effective against a broad spectrum of vegetative bacteria and viruses [42]. |
| Chemical Sterilants (e.g., Phenols, Ammonium compounds) | Used for disinfecting equipment and surfaces against hazardous biological agents and chemical residues [43] [47]. |
| Selective Culture Media (e.g., Martin Lewis Agar) | Specialized media for isolating and identifying specific pathogenic microbes (e.g., Neisseria species), supporting pure culture work [44]. |
| Sterilized Consumables (Pipettes, Tips, Loops) | Pre-sterilized, single-use items to prevent cross-contamination between samples during transfers and inoculations [42]. |
| Molecular Biology Kits (e.g., PCR Master Mixes) | Contain reagents for pathogen identification (e.g., S. pneumoniae, M. pneumoniae) via PCR, crucial for confirming culture purity and identity [42] [50]. |
In microbial culture handling research, Personal Protective Equipment and personal hygiene are not standalone tasks but are deeply integrated components of a comprehensive aseptic technique. Adherence to the detailed protocols for PPE use and hand hygiene, as outlined in this guide, is fundamental to protecting the researcher, preserving the integrity of scientific experiments, and ensuring the safety and efficacy of drug development processes. Consistent and correct application of these practices is the cornerstone of quality and reproducibility in microbiological science.
Sterile Handling of Reagents, Media, and Culture Vessels
In microbiological and cell culture research, aseptic technique refers to the stringent set of procedures and measures used to control or prevent contamination from various microorganisms during experimental workflows [51]. This practice is foundational to successful microbial culture handling, as it ensures the integrity of reagents, media, and culture vessels is maintained from preparation through to experimental use. The core objective is to create a reliable barrier between the sterile cell culture and the microorganism-laden environment [52]. Mastering these techniques is not merely a procedural formality but a critical competency that directly impacts the validity, reproducibility, and success of scientific research [53]. The distinction between "sterile" and "aseptic" is fundamental: sterilization is a process that destroys all microbial life, creating an absolute state of being free from living organisms, while aseptic technique is the practiced methodology used to maintain that sterility by preventing the introduction of contaminants into a previously sterilized environment [52] [53].
Fundamental Principles and Definitions
The philosophy of aseptic handling is built upon a rational framework for managing contamination risk. The Spaulding classification scheme, though originally devised for patient-care items, provides a logical structure that can be adapted to the research laboratory. It categorizes items based on the degree of infection risk, which correlates to the required level of microbial inactivation [54].
- Critical Items: These are items that contact sterile tissue or the vascular system. In a lab context, this can be analogous to reagents or instruments that will enter a sterile culture system. Such items must be sterile because any microbial contamination could result in compromised experiments [54].
- Semicritical Items: These items contact mucous membranes or nonintact skin. In the lab, this might apply to surfaces of containers or equipment that come near sterile openings. They require at least high-level disinfection, which destroys all microorganisms except some bacterial spores [54].
- Noncritical Items: These are items that contact only intact skin, such as lab benches, exterior surfaces of vessels, and equipment housings. They require low-level disinfection to destroy vegetative bacteria and some fungi and viruses [54].
The practices to achieve these states are summarized in the table below.
Table 1: Processes for Microbial Inactivation in the Laboratory
| Process | Level of Microbial Inactivation | Method Examples | Typical Laboratory Application |
|---|---|---|---|
| Sterilization | Destroys all microorganisms, including bacterial spores | Steam autoclaving (~40 min), dry heat (1–6 h), chemical sterilants, filtration [54] | Culture media preparation, surgical instruments, any item contacting sterile tissue [54] |
| High-Level Disinfection (HLD) | Destroys all microorganisms except some bacterial spores | Liquid immersion in chemical sterilants/HLDs (e.g., >2% glutaraldehyde for 20–90 min) [54] | Heat-sensitive semicritical items (e.g., certain sensors or reusable components) [54] |
| Low-Level Disinfection | Destroys vegetative bacteria, some fungi, and viruses, but not mycobacteria or spores | EPA-registered hospital disinfectants, 70%–90% alcohol [54] | Noncritical surfaces: work benches, exterior of bottles, blood pressure cuffs [54] |
Preparation of the Aseptic Work Environment
A controlled environment is the first line of defense against contamination. The most critical piece of equipment is the Biosafety Cabinet (BSC), or laminar flow hood, which provides a HEPA-filtered, sterile work surface [52] [53].
Biosafety Cabinet Management
The BSC must be managed meticulously before, during, and after use to preserve its sterile field.
- Pre-use Preparation: The BSC should be turned on for at least 15 minutes before beginning work to allow the airflow to stabilize and purge the work surface of particulates [53]. All interior surfaces (side walls, back panel, and work surface) must be thoroughly wiped with a 70% ethanol solution or other appropriate disinfectant [52] [51]. All necessary materials should be gathered and placed strategically inside the hood, ensuring they are within easy reach but do not block the front grille or rear air intake [53].
- During Use: The researcher must work slowly and deliberately, minimizing rapid arm and hand movements that can disrupt the laminar airflow [52] [53]. All items should be kept at least six inches from the front grille to maintain an effective air barrier [53].
- Post-use Cleanup: After completing work, all used materials must be removed from the BSC. The interior surfaces should be disinfected again with 70% ethanol, and the cabinet left running for 5-10 minutes to self-purge before being shut down [52] [51].
Personal Protective Equipment (PPE) and Hygiene
The laboratory personnel are a significant source of contamination; therefore, proper PPE and hygiene are non-negotiable.
- PPE Requirements: A clean lab coat, sterile gloves, and safety glasses must be worn at all times in the cell culture area [52] [53]. Gloves should be changed frequently, especially after touching non-sterile surfaces like door handles or computer keyboards [53].
- Personal Hygiene: Researchers must wash their hands before and after working with cultures [52]. Long hair should be tied back, and jewelry that could interfere with aseptic technique or get caught in equipment should be removed [52] [53]. Talking, singing, or whistling while performing sterile procedures should be avoided to minimize the release of aerosols from the respiratory tract [52].
Workflow for Sterile Material Handling
The following diagram illustrates the logical workflow for handling sterile materials within a biosafety cabinet, integrating key steps to maintain asepsis.
Sterile Handling in Practice: Protocols and Procedures
Handling Reagents and Media
Commercial reagents and media undergo strict quality control to ensure sterility, but they can easily become contaminated during handling [52]. The following protocols are essential for maintaining their integrity.
- Sterile Filtration: For reagents or media prepared in the laboratory that are heat-sensitive, sterilization using a 0.22 μm membrane filter validated for bacterial retention is the standard method [55]. This filter size is sufficient to remove bacteria and fungi from solutions.
- Container Management: Always wipe the outside of all bottles, flasks, and plates with 70% ethanol before introducing them into the BSC [52]. All containers should be kept capped when not in use [52]. If a cap or cover must be placed down on the work surface, place it with the opening (inner surface) facing down to prevent airborne contaminants from settling on it [52].
- Liquid Transfer: Always use sterile glass or disposable plastic pipettes with a pipettor to work with liquids [52]. Never pour media or reagents directly from bottles or flasks, as this dramatically increases the risk of contamination [52]. Each sterile pipette should be used only once to avoid cross-contamination [52]. Take care not to touch the pipette tip to any non-sterile surface, including the outer threads of a bottle [52].
Handling Culture Vessels
Culture vessels such as flasks, Petri dishes, and multi-well plates are the primary homes for cells and microbes, and their handling is critical.
- Opening and Closing: Never uncover a sterile flask, bottle, or Petri dish until the instant you are ready to use it, and never leave it open to the environment. Replace the cover as soon as you are finished [52].
- Post-Use Sealing: After use, always cap bottles and flasks securely. Multi-well plates should be sealed with paraffin tape or placed in resealable plastic bags to prevent microorganisms and airborne contaminants from entering during incubation or storage [52].
- Integrity Inspection: Before use, visually inspect vessels for any cracks or imperfections that could compromise sterility.
Inoculation Techniques
Specific techniques are employed for transferring microorganisms, each requiring strict aseptic practice. The core tool for these procedures is the inoculating loop or needle.
- Sterilizing Inoculating Loops: Before and after every use, the inoculating loop must be sterilized. This is done by holding the loop and shaft in the flame of a Bunsen burner (if used outside a BSC) until it is red-hot, paying special attention to joints [51].
- Cooling the Loop: A sterilized loop must be allowed to cool for a few seconds near the flame before contacting live culture to avoid killing the target organisms [51].
- Common Inoculation Methods:
- Streak Plating: Used to isolate individual bacterial colonies. After obtaining a sample from a glycerol stock or culture tube (the rim of which should be flamed briefly), the sample is streaked in sequential sections on an agar plate, with the loop being re-sterilized between each section [51].
- Slant Inoculation: Used for maintaining cultures. A single colony is transferred to a fresh agar slant using a zigzag pattern [51].
- Liquid Culture Inoculation: A similar aseptic procedure is used to transfer a colony or culture into a liquid broth medium [51].
Table 2: Essential Research Reagent Solutions for Aseptic Culture Work
| Reagent/Material | Function & Aseptic Purpose | Key Handling Considerations |
|---|---|---|
| Water for Injection (WFI) | Sterile, endotoxin-controlled solvent for reconstituting APIs or preparing media [55]. | Endotoxin limit should be ≤0.25 EU/mL; requires valid Certificate of Analysis (COA) [55]. |
| 70% Ethanol Solution | Gold standard for surface disinfection of work areas, gloves, and container exteriors [52] [53]. | Effective concentration for microbial kill; allows slow evaporation for surface contact time. |
| 0.22 μm Membrane Filter | Sterilizes heat-sensitive solutions by removing bacteria and fungi [55]. | Must be sterile, integrity-tested, and single-use; validated for bacterial retention per ISO 13408-2 [55]. |
| Agar Plates & Culture Media | Provides solid or liquid nutrient substrate for microbial growth. | Must be pre-sterilized (autoclaved/filtered); stored in sterile, re-sealable bags; checked for cloudiness before use [52] [51]. |
| Sterile Disposable Pipettes | Allows safe, aseptic transfer of liquid reagents and media without cross-contamination [52]. | For single-use only; never touch the non-sterile end to anything inside the BSC [52]. |
Validation and Quality Control
Ensuring that aseptic techniques are effective is as important as the techniques themselves. This is achieved through rigorous validation and continuous monitoring.
Media-Fill Simulation (Aseptic Process Simulation)
A media-fill test is a crucial validation procedure that simulates the entire aseptic manufacturing process using a sterile culture media instead of the actual product [56] [57]. The primary goal is not to test the sterility of a single batch but to validate the aseptic process, qualify personnel, identify critical control points, and verify the environment [57]. During these simulations, all routine procedures—including cleaning, disinfection, and environmental monitoring—must be continued to accurately assess the state of control [56]. A typical media-fill program involves filling a minimum of 5,000 to 10,000 units to effectively mirror all activities in the process, with periodic revalidation typically occurring twice a year per process [56].
Environmental Monitoring
Continuous monitoring of the laboratory environment is essential for proactive contamination control.
- Particulate Monitoring: Airborne particle counters are used to ensure the air quality within the BSC and cleanroom meets the required ISO classification (e.g., ISO Class 5 for a BSC) [57].
- Microbial Monitoring: Settle plates (agar plates left open to capture falling microbes) and air samplers are used routinely to monitor the microbial load in the air and on surfaces [51] [56]. This data helps track trends and identify potential issues before they lead to contamination events.
Reagent and Media Quality Control
- Growth Promotion Testing: Before use, any culture media should be tested for its ability to support microbial growth using a panel of representative reference microorganisms [56].
- Expiration Dates and Retesting: Laboratories must adhere to manufacturer expiration dates. While it is sometimes feasible to use reagents past their expiry after retesting (e.g., checking pH for acids/bases), this should be done with extreme caution. Factors such as storage conditions (temperature, light exposure, humidity) and the risk of chemical or biological contamination must be evaluated [58]. Using expired, nutrient-rich media for culturing, for instance, is not recommended due to the high risk of undetected contamination [58].
The sterile handling of reagents, media, and culture vessels is a disciplined science that forms the bedrock of reliable microbiological and cell culture research. It extends beyond a simple checklist of procedures to encompass a comprehensive philosophy of contamination control. This involves a deep understanding of the principles of sterilization and asepsis, meticulous preparation of the work environment and personnel, and the deliberate execution of proven handling protocols. Furthermore, the practice is not static; it requires continuous validation through media-fill simulations, environmental monitoring, and rigorous quality control of all materials. By integrating these elements—principled knowledge, disciplined practice, and continuous validation—researchers and drug development professionals can protect the integrity of their work, ensure the reproducibility of their experiments, and make meaningful contributions to scientific discovery and public health.
In microbiology and biopharmaceutical research, the integrity of microbial cultures is paramount. Aseptic technique refers to the collection of procedures and practices performed under sterile conditions to prevent the introduction of unwanted microorganisms (contamination) into cultures, sterile media, or the laboratory environment [59] [60]. For researchers and drug development professionals, mastering these techniques is not merely a foundational skill but a critical component in ensuring the validity of experimental data, the purity of biopharmaceutical products, and the safety of personnel. The consequences of contamination range from corrupted research findings and costly production losses to compromised patient safety in the context of drug manufacturing [37]. This guide details three core aseptic procedures: flaming, the use of inoculating loops, and aseptic pipetting, which underpin all manipulations in microbial cell culture handling.
The Principle and Procedure of Flaming
Flaming is a rapid and effective method of dry heat sterilization used to eliminate all microorganisms from small metal tools like inoculating loops and needles by heating them to incandescence in a Bunsen burner flame [61] [62] [59]. The objective is to destroy contaminating bacterial spores and vegetative cells instantly before the tool contacts a sterile culture or medium [61].
Quantitative Parameters for Effective Flaming
The table below summarizes the key quantitative data for proper flaming technique.
Table 1: Key Parameters for Effective Flaming
| Parameter | Specification | Purpose/Rationale |
|---|---|---|
| Sterilization Temperature | Heated until red hot (incandescence) [61] [62] [63] | Ensures destruction of all microorganisms, including bacterial spores [61]. |
| Cooling Time | 15-30 seconds in the air before use [62] [63] | Preants thermal killing of the culture being transferred and avoids causing the culture to splatter [61] [63]. |
| Flaming Method for Tube Necks | Pass neck of tube/bottle through the flame forwards and back [61] | Creates a convection current away from the opening, singeing lint and dust to prevent contamination [61] [62]. |
Detailed Methodology for Flaming an Inoculating Loop
The following workflow outlines the standardized procedure for flame-sterilizing an inoculating loop. The process involves careful heating and cooling to ensure sterility without compromising the sample.
Step-by-Step Protocol:
- Initial Positioning: Hold the handle of the wire loop close to the top, almost vertically. This positioning leaves the little finger free to handle bottle caps or tube plugs and ensures any residual liquid culture runs into the flame [61].
- Gradual Heating: Sterilize the loop by heating it to red hot. To prevent splattering of any remaining culture and the formation of an infectious aerosol, heat the loop gradually [61].
- Method 1 (Horizontal): Place the handle end of the loop in the flame with the loop outside it, allowing heat to conduct along the wire. Then, draw the wire steadily through the hottest part of the flame until it glows red hot [61].
- Method 2 (Vertical): Position the tip of the loop in the cooler blue cone of the flame and the rest of the wire in the hottest part. This pre-warms the tip and any liquids before full sterilization [61].
- Cooling: Allow the sterilized loop to cool for 15-30 seconds in the undisturbed air. Do not wave it around or place it on a non-sterile surface [61] [62]. A hot loop will kill microorganisms on contact and may cause media to splatter.
- Post-Use Sterilization: Re-sterilize the loop immediately after use by flaming it to redness again to destroy all organisms that were on the loop [61] [59].
Working with Inoculating Loops
Inoculating loops are essential for transferring and streaking microbial cultures. They can be reusable metal wires or pre-sterilized disposable plastic ones.
Experimental Protocol: Tube-to-Tube Transfer
This is a common procedure for subculturing bacteria or maintaining stock cultures [62].
- Preparation: Label the new sterile medium tube with culture, date, and initials. Loosen the cap of the source culture tube. Assemble all materials within easy reach and work near a lit Bunsen burner to create a sterile field with an upward air current [61] [62] [64].
- Sterilize Loop: Flame the inoculating loop as described in Section 2.2 and allow it to cool.
- Handle Tubes: Hold the source culture tube in one hand. Use the little finger of the hand holding the loop to remove the tube's cap. Do not place the cap on the bench. Briefly pass the neck of the tube through the Bunsen burner flame to create an updraft and incinerate any lint [61] [62] [63].
- Obtain Inoculum: Insert the cool, sterile loop into the tube and obtain a small amount of culture. Withdraw the loop without touching the tube's sides [62].
- Inoculate: Flame the neck of the source tube again and replace the cap. Pick up the sterile destination tube, remove its cap with your little finger, and flame the neck. Introduce the inoculum into the new medium. For a broth, rub the loop against the glass above the fluid; do not shake it, as this creates aerosols. For an agar slant, make a single midline streak over the surface [61] [62].
- Finish: Flame the necks of both tubes and replace their caps. Finally, re-sterilize the inoculating loop by flaming it to redness [62] [59].
Aseptic Pipetting Techniques
Serological pipettes are used for the precise, aseptic transfer of sterile liquids, cultures, and chemical solutions. The objective is to maintain the sterility of the liquid being transferred and the receiving vessel.
Quantitative Data for Serological Pipettes
Table 2: Specifications for Aseptic Pipetting
| Parameter | Specification | Purpose/Rationale |
|---|---|---|
| Common Sizes | 5 mL, 10 mL, 25 mL (volumes from 0.1 mL to 25 mL) [64] | Covers a wide range of liquid transfer needs in microbial culture. |
| Sterilization Method | Pre-sterilized by autoclaving (e.g., 121°C for at least 15-30 minutes) [64] [60] | Ensures pipettes are free of all microbial life before use. |
| Pipette Types | TD ("To Deliver"): Leaves a tiny bit in the tip. TC ("To Contain"): Must be "blown out" for full volume [64]. | Critical for volume accuracy; TD is most common. |
| Liquid Media Storage | Sterile solutions may be stored at 4°C for up to 5 months (less for unstable components like antibiotics) [64]. | Maintains sterility and stability of media and reagents. |
Detailed Methodology for Aseptic Liquid Transfer
The following workflow details the critical steps for using a serological pipette within a sterile field to avoid contamination.
Step-by-Step Protocol:
- Workspace Preparation: Clear and disinfect the bench surface with a suitable agent like 70% ethanol or 1% Virkon, allowing it to dry. Arrange a Bunsen burner and all supplies within reach. Light the burner to create a sterile field with an updraft [61] [64].
- Pipette Handling: For a plastic pipette, remove the paper sleeve by peeling it from the plugged end without touching the pipette's tip. For a glass pipette stored in a canister, remove one carefully without touching the others or the tip. Affix a pipette aid (bulb, pump, or gun) securely to the top [64].
- Accessing the Liquid Source: Hold the bottle containing the sterile liquid. Remove its cap with the little finger of your pipette hand, keeping the cap in your hand with the inner surface facing downward. Do not place the cap on the bench. Briefly pass the neck of the bottle through the Bunsen burner flame to create an updraft [61] [64].
- Aspirating the Liquid: Place the tip of the pipette into the liquid. Use the pipette aid to draw the liquid up smoothly to just above the desired volume. Precisely adjust the volume by aligning the meniscus of the liquid with the appropriate graduation mark on the pipette. Avoid squeezing the teat with the pipette tip beneath the liquid, as this introduces air bubbles and can cause "spitting" and aerosol formation [61] [64].
- Transferring the Liquid: Withdraw the pipette from the bottle. Flame the neck of the source bottle again and replace the cap. Hold the receiving vessel (e.g., flask, tube) at an angle, remove its cap, and flame its neck. Deliver the liquid smoothly into the vessel [61] [64].
- Disposal: Immediately after use, place the contaminated pipette into a nearby container of disinfectant. Remove the pipette aid only once the pipette is within the discard pot to avoid contaminating the work surface with drops of culture [61].
Essential Research Reagents and Materials
The following table catalogues the key materials required for executing the core aseptic techniques described in this guide.
Table 3: Essential Research Reagents and Materials for Aseptic Technique
| Item | Function/Application |
|---|---|
| Bunsen Burner | Creates a sterile field via an updraft and provides a flame for sterilizing inoculating loops and flaming vessel necks [61] [22] [64]. |
| Inoculating Loops/Needles | Tools for transferring and streaking microbial cultures onto solid or into liquid media [61] [65] [62]. |
| Serological Pipettes | Calibrated pipettes for precise, aseptic transfer of specific volumes of sterile liquids, cultures, and solutions [65] [64]. |
| Disinfectants (e.g., 70% Ethanol, 1% Virkon) | Used to disinfect work surfaces before and after experiments. Ethanol acts rapidly, while Virkon is a safer alternative for student use [61] [34] [64]. |
| Personal Protective Equipment (PPE) | Lab coats, disposable gloves, and safety goggles protect the operator from microorganisms and protect cultures from personal contamination [34] [22] [37]. |
| Autoclave | Uses steam under pressure to sterilize media, solutions, and glassware, ensuring all microbial life, including spores, is destroyed [65] [60] [37]. |
| Laminar Flow Hood/Biosafety Cabinet | Provides a HEPA-filtered, sterile air environment for handling cultures, offering protection to both the sample and the researcher [22] [37]. |
Mastering the core techniques of flaming, inoculating loops, and aseptic pipetting is non-negotiable for any researcher or professional working with microbial cultures. These procedures form the bedrock of contamination control, which is critical for data integrity in research and product quality and safety in drug development. While the principles are constant—maintaining sterility, controlling the environment, and preventing the introduction or spread of contaminants—their consistent and meticulous application is a skill that requires deliberate practice and unwavering attention to detail. By adhering to the detailed methodologies and protocols outlined in this guide, scientists can ensure their work in microbial culture handling is reliable, reproducible, and safe.
Aseptic technique is a foundational component of microbiology laboratories, encompassing the collection of procedures and techniques designed to prevent the introduction of unwanted organisms into pure cultures or the laboratory environment [66]. The term "aseptic" literally means "without contamination," and these procedures are equally crucial for maintaining culture purity and ensuring experimenter safety [67]. In the context of drug development and biomedical research, maintaining pure cultures through proper aseptic transfer is paramount for generating reproducible, reliable data and ensuring the validity of experimental results.
The three essential goals of aseptic technique are: (1) preventing contamination of the specimen or culture, (2) preventing contamination of oneself, and (3) preventing contamination of the work area [68]. Mastery of aseptic technique is vital for success in microbiology experiments, requiring careful attention to detail and deliberate, purposeful movements throughout the transfer process [69]. Subculturing, the process of transferring microorganisms from a stock culture to fresh nutritive medium, is essential for sustaining microbial cultures in laboratory conditions for varied applications [70].
Core Principles and Definitions
Media Types and Their Applications
Microbial growth media provides the nutrients necessary to sustain metabolic activities and reproduction [66]. The table below summarizes the primary media forms used in microbiological work.
Table 1: Characteristics and Applications of Primary Culture Media Types
| Media Type | Physical State | Primary Applications | Growth Patterns/Indicators |
|---|---|---|---|
| Broth [68] | Liquid | - Determining growth patterns in liquid medium [66]- Growing large quantities of bacteria [66]- Fast, luxuriant growth [71] | - Turbidity (uniform cloudiness) [69]- Flocculent growth (clumps) [69] [68]- Pellicle (surface film) [69] [68]- Sediment (precipitate at bottom) [69] [68] |
| Agar Slant [68] | Solid | - Long-term storage of cultures (weeks to months) [66] [68]- Maintaining stock cultures [72]- Intermediate-term storage [66] | - Growth along surface inoculation pattern [72]- Zig-zag pattern for abundant growth [72]- Straight line for stock maintenance [72] |
| Agar Plate [68] | Solid | - Isolation of colonies [73] [68]- Obtaining pure cultures [73]- Characterizing discrete colonies [66] | - Isolated colonies [73]- Colony morphology (color, size, form) [68] |
| Agar Deep [68] | Solid | - Determining motility [68]- Oxygen usage studies [68]- Certain metabolic tests [66] | - Growth along stab line [68]- Diffuse growth away from line in motile species [68] |
Critical Terminology
- Aseptic Transfer: The process of transferring microorganisms from one medium to another without contaminating the microorganisms, sterile medium, or surroundings [69].
- Pure Culture: A culture containing a single species of microorganism [69] [66].
- Subculturing: The process of transferring a small amount of bacteria (inoculum) from a pure culture into fresh, sterile medium to propagate the culture [69] [70].
- Sterilization: The complete removal of all vegetative cells, endospores, and viruses from an item, typically achieved through autoclaving (moist heat under pressure) [66] [67].
- Disinfection: The killing or growth inhibition of vegetative microbes using chemical agents like chlorine bleach on nonliving surfaces [66] [67].
- Inoculum: The sample of microorganisms being transferred to new media [69] [66].
Essential Materials and Reagents
Research Reagent Solutions
Table 2: Essential Reagents and Materials for Aseptic Transfer Procedures
| Item | Function/Application | Technical Specifications |
|---|---|---|
| Tryptic Soy Broth [69] | Complex media for bacterial growth | Contains readily utilizable carbon and energy source; used for activating lyophilized Serratia marcescens [69] |
| Agar [66] | Solidifying agent | Polysaccharide from red algae; not broken down by bacteria, contains no nutrients, melts at high temperatures but solid at most bacterial growth temperatures [66] |
| Isopropyl Alcohol [69] [67] | Disinfectant for inoculating tools | Used to fill small disposable containers half-way for disinfecting tools; flammable - keep away from heat sources [69] |
| Chlorine Bleach [69] | Surface disinfectant | Used at 10% concentration (20 ml bleach + 180 ml water) for disinfecting work surfaces; corrosive - use with proper ventilation and near water source for safety [69] |
| Sterile Transfer Pipettes [69] | Liquid transfer | Pre-sterilized by manufacturer, typically using radiation; used for broth transfers [69] |
| Inoculating Loop/Needle [72] [71] | Bacterial transfer | Metal instrument sterilized by heating to red hot in Bunsen burner flame; loop used for broths and plates, needle for deeps [71] |
Safety and Personal Protective Equipment (PPE)
Proper PPE is essential when working with microbial cultures. Required attire includes safety goggles, gloves, laboratory apron, long-sleeve shirt worn under the apron, closed-toe shoes (not made of cloth), long pants, and secured long hair [69]. Dangling jewelry or loose-hanging garments should be avoided as they may contaminate cultures or pose safety hazards [69].
General Aseptic Technique Workflow
The following diagram illustrates the logical workflow for aseptic transfer procedures, highlighting the decision points for different media types.
Figure 1: Aseptic Transfer Workflow Decision Diagram
Detailed Transfer Protocols
Broth to Broth Transfer Protocol
Broth-to-broth transfer is fundamental for propagating large volumes of bacteria and studying growth patterns in liquid medium [66] [68].
Table 3: Broth to Broth Transfer Protocol
| Step | Procedure | Critical Parameters | Purpose |
|---|---|---|---|
| 1. Labeling | Label destination broth tube with organism name, date, and initials [71] [68] | Label before starting procedure [66] | Ensures proper identification and tracking |
| 2. Loop Sterilization | Hold inoculating loop like pencil, insert into flame until red hot [72] [73] | Heat entire wire; hold at 30-degree angle in flame [72]; heat for at least 10 seconds [66] | Destroys all microbial life on loop |
| 3. Cooling | Hold sterile loop in air for 15 seconds to cool [66] | Do not wave around or set down [66] | Prevents killing of inoculum while maintaining sterility |
| 4. Obtain Inoculum | Pick up donor broth tube; remove cap with pinky finger [72] [66] | Do not place cap on bench; keep in hand [72] [73] | Maintains sterility of culture and medium |
| 5. Tube Flaming | Lightly pass lip of tube through flame [72] [74] | Brief exposure for glass tubes only [72] | Creates convection currents to prevent contamination |
| 6. Transfer | Insert cooled loop into broth, remove with film of liquid [72] [66] | Do not jiggle loop; avoid touching tube sides [66] | Obtains microbial inoculum without aerosol formation |
| 7. Re-cap Source | Flame tube lip, replace cap, return tube to rack [72] [74] | Perform quickly after transfer | Maintains sterility of stock culture |
| 8. Inoculate Destination | Remove cap from sterile broth, insert loop, swirl gently [72] [66] | Do not jiggle loop to dislodge cells [66] | Transfers inoculum to fresh medium |
| 9. Final Sterilization | Slowly insert loop into flame to sterilize [72] [74] | Slow heating prevents spattering [72] [74] | Kills remaining bacteria; prevents contamination |
Broth to Slant Transfer Protocol
Agar slants provide an optimal surface for storing bacterial cultures for intermediate periods (weeks to months) while minimizing dehydration and contamination risk [72] [66].
Table 4: Broth to Slant Transfer Protocol
| Step | Procedure | Critical Parameters | Purpose |
|---|---|---|---|
| 1. Preparation | Label sterile slant tube with organism, date, initials [71] [68] | Label before starting procedure [66] | Ensures proper identification |
| 2. Instrument Sterilization | Sterilize inoculating loop in flame until red hot [72] | Heat entire wire; allow to cool [72] [66] | Ensures sterile transfer instrument |
| 3. Obtain Broth Inoculum | Follow steps 3-7 from Broth to Broth protocol | Obtain loopful of broth culture [72] | Secures microbial inoculum |
| 4. Inoculate Slant | Insert loop to bottom of slant, drag up in zig-zag or straight line [72] [66] | Use "fishtail" or snake pattern; avoid digging into agar [72] [66] | Distributes inoculum across slant surface |
| 5. Pattern Selection | Use zig-zag for abundant growth or straight line for stock culture [72] | Zig-zag maximizes surface coverage; straight line conserves culture [72] | Tailors inoculation method to application |
| 6. Final Sterilization | Flame loop slowly to sterilize [72] | Slow heating prevents spattering of residual culture [72] | Kills remaining bacteria on loop |
Broth to Plate Transfer Protocol
Broth to plate transfers are essential for obtaining isolated colonies, observing colony morphology, and purifying cultures [73] [66].
Table 5: Broth to Plate Transfer Protocol
| Step | Procedure | Critical Parameters | Purpose |
|---|---|---|---|
| 1. Plate Labeling | Label bottom of Petri plate with organism, date, initials [66] [68] | Label on bottom before inoculation [66] | Ensures proper identification despite condensation |
| 2. Obtain Broth Inoculum | Follow steps 2-7 from Broth to Broth protocol | Secure loopful of broth culture [74] | Obtains microbial inoculum |
| 3. Plate Inoculation | Lift lid slightly, use loop to streak inoculum following appropriate pattern [74] [73] | Hold lid as shield over agar; minimize exposure [74] [66] | Transfers inoculum while minimizing contamination |
| 4. Streaking Method | Use quadrant streaking for isolation or spread plate technique [74] [73] | Follow established streaking patterns for isolation [73] | Dilutes bacteria to obtain isolated colonies |
| 5. Incubation Position | Place plates upside down for incubation [71] [68] | Invert plates after inoculation | Prevents condensation from disrupting growth |
| 6. Final Sterilization | Flame loop slowly to sterilize [72] | Slow heating prevents spattering [72] | Kills remaining bacteria on loop |
Troubleshooting and Quality Control
Contamination Identification and Prevention
Effective aseptic technique requires vigilance in identifying and preventing contamination. Before use, always inspect media for signs of pre-existing contamination, including unexpected cloudiness in broths, microbial growth on sterile slants or plates, or physical defects in the media [66]. If contamination is suspected, consult with supervisory personnel and do not use the compromised media [66].
Common indicators of microbial growth in broth cultures include: turbidity (uniform cloudiness), flocculent growth (clumps throughout broth), sediment (precipitate at bottom), and pellicle formation (bacterial film on surface) [69] [68]. On solid media, contamination typically appears as colonies with morphology different from the inoculated species, often exhibiting varying colors, textures, or growth patterns [68].
Technical Error Prevention
- Incomplete Sterilization: Ensure the entire length of the inoculating loop wire is heated to red hot, not just the tip [66]. Hold in flame for at least 10 seconds to ensure complete sterilization [66].
- Thermal Shock to Bacteria: Always allow the sterilized loop to cool for approximately 15 seconds before touching it to bacterial cultures [73] [66]. Waving the loop to cool it may introduce contaminants [66].
- Aerosol Generation: Insert loops into broths without jiggling or vigorous movement to prevent creating aerosol droplets that may contain microorganisms [66].
- Cap Management: Never place tube caps on the bench surface; always hold them in the pinky finger of the dominant hand during transfers [72] [73].
Applications in Research and Drug Development
In pharmaceutical and biotechnology research, precise aseptic technique is fundamental for maintaining the integrity of microbial strains used in antibiotic discovery, biodegradation studies, and bioprocess development [75]. Proper subculturing techniques ensure genetic stability and phenotypic consistency of microbial production strains used in biomanufacturing [70]. The protocols described herein form the basis for more advanced techniques including antimicrobial susceptibility testing, biotransformation experiments, and the development of novel microbiological assays critical to drug discovery pipelines.
The ability to consistently transfer cultures without contamination reduces experimental variables and enhances reproducibility in research settings. This is particularly crucial in regulated environments where documentation and standardization are required for compliance with Good Laboratory Practice (GLP) guidelines. Mastery of these fundamental techniques establishes the foundation for advanced microbiological methodologies employed throughout the drug development process.
Beyond the Basics: Troubleshooting Contamination and Optimizing Your Technique
In the realm of microbial culture handling, the visual identification of contamination serves as a critical first line of defense in maintaining the integrity of research, particularly in drug development. Contamination can compromise experimental validity, lead to erroneous conclusions, and incur significant financial losses. This technical guide details the visual identification and quantification of three key contamination indicators: turbidity, fungal growth, and pellicle formation. Framed within the broader context of aseptic technique, this whitepaper provides researchers and scientists with the methodologies and analytical tools necessary to safeguard cellular and microbiological studies. Adherence to rigorous aseptic protocols is fundamental to all aspects of this process, from routine handling to the execution of specific contamination assays [76].
Turbidity: Measurement and Significance
Principles and Instrumentation
Turbidity is a key quantitative measure of water clarity or cloudiness caused by suspended solid particles. In cell culture and microbiology, an unexplained increase in turbidity in culture media can be a primary indicator of microbial contamination. Modern online turbidity measurement systems provide real-time, accurate monitoring, essential for quality control in water systems used in laboratory reagent preparation and bioprocessing [77].
These systems utilize specialized sensors based on light scattering principles. The choice of sensor depends on the application and required specifications, as detailed in Table 1. For instance, low-range turbidity sensors are suited for monitoring filter integrity and purified water, while wide-range sensors are designed for challenging applications like wastewater effluent [77].
Table 1: Specifications of Representative Online Turbidity Sensors
| Feature | Low-Range Turbidity Sensor [77] | Wide-Range Turbidity Sensor [77] | DataStick Total Suspended Solids Sensor [77] |
|---|---|---|---|
| Measurement Principle | Scattered light detection | Scattered light detection | Fouling correction optics |
| Measuring Range | 0.0 to 100 NTU | 0.0 to 4000 NTU | 0-20,000 mg/L |
| Accuracy | ±2% of reading or ±0.015 NTU (whichever greater) | ±1% of reading | Not Specified |
| Key Applications | Filter monitoring, distribution monitoring, pharmaceutical process water | Drinking water, raw water, backwash monitoring | Municipal/industrial wastewater, activated sludge, aeration basins |
| Typical Use in Research | Quality control of purified water, cell culture media | Monitoring source water, bioreactor effluent | Monitoring fermentation broths, large-scale bioprocess wastes |
Experimental Protocol for Turbidity Measurement
Method: Off-line Verification using a Benchtop Turbidity Meter
This protocol is used to validate the readings from online systems or for spot-checking samples from culture media or laboratory water sources.
Materials:
- Sample (culture media, laboratory water, etc.)
- Benchtop turbidity meter (calibrated)
- Clean, matched sample vials/cuvettes
- Calibration standards (e.g., 0.1, 10, 100 NTU)
- Lint-free wipes
Procedure:
- Aseptic Sampling: Using strict aseptic technique, withdraw a sample from the vessel of interest. This prevents introducing contamination during sampling [76].
- Calibration: Ensure the turbidity meter is calibrated according to the manufacturer's instructions using the provided standards.
- Vial Handling: Fill a clean sample vial, avoiding the introduction of air bubbles. Wipe the outside of the vial with a lint-free wipe.
- Measurement: Place the vial into the meter chamber and record the reading in Nephelometric Turbidity Units (NTU).
- Data Interpretation: Compare the reading against established baselines for the specific medium or water type. A significant increase in NTU suggests potential contamination or particle shedding.
For cost-effective research applications, modified sensors using additional phototransistors to measure scattered light have been developed, offering enhanced measurement capabilities without the expense of commercial systems [78].
Fungal Contamination: Visual and Microscopic Identification
Characteristics of Fungal Contamination
Fungal contamination in liquid cultures can manifest as discrete, woolly, or powdery clumps floating in the medium or adhering to the vessel walls. In some cases, it may form a mat on the surface known as a pellicle (see Section 4). Color can vary, presenting as white, black, green, blue, or red. A definitive sign is a rapid drop in the pH of the culture medium, often making it more acidic.
Experimental Protocol for Fungal Biofilm Analysis (Crystal Violet Assay)
The Crystal Violet (CV) assay is a common colorimetric method used to quantify the total biomass of fungal and polymicrobial biofilms, which are key virulence factors in infections like fungal keratitis [79] [80].
Materials:
- Fungal isolate (e.g., Candida tropicalis, Neoscytalidium oculus) [79] [80]
- Tryptic Soy Broth (TSB) or other appropriate culture medium [79]
- 96-well flat-bottom microplates (polystyrene, non-treated)
- Phosphate Buffered Saline (PBS)
- Crystal Violet solution (0.1% w/v)
- Acetic acid (30% v/v) or 95% ethanol
- ELISA (microplate) reader capable of measuring OD at 570-600 nm [79]
Procedure:
- Inoculum Preparation: Prepare a suspension of the fungal conidia or cells in TSB to a standardized concentration (e.g., 1 x 10^6 conidia/mL) [80].
- Biofilm Growth: Aseptically transfer 200 µL of the inoculum into the wells of a 96-well microplate. Include negative control wells (medium only). Seal the plate and incubate for 48-96 hours at 37°C under static conditions to promote biofilm adhesion [79].
- Washing: Carefully remove the planktonic (non-adherent) cells by gently inverting the plate and pipetting out the liquid. Wash the adherent biofilms twice with 200 µL of PBS to remove loosely attached cells.
- Fixation and Staining: Add 200 µL of 0.1% crystal violet solution to each well and incubate at room temperature for 15-20 minutes.
- Destaining: Remove the crystal violet and wash the wells thoroughly with water until the runoff is clear.
- Elution: Add 200 µL of 30% acetic acid (or 95% ethanol) to each well to solubilize the crystal violet bound to the biofilm. Incubate for 10-15 minutes with gentle shaking.
- Measurement: Transfer 100-150 µL of the eluted dye to a new microplate (if necessary) and measure the Optical Density (OD) using an ELISA reader at a wavelength of 570 nm [79]. The OD value is proportional to the total biofilm biomass.
Pellicle Formation: A Biofilm at the Air-Liquid Interface
Understanding the Pellicle
A pellicle is a robust, floating biofilm that forms at the air-liquid interface of static liquid cultures. It is a common mode of growth for certain bacteria (e.g., Bacillus spp., some Pseudomonas spp.) and fungi (e.g., some yeasts and molds). The formation of a pellicle is a controlled, energy-dependent process where motile or non-motile microbes position themselves at the surface to access higher oxygen levels. Visually, a pellicle can appear as a thin, delicate film, a thick, wrinkled layer, or a discrete, island-like structure.
Experimental Protocol for Pellicle Induction and Analysis
Method: Pellicle Formation Assay with Metabolic Activity Assessment (MTT Assay)
The MTT assay is used to assess the metabolic activity of cells within a pellicle or biofilm, complementing the biomass data from the Crystal Violet assay [79].
Materials:
- Test microorganism (e.g., Pseudomonas aeruginosa, Candida tropicalis)
- Appropriate culture medium (e.g., TSB, YESCA)
- 24-well flat-bottom cell culture plates
- MTT reagent (3-(4,5-Dimethylthiazol-2-yl)-2,5-diphenyltetrazolium bromide), 5 mg/mL in PBS
- SDS solution (10% in 0.01M HCl) or DMSO
- Microplate reader
Procedure:
- Pellicle Growth: Aseptically add 1-2 mL of inoculated medium to each well of a 24-well plate. Leave the plate undisturbed in a static incubator at the appropriate temperature for 3-7 days. Visually inspect daily for pellicle formation at the air-liquid interface.
- MTT Application: Carefully, without disturbing the pellicle, remove half of the underlying medium from each well. Add MTT reagent to a final concentration of 0.5-1 mg/mL. Incubate the plate in the dark for 2-4 hours at 37°C. Metabolically active cells will reduce the yellow MTT to purple formazan crystals.
- Solubilization: Carefully remove the remaining medium. Add an equal volume of SDS solution (or DMSO) to solubilize the formazan crystals. Incubate for 1 hour with gentle shaking in the dark.
- Measurement: Transfer the solution to a 96-well plate and measure the OD at 570 nm, using a reference wavelength of 630-690 nm to subtract background. Higher OD values indicate greater metabolic activity within the pellicle [79].
The Scientist's Toolkit: Essential Research Reagents and Materials
Maintaining aseptic technique is paramount when handling any of these materials to prevent accidental contamination [76].
Table 2: Key Research Reagent Solutions for Contamination Analysis
| Item | Function/Explanation | Example Use Case |
|---|---|---|
| Crystal Violet (0.1%) | Stains negatively charged polysaccharides and proteins in the biofilm matrix, allowing quantification of total biomass. | Quantifying fungal biofilm formation in a 96-well plate model [79]. |
| MTT Reagent | A tetrazolium salt reduced to purple formazan by metabolically active cells, serving as an indicator of cell viability and metabolic activity. | Assessing the metabolic activity of a pellicle formed by bacteria or fungi [79]. |
| Tryptic Soy Broth (TSB) | A general-purpose, rich liquid medium used for the cultivation of a wide variety of fastidious and non-fastidious microorganisms, including fungi and bacteria. | Cultivating polymicrobial biofilms for analysis [79]. |
| Phosphate Buffered Saline (PBS) | An isotonic solution used for washing steps to remove non-adherent cells without damaging the biofilm structure. | Washing biofilms after incubation and before staining in the CV assay [79]. |
| HEPA Filter | A high-efficiency particulate air filter that removes nearly all bacteria and particles from the air, creating a sterile work environment. | Maintaining a sterile field in a laminar flow hood during media preparation and sample manipulation [81]. |
| 70% Ethanol | A disinfectant used to decontaminate work surfaces, gloves, and the outside of containers to maintain an aseptic environment. | Wiping down the work surface of a biosafety cabinet before and during experiments [76]. |
| Quality Control Microbes | Reference strains (e.g., from CICC, CMCC, ATCC) used for media performance testing and method validation per standards like GB 4789.28-2024. | Validating the growth promotion properties of a new batch of culture medium [82]. |
Integrated Workflow for Contamination Identification
The following diagram synthesizes the visual identification and analytical processes for the three contamination types into a single, coherent workflow for the researcher.
The visual identification of turbidity, fungal growth, and pellicle formation is a fundamental skill set in microbiological and cell-based research. By integrating sharp observational skills with the quantitative experimental protocols outlined in this guide—such as turbidity measurement, the Crystal Violet assay, and the MTT assay—researchers can move beyond simple detection to preliminary characterization of contaminants. This proactive approach, grounded in unwavering adherence to aseptic technique, is indispensable for ensuring data reliability, reproducibility, and ultimately, the success of scientific endeavors in drug development and beyond.
Common Pitfalls and How to Avoid Them
In the field of microbial culture handling and cell culture research, aseptic technique is the cornerstone of experimental integrity. It refers to the strict procedures designed to prevent contamination by pathogens and environmental microorganisms, thereby protecting both the cell cultures and the researchers handling them [76] [83]. For researchers and drug development professionals, a single lapse can compromise months of work, leading to altered growth patterns, compromised cell viability, and unreliable data, ultimately wasting valuable resources [76]. This guide provides an in-depth analysis of the most common pitfalls encountered in aseptic technique and outlines a strategic framework to avoid them, ensuring the reliability and reproducibility of your research.
Understanding Aseptic Technique and Its Importance
Aseptic technique is more than a set of rules; it is a fundamental mindset in the laboratory. Its primary importance lies in:
- Protecting Cell Cultures: It creates a barrier against bacteria, fungi, and viruses that can outcompete, infect, or kill valuable cell cultures [76].
- Ensuring Experimental Validity: Contamination can skew results, leading to inaccurate conclusions and invalidating research findings [76].
- Safeguarding Personnel: These techniques also form a critical part of laboratory safety, protecting researchers from exposure to potentially infectious materials used in experiments [76].
It is crucial to distinguish aseptic technique from sterile technique. While sterile technique aims to eliminate all microorganisms entirely and is used for sterilizing equipment, aseptic technique focuses on not introducing contamination into a previously sterilized environment during procedures [76] [84]. In many research contexts, the aseptic non-touch technique (ANTT) framework is applied, which emphasizes identifying and protecting key parts (sterile components of equipment) and key sites (non-intact skin or access points on cultures and devices) from contamination [84].
Common Pitfalls in Aseptic Technique
Even experienced researchers can fall prey to common errors. Understanding these pitfalls is the first step toward mitigation. The following table summarizes the most frequent issues, their consequences, and the underlying causes.
Table 1: Common Pitfalls in Aseptic Technique for Microbial and Cell Culture Research
| Pitfall Category | Specific Pitfall | Consequences for Research | Root Cause |
|---|---|---|---|
| Inadequate Personal Hygiene & PPE | Improper handwashing, not wearing appropriate PPE, or wearing PPE incorrectly [76] [84]. | Introduction of skin and environmental flora into cultures; risk of researcher exposure [76]. | Complacency, haste, lack of training on the "why" behind procedures. |
| Poor Work Area Management | Cluttered work surface, hood not in a low-traffic area, drafts from doors/windows, or ineffective surface decontamination [76]. | Increased risk of airborne and contact contamination; compromised sterile field. | Poor pre-experiment planning, inadequate laboratory setup. |
| Errors in Sterile Handling | Contaminating key parts (e.g., syringe tips, pipette barrels), touching non-sterile surfaces with sterile items, and unwrapping sterile equipment too early [76] [84]. | Direct introduction of contaminants into media, reagents, or cultures. | Lack of procedural knowledge, failing to follow non-touch principles, working too quickly. |
| Improper Reagent & Media Management | Using non-sterile or contaminated reagents, failing to wipe reagent bottles with 70% ethanol before introducing them into the hood, or leaving containers uncapped [76]. | Widespread contamination affecting multiple experiments; waste of resources. | Failure to inspect reagents, neglecting established protocols for lab-prepared media. |
| Ineffective Training & Communication | Inconsistent training by multiple trainers, "shortcuts" passed between researchers, and failure to confirm understanding [85]. | Institutionalization of poor technique, difficulty in identifying root causes of contamination. | Lack of standardized training programs and qualified trainers [85]. |
How to Avoid Pitfalls: A Strategic Framework
Avoiding these pitfalls requires a proactive and systematic approach centered on preparation, precise execution, and continuous improvement.
Foundational Principles: The ANTT Framework
The Aseptic Non-Touch Technique (ANTT) provides a robust mental model for all procedures [84]. Its four core principles are:
- Always wash hands effectively before and after procedures [84].
- Never contaminate key parts. Identify any sterile part of your equipment (e.g., needle hubs, syringe tips, inside of sterile petri dishes) and protect them at all costs [84].
- Touch non-key parts with confidence. Learn to identify what parts of your equipment can be safely handled (e.g., outside of reagent bottles, microscope stage) to maintain control without risking contamination [84].
- Take appropriate infective precautions. This includes using the correct personal protective equipment (PPE) and managing your environment [84].
Procedural Defense Strategies
Implement these specific strategies to build layers of defense against contamination:
Master Work Area and Environmental Control: The laminar flow hood (Biosafety Cabinet) is your primary defense. Ensure it is located in a low-traffic, draft-free area [76]. Before starting, declutter the work surface and thoroughly disinfect it with 70% ethanol, a practice that should be repeated after any spillage and during extended procedures [76]. Avoid using a Bunsen burner inside the hood, as it disrupts the laminar airflow [76].
Execute Sterile Handling with Precision: Always wipe gloved hands and all items entering the hood with 70% ethanol [76]. Handle liquids with sterile pipettes only, using a pipettor, and never use the same pipette for different reagents or cultures [76]. When you must set down a cap or cover, always place it with the opening facing down [76]. Work deliberately and efficiently to minimize the exposure time of sterile surfaces to the environment.
Implement Rigorous Reagent and Media Protocols: Always inspect reagents and media for cloudiness, unusual color, or floating particles before use, and discard any suspect materials [76]. Sterilize all lab-prepared solutions using validated methods (e.g., autoclaving, filtration) [76] [83]. Wipe the outside of all bottles and flasks with 70% ethanol and keep them capped whenever not in active use [76].
Building a Culture of Aseptic Excellence
Technical skill is not enough; the entire lab must foster a culture of excellence.
- Standardized and Effective Training: Move beyond simple information transmission. Training must be consistent, with standardized trainers who can clearly communicate principles and confirm understanding [85]. Invest in "training the trainers" programs to ensure all personnel are teaching the same, correct methods [85].
- Foster Individual Ownership: Researchers must understand that their individual diligence directly determines the success of the contamination control program [85]. Empower them to recognize and report contamination risks, making them active participants in continuous improvement.
Experimental Validation of Aseptic Technique
Validating your aseptic technique is critical for building confidence in your skills and your experimental results.
Key Validation Methodologies
Several straightforward experiments can be performed to validate your technique:
- Media Exposure Test: Expose sterile, nutrient-rich broth (e.g., Tryptic Soy Broth) or agar plates to your standard working environment and procedures. For example, leave an open plate in the hood for the duration of a typical procedure. Then, incubate it. The presence of microbial growth indicates a breach in your environmental or aseptic controls.
- Simulated Procedure Test: Perform a complete experimental procedure (e.g., a mock cell passage) using sterile culture media but no actual cells. After incubation, check the media for turbidity, which signals contamination introduced during the procedure.
- Glove Fingertip Test: After donning sterile gloves, press your fingertips onto the surface of a nutrient agar plate. This tests the effectiveness of your gloving technique. Incubate the plate; any bacterial or fungal colonies that grow pinpoint contamination from improper glove handling.
Workflow for Technique Validation
The following diagram visualizes the systematic workflow for designing and interpreting an aseptic technique validation experiment.
Diagram: Aseptic Technique Validation Workflow
The Scientist's Toolkit: Essential Research Reagent Solutions
The reliability of aseptic technique is dependent on the quality and proper use of key reagents and materials. The following table details essential items for a cell culture or microbial research laboratory.
Table 2: Essential Research Reagents and Materials for Aseptic Culture Work
| Item | Function & Purpose in Aseptic Technique | Key Considerations |
|---|---|---|
| 70% Ethanol | The primary disinfectant for decontaminating work surfaces, gloved hands, and the outside of all containers entering the sterile field [76]. | Its effectiveness relies on adequate contact time; it evaporates quickly and does not leave a residue. |
| Sterile Cell Culture Media | Provides nutrients for cells/microbes. Commercial media is pre-sterilized and quality-controlled. | Always wipe the bottle with 70% ethanol before use. Visually inspect for cloudiness or particles before use [76]. |
| Personal Protective Equipment (PPE) | Creates a barrier between the researcher and the biological materials. Includes sterile gloves, lab coat, and sometimes masks and eye protection [76] [84]. | Sterile gloves are required for invasive procedures. Gloves do not replace the need for hand hygiene [76] [84]. |
| Sterile Pipettes and Pipettors | For precise, aseptic transfer of liquids without the need to pour, which greatly increases contamination risk [76]. | Use each sterile pipette only once to avoid cross-contamination. Never touch the pipette tip to any non-sterile surface [76]. |
| Autoclave | A machine that uses steam and pressure to sterilize lab-prepared reagents, media, and equipment [83]. | The effectiveness of sterilization must be validated using indicators (e.g., temperature-sensitive tape) [83]. |
| Antiseptic Solution (e.g., Betadine) | Used for skin decontamination prior to procedures involving animals or human cells, reducing the microbial load at a key site [84]. | Differentiate from disinfectants like ethanol, which are for environmental surfaces, not skin. |
In microbial culture handling research, the integrity of laboratory equipment is a foundational pillar of aseptic technique. Incubators, water baths, and biosafety cabinets form the essential microenvironment where precise temperature, containment, and sterility converge to protect both experimental integrity and researcher safety. Proper maintenance of these systems is not merely operational but a critical scientific control that prevents contamination, ensures reproducible results, and safeguards valuable biological materials. Within the framework of good microbiological laboratory practices (GMLP), a comprehensive equipment care protocol directly supports the core objectives of aseptic technique: protecting personnel from experimental microbes, protecting experiments from environmental contamination, and protecting the environment from accidental release [5].
This technical guide provides researchers, scientists, and drug development professionals with detailed maintenance protocols, troubleshooting methodologies, and validation frameworks for these three critical systems. By integrating these procedures into regular laboratory practice, research facilities can maintain the controlled conditions essential for reliable microbial culture work, adherence to biosafety levels (BSL), and compliance with evolving standards in pharmaceutical and biotechnology research [86].
Biosafety Cabinet Maintenance and Certification
Biosafety cabinets (BSCs) serve as the primary containment barrier for procedures involving infectious agents or sterile materials. Their proper function depends on maintaining unidirectional airflow, HEPA filter integrity, and physical containment.
Annual Certification Protocol
Biosafety cabinet certification is a rigorous process that must be performed at least annually, after relocation, following filter changes, or after any significant maintenance [87] [86]. The certification process involves a multi-step validation performed by qualified technicians to ensure compliance with NSF/ANSI 49, ISO 14644, and other relevant standards.
Key Certification Tests and Methods:
- HEPA Filter Integrity Testing: This test uses a polyalphaolefin (PAO) or dispersed oil particulate (DOP) aerosol challenge upstream of the filter. A photometer probe scans the filter face and sealant areas to detect any microscopic leaks. The HEPA filter must capture particles as small as 0.3 microns with 99.97% efficiency [87] [86].
- Airflow Velocity Measurement: Using a calibrated hot-wire anemometer, technicians measure inflow velocity (typically at the access opening) and downflow velocity (across the work surface). Proper velocities are crucial for containing contaminants within the cabinet [87].
- Smoke Pattern Testing: This visualization test confirms proper airflow direction and absence of turbulence. Smoke is introduced at critical locations and should move smoothly without backflow or dead zones, demonstrating that air is correctly directed to protect both operator and samples [87].
- Additional Verification: The complete certification also includes testing of lighting intensity (minimum 800 lux), noise levels (not exceeding 68 dB), UV light intensity (if equipped), alarm functions, and cabinet integrity [87].
Daily and Weekly Maintenance Procedures
Between formal certifications, laboratory personnel must perform regular maintenance to ensure ongoing BSC performance:
- Pre-Use Checks: Visually inspect the cabinet for obvious damage. Check that the Magnehelic gauge (if present) reads within the certified range, indicating proper airflow.
- Surface Decontamination: Before and after each use, all interior work surfaces must be decontaminated with an appropriate disinfectant, such as 70% ethanol or a diluted bleach solution, followed by a sterile water rinse if using corrosive agents [5].
- Ultraviolet Light Maintenance: If using UV lights for surface decontamination, clean lamps weekly with 70% ethanol to remove dust and periodically measure UV intensity with a radiometer. Replace bulbs according to manufacturer specifications or when output falls below effective levels.
- Work Surface Management: Keep the rear air intake grilles unobstructed by equipment or supplies to maintain proper airflow balance. Avoid storing unnecessary items in the cabinet when not in use.
Table: Biosafety Cabinet Certification Requirements and Standards
| Test Parameter | Methodology | Acceptance Criteria | Frequency | Applicable Standard |
|---|---|---|---|---|
| HEPA Filter Integrity | PAO/DOP aerosol challenge with photometer scanning | No leaks > 0.01% of upstream concentration | Annual/after relocation | NSF/ANSI 49, ISO 14644 |
| Inflow Velocity | Hot-wire anemometer measurement at access opening | Typically 100-110 fpm for Class II BSCs | Annual | NSF/ANSI 49 |
| Downflow Velocity | Anemometer grid pattern across work surface | Manufacturer specification, typically 50-75 fpm | Annual | NSF/ANSI 49 |
| Smoke Pattern | Visual smoke test for airflow direction | Unidirectional flow without turbulence or backflow | Annual | NSF/ANSI 49 |
| Noise Level | Sound level meter at operator position | ≤68 dB | Annual | NSF/ANSI 49 |
| Light Intensity | Lux meter on work surface | ≥800 lux | Annual | NSF/ANSI 49 |
BSC Certification Workflow: The sequential testing process for biosafety cabinet certification.
Incubator Maintenance Protocols
Incubators provide stable temperature, humidity, and atmospheric conditions for microbial growth. Their reliability depends on consistent maintenance to prevent contamination and ensure parameter stability.
Routine Maintenance Schedule
Daily Maintenance:
- Monitor and record temperature, CO₂ (if applicable), and humidity levels using built-in displays or independent monitoring systems.
- Visually inspect the water reservoir (if present) for proper levels in humidified incubators.
- Check for condensation on internal viewports or seals that might indicate humidity or temperature issues.
Weekly Maintenance:
- Clean interior surfaces with a mild detergent followed by a disinfectant such as 70% ethanol. Pay special attention to shelves, corners, and door seals where contamination can accumulate.
- For CO₂ incubators, check the CO₂ tank level and replace if low.
- Verify and document sterilization cycles if the unit features automatic decontamination.
Monthly Maintenance:
- Perform a thorough decontamination of the entire chamber. This may involve heating the chamber to 90°C for humidified incubators or using chemical sterilants according to manufacturer recommendations.
- Inspect and clean door gaskets with appropriate disinfectants to ensure proper sealing.
- Calbrate temperature sensors against a NIST-traceable reference thermometer.
Quarterly Maintenance:
- Replace HEPA filters on filtered incubators according to manufacturer specifications.
- Conduct a comprehensive validation of temperature uniformity across multiple chamber locations using a multi-channel data logger.
- For CO₂ incubators, validate CO₂ sensor accuracy using an independent gas analyzer.
Contamination Control in Incubator Systems
In microbial research, incubator contamination can compromise weeks or months of experimental work. Prevention strategies include:
- Regular Decontamination Cycles: Implement a scheduled decontamination protocol using heat (90°C for several hours) or chemical methods appropriate for the incubator type.
- Water Quality Management: In humidified incubators, use only sterile, distilled water to prevent microbial growth in reservoirs and humidity systems. Clean and disinfect water reservoirs during weekly maintenance.
- Sample Management: Organize contents to minimize cross-contamination between cultures. Use secondary containment for plates and tubes, especially when working with different microbial strains.
- Environmental Monitoring: Periodically place settle plates or contact plates in the incubator during routine use to monitor microbial contamination levels.
Table: Incubator Maintenance Schedule and Procedures
| Maintenance Task | Frequency | Procedure | Quality Control |
|---|---|---|---|
| Parameter Verification | Daily | Document temperature, CO₂, and humidity | Compare against setpoints and investigate deviations |
| Interior Surface Cleaning | Weekly | Wipe with mild detergent, followed by 70% ethanol | Visual inspection for residue or contamination |
| Door Gasket Inspection | Monthly | Clean with disinfectant and inspect for wear | Ensure proper seal when door is closed |
| Temperature Calibration | Monthly | Compare against NIST-traceable reference thermometer | Adjust if deviation exceeds ±0.5°C |
| Full Decontamination | Monthly | Heat to 90°C or chemical sterilization cycle | Biological indicator verification |
| CO₂ Sensor Validation | Quarterly | Compare with independent gas analyzer | Adjust if deviation exceeds ±0.2% |
| HEPA Filter Replacement | Quarterly (or as needed) | Replace according to manufacturer instructions | Verify proper airflow after replacement |
Water Bath Maintenance and Troubleshooting
Water baths provide precise temperature control for applications such as enzyme reactions, sample thawing, and temperature-sensitive incubations. Their aqueous environment presents unique maintenance challenges.
Routine Maintenance Procedures
Weekly Maintenance:
- Drain and replace the water to prevent microbial growth and mineral accumulation. Use distilled or deionized water to reduce mineral scale formation.
- Clean the interior chamber with a mild detergent to remove biofilm and residues. Rinse thoroughly before refilling.
- Wipe the heating element gently to remove any scale or debris that could cause hot spots.
Monthly Maintenance:
- Perform a more thorough cleaning using a citric acid solution (5-10%) or commercial descaling agent to remove mineral deposits, particularly in areas with hard water.
- Inspect and clean the circulating pump intake (if present) to ensure proper water circulation.
- Calibrate the temperature control system using a NIST-traceable reference thermometer at the typical operating temperature.
As-Needed Maintenance:
- Replace deteriorated gaskets or seals that show signs of wear or leakage.
- Address any condensation in electronic components or displays immediately to prevent damage.
Troubleshooting Common Water Bath Problems
Water baths often provide error codes or specific symptoms that indicate common problems. The table below outlines frequent issues, their causes, and solutions based on manufacturer guidance.
Table: Water Bath Error Codes and Troubleshooting Guide
| Error Code/Problem | Possible Cause | Recommended Solution | Preventive Measures |
|---|---|---|---|
| 'Err 1 Sht' / 'Err 3 Sht' | Temperature sensor short circuit | Check sensor and motherboard for short circuit faults [88] | Avoid water spillage on electrical components |
| 'Err 2 OPn' / 'Err 4 OPn' | Temperature sensor open circuit | Check sensor connections [88] | Secure wiring during cleaning |
| 'Err 5 drY' | Dry-start alarm, low water level | Refill bath with water to appropriate level [88] | Regular water level checks |
| 'Err 6 OtP' | Over-temperature alarm | Let water cool, reset OtP value [88] | Verify temperature settings |
| 'Err 7 rOn' | Temperature sensors malfunction | Contact supplier or manufacturer [88] | Professional servicing |
| 'Err 8 Out' | Calibration temperature out of range | Check calibration points [88] | Proper calibration procedures |
| Inaccurate Temperature | Scale on heating element, calibration drift | Descale element, calibrate sensor | Use distilled water, regular calibration |
| Cloudy Water | Microbial growth, algal contamination | Drain, clean with disinfectant, refill with distilled water | Regular water changes, UV sterilization |
Water Bath Maintenance Flow: Regular maintenance and error diagnosis pathway for laboratory water baths.
Research Reagent Solutions for Maintenance and Validation
Proper equipment maintenance requires specific reagents and materials for cleaning, calibration, and validation. The following table details essential solutions used in the maintenance procedures described in this guide.
Table: Essential Research Reagent Solutions for Equipment Maintenance
| Reagent/Solution | Composition/Type | Function in Maintenance | Application Example |
|---|---|---|---|
| Tryptic Soy Broth (TSB) | Pancreatic digest of casein, enzymatic digest of soybean meal | Growth medium for media fill tests and contamination validation [89] | Validation of aseptic processes in biosafety cabinets |
| Polyalphaolefin (PAO) Aerosol | Polyalphaolefin particles in suspension | Challenge aerosol for HEPA filter integrity testing [87] [86] | Scanning filter faces and seals during BSC certification |
| Tryptic Soy Agar (TSA) Plates | Tryptic soy broth with agar solidifier | Microbiological environmental monitoring [89] | Active and passive air sampling, surface contact testing |
| Isopropanol 70% Solution | 70% isopropyl alcohol in water | Surface disinfection with optimal antimicrobial efficacy [89] | Wiping down BSC surfaces, incubator interiors |
| Citric Acid Solution | 5-10% citric acid in water | Descaling agent for mineral deposit removal | Cleaning water bath chambers and heating elements |
| Sporicidal Disinfectant | Peroxide blends or amine blends | Broad-spectrum surface decontamination [89] | BSC decontamination, spill management |
Integration with Aseptic Technique and Quality Systems
Equipment maintenance must be integrated into a broader quality system that includes comprehensive documentation, staff training, and change control procedures.
Documentation and Record Keeping
Maintain detailed records for each equipment piece including:
- Maintenance logs with dates, procedures performed, and personnel
- Certification reports with results, dates, and expiration
- Deviation reports and corrective actions for any out-of-specification findings
- Calibration certificates with references to national standards
Staff Training and Competency
Equipment maintenance is only effective when performed by trained personnel:
- Ensure all users understand basic operation principles and daily maintenance responsibilities
- Provide specialized training for complex maintenance procedures
- Certify operators in aseptic techniques relevant to each equipment type [5] [89]
- Maintain training records with competency assessments
Validation in Aseptic Process Simulation
Media fill tests, where a growth medium like Tryptic Soy Broth (TSB) replaces the product solution, represent a critical validation method for aseptic processes performed in biosafety cabinets [89]. These tests simulate the entire aseptic manufacturing process and should include all critical steps, worst-case scenarios, and interventions. Successful media fill tests provide assurance that the combination of equipment maintenance, environmental controls, and operator technique can maintain sterility throughout complex procedures.
Maintaining incubators, water baths, and biosafety cabinets to manufacturer and regulatory specifications is not merely an operational requirement but a fundamental component of the aseptic technique framework in microbial research. Through scheduled maintenance, comprehensive documentation, and integration with quality systems, these critical pieces of equipment provide the stable, contamination-free environment necessary for reproducible scientific research. The protocols outlined in this technical guide provide a roadmap for research facilities to preserve equipment function, extend operational lifespan, and most importantly, protect the integrity of both scientific data and research personnel.
In the fields of microbial and cellular research, biopharmaceutical development, and drug discovery, the integrity of experimental results is fundamentally dependent on the purity of biological cultures. Effective workflow optimization, which integrates rigorous aseptic techniques with strategic cell line management, is critical for preventing microbial contamination, ensuring genetic stability, and maintaining reproducible results. This is especially vital when handling multiple cell lines concurrently, where the risk of cross-contamination and procedural error is significantly amplified [35] [90].
The adoption of optimized, standardized workflows is not merely a best practice for quality control; it is a powerful driver of efficiency. A documented case in cell line development revealed that implementing structured digital workflows saved over 14,000 hours of manual data handling time annually, while also reducing the time to generate final development reports by 50% [91]. This guide provides an in-depth technical framework for researchers and drug development professionals seeking to minimize exposure risks and streamline the management of multiple cell lines within the context of a microbial culture handling research thesis.
Core Principles of Aseptic Technique
Aseptic technique is a foundational concept encompassing all procedures designed to prevent the introduction of contaminating microorganisms (bacteria, fungi, viruses) into cultures, and to protect laboratory personnel from potential exposure. Its proper execution is the cornerstone of reliable microbiological science [90].
The Contamination Control Framework
A robust aseptic practice is built on several key pillars:
- Environmental Control: The primary defense against contamination is a controlled workspace. This typically involves the use of laminar flow hoods (either horizontal for product protection or vertical for product and personnel protection) equipped with High-Efficiency Particulate Air (HEPA) filters. These filters are certified to remove at least 99.97% of airborne particles measuring 0.3 micrometers or larger, creating a sterile working environment [92] [35].
- Sterilization of Tools and Surfaces: All instruments that contact cultures, such as inoculating loops, pipettes, and forceps, must be sterilized immediately before use. Common methods include incineration in a Bunsen burner flame or autoclaving. Work surfaces within the hood must be meticulously disinfected before and after all procedures [92] [93].
- Personal Hygiene and Protective Equipment (PPE): Researchers must wear appropriate PPE, including lab coats, sterile gloves, and safety glasses. Tying back long hair and washing hands thoroughly are essential steps to minimize the introduction of contaminants from the researcher [90].
- Technique During Handling: Caps and lids from culture vessels should never be placed on the bench. They must be held in a manner that shields the open container from airborne contaminants while allowing for efficient manipulation. When working with a Bunsen burner, the rising heat creates a convection current that helps keep the immediate air sterile [93].
Table 1: Core Components of an Aseptic Technique Regimen
| Component | Key Procedures | Primary Function |
|---|---|---|
| Workspace | Laminar flow cabinet (BSC/clean bench); Disinfected surfaces | Provides a sterile, particle-free environment for culture handling [92] [35]. |
| Instrument Sterilization | Autoclaving (moist heat); Dry heat ovens; Flame sterilization; Chemical disinfectants | Eliminates microbial life from all tools contacting the culture [92] [90]. |
| Personal Practices | Sterile gloves, lab coat; Hand washing; Minimized talking/movement | Protects culture from researcher-borne contaminants and vice versa [90]. |
| Sample Handling | Working near a flame; Minimizing open vessel exposure; Avoiding airborne contact | Prevents introduction of environmental contaminants during transfers [93]. |
Strategic Workflow Optimization
Managing multiple cell lines introduces complexity that can only be addressed through systematic workflow design. The goal is to create a logical, sequential process that minimizes the movement of materials and people, thereby reducing opportunities for contamination and human error.
A Unified Workflow for Multiple Cell Lines
The following diagram illustrates an optimized, integrated workflow that combines aseptic practice with modern data management for handling multiple cell lines.
This workflow is divided into three critical phases:
- Preparation Phase (Yellow): This pre-work stage involves preparing the environment, oneself, and all necessary materials. A key strategic step is creating a prioritized schedule for handling the different cell lines and consulting a Laboratory Information Management System (LIMS) to review critical data such as cell lineage, specific culture requirements, and license restrictions before beginning hands-on work [94].
- Execution Phase (Red): All hands-on work is performed within the laminar flow hood using strict aseptic technique. Handling cell lines in a scheduled, batched manner minimizes the number of times the hood is entered and exited, thereby reducing overall exposure risk.
- Management Phase (Blue/Green): After the work is complete, proper disposal and cleanup are essential. This is followed by immediate and thorough data recording in the LIMS, which is critical for tracking cell line history, ensuring reproducibility, and maintaining genetic identity [91] [94].
The Scientist's Toolkit: Essential Research Reagent Solutions
The following table details key reagents, materials, and systems essential for executing the optimized workflow and maintaining multiple cell lines.
Table 2: Essential Materials and Reagents for Cell Line Management
| Item | Function/Application |
|---|---|
| Laminar Flow Biosafety Cabinet | Provides a HEPA-filtered, sterile workspace for all culture manipulations, protecting both the sample and the researcher [92] [35]. |
| Cell Culture Media (Selective/Enriched) | Formulated to support the growth of specific cell types. Selective media inhibit unwanted microbes, while enriched media support fastidious organisms [92]. |
| Cryoprotectants (e.g., Glycerol, DMSO) | Added to culture media before freezing. They stabilize cell membranes and prevent lethal ice crystal formation during cryopreservation [92]. |
| Laboratory Information Management System (LIMS) | A digital platform for centralizing data, tracking cell line lineage and licenses, managing storage, and standardizing workflows, which drastically improves efficiency and compliance [94]. |
| Automated Cell Culture Systems | Instrumentation that automates repetitive tasks like passaging and feeding, enhancing precision, throughput, and reproducibility while minimizing human error and exposure [95]. |
| ValitaTiter Assay Plates | Example of a high-throughput quantification method used for rapid IgG screening during clone selection, accelerating the cell line development process [91]. |
Advanced Management: Data, Storage, and Characterization
For laboratories managing numerous cell lines, advanced systematic strategies are required beyond the bench.
Digital Management with a Laboratory Information Management System (LIMS)
A cell line-specific LIMS, such as the referenced Limfinity Cell Line LIMS, is transformative for workflow optimization [94]. Its core functions include:
- Comprehensive Cell Line Management: A LIMS provides a searchable, centralized database for all cell line information. It documents the complete lineage tracing from parental lines through master banks, working banks, and individual vials, which is fundamental for ensuring traceability and reproducibility [94].
- Enhanced Compliance and License Management: The system can track cell line license agreements, restrictions, and expiration dates, centralizing visibility to help avoid costly ethical and compliance violations [94].
- Streamlined Storage and Accessibility: A LIMS allows researchers to flexibly manage and track the location of cell lines across diverse containers (vials, flasks, plates) and multiple storage sites (freezers, liquid nitrogen tanks), making it simple to locate specific materials when needed [94].
Cell Line Characterization and Model Selection
Selecting the appropriate cell line model is a critical pre-experimental step. Research has demonstrated that not all cell lines are equally representative of primary tumors. Genomic profiling is essential for informed model selection.
- Genomic Comparison for Model Validation: A seminal study comparing genomic profiles of 47 ovarian cancer cell lines to primary tumor samples found "pronounced differences" between commonly used lines and actual tumors. The study successfully identified less-frequently used cell lines that had higher genetic similarity to tumors, proposing them as more suitable models [96]. This principle applies across cancer types; a similar comprehensive comparison in breast cancer integrated copy number variation, mutation, mRNA, and protein expression data to evaluate the similarity of 68 cell lines to 1375 primary tumors [97].
- Weighted Similarity Algorithms: Advanced computational methods like TumorComparer have been developed to systematically compare molecular profiles of cell lines and tumors. This tool uses a weighted similarity approach, allowing researchers to emphasize specific genomic features (e.g., known driver mutations in a particular pathway) relevant to their research question, thereby guiding the choice of the most biologically relevant pre-clinical model [98].
Optimizing workflows for managing multiple cell lines is a multi-faceted endeavor that demands rigorous aseptic technique, strategic process design, and the integration of advanced digital tools. By adopting the structured workflow and management principles outlined in this guide—from daily bench-level procedures to enterprise-level data management—research laboratories can achieve substantial gains in efficiency, data integrity, and compliance. The implementation of these optimized workflows minimizes the risks of contamination and cross-contamination, ensures the long-term genetic stability of valuable cell resources, and ultimately accelerates the translation of basic research into groundbreaking therapeutic discoveries.
Decontamination Protocols for Spills and Accidents
In research involving microbial culture handling, aseptic technique constitutes the first and most crucial line of defense, creating a barrier to prevent contamination of cultures and the laboratory environment [76]. Despite stringent adherence to these practices, spills and accidents remain a tangible risk. Decontamination protocols are, therefore, the essential secondary barrier, a planned response to restore safety and sterility when a breach occurs. For researchers and drug development professionals, a robust understanding of both prevention and response is critical to ensure the integrity of scientific data, the safety of personnel, and the protection of the broader environment. This guide details the standardized procedures for the decontamination of biological spills, framed within the overarching principles of aseptic laboratory practice.
Fundamentals of Decontamination
Defining Decontamination
Decontamination is any process that reduces biohazardous material—including infectious agents, recombinant DNA (rDNA) material, and biological toxins—to a level deemed acceptable, meaning it is below the threshold required to cause disease [99]. The specific "acceptable level" is dependent on the biohazard in question and the nature of the laboratory work. It is vital to distinguish this term from other common processes [99]:
- Sanitizing: Reduces the number of microorganisms to a safe public health level.
- Disinfecting: Destroys or inactivates microorganisms on inanimate objects or surfaces.
- Sterilizing: Kills all forms of microbial life, including highly resistant bacterial spores.
Disinfectant Selection and Efficacy
The choice of disinfectant is not one-size-fits-all; it must be matched to the organism of concern, the nature of the surface, and the presence of organic material that may inactivate the chemical. The following table summarizes the efficacy of common disinfectant classes against major microbial groups.
Table 1: Efficacy of Common Disinfectant Classes Against Microbial Groups
| Microbial Group | Chlorine Compounds (e.g., Bleach) | Alcohols (e.g., 70% Ethanol) | Phenolics | Quaternary Ammonium Compounds (Quats) |
|---|---|---|---|---|
| Bacteria | Very Good | Good | Good | Good (Gram-positive) |
| Enveloped Viruses | Very Good | Good | Good | Good |
| Non-Enveloped Viruses | Very Good | Fair | Fair | Not Effective |
| Fungi | Good | Fair | Good | Fair |
| Bacterial Spores | Good (with high concentration) | Not Effective | Not Effective | Not Effective |
Note: * Efficacy varies for individual non-enveloped viruses; consult specific susceptibility data. Chlorine compounds are typically used as a 1:9 or 1:10 dilution of household bleach [99].*
The Researcher's Decontamination Toolkit
A well-stocked and accessible spill kit is a fundamental requirement for any laboratory working with biological materials. The contents should be assembled before work begins and stored in a clearly marked location [100] [99].
Table 2: Essential Components of a Biological Spill Kit
| Item Category | Specific Items | Function and Notes |
|---|---|---|
| Personal Protective Equipment (PPE) | Disposable gloves, lab coat, safety goggles or face shield, shoe covers [100]. | Creates a barrier between the researcher and the hazard. An N95 respirator is advised for spills with a high risk of aerosolization [100]. |
| Disinfectants | Primary: Chlorine-based (e.g., bleach, diluted 1:9 to 1:10). Alternatives: Prepared phenolic or peroxide solutions [99]. | Must be appropriate for the biological materials used. Diluted bleach should be made fresh monthly and stored in a sealed, light-protected container [99]. |
| Spill Cleanup Supplies | Absorbent paper towels or bench liners, biohazard bags (autoclavable), sharps container. | For containing, absorbing, and disposing of spilled material. |
| Tools | Forceps or tongs, dustpan/squeegee (autoclavable). | For mechanical removal of sharp objects like broken glass without using hands [100] [99]. |
| Documentation | Written spill procedure, emergency phone numbers. | Ensures a quick, standardized, and safe response. |
Pre-Spill Preparedness and Aseptic Prevention
The cornerstone of managing spills is to prevent them from occurring. This is achieved through rigorous aseptic technique, which minimizes the opportunities for contamination and accidental release [76] [61]. Key preventive measures include:
- Sterile Work Area: Working within a Bunsen burner's updraft or a biosafety cabinet to create a sterile field where airborne contaminants are drawn away from open vessels [101] [64].
- Proper Handling: Flaming the necks of culture bottles and tubes to create an upward air current [61] [101], keeping vessels capped when not in use, and working deliberately without haste [76].
- Personal Hygiene: Washing hands before and after procedures, wearing appropriate PPE, and tying back long hair [76] [64].
- Sterile Reagents and Equipment: Using sterile pipettes only once to avoid cross-contamination and ensuring all media and solutions are properly sterilized [76] [64].
Standard Spill Response Protocols
The following protocols provide a structured response to biological spills. The specific actions depend on the nature of the spill and its location.
General Biohazardous Spill Protocol
This procedure applies to spills of most biohazardous materials, including those involving Risk Group 1 (RG1) and RG2 organisms, outside of a biosafety cabinet [100] [99].
- Alert and Evacuate: Notify all personnel in the immediate area of the spill. Evacuate non-essential personnel. If the spill may generate an infectious aerosol (e.g., a dropped culture flask), everyone should immediately leave the room, closing doors behind them. The area should remain vacant for at least 30 minutes to allow aerosols to settle [100] [99].
- Assess and Don PPE: Assess the spill from a safe distance. Gather your spill kit and don appropriate PPE, including a lab coat, gloves, and safety goggles. For spills with aerosol potential, an N95 respirator is recommended [100].
- Contain and Disinfect: Contain the spill by surrounding it with absorbent towels. Carefully pour an appropriate disinfectant (e.g., a 10% bleach solution) over the spill, starting at the perimeter and working inward to avoid spreading. Avoid splashing. Allow a minimum of 20-30 minutes of contact time to ensure effective decontamination [100] [99].
- Clean and Collect: After the contact time, use paper towels to wipe up the disinfected spill, working from the outside in. Place all contaminated cleanup materials, including any broken glass retrieved with forceps, into a biohazard bag for autoclaving [100] [99].
- Final Disinfection and Disposal: Wipe down the entire area again with fresh disinfectant. Place all waste, including used gloves, into the biohazard bag. Autoclave the bag before disposal. Wash hands thoroughly with soap and water [100] [99].
Special Scenario Spills
Spills Inside a Biosafety Cabinet (BSC) If a spill occurs inside a running BSC, the room need not be evacuated. The cabinet should remain on during cleanup. Flood the spill tray and contaminated surfaces with disinfectant, ensuring adequate contact time. The spill tray underneath the work area and the air intake grill should also be cleaned, as they may be contaminated in large spills. Note that alcohol is not recommended for large spills inside a BSC due to explosion hazards [100].
Spills Involving Sharps and Broken Glass Extreme caution must be exercised. Sharp objects must be removed from the spill area using mechanical means such as forceps or tongs; never use hands [100] [99]. Contaminated sharps must be placed into a puncture-resistant sharps container for disposal [99].
Spills in a Centrifuge If a spill is contained inside a centrifuge, close the lid immediately. The centrifuge should remain closed for at least 30 minutes to allow aerosols to settle. Wearing appropriate PPE, the rotor and buckets should be removed and, if possible, transferred to a BSC for decontamination [100].
The logical workflow for decision-making during a spill response is summarized in the following diagram.
Exposure Response and Incident Reporting
Despite all precautions, accidental exposures can occur. A clear and immediate response is critical.
- Skin Exposure: Immediately remove contaminated clothing and wash the affected area with soap and water for at least 15 minutes [99].
- Eye Splash: Flush the eye with copious amounts of water for 15 minutes using an eyewash station [99].
- Puncture/Cut: Encourage a minor wound to bleed gently. Wash the area with soap and water [99].
- Seek Medical Attention: For exposures involving RG1 agents, seek medical attention within 1-2 hours. For exposures to RG2 agents or rDNA, seek immediate medical attention [99].
- Report the Incident: All exposures must be reported to the laboratory supervisor or chemical hygiene officer. An injury report form must be completed. Any accident involving rDNA must be reported to the Institutional Biosafety Committee (IBC) within 24 hours to comply with NIH guidelines [99].
Advanced Considerations: Low-Biomass and Bioinformatics Decontamination
In studies of low-biomass environments (e.g., air, skin, water), where contaminating DNA from reagents and kits can constitute a significant portion of the sequenced data, bioinformatic decontamination becomes a necessary step [102] [103]. These computational methods use negative controls processed alongside experimental samples to identify and remove contaminant sequences.
Established tools for this purpose include:
- Decontam: A prevalence-based method that identifies contaminants as sequences more prevalent in negative controls than in true samples [102].
- SourceTracker: Uses a Bayesian approach to estimate the proportion of contaminating sequences in each sample [102].
- MicrobIEM: A newer tool that provides a user-friendly graphical interface for decontamination using a ratio filter, performing comparably to established tools [102].
Benchmarking studies show that the performance of these tools depends heavily on user-selected parameters and the composition of the mock communities used for validation [102]. A systematic approach to pipeline selection, using a multi-criteria scorecard, is recommended for bioaerosol and other low-biomass microbiome data [103].
Ensuring Excellence: Validating Techniques with GMLP and Biosafety Standards
Adherence to Good Microbiological Laboratory Practices (GMLP)
Good Microbiological Laboratory Practices (GMLP) represent a collection of fundamental principles and procedures designed to ensure the safety of laboratory personnel, protect the environment, and guarantee the accuracy and reliability of microbiological data. Within the specific context of microbial culture handling research, GMLP is inextricably linked to the application of aseptic technique. Aseptic technique is a method that involves target-specific practices and procedures under suitably controlled conditions to reduce contamination from microbes [5]. It is a compulsory laboratory skill for research involving the screening of isolates, maintaining pure and slant cultures, and inoculating media [5]. The primary objective is to create a barrier between microorganisms in the environment and the sterile cell culture, thereby preventing the introduction of contaminants (such as bacteria, fungi, and viruses) and also ensuring that cultures do not escape into the surrounding laboratory environment [19] [21] [5]. Adherence to these practices is not merely a procedural formality; it is the foundation upon which the integrity of microbial research is built, safeguarding both the validity of experimental results and the well-being of research personnel.
The consequences of improper technique can be severe. In a pharmaceutical context, inaccurate microbiological testing can lead to batch failure, regulatory penalties, warning letters, and product recalls, ultimately jeopardizing patient safety [104]. In a research setting, contamination compromises the integrity and accuracy of experiments, wastes valuable resources, and can lead to altered growth patterns, compromised viability, or complete loss of cell cultures [21]. Proper aseptic technique, while not 100% fail-safe, significantly increases the probability of maintaining the health and purity of microbial cultures [21]. This guide details the core principles, experimental protocols, and regulatory frameworks that underpin GMLP, providing researchers, scientists, and drug development professionals with a comprehensive technical resource.
Core Principles of GMLP
The successful implementation of GMLP rests on several interconnected pillars. These principles form the basis for a safe and effective microbiological laboratory operation.
Personnel Training and Hygiene
The foundation of a good laboratory is its people. Personnel must receive thorough initial training on aseptic techniques, governing procedures, microbial methods, and laboratory safety, followed by regular refresher courses [104]. Practical assessment and qualification are essential before staff are permitted to work independently [104]. Good personal hygiene is a critical component, which includes wearing appropriate personal protective equipment (PPE) such as lab coats and gloves, tying back long hair, and strictly prohibiting eating, drinking, or applying cosmetics in the lab [19] [5]. Hands must be washed before and after working with cultures and upon exiting the laboratory [5].
Laboratory Environment and Contamination Control
Maintaining a controlled environment is paramount. This involves working in a clean, well-organized, and draught-free area to prevent stirring up dust and microorganisms [19]. The work surface must be disinfected with a suitable agent like 70% ethanol before and after all operations [19] [21]. The primary tool for achieving a sterile workspace is the laminar flow hood or biosafety cabinet, which provides a continuous flow of HEPA-filtered air to remove over 99.97% of airborne particles [19]. All operations should be performed carefully and deliberately within this sterile field to minimize the creation of aerosols and to avoid unnecessary exposure of cultures and media [104] [21].
Sample and Culture Handling
Microbiological samples are highly sensitive to contamination. They must be properly labeled immediately upon receipt and stored appropriately to maintain their integrity [104]. The core rule of sterile handling is to never introduce a non-sterile item into a sterile environment. This involves using only sterilized glassware or disposable plasticware, flaming the necks of glass bottles, and avoiding pouring from media bottles directly [21]. Instead, sterile pipettes should be used for all liquid manipulations, with each pipette used only once to avoid cross-contamination [21]. Containers should be kept capped whenever possible, and if a cap must be placed down, it should be placed with the opening face down on the disinfected work surface [21].
Equipment Management and Waste Disposal
All microbiological analysis relies on properly functioning equipment. Critical equipment like autoclaves, incubators, and laminar flow hoods must undergo initial qualification (IQ, OQ, PQ) and regular calibration and maintenance [104]. Microbiological waste, including used cultures and contaminated consumables, contains harmful bacteria and must be decontaminated, typically by autoclaving, before disposal to protect laboratory personnel and the environment [104] [5].
Table 1: Core Principles of Good Microbiological Laboratory Practices (GMLP)
| Principle | Key Components | Objective |
|---|---|---|
| Personnel & Training | Initial and refresher training, practical assessment, good personal hygiene, use of PPE [104] [5]. | Ensure staff competency and prevent contamination from personnel. |
| Environment & Control | Disinfected, draught-free workspace, use of laminar flow hoods, aseptic techniques, minimal clutter [19] [21]. | Create and maintain a sterile barrier against environmental contaminants. |
| Sample & Culture Handling | Proper labeling and storage, use of sterile equipment, no pouring from bottles, single-use pipettes, capped containers [104] [21]. | Maintain sample integrity and prevent cross-contamination. |
| Equipment & Waste | Equipment qualification/calibration, preventive maintenance, decontamination of waste before disposal [104] [5]. | Ensure data reliability and ensure laboratory safety. |
GMLP in Experimental Protocols
Translating the core principles of GMLP into actionable steps is critical for specific experimental procedures. The following protocols detail the application of aseptic technique in common microbiology tasks, with an emphasis on contamination control.
Protocol 1: Inoculating an Agar Plate via Streaking
The goal of this protocol is to isolate single bacterial colonies from a mixed culture or broth for the purpose of obtaining a pure culture [105].
Detailed Methodology:
- Work Area Preparation: Disinfect the work surface inside the laminar flow hood with 70% ethanol. Ensure all required materials (agar plate, inoculating loop, culture) are within easy reach [19] [21].
- Sterilize Inoculating Loop: Pass the entire wire of the inoculating loop through a Bunsen burner flame until it is red-hot. Allow it to cool for a few seconds without placing it on a non-sterile surface [19].
- Inoculate the Loop: Gently lift the culture tube or plate and, using your little finger, remove the cap or lid. Flame the neck of the tube if applicable. Insert the sterile loop into the culture to pick up a small sample of microorganisms [105].
- First Set of Streaks: Lift the lid of the agar plate just enough to allow access with the loop. Smear the inoculum over a small section (approximately quadrant 1) of the agar surface in a tight, zig-zag pattern [19] [105].
- Re-sterilize the Loop: Flame the loop again to destroy any remaining organisms. Allow it to cool.
- Second Set of Streaks: Rotate the plate. Drag the loop once or twice through the first set of streaks and then spread the bacteria into a new, adjacent section (quadrant 2) of the plate using a thinned-out streaking pattern. This step dilutes the initial inoculum [105].
- Final Streaks: Repeat the sterilization and streaking process one or two more times, each time dragging from the previous quadrant to further dilute the bacteria [19].
- Incubation: Replace the lid on the plate. Sterilize the loop one final time. Seal the plate with parafilm or place it in a resealable bag and incubate it under the appropriate conditions for the organism [19].
Protocol 2: Aseptic Transfer of a Broth Culture
This protocol is used to transfer microorganisms from one liquid culture to a fresh broth medium.
Detailed Methodology:
- Preparation: Disinfect the work surface and gather all materials, including the stock culture, fresh sterile broth, a Bunsen burner, and a sterile pipette with a pipettor [21].
- Handle Sterile Pipette: Aseptically unwrap or remove a sterile pipette from its container, taking care not to touch the tip to any non-sterile surface [21].
- Access Cultures: Using your non-dominant hand, pick up both the stock culture and the sterile broth media. Briefly flame the necks of both bottles after loosening and before removing the caps. Hold the caps with the same fingers, ensuring the inner surfaces do not touch anything.
- Withdraw Inoculum: Using the sterile pipette and pipettor, withdraw a precise volume of inoculum (e.g., 1 mL) from the stock culture.
- Transfer Inoculum: Carefully move the pipette to the flask of sterile broth, lift the lid/cap, and dispense the inoculum into the fresh medium. Avoid touching the pipette tip to the neck or threads of the flask [21].
- Complete the Transfer: Flame the necks of the bottles again and replace the caps. Discard the used pipette into an appropriate sharps or biohazard container. Do not reuse disposable pipettes [21] [5].
Table 2: Essential Research Reagent Solutions and Materials
| Item | Function in GMLP & Aseptic Technique |
|---|---|
| 70% Ethanol | Primary disinfectant for laboratory work surfaces, gloves, and the outside surfaces of containers before they are introduced into the sterile work area [19] [21]. |
| Laminar Flow Hood (Biosafety Cabinet) | Provides a sterile workspace by delivering a continuous, HEPA-filtered, vertical or horizontal airflow, creating a physical barrier against airborne contaminants [19] [21]. |
| Sterile Disposable Pipettes | Used for the precise and aseptic transfer of liquid cultures and reagents. Single-use prevents cross-contamination between samples [21]. |
| Bunsen Burner | Creates an upward air current that minimizes airborne contaminants and is used for sterilizing inoculating loops and warming the necks of glassware to create a convection current that prevents contamination [19]. |
| Validated Disinfectants | A rotation of at least three different disinfectants (e.g., effective against bacteria, fungi, and spores) is used to clean the laboratory environment and prevent the development of microbial resistance [104]. |
| Personal Protective Equipment (PPE) | Lab coats, gloves, and safety glasses form an immediate barrier, protecting the operator from biological hazards and preventing shed skin and clothing contaminants from entering the work area [21] [5]. |
Regulatory Framework and Quality Assurance
Pharmaceutical microbiology laboratories operate within a strict regulatory environment to ensure patient safety and product quality. Adherence to GMLP is not just a best practice but a regulatory requirement governed by several key guidelines, including FDA 21 CFR Part 211 (Good Manufacturing Practice for Finished Pharmaceuticals), EU GMP Annex 1 (Manufacture of Sterile Medicinal Products), and various USP chapters (e.g., <61>, <62>, <71> on microbiological examination) [104]. The World Health Organization (WHO) also provides specific "Good Practices for pharmaceutical microbiology laboratories," which cover all aspects from personnel and premises to testing procedures and waste disposal [106].
A robust quality assurance system is built on several key activities:
- Documentation and Data Integrity: All data must be recorded at the time of observation following the ALCOA+ principles (Attributable, Legible, Contemporaneous, Original, and Accurate, plus Complete, Consistent, Enduring, and Available) [104].
- Internal Audits and Root Cause Analysis: Regular internal audits help identify weaknesses before they become major compliance issues. Any contamination event must be systematically investigated using tools like root cause analysis (e.g., 5 Whys, fishbone diagrams) to implement effective corrective and preventive actions (CAPA) [104].
- Method Validation: All microbiological analytical methods, such as sterility testing, bioburden testing, and endotoxin testing, must be scientifically validated for their accuracy, sensitivity, and reproducibility before being used in routine testing [104] [106].
Future Trends in Microbiological Laboratories
The field of pharmaceutical microbiology is evolving, with several forward-thinking trends poised to enhance efficiency, safety, and data quality while aligning with GMLP principles.
- Automation and Robotics: Automation of repetitive tasks like plate inoculation, incubation, and colony counting is being adopted to reduce manual labor, minimize human error, and improve throughput. Robotic solutions and advanced digital colony counters are becoming more commonplace [107].
- Artificial Intelligence (AI) in Microbial Identification: While technologies like MALDI-TOF have improved identification speed, AI and machine learning are now being applied to interpret complex mass spectrometry spectra, potentially leading to higher identification accuracy and the ability to handle ambiguous results [107].
- Virtual Reality (VR) for Training: VR-based microbiology laboratories provide an immersive training environment where personnel can practice and repeat complex aseptic techniques and procedures without the risk of wasting valuable reagents or causing a real contamination event. The U.S. CDC, for example, has deployed VR training for biosafety cabinet use [107].
- Biosensors and Advanced Detection: The use of advanced molecular methods like viability quantitative PCR (qPCR) with dyes like propidium monoazide allows for the rapid and specific detection of viable pathogens in environmental samples, such as water systems, providing far greater information than traditional culture-based methods [107].
- Sustainability (Green Laboratories): There is a growing focus on reducing the environmental impact of laboratories. Initiatives include decontaminating and reusing certain types of plasticware, such as test tubes and culture loops, which can significantly reduce plastic waste without compromising sterility [107].
Adherence to Good Microbiological Laboratory Practices is the indispensable backbone of reliable and safe microbial research and quality control. Its foundation, aseptic technique, is a dynamic and critical skill that requires continuous dedication, training, and vigilance. From fundamental procedures like streaking plates to the adoption of cutting-edge technologies like AI and automation, every action in the microbiology laboratory must be guided by the principles of GMLP. By integrating these practices into a comprehensive quality system supported by regulatory guidelines, laboratories can ensure the generation of accurate data, the protection of personnel, and the integrity of the products and research that ultimately safeguard public health.
Visual Workflows
Aseptic Technique Workflow
Streak Plate Procedure
Understanding and Implementing Biosafety Levels (BSL 1-4)
In microbiological research, the twin pillars of biosafety and aseptic technique are fundamental to ensuring both experimental integrity and personnel safety. Biosafety is defined as the application of specific practices, safety equipment, and specially designed laboratories to create a safe environment, both within and outside the laboratory, for work conducted with infectious agents and toxins [108]. Aseptic technique encompasses the procedures and practices—such as sterilizing tools, disinfecting surfaces, and working in a controlled environment—that prevent the contamination of pure cultures and sterile media by unwanted, extraneous microorganisms [65] [92].
These concepts are intrinsically linked. Aseptic technique is a core component of the standard microbiological practices required at every biosafety level. Proper aseptic practice acts as a primary control to prevent cross-contamination between experiments and to protect the researcher from exposure. The implementation of biosafety levels provides a risk-based framework that dictates the stringency of the aseptic techniques and the level of containment required, ensuring that safety measures are commensurate with the potential hazard of the biological agent being handled [108] [109].
The Four Biosafety Levels: A Detailed Analysis
Biosafety Levels (BSLs) are designations applied to projects or activities in ascending order of containment, based on the degree of health-related risk associated with the work [108]. The appropriate BSL for a project is determined through a biological risk assessment that considers the nature of the infectious agent, the laboratory activities being performed, and the availability of preventive measures or treatments [108] [110]. Each level builds upon the controls of the level before it, creating a layered system of protection [111] [109].
Biosafety Level 1 (BSL-1)
BSL-1 is the baseline level of containment, suitable for work with well-characterized agents that are not known to consistently cause disease in healthy adult humans and present minimal potential hazard to laboratory personnel and the environment [108] [112].
- Typical Agents: Non-pathogenic strains of E. coli and Bacillus subtilis, Saccharomyces cerevisiae, and other non-infectious bacteria [112] [111].
- Laboratory Practices: Work is typically performed on open lab benches or tables using standard microbiological practices [108] [109].
- Safety Equipment: Personal protective equipment (PPE) such as lab coats, gloves, and eye protection are worn as needed [108].
- Facility Construction: The laboratory must have doors to separate it from the rest of the facility and a sink for handwashing [108] [109]. Specialized ventilation or air flow systems are not required.
Biosafety Level 2 (BSL-2)
BSL-2 builds upon BSL-1 and is applicable to work with agents associated with human diseases that pose a moderate hazard to personnel and the environment [110] [109]. These agents may be transmitted through percutaneous exposure (e.g., needlesticks), ingestion, or mucous membrane exposure [113].
- Typical Agents: Staphylococcus aureus, Salmonella species, Hepatitis A, B, and C viruses, Human Immunodeficiency Virus (HIV) [110] [111].
- Laboratory Practices: Access to the laboratory is restricted when work is being conducted. Biohazard warning signs are posted, and procedures are in place for the safe handling of sharps and spill decontamination [108] [113].
- Safety Equipment: In addition to PPE, all procedures that can create infectious aerosols or splashes (e.g., vortexing, sonication) must be performed within a Class I or II Biological Safety Cabinet (BSC). An autoclave or other decontamination method must be available for waste disposal [108] [109].
- Facility Construction: Laboratories have self-closing doors, and a sink and eyewash station are readily available [108].
Biosafety Level 3 (BSL-3)
BSL-3 is required for work involving indigenous or exotic agents that may cause serious or potentially lethal disease through respiratory transmission (inhalation) [108] [109]. The primary focus is on protecting personnel and the environment from airborne risks.
- Typical Agents: Mycobacterium tuberculosis, Francisella tularensis, SARS-CoV-1, SARS-CoV-2, West Nile virus, and Coxiella burnetii [110] [112].
- Laboratory Practices: Personnel are under medical surveillance and may be offered immunizations. Access to the laboratory is strictly controlled at all times, and a laboratory-specific biosafety manual must be followed [108] [112].
- Safety Equipment: All work with infectious materials must be performed within a Class I or II BSC or other physical containment device. Respirators may be required [108] [109].
- Facility Construction: The laboratory must be physically separated from other areas by a double-door, self-closing anteroom. It requires directional airflow (drawing air from clean areas into the laboratory) and exhaust air cannot be recirculated [108] [112]. Walls, floors, and ceilings are sealed for easy cleaning and decontamination.
Biosafety Level 4 (BSL-4)
BSL-4, the highest level of containment, is reserved for working with dangerous and exotic agents that pose a high individual risk of life-threatening disease, which may be transmitted via the aerosol route, and for which no available vaccines or treatments exist [108] [110].
- Typical Agents: Ebola virus, Marburg virus, Lassa virus, and other agents causing hemorrhagic fevers [110] [111].
- Laboratory Practices: Personnel are required to change clothing before entering and shower upon exiting. All materials must be decontaminated before leaving the facility [108].
- Safety Equipment: There are two main types of BSL-4 labs:
- Facility Construction: The laboratory is located in a separate building or a clearly demarcated, isolated zone within a building. It has dedicated supply and exhaust air, vacuum lines, and decontamination systems [108].
Table 1: Comparison of Biosafety Levels 1-4
| Feature | BSL-1 | BSL-2 | BSL-3 | BSL-4 |
|---|---|---|---|---|
| Agent Risk | Minimal hazard to personnel and environment [108] | Moderate hazard; associated with human disease [109] | Serious or lethal disease via inhalation [108] | High individual risk of life-threatening disease via aerosol [108] |
| Lab Access | Open | Restricted when work is conducted [108] | Restricted and controlled at all times [108] | Controlled via secure, isolated zone; clothing change required [108] |
| Safety Equipment (Primary Barrier) | Basic PPE (lab coats, gloves) as needed [108] | Class I or II BSC for aerosol-generating procedures; PPE required [109] | Class I or II BSC for all work with agents; respiratory protection may be needed [108] | Class III BSC or full-body, positive-pressure suit [108] |
| Facility Design (Secondary Barrier) | Basic lab with sink; no special ventilation [112] | Self-closing doors; sink and eyewash [108] | Double-door entry; directional airflow; sealed for decontamination [108] | Separate building or zone; dedicated air and vacuum systems; shower-out [108] |
| Example Agents | Non-pathogenic E. coli, Bacillus subtilis [112] [111] | Staphylococcus aureus, HIV, Salmonella [110] [111] | Mycobacterium tuberculosis, SARS-CoV-2, West Nile virus [110] [112] | Ebola virus, Marburg virus [110] [111] |
The Biosafety Risk Assessment Process
The assignment of a biosafety level to a project is not arbitrary; it is the outcome of a meticulous biological risk assessment. This protocol-driven process is a joint responsibility of the principal investigator, institutional biosafety professionals, and biosafety committees [108] [110]. The following workflow outlines the key steps in this critical assessment.
Diagram: Biosafety Risk Assessment Workflow
The risk assessment process involves evaluating specific factors to determine the necessary containment level [108] [110]:
- Identify the Agent's Characteristics: Assess the organism's ability to cause disease (pathogenicity), severity of disease, transmission routes, infectious dose, and host range [110].
- Identify Laboratory Procedure Hazards: Determine the risks presented by specific techniques, such as the potential for aerosol generation, use of sharp instruments, and the volumes and concentrations of the agents being used [110].
- Determine the Appropriate BSL: Select the biosafety level based on the risk assessment, which dictates the required safety precautions, facility safeguards, and regulatory compliance [108].
Core Aseptic Techniques Across Biosafety Levels
Aseptic technique is the foundation of safe microbiological work and is essential at every BSL. The specific methods become more rigorous as the biohazard risk increases.
Foundational Aseptic Practices (Common to BSL-1 and BSL-2)
- Sterilization and Disinfection: All tools (e.g., inoculating loops, needles) must be sterilized, typically by flaming with a Bunsen burner or using pre-sterilized disposable items. Work surfaces must be decontaminated before and after use [65] [92].
- Working Near a Flame: When not using a BSC, performing procedures near the updraft of a Bunsen burner flame creates a convection current that reduces the likelihood of airborne contaminants settling into sterile cultures or media [65].
- Proper Handling of Materials: Caps of bottles and tubes should never be placed on the bench surface. Sterile pipettes should be used without allowing the shaft to contact non-sterile surfaces. The mouths of bottles and tubes should be briefly flamed before and after transfers [65].
Aseptic Technique in a Biological Safety Cabinet (BSL-2 and Above)
For many procedures at BSL-2 and all work with agents at BSL-3, the biological safety cabinet becomes the primary location for aseptic technique.
- Cabinet Preparation: The BSC should be turned on and allowed to run for several minutes to purge contaminants. All interior surfaces should be wiped down with an appropriate disinfectant before placing supplies inside [109].
- Workflow Management: Materials should be arranged to create a clean-to-dirty workflow from one side of the cabinet to the other. All manipulations of open containers must be performed within the deep interior of the cabinet, at least 4-6 inches from the front grille [113].
- Minimizing Disruptions: Rapid hand and arm movements should be avoided as they can disrupt the protective air barrier of the cabinet. The number of items placed inside should be minimized to avoid blocking airflow grilles [113].
Advanced Aseptic Containment (BSL-3 and BSL-4)
At the highest containment levels, aseptic technique is integrated with stringent facility controls.
- Use of Sealed Containers: Within BSL-3 labs and Class III BSCs at BSL-4, work is often performed using containers with airtight pass-through boxes or ports to which gloves are attached, preventing any direct contact with the ambient air [108] [112].
- Decontamination Procedures: All materials, including liquid waste and used equipment, must undergo a validated decontamination process (e.g., autoclaving, chemical disinfection) before removal from the laboratory space [108].
The Scientist's Toolkit: Essential Reagents and Materials
Table 2: Key Research Reagent Solutions for Microbiological Culture Handling
| Item | Function and Application |
|---|---|
| Culture Media (Broth, Agar) | Provides essential nutrients (organic carbon, nitrogen, salts) in an artificial environment to support microbial growth and cultivation. Can be liquid (broth), solid (agar plates), or semi-solid [65]. |
| Selective & Differential Media | Selective media contains compounds (e.g., antibiotics, dyes) that inhibit the growth of unwanted microbes, selecting for specific types. Differential media contains indicators to reveal biochemical differences between microbial species based on colonial appearance [92]. |
| Agar | An inert, non-nutritive polysaccharide derived from seaweed used as a solidifying agent for culture media. It provides a stable surface for bacterial colonies to form [65]. |
| Cryoprotectants (Glycerol/DMSO) | Agents like 10-20% glycerol or dimethyl sulfoxide (DMSO) are added to microbial cultures before freezing. They stabilize cell membranes and prevent the formation of damaging ice crystals, allowing for long-term preservation of microbial strains at ultra-low temperatures (e.g., -80°C) [92]. |
| Disinfectants (e.g., Bleach) | Chemical agents used for decontamination of work surfaces, liquid waste, and equipment. They inactivate or destroy microorganisms on non-living surfaces and are a critical part of routine aseptic practice and laboratory cleanup [112]. |
| Personal Protective Equipment (PPE) | Includes lab coats, gloves, safety goggles, and face shields. Acts as a primary barrier to protect the skin and mucous membranes from accidental splashes or contact with infectious materials [108] [109]. |
The rigorous implementation of Biosafety Levels provides a standardized, risk-based framework that is essential for the safe and responsible conduct of microbiological research. From basic research at BSL-1 to the maximum containment work at BSL-4, each level prescribes a combination of laboratory practices, safety equipment, and facility design tailored to the specific biological hazards present. Aseptic technique serves as the common thread running through all BSLs, ensuring the purity of microbial cultures and protecting the researcher. A thorough and ongoing risk assessment is the critical first step in this process, ensuring that the appropriate level of containment is always applied. For researchers, a deep understanding and strict adherence to these principles are non-negotiable, forming the foundation for scientific integrity, personal safety, and environmental protection.
In the fields of pharmaceutical manufacturing, biotechnology, and basic microbiological research, the sterility of media and reagents is a fundamental prerequisite for ensuring the integrity and safety of processes and products. Contaminated media or reagents can compromise experimental results, lead to erroneous scientific conclusions, and, in a clinical context, pose significant risks to patient safety. Sterility validation provides documented evidence that the sterility testing methods used are capable of reliably detecting microbial contamination when present. This process is not merely a regulatory formality but a critical scientific exercise that confirms the analytical method's effectiveness, ensuring that the results of sterility tests are trustworthy. Within the broader framework of research on aseptic techniques for microbial culture handling, sterility validation represents the quantifiable and verifiable cornerstone that supports all subsequent experimental work [114].
The core principle of sterility validation is to demonstrate that the test method itself does not inhibit the growth of potential contaminants. This is crucial because the very products being tested—such as culture media or reagents containing antimicrobial components like antibiotics—might otherwise mask the presence of low levels of microorganisms. Therefore, the validation process formally challenges the test system with a known quantity of viable microorganisms to prove that the methodology can detect them consistently. For drug development professionals and researchers, adhering to validated methods is non-negotiable for complying with global regulatory standards from agencies like the FDA, EMA, and WHO, and for upholding the principles of Good Manufacturing Practice (GMP) and Good Laboratory Practice (GLP) [115] [116].
Regulatory and Compendial Frameworks
The validation of sterility tests is not an arbitrary process; it is guided by stringent international regulations and pharmacopeial standards. These frameworks ensure that methods are standardized, reproducible, and scientifically sound across the industry. The United States Pharmacopeia (USP), the European Pharmacopoeia (Ph. Eur.), and the Japanese Pharmacopoeia (JP) all provide specific chapters detailing the requirements for sterility testing and method validation [116] [117]. Furthermore, regulatory bodies such as the U.S. Food and Drug Administration (FDA) and the European Medicines Agency (EMA) enforce these standards through guidelines like the FDA's "Guidance for Industry: Sterile Drug Products Produced by Aseptic Processing" and the EU's GMP Annex 1 [115].
A central tenet of these guidelines is the principle of method suitability, which dictates that the sterility test must be validated for each specific product type. This is because different formulations can have varying interfering properties. The regulatory expectations are clear: any validation must include documented evidence that the method can overcome any inherent antimicrobial activity of the product and reliably detect contaminants at a low level [116] [114]. For novel methods, particularly Rapid Microbiological Methods (RMM), regulators encourage their adoption but require a rigorous validation process to demonstrate equivalence or superiority to traditional compendial methods, as outlined in documents like USP <1223> and PDA Technical Report 33 [116].
Core Validation Methodologies
The two primary compendial methods for sterility testing are the Membrane Filtration Method and the Direct Inoculation Method. The validation of either method follows a similar philosophy, centered on challenging the method with known microorganisms to confirm its ability to detect contamination reliably.
Method Suitability Tests
The validation protocol, often referred to as "method suitability” or “test for validity,” consists of three key experiments designed to challenge different aspects of the test procedure [114].
Test for Antimicrobial Activity: This test determines if the product itself has inherent microbial growth-inhibiting properties.
- Procedure: The product is added to culture media as per the routine sterility test method. The containers are then inoculated with a low number (not more than 100 CFU) of challenge microorganisms. After incubation, the media are examined for growth.
- Acceptance Criterion: Growth of the challenge microorganisms must be apparent within the prescribed time (e.g., within 3 days for bacteria and 5 days for fungi), demonstrating that the product does not inhibit growth under the test conditions [114].
Test for Residual Antimicrobial Activity (Neutralization Efficacy): This is critical for the membrane filtration method. It verifies that the product's antimicrobial activity can be effectively neutralized or removed by the filtration and rinsing procedure.
- Procedure: The product is filtered and the membrane is rinsed as per the standard protocol. The final rinse is performed with a peptone water solution containing a known low number of challenge organisms. The membrane is then incubated in culture media.
- Acceptance Criterion: The challenge organisms must grow within the specified timeframe, proving that any antimicrobial agent carried over to the membrane has been adequately neutralized by the rinsing process [114].
Stasis Test (Growth Promotion Test at Incubation End): This test confirms that the media used in the test remain capable of supporting microbial growth even after being exposed to the product for the full duration of the incubation period.
- Procedure: After the standard 14-day incubation period of the sterility test vessels, a representative sample of the media is inoculated with a low number of challenge microorganisms.
- Acceptance Criterion: The inoculated media must show visible growth of the challenge organisms within a short period (e.g., 48 hours), proving the media retained their growth-promoting properties throughout the entire test [114].
Challenge Microorganisms
A defined panel of microorganisms is used to challenge the method, ensuring it can detect a broad spectrum of potential contaminants. The panel typically includes representative gram-positive and gram-negative bacteria, yeasts, and molds [117] [114].
Table 1: Standard Challenge Microorganisms for Sterility Test Validation [117] [114]
| Microorganism | Strain (Example) | Gram Reaction / Feature | Relevance |
|---|---|---|---|
| Staphylococcus aureus | ATCC 25923 | Gram-positive coccus | Common skin contaminant |
| Bacillus subtilis | NCIM 2063 | Gram-positive spore-former | Environmental contaminant |
| Pseudomonas aeruginosa | ATCC 27853 | Gram-negative rod | Environmental organism, resilient |
| Escherichia coli | ATCC 25922 | Gram-negative rod | Common enteric and environmental organism |
| Candida albicans | ATCC 14053 | Yeast | Common fungal contaminant |
| Aspergillus brasiliensis | ATCC 16404 | Filamentous fungi | Environmental mold |
The following workflow diagram illustrates the logical sequence and decision points in a sterility validation process, integrating the key tests described above.
Advanced and Automated Sterility Testing Methods
While compendial methods are the gold standard, technological advancements have introduced Rapid Microbiological Methods (RMM) that offer significant advantages in speed and automation. The validation of these methods follows the same fundamental principles but requires additional steps to demonstrate equivalence to the traditional methods [116].
Automated Culture-Based Systems
Systems like the BD BACTEC automated blood culture system are being adapted for sterility testing of sensitive products like Advanced Therapy Medicinal Products (ATMPs). These systems use liquid culture media in vials that are continuously monitored for microbial growth through automated means, such as detecting CO₂ production or other metabolic indicators [117].
- Validation Approach: The method is challenged by inoculating test solutions (e.g., culture media, reagents) with a low concentration (e.g., 10-50 CFU) of challenge microorganisms. The time required for the automated system to detect growth (Time to Results - TTR) is recorded and compared against the 14-day incubation of the compendial method. The system must detect all challenge organisms within an acceptable and consistent timeframe to be considered valid [116] [117].
- Application: A 2024 study successfully validated this system for sterility testing of reagents used in the bioprocessing of mesenchymal stromal cells (MSCs) and their extracellular vesicles, demonstrating detection within regulatory guidelines [117].
General Principles for Validating RMM
The validation of any RMM for sterility testing must demonstrate several key attributes [116]:
- Equivalence: The RMM must be statistically comparable to the compendial method in its ability to detect a wide range of microorganisms.
- Specificity: The method must accurately distinguish between contaminated and non-contaminated samples.
- Limit of Detection (LOD): The method must be capable of consistently detecting a low number of microorganisms (typically near 10 CFU).
- Robustness: The method's performance should remain unaffected by small, deliberate variations in method parameters.
- Accuracy and Reproducibility: The method must provide correct results and consistent performance within and between laboratories.
The diagram below outlines the strategic pathway for validating and implementing a rapid sterility testing method.
Experimental Protocols in Practice
This protocol outlines the steps for validating the sterility test for a product using the membrane filtration method.
I. Prerequisites:
- A validated aseptic facility (e.g., Laminar Air Flow cabinet).
- Qualified and sterilized filtration assembly, forceps, and membrane filters (0.45 µm pore size, 47 mm diameter).
- Sterile culture media: Fluid Thioglycollate Medium (FTM) for aerobes, anaerobes, and Soybean Casein Digest Medium (SCDM) for aerobes and fungi.
- Sterile diluent and rinsing fluid (e.g., Peptone Water).
- Prepared inoculum of challenge microorganisms at a concentration of 10-100 CFU.
II. Procedure for "Test for Residual Antimicrobial Activity":
- Positive Product Control:
- Aseptically transfer the contents of 20 test containers into a sterile filtration funnel.
- Filter the solution and rinse the membrane with 2 x 100 ml of sterile peptone water.
- Perform a final rinse with 100 ml of peptone water that has been inoculated with a known low number (10-100 CFU) of one of the challenge microorganisms.
- Aseptically transfer the membrane to a container of the appropriate culture medium (FTM or SCDM).
- Repeat this process for each of the six challenge microorganisms.
- Incubate FTM at 30-35°C and SCDM at 20-25°C. Observe for growth for up to 5 days for bacteria and 5 days for fungi.
- Negative Product Control:
- Process the product identically but without adding challenge organisms. The goal is to confirm the inherent sterility of the test materials and process.
- Positive Control:
- Inoculate culture media directly with the challenge organisms to confirm the viability of the inoculum and the growth-promoting capacity of the media.
- Negative Control:
- Process sterile diluent alone to confirm the sterility of the entire test system.
III. Acceptance Criteria:
- Positive and Positive Product Controls: Must show "conspicuous growth" of the challenge microorganisms within 3 days for bacteria and 5 days for fungi. The growth in the positive product control must be comparable to that in the positive control.
- Negative and Negative Product Controls: Must show no growth throughout the 14-day incubation period.
- If these criteria are not met, the product possesses antimicrobial activity that has not been neutralized. The method must be modified (e.g., by increasing the volume or number of rinses, adding inactivators like polysorbate to the rinse fluid) and the validation repeated.
Incubation Parameters and Interpretation
Successful execution of sterility testing requires strict adherence to controlled incubation conditions to ensure the detection of a wide range of microorganisms.
Table 2: Standard Incubation Parameters for Sterility Tests [115] [114]
| Stage | Temperature Range | Duration | Purpose |
|---|---|---|---|
| Stage 1 | 20°C to 25°C (± 2.5°C) | 7 Days | Optimal for fungi and environmental bacteria. |
| Stage 2 | 30°C to 35°C (± 2.5°C) | 7 Days | Optimal for common mesophilic bacteria. |
| Examination Points | Day 3, Day 7, Day 10, Day 14 | Tubes are visually examined for turbidity (cloudiness) indicating growth. |
The Researcher's Toolkit: Essential Materials for Sterility Testing
The following table details the key reagents, media, and equipment required to perform and validate sterility tests.
Table 3: Essential Research Reagent Solutions and Materials for Sterility Testing
| Item | Function / Application | Key Specifications |
|---|---|---|
| Soybean Casein Digest Medium (SCDM) | General-purpose liquid growth medium for the detection of bacteria and fungi. | Must pass Growth Promotion Test (GPT). Used at 20-25°C [115]. |
| Fluid Thioglycollate Medium (FTM) | Liquid medium for aerobes, anaerobes, and microaerophiles. The thioglycollate creates an oxygen gradient. | Must pass GPT. Incubated at 30-35°C [114]. |
| Membrane Filter | To capture microorganisms from the test solution during filtration. | Cellulose nitrate or acetate; 0.45 µm pore size; 47 mm diameter [114]. |
| Sterile Peptone Water | Used as a diluent and rinsing fluid during membrane filtration to remove residual product. | Typically 1.0 g/L peptone, pH 7.1 ± 0.2 [114]. |
| Challenge Microorganisms | To validate the test method by providing a known, low-level contamination. | Standardized panels as per pharmacopoeia (e.g., S. aureus, P. aeruginosa, C. albicans) [117] [114]. |
| Automated System Vials (e.g., BACTEC) | Culture vials for automated sterility testing systems. Contain specialized media and growth detection sensors. | Vials are specific for aerobes, anaerobes, or fungi [117]. |
| Laminar Flow Hood / Isolator | Provides an ISO Class 5 (Class 100) aseptic work environment to prevent extrinsic contamination during testing. | HEPA-filtered unidirectional airflow [117] [19]. |
The validation of sterility testing for media and reagents is a rigorous, systematic process that is vital for any research or production activity relying on aseptic conditions. By understanding and implementing the core principles of method suitability—testing for antimicrobial activity, residual activity, and media stasis—scientists and drug development professionals can generate reliable, defensible data. As the field evolves with the introduction of rapid and automated methods, the foundational approach to validation remains: to provide documented, scientific proof that the test is fit for its purpose. This commitment to robust quality control not only fulfills regulatory requirements but also upholds the scientific integrity of microbial research and ensures the safety of biopharmaceutical products.
Within the context of aseptic techniques for microbial culture handling, sterilization is a foundational process, defined as the complete elimination of all viable microorganisms, including resistant bacterial spores and viruses [118] [119]. Achieving and maintaining sterility is non-negotiable in research and drug development, as it ensures the integrity of microbial cultures, the validity of experimental results, and the safety of biological products. The choice of sterilization method is critical and is influenced by the nature of the material to be sterilized—whether it is heat-stable or thermolabile, liquid or solid—and the specific requirements of the experimental protocol.
This whitepaper provides a comparative analysis of three cornerstone sterilization techniques: autoclaving (steam sterilization), filtration, and radiation. Each method operates on a distinct principle, offering unique advantages and limitations. Autoclaving uses moist heat to coagulate microbial proteins [119], filtration mechanically removes microorganisms from liquids and gases [120] [121], and radiation sterilization employs ionizing energy to disrupt microbial DNA [122] [123] [124]. The following sections will dissect these methods, providing detailed protocols, comparative data, and practical guidance to empower researchers in selecting and applying the most appropriate sterilization technique for their aseptic work.
Principles and Mechanisms of Action
Autoclaving: Moist Heat Sterilization
Autoclaving, or steam sterilization, relies on the application of saturated steam under pressure. The mechanism of microbial destruction is primarily the irreversible coagulation and denaturation of enzymes and structural proteins within the cell [119]. The critical parameters for effective sterilization are temperature, pressure, and time. The standard operating condition is 121°C at 1.05 kg/cm² (15-20 psi) for a minimum of 15-20 minutes for small volumes [125] [126]. However, the total exposure time must be adjusted for larger liquid volumes; for example, a 10-liter carboy may require over 60 minutes at temperature to ensure complete heat penetration [121]. The presence of steam is crucial, as it transfers thermal energy more efficiently than dry air, ensuring rapid and uniform heating of the entire load [126]. It is important to note that the sterilization time begins only after the contents of the autoclave chamber have reached the target temperature.
Filtration: Mechanical Removal
Filtration is a cold sterilization method ideal for heat-labile solutions such as sera, antibiotic solutions, and media components with vitamins [125] [120] [121]. This process does not kill microorganisms but physically removes them from the liquid or gas by passing it through a membrane with defined pore sizes, typically 0.22 µm for sterilization, which is sufficient to retain bacteria and spores [125] [121]. The removal mechanisms include sieving (trapping particles larger than the pore size), adsorption, and trapping [119]. While effective against bacteria and fungi, standard 0.22 µm filters cannot remove viruses or mycoplasma, which are smaller in size [120] [121]. The integrity of the filter membrane is paramount, as any compromise will lead to sterilization failure. Filter formats range from disposable syringe filters for small volumes to reusable cartridge or tangential flow systems for large-volume processing [121].
Radiation: Ionizing Energy
Radiation sterilization uses ionizing radiation—gamma rays, X-rays, or electron beams (e-beams)—to inactivate microorganisms. Its lethality stems from the direct and indirect damage to microbial DNA [122] [124]. When radiation interacts with cellular components, it generates highly reactive free radicals (e.g., hydroxyl radicals) and secondary electrons. These reactive species cause strand breaks, depolymerization, and chemical alterations in DNA, preventing replication and leading to cell death [122] [123]. This method is classified as a "cold" process because the temperature increase in the product is minimal, making it suitable for heat-sensitive materials [122] [123]. The effectiveness is quantified by the decimal reduction dose (D10 value), which is the radiation dose required to reduce a microbial population by 90% [122]. A standard sterilization dose of 25 kGy is often used to achieve a high sterility assurance level (SAL) of 10⁻⁶, meaning there is less than a one-in-a-million chance of a viable microorganism surviving [122] [123].
Comparative Analysis of Sterilization Methods
The following tables summarize the key characteristics, advantages, and disadvantages of autoclaving, filtration, and radiation sterilization, providing a clear, side-by-side comparison for researchers.
Table 1: Key Characteristics and Operational Parameters
| Parameter | Autoclaving | Filtration | Radiation |
|---|---|---|---|
| Primary Mechanism | Protein denaturation via moist heat [119] | Physical removal via membrane pores [119] | DNA damage via ionizing radiation [122] [124] |
| Typical Conditions | 121°C, 15-20 psi, 15-60+ minutes [125] [121] | 0.22 µm pore size, positive pressure or vacuum [125] [121] | 25 kGy standard dose (varies) [122] |
| Process Temperature | High (121°C+) | Ambient (Cold) | Ambient (Cold Sterilization) [122] [124] |
| Sterility Assurance Level (SAL) | 10⁻⁶ (Achievable) | 10⁻⁶ (for bacteria/fungi) | 10⁻⁶ or better (Achievable) [122] [123] |
| Processing Time | Minutes to Hours | Minutes to Hours (depends on volume) | Seconds (E-beam) to Hours (Gamma) [122] |
Table 2: Advantages and Limitations in Research Context
| Aspect | Autoclaving | Filtration | Radiation |
|---|---|---|---|
| Advantages | - Highly reliable & cost-effective for heat-stable items [126]- Excellent for liquids, glassware, surgical tools [127] [126] | - Ideal for heat-labile solutions (antibiotics, sera) [125] [121]- Preserves thermosensitive components | - Excellent for pre-packaged, single-use items [122] [123]- No chemical residues [122] [127]- Very rapid (E-beam) [122] |
| Limitations & Material Compatibility | - Unsuitable for heat-labile substances [125]- Can degrade plastics, cause corrosion [126] | - Does not remove viruses [120] [121]- Risk of membrane rupture [121]- Limited to liquids and gases | - High capital cost for facilities [122] [123]- Can degrade polymers (e.g., PVC, PTFE) [122] [123]- Requires specialized handling (radioactive source) [122] |
Method Selection and Experimental Protocol Guidance
Workflow for Method Selection
The following diagram outlines a logical decision-making workflow for selecting the appropriate sterilization method based on the material properties and research requirements.
Detailed Experimental Protocols
Protocol for Media Sterilization via Autoclaving
This protocol is standardized for sterilizing standard culture media in volumes up to 1 liter.
Preparation and Loading:
- Dispense the media into appropriate, heat-tolerant containers (e.g., borosilicate glass bottles or flasks). Fill liquids only to ~70% of the container's capacity to prevent boil-over [125].
- Loosen container caps to allow for steam penetration and pressure equalization.
- Place containers in the autoclave chamber, ensuring adequate space between them for efficient steam circulation.
Sterilization Cycle:
- Set the autoclave to 121°C and 15-20 psi (1.05 kg/cm²) [125].
- Set the sterilization timer. A duration of 20-30 minutes is recommended for volumes up to 1 liter after the chamber reaches the target temperature [125] [121]. Note that larger volumes require significantly longer times (e.g., ≥60 minutes for 10 L) [121].
Cooling and Storage:
- After the cycle completes, allow the pressure to return to ambient levels naturally before opening the chamber door.
- Tighten the caps of the containers once they are cool enough to handle.
- Let the media cool to room temperature before use. For plant tissue culture media that must be poured into plates, cool to approximately 35-45°C before aseptically dispensing [125].
Protocol for Solution Sterilization via Filtration
This protocol describes the aseptic sterilization of heat-labile solutions using a syringe filter.
Apparatus Setup:
- Work in a laminar flow hood to maintain asepsis.
- Assemble a sterile syringe and a 0.22 µm pore size, sterile membrane filter unit suitable for the solution's chemical properties (e.g., cellulose acetate or PVDF).
Filtration Process:
- Draw the solution to be sterilized into the sterile syringe.
- Attach the filter unit to the syringe.
- Gently and steadily push the plunger to pass the solution through the membrane into a sterile receiving container (e.g., a test tube or bottle).
- Avoid applying excessive pressure, which can cause membrane rupture.
Post-Sterilization Handling:
- Cap the sterile receiving container immediately.
- Label the container with the contents, date, and operator's initials.
- Store the filter-sterilized solution according to its specific requirements (e.g., refrigerated, protected from light).
Radiation sterilization is typically not performed within an individual research laboratory but is outsourced to specialized commercial facilities. The process is governed by strict international standards (e.g., ISO 11137) [122] [123].
Product Definition and Validation:
- The product and its packaging materials are selected for compatibility with radiation (e.g., avoiding radiation-sensitive polymers like PVC) [122] [123].
- The sterilization dose is established based on the product's bioburden (initial microbial load) and the D10 values of resistant microorganisms to achieve a SAL of 10⁻⁶ [122].
Irradiation Process:
- Products are packaged and palletized in their final shipping containers.
- The pallets are exposed to a validated, uniform dose of radiation. Gamma radiation from a Cobalt-60 source is highly penetrating and commonly used. Electron beam (E-beam) radiation is faster but less penetrating, suitable for lower-density products [122].
Release and Quality Control:
- The process is a "dosimetric release"—confirmation that the product received the required dose is sufficient to release it for use, eliminating the need for post-irradiation sterility testing [123].
Essential Research Reagent Solutions and Materials
The following table details key materials and reagents essential for implementing the discussed sterilization methods in a research setting.
Table 3: Essential Research Reagents and Materials for Sterilization
| Item Name | Function/Application | Method |
|---|---|---|
| Culture Media | Nutrient source for microbial growth. Requires sterilization before use. | Autoclaving, Filtration |
| 0.22 µm Pore Membrane Filter | Sterilizing heat-labile solutions by removing bacteria and spores. | Filtration |
| Heat-Labile Supplements (e.g., Antibiotics, Vitamins) | Additives that would be degraded by autoclaving. | Filtration |
| Biological Indicators (e.g., Bacillus pumilus spores) | Validating the efficacy of sterilization processes. | Radiation [124], Autoclaving |
| Single-Use Medical/Research Devices (e.g., Syringes, Petri Dishes) | Pre-sterilized consumables for aseptic procedures. | Radiation [122] [123] |
| Sterilization Pouch/ Tyvek Packaging | Allows steam or radiation penetration while maintaining sterility post-processing. | Autoclaving, Radiation |
Autoclaving, filtration, and radiation sterilization are three pillars of aseptic technique in microbial research, each indispensable within its specific domain. Autoclaving remains the most reliable and economical method for sterilizing heat-stable laboratory ware, surgical instruments, and aqueous culture media. Filtration is the unequivocal choice for processing thermolabile liquids and gases, such as antibiotic solutions or serum, preserving their biological activity. Radiation offers an unparalleled, cold-sterilization solution for single-use, pre-packaged medical devices and complex biomaterials on an industrial scale.
The optimal selection of a sterilization method is not a matter of superiority but of appropriateness. The decision must be guided by a critical assessment of the material's thermal stability, physical state, and the required sterility assurance level. Furthermore, adherence to validated, method-specific protocols is non-negotiable for ensuring both experimental reproducibility and personnel safety. A profound understanding of the principles, capabilities, and limitations of each technique empowers researchers and drug development professionals to build a robust foundation of aseptic practice, thereby safeguarding the integrity of their scientific endeavors.
Documentation, Risk Assessment, and Regulatory Compliance
Within the rigorous framework of microbial culture handling research, aseptic technique is the cornerstone practice for preventing contamination and ensuring culture purity [92] [29]. This technical guide establishes that robust documentation practices, systematic risk assessment, and strict regulatory compliance are not ancillary activities but are integral to the integrity and reproducibility of scientific research in drug development. A proactive approach to risk management protects valuable samples, ensures the validity of experimental data, and is mandated by an evolving global regulatory landscape [128] [129]. This whitepaper provides researchers and scientists with a comprehensive framework for integrating these disciplines into their daily workflows, transforming compliance from a checklist into a fundamental component of scientific excellence.
The Regulatory and Scientific Framework for Aseptic Processing
Aseptic processing in pharmaceutical and biotechnology research refers to the holistic technique of maintaining sterility from the beginning of the production line to the final product, ensuring that products, especially those for injection, are manufactured without introducing contamination [129]. This differs from terminal sterilization, as it requires all components—raw materials, containers, and equipment—to be individually sterilized and assembled in a controlled cleanroom environment [129].
Evolution of Regulatory Standards
Global regulations governing aseptic processing have intensified, moving beyond basic cleanliness to a comprehensive, risk-based approach. Key regulatory bodies include the U.S. Food and Drug Administration (FDA) and the European Medicines Agency (EMA) [129]. The FDA's guidance, "Sterile Drug Products Produced by Aseptic Processing – Current Good Manufacturing Practice," has been significantly updated to reflect modern expectations. A pivotal change is the EMA's 2022 revision of Annex 1, which mandates a proactive and holistic Contamination Control Strategy (CCS) [129]. This evolution demands that manufacturers formalize procedures across the entire aseptic manufacturing lifecycle.
Core Principles of Aseptic Technique
The scientific foundation of asepsis is built on proven laboratory techniques designed to prevent cross-contamination [29] [22]. These include:
- Flame Sterilization: Using a Bunsen burner to heat an inoculating loop or needle to redness to destroy all microorganisms before and after culture transfer [29] [22].
- Aseptic Transfer: Manipulating cultures in a manner that prevents environmental contaminants from entering vessels and stops culture microorganisms from escaping [29]. This involves working near a flame and quickly flaming the necks of test tubes during transfers [22].
- Controlled Environments: Performing sensitive culture work within laminar flow hoods or biosafety cabinets, which use HEPA filters to remove at least 99.97% of airborne particles (≥0.3 micrometers), providing a contamination-free workspace [92] [35].
Implementing a Risk Assessment Framework for Documentation
Risk assessment is the systematic evaluation of potential hazards, vulnerabilities, and their likelihood of occurrence in documentation processes to determine appropriate safety measures and controls [128]. For documentation teams, this proactive approach identifies threats to information security, project timelines, and content quality, ensuring workflows remain secure, compliant, and resilient [128].
The Risk Assessment Workflow
A standardized process ensures all potential risks are identified, evaluated, and mitigated. The following workflow outlines the key stages:
Real-World Use Cases and Mitigation Strategies
API Documentation Security
- Problem: API documentation often contains sensitive information that could expose security vulnerabilities, potentially leading to data breaches [128].
- Solution: Implement a comprehensive risk assessment framework that evaluates content sensitivity, access controls, and publication channels [128].
- Implementation:
- Catalog and classify all API documentation by sensitivity level.
- Assess current access controls and identify potential exposure points.
- Develop content sanitization guidelines for public-facing documentation.
- Establish regular security reviews and incident response procedures [128].
Regulatory Compliance Documentation
- Problem: Organizations in regulated industries face significant penalties when documentation fails to meet compliance requirements or becomes outdated [128].
- Solution: Develop a process that continuously monitors regulatory changes and evaluates documentation compliance gaps proactively [128].
- Implementation:
- Map all documentation to relevant regulatory requirements.
- Establish monitoring systems for regulatory updates.
- Identify high-risk areas where non-compliance could result in penalties.
- Create automated alerts for documentation review cycles [128].
Legacy Documentation Migration
- Problem: Migrating large volumes of legacy documentation presents risks of data loss, format corruption, and broken links that impact business continuity [128].
- Solution: Implement a comprehensive risk assessment to evaluate migration challenges and develop mitigation strategies [128].
- Implementation:
- Audit existing documentation and assess migration complexity.
- Identify critical documentation that cannot afford downtime.
- Develop a phased migration approach with rollback procedures.
- Create testing protocols and validation checkpoints [128].
Best Practices for Risk Management and Compliance
Foundational Best Practices
- Establish Regular Risk Assessment Cycles: Documentation risks evolve continuously. Treat risk assessment as an ongoing process, not a one-time activity [128]. Schedule quarterly assessments with additional reviews triggered by major changes in processes, team structure, or regulations [128].
- Involve Cross-Functional Stakeholders: Effective risk assessment requires input from technical writers, IT security, legal compliance, and business stakeholders to identify all potential vulnerabilities [128]. Avoid siloed approaches that miss critical interdependencies.
- Prioritize Risks Using an Impact-Probability Matrix: Not all risks require immediate attention. Use systematic prioritization to focus resources on the most critical threats, creating visual matrices to help stakeholders understand priorities [128].
- Document Risk Decisions and Rationale: Maintain detailed records of risk assessment decisions, mitigation strategies, and their effectiveness in a comprehensive risk register [128]. This creates valuable organizational knowledge and supports continuous improvement.
- Test and Validate Risk Mitigation Controls: Conduct regular drills and simulations to test risk response procedures [128]. Do not assume that documented procedures will work without practical validation.
Leveraging Technology for Compliance
Modern technologies are essential for meeting stringent regulatory demands and reducing human error [129].
- Digitalization and Automation: Regulatory bodies now view automation as essential for compliance [129]. Automated aseptic filling systems, robotic arms, and real-time digital batch records reduce human-induced contamination risks and enhance data integrity and traceability [129].
- Environmental Monitoring: Real-time monitoring systems, including automated particle counters and microbial sensors, replace traditional tests and allow for proactive contamination control [129].
- Single-Use Technologies (SUTs): SUTs and closed systems greatly reduce cross-contamination risks by eliminating cleaning validation and enabling faster product changeover [129]. Regulatory authorities favor them, provided they are properly validated.
The Scientist's Toolkit: Essential Research Reagent Solutions
The following table details key materials and reagents used in aseptic microbial culture and documentation risk assessment, with explanations of their specific functions.
Table 1: Essential Research Reagent Solutions for Aseptic Culture and Documentation Risk Management
| Item/Category | Primary Function | Application Context |
|---|---|---|
| Laminar Flow Hood [92] [35] | Provides a sterile workspace via HEPA-filtered, unidirectional airflow to prevent airborne contamination. | Essential for all open-container manipulations of microbial cultures; critical for maintaining asepsis. |
| Selective Culture Media [92] | Encourages growth of target microorganisms while inhibiting others, aiding in isolation. | Used for isolating specific pathogens or microbes from mixed populations. |
| Differential Culture Media [92] | Incorporates indicators to reveal biochemical differences between microbial species. | Facilitates preliminary identification of microbes based on metabolic properties. |
| Cryoprotectants (e.g., Glycerol, DMSO) [92] | Stabilize cell membranes during freezing, preventing ice crystal formation and cellular damage. | Used for long-term preservation of microbial strains at ultra-low temperatures (e.g., -80°C). |
| Digital Risk Register [128] | A centralized repository for tracking identified risks, assessments, mitigation actions, and outcomes. | Core tool for implementing and maintaining a proactive documentation risk assessment program. |
Integrated Workflow: From Culture Handling to Documentation
The following diagram synthesizes the core technical and documentation practices into a single, integrated workflow, highlighting their interdependence in ensuring research integrity and regulatory compliance.
In the high-stakes environment of microbial research and drug development, the integration of flawless aseptic technique with a rigorous, documented risk assessment framework is non-negotiable. Regulatory standards will continue to evolve, placing greater emphasis on data integrity, automation, and holistic contamination control strategies. By adopting the protocols and best practices outlined in this guide—from fundamental flame sterilization to digital risk registers—research organizations can build a culture of quality and compliance. This transforms regulatory requirements from a perceived burden into a powerful enabler of scientific reliability, patient safety, and long-term innovation.
Conclusion
Mastering aseptic technique is not merely a procedural skill but a fundamental component of rigorous and reproducible scientific research. By integrating the foundational principles, meticulous application of methods, proactive troubleshooting, and strict adherence to validation standards, researchers can significantly reduce the risk of contamination. This safeguards the integrity of microbial cultures and cell lines, which is paramount in drug development, diagnostics, and clinical applications. The future of biomedical research depends on such disciplined practices to ensure data reliability, patient safety, and the successful translation of laboratory findings into real-world therapies. Continuous training and a culture of safety are imperative for ongoing success in any life sciences laboratory.
References
- 1. " Aseptic " vs . " Sterile " – What's The Difference ? | Dictionary.com [https://www.dictionary.com/e/aseptic-vs-sterile/]
- 2. The Difference Between Aseptic and Sterile in a Cleanroom... [https://www.prudentialuniforms.com/blog/whats-the-difference-between-sterile-and-aseptic/]
- 3. | Ossila Aseptic vs Sterile [https://www.ossila.com/pages/aseptic-vs-sterile-technique]
- 4. process Sterile | PPT validation [https://www.slideshare.net/slideshow/sterile-process-validation/62056796]
- 5. The Basic Concept of Microbiology - PMC [https://pmc.ncbi.nlm.nih.gov/articles/PMC7123386/]
- 6. Filter Sterile | Sartorius Validation [https://www.sartorius.com/en/services/validation-service/sterile-filter-validation]
- 7. Evaluating Aseptic Presentation of Different Medical Device Packaging Configurations - PMC [https://pmc.ncbi.nlm.nih.gov/articles/PMC10512998/]
- 8. 无菌技术“规范”操作指南-海南省生物材料与医疗器械工程研究中心 [https://www.muhn.edu.cn/ecmd/info/1491/14925.htm]
- 9. 北京市医疗器械无菌检验检查要点指南(2023版) [https://yjj.beijing.gov.cn/yjj/ztzl48/ylqxjgfwzn/jdjczn61/436310322/index.html]
- 10. CN204569898U - 微 箱 - Google Patents 生 物 培 养 [https://patents.google.com/patent/CN204569898U/zh]
- 11. 全面的质量分析用非 无 基—— 菌 梅里埃 | [网址:名称] 培 养 生 物 [https://www.biomerieux-industry.com/cn/products/jinshiyongyufaguozhiyaoxingyedepeiyangji]
- 12. 液滴 微 流控 技 在 术 中的应用 - PMC 微 生 物 研 究 [https://pmc.ncbi.nlm.nih.gov/articles/PMC10475413/]
- 13. Cell Culture : How to Prevent Contamination , Yeast... | Corning Fungal [https://www.corning.com/worldwide/en/products/life-sciences/resources/stories/at-the-bench/how-to-control-bacterial-contamination-and-other-unwelcome-micro.html]
- 14. Types of Cell Culture and How... | Technology Networks Contamination [https://www.technologynetworks.com/cell-science/articles/types-of-cell-culture-contamination-and-how-to-prevent-them-397776]
- 15. Cell Culture and Practices to Avoid Techniques by... Contamination [https://www.jove.com/t/64769/cell-culture-techniques-practices-to-avoid-contamination-fungi]
- 16. Aseptic Technique [https://pubmed.ncbi.nlm.nih.gov/32150342/]
- 17. General Aseptic in Microbiology Laboratory Techniques [https://microbenotes.com/general-aseptic-techniques-in-microbiology-laboratory/]
- 18. Video: Aseptic in Environmental Science Technique [https://app.jove.com/v/10040/aseptic-technique-in-environmental-science]
- 19. technique | Ossila Aseptic [https://www.ossila.com/pages/aseptic-techniques]
- 20. Keeping It Clean: Why Aseptic and Sterile Techniques... - Joyful Microbe [https://joyfulmicrobe.com/aseptic-technique/]
- 21. Laboratory Techniques and Aseptic in Cell Culture Safety [https://www.thermofisher.com/za/en/home/references/gibco-cell-culture-basics/aseptic-technique.html]
- 22. in Microbiology Aseptic Techniques [https://www.news-medical.net/life-sciences/Aseptic-Techniques-in-Microbiology.aspx]
- 23. Laminar flow hood (again) - General Lab Techniques [http://www.protocol-online.org/biology-forums/posts/36701.html]
- 24. How To Set Up And Maintain A Sterile Laboratory - Decocorp [https://www.decocorp.com.au/blog/how-to-set-up-and-maintain-a-sterile-laboratory/]
- 25. : Pure , Features & Methods in Biology Culture Definition [https://www.vedantu.com/biology/pure-culture]
- 26. 2.2: Aseptic - Biology LibreTexts Technique [https://bio.libretexts.org/Courses/Ohio_State_University/Microbiology_Lab_SP25/02%3A_Lab_2/2.02%3A_Aseptic_Technique]
- 27. | Pure , Techniques, & Facts | Britannica culture Definition [https://www.britannica.com/science/pure-culture]
- 28. : Key Disinfection Explained vs Sterilization Differences [https://www.vedantu.com/biology/difference-between-disinfection-and-sterilization]
- 29. Basic Pure Culture Techniques [https://instr.bact.wisc.edu/book/displayarticlesinchapter?theme=printer&cid=16]
- 30. What Is Aseptic Technique? 2025 Guide to Infection Control | LearnTastic [https://learntastic.com/blog/what-is-aseptic-technique]
- 31. Between Difference And Disinfection - GeeksforGeeks Sterilization [https://www.geeksforgeeks.org/biology/difference-between-disinfection-and-sterilization/]
- 32. | PDF Aseptic Technique [https://www.slideshare.net/slideshow/aseptic-technique-29908470/29908470]
- 33. Automated, aseptic sampling with small-volume capacity from microbioreactors for cell therapy process analysis - PMC [https://pmc.ncbi.nlm.nih.gov/articles/PMC12351187/]
- 34. Aseptic Technique - BIO 2410: Microbiology - Research Guides at Baker College [https://guides.baker.edu/c.php?g=303096&p=2028582]
- 35. Aseptic technique for cell culture - PubMed [https://pubmed.ncbi.nlm.nih.gov/18228291/]
- 36. 层流罩 | Thermo Fisher Scientific - CN [https://www.thermofisher.cn/cn/zh/home/references/gibco-cell-culture-basics/cell-culture-equipment/laminar-flow-hood.html]
- 37. Aseptic Techniques & Contamination Control in Biotechnology – GMP Plastic [https://gmpplastic.com/blogs/useful-articles-on-lab-supplies-faq-section/aseptic-techniques-contamination-control-in-biotechnology]
- 38. | Thermo Fisher Scientific - VN Laminar Flow Hood [https://www.thermofisher.com/vn/en/home/references/gibco-cell-culture-basics/cell-culture-equipment/laminar-flow-hood.html]
- 39. ISO Class 5 Laminar : Functionality and Applications Flow Hood [https://www.sz-pharma.com/a-news-iso-class-5-laminar-flow-hood-functionality-and-applications.html]
- 40. Cleaning the Horizontal Laminar | PPTX Flow Hood [https://www.slideshare.net/slideshow/cleaning-the-horizontal-laminar-flow-hood/54975062]
- 41. Cleaning Procedure | Ossila Laminar Flow Hood [https://www.ossila.com/pages/laminar-flow-hood-cleaning-preparation]
- 42. Aseptic Technique in the Microbiology Laboratory – FC-BIOS SDN BHD [https://www.fcbios.com.my/blogs/news-insight/aseptic-technique-microbiology-laboratory]
- 43. Protective clothing in the pharmaceutical industry [https://www.dupont.co.uk/personal-protection/protective-clothing-in-the-pharmaceutical-industry.html]
- 44. ( Personal ) Used in the Laboratory... Protective Equipment PPE [https://microbeonline.com/personal-protective-equipment-ppe/]
- 45. The Role of PPE in Preventing Contamination in Pharmaceutical Production [https://safetyware.com/ppe-in-pharmaceutical-production/]
- 46. 4.2 Aseptic Technique Basic Concepts – Nursing Skills – 2e [https://wtcs.pressbooks.pub/nursingskills/chapter/4-2-asceptic-technique-basic-concepts/]
- 47. Personal Protective Equipment (PPE) usage - Pharma Beginners [https://pharmabeginers.com/personal-protective-equipment-ppe/]
- 48. Chapter 4 Aseptic Technique - Nursing Skills - NCBI Bookshelf [https://www.ncbi.nlm.nih.gov/books/NBK593203/]
- 49. Hand Hygiene - StatPearls - NCBI Bookshelf [https://www.ncbi.nlm.nih.gov/books/NBK470254/]
- 50. Etiology of parapneumonic effusion and pleural empyema in children. [https://pubmed.ncbi.nlm.nih.gov/27296817/]
- 51. in the Lab: Complete Step-by-Step Guide & SOP... Aseptic Technique [https://www.mantacc.com/blog/aseptic-technique]
- 52. Aseptic Laboratory Techniques and... | Thermo Fisher Scientific - US [https://www.thermofisher.com/us/en/home/references/gibco-cell-culture-basics/aseptic-technique.html]
- 53. Mastering Aseptic : The Foundation of... | Lab Manager Technique [https://www.labmanager.com/mastering-aseptic-technique-the-foundation-of-successful-cell-culture-34208]
- 54. Disinfection and Sterilization in Health Care Facilities: An Overview and Current Issues - PMC [https://pmc.ncbi.nlm.nih.gov/articles/PMC7134755/]
- 55. Rehydration & Sterile Prep — Lidocaine HCl Regulatory Checklist [https://www.cristalchem.com/2025/10/15/lidocaine-hcl-rehydration-sterile-prep-regulatory-checklist-2026/]
- 56. Aseptic Process Simulations - Applications | Thermo Fisher Scientific - US [https://www.thermofisher.com/us/en/home/industrial/microbiology/microbial-culture/aseptic-process-simulations/applications.html]
- 57. During The Production Of Aseptic Drugs Technique Sterile [https://www.ivteam.com/intravenous-literature/asepsis-intravenous-literature/aseptic-technique-during-the-production-of-sterile-drugs/]
- 58. How to Handle Expired Lab Reagents : Tips for Safe... | Lab Manager [https://www.labmanager.com/how-to-handle-lab-reagents-after-their-expiration-date-907]
- 59. Aseptic technique | PPTX [https://www.slideshare.net/slideshow/aseptic-technique-54602661/54602661]
- 60. 1.7: Aseptic Technique - Biology LibreTexts [https://bio.libretexts.org/Bookshelves/Microbiology/Microbiology_Laboratory_Manual_(Hartline)/01:_Labs/1.07:_Aseptic_Technique]
- 61. Aseptic techniques [https://practicalbiology.org/standard-techniques/aseptic-techniques]
- 62. sterilization and tube transfer Flame [https://instr.bact.wisc.edu/book/displayarticle/4]
- 63. Aseptic technique - The Australian Wine Research Institute [https://www.awri.com.au/industry_support/winemaking_resources/laboratory_methods/microbiological/aseptic/]
- 64. Laboratory Techniques: Volume Transfers with Serological... Aseptic [https://pmc.ncbi.nlm.nih.gov/articles/PMC3941987/]
- 65. Bacteriological Culture | Methods : A Laboratory... Microbiology [https://courses.lumenlearning.com/suny-microbio-labexperience/chapter/bacteriological-culture-methods/]
- 66. Aseptic Transfer – Microbiology Laboratory Manual [https://openoregon.pressbooks.pub/microbiologylaboratorymanual/chapter/background-theory-2/]
- 67. 1.9: Aseptic Transfer - Biology LibreTexts [https://bio.libretexts.org/Bookshelves/Microbiology/Microbiology_Laboratory_Manual_(Miller)/01:_Labs/1.09:_Aseptic_Transfer]
- 68. Lab 1: Aseptic – BI302 Clinical Microbiology Lab Manual Technique [https://una.pressbooks.pub/bi302-lab/chapter/chapter-1/]
- 69. – Hands On Microbiology ASEPTIC TECHNIQUE [https://open.maricopa.edu/handsonmicrobiologyexperiments/chapter/aseptic-technique/]
- 70. Sub-culturing of Bacteria, Fungi and Actinomycetes | SpringerLink [https://link.springer.com/protocol/10.1007/978-1-4939-9861-6_29]
- 71. 2: Aseptic Transfers - Biology LibreTexts [https://bio.libretexts.org/Learning_Objects/Laboratory_Experiments/Microbiology_Labs/Microbiology_Labs_I/02:_Aseptic_Transfers]
- 72. BISC209: Aseptic - OpenWetWare Transfer [https://openwetware.org/wiki/BISC209:_Aseptic_Transfer]
- 73. Lab 2: Aseptic Technique - Biology LibreTexts [https://bio.libretexts.org/Learning_Objects/Laboratory_Experiments/Microbiology_Labs/Book:_General_Microbiology_Lab_Manual_(Pakpour_and_Horgan)/Lab_02:_Aseptic_Technique]
- 74. BISC209/S13: Aseptic - OpenWetWare Transfer [https://openwetware.org/wiki/BISC209/S13:_Aseptic_Transfer]
- 75. Bacteriology Culture Guide | ATCC [https://www.atcc.org/resources/culture-guides/bacteriology-culture-guide]
- 76. 细胞 培 中的 养 与安全 | Thermo Fisher Scientific - CN 无 菌 技 术 [https://www.thermofisher.cn/cn/zh/home/references/gibco-cell-culture-basics/aseptic-technique.html]
- 77. 在线水质 测 量系统的浊度分析-赛默飞 | Thermo Fisher Scientific - CN [https://www.thermofisher.cn/cn/zh/home/life-science/lab-equipment/online-water-measurement-systems/turbidity-water-analysis.html]
- 78. Enhanced Turbidity By Modified Sensor - Volume 11... Measurement [https://ijetjournal.org/enhanced-turbidity-measurement-modified-sensor/]
- 79. formation by the interaction of Biofilm (Candida tropicalis) with... fungi [https://scholar.unair.ac.id/en/publications/biofilm-formation-by-the-interaction-of-fungi-candida-tropicalis-]
- 80. and Identification development by a new biofilm keratitis... fungal [https://pubmed.ncbi.nlm.nih.gov/30187586/]
- 81. globalrph.com/ aseptic - technique [https://globalrph.com/aseptic-technique/]
- 82. 新国标GB 4789.28-2024 《培养基和试剂的质量要求》详细解读! - 政策法规 - 实验与分析 [https://lab.jgvogel.cn/c/2025-03-13/1495080.shtml]
- 83. my.clevelandclinic.org/health/treatments/ aseptic - technique [https://my.clevelandclinic.org/health/treatments/aseptic-technique]
- 84. 4.3 Aseptic – Nursing Skills – 2e Technique [https://wtcs.pressbooks.pub/nursingskills/chapter/4-3-asceptic-technique/]
- 85. Training Production Operators In Aseptic Common Technique ... Pitfalls [https://www.pharmaceuticalonline.com/doc/training-production-operators-in-aseptic-technique-common-pitfalls-how-to-avoid-them-0001]
- 86. Everything You Need to Know About Biosafety Certification in... Cabinet [https://toptec.pk/biosafety-cabinet-certification-2025/]
- 87. and Certification: Step-by-Step Process... Biosafety Cabinet Validation [https://blog.labcreator.in/biosafety-cabinet-validation-and-certification-step-by-step-process-explained/]
- 88. and Repair | Troubleshooting Water Baths [https://support.thermoline.com.au/knowledge-base/troubleshooting-and-repair-water-baths]
- 89. Validation of the media fill method for Cytokine-Induced killer cells manufacturing process | Translational Medicine Communications | Full Text [https://transmedcomms.biomedcentral.com/articles/10.1186/s41231-023-00149-5]
- 90. in Biological Aseptic | Algor Cards Technique Research [https://cards.algoreducation.com/en/content/quQKKUX9/aseptic-techniques-biological-research]
- 91. Development (CLD) - Cell Solutions Line Workflow Optimization [https://lifesciences.danaher.com/us/en/solutions/mabs/cell-line-development.html]
- 92. Video: Key Techniques in Microbiology [https://www.jove.com/science-education/v/19597/key-techniques-in-microbiology]
- 93. | Viticulture and Enology Aseptic Technique [https://wineserver.ucdavis.edu/industry-info/enology/methods-and-techniques/winery-lab-techniques/aseptic-technique]
- 94. LIMS Helps Cell Therapy Line | Azenta Life Sciences Cell Workflows [https://www.azenta.com/learning-center/blog/5-ways-optimized-cell-line-management-helps-streamline-cell-therapy-workflows]
- 95. Revolutionizing Lab Efficiency with Automated Cell ... | Lab Manager [https://www.labmanager.com/cell-culture-automation-20697]
- 96. Evaluating cell lines as tumour models by comparison of genomic profiles - PubMed [https://pubmed.ncbi.nlm.nih.gov/23839242/]
- 97. Comprehensive comparison of molecular portraits between cell lines and tumors in breast cancer | BMC Genomics | Full Text [https://bmcgenomics.biomedcentral.com/articles/10.1186/s12864-016-2911-z]
- 98. A pan-cancer survey of cell line tumor similarity by feature-weighted molecular profiles - PMC [https://pmc.ncbi.nlm.nih.gov/articles/PMC9017219/]
- 99. Biological Exposure or Spills : Response, Decontamination ... [https://wp.stolaf.edu/chemical-hygiene/biological-spills-decontamination-clean-up/]
- 100. , Leaks, and Releases - Environmental Health and Safety Spills [https://www.ehs.iastate.edu/spills-leaks-releases]
- 101. Required practical 6 Aseptic - AQA A-Level Biology techniques [https://myedspace.co.uk/myresources/a-level/biology/aqa/revision-notes/required-practical-6-aseptic-techniques]
- 102. Benchmarking MicrobIEM – a user-friendly tool for decontamination of microbiome sequencing data - PMC [https://pmc.ncbi.nlm.nih.gov/articles/PMC10666409/]
- 103. Identifying optimal bioinformatics protocols for aerosol microbial community data - PMC [https://pmc.ncbi.nlm.nih.gov/articles/PMC8487624/]
- 104. in Pharmaceutical Best Practices Microbiology Laboratory [https://www.pharmaguideline.com/2025/04/best-practices-in-microbiology-lab.html]
- 105. 2.2: Introduction to Bacterial Growth and Aseptic Techniques - Biology LibreTexts [https://bio.libretexts.org/Courses/North_Carolina_State_University/MB352_General_Microbiology_Laboratory_2021_(Lee)/02:_Cultivation_of_Microbes/2.02:_Introduction_to_Bacterial_Growth_and_Aseptic_Techniques]
- 106. WHO Technical Report including Annex 2 " Good for..." Practices [https://www.gmp-compliance.org/gmp-news/who-technical-report-including-annex-2-good-practices-for-pharmaceutical-microbiological-laboratories]
- 107. 5 Characteristics Of Forward-Thinking Microbiology In Labs 2025 [https://www.cellandgene.com/doc/characteristics-of-forward-thinking-microbiology-labs-in-2025-0001]
- 108. & Lab Safety Biosafety Levels Guidelines [https://aspr.hhs.gov/S3/Pages/Biosafety-Level-Requirements.aspx]
- 109. CDC LC Quick Learn: Recognize the four Biosafety Levels [https://www.cdc.gov/training/quicklearns/biosafety/]
- 110. Biosafety Levels 1, 2, 3 & 4: What’s the Difference? [https://consteril.com/biosafety-levels-difference/]
- 111. to Guide ( Biosafety ) Levels , 2, 3, & BSL | Lab Manager 1 4 [https://www.labmanager.com/biological-safety-level-1-2-3-4-19123]
- 112. Biosafety level - Wikipedia [https://en.wikipedia.org/wiki/Biosafety_level]
- 113. ,2,3, Biosafety : Meanings & Differences | TRADESAFE Levels 1 4 [https://trdsf.com/blogs/news/biosafety-levels-comprehensive-guide]
- 114. (Membrane Filtration Method) in... | Pharmaguideline Sterility Validation [https://www.pharmaguideline.com/2011/04/sterility-validation-membrane.html]
- 115. Fill Media : The Critical Test for Validation Manufacturing... Sterile [https://www.webofpharma.com/2025/11/media-fill-validation-critical-test-for.html]
- 116. Rapid Sterility Testing Regulations | The Rapid Blog [https://www.rapidmicrobio.com/learning-center/rapid-blog/rapid-sterility-testing-regulations]
- 117. Validation of an automated quality control method to test sterility of two advanced therapy medicinal products: Mesenchymal stromal cells and their extracellular vesicles - PMC [https://pmc.ncbi.nlm.nih.gov/articles/PMC12011113/]
- 118. - Methods and its Principles - GeeksforGeeks Sterilization [https://www.geeksforgeeks.org/biology/sterilization/]
- 119. in Biology: Methods, Types & Full Guide Sterilization [https://www.vedantu.com/biology/sterilization]
- 120. Application of Membrane Filtration to Cold Sterilization of Drinks and Establishment of Aseptic Workshop - PMC [https://pmc.ncbi.nlm.nih.gov/articles/PMC10024305/]
- 121. – ANACC Sterilization and Materials Methods [https://research.csiro.au/anaccmethods/media/media/sterilization/]
- 122. Radiation Sterilization [http://large.stanford.edu/courses/2018/ph241/goronzy2/]
- 123. Radiation Sterilization - an overview | ScienceDirect Topics [https://www.sciencedirect.com/topics/pharmacology-toxicology-and-pharmaceutical-science/radiation-sterilization]
- 124. Radiation Sterilization: Types, Mechanism, Applications • Microbe Online [https://microbeonline.com/radiation-sterilization-types-mechanism-applications/]
- 125. Media Sterilization – Plant Tissue Culture Protocol [https://www.sigmaaldrich.com/JP/ja/technical-documents/protocol/cell-culture-and-cell-culture-analysis/cell-culture-media-preparation/media-sterilization]
- 126. Introduction to Autoclave Sterilization Process [https://www.news-medical.net/whitepaper/20190207/Introduction-to-Autoclave-Sterilization-Process.aspx]
- 127. Techniques For Medical Industry... | M-Kube Enterprise Sterilization [https://mkube.com.au/different-sterilization-techniques-used-in-medical-industry/]
- 128. for Risk Teams: Best... | Docsie.io Blog Assessment Documentation [https://www.docsie.io/blog/glossary/risk-assessment/]
- 129. Navigating New Regulatory Standards for Aseptic Processing [https://mavenprofserv.com/blog/aseptic-processing-regulatory-innovations/]