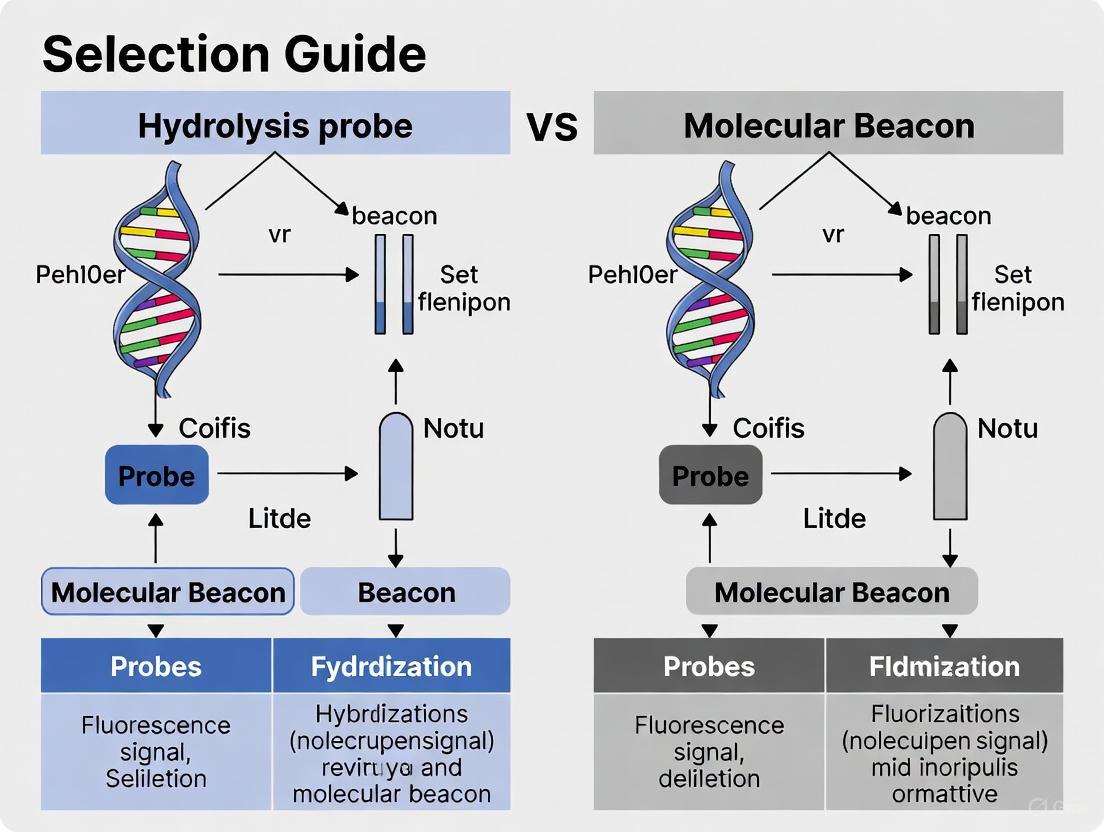
Hydrolysis Probe vs Molecular Beacon: A Complete Selection Guide for Molecular Assays
This guide provides researchers, scientists, and drug development professionals with a comprehensive framework for selecting between hydrolysis probes and molecular beacons in qPCR and RT-qPCR applications.
Hydrolysis Probe vs Molecular Beacon: A Complete Selection Guide for Molecular Assays
Abstract
This guide provides researchers, scientists, and drug development professionals with a comprehensive framework for selecting between hydrolysis probes and molecular beacons in qPCR and RT-qPCR applications. It covers the foundational principles of both probe chemistries, explores their specific methodological applications from pathogen detection to SNP genotyping, offers practical troubleshooting and optimization strategies, and delivers a direct comparative analysis for validation. The content synthesizes current information to enable informed probe selection based on experimental goals, cost, time, and required specificity.
Understanding Probe Chemistries: How Hydrolysis Probes and Molecular Beacons Work
Hydrolysis probes, most commonly known as TaqMan probes, form the basis of one of the most widely used detection methods in quantitative PCR (qPCR) [1] [2]. These probes enable real-time detection of specific DNA sequences during amplification by leveraging the 5'→3' exonuclease activity of Taq DNA polymerase [3] [4]. This core mechanism allows researchers to quantify initial template DNA concentrations with high specificity, making it indispensable for gene expression analysis, pathogen detection, and genotyping [5] [1].
The 5' nuclease assay, first described for allelic discrimination, provides a closed-tube, homogeneous assay system that eliminates post-PCR processing steps and enables automated data collection and analysis [4]. When combined with fluorogenic probes, this assay generates a signal that occurs only if the specific target sequence is amplified, providing a powerful tool for molecular diagnostics and life science research [1] [4].
Core Mechanism and Components
Structural Components of Hydrolysis Probes
Hydrolysis probes consist of three essential components that work in concert to achieve specific detection:
Oligonucleotide Sequence: A single-stranded DNA sequence typically 10-40 bases in length that is complementary to the target DNA sequence of interest [3] [6]. This sequence binds specifically to the target region during the annealing phase of PCR.
Fluorescent Reporter: A fluorophore (such as FAM) attached to the 5' end of the oligonucleotide that emits fluorescent light when separated from the quencher [3] [2]. Common reporter dyes include FAM, HEX, TET, and VIC, which can be selected based on the detection channels available on the qPCR instrument [4] [2].
Quencher Molecule: A molecule attached to the 3' end that absorbs the fluorescence energy from the reporter via Fluorescence Resonance Energy Transfer (FRET) when in close proximity [3] [2]. Modern "dark quenchers" such as Black Hole Quencher (BHQ) or Onyx Quencher do not emit fluorescence themselves, resulting in lower background signal compared to fluorescent quenchers like TAMRA [2].
The structural relationship between these components can be visualized as a dumbbell, where the oligonucleotide acts as the bar connecting the reporter and quencher "weights" [3]. This configuration ensures the quencher continuously suppresses the reporter's fluorescence until the probe is hydrolyzed.
The 5' Nuclease Mechanism
The hydrolysis probe mechanism unfolds during PCR thermal cycling through a precise sequence of molecular events:
Figure 1: The 5' Nuclease Assay Mechanism
During the denaturation step, double-stranded DNA templates separate into single strands at high temperatures (typically 95°C) [1]. As the reaction cools to the annealing temperature (typically 50-65°C), both the PCR primers and the hydrolysis probe bind to their complementary target sequences [1] [7]. Critical to this process is that the probe must be designed to bind between the forward and reverse primer sites [6].
When Taq polymerase extends the primer during the elongation phase, it eventually encounters the bound probe. The enzyme's 5'→3' exonuclease activity then cleaves the probe, releasing the 5' reporter dye from the oligonucleotide backbone [1] [4]. This cleavage permanently separates the reporter from the quencher, preventing energy transfer between the molecules [3]. The now-unquenched reporter dye emits fluorescence proportional to the amount of cleaved probe, which correlates directly with the number of amplified target molecules [1].
Unlike other probe systems where fluorescence is reversible, the hydrolysis mechanism generates an accumulating fluorescent signal with each PCR cycle because the cleavage event is irreversible [8] [2]. This cumulative signal provides the quantitative data necessary for determining initial template concentrations.
Experimental Protocols and Design Parameters
Critical Design Parameters for Hydrolysis Probes
Successful implementation of hydrolysis probes requires careful attention to several design parameters that significantly impact assay performance:
Table 1: Hydrolysis Probe Design Guidelines and Specifications
| Parameter | Recommended Specification | Impact on Performance |
|---|---|---|
| Probe Length | 10-40 nucleotides [6] | Shorter probes require MGB modifications for sufficient Tm [6] |
| Melting Temperature (Tm) | 7-10°C higher than primers [1] | Ensures probe binds before primer extension |
| GC Content | 35-65% [5] | Prejects excessive thermal stability or instability |
| 5' Base Avoidance | Not a G base [5] | Guanosine can quench fluorescence even after cleavage |
| Amplicon Size | <150 base pairs [4] | Improves amplification efficiency and probe competition |
| Quencher Selection | BHQ series based on reporter dye [6] [2] | Matched quencher-reporter pairs maximize quenching efficiency |
The melting temperature difference between the probe and primers is particularly critical. The probe Tm should be approximately 10°C higher than the primer Tm to ensure the probe binds to its target sequence before the primers extend [1]. This preferential binding is essential for efficient probe cleavage and signal generation.
For SNP detection and allelic discrimination, the polymorphic site should be positioned in the center of the probe sequence where a single mismatch has the most destabilizing effect on hybridization [4]. Mismatches near the ends of the probe have less impact on hybridization efficiency, reducing discriminatory power.
Probe Optimization and Validation Protocol
A systematic approach to hydrolysis probe validation ensures robust and reproducible qPCR results:
Initial Concentration Testing: Begin with 100-300 nM probe concentration in 25 μL reactions while maintaining primer concentrations at 200-900 nM [1]. Use standardized reaction buffers and a two-step thermal cycling protocol (95°C denaturation, 60°C annealing/extension) [1].
Efficiency Calculation: Perform serial dilutions (typically 1:10) of the target template to generate a standard curve. Calculate amplification efficiency using the formula: ( E = 10^{(-1/slope)} - 1 ). Optimal efficiency ranges from 90-110% (slope of -3.1 to -3.6) [1].
Specificity Verification: Confirm specific amplification through melt curve analysis or gel electrophoresis to detect potential primer-dimer formation or non-specific amplification products that could compromise quantification accuracy [2].
Background Signal Assessment: Compare the background fluorescence of the probe to no-template controls. High-quality hydrolysis probes should maintain low background signal until amplification occurs [8] [2].
For challenging targets with high GC content or secondary structures, modified probe chemistries such as Minor Groove Binder (MGB) probes or Locked Nucleic Acid (LNA) probes can significantly improve performance [6] [2]. MGB probes form extremely stable duplexes with DNA, allowing the use of shorter probes (13-20 bases) while maintaining appropriate Tm values [6].
Comparative Analysis with Alternative Technologies
Hydrolysis Probes vs. Molecular Beacons
While both hydrolysis probes and molecular beacons are widely used in qPCR applications, they operate through distinct mechanisms and offer different advantages:
Table 2: Performance Comparison: Hydrolysis Probes vs. Molecular Beacons
| Characteristic | Hydrolysis Probes | Molecular Beacons |
|---|---|---|
| Mechanism | Probe cleavage by 5' nuclease activity [3] | Conformational change upon hybridization [9] |
| Signal Generation | Irreversible, cumulative [2] | Reversible, cycle-specific [9] |
| Polymerase Requirement | Requires 5' nuclease activity [4] | Works with polymerases lacking nuclease activity [3] |
| Design Complexity | Moderate [3] | High (requires stable stem-loop) [3] [7] |
| Multiplexing Capacity | High [3] [1] | High [3] [9] |
| Background Signal | Moderate [8] | Low when well-designed [8] |
| Cost Considerations | Moderate [5] | Higher due to complex design [5] |
Molecular beacons maintain their structure through stem-loop formations where complementary arm sequences (typically 5-7 base pairs) bring the fluorophore and quencher into close proximity [9] [7]. When the probe loop binds to its target, the stem denatures, separating the reporter from the quencher and generating fluorescence [3]. Unlike hydrolysis probes, molecular beacons are not destroyed during amplification and can participate in multiple hybridization events, as they are displaced rather than degraded by the polymerase [9].
Advanced Probe Technologies
Recent advancements in probe technology have addressed specific limitations of conventional hydrolysis probes:
Double-Stranded Probes (DSPs) represent an innovative approach that reduces background signal while maintaining high sensitivity [8]. These probes consist of two complementary oligonucleotides of similar length, each labeled with both a fluorophore and a quencher [8]. When optimized with appropriate sticky ends (4-6 nt) and ΔG values (approximately -30 kcal/mol), DSPs demonstrate significantly improved signal-to-noise ratios compared to traditional TaqMan probes [8]. This technology has shown particular utility in detecting low-copy targets, with demonstrated applications in detecting HBV DNA at concentrations as low as 5 IU/mL and SARS-CoV-2 RNA at 50 copies/mL [8].
Tailed Molecular Beacons represent another innovation designed to overcome the limitation of detecting structured DNA or RNA targets [10]. By adding an extra sequence (tail) complementary to the region adjacent to the target sequence, these modified molecular beacons show ~40-fold improvement in signal-to-background ratio and ~800-fold faster hybridization rates compared to conventional molecular beacons when detecting folded analytes [10].
Research Reagent Solutions
Successful implementation of hydrolysis probe assays requires access to high-quality reagents specifically designed for 5' nuclease assays:
Table 3: Essential Research Reagents for Hydrolysis Probe Assays
| Reagent Category | Specific Examples | Function and Application |
|---|---|---|
| Polymerase Enzymes | Taq DNA polymerase [1] | Provides 5'→3' exonuclease activity essential for probe cleavage |
| Fluorescent Reporters | FAM, HEX, TET, VIC, ROX, Cy5 [6] [2] | Generates detectable signal upon separation from quencher |
| Quencher Molecules | BHQ series, TAMRA, QSY, Onyx Quencher [6] [2] | Suppresses reporter fluorescence until probe cleavage |
| Specialized Probes | MGB probes, LNA probes [6] [2] | Enhances binding affinity and specificity for challenging targets |
| Reaction Buffers | Universal PCR buffer with Mg²⁺ optimization [1] | Provides optimal ionic environment for efficient amplification |
| Quality Control Tools | MALDI-TOF MS, HPLC analysis [6] | Verifies probe integrity and purity before experimental use |
Commercial providers offer predefined dye-quencher combinations optimized for qPCR applications, with HPLC purification and MALDI-TOF MS quality control included to ensure probe integrity [6]. For specialized applications, MGB probes incorporate a minor-groove binder molecule that stabilizes probe-target hybridization, allowing for shorter probe designs (13-40 bases) while maintaining high melting temperatures [6]. Similarly, LNA (Locked Nucleic Acid) probes contain modified RNA bases with a 2'-O,4'-C-methylene bridge that "locks" the sugar moiety, significantly increasing thermal stability and improving SNP discrimination [6] [2].
The core mechanism of hydrolysis probes, centered on the 5' nuclease activity of Taq DNA polymerase, provides a robust foundation for specific nucleic acid detection in qPCR applications. The irreversible cleavage of dual-labeled probes generates a cumulative fluorescent signal that enables precise quantification of target sequences across diverse research and diagnostic applications.
Understanding the detailed mechanism, optimal design parameters, and comparative advantages of hydrolysis probes allows researchers to select the most appropriate detection chemistry for their specific experimental needs. While hydrolysis probes offer well-established performance for most qPCR applications, alternative technologies such as molecular beacons, double-stranded probes, and tailed molecular beacons address specific challenges including reduced background signal, detection of structured targets, and improved hybridization kinetics.
The continuing evolution of probe technologies, combined with rigorous experimental design and optimization protocols, ensures that hydrolysis probe-based detection remains a cornerstone technique in molecular biology, clinical diagnostics, and life science research.
Molecular beacons (MBs) are oligonucleotide probes that undergo a specific conformational change upon binding to their complementary nucleic acid targets, producing a fluorescent signal that enables real-time detection [11]. First developed by Tyagi and Kramer in 1996, these probes have revolutionized genetic detection methods through their unique stem-loop architecture and inherent signal transduction mechanism [11] [9]. The fundamental structure consists of four key components: a loop region that serves as the probe sequence complementary to the target DNA or RNA, a stem formed by two short, complementary arm sequences located on either side of the loop, a fluorescent reporter dye attached to one end of the oligonucleotide, and a quencher molecule attached to the opposite end [12] [13].
The exquisite specificity of molecular beacons stems from the competitive reaction between hairpin formation and target hybridization [12]. In the absence of the target sequence, the complementary stem sequences hybridize to form a hairpin structure, bringing the fluorophore and quencher into close proximity. This spatial arrangement enables fluorescence resonance energy transfer (FRET), where the energy from the excited fluorophore is transferred to the quencher rather than emitted as light, resulting in minimal background fluorescence [9]. When the molecular beacon encounters a complementary target sequence, the probe-target hybridization becomes thermodynamically favored over the stem-loop structure, causing the stem to unwind and the loop to form a rigid, double-stranded helix with its target [12]. This conformational change physically separates the fluorophore from the quencher, disrupting FRET and allowing fluorescence emission upon excitation [13]. This transition from a "closed" to "open" conformation can result in as much as a 200-fold increase in fluorescence intensity [12].
The following diagram illustrates the fundamental operational principle of a conventional molecular beacon:
Molecular beacons offer significant advantages over linear probes, including better thermodynamic stability, higher photostability, more efficient intrinsic signal switching, ultra-sensitivity, and exceptional selectivity [11]. These properties have made them invaluable tools across diverse applications including real-time PCR, pathogen detection, single nucleotide polymorphism (SNP) genotyping, mRNA expression monitoring in living cells, and detection of various non-nucleic acid targets such as proteins, ions, and small molecules [12] [11].
Molecular Beacon Design Variations
Conventional versus Shared-Stem Designs
While conventional molecular beacons have proven highly effective, design variants have been developed to optimize performance for specific applications. The shared-stem molecular beacon represents an important architectural modification where one arm of the stem participates in both stem formation when the beacon is closed and target hybridization when the beacon is open [12] [14]. This differs fundamentally from conventional molecular beacons, where the target-binding domain is centrally positioned between two complementary arms that form the stem, with stem sequences being completely independent of the target sequence [12].
This structural difference has significant functional implications. Shared-stem molecular beacons form more stable duplexes with target molecules than conventional molecular beacons due to the additional binding energy contributed by the stem sequence that also participates in target binding [12] [14]. However, this increased binding stability comes at a slight cost to specificity; conventional molecular beacons generally demonstrate superior ability to discriminate between wild-type and mutant targets [14]. Interestingly, hybridization kinetics are similar for both beacon classes and are influenced primarily by stem length and sequence rather than the fundamental design architecture [12].
The table below summarizes the key comparative characteristics of these two molecular beacon architectures:
Table 1: Comparison of Conventional and Shared-Stem Molecular Beacon Designs
| Characteristic | Conventional Molecular Beacons | Shared-Stem Molecular Beacons |
|---|---|---|
| Stem Structure | Two independent arm sequences complementary only to each other | One arm participates in both stem formation and target hybridization |
| Target Binding Stability | Standard duplex stability | Enhanced duplex stability |
| Specificity | Higher discrimination between wild-type and mutant targets | Slightly reduced discrimination capability |
| Design Flexibility | High flexibility in stem sequence design | Constrained by target sequence; certain stem/probe combinations not feasible |
| Kinetic Properties | Governed by stem length and sequence | Governed by stem length and sequence |
| Temperature Discrimination | Enhanced differentiation over wider temperature ranges with longer stems | Enhanced differentiation over wider temperature ranges with longer stems |
Design Optimization Parameters
Several critical parameters must be optimized when designing molecular beacons for specific applications. The probe length (typically 15-30 nucleotides) must be chosen to avoid secondary structure formation within the loop while achieving an optimal combination of specificity, kinetic rate, and melting behavior [12]. The stem length (generally 5-7 base pairs) must be sufficient to maintain the closed conformation in the absence of target while still allowing efficient unfolding upon target binding [12] [9]. For both conventional and shared-stem molecular beacons, increasing stem length enhances the ability to differentiate between wild-type and mutant targets over a wider range of temperatures [12].
The stem sequence must be designed to have a melting temperature 7-10°C higher than the annealing temperature while avoiding complementarity with the loop region or primer binding sites [9]. GC content of the probe region should be maintained between 30-70%, and the probe should be positioned as close as possible to one of the amplification primers without overlapping [9]. For shared-stem designs, an additional constraint exists as the stem sequence is not fully adjustable since one arm must complement the target, which can preclude certain stem/probe length combinations [12].
The following diagram illustrates the structural differences between these two molecular beacon designs:
Quantitative Design Parameters and Thermodynamic Properties
Systematic studies comparing molecular beacon architectures have yielded important quantitative data to guide optimal probe design. The thermodynamic and kinetic properties of molecular beacons are dependent on their structure and sequence in complex ways that can be precisely measured and optimized [12].
The length of both the stem and probe regions significantly impacts molecular beacon performance. Increasing stem length generally enhances differentiation capability between perfectly matched and mismatched targets across a wider temperature range for both conventional and shared-stem designs [12]. However, stems that are too long can prevent the beacon from opening even in the presence of target, while stems that are too short result in high background fluorescence due to incomplete quenching in the closed state [9].
For conventional molecular beacons, typical stem lengths range from 5-7 base pairs, while shared-stem designs have been successfully implemented with stem lengths of 4, 5, and 7 bases [12]. Notably, a 6-base stem could not be synthesized for the shared-stem design described in the research because the sequence is constrained—part of the arm sequence that makes up the 6-base stem is predetermined since the 5' end must complement the target sequence [12].
Table 2: Effects of Stem Length on Molecular Beacon Performance
| Stem Length (Base Pairs) | Effect on Specificity | Effect on Signal-to-Background Ratio | Effect on Hybridization Kinetics |
|---|---|---|---|
| Too Short (<4 bp) | Reduced discrimination between matched and mismatched targets | Low due to incomplete quenching and high background fluorescence | Faster hybridization but increased non-specific signal |
| Optimal (5-7 bp) | High specificity and discrimination capability | High with significant signal increase upon hybridization | Balanced kinetics allowing specific target binding |
| Too Long (>8 bp) | May prevent opening even with matched targets, reducing sensitivity | Potentially low if beacon cannot open effectively | Slower hybridization kinetics |
The melting temperature (Tm) of molecular beacons is another critical parameter that must be carefully optimized. The Tm of the probe-target duplex should typically be 7-10°C higher than the reaction temperature to ensure stable hybridization [9]. For qPCR applications, molecular beacons are designed with Tm values between 60-85°C to maintain stability at reaction temperatures while allowing efficient hybridization during the annealing phase [15]. The GC content of the probe region should be maintained between 35-65% to ensure appropriate thermal stability, and the 5' end of the probe should not contain a G base to prevent quenching of the fluorophore [16].
Thermodynamic analyses have revealed that shared-stem molecular beacons form more stable duplexes with target molecules than conventional molecular beacons, which can be advantageous for detecting targets with lower abundance [12] [14]. However, this increased stability comes with a slight reduction in specificity, as conventional molecular beacons demonstrate better discrimination between wild-type and mutant targets [12].
Experimental Protocols for Molecular Beacon Applications
Protocol 1: Molecular Beacon-Based Quantitative PCR
This protocol describes the methodology for utilizing molecular beacons in quantitative PCR applications for specific DNA target detection and quantification. Unlike hydrolysis probes, molecular beacons are not degraded by the 5'→3' exonuclease activity of DNA polymerase but are instead displaced during amplification, allowing them to participate in multiple rounds of hybridization [9].
Materials and Reagents:
- Molecular beacon probe (HPLC-purified, labeled with fluorophore and quencher)
- Forward and reverse primers specific to target sequence
- DNA template containing target sequence
- Hot-start DNA polymerase with reaction buffer
- dNTP mix (10 mM each)
- MgCl₂ solution (if not included in buffer)
- Nuclease-free water
Procedure:
- Reaction Setup: Prepare a master mix containing 1X PCR buffer, 3-5 mM MgCl₂ (optimize concentration), 200 µM of each dNTP, 0.2-0.5 µM of each primer, 0.1-0.2 µM molecular beacon probe, 0.5-1 U DNA polymerase per reaction, and nuclease-free water. Aliquot appropriate volume into PCR tubes or plates and add template DNA.
Thermal Cycling Conditions:
- Initial denaturation: 95°C for 2-5 minutes
- 40-50 cycles of:
- Denaturation: 95°C for 15-30 seconds
- Annealing/Extension: 60°C for 30-60 seconds (with fluorescence acquisition)
- Final extension: 72°C for 5 minutes (optional)
Data Collection: Configure the real-time PCR instrument to monitor fluorescence during the annealing/extension step of each cycle. The increase in fluorescence signal is directly proportional to the amount of amplified product.
Data Analysis: Determine Cq values for each sample and quantify target concentration using a standard curve prepared with known template concentrations or comparative Cq method for relative quantification.
Key Considerations:
- The molecular beacon should be designed to hybridize close to but not overlap with the primer binding sites [16].
- The melting temperature of the molecular beacon-target duplex should be 6-8°C higher than the primer annealing temperature [16].
- Include appropriate negative controls (no-template controls) to assess background signal and specificity.
The following workflow illustrates the molecular beacon mechanism during qPCR amplification:
Protocol 2: Universal Molecular Beacon Loop-Mediated Isothermal Amplification (LAMP) Assay
This protocol adapts molecular beacon technology for loop-mediated isothermal amplification (LAMP), enabling rapid, sequence-specific detection of nucleic acid targets in a closed-tube format. The universal molecular beacon (uMB) approach eliminates the need for target-specific probe redesign, significantly reducing cost and complexity [15].
Materials and Reagents:
- Universal molecular beacon (uMB) with predetermined stem-loop structure
- Stem-loop primer complex (SPCX) with target-specific regions
- LAMP primers (F3, B3, FIP, BIP) specific to target sequence
- Bst DNA polymerase (or other strand-displacing polymerase) with reaction buffer
- dNTP mix (10 mM each)
- Betaine (5 M stock)
- MgSO₄ solution (if not included in buffer)
- Polyethylenimine (PEI) for enhanced visual detection [15]
- Nuclease-free water
Procedure:
- Reaction Setup: Prepare LAMP master mix containing 1X isothermal amplification buffer, 6 mM MgSO₄, 1.4 mM dNTPs, 0.8 M betaine, 0.2 µM each F3 and B3 primers, 1.6 µM each FIP and BIP primers, 0.3 µM SPCX, 0.2 µM uMB, 8 U Bst polymerase, and nuclease-free water. Aliquot into reaction tubes and add target DNA.
Isothermal Amplification: Incubate reactions at 60-65°C for 30-60 minutes. Do not include a separate denaturation step prior to amplification.
Signal Detection: Monitor fluorescence in real-time or perform end-point detection. For visual inspection, add PEI after amplification to enhance signal intensity [15].
Data Interpretation: Positive reactions demonstrate significant fluorescence increase compared to negative controls. The uMB maintains its stem-loop structure in the absence of specific target amplification, minimizing false-positive results.
Key Considerations:
- The uMB with delicate stem-loop structure remains stable at reaction temperature, avoiding unfolding for non-target specimens [15].
- SPCX opens only in the presence of target DNA and rearranges to serve as the complementary analyte for uMB [15].
- When changing detection targets, only the LAMP primers need redesign with partial sequence substitution of SPCX at both ends [15].
- This method has demonstrated detection limits as low as 1 pg DNA and 2 × 10¹ CFU/mL for bacterial detection [15].
Research Reagent Solutions for Molecular Beacon Applications
The successful implementation of molecular beacon technologies requires specific reagents and materials optimized for these specialized applications. The following table details essential research reagent solutions for molecular beacon-based experiments:
Table 3: Essential Research Reagents for Molecular Beacon Applications
| Reagent/Material | Function/Application | Specifications/Considerations |
|---|---|---|
| Molecular Beacon Probes | Sequence-specific detection in qPCR and isothermal amplification | Dual-labeled with fluorophore (5') and quencher (3'); HPLC-purified; typically 25-45 nucleotides [9] |
| Strand-Displacing DNA Polymerase | Isothermal amplification methods (LAMP, RPA) | Bst polymerase or similar; lacking 5'→3' exonuclease activity to preserve molecular beacons [15] |
| Hot-Start DNA Polymerase | qPCR applications | Reduces non-specific amplification; available with or without 5'→3' exonuclease activity |
| Fluorescent Reporters | Signal generation | FAM, HEX, Cy3, TAMRA, ROX, Alexa Fluor dyes; selected based on instrument detection channels [11] |
| Quencher Molecules | Fluorescence quenching in closed state | Dabcyl, Black Hole Quenchers (BHQ); high quenching efficiency essential for low background [12] [13] |
| Modified Nucleotides | Enhanced stability and performance | 2'-O-methyl RNA, LNA, PNA backbones improve nuclease resistance and hybridization efficiency [11] |
| Universal MB Components | Cost-effective detection system | Pre-designed uMB and SPCX for adaptable target detection without custom probe synthesis [15] |
| Optofluidic Chips | Single-cell analysis | NanoPen environments for live single-cell functional analysis and sequencing [17] |
Comparative Selection Guide: Molecular Beacons vs. Hydrolysis Probes
The choice between molecular beacons and hydrolysis probes (such as TaqMan probes) depends on multiple factors including application requirements, experimental constraints, and performance priorities. The following comparison provides guidance for selecting the appropriate probe chemistry:
Molecular Beacons are preferable when:
- Maximum specificity is required, particularly for discrimination of single-nucleotide polymorphisms [18] [9]
- Multiplex detection of multiple targets in a single reaction is needed [13] [18]
- Performing post-amplification melt curve analysis is desirable [9]
- Background signal must be minimized, as molecular beacons typically exhibit extremely low background fluorescence [18]
- Target detection in living cells or real-time monitoring of enzymatic reactions is required [11]
Hydrolysis Probes are preferable when:
- Cost is a primary concern, as they are generally less expensive than molecular beacons [16] [18]
- Rapid assay development is needed, as they are widely used with established protocols [18]
- High-throughput applications are planned, where their reliability and robustness are advantageous [18]
- Working with abundant targets (Cq values < 30) where extreme specificity is less critical [18]
For applications involving rare targets (Cq values > 30) where primer-dimer formation or non-specific amplification may be problematic, molecular beacons or other probe-based chemistries are strongly recommended over DNA-binding dyes due to their superior specificity [18]. Molecular beacons are particularly well-suited for gene expression analysis, multiplex PCR, viral load quantification, and SNP detection, while hydrolysis probes excel in validation of microarray data, pathogen detection, and routine gene expression studies [18].
The development of fluorescent probes for nucleic acid detection represents a cornerstone of modern molecular diagnostics and genetic analysis. Within quantitative PCR (qPCR) and related amplification technologies, two principal probe architectures have emerged as critical tools: hydrolysis probes (e.g., TaqMan) and molecular beacons. Each system employs a specific mechanism where a fluorophore's emission is controlled by its proximity to a quencher molecule, generating a hybridization-dependent or cleavage-dependent signal [19] [20]. The performance of these probes—their specificity, sensitivity, and signal-to-noise ratio—is governed by the careful selection of fluorophores and quenchers, combined with precise oligonucleotide engineering [21] [22]. This application note provides a detailed comparison of these key components, framing the analysis within the critical decision-making process for selecting between hydrolysis probes and molecular beacons. We present structured quantitative data, experimental protocols, and design workflows to guide researchers, scientists, and drug development professionals in optimizing these essential reagents.
Fluorophores and Quenchers: Core Components of Detection Systems
Properties of Common Fluorophores
The choice of fluorophore fundamentally influences assay brightness, photostability, and compatibility with instrumentation. A fluorophore's brightness is quantified as the product of its molar extinction coefficient (ε, a measure of light absorption ability) and its fluorescence quantum yield (Φ, the efficiency of converting absorbed light into emitted fluorescence) [21]. Performance varies significantly across different dye families due to their underlying chemical structures.
- Xanthene-Based Dyes (e.g., FAM, HEX): These dyes, including fluorescein derivatives, typically exhibit high quantum yields (>0.8) and emission in the green spectrum (500–580 nm). A significant limitation is their pH sensitivity; fluorescence intensity can markedly decrease in acidic conditions (pH < 6.5) due to the ionization state of phenolic groups [21].
- Cyanine Dyes (e.g., Cy3, Cy5, Cy5.5): Characterized by a polymethine chain bridging two nitrogen-containing rings, cyanine dyes offer high molar extinction coefficients (often >100,000 M⁻¹cm⁻¹) and tunable emission spectra reaching into the near-infrared. Unmodified variants are prone to photobleaching and aggregation, but modern versions (e.g., Alexa Fluor, ATTO dyes) incorporate structural rigidization, sulfonation, or PEGylation to enhance photostability, water solubility, and reduce nonspecific binding [21] [22].
- Rhodamine and Derivatives (e.g., ROX, Texas Red): These dyes share structural features with xanthenes but incorporate quaternary amines, resulting in greater photostability and reduced pH sensitivity. Their emission spans orange to red (~550–610 nm), making them robust choices for multiplexed assays where stable fluorescence across thermal cycling is essential [19] [21].
Table 1: Characteristics of Common Fluorophores in Oligonucleotide Probes
| Fluorophore | Excitation Max (nm) | Emission Max (nm) | Extinction Coefficient (ε, M⁻¹cm⁻¹) | Quantum Yield (Φ) | Notes |
|---|---|---|---|---|---|
| FAM | ~495 | ~520 | ~75,000 | ~0.9 | pH sensitive; very bright [21]. |
| HEX | ~535 | ~556 | ~90,000+ | ~0.9+ | Similar photostability to FAM [19]. |
| Cy3 | ~550 | ~570 | ~136,000 | ~0.15 | High extinction but moderate quantum yield [21]. |
| ROX | ~585 | ~605 | ~90,000+ | ~0.9+ | Thermally stable; ideal for multiplexing [19]. |
| Texas Red | ~589 | ~615 | ~85,000 | ~0.9+ | Rhodamine derivative; high stability [19]. |
| Cy5 | ~649 | ~670 | ~200,000+ | ~0.28 | Near-IR emission; prone to aggregation without modification [19] [21]. |
Quencher Mechanisms and Selection
Quenchers suppress fluorophore emission through distinct physical mechanisms. Efficient quenching is critical for achieving low background fluorescence and a high signal-to-noise ratio.
- FRET Quenching (Förster Resonance Energy Transfer): This distance-dependent mechanism (effective within 10–100 Å) involves non-radiative energy transfer from the fluorophore (donor) to the quencher (acceptor). Efficiency requires significant spectral overlap between the donor's emission and the acceptor's absorption spectra [20]. The efficiency (E) is calculated as E = R₀⁶ / (R₀⁶ + r⁶), where R₀ is the Förster distance (separation for 50% transfer efficiency) and r is the actual donor-acceptor distance [20].
- Static Quenching (Contact-Mediated Quenching): This mechanism involves direct physical contact between the fluorophore and quencher, forming a non-fluorescent complex or intramolecular dimer. It is highly dependent on the affinity between the two molecules and is influenced by temperature and solvent conditions [20].
- Dark Quenchers (e.g., BHQ, BBQ): Unlike fluorescent quenchers like TAMRA, dark quenchers such as Black Hole Quenchers (BHQ) do not emit fluorescence, thereby minimizing background signal. They are engineered with broad absorption profiles to efficiently quench a wide range of fluorophores via FRET [20] [6]. For example, BHQ-1 (max absorbance 534 nm) quenches dyes like FAM and HEX, while BHQ-2 (max absorbance 544 nm) is optimal for quenching TAMRA, Cy3, and ROX [6].
Table 2: Properties of Common Dark Quenchers
| Quencher | Quenching Range (nm) | Maximum Absorbance (nm) | Molar Extinction Coefficient (M⁻¹cm⁻¹) | Ideal Fluorophore Matches |
|---|---|---|---|---|
| BHQ-1 | 480-580 | 534 | 34,000 | FAM, HEX [6] |
| BHQ-2 | 520-650 | 544 | 91,000 | TAMRA, Cy3, ROX, JOE [19] [6] |
| BHQ-3 | 620-730 | 672 | 103,000+ | Cy5, Cy5.5, Quasar 670 [6] |
| BBQ650 | 550-750 | 650 | N/A | Cy5, Cy5.5 [6] |
Oligonucleotide Design for Hydrolysis Probes and Molecular Beacons
Fundamental Design Principles
While both systems use dual-labeled oligonucleotides, their structural designs and operational mechanisms differ substantially.
- Hydrolysis Probes: These are linear oligonucleotides typically labeled with a 5' fluorophore and a 3' quencher. They hybridize to a specific sequence within the PCR amplicon during the annealing step. During the extension phase, the 5'→3' exonuclease activity of Taq polymerase cleaves the probe, permanently separating the fluorophore from the quencher and resulting in an irreversible increase in fluorescence that accumulates each cycle [6]. The probe should be located between the forward and reverse primers without overlapping them, and its melting temperature (Tm) should be 6–8°C higher than that of the primers [23].
- Molecular Beacons: These probes are engineered to form a stem-loop (hairpin) structure in their native state. The loop contains the target-specific sequence (typically 15–30 nucleotides), while the stem (typically 5–7 base pairs with high GC content) brings a 5' fluorophore and a 3' quencher into close proximity, quenching fluorescence. Upon hybridization to the exact target sequence during annealing, the probe undergoes a conformational change that linearizes the molecule, separating the fluorophore from the quencher and emitting fluorescence. This process is reversible, and the probe is displaced—not cleaved—by the polymerase [7] [9]. Molecular beacons offer exceptionally low background fluorescence because unbound probes remain tightly quenched in the hairpin conformation [18].
Figure 1: Mechanism of Hydrolysis Probes vs. Molecular Beacons
Quantitative Impact of Design on Performance
Experimental data demonstrates that design choices, particularly fluorophore-quencher geometry, significantly impact probe thermodynamics and assay performance.
- Fluorophore-Quencher Offset: A systematic study evaluating six fluorophores (FAM, HEX, Texas Red, ROX, ATTO Rho101, Cy5) with BHQ2 in different configurations found that all labeled oligonucleotides had higher annealing temperatures than unlabeled counterparts, with increases ranging from 0.5 to 8.5°C. The smallest perturbation (0.5°C increase) was achieved with a design where the quencher was offset by 10 bases from the fluorophore. In contrast, a design with no offset caused a 5°C shift. PCR efficiency was significantly higher for the 10-base offset design, highlighting the importance of fluorophore-quencher spacing for minimizing hybridization disruption [19].
- Linker Chemistry: Recent innovations explore internal quencher placement using novel linkers. A 2025 study introduced a highly modular, three-way branched glycerol 'X' linker for internal quencher attachment (e.g., BHQ1, BHQ2). This design, creating a flexible bulge in the oligonucleotide, demonstrated superior performance in a SARS-CoV-2 E-gene RT-qPCR assay, achieving near single-copy detection limits. The 'X' linker facilitated more efficient probe cleavage during primer extension compared to a more rigid arabinoside-based (ara) linker, which was more prone to being displaced without cleavage [22].
- Stem Design for Molecular Beacons: The stem sequence should be designed to have a melting temperature 7–10°C higher than the PCR annealing temperature, ensuring the hairpin remains closed in the absence of the target. Stems are typically 5–7 base pairs long with high GC content (75–100%). The folding of the selected sequence should be analyzed using DNA folding software (e.g., IDT Oligo Analyzer) to confirm the intended hairpin structure and avoid alternative secondary structures that cause high background or sluggish hybridization [7]. Guanosine residues should be avoided near the fluorophore-attached end, as they can intrinsically quench fluorescence [7].
Table 3: Impact of Quenching Scheme on DNA Annealing Temperature [19]
| Fluorophore | Quenching Scheme | ΔTm Relative to Unlabeled Oligo (°C) |
|---|---|---|
| FAM | BHQ2, 0-base offset | +5.0 |
| FAM | BHQ2, 10-base offset | +0.5 |
| HEX | BHQ2, 0-base offset | +5.5 |
| Texas Red | BHQ2, 0-base offset | +6.5 |
| ROX | BHQ2, 0-base offset | +8.5 |
| Cy5 | BHQ2, 0-base offset | +7.5 |
Experimental Protocols
Protocol: Determining Probe Hybridization Temperature
This protocol outlines a method for empirically determining the annealing temperature of fluorescently labeled oligonucleotide probes, a critical parameter for assay optimization [19].
Materials:
- Purified, dual-labeled oligonucleotide probe (e.g., HPLC-purified)
- Complementary target oligonucleotide
- VersaTaq PCR buffer or equivalent
- Real-time PCR instrument with temperature gradient capability (e.g., Qiagen Rotor-Gene Q)
Procedure:
- Sample Preparation: Prepare a 25 µL reaction mixture containing 100 nM fluorophore-labeled oligonucleotide and 100 nM complementary quencher-labeled oligonucleotide in 1X VersaTaq PCR buffer.
- Thermal Denaturation and Gradual Cooling: Place the sample in the real-time PCR instrument. Raise the temperature to 90°C and hold until thermal equilibrium is reached. Subsequently, lower the temperature at a controlled rate of 1°C per minute down to a final temperature of 50°C.
- Fluorescence Monitoring: Continuously monitor fluorescence throughout the temperature ramp.
- Data Analysis: Export the fluorescence vs. temperature data. Calculate the negative derivative of fluorescence with respect to temperature (-dF/dT). Fit the derivative data to a Gaussian curve. The temperature corresponding to the peak of this curve is the observed hybridization temperature (Tm) [19].
Protocol: Evaluating qPCR Probe Efficiency
This protocol describes a method to compare the efficiency of different probe designs, such as those with varying linkers or quencher positions, in a functional qPCR assay [22].
Materials:
- Optimized primer set for target sequence (e.g., SARS-CoV-2 E-gene primers)
- Test probes (e.g., with standard 3' quencher, internal 'X' linker quencher, etc.)
- One-step RT-qPCR Master Mix
- Template RNA (e.g., from SARS-CoV-2, influenza A/B for multiplexing)
- Real-time PCR Detection System (e.g., Bio-Rad CFX96 Touch)
Procedure:
- Reaction Setup: Prepare multiplex RT-qPCR reactions according to the master mix manufacturer's instructions. Include the primer set and each test probe at optimized concentrations.
- Thermal Cycling: Run the qPCR using the following standard conditions:
- Reverse Transcription: 50°C for 10-15 minutes.
- Initial Denaturation: 95°C for 2-5 minutes.
- 40-50 Cycles of:
- Denaturation: 95°C for 10-15 seconds.
- Annealing/Extension: 55-60°C for 30-60 seconds (acquire fluorescence).
- Data Analysis:
- Sensitivity: Determine the limit of detection (LOD) for each probe by testing serial dilutions of the template. The LOD is the lowest concentration at which 95% of replicates are positive.
- Efficiency: Calculate the amplification efficiency (E) for each probe from the standard curve using the formula: E = 10^(-1/slope) - 1. Ideal efficiency is 1.0 (or 100%).
- Signal-to-Noise: Compare the fluorescence intensity of positive samples to the baseline (no-template control) for each probe design [22].
Figure 2: Workflow for Probe Design and Evaluation
The Scientist's Toolkit: Research Reagent Solutions
Table 4: Essential Reagents for Probe-Based qPCR Assay Development
| Reagent / Tool | Function / Description | Example Providers / Notes |
|---|---|---|
| Custom Oligo Synthesis | Production of primers and dual-labeled probes with specified modifications. | IDT, Eurofins Genomics, Biosearch Technologies. Request HPLC purification and MALDI-TOF MS QC [6]. |
| Black Hole Quenchers (BHQ) | Dark quenchers for a wide range of fluorophores; minimize background fluorescence. | BHQ-1 (for FAM/HEX), BHQ-2 (for Cy3/ROX/TAMRA), BHQ-3 (for Cy5) [20] [6]. |
| Modified Nucleotides | Enhance probe binding affinity and stability, allowing for shorter probe designs. | LNA (LocNA) bases, MGB (Minor Groove Binder) [6]. |
| qPCR Master Mix | Optimized buffer/enzyme mixtures for efficient amplification and probe cleavage. | One-step RT-qPCR mixes (for RNA targets); ensure compatibility with probe chemistry [22]. |
| DNA Folding Software | Predicts secondary structures (crucial for molecular beacon stem-loop design). | IDT Oligo Analyzer, Beacon Designer [7]. |
| Real-time PCR Instrument | Equipment for thermal cycling and real-time fluorescence detection. | Ensure instrument filters match your fluorophores' emission spectra [18]. |
Selection Guide: Hydrolysis Probe vs. Molecular Beacon
The choice between a hydrolysis probe and a molecular beacon depends on the specific application requirements, including the need for multiplexing, specificity, and cost.
Choose Hydrolysis Probes When:
- Cost and Familiarity are Key: Hydrolysis probes are widespread, reliable, and often more cost-effective [23] [18].
- Simplicity and Time are Priorities: The design is straightforward, and protocols are well-established, minimizing troubleshooting time [18].
- General Gene Expression or Viral Load Quantification: They are the gold standard for many routine qPCR applications [22] [18].
Choose Molecular Beacons When:
- Ultimate Specificity is Required: Their stem-loop structure provides low background and exceptional specificity for distinguishing single-nucleotide polymorphisms (SNPs) [9] [18].
- Multiplexing in a Single Channel: Multiple molecular beacons with different colored fluorophores can be used simultaneously to detect different targets in one reaction [9] [18].
- The Application is SNP Detection or Pathogen Identification: Their ability to discriminate closely related sequences makes them ideal for these applications [18].
Table 5: Application-Based Selection Guide [18]
| Application | Hydrolysis Probes | Molecular Beacons | Key Reasoning |
|---|---|---|---|
| Gene Expression / Multiplex PCR | XX | XX | Both are suitable; choice depends on specificity needs and budget [18]. |
| Pathogen Detection | X | XX | Molecular beacons offer high specificity for identifying specific strains [18]. |
| SNP Detection | XX | The closed structure provides superior discrimination of single mismatches [9] [18]. | |
| Viral Load Quantification | XX | X | Hydrolysis probes are the established, robust standard [18]. |
| Validation of Microarray Data | X | X | Both provide the necessary specificity [18]. |
XX = Highly Suitable, X = Suitable
The selection of appropriate probe chemistry is a critical determinant of success in real-time PCR and nucleic acid detection assays. This application note examines the fundamental thermodynamic principles governing the performance of two predominant probe chemistries: hydrolysis probes (TaqMan) and molecular beacons. Within the framework of a comprehensive probe selection guide, this document provides researchers, scientists, and drug development professionals with detailed protocols and quantitative data to inform evidence-based assay design. The distinct, structured architecture of molecular beacons imposes a unique thermodynamic penalty during hybridization, which translates into enhanced specificity—particularly for applications requiring single-nucleotide discrimination. We elucidate these principles with experimental data and provide actionable methodologies for leveraging this specificity in demanding diagnostic and research applications.
Theoretical Background: Probe Thermodynamics
Fundamental Structures and Mechanisms
Molecular beacons are single-stranded oligonucleotide probes that form a stem-loop (hairpin) structure in their unbound state [24] [25]. The structure comprises four key elements:
- Loop: A 18-30 nucleotide region complementary to the target sequence.
- Stem: Typically 5-7 base pairs in length, formed by complementary arm sequences on either end of the loop.
- 5' Fluorophore: A reporter dye attached to one end.
- 3' Quencher: A non-fluorescent quencher covalently attached to the opposite end.
In the absence of the target, the stem structure maintains the fluorophore and quencher in close proximity, resulting in quenched fluorescence via Förster Resonance Energy Transfer (FRET) [25]. Hybridization with the target nucleic acid forces the stem to unwind, separating the fluorophore from the quencher and producing a detectable fluorescent signal [24].
In contrast, hydrolysis probes are linear oligonucleotides that rely on the 5'→3' exonuclease activity of DNA polymerase during amplification [26]. The polymerase cleaves the probe, permanently separating the fluorophore from the quencher and generating an irreversible fluorescent signal increment proportional to the amount of target amplified.
The Thermodynamic Basis of Specificity
The superior specificity of molecular beacons, especially for discriminating single-base mismatches (SNPs), stems from a competing unimolecular reaction—the re-formation of the stem-loop structure—that competes with the bimolecular probe-target hybridization [27]. This competition imposes a significant thermodynamic penalty on hybridization events that are not perfectly matched.
For a molecular beacon to hybridize, the free energy gained from probe-target binding must be sufficient to overcome the free energy required to disrupt the stable stem structure [27]. A mismatched probe-target duplex has lower stability (less negative ΔG). If the free energy from forming this imperfect duplex is less than the energy required to open the stem, hybridization will not occur, and no fluorescent signal will be produced. This creates a much sharper discrimination threshold compared to linear probes, which lack this competing reaction.
Table 1: Thermodynamic and Kinetic Comparison of Probe Chemistries
| Characteristic | Molecular Beacons | Hydrolysis (TaqMan) Probes | Experimental Basis |
|---|---|---|---|
| Probe Structure | Stem-loop (hairpin) | Linear | [24] [25] |
| Signal Mechanism | Conformational change, FRET | Polymerase-dependent cleavage | [24] [26] |
| Specificity Basis | Competing unimolecular reaction | Stability of linear duplex | [24] [27] |
| Single Mismatch Discrimination | Superior | Moderate | [24] |
| Hybridization Kinetics | Slower due to stem opening | Faster | [10] [27] |
| Multiplexing Potential | High (common quencher) | Moderate (requires different quenchers) | [24] |
Experimental Data and Optimization
Impact of Design Parameters on Performance
Systematic studies have quantified the relationship between molecular beacon structure and its thermodynamic and kinetic parameters. The length of both the probe (loop) and the stem are critical factors that can be tuned to optimize an assay for either maximum specificity or fastest kinetics [27].
- Stem Length: Increasing the stem length improves the signal-to-background (S:B) ratio and the ability to discriminate mismatches across a broader temperature range. However, this is achieved at the cost of a decreased hybridization rate, as a more stable stem requires more energy to open [27].
- Probe Length: Longer probes tend to have lower dissociation constants (higher affinity) and faster hybridization kinetics but offer decreased specificity because the energetic penalty of a single mismatch is smaller relative to the total binding energy [27].
Table 2: Optimization of Molecular Beacon Design Parameters
| Design Parameter | Effect on Thermodynamics/Kinetics | Impact on Assay Performance | Recommendation |
|---|---|---|---|
| Longer Stem | Increased stem stability (more negative ΔG) | Higher specificity & S/B ratio, slower kinetics | Use for SNP detection |
| Shorter Stem | Decreased stem stability (less negative ΔG) | Faster kinetics, lower S/B ratio, reduced specificity | Use for rapid detection of abundant targets |
| Longer Probe (Loop) | Increased affinity for target (more negative ΔG) | Faster kinetics, lower specificity | Use for highly conserved targets |
| Shorter Probe (Loop) | Decreased affinity for target (less negative ΔG) | Higher specificity, slower kinetics | Use for SNP detection or short targets |
| Shared-Stem Design | Higher melting temperature (Tm) vs. conventional design | Improved FRET efficiency in multiplexed formats | Use for FRET-based multiplexing [27] |
Advanced Design: Tailed Molecular Beacons for Structured Targets
A significant challenge for molecular beacons is the detection of targets with stable secondary structures, which can impede probe access. An innovative solution, the tailed molecular beacon, was recently developed to address this limitation [10].
This design incorporates an additional single-stranded "tail" sequence at one end of the beacon (e.g., the 5' end). This tail is complementary to a region of the analyte adjacent to the beacon's target site. The tail hybridizes first to a relatively accessible region, which serves two critical functions:
- It anchors the probe near the target site, dramatically increasing the local concentration and accelerating the hybridization of the loop portion to its target.
- It stabilizes the final complex, significantly lowering the free energy of the probe-analyte complex.
Experimental results demonstrate that this design can increase the signal-to-background ratio by ~40-fold and the hybridization rate by ~800-fold compared to conventional molecular beacons when challenging a folded 60-nt RNA target [10]. This design also functions as a mismatch-tolerant alternative for fast assays, as the anchoring effect of the tail can facilitate binding even in the presence of a single mismatch in the loop-binding region.
Application Notes & Protocols
Protocol: Designing a Molecular Beacon for SNP Detection
This protocol outlines the critical steps for designing and validating a molecular beacon for high-specificity applications, such as single nucleotide polymorphism (SNP) detection or allelic discrimination.
1. Design the Loop Sequence:
- Select a loop sequence of 18-30 nucleotides that is complementary to the target region containing the SNP [24].
- Place the SNP position centrally within the loop sequence to maximize the discriminatory effect [27].
- Check the sequence for potential self-complementarity or secondary structure that could interfere with hairpin formation or target binding.
2. Design the Stem Sequence:
- Design stems of 5-7 base pairs in length with a GC content of 40-60% to ensure stability without being excessively difficult to open [24] [27].
- The melting temperature (Tm) of the stem should be 7-10°C higher than the assay's annealing temperature to ensure efficient quenching in the unbound state but easy disruption upon target binding.
- The stem sequences should be independent of the target sequence to prevent unintended hybridization.
3. Select Fluorophore and Quencher:
- Attach the fluorophore to the 5' end of one stem arm and the quencher to the 3' end of the other [24].
- Common fluorophores include 6-FAM, Cy3, TET, or Texas Red.
- Use a dark quencher such as Dabcyl or Black Hole Quencher (BHQ). Molecular beacons can use a common quencher for different fluorophores, which is advantageous for multiplexing [24] [27].
4. In-silico Design and Validation:
- Utilize specialized software such as Beacon Designer to optimize the design and check for cross-homologies using BLAST [24].
- The software can predict secondary structures, calculate Tm values, and evaluate the assay for allele-specific discrimination.
5. Experimental Validation:
- Synthesis and Purification: Synthesize the molecular beacon using standard phosphoramidite chemistry. Dual HPLC purification (reverse-phase followed by ion-exchange) is critical to obtain a high S:B ratio [27].
- Determine Melting Profile: Perform a temperature melt experiment by slowly heating the molecular beacon (50 nM) in the presence of a perfectly matched target and a single-base mismatched target. Monitor fluorescence. A well-designed beacon will show a sharp transition and a significant Tm difference (>5-7°C) between the two targets [27].
- Optimize qPCR Conditions: Use standard qPCR optimization techniques, focusing on annealing temperature and probe concentration, to maximize the ΔRn (normalized reporter signal) and specificity.
Protocol: Employing a Tailed Molecular Beacon for a Structured Target
This protocol adapts the standard molecular beacon design to detect nucleic acid targets with strong secondary structures, based on recent research [10].
1. Identify an Accessible Flanking Region:
- Use secondary structure prediction software (e.g., Mfold) on the full-length target to identify a relatively unstructured region adjacent to the target sequence for the loop.
- Select a ~10 nt sequence within this accessible region to serve as the tail's target [10].
2. Construct the Tailed Molecular Beacon:
- Synthesize a probe where the tail sequence is appended to the 5' end of the standard molecular beacon structure (e.g., [5'-Tail-Fluorophore-Stem-Loop-Stem-Quencher-3']) [10].
- Ensure the tail sequence does not form a stable secondary structure with the beacon's loop or stem.
- An internal fluorophore (linked to a base, e.g., position 5 of a thymidine) can be used to avoid steric interference with the tail's function.
3. Validate Performance Against Folded Target:
- Hybridization Buffer: 50 mM Tris-HCl, 50 mM MgCl₂, pH 7.4, 0.1% Tween-20 [10].
- Kinetic Assay: Add 100 nM of the folded target analyte to 50 nM of the tailed molecular beacon. Monitor fluorescence in real-time over 30 minutes.
- Expected Outcome: The tailed molecular beacon should demonstrate a rapid increase in fluorescence (high initial rate) and a final S/B ratio significantly higher (>40-fold) than that achieved by a conventional molecular beacon targeting the same sequence [10].
The Scientist's Toolkit: Research Reagent Solutions
Table 3: Essential Reagents for Molecular Beacon-Based Research
| Reagent / Tool | Function / Description | Example Use Case |
|---|---|---|
| Beacon Designer Software | In-silico design of specific primers, molecular beacons, and other probe types; avoids template secondary structures and cross-homologies. | High-throughput design of allele-specific PCR assays [24]. |
| Dual-Labeled Oligonucleotides | Probes synthesized with a 5' fluorophore (e.g., 6-FAM, Cy3) and a 3' quencher (e.g., Dabcyl, BHQ). | Core component of the molecular beacon probe [27]. |
| Dual HPLC Purification | Sequential Reverse-Phase and Ion-Exchange HPLC purification of synthesized probes. | Essential for removing incomplete synthesis products and achieving a high signal-to-background ratio [27]. |
| Nuclease-Resistant Backbones | Molecular beacons with modified backbones (e.g., 2'-O-methyl RNA) to resist degradation by nucleases. | Essential for in vivo RNA detection in living cells [25]. |
| Tailed Molecular Beacon | A molecular beacon with an extra anchoring sequence to facilitate binding to structured targets. | Detection of highly structured DNA or RNA targets, such as bacterial 16S rRNA [10]. |
The choice between hydrolysis probes and molecular beacons is fundamentally guided by the specific demands of the assay. While hydrolysis probes are robust and effective for high-sensitivity quantitative PCR, the unique stem-loop structure of molecular beacons provides a thermodynamic advantage that is paramount for achieving superior specificity. The requirement to overcome the stem's stability creates a higher energy barrier for hybridization, which naturally filters out imperfectly matched duplexes. This makes molecular beacons the probe of choice for SNP genotyping, allelic discrimination, and multiplexed diagnostic assays where distinguishing between closely related sequences is critical. Furthermore, innovative designs like tailed molecular beacons extend this capability to challenging structured targets, offering dramatic improvements in both kinetics and signal strength. By understanding and applying the thermodynamic principles detailed in this application note, researchers can make informed decisions to optimize the accuracy and reliability of their nucleic acid detection assays.
Matching the Probe to Your Application: From Gene Expression to Multiplexing
Hydrolysis probes, commonly known as TaqMan probes, represent a foundational technology in quantitative PCR (qPCR) that utilizes the 5'→3' exonuclease activity of DNA polymerase. These probes provide exceptional specificity for detecting and quantifying nucleic acid sequences, making them particularly valuable for high-throughput genetic analysis and validation of gene expression data. This application note details the working mechanism, advantages, and specific protocols for implementing hydrolysis probes in gene expression validation and high-throughput qPCR studies. We also present a comparative analysis with molecular beacon probes to guide researchers in selecting the appropriate technology for their specific applications.
Quantitative PCR (qPCR) enables real-time monitoring of DNA amplification during the polymerase chain reaction, allowing for precise quantification of target sequences. Unlike conventional PCR that provides end-point analysis, qPCR tracks product accumulation during the exponential phase of amplification, providing reliable quantification over a wide dynamic range [28]. Two primary fluorescent chemistries facilitate this detection: DNA-binding dyes that intercalate nonspecifically into double-stranded DNA, and sequence-specific fluorescent probes, with hydrolysis probes being among the most widely implemented [18].
Hydrolysis probes are single-stranded oligonucleotides typically 25-1000 bases in length that contain three essential components: (1) a sequence complementary to the target DNA, (2) a fluorescent reporter dye attached to the 5' end, and (3) a quencher molecule attached to the 3' end [29]. When the probe is intact, the proximity of the quencher to the fluorophore suppresses fluorescence through fluorescence resonance energy transfer (FRET). During PCR amplification, the DNA polymerase's 5'→3' exonuclease activity cleaves the probe, separating the fluorophore from the quencher and generating a fluorescent signal proportional to the amount of amplified product [29] [28].
Technical Mechanism of Hydrolysis Probes
The hydrolysis probe mechanism integrates seamlessly with the PCR amplification process, with specific molecular events occurring during each cycle:
- Denaturation: High temperature (95°C) separates double-stranded DNA into single strands.
- Annealing: Temperature is lowered to allow both primers and the hydrolysis probe to hybridize to their complementary target sequences. The probe hybridizes downstream from one of the primer binding sites.
- Extension: The DNA polymerase extends the primer and, upon reaching the hybridized probe, cleaves the 5' end of the probe using its exonuclease activity. This cleavage separates the fluorophore from the quencher, allowing fluorescence emission. The polymerase continues DNA synthesis along the template strand [29].
This process repeats each cycle, with fluorescence accumulation directly correlating with amplicon production. The cycle threshold (Ct), the point at which fluorescence crosses a background threshold, is used for quantification, with lower Ct values indicating higher initial target concentrations [28].
Hydrolysis Probe Mechanism
Comparative Analysis of Probe Technologies
Performance Characteristics of qPCR Detection Methods
The table below summarizes key characteristics of hydrolysis probes compared to molecular beacons and dual hybridization probes:
| Characteristic | Hydrolysis Probes | Molecular Beacons | Dual Hybridization Probes |
|---|---|---|---|
| Mechanism | Polymerase cleavage separates fluorophore/quencher | Conformational change separates fluorophore/quencher | Two probes bring donor/acceptor fluorophores together |
| Signal Generation | Irreversible (cumulative) | Reversible | Reversible |
| Specificity | High | Very High (can discriminate single-base mismatches) [30] | High (requires two binding events) [18] |
| Multiplexing Capability | Good (with different fluorophores) [29] | Good (with different fluorophores) [29] | Limited |
| Design Complexity | Moderate | High (must optimize stem-loop structure) [29] [31] | High (must optimize two probes) [29] |
| Cost Considerations | Relatively low cost [18] | Higher due to complex design and optimization [31] | Higher (requires two labeled probes) |
| Best Applications | High-throughput quantification, gene expression validation [18] | SNP detection, pathogen detection [18] [28] | Applications requiring exceptional specificity |
Sensitivity Comparison of qPCR Probe Designs
A comparative study evaluating different probe designs revealed variations in detection sensitivity, which is crucial for applications requiring low-abundance target detection [32]:
| Probe Type | Relative Sensitivity | Notes |
|---|---|---|
| Conventional Molecular Beacon | Highest | Optimal stem-loop design provides excellent signal-to-background |
| Shared-Stem Molecular Beacon (AT-rich) | High | Combines properties of TaqMan and molecular beacons |
| Shared-Stem Molecular Beacon (GC-rich) | Moderate | |
| Hydrolysis (TaqMan) Probe | Lower relative sensitivity | Background fluorescence and incomplete cleavage may affect performance [32] |
Advantages of Hydrolysis Probes for Targeted Applications
High-Throughput qPCR
Hydrolysis probes offer distinct advantages for high-throughput screening applications:
- Simplified Workflow: The irreversible, cumulative signal generation requires no special handling or post-PCR processing, facilitating automation [28].
- Robust Performance: Established, standardized protocols reduce optimization time across large sample sets [18].
- Multiplexing Capability: Using different fluorophore-labeled probes allows simultaneous detection of multiple targets in a single reaction, increasing throughput and reducing reagent costs [29].
- Instrument Compatibility: Hydrolysis probes are supported by virtually all real-time PCR instruments, making them ideal for core facilities and standardized testing environments.
Gene Expression Validation
For validating gene expression data from microarray or RNA-seq experiments:
- Exceptional Specificity: The requirement for both specific primer binding and probe hybridization minimizes false positives from nonspecific amplification [18].
- Accurate Quantification: The cleavage mechanism directly correlates fluorescence with amplicon production, enabling precise measurement of transcript abundance [28].
- Broad Dynamic Range: Can accurately quantify targets across wide concentration ranges, essential for detecting both high- and low-abundance transcripts.
- Reproducibility: The robust chemistry provides consistent inter-experimental results, crucial for validation studies across multiple samples [18].
Experimental Protocol: Gene Expression Analysis Using Hydrolysis Probes
Probe and Primer Design Guidelines
- Probe Placement: Design the probe to hybridize close to the forward or reverse primer binding site but avoid overlapping with the primers. The probe should target an amplicon size of 75-150 bp for optimal efficiency [31].
- Melting Temperature (Tm): The probe should have a Tm 6-8°C higher than the primers to ensure hybridization before primer extension [31].
- GC Content: Maintain GC content between 35-65% for optimal hybridization efficiency. Avoid consecutive G residues, especially at the 5' end, as guanine can quench fluorescence [28] [31].
- Fluorophore/Quencher Selection: Common reporter dyes include FAM, VIC, and TAMRA, paired with appropriate quenchers (e.g., TAMRA, BHQ). Ensure selected fluorophores match your instrument's detection channels [29] [18].
- Sequence Verification: Check for secondary structures and potential dimerization with primers using tools like Mfold or OligoAnalyzer.
qPCR Reaction Setup and Thermal Cycling
Reagent Preparation
Prepare master mix according to the following proportions to minimize pipetting errors:
| Component | Final Concentration | Volume per 20µL Reaction |
|---|---|---|
| 2× PCR Master Mix | 1× | 10 µL |
| Forward Primer | 200-400 nM | 0.5-1 µL |
| Reverse Primer | 200-400 nM | 0.5-1 µL |
| Hydrolysis Probe | 100-200 nM | 0.5-1 µL |
| Template DNA/cDNA | 1-100 ng | Variable |
| Nuclease-Free Water | - | To 20 µL |
Thermal Cycling Conditions
Standard thermal cycling conditions for hydrolysis probe assays:
| Step | Temperature | Time | Cycles | Purpose |
|---|---|---|---|---|
| Initial Denaturation | 95°C | 2-10 min | 1 | Activate polymerase, denature template |
| Denaturation | 95°C | 15-30 sec | 40-50 | Template denaturation |
| Annealing/Extension | 55-60°C | 30-60 sec | 40-50 | Primer/probe hybridization and extension |
Data Analysis and Interpretation
- Threshold Setting: Set fluorescence threshold in the exponential phase of amplification above background but below plateau phase.
- Standard Curve Method: Use serial dilutions of known standards to generate a curve plotting Ct versus log starting quantity for absolute quantification.
- Comparative Ct Method (ΔΔCt): Normalize target gene Ct values to reference genes (e.g., GAPDH, β-actin) for relative quantification [33].
- Validation: Verify reaction efficiency (90-110%) and ensure primer-dimers or nonspecific amplification aren't interfering with quantification.
Research Reagent Solutions
Essential materials and reagents for implementing hydrolysis probe assays:
| Reagent/Category | Specific Examples | Function/Application |
|---|---|---|
| Hydrolysis Probes | TaqMan probes, Custom hydrolysis probes | Sequence-specific detection of target DNA |
| DNA Polymerase | Taq DNA polymerase, Hot-start enzymes | DNA amplification with 5'→3' exonuclease activity |
| Fluorescent Reporters | FAM, VIC, TAMRA, CY5 | Signal generation when separated from quencher |
| Quenchers | TAMRA, BHQ (Black Hole Quencher) | Suppresses fluorescence when probe is intact |
| qPCR Master Mix | TaqMan Universal Master Mix, Custom mixes | Optimized buffer containing dNTPs, polymerase, MgCl₂ |
| Reference Dyes | ROX, PASSIVE REFERENCE | Normalization for well-to-well variation |
| Nucleic Acid Preparation | RNA extraction kits, DNA purification kits, Reverse transcription kits | Sample preparation for gene expression analysis |
Implementation Workflow
Hydrolysis Probe Experimental Workflow
Hydrolysis probes provide a robust, specific, and reproducible method for quantitative PCR applications, particularly suited for high-throughput screening and gene expression validation. Their well-characterized mechanism, compatibility with standard instrumentation, and reliable performance make them an excellent choice for research and diagnostic applications requiring precise nucleic acid quantification. While alternative probe chemistries like molecular beacons may offer advantages for specific applications such as SNP detection, hydrolysis probes remain the gold standard for many quantitative PCR applications due to their proven track record and methodological consistency.
Molecular beacons are single-stranded, hairpin-shaped oligonucleotide probes that become fluorescent upon binding to their complementary nucleic acid target [34]. Their unique structure consists of a loop region complementary to the target sequence, flanked by stem sequences that are complementary to each other [24]. A fluorophore is attached to one end and a quencher to the other [24]. In the absence of the target, the stem-loop structure keeps the fluorophore and quencher in close proximity, preventing fluorescence through Fluorescence Resonance Energy Transfer (FRET) [34]. When the molecular beacon encounters its target sequence, it hybridizes and undergoes a conformational change that separates the fluorophore from the quencher, resulting in a fluorescent signal [24].
This technical note outlines the specific advantages of molecular beacons over hydrolysis probes (like TaqMan) for applications requiring high specificity and the ability to discriminate between closely related sequences, with a particular focus on single nucleotide polymorphism (SNP) detection, allelic discrimination, and multiplex PCR.
Key Applications and Comparative Advantages
Table 1: Optimal Applications for Molecular Beacons vs. Hydrolysis Probes
| Application | Recommended Probe | Key Reasons for Recommendation |
|---|---|---|
| SNP Detection & Allelic Discrimination | Molecular Beacons | Superior ability to discriminate single-base mismatches due to the stem-loop structure [24] [34]. |
| Multiplex PCR Assays | Molecular Beacons | A common quencher can be used with multiple different fluorophores, simplifying assay design for detecting multiple targets [24]. |
| Pathogen Detection & Strain Typing | Molecular Beacons | High specificity ideal for screening genetically diverse species and identifying specific strains [24] [35]. |
| Gene Expression Validation | Hydrolysis Probes | Widespread use, established protocols, and lower cost are sufficient for this application [36]. |
| Routine Quantitative PCR (qPCR) | Hydrolysis Probes | Cost-effective and robust for general target quantification where ultimate specificity is not critical [36] [35]. |
Quantitative Performance Comparison
Table 2: Performance Characteristics of Molecular Beacons and Hydrolysis Probes
| Characteristic | Molecular Beacons | Hydrolysis Probes (TaqMan) |
|---|---|---|
| Signal-to-Background Ratio | High (up to 200-fold increase) [34] | Moderate |
| Single-Base Mismatch Discrimination | Excellent [24] [34] | Good |
| Multiplexing Capability | High (single universal quencher) [24] | Moderate (requires different quencher/reporter pairs) |
| Design Complexity | High (requires careful stem-loop design) [37] [36] | Moderate |
| Cost Considerations | Higher probe cost and design effort [36] | Lower cost and more straightforward design [36] [35] |
| Mechanism | Conformational change upon hybridization [37] | Polymerase-mediated hydrolysis during amplification [37] |
Experimental Protocols
Protocol 1: SNP Genotyping Using Molecular Beacons
This protocol is adapted from high-throughput SNP genotyping methods that combine tag SNPs and molecular beacons [38].
1. Primer and Probe Design:
- Target Selection: Identify the SNP of interest and its flanking sequences. For genome-wide studies, select tag SNPs from resources like HapMap to capture haplotype diversity [38].
- Molecular Beacon Design:
- Loop Sequence: Design an 18-30 nucleotide sequence that is complementary to the target region and encompasses the SNP. The SNP should be located centrally within the loop for optimal discrimination [24] [34].
- Stem Sequence: Add 5-7 nucleotide arms to both ends of the loop sequence. These arms must be complementary to each other and have high GC content (75-100%) to form a stable stem [34].
- Fluorophore and Quencher: Attach a fluorophore (e.g., FAM, TET, HEX) to the 5' end and a non-fluorescent quencher (e.g., DABCYL, BHQ) to the 3' end [24] [34].
- In-silico Validation: Use software such as Beacon Designer to verify the specificity of the probe and to ensure it does not form alternative secondary structures [24].
2. Reaction Setup:
- Prepare a PCR master mix containing:
- 1X PCR Buffer
- dNTPs (200 µM each)
- Forward and Reverse Primers (optimal concentration to be determined, typically 100-400 nM each)
- Molecular Beacon Probe (optimal concentration to be determined, typically 50-200 nM)
- DNA Polymerase (1-2 units, does not require 5'→3' exonuclease activity) [37]
- Template DNA (10-100 ng)
- Dispense the reaction mix into a real-time PCR instrument compatible with your chosen fluorophore. Instruments like the Roche LightCycler 2.0 or the Applied Biosystems 7500 can detect up to 6 different fluorophores [38].
3. qPCR Cycling Conditions:
- Initial Denaturation: 95°C for 2-5 minutes.
- Amplification (40-50 cycles):
- Denaturation: 95°C for 5-15 seconds.
- Annealing: 60-65°C for 20-60 seconds (Read fluorescence at this step).
- Extension: 72°C for 10-30 seconds (can be combined with annealing if using a polymerase with displacement activity).
- Data Analysis:
- The fluorescence is read during the annealing step of each cycle.
- Genotypes are called based on the presence or absence of a fluorescent signal and the melting temperature (Tm) of the probe-target hybrid. A perfectly matched probe will have a higher Tm than a probe with a single-base mismatch [24].
Protocol 2: Multiplex PCR for Allelic Discrimination
1. Assay Design for Multiplexing:
- Design a unique molecular beacon for each allele or target. Each beacon must have the same stem sequence but a different loop sequence and a spectrally distinct fluorophore [24].
- Common fluorophores for multiplexing include FAM, HEX, TET, TAMRA, ROX, and Cy5 [38]. Ensure the real-time PCR instrument has the appropriate filters for your chosen fluorophores.
- Design primers to generate amplicons of similar length and with similar annealing temperatures.
2. Reaction Optimization:
- Set up reactions with a single probe to determine the optimal primer and probe concentrations for each target individually.
- Combine all probes and primers in a single reaction. Titrate the concentrations of each component to balance the signal intensity from all channels and to minimize cross-talk.
- The annealing temperature should be optimized to ensure specific binding for all primers and probes simultaneously.
3. Data Interpretation:
- The fluorescence in each channel is monitored during the annealing phase.
- The specific combination of fluorescent signals across the different channels indicates which target(s) are present in the sample.
The Scientist's Toolkit: Essential Reagents and Equipment
Table 3: Key Research Reagent Solutions for Molecular Beacon Assays
| Item | Function/Description | Example Products/Suppliers |
|---|---|---|
| Molecular Beacon Probes | Custom oligonucleotides with fluorophore and quencher; the core detection reagent. | Synbio Technologies, GoldBio [36] [35] |
| DNA Polymerase (without 5' nuclease) | Enzyme for PCR amplification; molecular beacons do not require hydrolysis activity. | Various suppliers [37] |
| Real-time PCR Instrument | Thermocycler with fluorescence detection capabilities for multiple fluorophores. | Roche LightCycler 480, Applied Biosystems 7500, Bio-Rad ICycler IQ5 [38] |
| Design Software | In-silico tool for designing specific primers and probes, avoiding secondary structures. | Beacon Designer [24] |
| dNTPs | Building blocks for DNA synthesis during PCR. | Various suppliers |
| PCR Plates & Seals | Reaction vessels compatible with the real-time PCR instrument. | Various suppliers |
Workflow and Signaling Mechanisms
Molecular Beacon Mechanism
SNP Genotyping Workflow
Molecular beacons provide a powerful detection system for applications where the highest level of specificity is required. Their stem-loop structure makes them uniquely suited for discriminating between targets that differ by only a single nucleotide, a critical requirement for SNP genotyping and allelic discrimination. Furthermore, their compatibility with multiplex PCR allows for the efficient and simultaneous interrogation of multiple genetic targets in a single, closed-tube reaction. For these specialized applications, molecular beacons often present a superior choice compared to hydrolysis probes.
Fluorescent probe-based real-time PCR (qPCR) and reverse transcription qPCR (RT-qPCR) represent the gold standard in molecular diagnostics for pathogen detection and viral load quantification. These techniques provide the sensitivity, specificity, and quantitative capabilities essential for clinical decision-making, vaccine development, and therapeutic monitoring. The selection between hydrolysis probes (such as TaqMan) and molecular beacons represents a fundamental methodological choice that directly impacts assay performance in clinical and research settings. Hydrolysis probes utilize the 5'→3' exonuclease activity of DNA polymerase to cleave a reporter dye from a quencher during amplification, generating a fluorescent signal proportional to target accumulation [39]. In contrast, molecular beacons employ a stem-loop structure that separates a fluorophore from a quencher upon hybridization to the target sequence, producing a specific fluorescence increase [39] [7]. This application note provides a detailed comparison of these technologies within the context of pathogen detection and viral load quantification, supported by experimental data, structured protocols, and implementation guidelines for researchers and diagnostic developers.
Technical Comparison: Hydrolysis Probes vs. Molecular Beacons
Fundamental Mechanisms and Design Principles
Hydrolysis Probes consist of a linear oligonucleotide complementary to the target sequence, dual-labeled with a fluorescent reporter at the 5' end and a quencher at the 3' end. During the extension phase of PCR, the DNA polymerase cleaves the probe when it encounters the bound probe, permanently separating the reporter from the quencher and generating a cumulative fluorescent signal [39]. The signal intensity thus reflects the total amplified product at any given cycle.
Molecular Beacons incorporate a probe sequence embedded within a stem-loop structure. The stem, typically 5-7 base pairs long with high GC content (75-100%), brings a fluorophore and quencher into close proximity in the unbound state. The loop region contains the target-specific probe sequence (typically 15-30 nucleotides). Upon hybridization to the complementary target during the annealing step, the stem dissociates, separating the fluorophore from the quencher and resulting in fluorescence emission. This process is reversible, with the beacon reverting to its closed, non-fluorescent state during the denaturation phase [39] [7].
Performance Characteristics in Pathogen Detection
Table 1: Comparative Analysis of Hydrolysis Probes and Molecular Beacons in Diagnostic Applications
| Parameter | Hydrolysis Probes | Molecular Beacons |
|---|---|---|
| Signal Mechanism | Cumulative, irreversible cleavage | Reversible, hybridization-dependent |
| Background Signal | Relatively higher [8] | Very low due to stem-loop structure [40] |
| Specificity | High; requires sequence complementarity | Very high; additional specificity from stem stability [7] |
| Multiplexing Capacity | Good (limited by available fluorophores) [39] | Excellent (can be combined with melting curve analysis) [40] |
| SNP Detection | Moderate | Excellent for single-nucleotide polymorphisms [7] |
| Design Complexity | Moderate | High (requires stem optimization) [39] [7] |
| Cost Considerations | Moderate | Higher synthesis cost |
| Optimal Application | High-sensitivity quantification | Multiplex detection, SNP identification, |
| Example Implementation | SARS-CoV-2 detection [8] | Respiratory pathogen panels [40] |
Application Spotlights in Pathogen Detection and Viral Load Quantification
Enteric Virus Detection with Clinical Severity Correlation
The Global Enteric Multicenter Study (GEMS) demonstrated the critical importance of quantitative molecular assays in understanding pathogen-specific disease severity. This large-scale study compared conventional diagnostic methods (EIAs for rotavirus and adenovirus 40/41, conventional PCR for other viruses) with quantitative TaqMan Array Card (TAC) assays, which utilize hydrolysis probe chemistry [41].
Table 2: Clinical Severity of Enteric Viruses Detected by Conventional vs. Molecular Assays
| Pathogen | Detection Method | Median Modified Vesikari Score | Clinical Implications |
|---|---|---|---|
| Rotavirus | Conventional EIA | 10 (IQR: 8-11) | Highest severity among enteric viruses |
| Rotavirus | TAC (CT<32.6) | 8 (2 points lower than EIA) | Less severe cases detected by molecular methods |
| Rotavirus | TAC (32.6≤CT<35) | 7 (3 points lower than EIA) | Mild cases only detected with sensitive molecular assays |
| Adenovirus 40/41 | Conventional EIA | 9 (IQR: 7-11) | High severity profile |
| Adenovirus 40/41 | TAC (any CT<35) | Similar to EIA | Consistent severity across detection methods |
| Norovirus GII | Conventional PCR | 8 (IQR: 6-10) | Moderate severity profile |
| Sapovirus | Conventional PCR | 8 (IQR: 6-10) | Moderate severity profile |
| Astrovirus | Conventional PCR | 8 (IQR: 6-10) | Moderate severity profile |
The GEMS data demonstrated that cycle threshold (CT) values from hydrolysis probe-based qPCR assays correlate with clinical severity, particularly for rotavirus. This finding has significant implications for establishing clinical cut-offs for pathogen detection and emphasizing the importance of quantitative rather than qualitative results in diagnostic assays [41].
Highly Multiplexed Pathogen Detection Using MeltArray Technology
The MeltArray system represents an advanced application of molecular beacon technology that enables unprecedented multiplexing capabilities. By coupling the 5'-flap endonuclease activity of Taq DNA polymerase with molecular beacon reporters, this approach can detect dozens of targets in a single reaction [40].
In the MeltArray system, target-specific "mediator probes" are cleaved by the 5'-flap endonuclease activity, releasing "mediator primers" that serve as endogenous barcodes. These primers then bind to molecular beacon reporters, generating fluorescent hybrids with distinct melting temperatures unique to each target. The total number of detectable targets equals the number of molecular beacon reporters multiplied by the number of mediator primers per reporter [40].
Validated implementations include:
- 24-plex respiratory pathogen assay: Simultaneous identification and quantification of multiple respiratory pathogens in a single reaction
- 62-plex Escherichia coli serovar determination: Comprehensive serotyping in a single assay
- 20-plex Y chromosome microdeletion detection: High-throughput genetic screening application
This technology dramatically expands the multiplexing capacity of real-time PCR systems while maintaining the specificity advantages of molecular beacons [40].
Enhanced Sensitivity with Double-Stranded Probes
Recent innovations in probe design have led to the development of double-stranded probes (DSPs) that offer superior performance characteristics for low-abundance target detection. Optimized DSPs utilize positive and negative strands of similar length, with controlled free energy of hybridization (ΔG ≈ -30 kcal/mol) and sticky ends of 4-6 nucleotides [8].
In comparative studies, DSPs demonstrated significantly lower background signal and higher sensitivity compared to conventional TaqMan probes and molecular beacons. This technology has enabled detection of clinically relevant targets at extremely low concentrations:
- Hepatitis B virus (HBV) DNA: 5 IU/mL detection limit
- SARS-CoV-2 RNA: 50 copies/mL detection limit
The enhanced sensitivity of DSPs reduces the probability of false-negative results for low-copy targets, making them particularly valuable for early infection detection and monitoring treatment response [8].
Experimental Protocols
Protocol: Hydrolysis Probe-Based Enteric Virus Detection and Quantification
This protocol adapts the TaqMan Array Card approach used in the GEMS study for detection and quantification of enteric viruses [41].
Research Reagent Solutions:
- Nucleic acid extraction: QIAamp MinElute Virus Spin Kit
- qPCR master mix: TaqPath ProAMP Master Mix
- Hydrolysis probes: FAM-labeled target-specific probes
- Positive controls: Synthetic viral RNA/DNA controls
- Internal control: Exogenous RNA internal control with VIC-labeled probe
Procedure:
- Nucleic Acid Extraction
- Extract nucleic acids from 200μL stool transport medium or stool suspension using the QIAamp MinElute Virus Spin Kit
- Elute in 50μL elution buffer
- Store extracts at -80°C if not testing immediately
Primer and Probe Validation
- Validate primer-probe sets for rotavirus, norovirus GI/GII, sapovirus, astrovirus, and adenovirus 40/41
- Determine optimal primer concentrations (typically 100-900nM)
- Verify probe efficiency (90-110%) using standard curves
qPCR Setup
- Prepare reaction mix: 10μL TaqPath ProAMP Master Mix, 1μL primer-probe mix, 5μL RNA template, 4μL nuclease-free water
- Run in triplicate for each sample
- Include negative controls (nuclease-free water) and positive controls (synthetic viral transcripts)
Thermal Cycling Conditions
- Reverse transcription: 50°C for 15 minutes (if detecting RNA viruses)
- Polymerase activation: 95°C for 2 minutes
- 45 cycles of: Denaturation: 95°C for 3 seconds, Annealing/Extension: 60°C for 30 seconds
Data Analysis
- Collect fluorescence data during annealing/extension step
- Determine CT values using automatic baseline and threshold settings
- Apply pathogen-specific CT cut-offs for clinical significance [41]
Protocol: Molecular Beacon-Based Multiplex Respiratory Pathogen Detection
This protocol implements the MeltArray technology for simultaneous detection of multiple respiratory pathogens using molecular beacons [40].
Research Reagent Solutions:
- Molecular beacons: Target-specific with various fluorophore labels (FAM, HEX, CY5, ROX)
- Mediator probes: Target-specific with complementary sequences to molecular beacons
- PCR master mix: Hot-start DNA polymerase with 5'-flap endonuclease activity
- Primers: Multiplex primer sets for respiratory pathogens
Procedure:
- Molecular Beacon and Mediator Probe Design
- Design molecular beacons with 15-30 nucleotide loop regions and 5-7 nucleotide stem sequences
- Design mediator probes with target-specific regions and mediator sequences that bind to molecular beacon loop regions
- Verify minimal cross-reactivity using alignment software
Reaction Setup
- Prepare reaction mix: 12.5μL 2× master mix, 0.5μL mixed molecular beacons (2.5μM each), 1μL mixed mediator probes (5μM each), 1μL mixed primers (10μM each), 5μL template DNA, 5μL nuclease-free water
- Include no-template controls and positive controls for each target
Thermal Cycling with Melting Curve Analysis
- Initial denaturation: 95°C for 10 minutes
- 40 cycles of: Denaturation: 95°C for 15 seconds, Annealing: 60°C for 30 seconds, Extension: 72°C for 30 seconds
- Melting curve analysis: 60°C to 95°C with 0.5°C increments
Data Interpretation
- Analyze real-time amplification curves for quantification
- Perform melting curve analysis to distinguish multiple targets
- Identify pathogens based on specific melting temperatures
The Scientist's Toolkit: Essential Research Reagent Solutions
Table 3: Key Reagents and Materials for Probe-Based Molecular Detection Assays
| Reagent/Material | Function | Implementation Example |
|---|---|---|
| TaqMan Array Card | Multiplex qPCR platform for simultaneous pathogen detection | Enteric pathogen detection in GEMS study [41] |
| Molecular Beacons | Stem-loop probes for specific hybridization detection | MeltArray multiplex pathogen detection [40] |
| Double-Stranded Probes (DSPs) | Low-background, high-sensitivity probes | HBV and SARS-CoV-2 ultradetection [8] |
| 5'-Flap Endonuclease | Enzyme for cleaving mediator probes in MeltArray | Highly multiplex PCR assays [40] |
| Minor Groove Binder (MGB) | Increases binding affinity of probes | Eclipse probe technology [39] |
| Hot-Start DNA Polymerase | Reduces non-specific amplification | Essential for multiplex PCR assays |
| Fluorescent Reporters | Signal generation (FAM, HEX, CY5, ROX) | Multiplex target discrimination |
| Quenchers | Fluorescence suppression in unbound probes | BHQ, TAMRA for background reduction |
| Digital PCR System | Absolute quantification for assay validation | TD-1 system for nucleic acid quantification [8] |
Hydrolysis probes and molecular beacons each offer distinct advantages for pathogen detection and viral load quantification in clinical and research applications. Hydrolysis probes provide robust, sensitive quantification ideal for standard diagnostic applications, while molecular beacons offer superior multiplexing capabilities and single-nucleotide specificity. The emerging data correlating quantitative PCR results with clinical outcomes, as demonstrated in the GEMS study, highlights the importance of quantitative thresholds in molecular diagnostics. Future developments will likely focus on enhanced multiplexing capabilities, point-of-care applications, and integration of novel probe chemistries such as double-stranded probes for ultra-sensitive detection. The optimal probe selection depends on specific application requirements, including sensitivity needs, multiplexing scale, target abundance, and discrimination level required.
The evolution of quantitative PCR (qPCR) technologies has been largely driven by the need for greater specificity and reliability in detecting challenging molecular targets, such as single-nucleotide polymorphisms (SNPs) and low-abundance transcripts. Within the broader context of selecting between hydrolysis probes and molecular beacons, advanced formats like Scorpion primers and tailed molecular beacons represent significant innovations for overcoming limitations of conventional probe systems. These challenging targets require exceptional discriminatory power, often pushing standard hydrolysis probes beyond their operational limits due to insufficient differentiation between wild-type and variant sequences.
Scorpion primers integrate both primer and probe functions into a single molecule, employing a unimolecular probing mechanism that offers kinetic advantages over traditional bimolecular systems [42]. This integrated design enables faster and more efficient hybridization, making Scorpions particularly valuable for rapid-cycle PCR applications and SNP detection where timing and specificity are critical. Molecular beacons, characterized by their stem-loop structure, provide inherently low background fluorescence and high specificity due to their conformational requirements for signal generation [9] [43]. When optimized with specialized tail designs, these beacons can achieve even greater specificity for discriminating highly similar sequences.
The selection between these advanced probe systems hinges on multiple factors, including the nature of the target sequence, required specificity level, instrumentation capabilities, and experimental throughput needs. This application note provides detailed protocols and performance comparisons to guide researchers in effectively applying these technologies to their most demanding detection challenges in drug development and diagnostic applications.
Scorpion Primers: Mechanism and Design
Scorpion primers are bifunctional molecules that combine a PCR primer with a detection probe in a single entity [44]. The structure consists of a target-specific primer sequence at the 3' end, linked via a PCR blocker (typically hexaethylene glycol, HEG) to a hairpin probe structure at the 5' end [42] [45]. This probe element contains a fluorophore at the 5'-end and a quencher at the 3'-end, with complementary stem sequences (typically 5-7 nucleotides) that maintain the hairpin configuration in the absence of the target [44].
The mechanism of Scorpion primers leverages their unimolecular nature for superior efficiency. During the first PCR cycle, the primer portion hybridizes to the target DNA and is extended by DNA polymerase. The PCR blocker prevents read-through into the probe element, which could cause non-specific signal generation [42]. In subsequent cycles, after denaturation and annealing, the probe region of the Scorpion molecule hybridizes to its complementary sequence within the same strand of DNA. This intramolecular hybridization opens the hairpin structure, physically separating the fluorophore from the quencher and generating a fluorescent signal [42] [44]. This unimolecular mechanism is significantly faster and more efficient than bimolecular probing systems, as it doesn't depend on random collision between separate molecules [42].
Table 1: Scorpion Primer Design Parameters
| Parameter | Specification | Rationale |
|---|---|---|
| Amplicon Length | 100-200 bp [45] | Optimal for rapid cycling conditions and efficient amplification |
| Probe Length | 17-27 bases [45] | Balances specificity and hybridization efficiency |
| Stem Length | 5-7 bases [44] | Provides sufficient stability without impeding target hybridization |
| Stem Sequence | GC-rich (e.g., CCGCGC/GCGCGG) [43] | Enhances stem stability; C at 5' end avoids fluorescence quenching by G |
| Stem Tm | 5-10°C higher than probe Tm [45] | Ensures hairpin stability at annealing temperature |
| Blocker Element | HEG monomer [44] | Prevents polymerase read-through into probe region |
Molecular Beacons: Mechanism and Enhanced Designs
Molecular beacons are dual-labeled hairpin probes that operate through a conformational change upon target hybridization [9]. A standard molecular beacon consists of a target-specific loop region (typically 18-30 nucleotides) flanked by complementary stem sequences (5-7 nucleotides) that form a stable hairpin in the unbound state [43]. A fluorophore is attached to one end of the molecule and a quencher to the other end, bringing them into close proximity in the native hairpin configuration, thereby quenching fluorescence through FRET (Förster Resonance Energy Transfer) [43].
When molecular beacons encounter a complementary target sequence during the annealing phase of PCR, they undergo a structural reorganization where the probe-target hybrid becomes more stable than the stem hybrid. This causes the hairpin to open, physically separating the fluorophore from the quencher and resulting in fluorescence emission [9] [28]. Unlike hydrolysis probes, molecular beacons are not degraded during PCR and can participate in multiple rounds of hybridization, making them suitable for melt curve analysis after amplification [9].
Tailed molecular beacons represent an advanced configuration where additional sequences are incorporated to enhance stability or facilitate specialized applications. These tailed designs can improve thermodynamic discrimination between perfectly matched and mismatched targets, which is particularly valuable for SNP detection and mutation analysis [46]. The tail sequences can provide additional binding stability or enable cooperative binding mechanisms that significantly enhance specificity compared to standard molecular beacons.
Table 2: Molecular Beacon Design Parameters
| Parameter | Specification | Rationale |
|---|---|---|
| Total Length | 25-35 nucleotides [43] | Optimal for hairpin stability and target specificity |
| Loop Length | 18-30 nucleotides [43] | Target-binding region; should be complementary to amplicon |
| Stem Length | 5-7 nucleotides [9] | Provides sufficient stability for efficient quenching |
| Stem ΔG | -1.5 to -2.0 kcal/mol [43] | Ideal free energy for hairpin stability at annealing temperatures |
| Probe Tm | 7-10°C above primer Tm [28] | Ensures hybridization before primer extension |
| GC Content | 30-70% | Balances hybridization stability and specificity |
Performance Comparison and Selection Guidelines
Direct comparative studies demonstrate distinct performance advantages for different probe technologies depending on application requirements. Research indicates that Scorpion primers perform better than both TaqMan probes and molecular beacons, particularly under fast cycling conditions [42]. This performance advantage is attributed to the unimolecular reaction mechanism of Scorpions, which is not dependent on enzymatic cleavage and demonstrates faster kinetics than bimolecular probing systems [42].
Table 3: Comparative Performance of qPCR Probe Systems
| Characteristic | Scorpion Primers | Molecular Beacons | TaqMan Probes |
|---|---|---|---|
| Mechanism | Unimolecular hybridization [42] | Bimolecular hybridization [42] | Enzymatic cleavage [28] |
| Signal Kinetics | Faster, more efficient [42] | Standard | Standard |
| Specificity | Excellent for SNPs [35] | Excellent for SNPs [18] | Good |
| Background Signal | Low [44] | Very low [18] | Moderate |
| Enzyme Requirement | Standard polymerase | Standard polymerase [28] | Polymerase with 5' nuclease activity [28] |
| Post-PCR Analysis | Melt curve possible [44] | Melt curve possible [9] | Not possible |
| Multiplexing Ability | Good [42] | Excellent [9] | Good |
| Design Complexity | High [45] | Moderate [43] | Low |
| Relative Cost | Moderate [18] | Higher [47] | Lower [47] [18] |
The selection between Scorpion primers and molecular beacons for challenging targets should be guided by specific application requirements:
Choose Scorpion primers when working with fast cycling conditions [42], when target abundance is low (Cq >30) [18], for SNP detection and allelic discrimination [44] [35], and when multiplexing in a single tube is required [42].
Opt for molecular beacons when background signal must be minimized [18], for applications requiring post-PCR melt curve analysis [9], when detecting multiple targets in multiplex assays [9], and for pathogen detection with high specificity requirements [28] [18].
Consider tailed molecular beacons for the most challenging discrimination tasks, such as identifying single-base mutations in GC-rich regions or when working with highly similar homologous sequences [46].
Experimental Protocols
Scorpion Primer Protocol for SNP Detection
Principle: This protocol utilizes Scorpion primers for highly specific discrimination of single-nucleotide polymorphisms, leveraging their unimolecular mechanism for superior allele discrimination [42].
Table 4: Reagent Formulation for Scorpion Primer Assay
| Component | Final Concentration | Function |
|---|---|---|
| Genomic DNA | 5-50 ng/µL | Template for amplification |
| Scorpion Primer | 200-400 nM | Sequence-specific primer with integrated probe |
| Reverse Primer | 200-400 nM | Standard PCR primer |
| dNTP Mix | 200 µM each | Nucleotides for DNA synthesis |
| PCR Buffer | 1X | Reaction buffer with MgCl₂ |
| DNA Polymerase | 0.5-1.25 U/µL | Enzyme for DNA amplification |
| PCR-Grade Water | To volume | Reaction volume adjustment |
Procedure:
- Assay Design:
- Design Scorpion primers with the probe target located within 11 bases from the 3' end of the Scorpion primer to ensure efficient intramolecular hybridization [45].
- Select a stem sequence with Tm 5-10°C higher than the probe Tm to maintain hairpin stability during annealing [45].
- Incorporate a PCR blocker (HEG monomer) between the probe and primer elements to prevent polymerase read-through [44].
Reaction Setup:
- Prepare master mix on ice containing all components except DNA template.
- Aliquot appropriate volume into PCR tubes or plates.
- Add DNA template to individual reactions, including no-template controls.
- Centrifuge briefly to collect contents at tube bottom.
Thermal Cycling:
- Initial Denaturation: 95°C for 2-5 minutes to activate polymerase and denature templates.
- Amplification (40-45 cycles):
- Denaturation: 95°C for 5-15 seconds
- Annealing: 55-65°C for 15-30 seconds (acquire fluorescence)
- Extension: 72°C for 15-30 seconds
- Melt Curve Analysis (optional): 95°C for 1 minute, 40°C for 1 minute, then gradual increase to 95°C while continuously monitoring fluorescence [44].
Troubleshooting:
- High background signal: Check stem stability; increase stem Tm or check for G adjacent to fluorophore [43] [45].
- Poor amplification: Verify amplicon length (optimal 100-200 bp) and check for secondary structures in target region [45].
- Low signal-to-noise: Ensure probe target is sufficiently close (within 11 bases) to 3' end of Scorpion primer [45].
Tailed Molecular Beacon Protocol for Challenging Targets
Principle: This protocol employs tailed molecular beacons with enhanced specificity for discriminating highly similar targets, such as single-base mutations or homologous genes [46] [43].
Table 5: Reagent Formulation for Tailed Molecular Beacon Assay
| Component | Final Concentration | Function |
|---|---|---|
| Template DNA/cDNA | 1-100 ng/µL | Nucleic acid target |
| Forward Primer | 200-400 nM | Standard PCR primer |
| Reverse Primer | 200-400 nM | Standard PCR primer |
| Tailed Molecular Beacon | 100-300 nM | Target-specific probe with tail modifications |
| dNTP Mix | 200 µM each | Nucleotides for DNA synthesis |
| PCR Buffer | 1X | Reaction buffer with optimized Mg²⁺ |
| Hot Start Polymerase | 0.5-1.25 U/µL | Reduces non-specific amplification |
| BSA | 0.1-0.5 µg/µL | Stabilizes reaction components |
Procedure:
- Beacon Design:
- Design loop sequence (18-30 nt) complementary to target with Tm 7-10°C higher than primers [43] [28].
- Create stem sequences (5-7 nt) with ΔG of -1.5 to -2.0 kcal/mol for optimal hairpin stability [43].
- Add tail sequences (10-20 nt) that provide cooperative binding or enhanced specificity [46].
- Avoid G nucleotides adjacent to the fluorophore to prevent quenching [43].
Reaction Setup:
- Prepare master mix containing all components except molecular beacon and template.
- Add molecular beacon to appropriate concentration.
- Aliquot reactions and add template to individual tubes.
- Include negative controls without template and with non-target DNA.
Thermal Cycling:
- Initial Denaturation: 95°C for 3-5 minutes for polymerase activation.
- Amplification (40-50 cycles):
- Denaturation: 95°C for 10-20 seconds
- Annealing: 5-8°C below probe Tm for 20-40 seconds (acquire fluorescence)
- Extension: 72°C for 20-40 seconds
- Melt Curve Analysis: 95°C for 1 minute, 35°C for 1 minute, then gradual ramp to 85°C with continuous fluorescence monitoring [9].
Troubleshooting:
- Low fluorescence signal: Verify probe Tm is sufficiently above primer Tm; check for stem-loop stability [43].
- Poor discrimination: Optimize annealing temperature; consider increasing tail length for enhanced specificity [46].
- Non-specific amplification: Implement hot start polymerase; optimize Mg²⁺ concentration; check primer specificity.
Research Reagent Solutions
Table 6: Essential Reagents for Advanced Probe Applications
| Reagent/Chemical | Specifications | Function in Application |
|---|---|---|
| HEG Blocker | Hexaethylene glycol monomer [44] | PCR stopper preventing read-through in Scorpion primers |
| Black Hole Quenchers | BHQ-1 (max abs 534 nm) or BHQ-2 (max abs 580 nm) [44] | Non-fluorescent quenchers for low-background probes |
| Fluorophores | FAM, CAL Fluor dyes, Quasar dyes [44] | Reporter dyes with various emission maxima for multiplexing |
| Hot Start Polymerase | Antibody-mediated or chemical modification | Reduces non-specific amplification in complex assays |
| dNTPs | PCR-grade, purified | Nucleotide substrates for DNA synthesis |
| MgCl₂ Solution | PCR-grade, concentration optimized | Cofactor for DNA polymerase activity |
| BSA | Molecular biology grade | Stabilizes reaction components, reduces adsorption |
Mechanism and Workflow Visualization
Scorpion primers and tailed molecular beacons represent advanced solutions for the most challenging qPCR applications, particularly when standard hydrolysis probes prove inadequate. The unimolecular mechanism of Scorpion primers provides distinct kinetic advantages for fast-cycle PCR and SNP detection, while tailed molecular beacons offer exceptional specificity for discriminating highly similar targets through enhanced thermodynamic discrimination [42] [46].
For researchers working with challenging targets, the selection between these technologies should be guided by specific experimental constraints and requirements. Scorpion primers are ideal for high-throughput applications requiring rapid results and excellent signal-to-noise ratios, while tailed molecular beacons provide superior performance for applications demanding the highest specificity, such as clinical diagnostics and mutation detection [46] [35]. Both technologies enable multiplex detection and post-amplification melt curve analysis, providing flexibility for complex experimental designs.
When implementing these advanced probe systems, careful attention to design parameters is essential for optimal performance. Proper stem design, blocker incorporation, and probe placement significantly impact assay specificity and sensitivity. By following the detailed protocols and design guidelines provided in this application note, researchers can effectively leverage these powerful technologies to overcome the limitations of conventional probe systems and advance their molecular detection capabilities for drug development and diagnostic applications.
Probe Design and Experimental Optimization: Maximizing Signal and Specificity
This application note provides a detailed protocol for the design and optimization of hydrolysis probes for quantitative PCR (qPCR). Within the broader context of selecting appropriate probe chemistry for molecular assays, understanding the specific design rules for hydrolysis probes is paramount for developing robust, sensitive, and specific detection methods. We summarize critical design parameters—including melting temperature (Tm`), GC content, and probe placement—into structured tables and provide a validated experimental workflow for in-laboratory protocol setup and validation, supported by data visualization and a reagent toolkit.
Hydrolysis probes (e.g., TaqMan probes) are a cornerstone of probe-based quantitative PCR (qPCR), enabling real-time detection and quantification of specific nucleic acid sequences [48] [49]. Their mechanism relies on the 5' to 3' exonuclease activity of a DNA polymerase, which cleaves a probe hybridized to the target amplicon during the extension phase. This cleavage separates a reporter fluorophore at the 5' end from a quencher molecule at the 3' end, resulting in a fluorescent signal proportional to the amount of amplified target [49]. The high specificity conferred by the requirement for both primer binding and probe hybridization makes hydrolysis probes ideal for applications demanding accurate quantification, such as gene expression analysis, viral load quantification, and single nucleotide polymorphism (SNP) genotyping [48] [18].
The choice between different probe chemistries, such as hydrolysis probes and molecular beacons, is guided by experimental goals. Molecular beacon probes form a stem-loop structure that brings the fluorophore and quencher into close proximity in the unbound state, leading to extremely low background fluorescence and high specificity for SNP detection [9] [7]. In contrast, hydrolysis probes are generally more cost-effective, simpler to design, and widely used for multiplexing and high-throughput applications [48] [18]. This document focuses on the precise design rules necessary to leverage the advantages of hydrolysis probe chemistry.
Core Design Rules for Hydrolysis Probes
Adherence to the following design parameters is critical for developing a successful hydrolysis probe-based qPCR assay.
Melting Temperature (Tm) and Annealing Temperature (Ta)
The relationship between the melting temperatures of the primers and the probe is a fundamental determinant of assay efficiency.
- Probe
Tm: The probe should have a melting temperature (Tm) 6–10°C higher than theTm` of the PCR primers [48] [50]. This ensures the probe hybridizes to the target before the primers anneal, allowing the polymerase to efficiently cleave the probe during the extension phase. - Primer
Tm`: The optimal melting temperature for PCR primers is between 60–64°C, with the forward and reverse primers within 2°C of each other [50]. - Annealing Temperature (
Ta): The annealing temperature of the PCR reaction should be set no more than 5°C below theTmof the primers [50] [49]. ATathat is too low can lead to non-specific amplification, while aTathat is too high will reduce reaction efficiency.
Table 1: Melting Temperature Guidelines for Hydrolysis Probe Assays
| Component | Optimal Melting Temperature (Tm`) |
Relationship to Other Components |
|---|---|---|
| PCR Primers | 60–64°C | Forward and reverse primer Tm` should be within 2°C of each other. |
| Hydrolysis Probe | 68–74°C | 6–10°C higher than the primer Tm`. |
Annealing Temp (Ta`) |
- | Set 5°C below the lower primer Tm`. |
GC Content and Sequence Composition
The nucleotide composition of the probe directly affects its stability and performance.
- GC Content: The probe should have a GC content between 35% and 65%, with an ideal target of 50% [50] [49]. This provides sufficient sequence complexity and thermal stability without promoting non-specific binding.
- 5' End Base: The 5' end of the probe should not be a guanine (G) base, as guanine can quench the fluorescence of the reporter fluorophore even after cleavage [48] [50].
- Sequence Repeats: Avoid runs of four or more identical nucleotides, particularly guanines, as they can also lead to quenching and complicate synthesis [50] [51].
Spatial Placement and Primer Overlap
Proper placement of the probe relative to the primer binding sites is essential to prevent steric hindrance and ensure efficient cleavage.
- Location: The probe must be designed to bind close to the forward or reverse primer on the same strand, but must not overlap with the primer-binding site [48] [50] [49].
- Amplicon Length: For optimal amplification efficiency, the target amplicon length should be between 70 and 150 base pairs [50]. Shorter amplicons are amplified more efficiently and allow the probe to compete more effectively with the complementary strand for binding.
Specificity and Secondary Structures
To ensure the probe binds only to the intended target and functions without interference:
- Specificity Check: The probe sequence should be analyzed using tools like NCBI BLAST to ensure it is unique to the target gene and lacks significant homology to non-target sequences [50].
- Secondary Structures: The probe sequence should be analyzed for self-complementarity and hairpin formation. The free energy (ΔG) for any potential secondary structures should be weaker (more positive) than -9.0 kcal/mol [50]. Software such as the IDT OligoAnalyzer Tool is recommended for this analysis.
Table 2: Comprehensive Hydrolysis Probe Design Specifications
| Design Parameter | Optimal Specification | Rationale |
|---|---|---|
| Length | 20–30 nucleotides [50] [49] | Balances specificity and Tm` without compromising quenching efficiency. |
| GC Content | 35–65% (ideal: 50%) [50] [49] | Provides thermal stability; avoids AT-rich (low Tm`) or GC-rich (non-specific) extremes. |
Tm` |
68–74°C; 6–10°C > primers [48] [50] | Ensures probe hybridizes before primers for efficient cleavage. |
| 5' End Base | Avoid G [48] [50] | Prevents internal quenching of the reporter dye. |
| Placement | Close to a primer, but no overlap [48] [50] | Allows for efficient polymerase cleavage without steric hindrance. |
| Specificity | No significant homology to off-target sequences [50] | Ensures signal is derived only from the intended amplicon. |
| Secondary Structure | ΔG > -9.0 kcal/mol [50] | Prevents internal folding that would inhibit hybridization. |
Experimental Protocol: Assay Design and Validation
The following step-by-step protocol ensures a systematic approach to hydrolysis probe assay development and validation.
Step 1: In Silico Design and Sequence Analysis
- Target Sequence Identification: Select a unique region within your target gene. If working with RNA, design the assay to span an exon-exon junction to prevent amplification of genomic DNA [50].
- Primer and Probe Design: Using specialized software (e.g., IDT PrimerQuest, Primer3), generate candidate primer pairs and a hydrolysis probe sequence that conform to the specifications in Table 2.
TmCalculation: Calculate theTmusing nearest-neighbor algorithms and input your specific buffer conditions (e.g., 50 mM K+, 3 mM Mg2+) into tools like the IDT OligoAnalyzer for accuracy [50].- Specificity and Dimer Analysis: Run a BLAST analysis on the selected sequences. Use the OligoAnalyzer Tool to check for cross-dimers between the probe and primers, and for self-dimers. Ensure any dimer ΔG is weaker than -9.0 kcal/mol [50].
Step 2: Assay Optimization
Even well-designed assays may require empirical optimization.
- Primer and Probe Concentration: A standard starting concentration is 500 nM for each primer and 250 nM for the probe [52]. Test a range of primer concentrations (e.g., 50–800 nM) and probe concentrations (e.g., 50–300 nM) using a matrix experiment to identify the combination that yields the lowest Cq (quantification cycle) value, highest fluorescence signal, and minimal background [52].
- Annealing Temperature Optimization: Perform a temperature gradient PCR (e.g., from 55°C to 65°C) to determine the
Ta` that provides the lowest Cq and highest assay specificity, as indicated by a single peak in a melt curve analysis (if using SYBR Green) or the absence of non-specific amplification products on an agarose gel [52].
Step 3: Assay Validation
Validate the optimized assay against the MIQE (Minimum Information for Publication of Quantitative Real-Time PCR Experiments) guidelines to ensure data reliability and reproducibility [53].
- PCR Efficiency: Run a standard curve with at least a 5-log dilution series of the target template. Calculate PCR efficiency using the formula: Efficiency = (10^(-1/slope) - 1) * 100%. Optimal efficiency is between 90% and 110% (slope of -3.6 to -3.1) [53].
- Linearity (
R²): The standard curve should have a coefficient of determination (R²) ≥ 0.980 [53]. - Limit of Detection (LOD): Determine the lowest concentration of target that can be reliably detected.
- Specificity: Verify the amplification of a single product of the expected size through gel electrophoresis or melt curve analysis.
The following workflow diagram summarizes the key stages of probe design and validation:
Figure 1: A systematic workflow for the design, optimization, and validation of a hydrolysis probe-based qPCR assay.
Comparative Analysis: Hydrolysis Probes vs. Molecular Beacons
The choice of probe chemistry is application-dependent. The table below provides a direct comparison to guide selection.
Table 3: Hydrolysis Probes vs. Molecular Beacons: A Comparative Guide
| Feature | Hydrolysis Probe | Molecular Beacon |
|---|---|---|
| Mechanism | Fluorophore is cleaved by polymerase during extension. | Probe undergoes conformational change upon hybridization; fluorophore and quencher are separated by distance [9]. |
Typical Tm` vs Primers |
6–10°C higher [48] [50] | Probe-target hybrid Tmshould be 7–10°C higher thanTa; stem Tmshould also be 7–10°C higher thanTa [7]. |
| Specificity | High | Very high; stem-loop structure confers enhanced ability to discriminate single-base mismatches [9] [18]. |
| Background Signal | Moderate | Very low due to quenching in closed conformation [9] [18]. |
| Ideal Applications | Gene expression, viral load, multiplex PCR [48] [18] | SNP detection, pathogen identification, assays requiring ultra-low background [48] [9] [18]. |
| Design Complexity | Moderate | High; requires careful design of stem-loop structure [48] [7]. |
| Relative Cost | Lower [48] [18] | Higher |
A selection of key reagents, software tools, and instruments critical for implementing a hydrolysis probe assay is listed below.
Table 4: Research Reagent Solutions and Essential Materials
| Item | Function/Description | Example Products / Tools |
|---|---|---|
| qPCR Master Mix | Optimized buffer, nucleotides, and polymerase for efficient probe-based qPCR. | SolisFAST Probe qPCR Mix, HOT FIREPol Probe qPCR Mix Plus, Luna qPCR Probe Mix [49] [53]. |
| Double-Quenched Probes | Hydrolysis probes with an internal quencher (e.g., ZEN/TAO) for lower background and higher signal-to-noise ratio, especially for longer probes [50]. | IDT PrimeTime Double-Quenched Probes. |
| Oligo Design Software | Free web-based tools for designing and analyzing oligonucleotides. | IDT OligoAnalyzer Tool, PrimerQuest Tool [50]. |
| Specificity Analysis Tool | Confirms primer and probe sequences are unique to the intended target. | NCBI BLAST [50]. |
| qPCR Instrument | Thermocycler with optical detection system for real-time fluorescence monitoring. | QuantStudio series, CFX96 systems. |
Hydrolysis probes remain a versatile and reliable choice for a wide array of qPCR applications due to their specificity, suitability for multiplexing, and straightforward design principles. Success hinges on meticulously following the core design rules governing melting temperature, GC content, and physical placement relative to primers. By adhering to the detailed protocols and validation metrics outlined in this document, researchers can develop robust and reproducible qPCR assays that generate high-quality data, thereby supporting informed decision-making in drug development and basic research.
Molecular beacons (MBs) are stem-loop structured oligonucleotide probes that fluoresce upon hybridization with complementary nucleic acid targets. Their exceptional specificity, low background fluorescence, and inherent signal transduction mechanism make them powerful tools for real-time PCR, live-cell RNA imaging, and biosensing. This application note provides a detailed protocol for designing high-performance molecular beacons, focusing on the critical interplay between stem-loop stability, length parameters, and sequence composition to avoid self-complementation. Within the broader context of hydrolysis probe versus molecular beacon selection, MBs offer superior specificity for applications requiring single-nucleotide discrimination and multiplex detection.
Molecular beacons are dual-labeled oligonucleotide probes that form a stem-loop (hairpin) structure in their native state [54]. A fluorescent reporter dye is attached to one end (typically the 5' end) and a quencher molecule to the opposite end (typically the 3' end). In the absence of a complementary target, the stem-forming sequences bring the fluorophore and quencher into close proximity, resulting in fluorescence quenching through mechanisms including Förster resonance energy transfer (FRET) and static quenching [54] [11]. When the MB encounters a complementary target sequence, the probe-target hybridization event, which is thermodynamically favored over the stem-loop structure, forces the stem to unwind. This physical separation of the fluorophore from the quencher results in fluorescence restoration [27] [9].
This unique structural switching mechanism provides MBs with significant advantages over linear probes like hydrolysis probes (e.g., TaqMan probes), including inherently low background signals, higher specificity for distinguishing closely related sequences, and the ability to perform melt curve analysis since they are not degraded during amplification [18] [9]. These properties make MBs particularly suitable for single-nucleotide polymorphism (SNP) genotyping, pathogen detection, multiplex PCR, and real-time monitoring of gene expression in living cells [55] [11].
Core Design Principles and Quantitative Parameters
The performance of a molecular beacon is governed by the careful balancing of its structural components. The following principles and parameters are critical to achieving optimal function.
Stem Design and Stability
The stem is a critical determinant of MB specificity and signal-to-background ratio. Its stability must be sufficient to keep the probe closed in the absence of a target, but not so stable that it impedes hybridization.
Key Design Parameters:
- Length: Stems are typically 5–7 base pairs (bp) long [7] [9]. A 5 bp GC-rich stem melts between 55–60°C, a 6 bp stem between 60–65°C, and a 7 bp stem between 65–70°C [7].
- Sequence and GC Content: Stems should have a high GC content (75–100%) to ensure thermal stability [7]. The sequence should be chosen to avoid complementarity with the probe region or the target.
- Base Placement: Avoid guanosine (G) residues at the end where the fluorophore is attached, as they can intrinsically quench fluorescence [7].
The relationship between stem length and performance is well-established. Systematic studies show that increasing stem length enhances a MB's ability to discriminate between perfectly matched and mismatched targets across a broader temperature range [27] [12]. However, this improved specificity comes at the cost of slower hybridization kinetics [27]. The stem must be long enough to prevent spontaneous opening (which causes high background) but short enough to allow easy opening in the presence of the target.
Probe (Loop) Design
The probe sequence, contained within the loop, is responsible for target recognition.
Key Design Parameters:
- Length: The probe is typically 15–30 nucleotides long [7]. The optimal length is a balance between specificity and binding strength.
- Melting Temperature (Tm): The Tm of the probe-target hybrid should be 7–10°C higher than the assay's annealing temperature (e.g., PCR annealing temperature) [7].
- Sequence Composition: The probe sequence must be analyzed to avoid internal secondary structure or self-complementarity that could compete with the intended stem-loop formation or target binding [7].
Longer probes tend to have lower dissociation constants and faster hybridization rates but may exhibit reduced specificity for single-base mismatches [27]. The probe length and sequence should be selected to achieve a Tm that fits the desired assay conditions.
Stem-Loop Stability Relationship
The central principle of MB design is that the free energy of the probe-target hybrid must be more negative (i.e., more stable) than the free energy of the stem structure for efficient hybridization to occur. The stem's melting temperature (Tm) should be 7–10°C higher than the assay annealing temperature to ensure the beacon remains closed and non-fluorescent when not bound to its target [7]. Concurrently, the probe-target hybrid must be stable at the annealing temperature.
Table 1: Quantitative Design Parameters for Molecular Beacons
| Design Parameter | Recommended Value | Impact on Performance |
|---|---|---|
| Stem Length | 5–7 base pairs | Longer stems increase specificity but slow hybridization kinetics [27]. |
| Stem GC Content | 75–100% | Higher GC content increases stem thermal stability [7]. |
| Probe (Loop) Length | 15–30 nucleotides | Longer probes increase affinity but can decrease single-base mismatch discrimination [27]. |
| Probe-Target Tm | 7–10°C > assay annealing T | Ensures stable binding to the target during the assay [7]. |
| Stem Tm | 7–10°C > assay annealing T | Ensures MB is closed and dark in the absence of target [7]. |
Advanced Design Considerations
Avoiding Self-Complementation and Secondary Structures
A primary challenge in MB design is ensuring the oligonucleotide folds exclusively into the intended stem-loop structure.
- In Silico Folding Analysis: Always analyze the final MB sequence using DNA folding software (e.g., IDT OligoAnalyzer, mFold) [7]. This predicts potential alternative secondary structures that could cause high background fluorescence or sluggish hybridization.
- Probe Sequence Selection: If the initial probe sequence is self-complementary or forms internal hairpins, shift the target frame by a few nucleotides to find a suitable sequence without problematic structures [7]. Small, internal stems of 2–3 nucleotides within the loop are generally tolerable [7].
Conventional vs. Shared-Stem Designs
Most MBs follow a conventional design where the stem sequences are independent of the target sequence. An alternative is the "shared-stem" design, where one arm of the stem is also part of the target-complementary probe sequence [12].
Table 2: Comparison of Conventional and Shared-Stem Molecular Beacon Designs
| Feature | Conventional MB | Shared-Stem MB |
|---|---|---|
| Stem Sequence | Independent of target sequence | One stem arm is part of the target-binding domain [12] |
| Duplex Stability | Standard | Forms more stable duplexes with targets [12] |
| Specificity | High; may have better ability to discriminate mismatches [12] | Slightly reduced specificity compared to conventional design [12] |
| Design Flexibility | High; stem sequence is fully adjustable | Constrained; the shared-stem sequence is predetermined [12] |
Fluorophore and Quencher Selection
The choice of reporter and quencher is vital for a high signal-to-background ratio.
- Reporter Dyes: Common dyes include FAM, HEX, Cy3, Cy5, TET, and ROX [11]. The selection depends on the excitation/emission filters of the detection instrument.
- Quenchers: Non-fluorescent quenchers (NFQs) like Dabcyl, BHQ-1, and BHQ-2 are preferred due to their high quenching efficiency (85–97%) and low background [54]. Dabcyl is a cost-effective universal quencher, while BHQ quenchers offer superior performance for a wider range of fluorophores.
- Spectral Overlap: Ensure significant spectral overlap between the reporter's emission spectrum and the quencher's absorption spectrum for efficient FRET [54].
Experimental Protocol: Design and Validation
Step-by-Step Design Workflow
- Identify Target Sequence: Select a unique region within the target gene (for PCR, choose a region within the amplicon but not overlapping with the primers).
- Design Probe Sequence:
- Choose a 15–30 nt sequence complementary to the target.
- Check GC content (aim for 35–65% for the probe itself) and avoid a G at the very 5' end [56].
- Verify specificity using BLAST or similar tools.
- Add Stem Sequences:
- Add complementary arm sequences of 5–7 nt to both ends of the probe. For conventional MBs, these should be unrelated to the target.
- Design the stem to have a high GC content.
- Use folding software (e.g., IDT OligoAnalyzer) to predict the Tm of the stem.
- Check Overall Sequence:
- Submit the full MB sequence (stem-loop-stem) to a DNA folding program.
- Confirm that the lowest free energy structure is the intended hairpin.
- If alternative stable structures form, revise the stem sequences or shift the probe frame.
- Select Fluorophore and Quencher: Choose a compatible reporter-quencher pair based on your instrument's capabilities and the need for multiplexing.
The following diagram summarizes the design workflow and the subsequent experimental validation process.
Experimental Validation Protocols
Before use in complex applications like live-cell imaging, MBs must be validated in vitro.
Protocol 1: Thermal Denaturation Profiling
- Purpose: To determine the melting temperature (Tm) of the stem and the probe-target hybrid.
- Materials: Spectrofluorometer or real-time PCR instrument, purified MB, complementary target oligonucleotide.
- Method:
- Prepare two solutions: (A) MB alone, and (B) MB with a 5-10 fold excess of target.
- Slowly heat the samples from a low (e.g., 20°C) to a high temperature (e.g., 95°C) while continuously monitoring fluorescence.
- For solution A (MB alone), the inflection point of the fluorescence increase corresponds to the stem melting temperature (Tmstem).
- For solution B (MB + target), the inflection point of the fluorescence decrease corresponds to the probe-target hybrid melting temperature (Tmhybrid).
- Success Criteria: The measured Tmhybrid should be 7-10°C above your assay temperature, and the Tmstem should also be 7-10°C above the assay temperature [7].
Protocol 2: Specificity and Kinetics Assay
- Purpose: To verify the MB's ability to discriminate mismatched targets and assess its hybridization speed.
- Materials: Spectrofluorometer, purified MB, perfectly matched target, single-base mismatched target.
- Method:
- At a constant temperature (e.g., your assay temperature), add a large excess of target to the MB and monitor fluorescence over time.
- Repeat with the mismatched target.
- Plot fluorescence vs. time to determine the hybridization kinetics (on-rate).
- Compare the maximum fluorescence signal and the rate of signal increase between the perfect and mismatched targets.
- Success Criteria: A high signal-to-background ratio (>10-fold) and a significantly lower signal with the mismatched target indicate good specificity [54].
The Scientist's Toolkit: Research Reagent Solutions
Table 3: Essential Reagents and Tools for Molecular Beacon Research
| Item | Function/Description | Example Providers/Sources |
|---|---|---|
| Oligonucleotide Synthesis | Custom synthesis of MBs with fluorophore and quencher. | Integrated DNA Technologies (IDT) [9], Sigma-Aldrich |
| Fluorophore-Quencher Pairs | Signal transduction system. FAM-BHQ1, Cy3-Dabcyl, Cy5-BHQ2. | IDT [9], Lumiprobe |
| HPLC Purification | Critical post-synthesis purification to remove incomplete products and ensure low background. | Standard service offered by synthesis companies [27] |
| In Silico Design Software | Predicts secondary structure, Tm, and potential off-target interactions. | IDT OligoAnalyzer [7], mFold [7], Beacon Designer (Premier Biosoft) |
| Hybridization Buffer | Provides optimal ionic strength and pH for MB function. Often contains MgCl₂ and salt. | In-house recipe (e.g., 10 mM Tris, 50 mM KCl, 5 mM MgCl₂) [12] |
Mastering molecular beacon design requires a meticulous, quantitative approach centered on optimizing the stem-loop stability, length, and sequence to avoid self-complementation. By adhering to the design rules and validation protocols outlined in this document, researchers can reliably generate MBs with high specificity, excellent signal-to-background ratios, and robust performance in demanding applications. When selecting a probe chemistry for a specific application, MBs stand out for their superior mismatch discrimination and versatility in multiplexing and live-cell analysis, providing a powerful alternative to hydrolysis probes.
Within the framework of selecting between hydrolysis probes and molecular beacons for quantitative PCR (qPCR), researchers frequently encounter specific technical challenges that can compromise assay integrity. High background fluorescence, poor signal-to-noise ratios, and complete assay failure represent significant hurdles, often stemming from fundamental probe design and reaction optimization issues. This application note delineates the core mechanisms behind these common pitfalls, providing detailed protocols and quantitative data to guide researchers and drug development professionals in achieving robust, reliable qPCR results. Understanding the distinct behaviors of hydrolysis (TaqMan) and molecular beacon probes is crucial for effective troubleshooting and assay design [57] [58] [59].
Technical Background: Probe Mechanisms and Inherent Challenges
The fluorescence generation and quenching mechanisms of hydrolysis probes and molecular beacons are fundamentally different, leading to characteristic strengths and vulnerabilities.
Comparative Probe Mechanics
Hydrolysis Probes (TaqMan): These linear probes are labeled with a 5' fluorescent reporter and a 3' quencher. In their unbound state, the proximity of the quencher to the fluorophore suppresses fluorescence. During the PCR extension phase, the DNA polymerase's 5'→3' exonuclease activity cleaves the probe, permanently separating the reporter from the quencher and resulting in an irreversible accumulation of fluorescent signal with each cycle [59]. A primary drawback of this system is the elevated background signal inherent to the design, as the fluorophore and quencher on a single-stranded oligonucleotide do not achieve 100% quenching efficiency [8].
Molecular Beacons: These probes are structured in a stem-loop (hairpin) conformation, with the fluorophore and quencher held in close proximity at the ends of the stem. This structure enables highly efficient "contact quenching," leading to very low background fluorescence in the closed state. Hybridization with the target DNA sequence forces the stem to open, separating the fluorophore from the quencher and generating a fluorescent signal. This binding is reversible, and the probe reforms its quenched structure when dissociated from the target [58] [59]. The main challenges involve the complexity of design and susceptibility to issues like "stem invasion," where the stem duplex is disrupted without proper target binding, causing false-positive signals [58].
The diagrams below illustrate the distinct operational mechanisms and failure modes of each probe type.
Quantitative Performance Comparison
The table below summarizes key performance characteristics and common issues associated with each probe type, providing a basis for selection and troubleshooting.
Table 1: Performance Comparison and Common Pitfalls of qPCR Probes
| Characteristic | Hydrolysis Probe (TaqMan) | Molecular Beacon |
|---|---|---|
| Typical Background Signal | Relatively high [8] | Very low [58] [8] |
| Primary Cause of High Background | Incomplete quenching in single-stranded linear form [8] | Stem invasion; imperfect hairpin formation [58] |
| Signal Generation | Irreversible (cleavage) | Reversible (hybridization) |
| Key Design Complexity | Optimizing primer-probe distance | Designing stable stem-loop; avoiding self-dimerization |
| Susceptibility to Failed Assays | Contamination; inefficient polymerase cleavage [60] | Mis-folding; stem-loop instability [58] |
| Multiplexing Capability | High (multiple reporter colors) [57] [59] | High (multiple reporter colors) [57] [59] |
Experimental Protocols for Troubleshooting and Optimization
Protocol 1: Diagnosing and Remedying High Background Fluorescence
Objective: To identify the source of elevated background fluorescence and implement corrective measures. Reagents: See Section 4, "The Scientist's Toolkit."
Procedure:
- Run No-Template Controls (NTC): Include NTCs containing all reaction components except the nucleic acid template. A significant signal in the NTC indicates contaminating DNA/amplicons or probe-related issues [60].
- Decontaminate: Treat all surfaces and equipment with a DNA decontamination solution (e.g., DNAzap) to destroy contaminating amplicons [60].
- Verify Probe Integrity and Design:
- For Hydrolysis Probes: Ensure the probe is fresh and has been stored correctly. If background remains high, consider switching to a dual-stranded probe (DSP) design, which has been shown to offer lower background signal [8].
- For Molecular Beacons:
- Check the stem stability. The melting temperature (Tm) of the stem should be at least 7°C higher than the assay temperature to ensure the hairpin remains closed in the absence of the target [58].
- Avoid placing the fluorophore directly on a guanosine (G) nucleotide, as guanine can quench fluorescence by up to 40%, reducing the final signal-to-noise ratio [58] [61]. Replace the 5' G with a cytosine (C) if possible.
- Utilize software like Beacon Designer for optimized probe sequences [58].
- Optimize Reaction Conditions:
Protocol 2: Improving Poor Signal-to-Noise (S/N) Ratio
Objective: To maximize the specific fluorescence signal while minimizing background noise. Reagents: See Section 4, "The Scientist's Toolkit."
Procedure:
- Titrate Probe Concentration: Perform a series of reactions with probe concentrations ranging from 10 nM to 300 nM. The optimal working concentration is typically in the low nanomolar range (10-100 nM) [57]. The concentration that yields the lowest Ct value and highest ΔRn (fluorescence minus baseline) should be selected.
- Validate Probe Specificity:
- Check the probe sequence for complementarity to non-target regions using BLAST or similar tools.
- For gene expression analysis using RNA, design primers that span an exon-exon junction to prevent amplification of genomic DNA [60].
- Assess Amplification Efficiency:
- Run a standard curve with a minimum of 5 serial dilutions (e.g., 1:10) of the template.
- Calculate the PCR efficiency using the formula: Efficiency = 10^(–1/slope) – 1. An ideal reaction has an efficiency between 90% and 110% (slope between -3.6 and -3.1) [60] [62].
- If efficiency is outside this range, re-design the primers or probe. Amplicons should be short (70-200 bp) for optimal efficiency [62].
- Check RNA Quality (for RT-qPCR): Use high-quality, intact RNA. Degraded RNA will limit reverse transcription efficiency and reduce signal. Assess RNA integrity using an instrument like a Bioanalyzer [60].
Protocol 3: Preventing and Investigating Failed Assays
Objective: To systematically identify the cause of complete assay failure (no signal or nonspecific amplification). Reagents: See Section 4, "The Scientist's Toolkit."
Procedure:
- Include Comprehensive Controls:
- Positive Control: Confirms that all reagents are functional.
- No-Template Control (NTC): Detects contamination.
- No-Amplification Control (NAC / Minus-RT Control): Contains all reagents except the reverse transcriptase (for RT-qPCR). A signal in the NAC indicates contamination from genomic DNA [60].
- Verify Primer and Probe Specificity:
- Run a melt curve analysis post-amplification if using dyes or molecular beacons. A single sharp peak indicates specific product formation, while multiple peaks suggest primer-dimer or non-specific amplification [60] [9].
- For molecular beacons, ensure the probe is displaced, not degraded, by the polymerase, allowing it to participate in multiple rounds of hybridization [9].
- Inspect Primer Design:
- Primers should be 15-30 bases long with a Tm of ~60-65°C.
- GC content should be 40-60%.
- The 3' ends should be devoid of complementary sequences to prevent primer-dimer formation [62].
- Check for Enzyme Inhibition: If using complex sample matrices (e.g., blood, soil), dilute the sample or use a nucleic acid purification method designed to remove inhibitors.
The Scientist's Toolkit: Essential Reagents and Materials
The following table lists key reagents and their critical functions in developing and troubleshooting qPCR assays with fluorescent probes.
Table 2: Essential Reagents for qPCR Probe-Based Assays
| Reagent / Material | Function | Considerations for Troubleshooting |
|---|---|---|
| Hydrolysis or Molecular Beacon Probe | Sequence-specific detection of the amplified target. | Aliquot to avoid freeze-thaw cycles. Verify purification (e.g., HPLC) and concentration. |
| Hot-Start DNA Polymerase | Amplifies DNA; hydrolyzes probes. Essential for specificity. | Verify 5' nuclease activity for hydrolysis probes. Use polymerase without 5' nuclease for molecular beacons. |
| dNTP Mix | Building blocks for new DNA strands. | Use a balanced, high-quality mix to prevent incorporation errors. |
| qPCR Master Mix | Provides optimized buffer, salts, and polymerase for robust amplification. | Use a commercial master mix for reproducibility. Contains a passive reference dye (e.g., ROX) to correct for well-to-well variation [60]. |
| Nuclease-Free Water | Solvent for reactions. | Use high-purity water for NTCs and reagent resuspension. |
| DNA Decontamination Solution | Degrades contaminating DNA and amplicons on surfaces. | Critical for preventing false positives. Use regularly in the PCR workspace [60]. |
| RNA Stabilization Reagent | Preserves RNA integrity in starting material. | Essential for accurate RT-qPCR gene expression results (e.g., RNAlater) [60]. |
| Optical Plates & Seals | Vessel for the qPCR reaction. | Ensure seals are clear and airtight to prevent evaporation and signal distortion. |
Successfully navigating the common pitfalls of high background, poor S/N, and assay failure in qPCR requires a deep understanding of the fundamental differences between probe technologies. Hydrolysis probes, while robust and widely used, are inherently prone to higher background, whereas molecular beacons offer superior background suppression but demand more meticulous design to avoid stem instability. By applying the systematic diagnostic protocols and optimization strategies outlined in this application note—including rigorous control practices, precise probe titration, and careful design considerations—researchers can make informed selections between these probe types and ensure the generation of precise, reproducible, and meaningful data for both research and drug development applications.
Within the framework of selecting an appropriate detection method for quantitative PCR (qPCR), the choice between hydrolysis probes (e.g., TaqMan) and molecular beacons is only the first step. Achieving high sensitivity, specificity, and reproducibility requires meticulous optimization of the reaction conditions. This document provides a detailed optimization checklist and protocols for these two prominent probe-based chemistries, enabling researchers and drug development professionals to robustly validate and implement their selected assay [18].
The performance of hydrolysis probes and molecular beacons is governed by distinct mechanisms. Hydrolysis probes rely on the 5'→3' exonuclease activity of Taq polymerase to cleave a reporter dye from a quencher during amplification [63]. In contrast, molecular beacons are hairpin-shaped probes that undergo a fluorogenic conformational change upon hybridization to the target, a process highly dependent on the stability of their stem-loop structure [7] [63]. The following sections provide a systematic approach to optimizing the critical parameters that control these processes.
The table below summarizes the key parameters requiring optimization for both hydrolysis probes and molecular beacons. The considerations and optimal ranges differ significantly due to their distinct mechanisms of action [18] [64].
Table 1: Key Optimization Parameters for Hydrolysis Probes and Molecular Beacons
| Parameter | Hydrolysis Probes | Molecular Beacons |
|---|---|---|
| Annealing Temperature | Primary goal is to maximize primer efficiency and polymerase activity. Must be compatible with polymerase's 5' nuclease activity. | Critical for specificity. Must be 5–10°C below the probe-target hybrid Tm and 7–10°C below the stem melting temperature [7]. |
| Probe Concentration | Typically 50–300 nM. Optimized to provide a strong signal without inhibiting the PCR reaction [65]. | Typically 100–300 nM. Requires titration to ensure low background fluorescence and high signal-to-noise [63]. |
| Mg²⁺ Concentration | Standard MgCl₂ concentration (e.g., 1.5–5 mM) is often sufficient, as the system is less sensitive to divalent cation fluctuations. | Can be more sensitive. Mg²⁺ stabilizes the hairpin structure; its concentration may require fine-tuning. |
| Buffer & Additives | Standard qPCR buffers are typically adequate. | May benefit from additives that stabilize the hairpin structure or reduce non-specific interactions. |
| Primary Optimization Goal | Maximize cleavage efficiency and reaction kinetics. | Minimize background fluorescence (ensure hairpin stability) while maximizing specific target binding signal [7]. |
Detailed Experimental Optimization Protocols
Protocol 1: Annealing Temperature Optimization
Principle: The annealing temperature is the most critical parameter for assay specificity and efficiency. It must be optimized to allow specific primer and probe binding while preventing non-specific amplification [64].
Materials:
- Optimized primer and probe sets.
- qPCR master mix (without primers/probe).
- Template DNA (positive control).
- Nuclease-free water.
- Real-time PCR instrument.
Method:
- Prepare a master mix containing all reaction components (primers, probe, template, buffer) at their standard concentrations.
- Design a thermal gradient on your real-time PCR instrument. A recommended range is 55°C to 65°C, spanning at least 8 different temperatures.
- Aliquot the master mix into individual tubes or wells and run the qPCR program using the gradient.
- Analyze the results post-run:
- Identify the temperature that yields the lowest Cq (Quantification Cycle) value with the highest fluorescence intensity (ΔRn).
- Check the amplification curves for sigmoidal shape and the absence of primer-dimer or non-specific amplification.
- For molecular beacons, ensure the chosen temperature is at least 7°C below the predicted stem melting temperature to guarantee the hairpin opens only upon target binding [7].
Diagram: Annealing Temperature Optimization Workflow
Protocol 2: Probe Concentration Titration
Principle: The probe concentration must be sufficient to generate a strong fluorescent signal without inhibiting the PCR amplification through steric hindrance or excessive resource consumption [65] [63].
Materials:
- As in Protocol 1, with an optimized annealing temperature.
Method:
- Prepare a series of reactions where the probe concentration is varied. A standard range is 50 nM to 400 nM.
- Example: 50, 100, 150, 200, 250, 300, 400 nM.
- Keep the concentrations of all other components (especially primers and Mg²⁺) constant.
- Run the qPCR using the optimized annealing temperature from Protocol 1.
- Analyze the results:
- Plot the Cq value vs. probe concentration. The optimal concentration is typically at the plateau where the Cq value stabilizes.
- Ensure that the final fluorescence (ΔRn) is strong and that amplification efficiency remains between 90–110%.
- For molecular beacons, also assess the background fluorescence in no-template controls (NTCs) at each concentration. Choose the concentration that offers the best signal-to-noise ratio.
Table 2: Example Data from a Probe Titration Experiment
| Probe Concentration (nM) | Mean Cq Value | ΔRn (Fluorescence) | Amplification Efficiency | Notes |
|---|---|---|---|---|
| 50 | 26.5 | 0.8 | 95% | Low signal |
| 100 | 25.8 | 1.5 | 98% | Good signal |
| 150 | 25.7 | 1.9 | 102% | Optimal |
| 200 | 25.7 | 2.0 | 105% | Excellent signal |
| 300 | 25.8 | 2.0 | 108% | Slight efficiency drop |
| 400 | 26.1 | 2.0 | 95% | Potential inhibition |
Protocol 3: Buffer and Mg²⁺ Concentration Optimization
Principle: The buffer system, particularly the concentration of magnesium ions (Mg²⁺), is a cofactor for DNA polymerase and can affect primer-template hybridization and probe stability [64].
Materials:
- qPCR master mix (often supplied with Mg²⁺) or individual components to prepare a custom buffer.
- MgCl₂ solution (e.g., 25 mM or 50 mM).
Method:
- If using a commercial master mix, follow the manufacturer's recommended protocol, as Mg²⁺ concentration is usually pre-optimized.
- For custom master mixes, prepare a series of reactions with MgCl₂ concentrations ranging from 1.0 mM to 5.0 mM in 0.5 mM increments.
- Use the optimized annealing temperature and probe concentration from previous protocols.
- Run the qPCR and analyze the results as described in Protocol 1.
- Select the Mg²⁺ concentration that yields the lowest Cq and highest ΔRn with specific amplification.
The Scientist's Toolkit: Research Reagent Solutions
The following table lists essential reagents and their critical functions for successfully developing and running optimized probe-based qPCR assays.
Table 3: Essential Reagents for Probe-Based qPCR Assay Development
| Reagent / Material | Function / Application | Considerations |
|---|---|---|
| Hot-Start DNA Polymerase | Prevents non-specific amplification and primer-dimer formation during reaction setup by requiring heat activation. | Essential for robust and reproducible qPCR. |
| dNTP Mix | Building blocks for new DNA strand synthesis. | Use a balanced, high-quality mix to prevent incorporation errors. |
| MgCl₂ Solution | Co-factor for DNA polymerase activity; influences Tm of primers and probes. | Critical for custom buffer optimization. |
| qPCR Buffer | Provides the optimal chemical environment (pH, salts) for polymerase activity and probe hybridization. | Can be supplied with or without Mg²⁺. |
| Fluorogenic Probes | Sequence-specific detection of the amplicon. | Hydrolysis Probes: Require 5' nuclease activity. Molecular Beacons: Require careful stem-loop design [7]. |
| Quenchers | Suppress reporter fluorescence when the probe is intact. | Dark Quenchers (e.g., BHQ, OQ) are preferred over fluorescent quenchers (e.g., TAMRA) for a lower background signal [63]. |
| Nuclease-Free Water | Solvent for all reaction components. | Prevents degradation of primers, probes, and template. |
| Software (Beacon Designer, Primer Express) | Aids in the design of primers and probes with appropriate Tm, avoids secondary structures, and ensures specificity. | Highly recommended for molecular beacon design due to complex thermodynamics [7]. |
A systematic approach to optimizing annealing temperature, probe concentration, and buffer conditions is non-negotiable for developing high-performance qPCR assays. While hydrolysis probes are often celebrated for their robustness and simpler design, molecular beacons offer superior specificity and lower background, making them ideal for applications like SNP detection and multiplex PCR [18]. The protocols outlined herein provide a clear pathway for researchers to harness the full potential of their chosen probe chemistry, ensuring the generation of reliable, publication-quality data in both basic research and drug development contexts.
Head-to-Head Comparison: Making the Final Selection for Your Experiment
Within quantitative PCR (qPCR), the selection of an appropriate probe chemistry is pivotal for the success of any detection assay. Hydrolysis probes (e.g., TaqMan probes) and Molecular Beacons represent two of the most prominent probe technologies, each with distinct mechanisms and performance characteristics. This application note provides a direct, detailed comparison to guide researchers and drug development professionals in selecting the optimal probe for their specific experimental needs, framed within the broader context of probe selection guide research. The core differentiator lies in their signaling mechanism: Hydrolysis Probes produce a signal through the irreversible, enzymatic cleavage of the probe during PCR amplification [28] [66], whereas Molecular Beacons undergo a reversible, conformational change upon hybridization to the target, which physically separates the fluorophore from the quencher without degrading the probe [28] [9].
The following table synthesizes key performance and practical metrics to facilitate a direct comparison between these two probe chemistries.
Table 1: Direct comparison of Hydrolysis Probes and Molecular Beacons.
| Feature | Hydrolysis Probes (TaqMan) | Molecular Beacons |
|---|---|---|
| Mechanism | Fluorophore release via 5'-3' exonuclease cleavage of the probe during polymerase extension [28] [66]. | Fluorescence dequenching via reversible hybridization and stem-loop conformational change [28] [9]. |
| Specificity | High, conferred by sequence-specific hybridization of the probe [67] [28]. | Very High, due to a dual-check mechanism involving both hybridization of the loop and the stability of the stem [9]. |
| Multiplexing Capability | Suitable, but can be limited by the requirement for multiple dyes with distinct emission spectra [67]. | Highly suitable; the stem-loop structure minimizes cross-talk, making them ideal for multiplex assays [67] [28]. |
| Cost Considerations | Widespread and relatively inexpensive; requires a polymerase with 5'-nuclease activity [67]. | Can be more costly due to more complex synthesis and design optimization; polymerase does not require nuclease activity [67]. |
| Ease of Design | Straightforward; primarily involves ensuring the probe's melting temperature (Tm) is 6–8°C higher than the primers [67]. | More complex; requires careful optimization of the stem-loop structure to ensure low background and efficient hybridization [67] [28]. |
| Signal-to-Noise Ratio | Good; background fluorescence is reduced as the quencher is permanently separated from the dye upon cleavage [28]. | Can be excellent with optimal design; unbound probes are quenched, leading to very low background [68] [9]. |
| Probe Reusability | No; probe is destroyed during the amplification process [28]. | Yes; probe is displaced intact and can hybridize to new targets in subsequent cycles [9]. |
Experimental Protocols for Probe Utilization
Protocol: QPCR Using Hydrolysis Probes
This protocol is adapted for the detection of a specific DNA target using a hydrolysis probe-based qPCR assay [67] [28].
Key Research Reagent Solutions:
- Polymerase: Thermostable DNA polymerase with 5'-3' exonuclease activity (e.g., Taq DNA polymerase).
- Hydrolysis Probe: A single-stranded DNA oligonucleotide, typically 20–30 nucleotides in length, dual-labeled with a reporter fluorophore (e.g., FAM) at the 5' end and a quencher (e.g., TAMRA, BHQ) at the 3' end.
- Primers: Forward and reverse primers, designed according to standard guidelines with a Tm typically 5°C lower than the probe's Tm.
Procedure:
- Reaction Setup: Prepare a master mix containing reaction buffer, dNTPs, MgCl₂ (at an optimized concentration, typically 3–5 mM), forward and reverse primers (typically 100–900 nM each), hydrolysis probe (typically 50–300 nM), DNA polymerase (e.g., 1.25 U), and template DNA.
- Thermal Cycling: Load the reactions into a real-time PCR instrument and run the following program:
- Initial Denaturation: 95°C for 2–10 minutes.
- Amplification Cycle (40–50 repeats):
- Denaturation: 95°C for 15 seconds.
- Annealing/Extension: 60°C for 60 seconds. Fluorescence data is acquired at the end of this step.
- Data Analysis: The increase in fluorescence of the reporter dye is monitored cycle-by-cycle. The cycle threshold (Ct) value is determined for each sample and used for quantitative analysis relative to a standard curve.
Protocol: QPCR Using Molecular Beacons
This protocol details the use of Molecular Beacons for real-time PCR, highlighting steps that differ from hydrolysis probe workflows [28] [9].
Key Research Reagent Solutions:
- Polymerase: Any standard thermostable DNA polymerase; 5'-nuclease activity is not required.
- Molecular Beacon Probe: A single-stranded DNA oligonucleotide with a stem-loop structure. The loop is complementary to the target sequence (typically 15–30 nucleotides). The stem (typically 5–7 bp) is formed by complementary arm sequences. A fluorophore is attached to one end and a quencher to the other.
- Primers: Forward and reverse primers. The Molecular Beacon is designed to have a hybridization temperature 7–10°C higher than the primers.
Procedure:
- Reaction Setup: Prepare a master mix similar to the one for hydrolysis probes, but substitute the Molecular Beacon for the hydrolysis probe. The polymerase can be any standard enzyme.
- Thermal Cycling: Load the reactions and run the following program:
- Initial Denaturation: 95°C for 2–10 minutes.
- Amplification Cycle (40–50 repeats):
- Denaturation: 95°C for 15 seconds.
- Annealing: A temperature 7–10°C below the Molecular Beacon's Tm for 30–60 seconds. Fluorescence data is acquired at this step, as the beacon hybridizes to its target and fluoresces.
- Extension: 72°C for 30 seconds. The polymerase displaces the intact Molecular Beacon, which then re-folds into its quenched state.
- Data Analysis: Fluorescence is measured during the annealing step of each cycle. The increase in fluorescence is proportional to the amount of accumulated target, and Ct values are calculated for quantification.
Signaling Pathway and Experimental Workflow Visualization
The diagrams below illustrate the fundamental signaling mechanisms and experimental workflows for both probe types, providing a visual guide to their operational logic.
Hydrolysis Probe Mechanism and Workflow
Molecular Beacon Mechanism and Workflow
Within molecular biology and diagnostic assay development, the selection of an appropriate probe chemistry for quantitative PCR (qPCR) is a critical decision that directly impacts the success, cost, and efficiency of research and development projects. This application note provides a detailed cost-benefit analysis framed within a broader thesis on probe selection, focusing on two predominant technologies: hydrolysis probes (e.g., TaqMan) and molecular beacons. The guidance is structured to assist researchers, scientists, and drug development professionals in making informed choices that balance budgetary constraints, time limitations, and specific experimental requirements, thereby optimizing resource allocation and enhancing data quality in molecular assays.
Hydrolysis probes and molecular beacons, while both serving as fluorescent detection mechanisms in qPCR, operate on fundamentally different principles. Understanding these mechanisms is essential for appreciating their respective advantages and limitations.
Hydrolysis Probes are single-stranded oligonucleotides containing a fluorescent reporter dye at the 5' end and a quencher molecule at the 3' end [69]. When the probe is intact, the proximity of the quencher to the fluorophore suppresses fluorescence. During the PCR annealing stage, the probe binds to its specific complementary target sequence. Subsequently, during the elongation phase, the 5'→3' exonuclease activity of the DNA polymerase cleaves the probe, physically separating the reporter from the quencher and resulting in a permanent increase in fluorescence that is proportional to the amount of amplified target [70] [69].
Molecular Beacons are also single-stranded oligonucleotides equipped with a 5' fluorophore and a 3' quencher. However, their design incorporates complementary sequences at their termini that cause the probe to form a stable stem-loop (hairpin) structure in its unbound state [9] [7]. In this closed conformation, the fluorophore and quencher are held in close proximity, quenching fluorescence. Upon hybridization to the target nucleic acid during the annealing phase, the probe undergoes a conformational shift that forces the stem to dissociate and the loop to linearize. This separation of the fluorophore from the quencher allows for fluorescence emission. Crucially, the probe is not degraded; it is merely displaced by the polymerase and can subsequently re-hybridize to other targets in later cycles [9].
The logical relationship governing the choice between these probes is summarized in the decision workflow below.
Comparative Cost-Benefit Analysis
The choice between hydrolysis probes and molecular beacons involves a direct trade-off between cost, time, and performance. The following table provides a structured comparison of these key parameters to guide the selection process.
Table 1: Direct Cost-Benefit Comparison of Hydrolysis Probes and Molecular Beacons
| Parameter | Hydrolysis Probes | Molecular Beacons |
|---|---|---|
| Initial Probe Cost | Generally lower and widespread availability [70] [18] | Typically more expensive [70] |
| Experimental Time & Setup | Well-established, familiar protocols; minimal troubleshooting for standard applications [70] [18] | Can require more optimization time due to complex stem-loop design [70] |
| Background Signal | Relatively higher background fluorescence [8] | Very low background due to efficient quenching in hairpin structure [9] [18] |
| Specificity | High, due to sequence complementarity and enzymatic cleavage [70] [69] | Very high; the hairpin structure is thermodynamically favored over binding to non-specific sequences, enhancing allele discrimination [9] [7] |
| Ease of Design | Straightforward; primarily requires a target-specific sequence [70] | Complex; requires careful design of both the target-specific loop and the complementary stem to ensure proper folding [70] [7] |
| Multiplexing Potential | Good, but higher background can be a limiting factor with many targets [70] [69] | Excellent; low background allows for clearer resolution of multiple fluorescent signals [70] [65] |
| Ideal Application Profile | Routine gene expression, pathogen detection, high-throughput screening where cost is a key factor [70] [18] | SNP genotyping, multiplex assays, detection of low-abundance targets, and applications demanding utmost specificity [9] [18] |
Application-Oriented Selection Guide
The theoretical advantages of each probe type translate directly into performance in specific experimental applications. The following table maps common research goals to the recommended probe chemistry.
Table 2: Probe Selection Guide Based on Experimental Application
| Application | Recommended Probe(s) | Rationale |
|---|---|---|
| Gene Expression Validation | Hydrolysis Probes, Molecular Beacons [18] | Both offer the required specificity. Hydrolysis probes are cost-effective for well-characterized targets, while beacons excel for low-expression genes. |
| Pathogen Detection | Scorpion Probes, Hydrolysis Probes, Molecular Beacons [18] | Specificity is paramount. Scorpion and hydrolysis probes are robust, while beacons are ideal for differentiating closely related strains. |
| SNP Detection | Molecular Beacons, Scorpion Probes [70] [18] | Molecular beacons provide superior allele discrimination due to their conformational change, which is highly sensitive to mismatches [9]. |
| Multiplex PCR | Molecular Beacons, Scorpion Probes, Dual Hybridization Probes [70] [18] | The low background of molecular beacons allows for cleaner signal separation in multiplexed reactions [70] [65]. |
| Viral Load Quantification | Scorpion Probes, Hydrolysis Probes, Molecular Beacons [18] | All three provide quantitative accuracy. Scorpion and hydrolysis probes are widely used, while beacons are excellent for low viral loads. |
Detailed Experimental Protocols
Protocol for qPCR Using Hydrolysis Probes
This protocol is designed for the sensitive and specific quantification of a DNA target using hydrolysis probe chemistry.
I. Research Reagent Solutions
Table 3: Essential Reagents for Hydrolysis Probe Assays
| Reagent/Material | Function | Specifications/Notes |
|---|---|---|
| Hydrolysis Probe | Sequence-specific detection | FAM-labeled at 5' end, BHQ/QSY quencher at 3' end. |
| qPCR Master Mix | Provides reaction components | Contains hot-start DNA polymerase with 5'→3' exonuclease activity, dNTPs, MgCl₂, and buffer. |
| Forward & Reverse Primers | Target amplification | 18-22 bp; Tm ~60-65°C; designed for amplicons 70-200 bp. |
| Template DNA/cDNA | Target nucleic acid | Quantity: 1-100 ng per reaction. |
| Nuclease-free Water | Reaction solvent | To adjust final volume. |
| qPCR Plates/Tubes | Reaction vessel | Optically clear for fluorescence detection. |
II. Procedure
- Reaction Setup: Thaw all reagents and prepare the qPCR master mix on ice. A typical 20 µL reaction contains:
- 10 µL of 2x qPCR Master Mix
- Forward Primer (10 µM final concentration)
- Reverse Primer (10 µM final concentration)
- Hydrolysis Probe (5 µM final concentration, optimized)
- Template DNA (1-100 ng)
- Nuclease-free water to 20 µL
- Thermal Cycling: Load the plate into a real-time PCR instrument and run the following program:
- Initial Denaturation: 95°C for 2-10 minutes (activates polymerase).
- Amplification (40-50 cycles):
- Denaturation: 95°C for 15 seconds.
- Annealing/Extension: 60°C for 60 seconds (acquire fluorescence signal at this step).
- Data Analysis: Analyze the fluorescence data using the instrument's software. Determine Cq values and perform absolute quantification using a standard curve or relative quantification using the ΔΔCt method [62].
Protocol for qPCR Using Molecular Beacons
This protocol leverages the high specificity and low background of molecular beacons, making it suitable for SNP detection and multiplexing.
I. Research Reagent Solutions
Table 4: Essential Reagents for Molecular Beacon Assays
| Reagent/Material | Function | Specifications/Notes |
|---|---|---|
| Molecular Beacon Probe | Sequence-specific detection | 5' Fluorophore, 3' Quencher; 5-7 bp stem, 15-30 nt loop. Designed to avoid self-complementarity. |
| qPCR Master Mix | Provides reaction components | Use a polymerase without or with minimal 5'→3' exonuclease activity to prevent probe degradation. |
| Forward & Reverse Primers | Target amplification | Designed as per standard guidelines; amplicon <150 bp for efficient probe competition. |
| Template DNA | Target nucleic acid | 1-100 ng per reaction. |
| Beacon Designer Software | Probe Design | Software (e.g., Beacon Designer) is crucial for optimizing stem-loop structure and predicting Tm [7]. |
II. Procedure
- Reaction Setup: Prepare the master mix on ice. A typical 20 µL reaction contains:
- 10 µL of 2x qPCR Master Mix (without exonuclease activity)
- Forward Primer (10 µM)
- Reverse Primer (10 µM)
- Molecular Beacon (5 µM final concentration, requires optimization)
- Template DNA
- Nuclease-free water to 20 µL
- Thermal Cycling: Program the qPCR instrument with the following steps:
- Initial Denaturation: 95°C for 2-10 minutes.
- Amplification (40-50 cycles):
- Denaturation: 95°C for 15 seconds.
- Annealing: Run at a temperature 7-10°C below the probe-target hybrid Tm (acquire fluorescence here) [7].
- Extension: 72°C for 20 seconds (optional, can be combined with annealing).
- Data Analysis: Analyze the fluorescence data. The high specificity of molecular beacons often allows for post-amplification melt curve analysis to verify correct amplicon and probe binding [9].
Advanced Design and Optimization Strategies
Design Specifications for Molecular Beacons
Achieving optimal performance from molecular beacons requires meticulous design, which can be visualized as a multi-step optimization pathway.
- Probe Sequence (Loop): The target-specific loop should be 15-30 nucleotides long, with a melting temperature (Tm) 7-10°C higher than the assay's annealing temperature for robust hybridization [7].
- Stem Sequence: The arm sequences should be 5-7 base pairs long with high GC content (75-100%) to form a stable stem. The Tm of the stem should be 7-10°C higher than the annealing temperature to ensure the beacon remains closed in the absence of the target [7]. Avoid guanosine residues directly adjacent to the 5' fluorophore, as they can inherently quench fluorescence [7].
- In-silico Validation: Use DNA folding programs (e.g., mFold, IDT Oligo Analyzer) to verify that the intended hairpin is the most stable secondary structure. Misfolded probes result in high background fluorescence [7].
Advanced Molecular Beacon Architectures
Recent research has led to innovations that address inherent limitations. For instance, tailed molecular beacons have been developed to overcome the challenge of detecting highly structured DNA or RNA targets [10]. These probes are equipped with an additional single-stranded "tail" sequence that is complementary to a region adjacent to the beacon's target site. The tail hybridizes first, rapidly anchoring the probe near the intended target and facilitating the subsequent hybridization of the loop region. This design can increase the signal-to-background ratio by up to 40-fold and accelerate hybridization rates by nearly 800-fold compared to conventional molecular beacons when dealing with folded analytes [10].
The decision between hydrolysis probes and molecular beacons is not a matter of identifying a superior technology, but rather of selecting the optimal tool for a specific experimental context. Hydrolysis probes represent the benchmark for cost-effective, robust, and relatively simple detection, ideal for high-throughput and routine applications. Molecular beacons, with their superior specificity, low background, and tolerance for multiplexing, are the preferred choice for demanding applications such as SNP genotyping, pathogen strain differentiation, and detection of low-abundance or highly structured targets, where their higher initial cost and design complexity are justified by enhanced performance.
Researchers are advised to use the structured tables and protocols provided herein to align their core constraints and application needs with the inherent strengths of each probe chemistry, thereby ensuring scientifically sound and fiscally responsible experimental outcomes.
Within molecular assay development, particularly when selecting between hydrolysis probes and molecular beacons, validation strategies are paramount for ensuring reliability, accuracy, and specificity. Melt curve analysis has emerged as a powerful, versatile technique for assay confirmation, providing a critical layer of validation that complements traditional positive and negative controls. This technique leverages the precise melting temperature (Tm) of nucleic acid hybrids to confirm amplicon identity, detect sequence variants, and verify reaction specificity [71] [72]. For researchers and drug development professionals, integrating melt curve analysis into a validation framework provides a robust, post-amplification method to distinguish true positive signals from artifacts, thereby reducing false results and increasing confidence in genetic data, especially in diagnostic and pharmacogenetic applications [24] [71].
This application note details how melt curve analysis, particularly when used with structured probes like molecular beacons, can be systematically employed for assay confirmation, and provides a direct comparison with hydrolysis probe assays to guide selection.
Technical Foundations: Molecular Beacons and Melt Curve Analysis
Principles of Molecular Beacon Probes
Molecular beacons are single-stranded oligonucleotide probes that form a hairpin-shaped (stem-loop) structure in their native state [24] [73]. Their design consists of four key elements:
- Loop Sequence: An 18-30 nucleotide region complementary to the specific target nucleic acid sequence [24] [73].
- Stem Structure: Formed by short (typically 5-7 base pairs), complementary arm sequences located on both ends of the loop [24] [9].
- 5' Fluorophore: A fluorescent dye covalently attached to the 5' end of the probe.
- 3' Quencher: A non-fluorescent quencher moiety attached to the 3' end [24].
In the absence of the target, the stem remains hybridized, bringing the fluorophore and quencher into close proximity, which quenches fluorescence via Fluorescence Resonance Energy Transfer (FRET). When the molecular beacon encounters a complementary target sequence, it hybridizes to the target, forcing the stem to unwind and separate the fluorophore from the quencher. This spatial separation results in fluorescence emission [24] [9]. A key differentiator from hydrolysis probes is that molecular beacons are not degraded during amplification; they are displaced intact by the polymerase and can participate in multiple rounds of hybridization [9]. This reversible binding is what makes them ideal for post-amplification melt curve analysis.
Fundamentals of Melt Curve Analysis
Melt curve analysis is a post-amplification procedure that monitors the dissociation of a fluorescent probe from its target as the temperature is gradually increased. The fluorescence signal is measured continuously during this temperature ramp. As the temperature reaches the melting point of the probe-target hybrid, the probe dissociates, causing a sharp drop in fluorescence [72]. The negative derivative of this fluorescence over temperature (-dF/dT) is plotted against temperature, producing a characteristic peak at the Tm [71]. This Tm is highly sequence-specific; even a single nucleotide change can cause a detectable shift, allowing for the discrimination of wild-type and mutant sequences [24] [71]. The high resolution of this method is evidenced by standard deviations of Tm values as low as 0.2°C in optimized digital PCR systems, enabling clear genotyping [71].
Experimental Protocol: Melt Curve Analysis with Molecular Beacons
Assay Setup and Reaction Composition
The following protocol is designed for a real-time PCR system with melting curve capabilities and uses an asymmetric PCR approach to generate an excess of the single-stranded DNA target for the molecular beacon, which significantly improves the melting curve signal [71] [72].
Research Reagent Solutions:
| Reagent | Function in the Assay | Typical Concentration |
|---|---|---|
| Molecular Beacon Probe | Sequence-specific detection and Tm analysis [24] |
100-400 nM |
| Forward & Reverse Primers | Amplification of the target region | Variable (Asymmetric Ratio) |
| DNA Polymerase with 5'→3' Activity | DNA synthesis and mediator primer release (if applicable) [40] | As per manufacturer |
| dNTP Mix | Building blocks for DNA synthesis | Standard concentration |
| PCR Buffer (with Mg²⁺) | Optimal enzyme activity and reaction conditions | 1X |
| Template DNA | The target nucleic acid to be analyzed | Variable |
Step-by-Step Workflow:
Reaction Assembly:
- Prepare a master mix on ice containing all reagents except the template DNA.
- Asymmetric PCR: Use a primer ratio of 50:1 or 100:1 (limiting primer : excess primer) to generate single-stranded amplicons complementary to the molecular beacon probe [71] [72].
- Include the molecular beacon probe at a final concentration of 100-400 nM.
- Aliquot the master mix into reaction wells and add the template DNA.
Thermal Cycling:
- Initial Denaturation: 95°C for 2-5 minutes.
- Amplification Cycles (40-50 cycles):
- Denature: 95°C for 15-30 seconds.
- Anneal/Extend: 55-60°C for 30-60 seconds. Fluorescence data is acquired at this step for real-time quantification.
- Hold: 40°C for 30 seconds (to allow probe-target hybridization before melting).
Melt Curve Data Acquisition:
Data Interpretation and Analysis
Following data acquisition, analyze the melt curves using the instrument's software:
- Plot the Melting Peaks: Generate a plot of the negative derivative of fluorescence relative to temperature (
-dF/dT) versus temperature. - Identify
TmValues: TheTmis the temperature at the peak of the melting curve for each sample. - Validate Results:
- Compare the observed
Tmof the test sample to theTmof the positive control. A match confirms amplicon identity. - Use known controls (wild-type, mutant) to establish reference
Tmvalues. A shift in the sample'sTmindicates a potential sequence variation [71]. - The presence of a single, sharp peak typically indicates specific amplification, whereas multiple or broad peaks suggest non-specific amplification or the presence of multiple sequence variants [72].
- Compare the observed
Comparative Analysis: Molecular Beacons vs. Hydrolysis Probes
The choice between molecular beacons and hydrolysis probes (like TaqMan) is critical and depends on the application's requirements, particularly concerning the need for melt curve analysis.
Table: Detailed comparison of molecular beacons and hydrolysis probes for assay validation.
| Feature | Molecular Beacons | Hydrolysis Probes (TaqMan) |
|---|---|---|
| Probe Structure | Stem-loop (hairpin) [24] [73] | Linear |
| Signal Mechanism | Hybridization-induced fluorescence (reversible) [9] | Hydrolysis-induced fluorescence (irreversible) [72] |
| Suitability for Melt Curve Analysis | Excellent: Probe remains intact for post-PCR analysis [71] [72] | Not Suitable: Probe is destroyed during PCR [72] |
| Ability to Discriminate SNPs | High: The stem structure makes mismatched hybrids thermally less stable [24] | Moderate |
| Signal-to-Noise Ratio | High (low background due to quenching in stem-loop) [24] [40] | Lower than molecular beacons |
| Multiplexing Potential | Excellent; common quencher can be used with multiple fluorophores [24] [72] | Good, but requires different quencher-fluorophore pairs |
| Primary Applications | SNP detection, allelic discrimination, multiplex PCR, diagnostic assays requiring confirmation [24] [73] | Quantitative PCR (qPCR) where only quantification is needed |
Advanced Application: Multiplexing and dPCR with Melt Curve Analysis
The combination of melt curve analysis with molecular beacons enables sophisticated multiplexing strategies. Advanced approaches, such as the MeltArray system, demonstrate that a single molecular beacon reporter can be used to detect multiple targets by generating mediator primers with distinct, differentiable Tm values [40]. This can increase the multiplexing capacity far beyond the number of available fluorescent channels.
Furthermore, integrating melt curve analysis with digital PCR (dPCR) enhances genotyping accuracy. In dPCR, the large number of individual partitions can exhibit fluctuations in fluorescence intensity due to insufficient amplification. Using the Tm value, which is largely independent of amplification efficiency, to call positives and negatives mitigates this issue and improves the accuracy of detecting mutations, such as in the KRAS gene [71].
Melt curve analysis is an indispensable tool for the thorough validation of molecular assays. When the assay requirements include confirming amplicon identity, detecting single-nucleotide polymorphisms, or highly multiplexed detection, molecular beacons provide a significant advantage over hydrolysis probes due to their reversible hybridization chemistry and high specificity. By implementing the validation strategies and protocols outlined here, researchers can significantly enhance the reliability and accuracy of their genetic analyses throughout the drug development pipeline.
Selecting the appropriate detection probe is a critical step in designing robust and reliable quantitative PCR (qPCR) or digital PCR (dPCR) assays. The choice between hydrolysis probes (such as TaqMan probes) and molecular beacons significantly impacts assay specificity, sensitivity, cost, and overall performance. This guide provides a systematic framework for researchers to select the optimal probe chemistry based on their specific experimental requirements, reagent availability, and technical constraints. The decision process must balance multiple factors including the degree of sequence specificity required, the necessity for multiplexing capabilities, budget limitations, and the technical expertise available within the laboratory.
Hydrolysis probes and molecular beacons represent two fundamentally different approaches to detecting amplification products in real-time PCR. While both technologies utilize the principle of fluorescence resonance energy transfer (FRET) with reporter and quencher molecules, their structural differences confer distinct advantages and limitations. Hydrolysis probes rely on the 5' to 3' exonuclease activity of DNA polymerase to separate the reporter dye from the quencher during amplification, generating a fluorescent signal proportional to accumulated PCR product. In contrast, molecular beacons employ a stem-loop structure that undergoes a conformational change upon hybridization to the target sequence, physically separating the fluorophore from the quencher without probe degradation.
Technical Comparison: Hydrolysis Probes vs. Molecular Beacons
Structural and Mechanistic Differences
The fundamental distinction between these probe types lies in their structure and signaling mechanism. Hydrolysis probes are linear oligonucleotides with a reporter dye at the 5' end and a quencher at the 3' end. During PCR amplification, the Taq polymerase cleaves the probe when it encounters the bound probe, permanently separating the reporter from the quencher and generating an increasing fluorescent signal with each cycle [74]. This cumulative signal generation makes hydrolysis probes exceptionally sensitive for quantification applications.
Molecular beacons contain a central target-specific loop region flanked by short complementary stem sequences that place a fluorophore and quencher in close proximity when the probe is in its closed (unbound) state. Hybridization to the target sequence opens the hairpin structure, separating the fluorophore from the quencher and generating fluorescence. This process is reversible, as the probe is not destroyed during amplification [30] [75]. The unique hairpin structure provides molecular beacons with exceptional specificity, enabling them to discriminate between targets that differ by as little as a single nucleotide [30].
Table 1: Structural and Functional Comparison of Hydrolysis Probes and Molecular Beacons
| Characteristic | Hydrolysis Probes | Molecular Beacons |
|---|---|---|
| Structure | Linear oligonucleotide | Stem-loop hairpin structure |
| Mechanism | Polymerase cleavage separates reporter/quencher | Conformational change separates reporter/quencher |
| Signal Type | Cumulative (irreversible) | Reversible |
| Stem Sequence | Not applicable | 5-7 base pairs, complementary |
| Loop Sequence | Not applicable | 18-30 bases, target-complementary |
| Typical Length | 25-40 nucleotides | 25-40 nucleotides (including stem) |
Performance Characteristics and Applications
When selecting between probe chemistries, researchers must consider how each technology performs against key assay requirements. Hydrolysis probes generally offer higher signal intensity due to the cumulative nature of the fluorescence signal, making them ideal for applications requiring maximum sensitivity, such as detecting low-abundance targets or quantifying subtle changes in gene expression [74]. The straightforward design process and widespread availability of hydrolysis probes also contribute to their popularity in routine diagnostic applications.
Molecular beacons excel in applications requiring exceptional specificity. The energy barrier imposed by the stem structure prevents the probe from fluorescing unless it is perfectly bound to its target, making molecular beacons particularly valuable for single-nucleotide polymorphism (SNP) detection, allelic discrimination, and pathogen strain differentiation [30] [75]. The reversible binding nature of molecular beacons also makes them suitable for monitoring reaction kinetics in real-time without being consumed in the process.
Table 2: Performance Comparison for Key Application Requirements
| Application Requirement | Hydrolysis Probes | Molecular Beacons |
|---|---|---|
| Sensitivity | High (cumulative signal) | Moderate |
| Specificity | High | Very High (discriminates single mismatches) |
| Multiplexing Capacity | Good (with spectral optimization) | Excellent (common quencher compatible with multiple fluorophores) |
| SNP Detection | Moderate | Excellent |
| Pathogen Detection/Strain Typing | Good | Excellent |
| Gene Expression Quantification | Excellent | Good |
| Live Cell Monitoring | Not suitable | Possible with modifications |
Diagram 1: Probe Signaling Mechanisms (76 characters)
Experimental Protocols
Standardized qPCR Protocol for Hydrolysis Probes
The following protocol is optimized for hydrolysis probe detection and can be adapted for various qPCR instruments. Begin by preparing a master mix containing 1X PCR buffer, 3.5-5.0 mM MgCl₂, 200 µM each dNTP, 300 nM forward primer, 300 nM reverse primer, 100-200 nM hydrolysis probe, 0.5-1.25 U DNA polymerase per reaction, and template DNA. A no-template control (NTC) should be included in every run to monitor for contamination [74].
Thermal cycling conditions typically consist of an initial denaturation at 95°C for 2-10 minutes, followed by 40-45 cycles of denaturation at 95°C for 5-15 seconds, and a combined annealing/extension at 60°C for 30-60 seconds. Fluorescence data collection occurs during the annealing/extension step of each cycle. The use of a hot-start polymerase is recommended to prevent non-specific amplification during reaction setup [74].
For hydrolysis probes, proper design is critical for optimal performance. The probe should be located between the forward and reverse primers without overlapping either primer binding site. The melting temperature (Tm) of the hydrolysis probe should be 5-10°C higher than the primer Tm to ensure the probe is bound before primer extension begins. Avoid placing a guanine residue at the 5' end of the probe, as it can quench the reporter fluorophore even after cleavage [74] [76].
Optimized Protocol for Molecular Beacon Assays
Molecular beacon assays require specific optimization to balance the stability of the stem-loop structure with efficient hybridization to the target. Prepare a reaction mix containing 1X PCR buffer, 3.0-4.5 mM MgCl₂ (typically lower than for hydrolysis probes), 200 µM each dNTP, 300 nM forward primer, 300 nM reverse primer, 100-300 nM molecular beacon, 0.5-1.25 U DNA polymerase per reaction, and template DNA. Note that molecular beacons do not require polymerase with 5' exonuclease activity, as the signal generation depends on hybridization rather than cleavage [75].
Thermal cycling parameters include initial denaturation at 95°C for 2-10 minutes, followed by 40-45 cycles of 95°C for 15-30 seconds, 50-60°C for 20-40 seconds (with fluorescence acquisition at this step), and 72°C for 15-30 seconds. The annealing temperature should be optimized for each specific molecular beacon, typically 5-7°C above the Tm of the stem structure to ensure proper hairpin formation while allowing efficient target binding [30].
Molecular beacon design requires careful consideration of both stem and loop regions. The loop should be 18-30 nucleotides long and perfectly complementary to the target sequence. The stem should be 5-7 base pairs long with high GC content (75-100%) to ensure stable hairpin formation at reaction temperatures. The Tm of the stem should be 7-10°C higher than the assay annealing temperature. The fluorophore and quencher are attached to the 5' and 3' ends of the probe, respectively, with dark quenchers such as Black Hole Quencher (BHQ) or Dabcyl preferred over fluorescent quenchers to minimize background signal [30] [75].
Selection Decision Framework
Systematic Probe Selection Algorithm
The following decision framework provides a structured approach to probe selection based on key experimental parameters. This algorithm considers the primary factors that should guide researchers toward the optimal probe chemistry for their specific application.
Diagram 2: Probe Selection Decision Algorithm (76 characters)
Application-Specific Selection Guidelines
Different research applications have distinct requirements that influence the optimal probe choice. The following guidelines provide detailed recommendations for common experimental scenarios:
SNP Detection and Allelic Discrimination: Molecular beacons are strongly recommended due to their exceptional ability to discriminate single-base mismatches. The stem-loop structure creates an energy barrier that prevents stable hybridization and fluorescence when even a single nucleotide is mismatched [30]. When designing molecular beacons for SNP detection, position the polymorphic nucleotide near the center of the probe sequence rather than at the ends to maximize discriminatory power.
Multiplex PCR Applications: Molecular beacons have a theoretical advantage for multiplexing because a common dark quencher can be used with multiple different fluorophores, simplifying probe design and reducing costs [75]. However, hydrolysis probes can also be effectively multiplexed with careful selection of non-overlapping emission spectra and optimization of probe concentrations. For high-level multiplexing (5+ targets), molecular beacons are generally preferred.
Gene Expression Quantification: For most gene expression applications, hydrolysis probes provide excellent performance with higher sensitivity due to their cumulative signal generation [74]. Their straightforward design process and generally lower cost make them ideal for high-throughput expression profiling studies. However, for distinguishing between highly homologous gene family members, molecular beacons may be preferable.
Pathogen Detection and Strain Typing: Molecular beacons are particularly valuable for diagnostic applications that require discrimination between closely related pathogen strains [30]. Their ability to differentiate single nucleotide changes enables precise pathogen identification. Additionally, the reversible nature of molecular beacon hybridization allows for melt curve analysis after amplification, providing an additional layer of verification.
Low-Abundance Target Detection: When maximizing sensitivity is critical, such as in detecting rare transcripts or low-level viral loads, hydrolysis probes are generally preferred due to their cumulative signal generation which provides better signal-to-noise ratio in later amplification cycles [74].
Research Reagent Solutions
Essential Materials for Probe-Based Detection
Successful implementation of probe-based qPCR requires specific reagents optimized for each detection chemistry. The following table summarizes key components and their functions in hydrolysis probe and molecular beacon assays.
Table 3: Essential Research Reagents for Probe-Based qPCR
| Reagent Category | Specific Examples | Function in Hydrolysis Probe Assays | Function in Molecular Beacon Assays |
|---|---|---|---|
| DNA Polymerase | Taq DNA Polymerase, Hot Start Taq | Must have 5'→3' exonuclease activity for probe cleavage | 5' exonuclease activity not required; standard polymerase sufficient |
| Fluorescent Reporters | FAM, HEX, TET, Cy3, Cy5 | Covalently attached to 5' end of probe; emission indicates cleavage | Covalently attached to 5' end of stem; emission indicates hybridization |
| Quenchers | TAMRA, BHQ series, Dabcyl, Onyx Quencher | Covalently attached to 3' end; quenches reporter fluorescence before cleavage | Covalently attached to 3' end; quenches reporter in closed conformation |
| Nucleotide Analogs | LNA, 2'-O-methyl RNA, PNA | Can be incorporated to increase Tm and specificity | Particularly valuable for enhancing stem stability and nuclease resistance |
| Buffer Components | MgCl₂, KCl, stabilizers | Typically requires 3.5-5.0 mM MgCl₂ for optimal activity | Often performs better with slightly lower MgCl₂ (3.0-4.5 mM) |
| Commercial Kits | TaqMan Gene Expression Master Mix, Universal ProbeLibrary | Optimized specifically for hydrolysis probe chemistry | Can be adapted for molecular beacons with MgCl₂ optimization |
Probe Design Considerations and Modifications
Both hydrolysis probes and molecular beacons can benefit from strategic incorporation of modified nucleotides to enhance performance. Locked Nucleic Acids (LNA) can be incorporated into either probe type to increase thermal stability and improve mismatch discrimination [74]. Each LNA base can increase the Tm by approximately 2-8°C, allowing for shorter probe designs with equivalent specificity [74]. For molecular beacons, LNA modifications in the stem region significantly enhance hairpin stability and reduce non-specific opening in cellular environments [30].
For applications involving RNA detection or working with challenging secondary structures, 2'-O-methyl RNA bases can be incorporated to improve binding affinity and nuclease resistance. Molecular beacons designed for intracellular applications particularly benefit from 2'-O-methyl or LNA modifications, which protect against nuclease degradation and reduce non-specific opening by single-stranded binding proteins [30].
When designing quencher-reporter systems, dark quenchers such as Black Hole Quenchers (BHQ) or Onyx Quencher are preferred over fluorescent quenchers like TAMRA because they provide lower background fluorescence and broader quenching spectra [74]. Onyx Quencher offers performance comparable to BHQ while being royalty-free for commercial diagnostic development [74].
The selection between hydrolysis probes and molecular beacons represents a critical methodological decision that directly impacts assay performance, specificity, and cost. Hydrolysis probes offer advantages in sensitivity, straightforward design, and established protocols, making them ideal for routine quantification applications. Molecular beacons provide superior specificity for discriminating closely related sequences and enhanced capabilities for multiplex detection, making them valuable for SNP analysis, pathogen strain differentiation, and diagnostic applications.
Before implementing either technology, researchers should verify: (1) target sequence accessibility and absence of secondary structure conflicts; (2) optimal probe placement between primers without overlap; (3) appropriate Tm differential between probes and primers; (4) compatibility of fluorophore combinations for multiplex applications; and (5) adequate instrument capability for detecting the chosen reporter dyes. Following this structured selection framework will enable researchers to make informed decisions that align probe chemistry with experimental objectives, ultimately ensuring robust, reproducible, and scientifically valid results.
Conclusion
The choice between hydrolysis probes and molecular beacons is not one of superiority, but of suitability. Hydrolysis probes offer a robust, widely-adopted solution for high-throughput quantitative applications like gene expression analysis, where their sensitivity and familiar protocols are advantageous. Molecular beacons, with their exceptional specificity and inherent ability to discriminate single-nucleotide variations, are the superior choice for genotyping, SNP detection, and multiplex diagnostic assays. The ongoing development of advanced probe formats, such as tailed molecular beacons with dramatically improved hybridization kinetics, promises to further expand the capabilities of real-time PCR. By carefully weighing application needs, design complexity, and cost constraints as outlined in this guide, researchers can confidently select the optimal probe chemistry to ensure the accuracy, reliability, and success of their molecular experiments, ultimately accelerating progress in biomedical research and clinical diagnostics.
References
- 1. Why TaqMan Assay Design is Important [https://www.thermofisher.com/in/en/home/life-science/pcr/real-time-pcr/real-time-pcr-learning-center/real-time-pcr-basics/why-taqman-assay-design-important.html]
- 2. Quantitative PCR and Digital PCR Detection Methods [https://www.sigmaaldrich.com/US/en/technical-documents/technical-article/genomics/qpcr/quantitative-pcr-and-digital-pcr-detection-methods?srsltid=AfmBOooI_Pa4x8iObyxlPCXedTytjiztrn43BJDS7m4XFrlkxXYKwsb0]
- 3. Overview: Types of PCR Probes [https://www.goldbio.com/blogs/articles/overview-types-pcr-probes?srsltid=AfmBOor-M4cNoLcj-RTxkXbG2K7P3P_HLOWPPNDDbawZHHy_awQGFr79]
- 4. Allelic discrimination using fluorogenic probes and the 5 [https://www.sciencedirect.com/science/article/abs/pii/S1050386298000199]
- 5. How to Choose a PCR Probe [https://www.goldbio.com/blogs/articles/how-to-choose-pcr-probe?srsltid=AfmBOoqU7zlyaPBE7s4IFKDXSY6gG4a6KSaO2Pl05ryTWfXHKRy6ULkV]
- 6. qPCR Probes - Made to Perform. [https://eurofinsgenomics.eu/en/dna-rna-oligonucleotides/optimised-application-oligos/qpcr-probes/]
- 7. Probe Design - molecular beacons [https://www.molecular-beacons.org/MB_SC_design.html]
- 8. Optimization and performance evaluation of double- ... [https://www.sciencedirect.com/science/article/abs/pii/S0003269722001671]
- 9. Molecular Beacons | IDT [https://sg.idtdna.com/pages/products/qpcr-and-pcr/custom-probes/molecular-beacons]
- 10. an approach for the detection of structured DNA and RNA ... [https://pubs.rsc.org/pl/content/articlehtml/2025/cc/d4cc05984k]
- 11. Molecular beacon strategies for sensing purpose [https://www.sciencedirect.com/science/article/abs/pii/S0165993620303721]
- 12. Structure–function relationships of shared-stem and ... [https://pmc.ncbi.nlm.nih.gov/articles/PMC140536/]
- 13. Overview: Types of PCR Probes [https://www.goldbio.com/blogs/articles/overview-types-pcr-probes?srsltid=AfmBOor6X-z8W5JyDaJ6kxB4vmcrkcWackyNUSUiAwS_oqpzzDM9sQM9]
- 14. Structure-function relationships of shared-stem and ... [https://pubmed.ncbi.nlm.nih.gov/12364599/]
- 15. Development of a rapid, sequence-specific, and visual loop ... [https://www.sciencedirect.com/science/article/abs/pii/S0925400525002515]
- 16. How to Choose a PCR Probe [https://www.goldbio.com/blogs/articles/how-to-choose-pcr-probe?srsltid=AfmBOooCSO2HBVQonlHjWEYqm7uAS5bsf2_RtSDwAPjHo2MonBo_R32u]
- 17. Bruker to Launch Beacon Discovery™ at AACR 2025 ... [https://www.biospace.com/press-releases/bruker-to-launch-beacon-discovery-at-aacr-2025-expanding-access-to-live-single-cell-functional-analysis]
- 18. How to Choose the Best qPCR Probe for Your Experiment [https://bitesizebio.com/37033/how-to-choose-the-best-qpcr-probe-for-your-experiment/]
- 19. Fluorophore-Quencher Interactions Effect on Hybridization ... [https://pmc.ncbi.nlm.nih.gov/articles/PMC7357715/]
- 20. Quenching mechanisms in oligonucleotide probes [https://oligos.biosearchtech.com/support/education/quenching-mechanisms]
- 21. Selecting Fluorescent Dyes and Quenchers for ... [https://www.biotechnologyreviews.com/p/selecting-fluorescent-dyes-and-quenchers]
- 22. Fluorogenic oligonucleotide cleavage probes with a ... [https://pmc.ncbi.nlm.nih.gov/articles/PMC11886808/]
- 23. How to Choose a PCR Probe [https://www.goldbio.com/blogs/articles/how-to-choose-pcr-probe?srsltid=AfmBOoqZ_-uZFqL33EwspiUmUbDMuu1IZ62BlqwAhH6Cr9Y8_O5bwTXB]
- 24. Molecular Beacons [http://www.premierbiosoft.com/tech_notes/molecular_beacons.html]
- 25. Molecular Beacon - an overview | ScienceDirect Topics [https://www.sciencedirect.com/topics/agricultural-and-biological-sciences/molecular-beacon]
- 26. Development a hydrolysis probe-based quantitative PCR assay for the specific detection and quantification of Candida auris - PMC [https://pmc.ncbi.nlm.nih.gov/articles/PMC8018816/]
- 27. Hybridization kinetics and thermodynamics of molecular ... [https://pmc.ncbi.nlm.nih.gov/articles/PMC150230/]
- 28. Application of Molecular Beacons in Real-Time PCR - PMC [https://pmc.ncbi.nlm.nih.gov/articles/PMC7123797/]
- 29. Overview: Types of PCR Probes [https://www.goldbio.com/blogs/articles/overview-types-pcr-probes?srsltid=AfmBOorcvkuyvF2TXKUPrja5yFmvPBlrpTEZC8cKvf9DG4zlKIai8CH0]
- 30. Molecular Beacons in Biomedical Detection and Clinical ... [https://pmc.ncbi.nlm.nih.gov/articles/PMC2480550/]
- 31. How to Choose a PCR Probe [https://www.goldbio.com/blogs/articles/how-to-choose-pcr-probe?srsltid=AfmBOopp_yw3ThoCzBdZxvhIZwBgSgrlsT4AmMTKCOvUHZMvQ5qmb3Pk]
- 32. Sensitivity comparison of real-time PCR probe designs on ... [https://www.sciencedirect.com/science/article/abs/pii/S0003269705004951]
- 33. Reference genes in real-time PCR - PMC [https://pmc.ncbi.nlm.nih.gov/articles/PMC3825189/]
- 34. Molecular Beacons: A Novel Optical Diagnostic Tool - PMC [https://pmc.ncbi.nlm.nih.gov/articles/PMC7079750/]
- 35. How to choose the right qPCR probe for your experiment? [https://synbio-tech.com/choose-right-qpcr-probe-for-the-experiment]
- 36. How to Choose a PCR Probe [https://www.goldbio.com/blogs/articles/how-to-choose-pcr-probe?srsltid=AfmBOop__5ku3Wlqvl_hyBildJNj7xNG6HD7i5D7BYoWmqk6iPHWFDJZ]
- 37. Overview: Types of PCR Probes [https://www.goldbio.com/blogs/articles/overview-types-pcr-probes?srsltid=AfmBOoqrjNKz96OcQ4C60LY7knl29CRBzRUiIpfD26L16Y9oksUiVC9K]
- 38. High-Throughput SNP Genotyping: Combining Tag SNPs and ... [https://pmc.ncbi.nlm.nih.gov/articles/PMC7121513/]
- 39. Overview: Types of PCR Probes [https://www.goldbio.com/blogs/articles/overview-types-pcr-probes?srsltid=AfmBOorzd32Bd-g84X0oP2GhM5l4hdDeLCjWxj2wc5Srfr_ALf8jNXsU]
- 40. Highly multiplex PCR assays by coupling the 5 [https://pmc.ncbi.nlm.nih.gov/articles/PMC8892341/]
- 41. Clinical severity of enteric viruses detected using a ... [https://pmc.ncbi.nlm.nih.gov/articles/PMC11486833/]
- 42. Mode of action and application of Scorpion primers to ... [https://pmc.ncbi.nlm.nih.gov/articles/PMC110766/]
- 43. Design rules for Molecular Beacons [https://www.biosyn.com/tew/Design-rules-for-Molecular-Beacons.aspx]
- 44. Scorpions Primers [https://oligos.biosearchtech.com/products/custom-dna-probes-for-qpcr/scorpions-primers]
- 45. Scorpion Primers & Probes [http://www.premierbiosoft.com/tech_notes/Scorpion.html]
- 46. Surpassing Specificity Limits of Nucleic Acid Probes via ... [https://www.sciencedirect.com/science/article/pii/S1525157810600724]
- 47. How to Choose a PCR Probe [https://www.goldbio.com/blogs/articles/how-to-choose-pcr-probe?srsltid=AfmBOopCLrF54hOwz-kAu_2SK2qmVTCTH1pJ67__ITgTSuVnw1gDYrrM]
- 48. How to Choose a PCR Probe [https://www.goldbio.com/blogs/articles/how-to-choose-pcr-probe?srsltid=AfmBOoracvcgFH1_lG6U7h5GGfdVDN2UBs05MRqUxA0a_ZIX-XNI8Zsv]
- 49. The basics about probe-based qPCR [https://solisbiodyne.com/EN/the-basics-about-probe-based-qpcr/]
- 50. Rules and Tips for PCR & qPCR Primer Design | IDT [https://www.idtdna.com/page/support-and-education/decoded-plus/how-to-design-primers-and-probes-for-pcr-and-qpcr/]
- 51. PCR Primer Design Tips - Behind the Bench [https://www.thermofisher.com/blog/behindthebench/pcr-primer-design-tips/]
- 52. PCR Assay Optimization and Validation [https://www.sigmaaldrich.com/US/en/technical-documents/technical-article/genomics/pcr/assay-optimization-and-validation?srsltid=AfmBOorEGQdj5bzbuIMOnkf-uJdvg-nP6KlyXLUwfZ6s_7CIOyeyRlCk]
- 53. High-Throughput Data Analysis for qPCR [https://www.neb.com/en-us/tools-and-resources/feature-articles/development-of-a-high-throughput-data-analysis-method-for-quantitative-real-time-pcr?srsltid=AfmBOooINSGZgvNd9NDqQrIyTJyscwZWIN09DGrRb_EhUCVIQfNLOALY]
- 54. Molecular Beacons: Powerful Tools for Imaging RNA in ... [https://pmc.ncbi.nlm.nih.gov/articles/PMC3163130/]
- 55. Recent Advances in the Molecular Beacon Technology for ... [https://www.sciencedirect.com/science/article/pii/S2589004220309986]
- 56. How to Choose a PCR Probe [https://www.goldbio.com/blogs/articles/how-to-choose-pcr-probe?srsltid=AfmBOorb-rxJEPkqD_usJ52P13cCJGfLm4FtUVsxbFjU1XlJulJXU7Cy]
- 57. qPCR Probes Unlocking Growth Opportunities: Analysis ... [https://www.archivemarketresearch.com/reports/qpcr-probes-138376]
- 58. An Elegant Biosensor Molecular Beacon Probe: Challenges ... [https://pmc.ncbi.nlm.nih.gov/articles/PMC3820487/]
- 59. Overview: Types of PCR Probes [https://www.goldbio.com/blogs/articles/overview-types-pcr-probes?srsltid=AfmBOopfxuCHzGyiDtuCTCXf6s7Eq-Bw5cabIPU_QaUUeZYxz-R8eJrk]
- 60. Top Ten Most Common Real-Time qRT-PCR Pitfalls [https://www.thermofisher.com/us/en/home/references/ambion-tech-support/rtpcr-analysis/general-articles/ten-most-common-real-time-qrt-pcr-pitfalls.html]
- 61. DNA Repair Molecular Beacon assay: a platform for real ... [https://pmc.ncbi.nlm.nih.gov/articles/PMC6114979/]
- 62. Insights into qPCR: Protocol, Detection Methods, and Analysis [https://www.the-scientist.com/insights-into-qpcr-protocol-detection-methods-and-analysis-71478]
- 63. Quantitative PCR and Digital PCR Detection Methods [https://www.sigmaaldrich.com/US/en/technical-documents/technical-article/genomics/qpcr/quantitative-pcr-and-digital-pcr-detection-methods?srsltid=AfmBOor78d3O3QqGA91Or3vIzDiwuEzyx06HZqIJ-FUsipgjths4CRv9]
- 64. How to Choose a PCR Probe [https://www.goldbio.com/blogs/articles/how-to-choose-pcr-probe?srsltid=AfmBOoq2GyYVPfgKDcWWbzb6IOIJ6j0IhYxW6tkbPF6HVHwtaTd6ZUX3]
- 65. One-Step, Multiplex, Real-Time PCR Assay with Molecular ... [https://pmc.ncbi.nlm.nih.gov/articles/PMC2668303/]
- 66. The use of hydrolysis and hairpin probes in real-time PCR [https://link.springer.com/article/10.1385/MB:25:3:267]
- 67. How to Choose a PCR Probe [https://www.goldbio.com/blogs/articles/how-to-choose-pcr-probe?srsltid=AfmBOoqZWhdGs6Q5BrjvfsqXDdlGwdmPlIlRlm2PsarNKnQBU1gECqKt]
- 68. HydrolEasy® Probes [https://pentabase.com/technology/hydroleasy/]
- 69. Overview: Types of PCR Probes [https://www.goldbio.com/blogs/articles/overview-types-pcr-probes?srsltid=AfmBOorHJMyn91hFgaO_QOlTB9RIUSyuAUsWip0NzDpP2Mzyd3hG9ue1]
- 70. How to Choose a PCR Probe [https://www.goldbio.com/blogs/articles/how-to-choose-pcr-probe?srsltid=AfmBOopgA6V1BFbhNTFPVunZZfYRvFaMFyKmohcQ_yuvLOZc9YHNTguK]
- 71. KRAS genotyping by digital PCR combined with melting ... [https://www.nature.com/articles/s41598-019-38822-1]
- 72. Multiplex Fluorescence Melting Curve Analysis for Mutation ... [https://pmc.ncbi.nlm.nih.gov/articles/PMC3084284/]
- 73. Molecular beacon - Wikipedia [https://en.wikipedia.org/wiki/Molecular_beacon]
- 74. PCR and Digital PCR Detection Methods Quantitative [https://www.sigmaaldrich.com/DE/de/technical-documents/technical-article/genomics/qpcr/quantitative-pcr-and-digital-pcr-detection-methods]
- 75. Molecular Beacons [https://premierbiosoft.com/tech_notes/molecular_beacons.html]
- 76. How to Choose a PCR Probe [https://www.goldbio.com/blogs/articles/how-to-choose-pcr-probe?srsltid=AfmBOoqyD2jaXzMx_WxMclCq8A4b59F_yrvq5vV3qAyyTvZIIH4sY1Tq]