Foundational Protocols for Bacterial Culture: A Comprehensive Guide for Biomedical Research
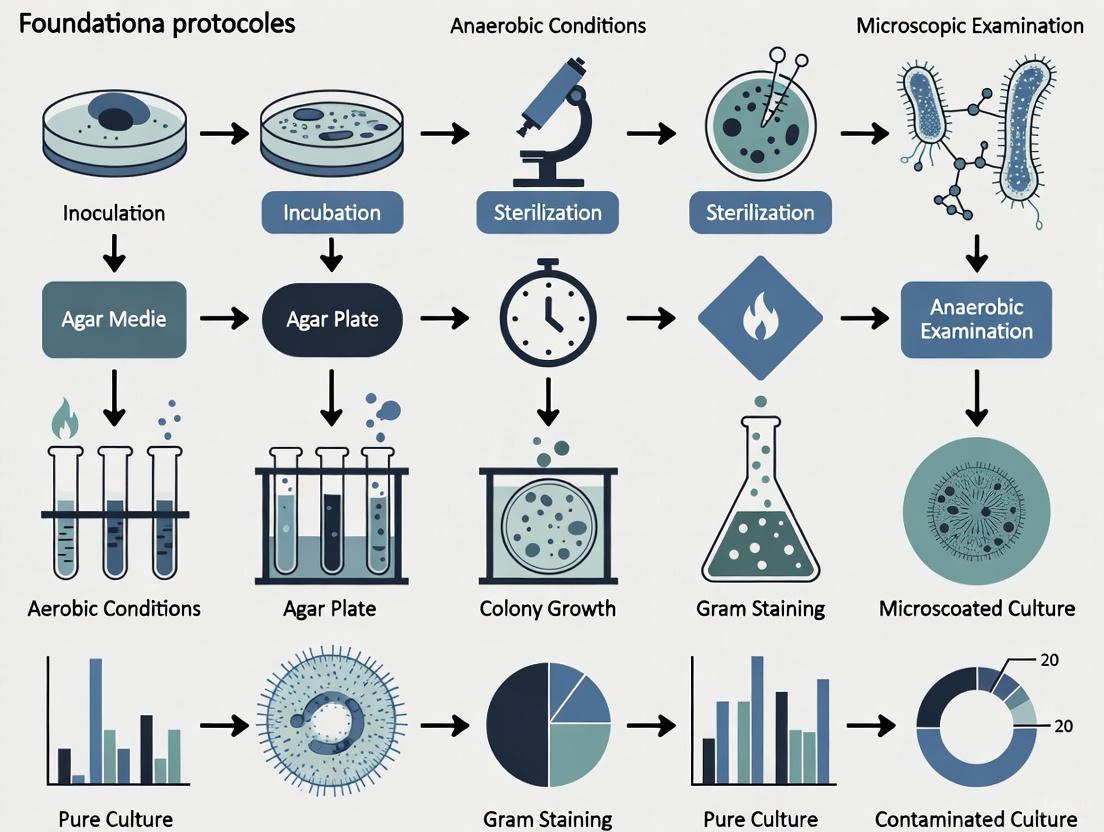
This article provides a comprehensive guide to the foundational protocols for bacterial culture, tailored for researchers, scientists, and drug development professionals.
Foundational Protocols for Bacterial Culture: A Comprehensive Guide for Biomedical Research
Abstract
This article provides a comprehensive guide to the foundational protocols for bacterial culture, tailored for researchers, scientists, and drug development professionals. It covers the core principles and history of bacteriology, detailed methodological applications for culturing and isolating pure strains, systematic troubleshooting for common laboratory challenges, and a comparative analysis of traditional culture versus modern molecular techniques. The content synthesizes established practices with current advancements to enhance experimental reproducibility, support pathogen identification, and inform antibiotic susceptibility testing in clinical and research settings.
The Bedrock of Bacteriology: Principles, History, and Culture Media
The late 19th century marked a revolutionary period in medical science now known as the Golden Age of Microbiology. During this transformative era, groundbreaking discoveries by Robert Koch and Louis Pasteur established the fundamental principles and techniques that form the bedrock of modern bacteriology. Their work definitively confirmed the germ theory of disease, systematically displacing long-held beliefs in spontaneous generation and miasmatic theories of illness. This paradigm shift created the scientific foundation for public health, clinical microbiology, and infectious disease control, ultimately saving millions of lives through the development of novel methodologies for pathogen identification, culture, and vaccine development [1] [2].
This whitepaper examines the specific technical contributions of Koch and Pasteur within the context of foundational protocols for bacterial culture research. For working researchers, scientists, and drug development professionals, understanding these core principles remains essential for designing contemporary experimental approaches in microbial isolation, identification, and characterization. We will analyze the complementary approaches of these two pioneers—Koch's systematic methods for pure culture isolation versus Pasteur's work on attenuation and immunization—and their collective impact on establishing standardized bacteriological techniques that continue to influence modern laboratory practice [3].
Historical Rivalry and Complementary Approaches
The scientific rivalry between German physician Robert Koch (1843-1910) and French chemist Louis Pasteur (1822-1895) fueled rapid advancement in microbiological science. Despite their national and methodological differences, their work collectively established microbiology as a discrete scientific discipline [3].
Table 1: Comparative Overview of Koch and Pasteur's Contributions
| Aspect | Robert Koch | Louis Pasteur |
|---|---|---|
| Primary Focus | Medical bacteriology, etiology | Fermentation, immunology, applied microbiology |
| Key Theories | Germ theory validation, Koch's postulates | Germ theory, disproval of spontaneous generation |
| Major Discoveries | Anthrax bacillus (1876), Tuberculosis bacillus (1882), Cholera vibrio (1883) | Pasteurization, anthrax vaccine (1881), rabies vaccine (1885) |
| Technical Innovations | Pure culture techniques, agar solid media, bacterial staining, microphotography | Attenuation methods, liquid culture media, vaccine development |
| Institutional Legacy | Robert Koch Institute (1891) | Pasteur Institute (1887) |
Tensions between Koch and Pasteur were influenced by the political climate following the Franco-Prussian War (1870-1871), during which Germany seized Alsace-Lorraine from France. Pasteur, who had been a professor at the University of Strasbourg in Alsace and whose son served in the French army during the conflict, maintained strong patriotic sentiments [3]. This national rivalry manifested scientifically in their competing approaches—Koch's German school emphasized rigid bacteriological principles and pure cultures with constant bacterial traits, while Pasteur's French school accepted bacterial variation and focused on practical applications like attenuation for vaccine development [3].
Their methodological differences were particularly evident in their approach to anthrax. Koch's meticulous work in 1876 established Bacillus anthracis as the causative agent and uncovered its spore stage, demonstrating that a specific microorganism caused a specific disease [1]. Pasteur, building on the work of French colleague Casimir Davaine, subsequently developed an anthrax vaccine in 1881 using attenuation techniques, though historical evidence suggests he initially used chemical deactivation methods developed by Toussaint [3]. Despite these conflicts, their complementary approaches collectively established the framework for modern microbiological investigation.
Foundational Experimental Protocols and Methodologies
Koch's Postulates and Pathogen Identification
Robert Koch established a systematic protocol for definitively linking specific microorganisms to particular diseases. These principles, known as Koch's postulates, provided a rigorous methodological framework for disease etiology that remains influential in epidemiology and microbial pathogenesis [1] [4].
Table 2: Koch's Postulates and Modern Interpretation
| Postulate | Original Principle | Contemporary Application |
|---|---|---|
| First | The microorganism must be found in abundance in all organisms suffering from the disease, but not in healthy organisms. | Molecular detection methods (PCR, sequencing) complement culture. |
| Second | The microorganism must be isolated from a diseased organism and grown in pure culture. | Enhanced culture techniques and cellular models address fastidious organisms. |
| Third | The cultured microorganism should cause disease when introduced into a healthy organism. | Ethical constraints modified with animal models and molecular evidence. |
| Fourth | The microorganism must be reisolated from the inoculated, diseased experimental host and identified as identical to the original specific causative agent. | Genomic fingerprinting confirms isolate identity. |
The following workflow visualizes the experimental process Koch established for pathogen identification, incorporating both his postulates and technical innovations:
Pasteur's Attenuation Method and Vaccine Development
Louis Pasteur developed revolutionary protocols for vaccine development through bacterial attenuation. His critical insight came in 1879 when an old culture of Pasteurella multocida (the causative agent of chicken cholera) was accidentally left exposed to air, resulting in diminished virulence [3]. When inoculated into chickens, this attenuated culture failed to cause disease but conferred protection against subsequent challenges with virulent strains.
The following diagram outlines Pasteur's attenuation workflow and its application to vaccine development:
Pasteur applied this attenuation principle to develop the first anthrax vaccine in 1881, which he demonstrated in a highly publicized experiment at Pouilly-le-Fort [3]. He later adapted this approach for rabies, though the rabies "vaccine" actually functioned as a post-exposure therapy rather than a true prophylactic vaccine [2].
Technical Innovations in Bacterial Culture
Evolution of Culture Media
The development of reliable culture media was essential for advancing microbiological research. Pasteur created the first liquid artificial culture medium in 1860, composed of "yeast soup," ashes, sugar, and ammonium salts [5]. This allowed for the reproducible growth of bacteria but did not enable the isolation of pure clones.
Koch recognized the limitations of liquid media and systematically evaluated solidifying agents, beginning with coagulated egg albumin, starch paste, and potato slices [1] [5]. He initially used gelatin as a solidifying agent but found it liquefied at temperatures above 25°C and was degraded by gelatinase-producing bacteria [5]. In 1881, based on a suggestion from his assistants Walther and Fanny Hesse, Koch adopted agar as a superior gelling agent [4]. Agar's unique properties—including its solid state at 37°C (the optimal temperature for human pathogens), resistance to bacterial degradation, and transparency—made it ideal for cultivating and isolating pure bacterial colonies [4].
Table 3: Evolution of Bacterial Culture Media Components
| Component Type | Specific Examples | Function | Historical Context |
|---|---|---|---|
| Nutrient Bases | Meat extract, beef serum, yeast extract | Provides carbon, nitrogen, and essential elements | Koch's early broths used meat extracts; Pasteur used yeast-based solutions |
| Solidifying Agents | Gelatin, agar, potato slices | Creates solid surface for colony isolation | Koch initially used gelatin (1881), switched to agar (1882) |
| Selective Agents | Dyes, antibiotics, chemicals | Inhibits unwanted bacteria | Developed after antimicrobial discovery |
| Growth Factors | Purines, pyrimidines, amino acids | Provides essential metabolites | Identified through nutritional requirement studies |
The Scientist's Toolkit: Essential Research Reagents and Materials
The pioneering work of Koch and Pasteur established fundamental tools and reagents that remain essential in modern microbiology laboratories. The following table details key research reagent solutions from this foundational period:
Table 4: Essential Research Reagents and Materials in Foundational Bacteriology
| Reagent/Material | Composition/Type | Function | Innovator |
|---|---|---|---|
| Agar Solid Medium | Nutrient broth + 1.5-2% agar | Solid surface for bacterial colony isolation | Koch (adapted from Fannie Hesse's suggestion) |
| Gelatin Medium | Nutrient broth + gelatin | Initial solidifying agent (pre-agar) | Koch |
| Methylene Blue Stain | Methylene blue dye solution | Bacterial visualization under microscope | Koch |
| Bismarck Brown Stain | Bismarck brown dye solution | Bacterial differentiation in microscopy | Koch |
| Potato Slice Medium | Sterile potato slices | Natural solid medium for some bacteria | Koch |
| Yeast Extract Broth | Yeast extract, sugars, salts | Liquid culture medium for fermentation studies | Pasteur |
| Attenuated Cultures | Aged or oxygen-exposed pathogens | Vaccine development through reduced virulence | Pasteur |
| Petri Dish | Circular glass dish with cover | Container for solid media with reduced contamination | Julius Petri (Koch's assistant) |
Legacy and Modern Applications
The foundational work of Koch and Pasteur established principles and methodologies that continue to influence contemporary microbiology research and clinical practice. Koch's systematic approach to pathogen identification finds modern expression in molecular Koch's postulates, which use genetic evidence to establish disease causation [4]. The culture techniques they pioneered remain central to clinical diagnostics, pharmaceutical development, and microbiological research.
Modern automated microbial identification systems like VITEK 2 represent the technological evolution of Koch's pure culture principles, enabling rapid, high-throughput identification and antimicrobial susceptibility testing [6]. Similarly, contemporary vaccine development continues to build upon Pasteur's attenuation concepts, employing genetic engineering to create precisely modified attenuated strains [2].
The institutional legacies of both scientists continue to drive infectious disease research. The Robert Koch Institute in Berlin and the global network of Pasteur Institutes (the first opening in Paris in 1888, followed by others worldwide) maintain their founders' commitment to understanding and combating infectious diseases [1] [3]. Their complementary approaches—Koch's rigorous bacteriological standards and Pasteur's applied immunological interventions—created a dual foundation upon which modern microbiology continues to build.
The Golden Age of Microbiology, defined by the contributions of Robert Koch and Louis Pasteur, established the fundamental protocols that continue to guide bacterial culture research. Their complementary approaches—Koch's systematic methodology for pathogen identification and pure culture techniques, combined with Pasteur's innovative work on attenuation and vaccine development—created a comprehensive foundation for microbiological science. The technical innovations from this period, including solid culture media, bacterial staining, and controlled attenuation methods, directly enabled the development of modern diagnostic, therapeutic, and research approaches. For contemporary researchers and drug development professionals, understanding these foundational protocols provides essential historical context and continues to inform experimental design in microbial isolation, characterization, and antimicrobial development. The legacy of this transformative period persists in every microbiology laboratory where agar plates are poured, pathogens are isolated, and novel therapeutics are developed against infectious diseases.
The successful in vitro cultivation of bacteria is a cornerstone of microbiological research, underpinning advancements in drug development, molecular biology, and microbial ecology. Central to this process is the formulation of culture media that precisely meets the nutritional requirements of the target microorganisms. This guide details the core nutritional elements—carbon, nitrogen, and growth factors—that researchers must provide to support bacterial growth, metabolism, and recombinant protein production. Framed within foundational protocols for bacteriology research, this whitepaper synthesizes current knowledge to equip scientists with the principles necessary for designing and optimizing culture conditions for diverse experimental applications.
The Triad of Bacterial Nutrition
Bacterial growth and replication require the assimilation of numerous elements from the environment. The essential nutritional requirements can be categorized into six broad classes: carbon, nitrogen, energy, growth factors, inorganic salts, and water [7]. Among these, carbon and nitrogen are the primary building blocks of cellular material, while growth factors regulate metabolic efficiency. Carbon is the most abundant element in bacterial cells, forming the structural backbone of all organic compounds, including proteins, nucleic acids, and lipids [8] [9]. Nitrogen is a fundamental component of amino acids and nucleic acids, typically constituting 12-15% of bacterial dry weight [7]. The interplay between these nutrients directly influences growth rates, metabolic pathways, and the yield of target products.
A carbon source is an organic or inorganic compound that provides the carbon skeletons for cellular biosynthesis and, for heterotrophs, serves as the primary energy source [9]. Bacteria are classified based on their carbon source utilization:
- Heterotrophs require organic carbon molecules, such as sugars, alcohols, and organic acids [8]. The majority of bacteria cultivated in laboratories are heterotrophs.
- Autotrophs utilize inorganic carbon, primarily carbon dioxide (CO₂), to synthesize organic molecules [8].
In practice, the choice of carbon source is a critical experimental parameter. Simple sugars like glucose are widely used for rapid growth, while other sources like pyruvate are employed in specialized applications, such as selective isotopic labeling for nuclear magnetic resonance (NMR) spectroscopy studies [10]. The ability of bacteria to utilize different carbon sources is a key characteristic used in identification and classification [9].
Table 1: Common Carbon Sources in Bacterial Culture Media
| Carbon Source | Chemical Class | Example Applications | Metabolic Considerations |
|---|---|---|---|
| Glucose | Monosaccharide | General-purpose growth, high-yield protein production | Rapidly metabolized; can cause catabolite repression [8]. |
| Glycerol | Sugar alcohol | Biomass production, cryopreservation | Slower metabolism than glucose; can reduce acetate formation. |
| Lactose | Disaccharide | Recombinant protein induction (e.g., in lac operon systems) | Requires β-galactosidase for hydrolysis [8]. |
| Pyruvate | Organic acid | Selective isotopic labeling for NMR spectroscopy | Can be rapidly depleted, leading to metabolic byproducts like acetate and lactate [10]. |
| Acetate | Organic acid | Growth under nutrient limitation | Can be used as a carbon source by many bacteria after preferred sources are exhausted. |
Nitrogen is essential for the synthesis of amino acids, proteins, nucleic acids, and coenzymes. A nitrogen source is any substance that provides a bioavailable form of nitrogen for these syntheses [7]. Unlike carbon, nitrogen sources are typically not used as primary energy sources [7]. Microbes exhibit varying capabilities in nitrogen assimilation:
- Diazotrophs: Specialized bacteria capable of fixing atmospheric dinitrogen (N₂) [7].
- General Assimilators: Most bacteria utilize ammonium salts (e.g., NH₄⁺), nitrates, or organic nitrogen compounds like amino acids and peptides [7].
In complex media, nitrogen is often supplied via protein hydrolysates like peptone, tryptone, and yeast extract, which provide a mixture of amino acids and peptides [11]. In synthetic or defined media, inorganic salts such as ammonium sulfate or potassium nitrate are used to ensure consistency and reproducibility. Recent innovations explore alternative nitrogen sources, such as enzymatic hydrolysates of soy protein, for cost-effective microbial production of metabolites like nattokinase and clavulanic acid [12].
Table 2: Common Nitrogen Sources in Bacterial Culture Media
| Nitrogen Source | Type | Example Applications | Considerations |
|---|---|---|---|
| Ammonium Sulfate | Inorganic | Defined minimal media | Readily assimilated; can acidify medium as ammonium is consumed. |
| Peptone | Organic (Protein hydrolysate) | Complex media (e.g., Nutrient Broth) | A mixture of peptides and amino acids; composition can be variable. |
| Tryptone | Organic (Casein digest) | Complex media (e.g., LB Broth) | Rich in tryptophan; provides a readily available nitrogen source. |
| Yeast Extract | Organic | Complex media, vitamin source | Contains amino acids, peptides, vitamins, and minerals. |
| Soy Protein Hydrolysate | Organic | Industrial fermentation for secondary metabolites [12] | Cost-effective; supports high production yields for certain compounds. |
Growth Factors
Growth factors are organic compounds that a bacterium requires for normal metabolism but cannot synthesize de novo. They must be supplied in the culture medium in small quantities [7]. Their primary functions are to serve as precursors for important chemical substances (proteins, nucleic acids, lipids) or as components of coenzymes [7]. Based on their growth factor requirements, bacteria can be classified as:
- Prototrophs: Do not require external growth factors.
- Auxotrophs: Require specific growth factors to be added to the medium.
Common growth factors include [7] [11]:
- Vitamins: Often act as coenzymes (e.g., B vitamins for various metabolic reactions).
- Amino Acids: Required by auxotrophs that lack specific biosynthetic pathways (e.g., valine and glutamic acid for Leuconostoc mesenteroides).
- Purine and Pyrimidine Bases: Required for nucleic acid synthesis by some fastidious bacteria.
Experimental Protocols for Investigating Nutritional Requirements
Protocol: Investigating Carbon Source Utilization
This protocol outlines a method for determining the ability of a bacterial strain to utilize different carbon sources, which is vital for both identification and medium optimization.
- Base Medium Preparation: Prepare a chemically defined minimal medium containing all essential inorganic salts (e.g., MgSO₄, KH₂PO₄), a nitrogen source (e.g., (NH₄)₂SO₄), and trace elements. Omit a carbon source [10].
- Carbon Source Supplementation: Dispense the base medium into sterile flasks. Supplement each flask with a filter-sterilized carbon source (e.g., glucose, pyruvate, glycerol) at an equimolar carbon concentration (e.g., 0.5-1% w/v). Include a negative control with no carbon source.
- Inoculation and Incubation: Inoculate each flask with a standardized inoculum of the test bacterium, prepared in a carbon-free buffer. Incubate under appropriate conditions (temperature, aeration).
- Growth Monitoring: Monitor bacterial growth by measuring optical density (OD) at 600 nm at regular intervals (e.g., hourly) until the culture enters the stationary phase [10].
- Metabolite Analysis (Optional): For a deeper metabolic understanding, analyze the culture medium at different time points using techniques like NMR spectroscopy to track carbon source depletion and byproduct formation (e.g., acetate, lactate) [10].
- Data Analysis: Calculate the maximum growth rate (μₘₐₓ) and final biomass yield for each carbon source to determine utilization efficiency.
Protocol: Analyzing the Impact of Organic Amendments on Nitrogen Metabolism
This protocol, adapted from a year-long anaerobic soil study, demonstrates how different organic materials, with varying carbon compositions, drive distinct nitrogen metabolic pathways [13].
- Material Preparation: Select organic amendments with distinct properties (e.g., pig-manure digestate, compost, straw powder). Sterilize materials (e.g., via γ-irradiation) to eliminate exogenous microbes. Analyze initial total organic carbon (TOC) and total nitrogen (TN) content [13].
- Experimental Setup: Establish microcosms (e.g., in serum bottles) containing a base soil or matrix. Add organic amendments normalized to an equivalent total carbon input. An inorganic fertilizer-only control should be included. Add potassium nitrate solution to standardize initial nitrate levels across treatments [13].
- Incubation and Maintenance: Maintain anaerobic conditions by replacing the headspace with pure helium. Incubate at a constant temperature (e.g., 25°C) for the desired duration. For long-term studies, a second batch of amendments can be added mid-way through the incubation to simulate follow-up fertilization [13].
- Sampling and Analysis: Collect samples at multiple time points for chemical and molecular analysis:
- Chemical Analysis: Measure ammonium (NH₄⁺), nitrate (NO₃⁻), total nitrogen (TN), and total organic carbon (TOC) concentrations [13].
- Microbial Community Analysis: Extract total DNA and perform shotgun metagenomic sequencing to profile the functional genes and taxonomic composition of the nitrogen-transforming microbiome [13].
- Data Interpretation: Correlate temporal shifts in nitrogen chemistry with changes in the abundance of key microbial taxa (e.g., Ramlibacter, Lysobacter, Clostridium) and functional genes to elucidate the microbial mechanisms driving processes like mineralization or fixation [13].
Visualization of Experimental Workflows
Carbon Utilization Workflow
Nitrogen Metabolism Analysis
The Scientist's Toolkit: Key Research Reagents
Table 3: Essential Reagents for Bacterial Nutrition Research
| Reagent / Material | Function | Example Application |
|---|---|---|
| D-Glucose | A readily metabolizable carbon source for energy and biomass. | General propagation of heterotrophic bacteria [11]. |
| Ammonium Sulfate | A defined, inorganic nitrogen source for ammonium assimilation. | Component of M9 minimal medium for controlled experiments [10]. |
| Peptone | A complex mixture of peptides and amino acids from digested proteins. | Nitrogen and vitamin source in complex media like Nutrient Broth [11]. |
| Yeast Extract | A complex source of amino acids, nitrogen, vitamins, and trace elements. | Enrichment agent in media for fastidious bacteria [11]. |
| Agar | A polysaccharide gelling agent derived from algae. | Solidifying agent for Petri plates to isolate colonies [11]. |
| Vitamin Stocks | Aqueous or ethanolic solutions of essential vitamins (e.g., B1, B12). | Supplementation of defined media for auxotrophic strains [7]. |
| HEPES or PIPES Buffer | Chemical buffers to maintain stable pH during bacterial growth. | Cultures where metabolic activity causes significant pH shifts. |
| Trace Element Solution | A cocktail of essential metal ions (e.g., Fe, Zn, Mo, Co). | Defined media to ensure availability of cofactors for enzymes [7]. |
Advanced Considerations and Future Directions
Understanding microbial growth extends beyond optimal conditions. In natural environments, microbes often exist in a state of near-zero growth due to severe nutrient limitation [14]. This slow-growth state activates unique metabolic pathways and the production of secondary metabolites, presenting both a challenge and an opportunity for discovering novel compounds and genes [14]. Furthermore, the longstanding paradigm that "99% of microbes are unculturable" is being re-evaluated. Recent research on nitrogen-fixing bacteria suggests that the issue is not absolute unculturability but rather that many microbes are "difficult-to-culture" or "not-yet-cultured," often because they are rare taxa that get outcompeted in standard enrichment cultures [15]. Future research will focus on innovative cultivation strategies, such as in-situ cultivation using diffusion chambers and co-culture techniques, to access this hidden microbial diversity [11]. Finally, genomic prediction of maximum growth rates is becoming more sophisticated. Tools like Phydon integrate codon usage bias (CUB) with phylogenetic information to accurately predict the growth rates of uncultivated organisms from genome sequences, enhancing ecosystem modeling and guiding cultivation efforts [16].
The cultivation of bacteria remains a cornerstone of microbiological research, forming the foundational protocol upon which advancements in diagnostics, drug development, and molecular biology are built. As first established by Robert Koch, a pure bacterial culture is essential for studying virulence, antibiotic susceptibility, and genome sequence [17]. The efficacy of this research is fundamentally dependent on the appropriate selection and formulation of culture media, which provide the necessary nutrients and physical environment for bacterial growth and propagation. Culture media have evolved significantly since the creation of the first liquid artificial medium by Louis Pasteur in 1860 and the subsequent development of solid media by Koch, which enabled the purification of bacterial clones [18]. This technical guide provides an in-depth classification of culture media based on their physical state—liquid, solid, and semi-solid—detailing their formulations, applications, and specific protocols for their use in a research context. A thorough understanding of these media is critical for researchers and scientists engaged in drug development and bacteriological studies, as the choice of medium directly impacts experimental outcomes, reproducibility, and the validity of scientific conclusions.
The Function and Composition of Culture Media
At its core, a culture medium is designed to replicate the natural environment and meet the nutritional needs of bacteria [18]. Its primary function is to supply the essential elements for bacterial growth: water, a source of energy, carbon, nitrogen, vitamins, and minerals. The basic components of a standard medium, such as Luria-Bertani (LB) broth, typically include tryptone (a source of amino acids and peptides), yeast extract (providing vitamins, minerals, and other cofactors), and sodium chloride (to maintain osmotic equilibrium) [19] [20]. Beyond these basic nutrients, media can be tailored through additives to select for or differentiate between bacterial species.
- Selective Media: These incorporate inhibitors that suppress the growth of unwanted microbes. This is achieved using organic or inorganic components like bile salts or crystal violet (which inhibit Gram-positive bacteria), or specific antibiotics [17] [18]. For instance, bismuth sulfite agar is used to inhibit commensal organisms for the culture of enteric bacilli [17].
- Enriched Media: These are basal media supplemented with extra nutrients like blood, which provides hemin and other growth factors, to support the growth of fastidious microorganisms [17].
- Defined vs. Complex Media: Defined media have a known exact chemical composition, while complex media, such as LB, contain digest of animal or plant products which provide nutrients in a non-defined form [19] [20].
The physical state of the medium—dictated by gelling agents—determines its key applications, from achieving high cell densities in liquid broth to isolating pure colonies on solid surfaces.
Classification by Physical Formulation
Bacterial culture media are categorized into three primary physical formulations, each serving distinct and critical roles in microbiological workflows. The selection of the appropriate formulation is a fundamental decision in any experimental design.
Liquid Media (Broths)
Liquid media, or broths, are nutrient-rich solutions without a gelling agent. They are used to promote high-density bacterial growth, which is essential for obtaining sufficient biomass for downstream applications like plasmid DNA isolation, protein expression, and metabolite production [19] [20].
- Protocol for Inoculating a Liquid Bacterial Culture:
- Prepare Liquid LB: Weigh out 10 g tryptone, 5 g yeast extract, and 10 g NaCl per liter of distilled water. Dissolve the components and adjust the pH to 7.0 with 5 M NaOH. Adjust the final volume to 1 L [20].
- Sterilize: Decant the medium into several small bottles, loosen the caps, and sterilize by autoclaving. Tighten the caps once the medium has cooled below 40°C [20].
- Add Antibiotic: Once the sterilized medium has cooled to below 50°C, add the appropriate filter-sterilized antibiotic to the recommended working concentration (e.g., 100 µg/mL ampicillin) [19] [20].
- Inoculate: Using a sterile pipette tip or toothpick, select a single colony from a freshly streaked agar plate and drop it into the liquid LB with antibiotic [19].
- Incubate: Loosely cover the culture tube or flask to allow for aeration and incubate at 37°C for 12-18 hours in a shaking incubator (typically 150-250 rpm) [19].
- Verify Growth: After incubation, growth is characterized by a cloudy haze in the media. For precise measurements, the optical density at 600 nm (OD600) can be determined [19].
Solid Media
Solid media are created by adding a gelling agent, most commonly agar at a concentration of 1.5%, to a liquid broth base before sterilization [17] [18] [20]. The invention of the petri dish revolutionized clinical microbiology by allowing observation of colonies and limiting contamination [17]. Solid media are indispensable for isolating individual bacterial clones, quantifying viable cells, and studying colony morphology.
- Protocol for Preparing LB Agar Plates:
- Prepare LB Broth: Follow the protocol for liquid LB medium as described above [20].
- Add Agar: Just before autoclaving, add 15 g of agar per liter of LB medium and mix [20].
- Sterilize: Sterilize the medium with agar by autoclaving. Swirl the medium gently after autoclaving to distribute the melted agar evenly [20].
- Cool and Add Antibiotics: Cool the autoclaved agar medium to below 50°C (comfortable to hold) before adding heat-sensitive antibiotics. Mix thoroughly [20].
- Pour Plates: Pour approximately 30-35 mL of medium per standard 90 mm petri dish in a laminar flow hood or on a cleaned bench surface. Remove air bubbles by briefly passing a Bunsen burner flame over the surface [20].
- Dry and Store: Allow the plates to solidify, then dry them with lids slightly ajar in a laminar-flow hood for about an hour or in a 37°C incubator for 30 minutes. Store plates inverted at 4°C in the dark [20].
Semi-Solid Media
Semi-solid media are formulated with a lower concentration of agar, typically between 0.2% and 0.5%. This reduced agar content creates a soft, jelly-like consistency that is ideal for studying bacterial motility, as motile bacteria can swim through the medium, creating a diffuse zone of growth away from the inoculation line [21] [22]. They are also used in certain biochemical tests and for the maintenance and storage of cultures [22].
Table 1: Key Characteristics of Media Formulations
| Formulation | Agar Concentration | Primary Applications | Key Features |
|---|---|---|---|
| Liquid Media | 0% | High-density growth, plasmid preparation, protein expression | Supports suspension growth; suitable for scaling up volumes from mL to L [19] [20] |
| Solid Media | 1.0 - 1.5% | Isolation of pure colonies, quantification (CFU), strain storage | Provides a solid surface for colony formation; essential for cloning and purification [17] [20] |
| Semi-Solid Media | 0.2 - 0.5% | Motility assays, biochemical tests, culture storage | Soft consistency allows for visualization of bacterial movement [21] [22] |
Supporting Methodologies and Conditions for Bacterial Culture
Successful bacterial cultivation extends beyond the medium itself to encompass stringent control of incubation conditions and specialized techniques for handling and preserving cultures.
Critical Incubation Parameters
- Temperature: Most pathogenic or commensal bacterial strains are mesophiles, growing optimally at body temperature (37°C). Environmental strains may thrive at lower temperatures (25-30°C), while thermophiles require higher temperatures [21]. Some bacteria, like Rickettsia felis, have very specific temperature requirements for successful culture [17].
- Atmosphere: Bacterial species vary in their oxygen requirements [21].
- Aerobes require oxygen.
- Microaerophiles, such as Campylobacter spp., require lower oxygen levels (~5% O₂) [17].
- Anaerobes, like Clostridium species, cannot survive in oxygen and require specialized anaerobic chambers or jars [21]. The addition of antioxidants in culture media under an aerobic atmosphere has been shown to allow the growth of some strictly anaerobic species [17].
- Incubation Time: While many common pathogens grow within 24-48 hours, some fastidious species require extended incubation. For example, Bartonella species can require 12-14 days, and some isolates may need over 45 days to grow [17].
Essential Research Reagent Solutions
The following reagents are fundamental to routine bacteriology work.
Table 2: Essential Research Reagent Solutions
| Reagent | Function | Example Protocol & Handling |
|---|---|---|
| Antibiotic Stocks | Selective pressure to maintain plasmids or select for resistant bacteria. | Prepare 1000X stocks (e.g., 50 mg/mL Ampicillin in water), filter-sterilize, aliquot, and store at -20°C. Add to cooled (<50°C) sterilized media at 1:1000 dilution [19] [20]. |
| Agar | Gelling agent for solid and semi-solid media. | Add 15 g/L for solid plates or 2-5 g/L for semi-solid media before autoclaving [20]. |
| Hydrogen Peroxide (3%) | Substrate for the catalase test, a key biochemical identification assay. | Use a freshly prepared solution. Adding a few drops to a colony will cause immediate bubbling (O₂ production) in catalase-positive organisms (e.g., Staphylococcus) [23]. |
| Tetramethyl-p-phenylenediamine dihydrochloride | Substrate for the oxidase test. | Use a fresh 1% solution. A colony smeared on filter paper moistened with the reagent will turn dark purple within 10-20 seconds if oxidase-positive (e.g., Pseudomonas) [23]. |
Experimental Workflow and Visualization
The process of selecting and using the appropriate culture medium follows a logical sequence, from sample processing to pure culture and analysis. The diagram below outlines this core workflow in bacteriological research.
Figure 1: Media Selection Workflow. This diagram outlines the logical progression for using different media formulations to obtain a pure culture and proceed with specific experimental applications.
The meticulous classification and application of liquid, solid, and semi-solid culture media form the bedrock of bacteriological research. From the foundational work of Pasteur and Koch to the modern, optimized media used in today's clinical and pharmaceutical development laboratories, understanding the distinct roles of each formulation is non-negotiable. Liquid media enable the amplification of biomass, solid media are critical for isolation and purity, and semi-solid media facilitate the study of motility and other phenotypic traits. Mastery of their preparation, supplemented with controlled incubation conditions and the use of selective agents like antibiotics, empowers researchers, scientists, and drug development professionals to reliably culture, identify, and manipulate bacterial strains. This foundational protocol is a prerequisite for all subsequent research, ensuring the integrity, reproducibility, and success of scientific endeavors in microbiology and beyond.
The selection of an appropriate culture medium is a critical foundational protocol in bacteriology, directly influencing the success and reproducibility of research and drug development. The core choice often lies between complex media and defined media, a decision that hinges on the specific requirements of the experimental or production workflow [24]. Complex media, also known as undefined media, contain ingredients of unknown exact chemical composition, such as yeast extract, peptone, or other plant or animal derivatives [24] [25]. These media provide a rich, nonspecific mixture of nutrients, vitamins, and growth factors, making them versatile for cultivating a wide array of microorganisms, particularly those with unknown nutritional requirements [26] [25]. In contrast, defined media (also called synthetic or chemically defined media) are formulated with precise, known quantities of pure chemical compounds [24] [26]. This ensures a completely reproducible and consistent environment, free of animal-derived components, which is essential for studying microbial metabolism, conducting precise physiological studies, or producing products for therapeutic use where regulatory compliance is paramount [24] [27]. This guide provides an in-depth technical comparison of these two media types to empower researchers and scientists in making an informed selection for their foundational culturing protocols.
Core Definitions and Key Characteristics
Complex Media
Complex media are nutrient-rich growth environments whose exact chemical composition is not known. Their formulation relies on crude digest or extracts of biological materials which contain a vast and variable assortment of nutrients in undefined proportions [24] [26]. Common components include:
- Peptones: These are protein digests (e.g., from casein or meat) that provide a mixture of peptides, amino acids, and inorganic salts.
- Yeast Extract: A rich source of B vitamins, carbohydrates, and nitrogen compounds.
- Beef Extract: Provides vitamins, minerals, and organic compounds.
The primary advantage of complex media is their ability to support the growth of a wide variety of microorganisms, including fastidious bacteria with complex nutritional needs that are difficult or impossible to culture on defined media [24] [25]. They are commonly used for routine cultivation, propagation of starter cultures, and in many industrial fermentation processes. Examples of complex media include Nutrient Broth, Tryptic Soy Broth (TSB), and Blood Agar [25].
Defined Media
Defined media are composed solely of known, purified chemical components of specified concentrations [24] [26]. There is no animal, plant, or yeast tissue present, and the medium is entirely free of undefined constituents. A typical defined medium will contain:
- A precise carbon source (e.g., glucose, glycerol).
- A defined nitrogen source (e.g., ammonium salts, specific amino acids).
- Inorganic salts (e.g., phosphates, sulfates, magnesium, iron).
- Vitamins and other growth factors as required by the specific microbe.
The major advantage of defined media is the high level of reproducibility and consistency they offer [28]. They are indispensable for experiments that require precise control over the nutritional environment, such as studies of metabolic pathways, nutrient requirements, or the effects of specific variables on growth [26]. Furthermore, they are mandatory in biopharmaceutical production to ensure product purity and comply with regulatory standards, as they eliminate the risk of introducing adventitious agents from animal sera [24] [27].
Table 1: Comparative Analysis of Complex and Defined Media
| Characteristic | Complex Media | Defined Media |
|---|---|---|
| Chemical Composition | Partially or fully undefined; exact concentrations unknown [24] [25] | Fully known and specified for every component [24] [26] |
| Typical Ingredients | Yeast extract, peptone, beef extract, malt extract [25] | Glucose, ammonium sulfate, purified amino acids, defined salts and vitamins [24] |
| Reproducibility | Lower; varies between batches and suppliers [28] | High; highly consistent and reproducible between batches [28] |
| Cost | Generally lower cost | Generally higher cost due to purified reagents |
| Primary Applications | Routine cultivation, diagnostic microbiology, growing fastidious organisms, industrial fermentation [29] [25] | Metabolic studies, physiological research, recombinant protein production, vaccine and biopharmaceutical manufacturing [24] [27] |
| Regulatory Suitability | Less suitable for stringent therapeutic production due to variability and undefined nature [24] | Essential for therapeutic product manufacturing where a completely defined process is required [24] |
Strategic Selection and Market Context
Selecting the appropriate medium type is a strategic decision that impacts experimental outcomes, process scalability, and cost-effectiveness. The global market for microbiology and bacterial culture media, valued at approximately $6.03 billion in 2025, reflects the critical importance of these materials, with complex media holding a dominant share of about 35% due to their versatility and widespread use in clinical and industrial settings [29]. The decision framework for selection can be visualized in the following workflow, which guides the researcher through key questions to arrive at the optimal media type for their specific application.
Beyond the technical considerations, market trends highlight the growing adoption of ready-to-use formats, which improve workflow efficiency and reduce contamination risks [29] [30]. Furthermore, the integration of artificial intelligence and automation in microbial discovery and culture screening is transforming media optimization and selection processes, enabling high-throughput testing and data-driven formulation design [29].
Experimental Protocols for Media Comparison
To empirically determine the optimal media for a specific bacterial strain, a systematic comparison of growth in complex and defined media is essential. The following protocol provides a detailed methodology for such an evaluation.
Growth Kinetics and Reproducibility Assessment
Objective: To compare the growth performance, yield, and batch-to-batch reproducibility of a bacterial culture in complex versus defined media.
Materials:
- Test Organism: A pure culture of the bacterium of interest (e.g., Escherichia coli, Bacillus subtilis).
- Media:
- Complex Medium: e.g., Tryptic Soy Broth (TSB) or Luria-Bertani (LB) Broth.
- Defined Medium: A formulation specific to the test organism (e.g., M9 minimal medium for E. coli).
- Equipment: Sterile flasks, spectrophotometer (for measuring optical density, OD), pH meter, shaking incubator, autoclave.
Methodology:
- Media Preparation: Prepare multiple independent batches (e.g., n=5) of both the complex and defined media according to standard recipes. Sterilize by autoclaving or filtration as required. Measure and record the initial pH of each batch.
- Inoculum Preparation: Grow the test organism to mid-exponential phase in a small volume of either medium. Wash the cells by centrifugation and resuspend in a sterile saline solution to create a standardized inoculum.
- Cultivation: Aseptically inoculate each batch of media (in triplicate) with the standardized inoculum to a low starting OD (e.g., OD600 ≈ 0.05).
- Monitoring: Incubate the cultures under optimal conditions (temperature, aeration). Monitor growth by measuring OD600 at regular intervals (e.g., every 30-60 minutes).
- Data Analysis: Plot growth curves for each culture. Calculate key parameters:
- Lag Phase Duration: Time before exponential growth begins.
- Maximum Growth Rate (μmax): Calculated from the slope of the exponential phase.
- Final Cell Yield: Maximum OD600 reached.
- Reproducibility: Calculate the coefficient of variation (CV) for the final cell yield across the different batches of each media type.
Expected Outcomes: As demonstrated in a comparative study with Bacillus subtilis, defined media typically provide substantially better reproducibility across batches from a single supplier and even more so when comparing media from different suppliers [28]. Complex media may support a higher maximum cell yield or faster growth rate for some organisms but will likely show greater batch-to-batch variability.
Table 2: The Scientist's Toolkit: Essential Reagents for Media Preparation and Evaluation
| Reagent / Material | Function / Purpose | Example in Complex Media | Example in Defined Media |
|---|---|---|---|
| Peptones | Provides a complex mixture of peptides and amino acids as nitrogen and carbon sources. | Tryptone, Peptone from Casein | Not Used |
| Yeast Extract | Serves as a source of B-complex vitamins, nucleotides, and other cofactors. | Yeast Extract | Not Used |
| Defined Carbon Source | Provides a known, fermentable energy source. | Not specified/defined | Glucose, Glycerol |
| Defined Nitrogen Source | Provides a known, metabolizable nitrogen source. | Not specified/defined | Ammonium Sulfate, Potassium Nitrate |
| Inorganic Salts Buffer | Maintains osmotic balance and provides essential ions; buffers pH. | Sodium Chloride, Phosphates | Magnesium Sulfate, Potassium Phosphate |
| Agar | A polysaccharide used as a solidifying agent for petri dishes and slants. | Used in solid media | Used in solid media |
| pH Indicator | A dye that changes color with pH, useful for detecting metabolic activity. | Phenol Red | Phenol Red |
| Selective Agents | Antibiotics, dyes, or other compounds that inhibit unwanted microbes. | Can be added to both media types | Can be added to both media types |
The choice between complex and defined media is a fundamental decision that underpins successful bacterial research and development. Complex media offer robustness and ease of use for general cultivation and diagnostic purposes, explaining their dominant share in the market [29]. However, their inherent variability can be a significant drawback for studies requiring precision. Defined media, while often more costly and time-consuming to formulate, provide an unparalleled level of control and consistency, making them indispensable for metabolic studies, and the production of vaccines and biopharmaceuticals [24] [27]. As the field advances, with trends pointing towards increased automation, AI-driven design, and stringent regulatory requirements, the strategic selection and optimization of culture media will remain a cornerstone of foundational protocols in bacteriology. Researchers are advised to align their media selection with their primary experimental goals, using the frameworks and protocols provided herein as a guide to establish a reliable and reproducible nutritional foundation.
In the field of bacteriological research, the integrity of experimental outcomes hinges on the rigorous exclusion of unintended microorganisms. Sterilization and aseptic technique form the foundational framework that enables researchers to maintain this purity, ensuring that observed results are attributable only to the microbes under investigation rather than to contaminants. These protocols are not merely supportive practices but are critical determinants of experimental success, influencing everything from basic culture viability to the reliability of drug development data. Within research laboratories, the consistent application of these methods protects valuable cell lines, preserves the accuracy of enumerations, and safeguards both personnel and the broader environment from potential biological hazards. This technical guide examines the core principles and procedures that constitute effective contamination control, providing a comprehensive resource for scientists dedicated to methodological excellence in bacterial culturing.
Core Concepts and Definitions
Understanding the distinction between key terms is essential for implementing appropriate contamination control strategies.
- Aseptic Technique: A set of procedures designed to prevent the introduction of contaminating microorganisms into sterile cultures, reagents, or equipment. The goal is to create a barrier between the environment and the sterile cell culture, thereby reducing the probability of contamination. [31] [32] It focuses on not introducing contamination to a previously sterilized environment.
- Sterilization: A process that eliminates all forms of viable microorganisms, including bacteria, fungi, viruses, and especially resistant bacterial spores, from a surface, object, or fluid. After sterilization, an object is referred to as sterile. [33] Sterile techniques are used to achieve this state of sterility, often describing the methods and the resulting condition of instruments and environments. [31]
- Clean Technique: This approach aims to reduce the overall number of germs but does not completely eliminate them. It involves using clean, but not sterile, items to minimize the transfer of microorganisms. For example, unused gloves from a box are clean but not sterile. [31]
Table: Comparison of Contamination Control Terms
| Term | Objective | Level of Microbial Control | Common Applications |
|---|---|---|---|
| Sterile Technique | Complete elimination of all microorganisms | Eliminates all microbes, spores, and viruses | Surgical instrument processing, preparation of culture media, parenteral drugs [31] [33] |
| Aseptic Technique | Prevent contamination of a sterile field | Maintains a previously achieved sterile state | Plating procedures, cell culture manipulations, inoculations [32] [34] |
| Clean Technique | Reduce the overall number of pathogens | Reduces microbial count but does not eliminate all | Non-sterile glove use in a doctor's office, handling of non-critical items [31] |
Sterilization Methods in Microbiology
A variety of sterilization methods are employed in research laboratories, each with distinct mechanisms, advantages, and ideal applications. The selection of an appropriate method depends on the nature of the material to be sterilized, including its heat stability, composition, and intended use.
Heat-Based Sterilization
Heat is the most reliable and widely used method for sterilization and can be applied as either moist or dry heat.
- Moist Heat (Autoclaving): This process uses pressurized steam to achieve rapid microbial inactivation. The mechanism of action is the hydrolysis and coagulation of cellular proteins. Typical autoclave cycles run between 3 and 30 minutes at 121–134 °C (250–273 °F). Steam sterilization is a faster process than dry heat due to the high latent heat of steam, which allows for efficient heat penetration. [35] [33] It is the method of choice for aqueous solutions, culture media, and any materials that can withstand high temperatures and moisture.
- Dry Heat (Flaming & Baking): Dry heat kills microbes primarily through the oxidation of cell constituents. This requires more energy than protein hydrolysis, necessitating higher temperatures and longer exposure times than moist heat. For example, sterilization in a hot air oven often requires at least 2 hours at 160 °C (320 °F). Dry heat is suitable for materials that might be damaged by moist heat or are impenetrable to steam, such as powders, petroleum products, and sharp instruments. [35] [36] [33] Flaming is a rapid form of dry heat sterilization used for inoculating loops and straight wires in microbiology labs, where heating the wire until it glows red ensures the inactivation of any infectious agent. [33]
Non-Thermal and Alternative Sterilization Methods
For heat-sensitive materials, several effective non-thermal alternatives exist.
- Filtration: This is a quick, heatless method for sterilizing solutions that would be degraded by heat. Filters work by passing the solution through a membrane with a pore diameter too small for microbes to pass through, typically 0.2 µm for bacterial removal. It is crucial to note that viruses and phages can pass through these filters. This method is commonly used for sterilizing thermolabile pharmaceutical fluids, serum, and antibiotic solutions. [35] [36]
- Chemical Sterilization:
- Liquid Chemicals: Chemical sterilants like glutaraldehyde and performic acid are used for medical devices that are heat-sensitive and incompatible with other methods. They require prolonged contact times (3-12 hours) and have limitations, as they cannot adequately penetrate barriers like biofilms, and their survivor curves may not provide the same sterility assurance level as thermal methods. [36]
- Gas Sterilization: Ethylene oxide gas is used to sterilize heat- and moisture-sensitive items, such as catheters and complex medical devices. It alkylates cellular components, preventing metabolism and replication. However, ethylene oxide is highly toxic, requires aeration after sterilization, and presents several health risks, making it less common in general research labs. [35] [36]
- Vaporized Hydrogen Peroxide (VHP) & Ozone: These are low-temperature sterilization systems that have been developed more recently. VHP offers rapid cycle times and leaves behind only water and oxygen as by-products. Ozone is generated from oxygen and water within the sterilizer and is converted back at the end of the cycle, making it an environmentally friendly option. [36]
- Radiation: Ionizing radiation, such as gamma rays and electron beams, is a low-temperature method that damages microbial DNA. It is highly effective and used for large-scale sterilization of medical devices and single-use consumables during manufacturing. Non-ionizing radiation, like UV light, has limited penetration and is useful for sterilizing air and exposed surfaces, such as inside laminar flow hoods between uses. [35] [32]
Table: Comparison of Common Laboratory Sterilization Methods
| Method | Mechanism | Typical Conditions | Applications | Limitations |
|---|---|---|---|---|
| Steam (Autoclave) | Protein hydrolysis & coagulation | 121°C, 15-30 min, 15 psi [35] [33] | Culture media, aqueous solutions, surgical tools [35] [33] | Unsuitable for heat-sensitive or moisture-sensitive items [35] |
| Dry Heat (Oven) | Oxidation | 160°C for 120 min [36] [33] | Powders, sharp instruments, glassware [36] [33] | Long cycle times; high temperatures damage many materials [35] [36] |
| Filtration | Physical removal | 0.2 µm membrane pore size [35] | Thermolabile solutions (sera, antibiotics) [35] [36] | Does not remove viruses; requires pre-filtration for cloggy solutions [35] |
| Ethylene Oxide Gas | Alkylation | 3-5 hours, 37-63°C [36] | Heat- and moisture-sensitive medical devices [35] [36] | Highly toxic; requires long aeration; lengthy cycle [35] |
| Radiation (Gamma) | DNA damage | Varies with dose [35] | Industrial sterilization of plastics (e.g., pipettes, petri dishes) [35] | Not practical for lab-scale use; requires specialized facilities [35] [36] |
Sterilization Method Decision Workflow
Aseptic Technique in Practice
Aseptic technique encompasses all the practices that maintain the sterility of experimental materials during handling. Its proper execution is paramount for successful cell culture, media preparation, and all manipulations involving pure bacterial strains.
Foundational Principles
The core elements of aseptic technique can be broken down into four key areas: [31]
- Tool and Patient Preparation: All tools and instruments must be properly sterilized, typically via autoclaving. The work surface and the operator's hands are also prepared to reduce the microbial load. [31]
- Barriers: Physical barriers, such as personal protective equipment (PPE) including gloves, gowns, and masks, are used to prevent cross-contamination between the user and the sterile field or culture. [31]
- Contact Guidelines: A fundamental rule is to maintain sterile-to-sterile contact only. This means sterile instruments should only touch other sterile surfaces or the culture, and non-sterile items must be excluded from the sterile field. [31]
- Environmental Controls: This involves preparing the workspace to minimize airborne contamination by working in a designated, uncluttered area, such as a laminar flow hood, and minimizing drafts and movements that could disturb the air. [31] [37]
Practical Procedures for the Microbiology Lab
The following procedures are essential for daily work in a bacteriology laboratory.
- Workspace Preparation: The laboratory bench should be clear of clutter and disinfected with a suitable agent, such as 70% ethanol or 1% Virkon, before and after work. [37] [32] A Bunsen burner is often used to create a sterile field; the updraft of the flame draws airborne contaminants away from the immediate work area. All necessary supplies should be organized within immediate reach before starting the procedure. [37] [34]
- Sterile Handling of Instruments:
- Using a Wire Loop: A wire loop is sterilized by heating it to red hot in the Bunsen burner flame before and after use. To prevent splattering, the loop should be heated gradually, starting from the base of the wire near the handle and moving the tip slowly into the hottest part of the flame. The sterile loop must be allowed to cool for a few seconds in the air before touching a culture and should not be placed on the bench surface. [37]
- Using a Pipette: Sterile pipettes should be removed from their wrapper by the end containing the cotton wool plug. After attaching a teat, the pipette barrel is held like a pen. The teat is depressed before immersion into the liquid to avoid introducing air bubbles, and then released slowly to draw up the fluid. After use, contaminated pipettes should be immediately placed in a pot of disinfectant. [37]
- Flaming the Neck of Vessels: The necks of bottles and test tubes should be passed briefly through the Bunsen burner flame after opening and before recapping. This action creates a convection current away from the opening, helping to prevent airborne microorganisms from entering the vessel. [37]
- Working with Plates and Flasks: When working with Petri dishes, exposure of the sterile inner surfaces should be limited. The lid should be lifted as little as possible and not placed on the bench; instead, it can be held over the base at an angle that shields the agar surface. Similarly, bottles and flasks should be capped when not in immediate use. [37] [32]
Aseptic Technique Core Steps
Contamination Detection and Control Strategy
Despite rigorous aseptic technique, contamination remains a risk. A proactive, comprehensive strategy for microbial control and detection is therefore essential.
Understanding potential contamination sources is the first step in mitigating risk. Key sources include: [38]
- Raw Materials: Cell lines themselves can be a source, with studies suggesting 5-35% of bioproduction cell lines have mycoplasma contamination. Biological raw materials like serum albumin can also be contaminated. [38]
- Laboratory Environment: Airflow (HVAC systems), water, and cleanroom surfaces can harbor microbes. Airborne contaminants can compromise processes, especially if filters are worn out or pressure is incorrect. [38]
- Personnel: Human error is a significant source of GMP deviations. Shed skin, dirt from clothing, and improper technique can introduce contaminants. [32] [38]
- Process Additives and Equipment: Non-sterile additives or single-use systems with manufacturing defects (e.g., micro-holes) can introduce contamination. Cross-contamination can occur between bioreactors if cleaning is insufficient, allowing biofilms to form. [38]
Detection Methods
Timely detection of contamination is critical for preventing the loss of experimental data and resources.
- Traditional Microbiological Methods: These are the cornerstone of sterility testing but are often slow. They include bioburden testing by filtration or plating methods, where filters or samples are placed in culture media and observed for microbial growth over several days up to two weeks. [38] These methods are effective but can delay process decisions.
- Rapid Microbiological Methods (RMMs): Newer technologies aim to reduce detection time. These include methods based on nucleic acid amplification (e.g., PCR) and advanced spectroscopy. One novel method uses UV absorbance spectroscopy combined with machine learning to provide a label-free, non-invasive contamination assessment in under 30 minutes, a significant improvement over traditional 7-14 day incubation periods. [39]
Experimental Protocols: Essential Plating Techniques
The following core plating methodologies are routinely used in microbiology to isolate, propagate, or enumerate bacteria. All incorporate aseptic technique to maintain sterility. [34]
Streak Plate Procedure: Isolation of Bacterial Colonies
The streak-plate procedure is designed to isolate pure cultures of bacteria, or colonies, from mixed populations by simple mechanical separation. [34]
Protocol: Quadrant Method [34]
- Preparation: Ensure the agar plate is dry and pre-warmed to room temperature. Label the bottom of the plate. Sterilize a metal loop by flaming until red hot and allow it to cool.
- First Quadrant: If the inoculum is a broth suspension, obtain a loopful. If it is a colony from another plate, gently touch the colony with the cooled loop. Lift the lid of the plate slightly and spread the inoculum over about one-quarter of the agar surface using a rapid, smooth, back-and-forth motion. Flame the loop.
- Second Quadrant: Turn the plate 90°. Touch the cooled loop to the first quadrant near the end of the last streak and drag it into the empty second quadrant, crossing over the last half of the streaks from the first quadrant. Do not go back into the first half. Fill the second quadrant with streaks. Flame the loop.
- Third and Fourth Quadrants: Repeat the process for the third and fourth quadrants, each time using a sterile loop (or re-flaming) and ensuring the loop does not go back into previous quadrants where a higher density of cells was deposited.
- Incubation: Incubate the plate upside down to prevent condensation from accumulating on the lid and falling onto the agar surface.
Objective: To obtain well-isolated single colonies derived from a single bacterium in the final quadrant.
Spread Plate and Pour Plate Procedures: Enumeration of Viable Bacteria
These methods are used to determine the concentration of viable bacteria in a liquid culture.
Protocol: Spread Plate [34]
- Prepare the Inoculum: Serially dilute the bacterial culture in a sterile diluent.
- Transfer and Spread: Pipette a small, measured volume (e.g., 100 µL) of the desired dilution onto the center of a pre-dried agar plate. Use a sterile, bent glass spreader (often dipped in ethanol and flamed to sterilize). Gently spread the liquid evenly over the agar surface by rotating the plate while the spreader is in contact with the agar.
- Incubation: Allow the liquid to absorb into the agar, then incubate the plate upside down.
Protocol: Pour Plate [34]
- Prepare the Inoculum: Serially dilute the bacterial culture as before.
- Transfer to Empty Plate: Pipette a measured volume (0.1-1.0 mL) of the dilution into an empty, sterile Petri dish.
- Add and Mix Agar: Promptly add approximately 15-20 mL of molten, but cooled, agar medium (ca. 45-50°C) to the dish. Swirl the dish gently to mix the inoculum thoroughly with the molten agar.
- Solidification and Incubation: Allow the agar to solidify completely, then incub the plate upside down.
Objective: After incubation, count the number of colonies on a plate to calculate the colony-forming units (CFU) per mL of the original culture.
The Scientist's Toolkit: Essential Research Reagent Solutions
Table: Key Reagents and Materials for Aseptic Microbiology Work
| Item | Function | Application Notes |
|---|---|---|
| Autoclave | Sterilizes using pressurized steam | Workhorse for media, solutions, and glassware; requires validation with biological indicators (e.g., G. stearothermophilus spores) [35] [33] |
| Laminar Flow Hood (BSC) | Provides a sterile work area via HEPA-filtered air | Essential for BSL-2 work; maintains product protection via unidirectional air; no Bunsen burner used inside [32] [34] |
| 70% Ethanol | Disinfects surfaces and gloved hands | Rapid action; used for wiping down work surfaces and equipment before use; fire hazard [37] [32] |
| Bunsen Burner | Creates an updraft sterile field; sterilizes loops | Standard for BSL-1 work on an open bench; flame used for sterilizing loops and flaming bottle necks [37] [34] |
| Sterile Pipettes | Transfers sterile liquids accurately | Disposable plastic or glass; used with a pipettor; never used more than once to avoid cross-contamination [37] [32] |
| Membrane Filters (0.2 µm) | Sterilizes heat-sensitive solutions | Removes bacteria from solutions like antibiotics or serum; does not remove viruses [35] |
| Selective & Differential Media | Grows and identifies specific microbes | Contains indicators or antibiotics to select for or differentiate between bacterial species |
Mastering Practical Techniques: Inoculation, Isolation, and Culture Conditions
Inoculation Tools and Aseptic Transfer Protocols
In microbiological research, the ability to study and characterize microorganisms fundamentally depends on working with them in a way that prevents contamination of the sample, the environment, or the researcher. Aseptic technique refers to this collection of procedures designed to prevent the introduction of unwanted organisms into pure cultures or laboratory settings [40]. These protocols are equally critical for maintaining experimental integrity and ensuring operator safety.
The core principle involves excluding contaminating microorganisms during the transfer of microbial cultures from one sterile medium to another [40]. Mastery of aseptic technique is a foundational skill for all subsequent procedures in bacteriology, from basic culture maintenance to advanced genetic and co-culture experiments. Without it, the reliability of any experimental result is compromised.
Core Concepts and Definitions
Growth Media Forms
Bacteria are cultivated in growth media, which provide the nutrients necessary to sustain their metabolism and reproduction. These media are prepared in several physical forms, each serving a distinct purpose in the laboratory [41].
- Broth (Liquid Medium): A liquid medium without agar, used for fast, luxuriant growth and for growing large quantities of bacteria [42] [41]. It is also essential for certain metabolic tests and inoculations.
- Agar Plates: Melted agar poured into Petri dishes, providing a large surface area for microbial growth. This format is ideal for isolating individual colonies, characterizing colonies, and performing certain biochemical tests [41].
- Agar Slants: Test tubes in which melted agar is allowed to solidify at an angle, creating a slanted surface. The relatively small tube opening reduces dehydration and contamination risk, making slants ideal for culturing and storing bacterial stocks for intermediate periods (weeks) [41].
- Agar Deeps: Test tubes in which melted agar is allowed to solidify vertically. This form is typically used for cultivating anaerobic bacteria or for specific differential metabolic tests [42] [41].
Sterilization vs. Disinfection
A clear understanding of decontamination methods is essential for laboratory safety and protocol integrity.
- Sterilization: The complete removal or destruction of all vegetative cells, endospores, and viruses from an item. It is an all-or-nothing process; an item is either sterile or not. Media and tools are typically sterilized using an autoclave, which employs moist heat (steam) under pressure to achieve temperatures of 121-132°C, effectively killing all life forms [41].
- Disinfection: The killing or inhibition of vegetative microbes, though bacterial spores may survive. Chemical disinfectants (e.g., chlorine bleach) are used on non-living surfaces like laboratory benches [41]. It is critical to note that a disinfected surface is not sterile.
Essential Tools and Reagents
Successful bacterial culturing requires the use of specific tools and reagents. The following table details the core components of the researcher's toolkit.
Table 1: Research Reagent Solutions and Essential Materials for Bacterial Cultivation
| Item | Function/Description | Common Examples |
|---|---|---|
| Inoculating Loop | Sterilizable tool, typically metal or disposable plastic, for transferring and streaking cultures [42] [40]. | – |
| Inoculating Needle | A straight, stiffer wire used for stabbing into solid media, such as agar deeps [42]. | – |
| Growth Media | Nutrient-rich substance supporting bacterial growth; can be liquid (broth) or solid (with agar) [42] [19]. | Luria Broth (LB), MRS Broth, Trypticase Soy Broth [19] [43] [44] |
| Agar | A polysaccharide from red algae used as a solidifying agent in culture media; not degraded by most bacteria [41]. | – |
| Antibiotics | Selective agents added to media to isolate bacteria carrying specific plasmid-encoded resistance genes [19]. | Ampicillin (100 µg/mL), Kanamycin (50 µg/mL), Chloramphenicol (25 µg/mL) [19] |
| Chromogenic Agar | Specialized agar containing substrates that produce colorimetric changes based on bacterial enzymatic activity, allowing for rapid preliminary identification [44]. | – |
| Disinfectant | Chemical agent used to kill or inhibit vegetative microbes on non-living surfaces [41]. | Chlorine-based solutions, Alcohol [41] |
Fundamental Aseptic Transfer Protocols
The following workflow outlines the generalized steps for aseptically transferring bacteria, which are adapted based on the source and destination media.
Diagram 1: General aseptic transfer workflow for different media types.
Detailed Transfer Procedure
The specific actions for each step in the workflow are critical for success.
- Sterilizing the Tool: The inoculating loop or needle must be sterilized by passing it at an angle through the flame of a Bunsen burner until the entire wire becomes orange from the heat, incinerating all contaminants [40]. The tool should not be laid down after sterilization to prevent recontamination.
- Removing Inoculum from a Broth Culture:
- Hold the sterile loop like a pencil and the culture tube in the other hand.
- Use the little finger of the loop hand to remove the tube cap. Never lay the cap down, and keep the open end facing downward to minimize contamination [40].
- Briefly pass the lip of the culture tube through the flame to create a convection current that forces air out of the tube.
- Keeping the tube at an angle, insert the cooled loop and remove a loopful of inoculum.
- Re-flame the lip of the tube and replace the cap [40].
- Removing Inoculum from a Plate Culture: Slightly lift the lid of the Petri dish, stab the loop into the agar away from any bacterial growth to cool it, then scrape off a small amount of the organism and close the lid [40].
- Transferring Inoculum to a Sterile Broth Tube:
- Pick up the sterile broth tube and remove the cap with the little finger of your loop hand.
- Briefly flame the lip of the tube.
- Place the loopful of inoculum into the broth and withdraw the loop.
- Re-flame the lip of the tube and replace the cap.
- Re-sterilize the loop in the flame before laying it down [40].
- Transferring Inoculum to an Agar Plate (Streaking): The goal is to separate individual bacterial cells to obtain isolated colonies.
- Primary Streaking: After obtaining the inoculum, lift the lid of the plate just enough to insert the loop. Lightly streak back and forth in one sector of the plate, making close, parallel streaks.
- Secondary Streaking: Sterilize and cool the loop again. Make a new set of nearly parallel streaks, starting from the inoculated area and crossing into a sterile area of the plate, so that about half the plate is covered.
- Tertiary Streaking: Flame and cool the loop once more. Make a final set of streaks, starting from the secondary streaks and crossing into the remaining sterile area, avoiding the first set of streaks [40].
Inoculation of Specific Culture Types
Preparing a Liquid Broth Culture from a Single Colony
Liquid cultures are used to grow high densities of bacteria, which are necessary for many applications, such as plasmid DNA isolation [19].
- Prepare Media: Prepare liquid broth (e.g., LB broth) and autoclave it. Once cooled, add the appropriate antibiotic to the correct working concentration [19].
- Inoculate: Using a sterile pipette tip or toothpick, select a single, well-isolated colony from an agar plate.
- Transfer: Drop the tip or swirl the toothpick into the liquid broth containing antibiotic [19].
- Incubate: Loosely cover the culture tube or flask (to allow aeration) and incubate at the appropriate temperature (e.g., 37°C) for 12-18 hours in a shaking incubator. Shaking is critical for oxygenating the culture, which promotes robust growth [19].
- Verify Growth: After incubation, successful growth is indicated by a cloudy haze in the media. A negative control (broth with antibiotic but no bacteria) should remain clear [19].
Table 2: Quantitative Parameters for Liquid Culture Inoculation
| Parameter | Typical Value/Range | Purpose/Notes |
|---|---|---|
| Culture Volume | 2 mL (miniprep) to 1 L (large prep) | Volume depends on the required bacterial yield [19]. |
| Antibiotic Dilution | 1:1,000 from a 1000X stock | Ensures correct selective pressure without inhibiting growth [19]. |
| Incubation Temperature | 30°C or 37°C | Strain-dependent; growth is slower at lower temperatures [19]. |
| Incubation Time | 12-18 hours (37°C) | For high-copy number plasmids; longer for low-copy plasmids [19]. |
| Shaking Speed | 150-250 rpm (standard); up to 350-400 rpm (high density) | Aeration is crucial for achieving high cell density [19]. |
Advanced and Specialized Applications
Rapid Bacterial Isolation from Blood for Diagnostics
Conventional diagnosis of bacteremia relies on blood cultures, which can take days. Advanced protocols have been developed to drastically reduce this time. One recent method isolates and identifies bacteria from blood within 12 hours by bypassing prior hemocultures [44].
Diagram 2: Workflow for rapid bacterial isolation from blood samples.
The protocol's key steps are:
- Bacterial Isolation: A low-speed centrifugation step (e.g., 500g for 2 minutes) separates bacteria from blood cells in a hemoculture sample, achieving >99% red blood cell removal with a bacterial isolation efficiency of approximately 50-65% for a single spin. This efficiency can be increased to over 80% with iterative centrifugation steps [44].
- Up-Concentration: The supernatant is further up-concentrated by centrifugation at a higher force (1000g for 10 minutes) over a density medium like Percoll, which acts as a cushion to preserve bacterial viability and near-complete recovery [44].
- Identification: The final pellet is resuspended, plated onto chromogenic agar plates, and incubated overnight. Distinct colony colors allow for accurate identification of pathogenic species like Escherichia coli, Klebsiella pneumoniae, and Staphylococcus aureus [44].
In Vitro Co-culture with Mammalian Cells
Co-culture systems are vital for investigating host-microbe interactions, such as the effects of probiotics on intestinal barrier function. The following protocol outlines the process for co-culturing bacteria with mammalian Caco-2 cells, which model the intestinal epithelium [43].
- Prepare Mammalian Cells: Seed Caco-2 cells on polyester filter inserts and culture for approximately 17 days to allow them to form a differentiated, polarized monolayer with tight junctions [43].
- Prepare Bacterial Inoculum: Grow the bacteria of interest (e.g., Lactiplantibacillus plantarum) on an agar plate. Pick a single colony to prepare a liquid culture in a suitable broth (e.g., MRS broth for lactobacilli) and grow to the desired phase [43].
- Establish Co-culture: On the day of the experiment, resuspend the bacterial cells in a cell culture medium appropriate for the mammalian cells. Replace the medium on the Caco-2 cell monolayer with the medium containing the bacteria [43].
- Assay Barrier Function: Monitor the integrity of the intestinal barrier in real-time by measuring Transepithelial Electrical Resistance (TEER) using an automated system like the cellZscope. A decrease in TEER indicates a compromise in barrier function ("leaky gut"), while an increase or stabilization suggests a protective or enhancing effect from the bacteria [43].
Troubleshooting and Best Practices
Adherence to best practices is essential for consistent and successful results.
- General Aseptic Guidelines:
- Always disinfect work surfaces before and after procedures [42].
- Work near a flame (Bunsen burner) or within a laminar flow cabinet to create a sterile field [40].
- Never lay down sterile instruments or leave culture vessels open longer than necessary [42] [40].
- Always flame the lips of culture tubes before and after access [40].
- Label all tubes and plates clearly with organism, date, and researcher's initials [42].
- Incubation Specifications: Incubate agar plates in an inverted position (upside down) to prevent condensation from accumulating on the lid and dropping onto the agar surface, which can cause colonies to spread and mix [42].
- Troubleshooting Liquid Cultures:
- No Growth: Confirm the antibiotic matches the plasmid resistance, streak bacteria onto a fresh agar plate to ensure viability, and ensure adequate aeration is provided by sufficient shaking [19].
- Low Yield: Increase the shaking speed, extend the incubation time (especially for cultures at 30°C or with low-copy number plasmids), or use a larger inoculum [19].
The Streak Plate Method for Isolating Pure Cultures
The streak plate method represents a foundational mechanical isolation technique in microbiology, essential for obtaining pure cultures from mixed populations. This guide details the core principle of sequential dilution on solid media, standardized protocols for various streaking patterns, and critical aseptic requirements. As a cornerstone technique in bacteriological research, it enables the study of colony morphology, genetic manipulation, and antimicrobial susceptibility testing, forming the basis for downstream analytical processes in drug development and diagnostic applications.
The streak plate method is a microbiological laboratory technique of isolating pure cultures and obtaining well-isolated colonies of bacteria from a mixed population [45]. First developed in the 1880s by Loeffler and Gaffky in Robert Koch's laboratory, this method remains a fundamental procedure in contemporary bacteriological research [45] [46]. The technique involves systematically spreading a microbial sample over the surface of a solidified agar-based nutrient medium to mechanically separate individual bacterial cells, which subsequently develop into genetically identical colonies after incubation [47]. For researchers and drug development professionals, mastering this technique is prerequisite for reliable experimentation, from basic phenotypic characterization to advanced genomic analyses.
Principle and Significance
Core Principle
The streak plate method operates on the principle of mechanical dilution during the process of spreading an inoculum over the surface of solidified culture media [45] [48]. As streaking proceeds sequentially across different sections of the agar plate, the bacterial load is systematically reduced to the point where individual cells are deposited at substantial distances from one another [49]. Following incubation, these individual cells or colony-forming units (CFUs) undergo repeated binary fission, generating macroscopically visible, well-isolated colonies, each theoretically derived from a single progenitor cell [34] [47]. This progressive dilution is visually confirmed by confluent growth in the initial streaking area transitioning to discrete colonies in the final section.
Research Significance
In the context of bacterial research and drug development, the isolation of pure cultures is an indispensable preliminary step. Pure cultures are mandatory for accurate:
- Morphological and Physiological Studies: Consistent colony morphology (size, shape, margin, elevation, texture, pigmentation) can only be reliably described from pure cultures [47].
- Genetic and Molecular Analyses: Modern techniques like genome sequencing, PCR, and genetic transformation require genetically identical bacterial samples to ensure result reproducibility [46] [50].
- Antibiotic Susceptibility Testing (AST) : Determining the efficacy of antimicrobial agents relies on testing against a single, identified bacterial species without interference from contaminants [49] [50].
- Pathogen Identification : In clinical diagnostics, pure cultures isolated from patient samples are fundamental for identifying the etiological agent of infectious diseases [49].
Materials and Reagents
Table 1: Essential Research Reagents and Materials for the Streak Plate Method
| Item | Function/Description | Key Considerations |
|---|---|---|
| Solid Culture Media | Provides nutritional support for bacterial growth in a solid matrix. | Pre-solidified, specific for target bacteria (e.g., Nutrient Agar, MacConkey Agar, Blood Agar) [48] [49] [46]. |
| Inoculating Loop | Primary tool for sample transfer and streaking. | Metal (reusable, requires flaming) or disposable plastic/wooden (pre-sterilized) [45] [34]. |
| Bunsen Burner | Creates a sterile field and sterilizes metal tools. | Not for use in biosafety cabinets [34]. |
| Petri Dishes | Container for solid culture media. | Standard 90-100 mm diameter; must be sterile [45]. |
| Sample Culture | Source of microorganisms for isolation. | Can be suspension, broth, or colonies from another plate [45] [48]. |
| Incubator | Provides optimal temperature and atmosphere for growth. | Set to species-specific temperature (e.g., 37°C for many pathogens) [49] [46]. |
Streaking Methodologies: Protocols and Applications
Several streaking patterns have been developed, each with specific protocols and ideal use cases. The following table summarizes the primary methods.
Table 2: Comparison of Primary Streak Plate Techniques
| Method | Protocol Summary | Best Use Cases | Isolation Efficacy |
|---|---|---|---|
| Quadrant Streaking [45] [46] | Plate divided into 4 sectors. Loop is sterilized between each quadrant after streaking from the previous section. | Gold standard for pure culture isolation from mixed samples. | High |
| T-Streaking [45] [51] | Plate divided into 3 sections in a "T" shape. Loop sterilized between each section. | Recommended for beginners; moderate isolation needs. | Moderate to High |
| Continuous Streaking [45] [46] | Inoculum spread in a single, continuous movement across the plate. No loop sterilization during process. | Propagating pure cultures, very dilute samples, or multiple samples on one divided plate. | Low (unless sample is very dilute) |
| Radiant Streaking [45] [46] | Initial streak at edge, followed by vertical lines and finally diagonal cross-streaks. | Dilute specimens and pure culture propagation. | Moderate |
| Zigzag Streaking [45] [52] | A single, continuous back-and-forth motion across the plate. | Quick propagation; not ideal for isolation from dense cultures. | Low |
Detailed Protocol: Quadrant Streak Method
The quadrant streak is the most preferred and reliable method for obtaining well-isolated colonies and is described here in detail [45] [34].
Step-by-Step Procedure:
- Aseptic Setup: Clear the work area and disinfect surfaces. Arrange all materials near a Bunsen burner to work within the sterile updraft created by the flame. For BSL-2 organisms, perform all work in a biosafety cabinet [34].
- Plate Labeling: Label the bottom of a sterile, dry agar plate around the edge with identifying information (e.g., name, date, sample, medium) [34].
- Initial Inoculation: Sterilize a metal inoculating loop by passing it through the Bunsen burner flame until it is red-hot. Allow it to cool for a few seconds without placing it down. Obtain a small sample of the mixed culture (a loopful of suspension or a gentle touch of a colony) [45] [34].
- First Quadrant: Lift the lid of the agar plate at a 60° angle to minimize airborne contamination. Smear the inoculum over approximately one-quarter of the agar surface (first quadrant) using a rapid, gentle, back-and-forth motion. The goal is dense, confluent growth in this area [45] [34].
- Second Quadrant: Re-sterilize the loop and allow it to cool. Turn the plate 90°. Touch the loop to the last few streaks of the first quadrant and drag it into the adjacent, empty second quadrant, spreading the inoculum back and forth. Do not re-enter the first half of the initial streaks [45] [52].
- Third and Fourth Quadrants: Repeat the process of sterilizing the loop, turning the plate 90°, and streaking from the edge of the previous quadrant into the next empty one. Each successive quadrant picks up fewer cells, leading to greater dilution [45].
- Incubation: Replace the lid. Incubate the plate in an inverted position (agar side up) to prevent condensation from falling onto the growing colonies [34] [46]. Incubate at the appropriate temperature and duration for the target organism.
Results Interpretation and Troubleshooting
Expected Outcome and Analysis
After incubation, a successfully streaked plate will show a gradient of growth [45] [52]:
- First Quadrant: Heavy, often confluent growth where colonies are not isolated.
- Second and Third Quadrants: Progressively lighter growth with colonies becoming more separated.
- Fourth Quadrant: Well-isolated, distinct colonies spaced several millimeters apart.
These isolated colonies represent pure cultures [47]. Each should be composed of cells with identical colonial morphology (e.g., size, shape, color, margin, elevation, texture) [47]. The presence of multiple, distinct colony morphologies in the final streak area indicates the original sample contained different bacterial species, and sub-culturing of a single colony is required to achieve a pure culture.
Common Technical Challenges
- No Isolated Colonies: Caused by insufficient dilution (e.g., failing to sterilize the loop between quadrants, streaking back into a heavily inoculated area) or using an overly dense initial sample [52].
- No Growth: May result from using an inactive culture, incubation at the wrong temperature, damaging the agar surface, or inadvertently killing the sample with a hot loop [34].
- Contaminated Growth: Colonies growing in a pattern inconsistent with the streaking path or with unexpected morphologies indicate a breach in aseptic technique [47].
Applications in Research and Drug Development
The streak plate method serves as a critical gateway procedure for numerous advanced applications:
- Pure Culture Propagation: Isolated colonies are picked to inoculate broth or fresh agar slants to create working stocks for experiments [45] [47].
- Antimicrobial Susceptibility Testing (AST): Isolated colonies are used to prepare standardized bacterial inocula for disk diffusion or broth microdilution tests to determine antibiotic efficacy [49] [50].
- Genomic Studies: Pure cultures ensure that extracted DNA and subsequent sequencing, PCR, or transformation results are attributable to a single organism [46] [50].
- Strain Storage: Well-isolated colonies are a source for creating long-term glycerol stocks or lyophilized cultures for preservation [47].
Advantages and Limitations
Advantages
- Simplicity and Cost-Effectiveness: Requires minimal specialized equipment, making it accessible and inexpensive [48] [50].
- Rapid Isolation: Allows for dilution and inoculation in a single step, providing isolated colonies within 24-48 hours [48].
- Visual Clarity: Enables direct observation of colony morphology, a key diagnostic tool [47] [50].
- Manual Control: Provides the researcher with direct control over inoculum size and streaking area [48].
Limitations
- Qualitative, Not Quantitative: While semi-quantitative estimation is possible, it does not yield precise colony-forming unit (CFU) counts like pour plate or spread plate methods [48] [49].
- Not Suitable for All Organisms: Ineffective for strict anaerobes (without special equipment) or organisms with specific syntrophic requirements [48].
- Technique Sensitivity: Success heavily depends on the skill and consistency of the practitioner [50].
- Risk of Contamination: The open-plate nature of the process poses a contamination risk if aseptic technique is flawed [49] [50].
The streak plate method remains an indispensable tool in the microbiologist's arsenal. Its enduring relevance, from the era of Robert Koch to modern drug discovery pipelines, is a testament to its fundamental utility in achieving the primary goal of bacteriology: obtaining a pure culture. Mastery of this technique, including understanding its principles, variations, and limitations, is non-negotiable for generating reliable, reproducible research data. As a foundational protocol, it continues to underpin advancements in microbial genetics, pathogen characterization, and the development of novel antimicrobial agents.
The systematic description of bacterial colonies represents a foundational skill in microbiology, serving as a critical first step in the characterization and identification of microorganisms. A colony, defined as a visible mass of microorganisms originating from a single mother cell, constitutes a genetically alike clone [53]. The analysis of its physical appearance—its morphology—provides immediate, non-destructive clues about the identity and physiological state of the bacterium [54]. For researchers and drug development professionals, interpreting colony morphology is more than a taxonomic exercise; it is an essential protocol for tracking phenotypic changes, assessing purity, and generating hypotheses about microbial function and pathogenicity, all within the broader context of culturing-based research.
This guide details the core principles of interpreting three key morphological traits—texture, transparency, and pigmentation—by providing standardized observational criteria, detailed experimental methodologies, and modern analytical tools. Mastery of these protocols ensures that observations are reproducible, quantitative, and meaningful, thereby solidifying the role of colonial morphology as a cornerstone of microbiological analysis.
Core Morphological Characteristics: Criteria and Interpretation
The accurate interpretation of colony morphology requires a structured approach to observation. The following characteristics should be systematically evaluated for every isolated colony.
Texture and Consistency
Texture refers to the surface quality and physical constitution of a colony. Consistency, a related property, describes its structural integrity when manipulated with a sterile loop [53].
- Butyrous: The colony has a soft, butter-like consistency and is easily picked up by a loop. This is common in many non-slime-producing bacteria.
- Viscid or Mucoid: The colony is sticky and mucus-like, often resulting from the production of extracellular polysaccharide capsules. This is a key virulence factor in pathogens such as Klebsiella pneumoniae or Streptococcus pneumoniae.
- Brittle or Friable: The colony is dry and crumbles when touched with a loop, often observed in saprophytic bacteria like Streptomyces species.
- Rough: The colony surface appears dull, granular, and non-homogeneous. This can be associated with avirulent strains, as seen in the rough colonies of Bacillus anthracis versus its smooth, virulent form.
Transparency and Opacity
Transparency describes how much light passes through a colony. This characteristic can reveal information about cell density and internal structure [53].
- Transparent: Light passes through the colony easily, allowing clear vision of underlying media or text.
- Opaque: Light does not penetrate the colony, which appears solid and impervious to light. This indicates high cell density or the presence of light-scattering inclusions.
- Translucent: An intermediate state where light passes through but is diffused, resulting in a frosted-glass appearance that distorts the view of objects beneath.
- Iridescent: The colony exhibits a shimmering play of colors when viewed from different angles under reflected light, often due to fine surface structures that diffract light.
Pigmentation and Chromogenesis
Pigmentation, or chromogenesis, is the production of colorful compounds by the microorganism. This trait can be a stable identifying feature [53].
- Pigment Colors: Colonies can be white, buff, yellow, red, purple, or other colors. For example, Micrococcus luteus produces yellow colonies, while Serratia marcescens can produce red pigmentation.
- Water-Solubility: It is critical to note if the pigment is water-soluble, as it will diffuse into the surrounding agar (e.g., Pseudomonas aeruginosa's pyocyanin), or insoluble, remaining within the colony itself.
- Environmental Influence: Pigmentation can be influenced by environmental factors such as incubation temperature and nutrient availability. Documenting the growth conditions is therefore essential.
Table 1: Comprehensive Guide to Bacterial Colony Morphology
| Characteristic | Category | Description | Example Organism(s) |
|---|---|---|---|
| Texture/Consistency | Butyrous | Soft, buttery; easily picked up | Escherichia coli (common forms) |
| Viscid/Mucoid | Sticky, mucus-like; sticks to loop | Klebsiella pneumoniae, S. pneumoniae (encapsulated) | |
| Brittle/Friable | Dry, crumbles when touched | Streptomyces species | |
| Rough | Dull, granular, uneven surface | Avirulent Bacillus anthracis | |
| Transparency/Opacity | Transparent | Light passes through clearly | Some young or low-density colonies |
| Opaque | Light does not penetrate; solid | Most mature, dense colonies | |
| Translucent | Light passes but is diffused (frosted glass) | Many common bacteria | |
| Iridescent | Shimmering colors in reflected light | Some Bacillus and Pseudomonas species | |
| Pigmentation | White/Buff | Common non-pigmented colonies | Many Bacillus species |
| Yellow | Yellow pigmentation | Micrococcus luteus | |
| Red | Red pigmentation | Serratia marcescens (under certain conditions) | |
| Water-Soluble | Pigment diffuses into agar | Pseudomonas aeruginosa (pyocyanin) | |
| Elevation | Flat | No significant elevation | |
| Raised | Moderately raised | ||
| Convex | Dome-shaped elevation | ||
| Umbonate | Raised center with flat edges | ||
| Margin/Edge | Entire | Smooth, uninterrupted edge | |
| Undulate | Wavy edge | ||
| Filamentous | Thread-like, spreading edge | Bacillus subtilis (some forms) | |
| Rhizoid | Root-like, branching edge |
Foundational Experimental Protocols for Morphological Analysis
Standardized protocols are essential for generating consistent and reliable morphological data. The following methodologies form the basis of high-quality observational research.
Protocol 1: Basic Visual Assessment of Colony Morphology
This protocol outlines the standard procedure for observing and documenting colonies grown on solid agar media [54] [53].
Materials Needed:
- Pure bacterial cultures (e.g., Pseudomonas, Chromobacterium, Micrococcus, Bacillus, Streptomyces)
- Appropriate solid agar plates
- Incubator set to optimal growth temperature
- Sterile loops for inoculation
- Dissecting microscope (or high-quality magnifying lens)
- Millimeter ruler or caliper
- Laboratory notebook for documentation
Methodology:
- Streak Plate Preparation: Using a sterile loop, streak the bacterial sample onto the surface of an agar plate to achieve well-isolated, individual colonies.
- Incubation: Incubate the plate under optimal conditions (temperature, atmosphere) for 24-48 hours, or until colonies are of a size suitable for observation.
- Macroscopic Observation: With the naked eye, observe the plate first. Note the overall distribution and size of colonies. Always select a well-isolated colony for analysis to avoid the mixed morphology of merging colonies [53].
- Size Measurement: Measure the diameter of a representative colony using a millimeter rule. Note if colonies are punctiform (less than 1 mm), small, moderate, or large.
- Shape and Margin Examination: Use a dissecting microscope to examine the colony's overall shape (round, irregular, filamentous, rhizoid) and the detailed structure of its edge or margin (entire, undulate, filamentous, curled).
- Elevation Assessment: View the plate from the side to determine how much the colony rises above the agar (e.g., flat, raised, convex, umbonate).
- Texture, Opacity, and Pigmentation Documentation: Under consistent lighting, document the surface texture (smooth, rough, rugose), opacity (transparent, opaque, translucent, iridescent), and color (pigmentation). For chromogenesis, test water-solubility by touching a colony with a wet loop or placing a colony in saline and observing for color diffusion [53].
Protocol 2: Sample Preparation for High-Resolution SEM Morphology
For ultra-structural analysis, Scanning Electron Microscopy (SEM) provides high-resolution images of colony and cell surface details. Proper preparation is critical to avoid artifacts [55].
Materials Needed:
- Glutaraldehyde (2.5-4% in buffer, e.g., 0.1 M sodium cacodylate or phosphate buffer)
- Osmium tetroxide (1% in dH₂O or buffer)
- Ethanol series (30%, 50%, 70%, 80%, 90%, 100%)
- Hexamethyldisilazane (HMDS) or Critical Point Dryer
- Conductive adhesive tape
- Sputter coater
Methodology:
- Primary Fixation: Carefully excise a small section of agar containing isolated colonies. Fix the sample in a glutaraldehyde solution (1.5-4% in 0.1 M buffer, pH 6.8-7.4) for 1-48 hours at 4°C. This crosslinks proteins and preserves the native structure [55].
- Washing: Rinse the sample 3 times for 2 minutes each with the same buffer used for the fixative to remove residual glutaraldehyde.
- Secondary Fixation (Optional but Recommended): Post-fix the sample with 1% osmium tetroxide for 30-60 minutes. This stabilizes lipids and enhances conductivity. Rinse again with buffer and then dH₂O [55].
- Dehydration: Gradually dehydrate the sample by immersing it in a graded ethanol series (e.g., 30%, 50%, 70%, 80%, 90%, 100%) for several minutes at each step to remove all water.
- Drying: Use a critical point dryer or a chemical drying agent like HMDS to remove the ethanol without causing the surface tension-induced collapse of delicate structures. For HMDS, incubate the sample in HMDS after the final ethanol wash and allow it to evaporate completely [55].
- Mounting and Coating: Mount the dried sample on a stub using conductive tape. Sputter-coat the sample with a thin layer (a few nanometers) of gold or platinum to make it conductive for SEM imaging.
Diagram 1: SEM Sample Preparation Workflow.
Advanced Tools for Quantitative Morphological Analysis
Moving beyond qualitative description, modern microbiology leverages computational tools to obtain quantitative metrics on colony morphology, enabling high-throughput screening and robust statistical analysis.
Automated Image Analysis with TAMMiCol and ImageJ
Software tools automate the conversion of colony images into binary data, which can then be quantified for metrics like area, perimeter, and fractal dimension [56] [57].
- TAMMiCol (Tool for Analysis of the Morphology of Microbial Colonies): This specialized software uses an automated thresholding method tailored to the structure of colony images to produce a binary (black and white) representation. It allows for batch processing of thousands of images and computes built-in statistics or exports data for further analysis. It has been successfully used to show that Saccharomyces cerevisiae colonies reach a maximum level of filamentous growth when ammonium sulfate is reduced to 200 μM [56].
- ImageJ/Fiji with Cell Counter Plugin: ImageJ is a powerful, open-source image processing program. The Cell Counter plugin facilitates both manual and automated counting and analysis of colonies. Its effectiveness depends on high-quality, evenly lit input images with good contrast between the colony and background [57]. Fiji is a distribution of ImageJ that comes with many pre-installed plugins useful for biological image analysis [58].
Table 2: Essential Research Reagent Solutions for Morphological Analysis
| Item | Function/Application | Example Use Case |
|---|---|---|
| Solid Agar Media | Provides solid surface for colony growth; can be selective or differential. | General growth (Tryptic Soy Agar), selective isolation (MacConkey Agar). |
| Glutaraldehyde | Primary fixative for SEM; crosslinks proteins to preserve native structure. | Sample preparation for high-resolution electron microscopy [55]. |
| Osmium Tetroxide | Secondary fixative for SEM; stabilizes lipids and increases conductivity. | Enhancing sample preservation and image quality in SEM [55]. |
| Hexamethyldisilazane (HMDS) | Chemical drying agent; reduces sample shrinkage vs. air drying. | Preparing delicate biological samples for SEM imaging [55]. |
| Fluorescent Dyes (e.g., DAPI, SYTO) | Stain nucleic acids to aid in cell counting and viability assessment. | Differentiating live/dead cells in a colony via fluorescence spectroscopy [59]. |
| ImageJ/Fiji Software | Open-source image analysis for quantifying colony size, shape, and distribution. | Automated colony counting and morphological measurement [57] [58]. |
| TAMMiCol Software | Automated, specialized software for converting colony images to binary data. | High-throughput, quantitative analysis of colony morphology datasets [56]. |
Diagram 2: Automated Image Analysis Pipeline.
Integrating Absolute Quantification in Morphological Studies
Interpreting community-level morphology, as in biofilms or mixed cultures, requires caution. Studies based solely on relative abundance from sequencing can be misleading. Absolute quantification methods, such as flow cytometry, 16S qPCR, or internal reference spike-ins, provide the true abundance of specific taxa [59]. This is crucial because a change in the relative proportion of a bacterium could be due to its actual growth or the decline of others. For morphological correlates, absolute quantification ensures that observed structural changes are interpreted in the context of actual cell numbers, providing a more accurate picture of community dynamics and function [59].
The detailed interpretation of colonial morphology—encompassing texture, transparency, and pigmentation—remains an indispensable protocol in foundational bacteriological research. From the initial visual assessment using a dissecting microscope to the high-resolution insights gained from SEM and the quantitative power of automated image analysis, these techniques provide a multi-faceted understanding of microbial phenotypes. For researchers and drug development professionals, rigorously applying these standardized protocols ensures that the rich information encoded in the simple bacterial colony is fully extracted, documented, and leveraged to inform downstream experimental decisions, from strain selection to the investigation of pathogenicity and the discovery of new antimicrobial agents.
The cultivation of bacteria is a cornerstone of microbiological research, clinical diagnostics, and drug development. A fundamental aspect of this process is replicating a bacterium's natural atmospheric environment in the laboratory, as oxygen concentration is a primary determinant of microbial growth, metabolism, and physiology. The broad classification of bacteria based on their relationship with oxygen—as aerobes, anaerobes, or microaerophiles—provides a essential framework for successful cultivation [60]. Historically, microbiology has focused heavily on aerobic organisms, with less attention paid to anaerobes and, until recently, even less to microorganisms thriving in intermediate, microoxic conditions [61]. This neglect is being remedied as researchers recognize that a vast range of natural environments, from host-associated niches like the gastrointestinal tract to environmental sites like hot springs and sediments, are microoxic rather than fully aerobic or anoxic [61] [62]. Tailoring the atmospheric conditions for bacterial culture is therefore not merely a technical step, but a foundational protocol that enables the study of microbial life in its true ecological context, directly impacting research outcomes in virulence studies, antibiotic susceptibility testing, and genome sequencing [17].
Defining Atmospheric Conditions for Bacterial Growth
Bacteria have evolved diverse strategies to manage molecular oxygen (O₂), leading to a spectrum of requirements and tolerances. Their classification is rooted in their metabolic capacity to use oxygen as a terminal electron acceptor in respiration and their ability to detoxify reactive oxygen species (ROS) like the superoxide anion and hydrogen peroxide [60].
Aerobic Conditions
Aerobic conditions involve atmospheric oxygen levels, typically around 20-21%. Obligate aerobes require oxygen for growth because they rely on it as a terminal electron acceptor for efficient aerobic respiration [60]. These organisms possess robust defense systems, including the enzymes superoxide dismutase and catalase, which work in concert to convert lethal superoxide radicals into water and ground-state oxygen [60].
Anaerobic Conditions
Anaerobic conditions are characterized by the complete absence of molecular oxygen. Obligate anaerobes cannot grow in its presence and are often killed by oxygen due to low or undetectable levels of superoxide dismutase and catalase, leaving them vulnerable to oxidative damage [60]. They generate energy via fermentation or anaerobic respiration, using alternative inorganic compounds such as nitrate, sulfate, or carbon dioxide as terminal electron acceptors [21] [60]. It is important to note that recent research suggests the line between obligate anaerobes and other classifications may be blurrier than once thought, with some "obligate anaerobes" demonstrating unexpected tolerance to low levels of oxygen [61].
Microaerophilic Conditions
Microaerophilic conditions feature oxygen concentrations significantly below atmospheric levels, generally between 1% and 10% [61]. Microaerophiles require these reduced oxygen levels for growth but are inhibited by both its complete absence and the full oxygen concentration of air. They may possess defenses against ROS, but these systems are often effective only within a narrow oxygen range. The term microoxia is used to describe these low-oxygen environmental niches or the conditions that support such growth [61].
Table 1: Classification of Bacteria Based on Oxygen Relationship
| Classification | Oxygen Requirement | Key Enzymatic Defenses | Primary Energy Metabolism |
|---|---|---|---|
| Obligate Aerobe | Required | Superoxide Dismutase, Catalase | Aerobic Respiration |
| Facultative Anaerobe | Not required, but grows better with oxygen | Superoxide Dismutase, Catalase | Aerobic Respiration; Fermentation/Anaerobic Respiration without O₂ |
| Obligate Anaerobe | Toxic, killed by oxygen | Low or absent levels of key defenses | Fermentation / Anaerobic Respiration |
| Microaerophile | Required at low concentrations (1-10%) | Often present, but effective only at low O₂ | Aerobic Respiration at low O₂ |
Table 2: Documented Oxygen Levels in Natural and Host-Associated Environments [61]
| Environment / Niche | Reported Oxygen Level |
|---|---|
| Marine Oxygen Minimum Zones (OMZs) | Microoxic/Hypoxic |
| Mammalian Gastrointestinal Tract | Microoxic to Anoxic (gradients) |
| Leguminous Root Nodules | Microoxic |
| Hot Spring Water Column (e.g., RSW, YNP) | ~77-97 µM (Microoxic) |
| Hot Spring Sediment (0.5 cm depth) | ~12.5 µM (Nanoxic) |
Methodologies for Creating and Maintaining Cultivation Atmospheres
Establishing Aerobic Conditions
Standard aerobic cultivation is performed by incubating cultures in ambient air. For liquid cultures, this is coupled with agitation (e.g., shaking at 150-250 rpm in a shaking incubator) to introduce oxygen into the medium, which is critical for achieving high cell densities [19]. Solid cultures are incubated in air-filled containers.
Protocols for Anaerobic Cultivation
Creating an oxygen-free environment requires specialized equipment and meticulous technique to protect oxygen-sensitive organisms [60] [17].
- Anaerobic Chambers: These are sealed, rigid enclosures from which oxygen is removed and replaced with a gas mixture (typically 5-10% H₂, 5-10% CO₂, and balance N₂). A palladium catalyst removes residual oxygen by combining it with hydrogen to form water. All procedures, including media preparation, inoculation, and incubation, occur within the chamber.
- Anaerobic Jars: These are robust, sealable containers that use chemical packet systems to generate an anaerobic atmosphere after sealing. GasPak systems generate hydrogen and carbon dioxide upon the addition of water; the hydrogen then combines with ambient oxygen in the presence of a catalyst in the jar lid to form water, effectively removing oxygen.
- Specimen Collection and Transport: Clinical specimens for anaerobic culture must be protected from oxygen exposure immediately after collection. Aspirates should be collected via syringe, all air expelled, and the contents transferred to an anaerobic transport tube filled with oxygen-free gas [60]. Tissue specimens should be large enough to protect anaerobes within their core [63].
Protocols for Microaerophilic Cultivation
Generating microaerophilic conditions typically involves using a sealed jar system with a gas-generating packet that produces an atmosphere with approximately 5-10% O₂ and 5-10% CO₂, with the balance made up of N₂ or H₂ [17]. This lower oxygen tension is ideal for pathogens like Campylobacter spp. and Helicobacter pylori. Recent studies have also shown that a microaerophilic atmosphere can enhance the growth of other fastidious bacteria, such as Mycobacterium tuberculosis, in clinical cultures [17].
Diagram: Workflow for Selecting and Establishing Bacterial Culture Atmospheres
Advanced Concepts and Current Research Frontiers
The Spectrum of Oxygen Tolerance and Redefining "Obligate Anaerobes"
The traditional binary view of oxygen relationships is being challenged. Advanced oxygen-sensing technologies, such as Switchable Trace Oxygen (STOX) sensors capable of detecting nanomolar (nM) concentrations, have revealed that many environments previously considered anoxic are in fact microoxic or nanoxic [61]. Consequently, many microorganisms historically classified as "obligate anaerobes" are now being re-evaluated. Studies show that some sulphate-reducing bacteria can be found in oxygen chemoclines of microbial mats, and some clostridia can tolerate brief oxygen exposure [61]. This suggests a continuous spectrum of oxygen tolerance, influenced not only by superoxide dismutase levels but also by the rate of oxygen uptake and other cellular factors [60]. This paradigm shift underscores the need for precise oxygen control in experiments, as physiological behaviors observed under standard anaerobic conditions may not fully represent an organism's capabilities in its natural, dynamically oxygenated niche.
Simultaneous Aerobic and Anaerobic Respiration
Groundbreaking research has uncovered metabolically flexible bacteria capable of hybrid respiration. A recent study on Hydrogenobacter, a chemolithotrophic bacterium from a Yellowstone hot spring, demonstrated simultaneous aerobic and anaerobic respiration when provided with hydrogen (H₂), elemental sulfur (S⁰), and oxygen (O₂) [62]. This co-metabolism enhanced growth rates and final cell yields compared to purely aerobic or anaerobic growth. Transcriptomic analysis confirmed the activation of pathways for both sulfur and oxygen reduction [62]. This challenges the long-held paradigm of strict biochemical incompatibility and delineation between aerobic and anaerobic metabolism. It suggests that such hybrid energy metabolism may be a widespread but previously overlooked competitive advantage in environments where O₂ availability is low and variable, with significant implications for our understanding of microbial ecology and early life on an oxygenating Earth [62].
The Scientist's Toolkit: Essential Reagents and Materials
Table 3: Key Research Reagent Solutions for Bacterial Cultivation
| Reagent / Material | Function / Application |
|---|---|
| Luria-Bertani (LB) Broth/Agar | A nutrient-rich, general-purpose medium for growing a wide variety of bacteria [19]. |
| Defibrinated Blood | An enrichment additive for fastidious pathogens; provides hemin and other growth factors [17]. |
| Antibiotic Stocks (e.g., Ampicillin, Kanamycin) | Selective pressure for maintaining plasmids; component of selective media [19]. |
| Anaerobic Gas Generators (GasPak) | Creates an anaerobic or microaerophilic atmosphere within a sealed jar [17]. |
| Anaerobic Transport Medium | Protects oxygen-sensitive bacteria in clinical specimens during transport to the laboratory [60] [63]. |
| Reducing Agents (e.g., Cysteine, Thioglycollate) | Scavenges residual oxygen in culture media to support anaerobe growth [17]. |
| Antioxidant Supplements | Can be added to culture media to allow growth of strict anaerobes under an aerobic atmosphere [17]. |
Diagram: Key Enzymatic Pathways for Detoxifying Reactive Oxygen Species
The precise tailoring of atmospheric conditions—aerobic, anaerobic, and microaerophilic—is a non-negotiable, foundational protocol in bacteriology. It is not simply a matter of achieving growth but of replicating physiologically relevant environments to study authentic microbial behavior. As research continues to reveal the complexity of microbial oxygen relationships, from the redefinition of obligate anaerobes to the discovery of simultaneous hybrid respirations [61] [62], the methods for controlling and monitoring oxygen levels will only increase in importance. The proper application of these techniques is fundamental to unlocking meaningful discoveries in microbial ecology, pathogenesis, and the development of novel therapeutic agents.
The cultivation of bacteria is a cornerstone of microbiological research, clinical diagnostics, and biotechnological drug development. The reliability and reproducibility of these applications are fundamentally dependent on the strict control of incubation conditions. This guide details the optimization of three core parameters—time, temperature, and aeration (ventilation)—framed within the context of establishing robust foundational protocols for research. Precise management of these factors is not merely a procedural step but a critical determinant of experimental success, influencing everything from bacterial growth rates and recovery to physiological responses and the accuracy of subsequent phenotypic analyses [64] [65].
Core Incubation Parameters and Their Optimization
The interplay between time, temperature, and aeration defines the microenvironment in which bacteria grow. Optimizing these parameters requires an understanding of the specific needs of the target microorganisms and the objectives of the experiment.
Incubation Temperature
Temperature is one of the most critical factors, as it directly influences enzymatic activity and metabolic rates. The optimal temperature range for growth must be determined based on the bacterial strain and the research goals [64].
Summary of Temperature Effects:
- Clinical Pathogens: Typically require a range between 25°C and 45°C, with common incubations at 35°C or 37°C for 24–48 hours to support mesophilic organisms of human origin [64].
- Fungi and Environmental Isolates: Often prefer cooler temperatures, such as 20–25°C [64] [65].
- Thermal Tolerance: The incubation temperature must be maintained within a narrow window for proper development, as deviations can inhibit growth or alter phenotypic outcomes [64].
Incubation Time
The duration of incubation is intrinsically linked to temperature and must be sufficient for the target organisms to form visible colonies, particularly when dealing with stressed or slow-growing microorganisms [65].
Key Considerations for Incubation Duration:
- Fast-Growing Bacteria: May form colonies within 24–48 hours [64].
- Stressed Microorganisms: Recovered from environmental cleanrooms, for instance, can exhibit longer lag phases and may require extended incubation times to be cultured effectively [65].
- Aseptically Filled Products: Require incubation for not less than 14 days to detect slow-growing molds or damaged aerobic bacteria [64].
Aeration and Ventilation
While often considered a secondary factor, aeration—or the control of gas exchange—is a vital parameter, especially for aerobic organisms. Ventilation can significantly modulate the growth environment by regulating humidity and removing metabolic waste gases [66].
Experimental Findings on Ventilation:
- A 2022 study demonstrated that increased ventilation and reduced humidity significantly decreased bacterial growth on fresh pork substrates at both 26°C and 34°C [66].
- The contribution of increased ventilation to growth reduction was found to exceed that of decreased humidity. At 34°C, medium and high levels of ventilation were required to effectively curb bacterial growth [66].
- The study established cross-section air velocities of 0.02 m/s (low), 0.06 m/s (medium), and 0.1 m/s (high) as effective benchmarks for controlling bacterial growth in a controlled cabinet environment [66].
The following tables consolidate key quantitative data from relevant studies to facilitate comparison and decision-making.
Table 1: Effects of Ventilation and Humidity on Bacterial Growth at Different Temperatures (Based on [66]) This table synthesizes data from a study examining bacterial growth on a fresh pork substrate under controlled conditions. Growth rates are relative to a base value.
| Temperature | Relative Humidity | Ventilation Level (Cross-Section Velocity) | Effect on Bacterial Growth |
|---|---|---|---|
| 26°C | 50%, 70%, 90% | High (0.1 m/s) | Significant decrease |
| 26°C | 50%, 70%, 90% | No ventilation (0.0 m/s) | Highest growth observed |
| 34°C | 50%, 70%, 90% | Medium (0.06 m/s) / High (0.1 m/s) | Required for significant growth reduction |
| 34°C | 90% | No ventilation (0.0 m/s) | Very high growth |
Table 2: Standard Incubation Regimes for Different Contexts (Based on [64] [65]) This table outlines common incubation parameters used in clinical and environmental monitoring microbiology.
| Application / Organism Type | Typical Temperature Range | Typical Incubation Time | Key Rationale / Note |
|---|---|---|---|
| Clinical Pathogens (e.g., S. aureus, E. coli) | 30–35°C / 37°C | 24–48 hours | Approximates human body temperature [64] |
| Fungi / Environmental Isolates | 20–25°C | Up to 5-14 days | Prefers cooler temperatures; slower growth [64] [65] |
| Dual-Incubation Regime (Environmental Monitoring) | 20-25°C, then 30-35°C | 5 days + 2 days | Recovers both bacteria and fungi [65] |
| Aseptically Filled Products | 20-25°C and/or 30-35°C | Not less than 14 days | Detects slow-growers/damaged cells [64] |
Detailed Experimental Protocols
Protocol: Evaluating Ventilation and Temperature on Bacterial Growth
This protocol is adapted from a 2022 study that characterized the role of humidity and ventilation in bacterial growth on a fresh pork substrate [66].
Objective: To quantify the impact of different ventilation levels and temperatures on the growth rate and genus distribution of environmental bacteria.
Key Materials:
- Test Substrate: Fresh, sterile-cut pieces of pork (approx. 2 g each).
- Growth Medium: Plate Count Agar.
- Equipment:
- Controlled environmental chamber (capable of maintaining set temperature and humidity).
- Custom test cabinets with adjustable ventilation fans.
- Anemometer (e.g., TSI air volume/flow rate meter).
- Electronic temperature/humidity data logger.
- Sterile phosphate-buffered saline (PBS), Petri dishes, and cell scrapers.
Methodology:
- Environmental Setup:
- Set the chamber to the desired test condition (e.g., 26°C or 34°C; 50%, 70%, or 90% RH).
- Within the chamber, establish different ventilation levels in separate test cabinets: no ventilation (0.0 m/s), low (0.02 m/s), medium (0.06 m/s), and high (0.1 m/s) cross-section air velocity. Measure and verify velocities at ventilation outlets using an anemometer.
Sample Exposure:
- Place pieces of sterile pork in petri dishes inside the test compartments of each cabinet.
- Expose the samples to the test conditions for 24 hours.
Bacterial Collection and Enumeration:
- After incubation, transfer each pork piece to a tube containing 5 mL of sterile PBS. Vortex or wash thoroughly to dislodge surface bacteria.
- Serially dilute the resulting bacterial suspension (e.g., 1:10, 1:100, 1:1000) in PBS.
- Plate 1 mL of appropriate dilutions onto Plate Count Agar plates in duplicate.
- Pour 15-20 mL of additional, cooled agar into each plate, mix gently, and allow to solidify.
- Incubate the plates at 37°C for 48 hours.
Data Analysis:
- Count colonies on plates with 30-300 colonies. Calculate the total number of bacteria (CFU) under each test condition.
- Compare against a base reference value (e.g., from uncultured pork) to determine the growth rate.
Genus Distribution Analysis (Optional):
- Collect 1 mL of the original bacterial liquid for 16S rDNA sequencing to analyze shifts in bacterial genera under different conditions.
Protocol: Comparing Dual vs. Single Incubation Times for Environmental Monitoring
This protocol is based on a 2023 case study designed to determine if a dual-incubation regime could be shortened without affecting microbial recovery from cleanrooms [65].
Objective: To assess the influence of incubation duration and temperature on the recovery of microorganisms from cleanroom environments.
Key Materials:
- Growth Medium: Tryptone Soya Agar (TSA) contact plates containing a disinfectant neutralizer.
- Microorganisms: For in vitro phase, use typed cultures (e.g., Staphylococcus aureus, Bacillus subtilis, Aspergillus brasiliensis).
- Equipment: Incubators set at 20-25°C and 30-35°C, colony counter.
Methodology: Phase 1: Determine Optimal Single-Incubation Times
- In Vitro Testing:
- Inoculate TSA plates with low inocula (10-100 CFU) of typed cultures. Prepare ten replicates per microorganism.
- Incubate replicates at two single-temperature regimes: 20-25°C and 30-35°C. Perform daily plate counts for up to 15 days.
- Statistically compare daily counts (e.g., using Student's t-test) to identify the point where colony counts stabilize (no significant difference from previous day), defining the "optimum" incubation time for each temperature.
- In Situ (Field) Testing:
- Collect surface samples (e.g., using contact plates) from various locations in grade C cleanrooms (floors, walls).
- Collect samples in triplicate and incubate under the same single-temperature regimes as above, with daily counting.
Phase 2: Compare New vs. Established Incubation Regimes
- Based on Phase 1 results, define a "test" dual-incubation regime (e.g., 4 days at 20-25°C + 2 days at 30-35°C).
- Compare this new regime against the established regime (e.g., 5 days at 20-25°C + 2 days at 30-35°C) using both typed cultures (in vitro) and fresh environmental samples (in situ).
- Use statistical analysis to confirm that the new, shorter regime does not yield a statistically significant difference in microbial recovery compared to the established regime.
Workflow and Relationship Visualizations
Figure 1: A logical workflow for determining optimal incubation parameters, beginning with the research objective and bacterial strain.
Figure 2: The interconnected effects of core incubation parameters on bacterial development and experimental results. Note that metabolic activity influenced by these parameters can alter medium pH, creating a critical feedback loop [67].
The Scientist's Toolkit: Essential Research Reagent Solutions
Table 3: Key Materials and Reagents for Incubation Optimization Experiments
| Item | Function / Application |
|---|---|
| Tryptone Soya Agar (TSA) | A general-purpose, non-selective recovery medium widely used in environmental monitoring and for cultivating a broad spectrum of non-fastidious microorganisms [65]. |
| Plate Count Agar | Used specifically for the standard enumeration of viable microorganisms via the plate count method, as applied in studies quantifying bacterial growth under different conditions [66]. |
| MacConkey Agar | A selective and differential medium used primarily for the isolation and differentiation of Gram-negative bacilli (e.g., to distinguish lactose fermenters like E. coli from non-fermenters) [68]. |
| Triple Sugar Iron (TSI) Agar | A differential medium used to characterize Gram-negative bacteria based on their ability to ferment glucose, lactose, and sucrose, and to produce hydrogen sulfide [68]. |
| Luria Bertani (LB) Medium | A rich, complex medium commonly used for the routine cultivation of a wide variety of bacteria, including Escherichia coli, in research laboratories [67]. |
| M63 Medium | A defined minimal salt medium often used in bacterial physiology and genetics research to study growth under controlled nutrient conditions [67]. |
| Phosphate-Buffered Saline (PBS) | A balanced salt solution used for a variety of applications, including diluting bacterial suspensions and washing cells without causing osmotic shock [66]. |
| DNeasy PowerSoil Kit | A standardized kit for efficient extraction of high-quality genomic DNA from environmental and complex samples, suitable for downstream applications like 16S rDNA sequencing [66]. |
Solving Common Challenges: A Guide to Culture Troubleshooting and Yield Optimization
Contamination control represents a foundational pillar of microbiological research and drug development. Effective management of contamination is not merely a technical procedure but a critical determinant of experimental integrity, reproducibility, and patient safety. The serious consequences of undetected contamination are starkly illustrated by recent public health crises. In late 2025, a multistate outbreak of infant botulism was epidemiologically linked to contaminated infant formula, with Clostridium botulinum identified in unopened product containers [69]. This incident underscores the devastating real-world implications of contamination control failures that can originate at the research and manufacturing levels. Within research laboratories, contamination can invalidate months of experimental work, compromise drug safety profiles, and lead to erroneous scientific conclusions. This guide provides a comprehensive framework for identifying, eliminating, and preventing biological contamination in bacterial cultures, with protocols designed to uphold the highest standards of research quality and reliability.
Identifying Common Contaminants
Rapid and accurate identification of microbial contaminants is the first critical step in effective contamination control. Different categories of contaminants present distinct morphological features and effects on culture media, enabling researchers to diagnose contamination types through systematic observation.
Bacterial Contamination
Bacterial contamination is among the most common issues in cell culture laboratories. Infected cultures typically appear cloudy or turbid and may display a thin film on the surface [70]. Microscopic examination reveals tiny, moving granules between cells, with individual bacteria becoming distinguishable under higher magnification [70]. A characteristic sudden drop in media pH often accompanies bacterial contamination due to metabolic acid production [71] [70]. Common bacterial contaminants include Escherichia coli, which appears as rod-shaped cells approximately 2 µm long and 0.5 µm in diameter [70].
Fungal and Yeast Contamination
Fungal contaminants include both molds and yeasts, which are eukaryotic microorganisms [70].
- Yeast contamination presents as individual ovoid or spherical particles that may bud off smaller particles during replication [70]. While initial pH remains stable, it typically increases as contamination advances, with cultures becoming turbid in advanced stages [70].
- Mold contamination appears as thin, wisp-like filaments (hyphae) or denser clumps of spores under microscopy [70]. Mold spores demonstrate remarkable environmental resilience, surviving harsh conditions in dormancy only to activate under favorable growth conditions [70].
Mycoplasma Contamination
Mycoplasma contamination presents particular challenges due to its subtle detection profile. As the smallest self-replicating organisms without cell walls, mycoplasma escapes filtration by standard 0.22µm filters and doesn't cause media turbidity even at high concentrations (up to 10⁸/mL) [72]. Detection requires specialized methods including DNA staining with DAPI or Hoechst, PCR assays, or microbial cultures [71] [72]. Mycoplasma contamination significantly affects host cell metabolism, causing chromosomal aberrations, reduced growth rates, and impaired cellular attachment [72].
Viral Contamination
Viral contaminants are exceptionally difficult to detect due to their miniscule size and frequent lack of cytopathic effects [70] [72]. Detection requires sophisticated methods such as electron microscopy, immunostaining, ELISA, PCR, or in vivo testing [71] [70]. Beyond potential effects on experimental systems, viral contamination poses significant safety risks, particularly with human or primate cells that may harbor pathogens including HIV, hepatitis, or Epstein-Barr virus [72].
Table 1: Characteristics of Common Biological Contaminants
| Contaminant Type | Visual Indicators | Microscopic Appearance | pH Changes | Primary Detection Methods |
|---|---|---|---|---|
| Bacteria | Cloudy/turbid media, surface film | Tiny moving granules, rod/spherical shapes | Sharp decrease to acidic | Visual inspection, Gram stain, microbial culture |
| Yeast | Turbidity in advanced stages | Ovoid/spherical particles, budding | Stable then increases | Visual inspection, microbial culture |
| Mold | Turbidity, visible mycelia | Thin filaments, spore clumps | Stable then increases | Visual inspection, microbial culture |
| Mycoplasma | No turbidity | Not visible by standard microscopy | Minimal change | PCR, Hoechst staining, specialized kits |
| Virus | No visible changes | Not visible by standard microscopy | No change | Electron microscopy, PCR, ELISA, immunostaining |
Detection and Diagnostic Methodologies
Implementing robust detection methodologies is essential for maintaining contamination-free cultures. The following experimental protocols provide standardized approaches for identifying contaminants before they compromise research outcomes.
Protocol for Routine Microscopic Examination
Purpose: Early detection of bacterial, fungal, and yeast contamination through daily culture monitoring. Materials: Phase contrast microscope, sterile pipettes, personal protective equipment. Procedure:
- Aseptically remove culture vessel from incubator
- Examine media visually for cloudiness, discoloration, or surface films
- Observe under low power (10X-20X) for moving granules between cells
- Switch to high power (40X) to resolve individual contaminant morphology
- Document findings and immediately isolate suspicious cultures Interpretation: Compare observations with Table 1 characteristics to identify contaminant type. Turbidity with acidic pH shift suggests bacteria; ovoid budding particles indicate yeast; filamentous structures suggest mold [70].
Protocol for Mycoplasma Detection via DNA Staining
Purpose: Identify mycoplasma contamination often missed by routine microscopy. Materials: Cell culture sample, DNA-binding fluorochrome (DAPI or Hoechst 33258), fixative (methanol:acetic acid 3:1), fluorescence microscope. Procedure:
- Grow cells on sterile coverslips in culture dish until subconfluent
- Fix cells with methanol:acetic acid for 5 minutes
- Stain with DNA-specific fluorochrome for 15 minutes in dark
- Wash with buffer and mount on slides
- Examine under fluorescence microscopy (excitation 350-360 nm) Interpretation: Uninfected cells show nuclear staining only; mycoplasma-contaminated cultures display extranuclear filamentous or granular staining on cell surfaces [72].
Protocol for Biochemical Detection of Microbial Contamination
Purpose: Detect contamination through metabolic activity indicators. Materials: Culture media with pH indicator (phenol red), spectrophotometer. Procedure:
- Observe media color changes: yellow indicates acidic shift (common with bacteria); purple indicates alkaline shift (possible yeast/fungal contamination)
- Measure optical density at 600nm for quantitative assessment
- Compare with sterile control media Interpretation: Rapid acidification suggests bacterial metabolism; alkaline drift may indicate fungal contamination; stable pH with cellular deterioration suggests mycoplasma [71] [70].
Elimination and Decontamination Protocols
When contamination occurs in irreplaceable cultures, targeted decontamination may be attempted. Antibiotics and antimycotics should be used judiciously, as their continuous application promotes resistant strains and can mask low-level contamination [70] [72].
Protocol for Systematic Decontamination
Purpose: Eliminate microbial contaminants from valuable cultures while maintaining cell viability. Materials: Appropriate antibiotic/antimycotic, multi-well culture plates, sterile media. Procedure:
- Dissociate, count, and dilute contaminated cells in antibiotic-free medium to standard passage concentration
- Dispense cell suspension into multi-well plates
- Add candidate antibiotic/antimycotic in a concentration gradient (e.g., 1x, 2x, 5x, 10x recommended concentration)
- Observe cells daily for toxicity signs: sloughing, vacuole appearance, decreased confluency, cellular rounding
- Culture cells for 2-3 passages using antibiotic concentration 1-2 fold lower than toxic level determined in step 4
- Culture for one passage in antibiotic-free media
- Repeat antibiotic treatment for 2-3 passages
- Maintain in antibiotic-free medium for 4-6 passages to confirm elimination Interpretation: Successful decontamination preserves cell viability while eliminating contaminants. Continued contamination requires reassessment or culture termination [70].
Antibiotic and Antimycotic Applications
Purpose: Select appropriate antimicrobial agents based on contaminant type. Selection Criteria:
- Bacterial contaminants: Choose antibiotics based on spectrum and cell line compatibility. Common options include penicillin-streptomycin combinations
- Fungal contaminants: Utilize antimycotics such as amphotericin B
- Mycoplasma: Specific antibiotics like plasmocin may be effective Critical Considerations: Antibiotics should be reserved for emergency use rather than routine prevention. Antibiotic-free cultures should be maintained in parallel as controls whenever possible [70] [72].
Table 2: Decontamination Agents and Applications
| Contaminant | Recommended Agents | Typical Working Concentration | Toxicity Considerations | Treatment Duration |
|---|---|---|---|---|
| Gram-positive Bacteria | Penicillin, Vancomycin | 100 U/mL, 50 µg/mL | Cell type-dependent | 2-3 passages |
| Gram-negative Bacteria | Streptomycin, Gentamicin | 100 µg/mL, 10 µg/mL | Nephrotoxic at high doses | 2-3 passages |
| Fungal/Yeast | Amphotericin B | 0.25-2.5 µg/mL | Can be cytotoxic | 2-3 passages |
| Mycoplasma | Plasmocin, Tetracycline | 5-25 µg/mL, 10 µg/mL | Metabolic effects | 3-5 passages |
| Broad-spectrum | Antibiotic-Antimycotic cocktails | As manufacturer recommends | Increased toxicity risk | 2-3 passages |
Prevention: Foundational Aseptic Technique
Prevention represents the most effective contamination control strategy. Rigorous aseptic technique forms the cornerstone of contamination prevention, requiring consistent application of standardized procedures.
Personal Protective Equipment and Practices
Appropriate Attire: Wear laboratory coats, gloves, and safety glasses to minimize personnel-derived contamination [71]. Hand Hygiene: Wash hands thoroughly before and after handling cultures, after touching potentially contaminated surfaces, and when moving between different culture areas [71].
Biosafety Cabinet Protocols
Workspace Organization:
- Gather all required materials before beginning work
- Disinfect all items entering cabinet with 70% ethanol
- Arrange items to maintain clear workspace and avoid airflow disruption
- Minimize rapid movements that might disrupt laminar airflow patterns Workflow Management:
- Work with only one cell line at a time to prevent cross-contamination [71]
- Clean biosafety cabinet surfaces with 70% alcohol before and after operations
- Perform monthly cabinet cleaning with 10% bleach or equivalent [71]
Equipment and Reagent Sterilization
Liquid Handling:
- Use sterile, plugged pipettes for media transfers
- Avoid generating aerosols during pipetting
- Never use pipettes directly from packaging without sterilization Surface Decontamination:
- Use 70% ethanol for routine surface disinfection
- Implement 10% sodium hypochlorite (bleach) for blood and biological spills
- Avoid phenolic disinfectants with certain cell types [72]
The Scientist's Toolkit: Essential Research Reagents
Table 3: Essential Reagents for Contamination Control
| Reagent/Category | Primary Function | Application Notes |
|---|---|---|
| 70% Ethanol | Surface disinfection, cabinet cleaning | Optimal concentration for microbial efficacy; prepare fresh regularly |
| 10% Sodium Hypochlorite | Surface decontamination, spill management | Effective against viruses; corrosive to metals; inactivated by organic matter |
| Antibiotic-Antimycotic Cocktails | Emergency contamination control | Use short-term only; not for routine prevention; validate cell compatibility |
| DNA Staining Dyes (Hoechst/DAPI) | Mycoplasma detection | Fluorescence microscopy required; reveals extranuclear DNA |
| Sterile Filtration Units (0.1µm-0.22µm) | Media and reagent sterilization | 0.1µm required for mycoplasma exclusion; 0.22µm standard for bacteria |
| Selective Growth Media | Microbial contamination testing | Supports contaminant growth while inhibiting mammalian cells |
| PCR Kits (Mycoplasma/Viral) | Molecular detection | High sensitivity for cryptic contaminants; species-specific primers available |
Vigilant contamination control represents an essential competency for researchers engaged in bacterial culture and drug development. The protocols and methodologies presented in this technical guide provide a systematic framework for establishing and maintaining contamination-free research environments. By integrating routine monitoring with sophisticated detection methodologies, implementing targeted decontamination when necessary, and adhering rigorously to preventive practices, research laboratories can safeguard experimental integrity and contribute to the development of safe, effective therapeutic products. In an era of increasing antibiotic resistance and public health challenges, meticulous attention to contamination control remains both a scientific imperative and an ethical responsibility for the research community.
In bacterial research and drug development, the inability to culture bacterial pathogens from clinical or experimental samples represents a critical failure point that can compromise entire research streams and therapeutic discovery pipelines. Successful cultivation is the cornerstone of microbiological investigation, enabling downstream analyses such as identification, antibiotic susceptibility testing (AST), and virulence studies [73]. Despite technological advancements, researchers frequently encounter culture failures due to a complex interplay of pre-analytical, medium-related, and microbial factors. Within the context of a broader thesis on foundational microbiology protocols, this guide provides a systematic diagnostic framework to troubleshoot and resolve poor or no bacterial growth. The principles outlined here are essential for maintaining the integrity of research data, ensuring reproducible results in drug development, and advancing our understanding of host-pathogen interactions. This document synthesizes current methodologies—from optimized isolation techniques to artificial intelligence-driven growth prediction—into a cohesive, actionable protocol for the scientific community.
A Systematic Diagnostic Workflow
The following diagram provides a high-level overview of the systematic diagnostic approach for investigating poor bacterial growth.
Step 1: Verify Specimen Quality and Pre-Analytical Handling
The pre-analytical phase is the most common source of culture failure, as variables during specimen collection, transport, and initial processing directly impact microbial viability.
Specimen Collection and Transport Standards
- Specimen Selection: The laboratory requires a specimen, not merely a swab of a specimen. Tissues, aspirates, and fluids are always preferred, as swabs hold minimal volumes (approximately 0.05 mL) and can fail to release microorganisms onto culture media [74]. Swabs are acceptable primarily for nasopharyngeal and specific viral respiratory specimens.
- Transport Conditions: Adhere strictly to transport time and temperature requirements. Delays in processing can lead to overgrowth of commensals or the death of fastidious pathogens. Most specimens for bacterial culture require transport at room temperature and processing within 2 hours [74]. The use of appropriate transport media, such as Cary-Blair for stool specimens or specialized anaerobic containers, is critical.
- Antimicrobial Neutralization: If the specimen source has been exposed to antimicrobial agents (e.g., a patient on antibiotics), the culture protocol must include neutralizers. Common neutralization methods include dilution, rinsing, filtration, or the incorporation of specific neutralizing agents (e.g., sodium polyanethol sulfonate for blood cultures) into the culture medium [75].
Specimen Sufficiency and Contamination Control
- Volume Adequacy: The specimen volume must be sufficient for the intended analysis, especially for blood cultures where low microbial loads are expected. For bacteremia, low concentrations of 1–10 colony-forming units (CFU) per milliliter of blood are common, necessitating adequate sample volumes for reliable detection [73] [76].
- Contamination Avoidance: Background noise from commensal microbiota must be avoided. Specimens from sites with rich normal flora (e.g., sputum, superficial wounds) require careful collection techniques to minimize contamination, and laboratory interpretation must differentiate pathogens from commensals [74].
Step 2: Diagnose Culture Medium and Environmental Conditions
If pre-analytical factors are ruled out, the investigation must focus on the culture medium and incubation environment.
Culture Medium Optimization and Quality Control
The culture medium must provide all essential nutrients in the correct proportions. A systematic approach to medium optimization is crucial.
Table 1: Key Factors for Culture Medium Optimization and Diagnosis
| Factor | Diagnostic Action | Quantitative Benchmark |
|---|---|---|
| Nutrient Balance | Employ Design of Experiment (DOE) to identify key nutrients and optimal concentrations [77]. | DOE models can improve growth yield and product quality (e.g., OMV production) while reducing impurities [77]. |
| Growth Promotion | Perform growth promotion tests on every new media lot using a panel of reference strains [75]. | Use strains like E. coli, P. aeruginosa, S. aureus, C. albicans, and A. brasiliensis [75]. |
| pH Control | Monitor and model pH changes during growth. AI models can predict pH dynamics [67]. | 1D-CNN AI models can predict pH with high accuracy (R² >0.95) using inputs like bacterial type, medium, and cell concentration [67]. |
| Selective Agents | Verify concentration of antibiotics or other selective agents in formulated media. | Confirm agent is not inhibiting target organisms due to incorrect concentration or degradation. |
Incubation Conditions and Atmosphere
Different microorganisms have specific requirements for temperature, atmosphere, and incubation time, which must be rigorously controlled and monitored.
- Temperature and Time: The incubation temperature must match the physiological requirements of the target microorganism. Commonly used ranges include 20–25°C for fungi, 30–35°C for environmental bacteria, and 36–38°C for human pathogens [75]. Incubation times must be sufficient for slow-growing organisms and should be defined with minimum and maximum read times (e.g., read at 24 and 48 hours) rather than a single endpoint [75].
- Atmosphere: Consider whether the target organism is an obligate aerobe, facultative anaerobe, microaerophile, or obligate anaerobe. Microaerophiles require oxygen levels below atmospheric concentration (typically 2–10% O₂), while capnophiles require elevated CO₂ (5–10%) [75]. Providing the incorrect atmosphere is a common cause of culture failure for fastidious species.
Step 3: Assess Microbial Viability and Physiological State
The physiological state of the microbial population at the time of culture significantly impacts recoverability.
Viable But Non-Culturable (VBNC) and Stressed States
Microorganisms from environmental or clinical sources are often in a stressed state, unlike the robust batch cultures grown in laboratories. Stressors like nutrient deprivation, desiccation, cold shock, or sublethal exposure to disinfectants can render cells non-culturable on standard media without being dead [75]. The Viable But Non-Culturable (VBNC) state is a survival mechanism where cells are metabolically active but cannot form colonies on routine media [78]. Reviving such populations may require specialized resuscitation techniques or culture-independent detection methods.
Inoculum Quality and Preparation
The purity, age, and preparation of the inoculum are critical for consistent results.
- Culture Age and Passaging: Microorganisms should be prepared from young cultures, typically no more than 24 hours old, and should be subcultured no more than five times from a master seed stock to prevent phenotypic drift [75].
- Growth Phase: The growth phase of the inoculum affects recovery. Cells from the lag or death phase are more sensitive to stress and may not grow compared to robust, log-phase cells [75]. Standardize the growth phase used for inoculation.
Step 4: Implement Advanced and Culture-Free Methodologies
When standard culture fails despite optimizing the above parameters, advanced or culture-independent methods are necessary to confirm the presence of bacteria and guide further troubleshooting.
Advanced Cultivation and Isolation Protocols
Recent protocols have been developed to enhance the efficiency of bacterial isolation, particularly from complex matrices like blood.
Table 2: Advanced Methodologies for Bacterial Isolation and Detection
| Methodology | Protocol Summary | Efficiency & Performance Data |
|---|---|---|
| Rapid Blood Pathogen Isolation [73] | Utilizes differential centrifugation and common lab equipment to isolate bacteria directly from blood, bypassing culture. | >70% isolation efficiency within 30 min; effective at low concentrations (1–10 CFU/0.3 mL blood); preserves viability. |
| Culture-Free Sepsis Detection [76] | "Smart centrifugation" with a density medium, selective lysis, microfluidic trapping, and deep-learning-based microscopy. | Detects E. coli, K. pneumoniae in <2 hrs at 9 and 7 CFU/mL respectively; high cell removal (>99.8% RBCs). |
| Full-Length 16S rRNA Sequencing [79] | Uses nanopore sequencing with spike-in internal controls for absolute quantification of bacterial load in a sample. | Provides species-level resolution and quantification; correlates well with culture counts in diverse human microbiomes. |
The workflow for one such advanced, culture-free detection method is detailed below.
Molecular Quantification and Viability Testing
For samples where growth is consistently poor, molecular methods can determine if bacteria are present but non-culturable.
- qPCR with Exogenous Controls: Standard qPCR can be optimized for accurate absolute quantification by adding a known concentration of an exogenous bacterial control (e.g., E. coli) prior to DNA extraction. This controls for gDNA loss during purification, which is more significant at lower bacterial concentrations, and minimizes biases related to centrifugation losses [78] [80].
- Viability PCR: Techniques that use propidium monoazide (PMA) or similar dyes can differentiate between DNA from live cells with intact membranes and dead cells. This confirms whether non-culturable cells are truly non-viable or simply in a VBNC state.
The Scientist's Toolkit: Essential Reagents and Materials
The following table catalogs key reagents and materials referenced in the diagnostic protocols and advanced methodologies discussed in this guide.
Table 3: Research Reagent Solutions for Bacterial Cultivation and Diagnosis
| Reagent/Material | Function & Application | Specific Example & Use Case |
|---|---|---|
| Lymphoprep Density Medium | Separates blood cells from bacteria during "smart centrifugation" based on differential sedimentation velocity [76]. | Used in culture-free sepsis diagnosis to create a density barrier (~1.051 g/ml) for enriching bacteria from whole blood [76]. |
| Selective Lysis Solution | Lyses remaining human blood cells (RBCs, WBCs, platelets) while preserving bacterial integrity [76]. | A mixture of sodium cholate hydrate and saponin used post-centrifugation to remove host cells prior to bacterial detection [76]. |
| Spike-in Internal Controls | Exogenous controls added to samples for absolute quantification in molecular assays, normalizing for losses during DNA extraction [79]. | Fixed concentrations of Allobacillus halotolerans and Imtechella halotolerans used in full-length 16S rRNA sequencing to estimate microbial load [79]. |
| Semi-defined Medium Components | Provides essential nutrients in a controlled, animal-component-free formulation for fastidious pathogens [77]. | Includes phosphate buffer, lactic acid (carbon source), yeast extract, casamino acids, salts, trace elements, vitamins, and iron citrate [77]. |
| Design of Experiment (DOE) Software | Statistically optimizes culture medium composition by exploring multiple variables and their interactions with minimal experimental runs [77]. | Software like Sartorius MODDE used with microbioreactor systems (e.g., Ambr 15F) to simplify complex media and improve yield [77]. |
Diagnosing poor or no bacterial growth requires a methodical approach that scrutinizes every stage of the workflow, from specimen collection to final incubation. Foundational protocols must be rigorously applied and continuously validated. By adhering to the step-by-step diagnostic framework outlined in this guide—verifying pre-analytical conditions, optimizing culture media and environment, assessing microbial physiology, and employing advanced or culture-free methods when needed—researchers and drug development professionals can significantly improve culture success rates. This systematic troubleshooting not only salvages critical experiments but also strengthens the overall reliability and reproducibility of microbiological research, forming a solid foundation for meaningful scientific discovery and therapeutic innovation.
Optimizing Aeration with Baffled Flasks and Shaking Speeds
In bacterial culturing, achieving optimal oxygen transfer is a foundational prerequisite for robust cell growth, high protein yield, and reproducible experimental outcomes. This technical guide delves into the engineering principles and practical methodologies for enhancing aeration through the synergistic use of baffled flasks and precise shaking speed control. Within the context of foundational research protocols, we provide a detailed examination of the oxygen transfer mechanisms, quantitative performance data, and step-by-step experimental procedures for optimizing these critical parameters. The guidance is tailored for researchers and scientists in drug development, ensuring that screening and process development in shake flasks is conducted under conditions that are both controllable and representative of larger-scale bioreactors.
Aerobic bacterial cultures require a continuous supply of oxygen for efficient aerobic respiration. In shake flasks, oxygen is supplied through surface aeration from the gas atmosphere in the flask headspace [81]. The primary resistance to oxygen delivery is the liquid-phase boundary layer at the gas-liquid interface. The rate of oxygen transfer is quantified by the volumetric mass transfer coefficient (kLa), and the maximum oxygen transfer capacity (OTRmax) is a critical parameter indicating the highest achievable oxygen supply under specific conditions [82]. Insufficient oxygen transfer can lead to reduced metabolic activity, the formation of anaerobic byproducts, and ultimately, suboptimal cell yields and unreliable screening data [82] [81]. It is, therefore, imperative to optimize the system to meet the oxygen demand of the culture.
The Role of Baffled Flasks in Enhancing Aeration
Design and Mechanism of Action
Baffled flasks are specifically designed with indentations or ridges on their inner walls. Unlike classic Erlenmeyer flasks, which promote a smooth, laminar vortex during shaking, baffled flasks use these protrusions to disrupt laminar flow and create turbulent flow [83]. This turbulence serves two primary functions:
- It increases the interfacial surface area (a) available for oxygen transfer by throwing liquid more vigorously onto the flask walls, creating a larger and constantly renewed liquid film [83] [84].
- It improves mixing within the culture broth, eliminating dead zones and ensuring homogeneous distribution of nutrients and cells, which prevents stratification and oxygen-deprived zones [83] [85].
The cumulative effect is a significant enhancement of the gas-liquid mass transfer, making these flasks superior for oxygen-demanding processes.
Quantitative Performance and Advantages
The turbulent flow induced by baffles can dramatically increase oxygen saturation. Some studies suggest that oxygen saturation can increase by nearly 50% compared to standard Erlenmeyer flasks [83]. This makes them particularly well-suited for cultivating aerobic bacteria, insect cell lines, and other high-density cultures [86] [83]. The design of modern baffled flasks, such as the KIMBLE KIMAX Baffled Shake Flask with four integrated baffles, is engineered to boost oxygen transfer while minimizing foam formation, even at lower shaking speeds [84].
Table 1: Comparison of Baffled vs. Non-Baffled Shake Flasks
| Feature | Baffled Flasks | Non-Baffled Flasks |
|---|---|---|
| Oxygen Transfer Rate (OTR) | High | Moderate to Low |
| Flow Regime | Turbulent | Laminar (Vortex) |
| Mixing Efficiency | Excellent, reduces stratification | Good, but can have dead zones |
| Reproducibility | Can vary with baffle design and manufacturing [85] | Generally high due to simple design [85] |
| Foam Formation | Increased, often requiring antifoam agents [83] [85] | Lower |
| Shear Stress | Higher, potentially problematic for delicate cells [83] [85] | Lower |
| Ideal Application | High-density, oxygen-demanding cultures | Standard cultures, shear-sensitive cells |
Practical Considerations and Limitations
Despite their advantages, baffled flasks present certain challenges. The increased turbulence often leads to excessive foam formation, which can wet and clog the sterile barrier, increasing contamination risk and potentially stressing cells [82] [83] [85]. Mitigation strategies include the addition of antifoam agents like Pluronic F-68 or EX-CELL Antifoam at concentrations typically up to 0.1-1% [86]. Furthermore, the enhanced hydromechanical stress can generate shear stress that may damage delicate or shear-sensitive cell lines [83] [85]. Researchers must also note that reproducibility can be less consistent compared to standard flasks due to variations in baffle design and manufacturing [85].
Optimizing Shaking Speed and Orbital Diameter
Fundamental Principles
Shaking frequency (agitation rate) and orbital diameter are the two most critical shaker parameters controlling aeration in standard (non-baffled) flasks. The shaking motion moves the liquid onto the vessel walls, increasing the surface area available for oxygen transfer [87]. The shaking frequency (n) has a more pronounced impact on the oxygen transfer rate than the shaking diameter (d₀) [82] [88]. According to Newton's second law, the centrifugal force responsible for liquid movement is proportional to the square of the shaking frequency and the orbital diameter [87].
Quantitative Analysis of Shaking Parameters
Recent advancements in shaker technology have enabled the exploration of high-speed shaking. Using a self-balancing orbital shaker prototype, researchers achieved shaking frequencies of up to 750 rpm at a 25 mm diameter and 600 rpm at a 50 mm diameter [82]. This high-speed shaking resulted in a maximum kLa value of 650 h⁻¹ (OTRmax = 135 mmol/L/h) in a 250 mL glass flask with a 10 mL filling volume, representing an approximately 50% increase in kLa compared to conventional commercial shakers [82]. This demonstrates that increasing shaking frequency is a highly effective method for enhancing oxygen supply.
Table 2: Impact of Shaking Conditions on Oxygen Transfer
| Shaking Parameter | Impact on Oxygen Transfer | Typical Operational Range | Key Findings |
|---|---|---|---|
| Shaking Frequency (RPM) | Strong positive correlation; primary control parameter [82] | 150-250 rpm (standard); up to 750 rpm (high-speed) [89] [82] | kLa of 650 h⁻¹ achieved at 750 rpm, 25 mm diameter [82] |
| Orbital Diameter | Positive correlation; secondary impact [82] | 19 mm, 25 mm, 50 mm [88] | High-speed shaking is more beneficial at 25 mm than 50 mm diameter [82] |
| Filling Volume | Strong negative correlation; critical for surface-to-volume ratio [81] | 10-25% of total flask volume [89] [88] | >100 ml in a 250-ml flask significantly reduces kLa [81] |
Converting Parameters Between Different Shakers
A common challenge in standardizing protocols arises when transferring a method between shakers with different orbital diameters. The following equation allows for the calculation of the required shaking speed (r₂) on a new shaker to maintain the same level of aeration [89] [87]:
Where:
r₁= Agitation speed (RPM) of the original shakerr₂= Agitation speed (RPM) of the new shakerd₁= Orbital diameter of the original shakerd₂= Orbital diameter of the new shaker
This formula ensures that the centrifugal force and resulting liquid movement, which drive oxygen transfer, are consistent across different equipment [87].
Integrated Experimental Protocols for Aeration Optimization
Protocol: Determining Maximum Oxygen Transfer Capacity (OTRmax)
This protocol utilizes the Respiration Activity MOnitoring System (RAMOS) technology to measure OTRmax in shake flasks [82].
Principle: The OTR is determined by measuring the decrease in oxygen partial pressure in the headspace of a temporarily sealed shake flask.
Materials:
- RAMOS shake flasks or a Transfer-rate Online Monitoring (TOM) device [82]
- High-speed orbital shaker (e.g., modified with self-balancing mechanism)
- Kluyveromyces lactis GG799 pKlac1 (or other suitable aerobic model organism)
- YEP Medium: 10 g/L yeast extract, 20 g/L peptone, pH adjusted to 4.8 [82]
- Glucose solution (80 g/L for main culture)
- Inoculum
Method:
- Inoculum Preparation: Inoculate 10 mL of pre-culture medium in a 250 mL RAMOS flask and incubate overnight until the culture reaches the exponential growth phase (e.g., OTR of ~50 mmol/L/h) [82].
- Main Culture Setup: Inoculate the main culture in a 250 mL RAMOS flask with a defined filling volume (e.g., 10 mL) to an initial optical density (OD600) of 0.3 [82].
- Monitoring and Data Acquisition:
- Place the flask in the monitoring system on the shaker.
- Set the initial shaking frequency (e.g., 600 rpm for 25 mm diameter).
- The system undergoes repeated cycles of aeration (15 min) and measurement (5 min) phases. During the measurement phase, aeration stops, and the slope of the oxygen partial pressure in the headspace is used to calculate the OTR [82].
- Stepwise Increase in Shaking Frequency: Once the culture leaves the exponential phase at the initial speed, systematically increase the shaking frequency (e.g., to 750 rpm) and subsequently decrease it in steps every 100 minutes while continuously monitoring the OTR [82].
- Data Analysis: The OTRmax is the highest stable OTR value recorded before the culture becomes oxygen-limited. The kLa can be calculated from the OTRmax using the formula:
OTRmax = kLa * (c* - cL), wherec*is the saturation concentration of oxygen andcLis the actual dissolved oxygen concentration (often assumed to be zero at the critical point).
Protocol: Empirical Optimization of Shaking Speed for Bacterial Growth
This is a practical protocol for labs without specialized OTR monitoring equipment.
Materials:
- Baffled and non-baffled flasks
- Standard orbital shaker
- Bacterial strain (e.g., E. coli)
- LB or other appropriate broth
Method:
- Culture Setup: Prepare a series of identical culture flasks (e.g., 250 mL flasks containing 25 mL of medium). Use both baffled and non-baffled flasks for comparison.
- Shaker Configuration: Determine the orbital diameter of your shaker.
- Growth Curve Analysis: Inoculate all flasks with the same volume of a standardized pre-culture. Incubate the flasks at a constant temperature but at different, fixed shaking speeds (e.g., 150, 200, 250, 300 rpm).
- Monitoring: Track bacterial growth over time by measuring optical density (OD600) at regular intervals.
- Analysis: Plot growth curves for each condition. The optimal speed is identified as the point beyond which increases in RPM no longer yield significant improvements in maximum cell density or growth rate, and before which a decrease in performance is observed. Watch for signs of excessive shear at high speeds, such as cell clumping or a decline in viability.
The Scientist's Toolkit: Essential Research Reagent Solutions
Table 3: Key Materials and Reagents for Optimized Shake Flask Cultivation
| Item | Function / Application | Example Products / Notes |
|---|---|---|
| Baffled Shake Flasks | Enhanced oxygen transfer for high-density cultures. | KIMBLE KIMAX Baffled Flasks [84], Thomson Optimum Growth Flasks (disposable) [86] |
| Antifoam Agents | Suppress foam formation in baffled flasks and at high speeds. | ThermoFisher Pluronic F-68 [86], Sigma Aldrich EX-CELL Antifoam [86] |
| High-Speed Shaker | Enables highest possible kLa values; requires good balancing. | Self-balancing orbital shakers (e.g., Adolf Kühner AG) [82] |
| Complex Media | Supports high cell density growth. | Terrific Broth, SOB, SOC (some contain magnesium) [89] |
| Magnesium Salts | Cofactor for bacterial growth; can improve yields in basic media. | MgCl₂, MgSO₄ (add to media like LB) [89] |
| Breathable Closures | Allow gas exchange while preventing contamination. | Polypropylene foam plugs, specialized breathable membranes [89] |
Integrating optimized aeration strategies into foundational culturing protocols is non-negotiable for reliable and scalable research. The synergistic use of baffled flasks and precisely controlled shaking speeds provides a powerful means to meet the oxygen demands of aerobic bacterial cultures. Researchers should adopt the following best practices:
- For Maximum Aeration: Prioritize increasing shaking frequency and use baffled flasks with low filling volumes (10-25% of nominal flask volume) [82] [89].
- For Reproducibility and Delicate Cells: Use non-baffled flasks with adjusted shaking speeds, as they offer lower shear and higher experimental consistency [85].
- During Scale-Down/Up: Use the provided formula to compensate for different shaker orbital diameters to maintain consistent aeration conditions [87].
- Always Monitor for Stress: Be vigilant for foam formation and cell clumping, which indicate the need for antifoam agents or a reduction in shaking speed.
By systematically applying these principles, researchers can ensure that their shake flask cultivations are not a bottleneck in the drug development pipeline, but a robust and predictive foundation for subsequent process scaling.
Diagram Appendix
Oxygen Transfer Pathway in a Baffled Flask
Experimental Workflow for Aeration Optimization
This technical guide provides a comprehensive framework for utilizing magnesium and blood-derived supplements to enhance bacterial growth in research cultures. Within the broader thesis of foundational microbiological protocols, this whitepaper details the biochemical mechanisms, experimental methodologies, and practical considerations for optimizing media formulation. We present standardized protocols for assessing bacterial growth responses to magnesium supplementation, including quantitative analysis techniques and implementation guidelines for researchers, scientists, and drug development professionals seeking to refine culturing systems through evidence-based additive integration.
Magnesium (Mg²⁺) stands as an essential divalent cation serving critical biochemical functions in bacterial cellular processes. As a cofactor for over 300 enzymatic reactions, magnesium facilitates fundamental metabolic activities including energy production through ATP utilization, protein synthesis, and nucleic acid stability [90] [91]. The cation's importance extends to cellular signaling, membrane integrity, and ion transport regulation, establishing it as an indispensable component in culture media formulation for robust bacterial growth.
The homeostasis of magnesium within bacterial systems involves specialized transport mechanisms, primarily through channels such as TRPM6 and TRPM7, which regulate cellular uptake and concentration [90] [91]. Understanding these mechanisms provides the foundational knowledge for rational media design, allowing researchers to manipulate magnesium concentrations to achieve specific growth objectives or metabolic states in bacterial cultures.
Biochemical Mechanisms of Magnesium
Cellular Functions and Metabolic Pathways
Magnesium's biochemical significance stems from its role as a structural component and catalytic cofactor in numerous essential cellular processes:
Energy Metabolism: Magnesium forms the complex MgATP²⁻, which is required for all ATP-dependent enzymatic reactions. This complex facilitates phosphate transfer in kinases and supports glycolytic pathways and oxidative phosphorylation, directly influencing cellular energy production [90] [91].
Nucleic Acid Synthesis: DNA and RNA polymerases require magnesium for structural integrity and catalytic activity. Magnesium ions stabilize the structure of nucleic acids and facilitate the function of topoisomerases, helicases, and exonucleases, thereby influencing replication, transcription, and ultimately cell proliferation [90].
Protein Synthesis and Structural Functions: Magnesium acts as a cofactor for ribosomal function and participates in multi-enzyme complexes, G-proteins, and membrane-associated processes. Its role in protein synthesis extends to the activation of amino acids and the stabilization of ribosome structure [91].
Magnesium Transport and Cellular Homeostasis
Bacterial cells maintain magnesium homeostasis through specialized transport systems that regulate intracellular concentrations. The TRPM7 channel protein serves as a primary cellular magnesium gatekeeper, influencing how bacteria respond to environmental magnesium availability [92] [93]. Genetic variations in TRPM7 functionality significantly impact magnesium uptake efficiency, creating strain-specific responses to magnesium supplementation that researchers must consider in media formulation [94] [92].
Experimental Protocols for Magnesium Supplementation
Quantitative Assessment of Bacterial Growth Response
Objective: To systematically evaluate bacterial growth responses to magnesium supplementation across diverse genetic backgrounds and media compositions.
Materials:
- Bacterial Strains: 115 Escherichia coli strains (114 single-gene knockout mutants + wild-type BW25113) with variations in vitamin B metabolic pathways [95]
- Media Formulation: 135 synthetic media compositions with varying concentrations of 45 chemical components, including magnesium gradients [95]
- Growth Monitoring Equipment: Spectrophotometer capable of high-throughput OD₆₀₀ measurements in 96-well format
Methodology:
- Strain Preparation: Culture each bacterial strain to mid-log phase in standard rich media (e.g., LB)
- Media Inoculation: Dilute cultures to standardized OD₆₀₀ and transfer to synthetic media formulations containing systematically varied magnesium concentrations
- Growth Profiling: Incubate at 37°C with continuous shaking, monitoring OD₆₀₀ every 30 minutes for 72 hours to establish complete growth curves
- Data Collection: Precisely measure saturated population density (K) for each strain-media combination, with four biological replicates per profile to ensure statistical robustness [95]
- Quality Control: Exclude growth profiles with standard deviation of K > 0.1 between replicates to maintain data integrity
Data Analysis:
- Calculate growth parameters including maximum OD, growth rate, and lag phase duration
- Employ machine learning algorithms (Gradient-Boosting Decision Tree) to model relationships between magnesium concentrations and growth outcomes
- Perform hierarchical clustering to identify strain groupings with similar magnesium response profiles
- Validate models through cross-validation and experimental confirmation
Magnesium Bioavailability and Formulation Testing
Objective: To evaluate the bioavailability of different magnesium formulations and their impact on bacterial growth enhancement.
Background: Magnesium bioavailability varies significantly between different salt forms, influencing their effectiveness as media additives [96].
Table 1: Bioavailability Profile of Common Magnesium Formulations
| Magnesium Form | Elemental Magnesium Content | Relative Bioavailability | Solubility Profile | Research Applications |
|---|---|---|---|---|
| Magnesium Oxide | High (60%) | Low | Poor solubility | High magnesium loading despite limited bioavailability |
| Magnesium Citrate | Moderate | High | Excellent | High solubility applications |
| Magnesium Glycinate | Variable | High | Good | Precision supplementation studies |
| Magnesium Chloride | Moderate | High | Excellent | Controlled concentration experiments |
Protocol:
- Formulation Preparation: Prepare stock solutions of different magnesium salts at standardized concentrations (e.g., 100mM) in purified water
- Media Supplementation: Add magnesium formulations to base media at concentrations ranging from 0.1-10mM
- Growth Comparison: Inoculate with standardized bacterial suspensions and monitor growth parameters as described in Protocol 3.1
- Bioavailability Assessment: Compare growth enhancement across formulations to identify optimal magnesium delivery systems for specific research applications
Data Analysis and Machine Learning Approaches
The complexity of magnesium's interactions with genetic and environmental factors necessitates advanced analytical approaches for comprehensive understanding.
Machine Learning Implementation for Growth Prediction
Algorithm Selection: Employ XGBoost (Extreme Gradient Boosting) algorithms to construct predictive models of bacterial growth based on magnesium concentrations and genetic backgrounds [97] [95].
Feature Engineering:
- Input features include concentrations of 45 chemical components in media formulations
- Genetic features derived from 16S rRNA sequences converted to 3-mer frequency profiles [97]
- Magnesium concentration gradients as continuous variables
- Output variable: saturated population density (K)
Model Training and Validation:
- Train 115 separate models corresponding to different bacterial strains
- Utilize grid search with cross-validation (GridSearchCV) for hyperparameter optimization
- Focus on maximum tree depth (range: 3-10) and learning rate (range: 0.01-0.4) [97]
- Evaluate model performance using accuracy, precision, recall, F1 score, and AUPRC
Table 2: Model Performance Metrics for Bacterial Growth Prediction
| Model Type | Average Accuracy | Precision Range | Recall Range | F1 Score | Top-Performing Media |
|---|---|---|---|---|---|
| XGBoost (45 models) | 76%-99.3% | 75%-99% | 76%-99% | Mostly >90% | J386 (99.3%), J50 (98.9%), J66 (98.8%) |
Interplay Between Genetic and Environmental Factors
Data-driven analysis reveals that magnesium's effectiveness is modulated by genetic factors, particularly through TRPM7 functionality [94] [92]. The hierarchical gene-chemical networks identify glucose, isoleucine, and valine as key interactive components with magnesium in determining growth outcomes [95].
Research Reagent Solutions
The following table details essential materials and their specific functions in magnesium supplementation research, providing researchers with a practical toolkit for experimental implementation.
Table 3: Essential Research Reagents for Magnesium Supplementation Studies
| Reagent/Category | Specific Function | Research Application | Technical Notes |
|---|---|---|---|
| Magnesium Salts | Mg²⁺ ion source | Media supplementation | Selection affects bioavailability [96] |
| TRPM7 Genotyping Assay | Assess magnesium regulation capacity | Participant stratification | Identifies responders vs. non-responders [94] |
| o-Cresolphthalein Complexone | Magnesium detection | Spectrophotometric quantification | Detects as low as 2μM Mg²⁺ [98] |
| Synthetic Media Components | Environmental control | Growth profiling | 45 chemicals for systematic variation [95] |
| XGBoost Algorithm | Growth prediction | Data analysis | Models gene-environment interactions [97] |
Technical Considerations and Optimization Strategies
Strain-Specific Response Considerations
Genetic background significantly influences magnesium utilization efficiency. Key considerations include:
TRPM7 Genotype: Strains with fully functional TRPM7 demonstrate enhanced responsiveness to magnesium supplementation, showing significant increases in beneficial bacteria such as Carnobacterium maltaromaticum and Faecalibacterium prausnitzii [94] [92]. In contrast, strains with TRPM7 missense variants (Thr1482Ile) may show reduced or even opposite responses to magnesium supplementation [92].
Vitamin B Metabolic Pathways: Genes involved in vitamin B metabolism interact significantly with magnesium availability, creating strain-specific growth patterns that cluster into distinct response groups [95].
Media Composition Optimization
Magnesium does not function in isolation; its effectiveness is modulated by other media components:
Carbon Source Interactions: Glucose concentration significantly influences magnesium-dependent growth patterns, with high glucose conditions amplifying growth variation across strains [95].
Amino Acid Balance: Isoleucine and valine emerge as critical co-factors that enhance magnesium utilization efficiency across multiple bacterial strains [95].
Mineral Balance: Maintain appropriate calcium-to-magnesium ratio (typically 2:1 on weight basis) to prevent competitive inhibition while supporting overall mineral homeostasis [92].
This technical guide establishes a comprehensive framework for utilizing magnesium and blood-derived supplements in bacterial culture systems. Through detailed experimental protocols, analytical methodologies, and practical implementation guidelines, we provide researchers with evidence-based strategies for enhancing bacterial growth through targeted media supplementation. The integration of machine learning approaches with traditional microbiological techniques represents a significant advancement in the precision and predictive capacity of media optimization, contributing foundational protocols for the broader thesis of bacterial culturing methodology. Future directions should focus on expanding genetic diversity in response profiling and developing strain-specific formulation strategies that maximize growth outcomes through personalized media composition.
Strategies for Culturing Fastidious and Intracellular Bacteria
The isolation and cultivation of microorganisms in pure culture remains the cornerstone of infectious disease research, enabling the study of virulence, antibiotic susceptibility, and genome sequences [17]. However, for decades, clinical microbiology has faced a significant challenge: the so-called "Great Plate Count Anomaly," where the number of bacteria observed under a microscope vastly exceeds those that can be cultured using standard laboratory methods [99]. This is particularly true for fastidious and intracellular bacteria, which have specific, often unmet, growth requirements. It is estimated that approximately 99% of environmental bacteria and about a third of oral bacteria remain uncultivated [99].
The revival of culture techniques, largely propelled by microbiologists specializing in intracellular pathogens, has led to major advances [17] [100]. Successfully culturing these elusive organisms is essential, as it allows for the comprehensive characterization of phenotypes, validation of genomic predictions, and development of effective treatments [100]. This guide outlines the foundational strategies and protocols for cultivating fastidious and intracellular bacteria, providing a critical resource for researchers and drug development professionals.
Understanding Fastidiousness and Bacterial Growth Requirements
Bacterial resistance to in vitro cultivation can stem from several biological and environmental factors. A primary reason is unmet fastidious growth requirements, where the culture medium or atmosphere lacks specific nutrients or conditions [99]. Furthermore, many bacteria exist in complex interactive communities within their natural habitats. When isolated, they are deprived of essential signals or metabolites provided by neighboring "helper" bacteria [99]. This is often linked to auxotrophy, where a bacterium's reduced genome lacks the genes for biosynthetic pathways of essential nutrients, forcing it to rely on a symbiotic relationship for survival [99]. Inhibition by chemical factors like hydrogen peroxide generated in culture media or by bacteriocins from other bacteria can also prevent growth [99].
Successful cultivation hinges on optimizing four primary elements that determine bacterial growth: nutrients, atmosphere, temperature, and incubation time [17]. The following sections detail the strategies to control these elements.
Culture Media and Nutrients
The design of culture media has evolved from empirical use of environmental extracts and kitchen ingredients to sophisticated, genome-informed formulations [17] [100].
- Nonselective and Enriched Media: These media contain no inhibitors and permit the growth of a wide variety of microorganisms. Common components include meat infusions, heart or brain extracts, yeast extracts, and peptones [17]. A critical innovation was the addition of solidifying agents like agar or coagulated eggs, enabling the description of species in pure culture [17]. Enriched media are supplemented with specific components to support the growth of fastidious organisms. Blood is a frequent addition, providing hemin and other nutrients that significantly improve the growth of many pathogens, including Mycobacterium tuberculosis [17].
- Selective Media: These media incorporate inhibitors to isolate pathogenic microorganisms from complex microbiota. Common inhibitors include deoxycholic acids, bile salts, crystal violet (which inhibit Gram-positive bacteria), and bismuth sulfite (which inhibits commensal organisms for enteric bacilli culture) [17]. Antibiotics and antiseptics are also used in selective cocktails, such as in Campylobacter blood agar or media for Mycobacterium culture [17].
- Axenic Media: The development of axenic (sterile, containing no other living organisms) media for extremely fastidious bacteria represents a major breakthrough. For example, a cell-free culture medium for Tropheryma whipplei was designed based on genomic analysis that revealed auxotrophies for several amino acids [100]. Similarly, an axenic medium for Coxiella burnetii was developed, although its composition was not deduced from genomic data alone, indicating the need for empirical experimentation [100].
Atmosphere and Temperature Control
The atmospheric requirements for bacteria are diverse and must be meticulously controlled for successful cultivation.
- Aerophilic and Anaerobic Conditions: Standard aerobic incubation is sufficient for many pathogens, but obligate anaerobes, such as Clostridium species, require the complete absence of oxygen [21]. Techniques like the use of roll tubes or the addition of antioxidants in culture media under an aerobic atmosphere have allowed the growth of strictly anaerobic species [17].
- Microaerophilic Conditions: Bacteria like Campylobacter spp. require an atmosphere with relatively low oxygen concentration (∼5% O₂, 10% CO₂, and 85% N₂) for optimal recovery [17]. Notably, a microaerophilic atmosphere has also been shown to improve the culture efficiency of Mycobacterium species [17].
- Temperature: While most clinical pathogens are mesophilic (growing at 25°C to 45°C), some require specific temperatures. A classic example is Rickettsia felis, which was successfully cultured in cell lines at 28°C after failures at 37°C [17].
Incubation Time
Many fastidious bacteria require extended incubation periods far beyond the standard 24-48 hours. Helicobacter pylori was first isolated after an accidental 5-day incubation [17]. Bartonella species can require 12 to 14 days on blood agar, with some isolates needing over 45 days [17]. Aerobic actinomycetes like Nocardia spp. may need 2 to 3 weeks of incubation [17]. Therefore, laboratories must adjust their protocols and maintain cultures for extended durations to avoid false negatives.
Table 1: Optimized Growth Requirements for Selected Fastidious Bacteria
| Bacterium | Culture Strategy | Key Growth Factors | Incubation Time | Reference |
|---|---|---|---|---|
| Tropheryma whipplei | Axenic medium | Genome-based medium; requires specific amino acids | Several days | [100] |
| Coxiella burnetii | Axenic medium | Acidic pH (pH 4.5) and a complex medium | 7 days | [100] |
| Mycobacterium tuberculosis | Solid culture media (e.g., blood agar) | Microaerophilic atmosphere; use of antioxidants | Dramatically decreased (vs. egg-based media) | [17] |
| Bartonella spp. | Enriched solid media (blood agar) | Aerobic atmosphere, 37°C | 12 to 14 days (up to >45 days) | [17] |
| Helicobacter pylori | Enriched solid media | Microaerophilic atmosphere, 37°C | 5 days | [17] |
Advanced Cultivation Strategies and Protocols
Co-culture and Simulated Natural Environments
Many uncultivated bacteria depend on interactions with other microorganisms. Strategies that simulate their natural environment have proven highly successful.
- Diffusion Chambers: Devices like the diffusion chamber and its high-throughput successor, the ichip, allow bacteria to be cultivated in a simulated natural environment [99]. Bacteria are inoculated into chambers separated from the environment by semi-permeable membranes, which permit the passage of essential chemical factors and signals from the external environment, thereby facilitating the growth of previously uncultivated species [99].
- Direct Helper Strains: Some bacteria have an obligate symbiotic relationship with a helper strain. A prominent example is the cultivation of Candidate phylum Saccharibacteria (TM7), which grows on the surface of its host bacterium, Actinomyces odontolyticus [99]. This co-culture protocol is outlined below.
Protocol 3.1: Co-culture of Saccharibacteria (TM7) with a Helper Strain
- Principle: The ultrasmall parasitic bacterium TM7x relies on its host, Actinomyces odontolyticus, for essential metabolites, as revealed by its reduced genome.
- Materials:
- Helper strain: Actinomyces odontolyticus (e.g., ATCC 17982).
- Inoculum of the uncultivated TM7x.
- Brain Heart Infusion (BHI) broth and agar plates.
- Anaerobic chamber (for creating an anaerobic atmosphere, 5-10% H₂, 5-10% CO₂, balance N₂).
- Method:
- Grow A. odontolyticus in BHI broth to mid-exponential phase under anaerobic conditions at 37°C.
- Mix the TM7x inoculum with the A. odontolyticus culture.
- Spread the co-culture onto BHI agar plates.
- Incubate the plates anaerobically at 37°C for several days to a week.
- Monitor for the formation of TM7x microcolonies on the lawn of the host bacterium. Pure TM7x can be maintained through continuous co-culture with the host.
Sample Pre-treatment and Decontamination
For samples with heavy commensal flora, pre-treatment is often necessary to isolate the pathogen of interest.
- Chemical Decontamination: The N-acetyl-L-cysteine–NaOH method is traditionally used for decontaminating samples for Mycobacterium culture [17]. Chlorhexidine has also been used successfully to decontaminate stool samples before Mycobacterium species culture and sputum from cystic fibrosis patients [17].
- Lytic Phages: Phages that lyse the normal flora but not the pathogen of interest can be used to decontaminate samples, such as sputum, before M. tuberculosis culture, offering an alternative to antibiotics [17].
High-Throughput Cultivation (HTC) Methods
To address the challenge of cultivating the vast majority of uncultivated bacteria, high-throughput methods have been developed, particularly in environmental microbiology. These methods are also adaptable for educational purposes via Course-Based Undergraduate Research Experiences (CUREs) [101].
Protocol 3.2: Dilution-to-Extinction High-Throughput Culturing for Aquatic Bacterioplankton
- Principle: By massively diluting a sample in sterilized natural water or a defined artificial medium, this method reduces the inhibitory effects of other organisms and increases the probability of cultivating abundant yet fastidious oligotrophic bacteria.
- Materials:
- Environmental sample (e.g., seawater).
- Sterilized natural water or artificial seawater medium.
- 96-well plates.
- Flow cytometer (for detecting positive growth).
- Method:
- Serially dilute the environmental sample in the sterilized medium across a 96-well plate.
- Incubate the plates for 2-3 weeks under optimal conditions (e.g., temperature, light) for the target environment.
- Use flow cytometry to detect positive growth in wells based on increased cell density.
- Transfer positive cultures to larger volumes for further growth and characterization (e.g., 16S rRNA gene sequencing for identification).
Modern Approaches: Machine Learning and Media Optimization
Traditional medium selection relies on empirical knowledge, which can be inefficient. Recent advances leverage machine learning to predict the appropriate culture medium for a microorganism based on its 16S rRNA sequence.
- MediaMatch Tool: One study constructed 45 binary classification models using the XGBoost algorithm. The models used the frequencies of 3-mers in the 16S rRNA sequences as features to predict whether a bacterium could grow on one of 45 different culture media [97]. These models demonstrated strong predictive performance, with accuracies ranging from 76% to 99.3% [97]. This data-driven approach can significantly improve the efficiency of microbial cultivation.
Furthermore, response surface methodology (RSM) is a powerful statistical approach for optimizing fermentation conditions. It systematically evaluates the interaction of multiple variables (e.g., carbon source, pH, temperature) to find the optimal combination for maximum growth or product yield [102]. This method has been successfully applied to optimize the culture conditions for strains like Bacillus amyloliquefaciens [102].
Table 2: Essential Research Reagent Solutions for Cultivating Fastidious Bacteria
| Reagent Category | Specific Examples | Function in Cultivation |
|---|---|---|
| Nutrient Enrichments | Blood (e.g., defibrinated sheep blood), Yeast Extract, Peptones | Provides essential nutrients, growth factors, and cofactors not present in basal media. |
| Selective Inhibitors | Cycloheximide, Nalidixic Acid, Colistin, Amphotericin B | Suppresses the growth of contaminating bacteria or fungi from mixed samples. |
| Gelling Agents | Agar, Coagulated Eggs (Lowenstein-Jensen medium), Coagulated Serum (Loeffler medium) | Provides a solid surface for colony isolation and observation. |
| Atmosphere-Generating Systems | Anaerobic gas packs, Microaerophilic gas generator sachets, CO₂ incubators | Creates the required low-oxygen or high-CO₂ environments for specific pathogens. |
| Antioxidants | Sodium thioglycollate, Cysteine | Scavenges reactive oxygen species in media, facilitating the growth of strict anaerobes. |
| Buffering Agents | Phosphate buffers, HEPES | Maintains pH homeostasis in the medium, counteracting metabolic by-products. |
| Cell Lines | XTC2 cells (from Xenopus laevis), Human Embryonic Lung (HEL) cells | Provides a living host system for the cultivation of obligate intracellular bacteria. |
Visualization of Cultivation Strategy Workflow
The following diagram illustrates a consolidated, strategic workflow for approaching the cultivation of a fastidious or intracellular bacterium, integrating both classical and modern methods.
Cultivation Strategy Workflow for Fastidious Bacteria
The cultivation of fastidious and intracellular bacteria, while challenging, is far from an insurmountable problem. The key lies in moving beyond standardized, one-size-fits-all protocols and toward a tailored approach that seeks to replicate a bacterium's unique ecological niche. This involves a deep understanding of its metabolic requirements, often revealed through genomic data, and its dependence on specific physical conditions or other living organisms.
The strategies outlined in this guide—from designing axenic media and employing co-culture techniques to leveraging modern tools like machine learning and high-throughput microcultivation—form a foundational toolkit for researchers. As these methods continue to evolve and become more accessible, they promise to unlock the vast "microbial dark matter," paving the way for new discoveries in microbiology, novel drug targets, and improved therapeutic interventions for infectious diseases. The persistent efforts and innovations of cultivators will undoubtedly overcome even the most challenging remaining obstacles, such as the axenic culture of Treponema pallidum or Mycobacterium leprae [17].
Beyond Traditional Culture: Validation, Modern Alternatives, and Diagnostic Applications
Validating Culture Purity and Identifying Pathogens
In bacteriology research, the ability to obtain and validate a pure culture is the foundation upon which reliable scientific discovery is built. A pure culture, defined as a population of bacteria derived from a single parent cell, is indispensable for studying virulence, antibiotic susceptibility, and genomic content [17]. Contaminated or mixed cultures can lead to confounding experimental results, erroneous data, and flawed conclusions, ultimately compromising drug development pipelines. This guide details the foundational protocols for ensuring culture purity and provides advanced methodologies for the accurate identification of bacterial pathogens, framed within the rigorous quality standards expected in research and development.
Foundational Principles of Bacterial Culture
The Critical Role of Pure Cultures
Robert Koch's establishment of pure culture techniques revolutionized infectious disease research, enabling the definitive linking of microorganisms to specific diseases [17]. Today, pure cultures remain essential for:
- Genome Sequencing: Provides a clear, uncontaminated genomic background for analysis [17].
- Virulence Studies: Allows for the specific study of a pathogen's disease-causing mechanisms.
- Antibiotic Susceptibility Testing (AST): Ensures that susceptibility profiles are accurate and attributable to a single pathogen [17].
- Proteomic and Immunologic Research: Facilitates the production of specific proteins for use as antigens in serologic tests [17].
Aseptic Technique and Contamination Control
Maintaining an aseptic work environment is paramount. Key practices include working in a biological safety cabinet, using pre-sterilized equipment, and employing proper flaming techniques for metal inoculating loops and needles [47]. All tools, glassware, and media must be sterile, and caps should never be placed on lab surfaces to prevent airborne contamination [47] [21].
Core Methodologies for Isolating and Validating Pure Cultures
The Streak Plate Method
The most effective method for isolating single types of bacteria from a mixed source is the streak plate method [47]. This technique dilutes individual bacterial cells by systematically spreading them over the surface of an agar plate. Single cells reproduce into millions of clones, forming visible colonies that are piles of genetically identical cells. Transferring a single colony to new media results in a pure culture [47].
Assessing Colonial Morphology
A critical preliminary step in validating purity and identifying bacteria is examining colonial morphology—the appearance of colonies on an agar plate [47]. Researchers should describe the following characteristics, typically using a single colony for assessment:
- Texture: Can be smooth, glistening, mucoid, slimy, dry, or powdery [47].
- Transparency: Colonies may be transparent, translucent, or opaque [47].
- Color (Pigmentation): Many bacteria produce intracellular pigments, leading to distinct colony colors (e.g., yellow, pink, purple, red) [47].
- Form: This includes the colony's overall size, shape (e.g., circular, irregular), margin (edge pattern), and elevation (e.g., raised, convex, flat) [47].
Distinct colonial morphologies often provide the first clue that a culture is pure and can help differentiate between bacterial species.
Culture Media and Growth Conditions
Selecting the appropriate culture medium and growth conditions is vital for isolating and growing target pathogens.
- Media Types:
- Nonselective Media (e.g., Tryptic Soy Agar): Contain no inhibitors and support the growth of a wide range of bacteria [47].
- Enriched Media: are supplemented with nutrients like blood to support the growth of fastidious (picky) microorganisms [17].
- Selective Media: Contain inhibitors like antibiotics, deoxycholic acids, or crystal violet to suppress the growth of unwanted commensal bacteria and allow specific pathogens to grow [17].
- Atmosphere Control: Bacteria have varying oxygen requirements. Cultures may need aerobic, anaerobic, microaerophilic (low oxygen), or enriched CO₂ conditions for optimal growth [21] [17].
- Incubation Time and Temperature: While many pathogens grow in 24-48 hours, some fastidious species require extended incubation. Bartonella spp., for example, can require 12-14 days or even longer to form colonies [17]. Incubation temperatures typically range from 25°C to 45°C for mesophilic bacteria [17].
The following workflow summarizes the key steps and decision points in the classical and modern approaches to obtaining a pure culture for downstream analysis.
Advanced and Rapid Identification Techniques
While classical methods are foundational, newer technologies have significantly accelerated the identification pipeline.
Chromogenic Agar Platforms
Chromogenic agar is a powerful tool for rapid preliminary identification. It contains substrates that produce distinctive colorimetric changes in the presence of specific enzymes produced by different bacterial species, allowing for differentiation based on colony color [44]. A 2025 study demonstrated that this method could accurately distinguish between five prevalent sepsis-causing bacteria (E. coli, K. pneumoniae, S. aureus, E. faecalis, and P. aeruginosa) within 12 hours of sampling by analyzing colony colors in RGB space [44].
Molecular and Mass Spectrometry Methods
- Matrix-Assisted Laser Desorption/Ionization Time-of-Flight Mass Spectrometry (MALDI-TOF MS): This technology identifies microorganisms by analyzing their unique protein profiles and has become a routine, rapid identification method in clinical laboratories [44] [103]. A 2025 study using a membrane filtration protocol to prepare samples from positive blood cultures achieved a 76.5% identification success rate with MALDI-TOF MS, with the highest success for Gram-negative bacteria (88.1%) [103].
- PCR-Based Quantification (qPCR/dPCR): Quantitative PCR (qPCR) and digital PCR (dPCR) are widely used for the detection and absolute quantification of bacterial pathogens [104]. A 2017 comparative study found that while qPCR and dPCR results can vary (with differences of up to 0.5 Log₁₀), both molecular methods were a valid alternative to cultural methods for quantifying Listeria monocytogenes [104]. In contrast, cultural methods underestimated the number of bacteria for Francisella tularensis and Mycobacterium avium subsp. paratuberculosis by one to two Log₁₀ [104].
Table 1: Comparison of Pathogen Quantification Methods (Adapted from [104])
| Method | Principle | Key Advantage | Key Limitation | Performance Note |
|---|---|---|---|---|
| Cultural Plating | Growth of viable bacteria on solid media | Gold standard for viability | Slow (days to weeks) | Underestimated F. tularensis & M. avium by 1-2 Log₁₀ |
| Quantitative PCR (qPCR) | Quantification using a standard curve | Rapid, high-throughput | Susceptible to inhibitors | Over/under-estimated bacterial count by <0.5 Log₁₀ vs. dPCR |
| Digital PCR (dPCR) | Absolute quantification by sample partitioning | Highly precise, robust to inhibitors | Higher cost, lower throughput | Valid alternative to culture for L. monocytogenes |
Quantitative Analysis: From Culture to Molecular Methods
Understanding bacterial load is critical in both research and clinical diagnostics.
Cultural vs. Molecular Quantification
The comparison between semi-quantitative culture analysis and quantitative molecular methods reveals significant disparities. A 2021 study found that semi-quantitative results (e.g., "light," "moderate," or "heavy" growth) correspond to quantitative values (in CFU/g) that span a wide range with considerable overlap between categories [105]. For instance, "light growth" averaged a clinically significant 2.5 × 10⁵ CFU/g, a level that can impede wound healing [105]. This highlights the potential for semi-quantitative methods to be unreliable for precise quantification.
A Rapid Centrifugation Protocol for Bacterial Isolation
A 2025 protocol for isolating bacteria from blood culture media demonstrated an optimized centrifugation approach. Using standard laboratory equipment, the method achieved a 85% isolation efficiency for E. coli at clinically relevant concentrations (10-200 CFU/mL) within 15 minutes, dramatically accelerating the diagnostic pipeline [44].
- Methodology: The protocol starts with blood added to standard aerobic hemoculture bottles. An initial centrifugation at 500g for 2 minutes isolates bacteria with >99% red blood cell removal [44].
- Efficiency Optimization: A second centrifugation of the resuspended sediment increased cumulative isolation efficiency to 77% for E. coli, and a third spin increased it to 84% [44].
- Up-Concentration: The supernatant is up-concentrated by centrifugation over a density medium (Percoll) cushion at 1000g, resulting in near-complete bacterial recovery in a small volume suitable for plating [44].
Equipment and Method Validation in a Regulatory Framework
For research intended to support drug development, adherence to regulatory frameworks is essential. Equipment validation under current Good Manufacturing Practices (cGMP) is a critical component.
- Installation Qualification (IQ): Verifies that the equipment is received as specified and properly installed in the correct environment [106] [107].
- Operational Qualification (OQ): Verifies that the installed equipment operates according to the manufacturer's specifications across its defined ranges [106] [107].
- Performance Qualification (PQ): Evaluates the equipment's performance under real-world conditions to demonstrate it consistently meets pre-defined acceptance criteria for its intended use [106] [107].
This IOPQ process, following an approved validation protocol, is required for cGMP testing and would have been relevant for laboratory-developed tests (LDTs) classified as devices [107].
The Scientist's Toolkit: Essential Research Reagents and Materials
Table 2: Key Research Reagent Solutions for Bacterial Culture and Identification
| Item | Function/Application | Key Characteristics |
|---|---|---|
| Chromogenic Agar [44] | Rapid species identification based on enzymatic activity | Contains substrates that yield colorimetric changes specific to bacterial species. |
| Blood Agar [17] | Enriched medium for growing fastidious bacteria | Provides hemin and other essential nutrients from blood. |
| Selective Media (e.g., MacConkey, CNA) [105] [17] | Isolation of specific pathogens from mixed samples | Contains inhibitors (antibiotics, chemicals) that suppress commensal flora. |
| Density Medium (e.g., Percoll) [44] | Bacterial up-concentration via centrifugation | Creates a cushion to reduce pellet compression and improve recovery. |
| MALDI-TOF MS Targets [103] | Pathogen identification by protein mass fingerprinting | Steel plates for spotting bacterial samples for mass spectrometry analysis. |
| dPCR/QPCR Reagents [104] | Absolute quantification of bacterial load | Includes master mixes, primers, and probes for specific molecular targets. |
Validating culture purity and accurately identifying pathogens remain cornerstones of credible bacteriological research. The foundational technique of streak plating and morphological assessment must now be integrated with advanced tools like chromogenic agars, MALDI-TOF MS, and precise molecular quantification methods. Furthermore, operating within a structured quality framework, including proper equipment validation, ensures that research data is not only scientifically sound but also compliant with regulatory standards. This multi-faceted approach, leveraging both classical and modern methodologies, provides the rigor necessary for successful drug development and the advancement of public health.
Colonial Morphology and Biochemical Profiling for Identification
Within the framework of foundational protocols for culturing bacteria, the ability to accurately identify microbial agents is paramount for research, diagnostics, and therapeutic development. Colonial morphology and biochemical profiling represent cornerstone methodologies in this identification pipeline. These phenotypic approaches provide the first critical data points for characterizing bacterial isolates, guiding subsequent genetic analysis, and informing initial therapeutic decisions [73] [54]. Colonial morphology—the visual assessment of a bacterial colony's physical characteristics on a solid medium—serves as a rapid, initial screening tool. Biochemical profiling builds upon this by interrogating the metabolic capabilities of a bacterium, creating a unique fingerprint for species-level identification [73]. Together, these methods form an indispensable toolkit for researchers and drug development professionals, enabling the systematic classification of bacterial isolates in both routine and investigative microbiology.
Colonial Morphology Characterization
Fundamental Colony Morphotypes
The observation of colony morphology is a fundamental technique for describing and differentiating microorganisms. A colony, theoretically derived from a single cell, develops characteristic physical features when well-isolated on a solid medium [54]. These features provide initial clues about the bacterial species and can even indicate phenotypic variations, such as those associated with increased virulence or antimicrobial resistance [108]. Standard observation is performed with the naked eye or using dissecting microscopes to assess a standard set of characteristics.
Table 1: Key Characteristics of Bacterial Colony Morphology
| Characteristic | Description | Examples |
|---|---|---|
| Form | The shape of the colony in elevation and margin. | Circular, irregular, filamentous, rhizoid [54]. |
| Size | The diameter of the colony, often measured after a standard incubation time. | Punctiform (very small), small, large. |
| Elevation | The cross-sectional shape of the colony. | Flat, raised, convex, umbonate. |
| Margin | The edge or boundary of the colony. | Entire (smooth), undulate, filiform, curled. |
| Surface | The texture and appearance of the colony's top. | Smooth, rough, wrinkled, glistening, dull. |
| Color/Pigmentation | The intrinsic color of the colony. | White, yellow, red, purple; opaque, translucent. |
| Consistency | The physical texture when touched with an inoculating loop. | Butyrous (butter-like), friable, viscous [54]. |
Experimental Factors Influencing Morphology
Interpreting colonial morphology requires strict adherence to standardized experimental conditions, as colony morphogenesis is highly sensitive to environmental variables. A systematic study demonstrated that factors such as colony growth time, plate colony density, culture medium, and the strain's genetic background significantly influence colony traits [108]. For instance, colony growth time and the composition of the culture medium were identified as the variables with the highest impact on colony differentiation. Characterizing morphology before 45 hours of incubation was considered inadequate for reliable profiling. Furthermore, non-selective media like Tryptic Soy Agar (TSA) were found to provide greater colony diversity compared to selective media [108]. These findings underscore the necessity of performing comparisons between colony morphologies under equivalent conditions to avoid misinterpretation in both microbial diagnostics and biomedical research.
Advanced Morphological Analysis
Modern approaches to morphological profiling leverage computational tools for high-throughput, quantitative analysis. Software such as the Tool for Analysis of the Morphology of Microbial Colonies (TAMMiCol) has been developed to automatically and efficiently convert standard colony images into binary formats for quantification [109]. This process, which can take as little as 20 seconds per image compared to up to 15 minutes for manual processing, enables the analysis of large datasets—such as those from genome-wide mutant libraries. TAMMiCol computes specialized spatial indices, including the area, perimeter, and fractal dimension of colonies, providing robust statistics for quantifying complex growth patterns like the filamentous growth of yeasts [109]. The application of such tools moves colonial morphology from a subjective art to a reproducible, data-driven science.
Biochemical Profiling for Identification
Core Biochemical Tests
Biochemical profiling investigates the enzymatic and metabolic capabilities of a bacterium, which are often unique at the species level. This profiling typically involves culturing the isolate in various substrates and indicators to detect specific metabolic end products. The results generate a phenotypic profile that is compared against databases for identification. These tests are especially valuable following colonial morphology observation to narrow down and confirm a bacterium's identity.
Table 2: Common Biochemical Tests for Bacterial Identification
| Test Name | Principle | Application & Interpretation |
|---|---|---|
| Catalase Test | Detects the production of catalase enzyme that breaks down hydrogen peroxide into water and oxygen. | Differentiates Staphylococcus (catalase-positive) from Streptococcus and Enterococcus (catalase-negative) [73]. |
| Oxidase Test | Identifies the presence of cytochrome c oxidase. | Helps distinguish between certain Gram-negative rods (e.g., Pseudomonas is oxidase-positive). |
| Carbohydrate Fermentation | Assesses acid and/or gas production from specific carbohydrates (e.g., in Durham tubes). | Differentiates organisms like E. coli (gas-positive) from Shigella (gas-negative) [73]. |
| Triple Sugar Iron (TSI) Agar | Detects fermentation of glucose, lactose, and sucrose, and production of hydrogen sulfide (H₂S). | Provides metabolic characterization for Enterobacteriaceae [73]. |
| Litmus Milk Test | Evaluates various reactions in milk, including acid production and coagulation. | Pink coagulation indicates acid production and casein precipitation, as used in characterizing Lactobacillus [110]. |
| Use of Selective/Differential Media | Media contain indicators and selective agents to inhibit some bacteria while differentiating others. | MacConkey agar selects for Gram-negative bacteria and differentiates lactose fermenters (e.g., E. coli) from non-fermenters (e.g., Salmonella) [73]. |
Protocol: Biochemical Profiling of a Bacterial Isolate
The following protocol outlines a generalized workflow for the biochemical characterization of a bacterial isolate, integrating tests relevant to both Gram-positive and Gram-negative bacteria.
Materials:
- Pure culture of the bacterial isolate.
- Tryptic Soy Agar (TSA) plates or other non-selective media.
- Test media: Catalase reagent (3% H₂O₂), Oxidase test strips, TSI slants, MacConkey Agar plates, MRS broth for lactobacilli, etc.
- Sterile inoculating loops, sticks, and slides.
- Incubator set at appropriate temperature (e.g., 37°C).
Procedure:
- Subculture for Purity: Using a sterile loop, streak the isolate onto a TSA plate to obtain well-isolated single colonies. Incubate for 18-24 hours.
- Gram Staining: Perform a Gram stain on cells from a single colony to determine the Gram reaction and cell morphology. This is critical for selecting the appropriate subsequent biochemical tests [73].
- Inoculation of Biochemical Media:
- Catalase Test: Transfer a small amount of a colony to a clean glass slide and add a drop of 3% H₂O₂. Immediate effervescence indicates a positive result.
- Oxidase Test: Smear a colony directly onto a filter paper saturated with oxidase reagent. A color change to dark blue/purple within 10-30 seconds indicates a positive result.
- TSI Agar Slant: Stab the butt and streak the slant of a TSI agar tube with a single colony. Incubate and observe for color change (acid production) in the butt and slant, gas production (cracking of the medium), and H₂S production (black precipitate).
- Selective Plating: Streak the isolate onto a MacConkey agar plate to determine if it is a Gram-negative lactose fermenter (pink colonies) or non-fermenter (colorless colonies).
- Incubation and Reading: Incubate all inoculated media at the optimal temperature for 18-24 hours, unless specified otherwise. Record all observations and compare against standard interpretations.
Integrated Workflow for Bacterial Identification
The following diagram illustrates the logical workflow integrating colonial morphology and biochemical profiling within a broader bacterial identification pipeline, leading to modern analytical techniques.
Figure 1. Integrated bacterial identification workflow.
The Scientist's Toolkit: Research Reagent Solutions
The following table details key reagents, their functions, and considerations for use in experiments involving colonial morphology and biochemical profiling.
Table 3: Essential Research Reagents for Morphological and Biochemical Studies
| Reagent/Medium | Function/Application | Key Considerations |
|---|---|---|
| Tryptic Soy Agar (TSA) | A general-purpose, non-selective medium for promoting growth of a wide range of bacteria and observing baseline colonial morphology. | Recommended for initial isolation and morphological profiling as it provides more colony diversity than selective media [108]. |
| MacConkey Agar | A selective and differential medium for the isolation and differentiation of Gram-negative enteric bacteria based on lactose fermentation. | Lactose fermenters form pink-red colonies, while non-fermenters form colorless or transparent colonies [73]. |
| Triple Sugar Iron (TSI) Agar | A differential medium used to distinguish Gram-negative bacilli based on carbohydrate fermentation and H₂S production. | Inoculation requires both stabbing the butt and streaking the slant. Color change indicates acid production; blackening indicates H₂S [73]. |
| MRS Broth/Agar | A selective medium for the growth and isolation of Lactobacillus and other lactic acid bacteria. | Often supplemented with bromocresol purple as a pH indicator; yellow-pigmented colonies indicate acid production [110]. |
| Antibiotics (e.g., Ampicillin, Kanamycin) | Selective agents added to culture media to maintain plasmid selection and prevent contamination of non-resistant bacteria. | Working concentrations are critical (e.g., 100 µg/mL for ampicillin in E. coli). Add to medium immediately before use for optimal performance [111]. |
| Bromocresol Purple | A pH indicator used in culture media. Changes from purple to yellow in response to acid production by fermenting bacteria. | Used in MRS agar to rapidly identify acid-producing Lactobacillus colonies [110]. |
Colonial morphology and biochemical profiling remain foundational pillars in the identification and characterization of bacteria. Despite the advent of rapid genomic and spectrometric technologies, these classical methods provide the essential phenotypic context that genotypic data alone cannot fully capture. The robustness of these protocols is evidenced by their enduring application in diverse fields, from clinical diagnostics—where they guide initial, life-saving therapeutic decisions—to drug discovery and comparative genomics, where they help delineate novel species and functional traits [73] [110]. A thorough understanding of these core techniques, including their standardized execution and interpretation, is therefore indispensable for any researcher or professional engaged in microbiological inquiry. Mastery of this foundational knowledge ensures not only accurate microbial identification but also the generation of reliable, reproducible data that can be seamlessly integrated with downstream modern analytical platforms.
The 16S ribosomal RNA (rRNA) gene has emerged as a cornerstone of modern microbial identification and classification, providing an essential molecular tool that complements traditional culturing methods. This approximately 1.5 kb gene contains nine hypervariable regions (V1-V9) flanked by highly conserved sequences, creating a genetic signature that enables precise taxonomic classification of bacteria. [112] While conventional culture-based techniques remain fundamental to microbiology, they possess significant limitations, including the inability to culture many microorganisms and prolonged turnaround times. 16S rRNA sequencing has revolutionized bacterial research by enabling culture-independent identification, which is particularly valuable for studying complex polymicrobial communities and non-culturable organisms like Borrelia species. [113]
The integration of 16S rRNA sequencing with foundational culturing protocols has created a powerful synergistic relationship in microbiological research. Molecular diagnostics provides precise genetic identification, while culturing remains essential for functional studies, antibiotic susceptibility testing, and validating genomic findings. This complementary approach has advanced our understanding of microbial pathogenesis, host-microbe interactions, and ecosystem dynamics. As sequencing technologies have evolved from Sanger sequencing to next-generation platforms, the resolution, speed, and applications of 16S rRNA analysis have expanded dramatically, making it an indispensable tool in both basic research and clinical diagnostics. [113] [114]
Technological Platforms and Performance Comparison
The landscape of 16S rRNA sequencing technologies has diversified significantly, with multiple platforms now available to researchers, each offering distinct advantages and limitations. Understanding these technological differences is crucial for selecting the appropriate platform for specific research objectives in bacterial culturing studies.
Table 1: Comparison of Major 16S rRNA Sequencing Platforms
| Platform | Read Length | Target Regions | Error Rate | Key Strengths | Ideal Applications |
|---|---|---|---|---|---|
| Illumina | ~300 bp | V3-V4 (partial gene) | <0.1% [114] | High accuracy, excellent for genus-level classification [114] [115] | Large-scale microbial surveys, diversity studies [114] |
| Oxford Nanopore (ONT) | ~1,500 bp (full-length) | V1-V9 (full gene) | 5-15% (improving with new chemistries) [114] [115] | Species-level resolution, real-time analysis [112] [114] | Clinical diagnostics, pathogen detection, field applications [113] [114] |
| PacBio HiFi | ~1,450 bp (full-length) | V1-V9 (full gene) | ~Q27 (very high fidelity) [115] | High accuracy long reads, excellent species resolution [115] | Reference genomes, complex microbiome studies [115] |
| Sanger Sequencing | ~500-900 bp | Single segments | Very low | Low cost, reliable for pure cultures [113] | Monobacterial identification, validation studies [113] |
Recent comparative studies reveal important performance differences across platforms. A 2025 analysis of respiratory microbiome samples demonstrated that Illumina captured greater species richness, while ONT provided improved resolution for dominant bacterial species. [114] Another 2025 study comparing all three major platforms for gut microbiota characterization found that ONT achieved the highest species-level classification (76%), followed by PacBio (63%), with Illumina at 47%. [115] However, the same study noted that a significant portion of species-level classifications across all platforms were labeled as "uncultured_bacterium," highlighting the ongoing challenge of database limitations.
The choice of platform significantly influences experimental outcomes and must align with research goals. For broad microbial surveys requiring high accuracy, Illumina remains preferred, while studies demanding species-level resolution benefit from long-read technologies like ONT or PacBio. [114] [115] The detection of polymicrobial samples is particularly enhanced by long-read technologies; one clinical study found ONT detected 13 polymicrobial samples compared to only 5 detected by Sanger sequencing. [113]
Experimental Protocols and Methodologies
Sample Preparation and DNA Extraction
Proper sample preparation is fundamental to successful 16S rRNA sequencing, particularly when working with complex samples that may contain both culturable and non-culturable organisms. The extraction method must be tailored to the sample type to ensure high-quality DNA while minimizing bias:
- Environmental water samples: ZymoBIOMICS DNA Miniprep Kit recommended [112]
- Soil samples: QIAGEN DNeasy PowerMax Soil Kit recommended [112]
- Stool samples: QIAmp PowerFecal DNA Kit or QIAGEN Genomic-tip 20/G for balanced host-microbiome DNA [112]
- Clinical samples (tissue/fluid): Commercial kits like Micro-Dx with SelectNA plus system, incorporating steps to remove host DNA contamination [113]
Quality assessment of extracted DNA should include spectrophotometric measurement (Nanodrop) and fluorometric quantification (Qubit) to ensure adequate concentration and purity. [114] For clinical samples with previous antibiotic exposure or negative cultures, 16S rRNA PCR is often performed as a screening step before sequencing. [113]
Library Preparation and Sequencing
Library preparation strategies vary significantly by platform but share common principles:
For Illumina Sequencing:
- Target the V3-V4 hypervariable regions using specific primers (e.g., 341F/805R) [114]
- Implement a two-step amplification process: initial target amplification followed by index attachment for multiplexing [114]
- Use 20-25 amplification cycles to minimize PCR bias [114]
- Employ standardized protocols such as the 16S Metagenomic Sequencing Library Preparation (Illumina) [115]
For Oxford Nanopore Full-Length 16S Sequencing:
- Use the 16S Barcoding Kit (SQK-16S114.24) with primers 27F/1492R targeting the full V1-V9 regions [112] [115]
- Perform PCR amplification (25-40 cycles) with barcoded primers [115]
- Attach sequencing adapters to amplified products [112]
- Multiplex up to 24 samples per flow cell to reduce costs [112]
- Sequence on MinION flow cells with high-accuracy basecalling for 24-72 hours, depending on sample complexity [112]
For PacBio Full-Length 16S Sequencing:
- Amplify full-length 16S rRNA gene with barcoded universal primers 27F/1492R [115]
- Use KAPA HiFi Hot Start DNA Polymerase over 27 cycles for high-fidelity amplification [115]
- Prepare library with SMRTbell Express Template Prep Kit 2.0 [115]
- Sequence on Sequel II system with circular consensus sequencing (CCS) to generate HiFi reads [115]
Bioinformatic Analysis Pipelines
Bioinformatic processing of 16S rRNA sequencing data requires platform-specific approaches to account for different error profiles and read characteristics:
Illumina Data Processing:
- Quality control with FastQC and adapter trimming with Cutadapt [114]
- Denoising with DADA2 for error correction and Amplicon Sequence Variant (ASV) generation [114] [115]
- Taxonomic classification using reference databases (SILVA, GreenGenes) [116] [114]
- Diversity analysis with phyloseq and vegan packages in R [114] [115]
Oxford Nanopore Data Processing:
- Basecalling and demultiplexing with Dorado or MinKNOW [114]
- Quality filtering and taxonomic classification with EPI2ME wf-16S workflow [113] [112]
- Alternatively, custom pipelines like Spaghetti for OTU-based clustering [115]
- Database alignment using k-mer alignment (KMA) tools against NCBI RefSeq and SILVA [113]
PacBio Data Processing:
- Generation of Circular Consensus Sequences (CCS) for high-fidelity reads [115]
- Demultiplexing and quality filtering [115]
- Denoising with DADA2 for ASV generation [115]
- Taxonomic classification with customized SILVA database classifiers [115]
For all platforms, downstream analysis typically includes alpha and beta diversity metrics, differential abundance testing, and visualization using tools like phyloseq, ANCOM-BC, and ggplot2 in R. [114] [115]
Research Reagent Solutions and Essential Materials
Table 2: Essential Research Reagents and Materials for 16S rRNA Sequencing
| Category | Specific Products/Kits | Application and Function |
|---|---|---|
| DNA Extraction Kits | ZymoBIOMICS DNA Miniprep Kit [112], QIAGEN DNeasy PowerMax Soil Kit [112], QIAmp PowerFecal DNA Kit [112], Norgen Biotek Sputum DNA Isolation Kit [114] | Sample-specific optimized DNA extraction and purification |
| Library Preparation | QIAseq 16S/ITS Region Panel (Illumina) [114], ONT 16S Barcoding Kit 24 (SQK-16S114.24) [112] [114], PacBio SMRTbell Express Template Prep Kit 2.0 [115] | Target amplification, barcoding, and library construction for specific platforms |
| Quality Control | Nanodrop spectrophotometer [117] [114], Qubit fluorometer [114], Bioanalyzer/Fragment Analyzer [115] | Assessment of DNA quality, concentration, and library integrity |
| PCR Components | KAPA HiFi Hot Start DNA Polymerase [115], Nextera XT Index Kit [115], Custom 16S primers (341F/805R, 27F/1492R) [114] [115] | High-fidelity amplification of target regions with minimal bias |
| Reference Materials | Vitroids, LENTICULE discs [118] | Certified microbial standards for quality control and method validation |
| Bioinformatics Tools | DADA2 [114] [115], EPI2ME wf-16S [112], QIIME2 [115], SILVA database [114] [115], GreenGenes database [116] | Data processing, taxonomic classification, and diversity analysis |
The selection of appropriate reagents and reference materials is critical for obtaining reliable, reproducible results. Certified reference materials like Vitroids and LENTICULE discs provide standardized microbial controls that are stable for 16-24 months and contain certified colony-forming unit (CFU) counts, enabling quality control across experiments and laboratories. [118] These materials are particularly valuable for validating method performance in pharmaceutical, food, water, and environmental microbiology applications.
Advanced Analytical Frameworks
Beyond basic taxonomic classification, advanced analytical frameworks have been developed to extract deeper biological insights from 16S rRNA sequencing data. The Microbial Search Engine (MSE) represents one such innovation, enabling rapid comparison of microbial community structures against large reference databases. [116] This approach calculates a Microbiome Novelty Score (MNS) that quantifies the compositional uniqueness of a sample compared to reference populations, facilitating disease detection without reliance on specific biomarker microorganisms. [116]
In one application for dental caries diagnosis, researchers built a reference database from 20,540 oral microbiome samples and achieved an area under curve (AUC) of 0.67 for caries detection using MNS. [116] After controlling for host factors like age, sampling location, and caries status, the optimized model performance improved significantly, with AUC reaching 0.87 for high-caries risk children. [116] This demonstrates how advanced computational approaches can enhance the diagnostic utility of 16S rRNA sequencing data.
Integration of 16S rRNA data with other omics technologies represents another powerful approach. Combined 16S sequencing and metagenomic binning has revealed 689 novel species in epiphytic microbial communities of macroalgae, uncovering core functional communities and their potential contributions to biosynthetic pathways. [119] Similarly, proteomic analysis of bacterial outer membrane vesicles (OMVs) has provided insights into functional heterogeneity within Gram-negative bacteria, revealing subpopulations with distinct roles in energy metabolism, substance transport, and ribosomal synthesis. [120]
Applications in Clinical and Research Settings
The implementation of 16S rRNA sequencing has generated significant advances across clinical diagnostics and fundamental research. In clinical microbiology, studies have demonstrated a higher positivity rate for pathogen identification using ONT sequencing (72%) compared to Sanger sequencing (59%), with particularly improved detection in polymicrobial samples. [113] The technology has proven valuable for identifying fastidious pathogens in culture-negative samples, as exemplified by the detection of Borrelia bissettiae in synovial fluid—a finding missed by Sanger sequencing. [113]
In research applications, full-length 16S rRNA sequencing has enabled more precise characterization of complex microbial ecosystems. Studies of the respiratory microbiome have revealed how dysbiosis contributes to diseases like ventilator-associated pneumonia, with platform-specific biases noted: ONT may overrepresent certain taxa (e.g., Enterococcus, Klebsiella) while underrepresenting others (e.g., Prevotella, Bacteroides). [114] These findings highlight the importance of understanding technological limitations when interpreting ecological data.
The growing significance of this field is reflected in market analyses forecasting substantial growth in metagenomics applications, driven by new diagnostic approaches, aging populations, and advancements in biomarkers. [121] Metagenomic assays are increasingly recognized for their potential to identify causes of chronic infections and elucidate microbiome secrets, fundamentally changing approaches to medical treatment and environmental research. [121]
16S rRNA sequencing represents a transformative technology that has expanded our understanding of microbial diversity, evolution, and function. The complementary use of multiple sequencing platforms—leveraging the high accuracy of short-read technologies like Illumina with the superior resolution of long-read platforms like Oxford Nanopore and PacBio—provides researchers with powerful tools to address diverse biological questions. As reference databases expand and bioinformatic methods mature, the taxonomic and functional insights derived from 16S rRNA sequencing will continue to deepen.
Future advancements will likely focus on improving real-time analysis capabilities, enhancing species-level resolution through complete 16S rRNA gene sequencing, and reducing costs to enable routine clinical application. The integration of 16S rRNA data with other omics approaches—metagenomics, metatranscriptomics, and proteomics—will provide more comprehensive understanding of microbial community dynamics and function. For bacterial culturing research, the synergy between classical cultivation methods and modern molecular diagnostics will continue to drive discoveries, enabling researchers to link genomic potential with phenotypic expression and ecological function across diverse environments and clinical contexts.
The identification of pathogenic microorganisms is a cornerstone of clinical microbiology, epidemiology, and drug development. For over a century, culture-based methods have served as the fundamental protocol for bacterial isolation and propagation. However, the advent of next-generation sequencing (NGS) has introduced a paradigm shift in diagnostic capabilities. This technical guide provides an in-depth comparative analysis of these two methodologies, evaluating their principles, performance, and applications within modern research frameworks. Quantitative data synthesized from recent clinical studies demonstrate the superior detection sensitivity of NGS (95%) compared to traditional culture (60%) for bacterial and fungal infections. The document further details standardized experimental protocols for both techniques and discusses the critical considerations for their implementation, underscoring NGS's transformative potential while acknowledging the enduring role of culture for phenotypic characterization.
Bacterial culture has long been the foundation of microbiological research and clinical diagnosis. This method relies on the propagation of microorganisms in nutrient-rich media, allowing for isolation, phenotypic analysis, and antibiotic susceptibility testing [21]. Despite its established role as a historical "gold standard," culture is limited by its dependence on the ability of pathogens to grow under laboratory conditions, which can be time-consuming and often fails for fastidious or non-culturable organisms [122] [123].
In contrast, next-generation sequencing (NGS) represents a culture-independent approach that identifies pathogens by directly determining their genetic sequences. This high-throughput technology can generate massive volumes of sequence data, providing unbiased, broad-spectrum detection of bacteria, fungi, viruses, and parasites from a single sample [124] [123]. The integration of NGS into research and clinical workflows is redefining bacterial species classification and enhancing the precision of infectious disease diagnosis [125].
Principles and Comparative Performance
This section outlines the core principles of each technology and presents a quantitative comparison of their diagnostic performance based on recent clinical studies.
Core Principles and Workflows
The fundamental workflows for culture and NGS differ significantly in their approach and execution. The diagram below illustrates the key steps involved in each process.
Quantitative Performance Comparison
Recent clinical studies directly comparing culture and NGS reveal significant differences in detection capabilities. The following table synthesizes key performance metrics from research involving patients with bacterial, fungal, and central nervous system infections.
Table 1: Comparative Diagnostic Performance of Culture vs. NGS
| Performance Metric | Culture Method | NGS Method | Study Context |
|---|---|---|---|
| Detection Rate | 60.0% (12/20 patients) [122] | 95.0% (19/20 patients) [122] | Bacterial and fungal infections [122] |
| Detection Rate | 59.1% [126] | 86.6% [126] | Neurosurgical CNS infections [126] |
| Time to Result | 22.6 ± 9.4 hours (after growth) [126] | 16.8 ± 2.4 hours [126] | Clinical application [126] |
| Polymicrobial Detection | Limited, often misses mixed infections [127] | Excellent; 98% of UTI samples showed polymicrobial infections [127] | Urinary Tract Infections (UTIs) [127] |
| Pathogen Scope | Culturable bacteria and fungi only | Bacteria, fungi, viruses, parasites [122] [123] | Clinical samples [122] |
| Impact of Antibiotics | Significant reduction in yield [126] | Minimal impact on detection rate [126] | Patients on empirical therapy [126] |
The data consistently show that NGS offers a substantially higher detection rate across different infection types. A pivotal study on bacterial and fungal infections found a statistically significant difference (P=0.008) in favor of NGS [122]. Furthermore, NGS uniquely detects viral pathogens, which are entirely missed by standard culture methods [122] [128]. Its ability to identify polymicrobial infections and its resilience to prior antibiotic administration make it a powerful tool for complex clinical cases [126] [127].
Detailed Experimental Protocols
Standard Protocol for Liquid Bacterial Culture
Culture-based methods remain foundational for obtaining viable isolates for further research. The following is a standard protocol for inoculating a liquid bacterial culture, essential for biomass expansion [19] [129].
Methodology:
- Media Preparation: Prepare liquid Luria-Bertani (LB) broth by dissolving 10 g Tryptone, 5 g Yeast Extract, and 10 g NaCl in 1 L of deionized water. Loosely cap the container and autoclave to sterilize.
- Antibiotic Supplementation: Once the medium has cooled, add the appropriate antibiotic to the required concentration (e.g., 100 µg/mL ampicillin). Aseptically aliquot the media into sterile culture tubes or flasks.
- Inoculation: Using a sterile pipette tip or inoculation loop, select a single, isolated bacterial colony from a freshly streaked agar plate.
- Incubation: Drop the tip or swirl the loop in the liquid LB medium with antibiotic. Loosely cover the culture with a sterile cap or foil to allow aeration and incubate at 37°C for 12-18 hours in a shaking incubator (250-300 rpm).
- Growth Verification: After incubation, check for turbidity (cloudiness), which indicates bacterial growth. For quantitative measures, the optical density at 600 nm (OD600) can be determined.
Troubleshooting: Lack of growth may require longer incubation, verification of antibiotic selection, or use of fresh starter plates [19].
Metagenomic NGS (mNGS) for Pathogen Detection
Metagenomic NGS allows for the comprehensive detection of all nucleic acids in a sample without the need for culture. The protocol below is adapted from clinical studies [122] [126].
Methodology:
- Sample Processing and DNA Extraction:
- Centrifuge 1 mL of clinical sample (e.g., cerebrospinal fluid) at 12,000 x g for 5 minutes to pellet microbial cells [126].
- Treat the pellet with enzymes like Benzonase to degrade host nucleic acids and reduce human background [126].
- Extract total DNA from the precipitate using a commercial kit (e.g., TIANamp Micro DNA Kit) according to the manufacturer's guidebook [122].
- Library Construction:
- Fragment the extracted DNA by mechanical or enzymatic means.
- Perform end-repair, adapter ligation, and PCR amplification to create sequencing-ready libraries.
- Use a system like Agilent 2100 for quality control of the final DNA libraries [122].
- Sequencing:
- Bioinformatic Analysis:
- Quality Control: Remove low-quality reads and short reads (e.g., <35 bp) [122].
- Host Depletion: Map sequences to the human reference genome (hg19) and subtract aligning reads [122].
- Pathogen Identification: Align the remaining high-quality non-host reads against comprehensive microbial genome databases (including viruses, bacteria, fungi, and parasites) to identify the present pathogens [122] [124].
The Scientist's Toolkit: Essential Research Reagents
Successful execution of the aforementioned protocols requires specific reagents and materials. The following table lists key solutions and their functions.
Table 2: Essential Reagents for Microbial Culture and NGS
| Reagent/Material | Function | Application |
|---|---|---|
| LB Broth (Luria-Bertani) | A nutrient-rich medium providing peptides, vitamins, and ions for robust bacterial growth. | Bacterial Culture [19] |
| Selective Antibiotics | Selective pressure to ensure growth only of plasmid-carrying or resistant bacteria of interest. | Bacterial Culture [19] |
| Agar | A polysaccharide used as a solidifying agent for preparing solid media to isolate single colonies. | Bacterial Culture [129] |
| DNA Extraction Kit | For lysing microbial cells and purifying total DNA, free of contaminants that inhibit downstream reactions. | NGS [122] |
| Benzonase | An endonuclease that degrades host (e.g., human) DNA and RNA to increase the relative proportion of microbial sequences. | NGS [126] |
| Library Prep Kit | Contains enzymes and buffers for DNA fragmentation, end-repair, adapter ligation, and index PCR. | NGS [122] [124] |
| Microbial Genome Databases | Curated reference sequences for accurate classification and identification of sequenced reads. | NGS Bioinformatics [122] |
Discussion and Integration in Research
Synergistic Application and Future Outlook
The choice between culture and NGS is not merely binary but should be guided by the research objectives. The following diagram outlines a decision framework for deploying these technologies synergistically.
Culture methods are indispensable when a viable isolate is required. This includes scenarios such as conducting antibiotic susceptibility testing (AST), functional phenotypic studies, or producing antigens. Furthermore, culture remains a cost-effective option for routine identification of readily cultivable pathogens [21].
NGS technologies are superior for hypothesis-free, broad-spectrum pathogen detection. They are the method of choice for diagnosing complex polymicrobial infections, identifying fastidious or non-culturable organisms, and detecting viruses. Beyond identification, NGS provides unparalleled resolution for genomic epidemiology (e.g., outbreak tracing through phylogenetic clustering) and can predict antimicrobial resistance genes from sequence data, informing public health responses [124] [125].
An integrated approach, using NGS for rapid, comprehensive pathogen identification followed by targeted culture for phenotypic confirmation and antimicrobial testing, represents the most powerful strategy for modern microbiological research and complex diagnostic challenges.
Both culture and next-generation sequencing are foundational protocols with distinct and complementary roles in bacteriological research. Culture provides the living biological material essential for phenotypic validation and functional studies, while NGS offers a powerful, unbiased lens for genomic-scale exploration and diagnosis. The continued evolution and integration of NGS, including the maturation of third-generation long-read sequencing, will further refine our understanding of microbial diversity and pathogenesis. For researchers and drug development professionals, a nuanced understanding of both methodologies—their strengths, limitations, and optimal applications—is critical for designing robust experiments, accelerating discovery, and effectively combating infectious diseases.
The Indispensable Role of Culture in Antibiotic Susceptibility Testing
Antibiotic susceptibility testing (AST) stands as a cornerstone of modern clinical microbiology and infectious disease management. Despite advancements in genotypic methods, phenotypic AST, rooted in microbial culture, remains the gold standard for guiding effective antibiotic therapy. This whitepaper delineates the indispensable role of culture-based methodologies, detailing the core protocols of broth microdilution and agar disk diffusion, the critical interpretation of minimum inhibitory concentration (MIC) data, and the integration of these phenotypic results with emerging genomic techniques. Within the broader thesis of foundational bacteriology protocols, this guide underscores culture as an irreplaceable practice for surveilling antimicrobial resistance (AMR), a global threat causing approximately 1.3 million deaths annually [130] [131].
The development of antimicrobial resistance (AMR) represents one of the most urgent threats to global public health, prompting coordinated surveillance efforts by organizations worldwide [131]. The primary tool for monitoring resistance levels is the minimum inhibitory concentration (MIC) test, a culture-based assay that quantitatively measures an antibiotic's potency against a bacterial isolate [132] [133]. This in vitro method determines the lowest concentration of an antimicrobial agent that inhibits visible bacterial growth [133].
While whole genome sequencing (WGS) offers a powerful approach for identifying known resistance genes and can sometimes predict phenotypic resistance, its predictive power is incomplete for many bacterial species [131]. Phenotypic culture methods remain essential for verifying that resistance levels have not significantly changed and for providing the critical data against which genomic findings are validated [131]. Thus, culture-based AST is not a legacy technique but a foundational protocol that continues to synergize with modern genomics to provide a comprehensive picture of bacterial resistance.
Core Quantitative Methodologies and Data Interpretation
The Minimum Inhibitory Concentration (MIC)
The MIC is a quantitative value, typically reported in micrograms per milliliter (μg/mL), determined by exposing a standardized bacterial inoculum to a series of doubling dilutions of an antimicrobial agent [131] [133]. The core methodologies for its determination are outlined in Table 1.
Table 1: Core Methodologies for Culture-Based AST
| Methodology | Principle | Output | Key Features |
|---|---|---|---|
| Broth Microdilution [133] | Antibiotics are diluted in a liquid growth medium in a multi-well plate; the lowest concentration preventing growth is the MIC. | Quantitative (MIC value) | - High-throughput- Amenable to automation- Provides precise MIC |
| Agar Disk Diffusion (Kirby-Bauer) [133] | Paper disks impregnated with antibiotics are placed on an agar plate seeded with bacteria; the zone of inhibition is measured after incubation. | Qualitative (S/I/R based on zone diameter) | - Low cost, technically simple- Does not yield a numeric MIC- Zone diameter correlates with MIC |
| Gradient Diffusion (E-test) [131] | A strip with a pre-formed, continuous antibiotic gradient is placed on an agar lawn; the MIC is read where the ellipse of inhibition intersects the strip. | Quantitative (MIC value) | - Useful for fastidious organisms- Flexible for individual tests |
A critical characteristic of MIC data is that it is interval-censored. The reported MIC value represents a range on a log₂ scale; the true MIC lies between the reported concentration and the next lowest dilution tested. For example, a reported MIC of 32 μg/mL means the true MIC falls between 16 μg/mL and 32 μg/mL. Data can also be left-censored (growth inhibition at all dilutions, reported as ≤J μg/mL) or right-censored (growth at all dilutions, reported as >J μg/mL) [131].
From MIC to Clinical Interpretation: Breakpoints and Cutoffs
The raw MIC value is interpreted using standardized criteria, or "breakpoints," to categorize the bacterium as Susceptible (S), Intermediate (I), or Resistant (R) [133]. These breakpoints are established by organizations like the Clinical and Laboratory Standards Institute (CLSI) and the U.S. Food and Drug Administration (FDA) [134] [131] [133].
Table 2: AST Interpretive Categories and Standards for Selected Antibiotics (NARMS 2024)
| Antibiotic Class | Antibiotic | Concentration Range (μg/mL) | MIC Interpretive Standard (μg/mL) | Resistance Breakpoint (μg/mL) | ||
|---|---|---|---|---|---|---|
| Aminoglycosides | Gentamicin | 0.25–16 | ≤2 | 4 | ≥8 | ≥8 [132] |
| β-lactam/β-lactamase inhibitor | Amoxicillin-clavulanic acid | 1/0.5–32/16 | ≤8/4 | 16/8 | ≥32/16 | ≥32/16 [132] |
| Cephems (3rd Gen.) | Ceftriaxone | 0.25–64 | ≤1 | 2 | ≥4 | ≥4 [132] |
| Penicillins | Ampicillin | 1–32 | ≤8 | 16 | ≥32 | ≥32 [132] |
| Quinolones | Ciprofloxacin | 0.015–4 | ≤0.06 | 0.12–0.5 | ≥1 | ≥1 [132] |
| Tetracyclines | Tetracycline | 4–32 | ≤4 | 8 | ≥16 | ≥16 [132] |
Another critical interpretive value is the Epidemiological Cutoff Value (ECOFF). Unlike clinical breakpoints, which predict treatment success, the ECOFF distinguishes wild-type (WT) bacteria (lacking acquired resistance mechanisms) from non-wild-type (non-WT) bacteria (possessing such mechanisms) [131]. An isolate can be non-WT without being clinically resistant, making the ECOFF a vital tool for resistance surveillance and detecting emerging resistance trends [131].
Essential Experimental Protocols
Standard Broth Microdilution for MIC Determination
This protocol details the steps to perform a manual broth microdilution test, the foundational reference method for AST [133].
Research Reagent Solutions & Essential Materials
| Item | Function/Description |
|---|---|
| Cation-adjusted Mueller-Hinton Broth (CAMHB) | Standardized growth medium for most non-fastidious bacteria. |
| Sterile 96-well microdilution trays | Can be prepared in-house or purchased as pre-panels. |
| Antibiotic stock solutions | Prepared at high concentration (e.g., 5120 μg/mL) in appropriate solvent and stored at -80°C. |
| Biologics incubator | Maintained at 35±2°C for incubation. |
| Saline (0.85%) or Tryptic Soy Broth | For preparing the bacterial inoculum suspension. |
| McFarland Standard (0.5) | Reference for standardizing the turbidity of the bacterial suspension to ~1.5 x 10^8 CFU/mL. |
| Multichannel pipettes | For efficient liquid handling during tray preparation or dilution. |
Methodology:
- Panel Preparation: Prepare a two-fold serial dilution of the antibiotic in CAMHB across the wells of a microdilution tray. The final volume in each well is typically 100 μL. One well serves as a growth control (no antibiotic), and another as a sterility control (no inoculum).
- Inoculum Preparation: Pick 3-5 colonies from an overnight agar plate and suspend them in saline. Adjust the suspension's turbidity to match a 0.5 McFarland standard, yielding a suspension of approximately 1.5 x 10^8 Colony Forming Units (CFU)/mL.
- Inoculation: Further dilute the standardized suspension in broth to achieve a final concentration of approximately 5 x 10^5 CFU/mL in each well of the microdilution tray. Add 100 μL of this diluted inoculum to each test well.
- Incubation: Seal the tray and incubate it at 35±2°C for 16-20 hours under ambient air.
- Reading Results: After incubation, examine each well for visible turbidity. The Minimum Inhibitory Concentration (MIC) is the lowest concentration of antibiotic that completely inhibits visible growth of the organism [133].
Agar Disk Diffusion (Kirby-Bauer Method)
Methodology:
- Inoculum Preparation: Standardize a bacterial suspension to a 0.5 McFarland standard as described above.
- Inoculation: Within 15 minutes of standardization, dip a sterile cotton swab into the suspension and streak it evenly over the entire surface of a Mueller-Hinton agar plate to create a confluent lawn.
- Disk Application: Using sterile forceps or an automated dispenser, apply antibiotic-impregnated paper disks to the surface of the inoculated agar plate. Disks should be evenly spaced and pressed down to ensure full contact.
- Incubation: Invert the plates and incubate at 35±2°C for 16-18 hours.
- Reading Results: After incubation, measure the diameter of each zone of inhibition (including the disk diameter) in millimeters. The zone diameter is then interpreted using CLSI standards to categorize the isolate as Susceptible (S), Intermediate (I), or Resistant (R) [133].
Data Analysis and Workflow Integration
Statistical Considerations for MIC Data Analysis
The interval-censored nature of MIC data necessitates specialized statistical approaches. Simplifying the data into categories (S/I/R) for use in logistic regression is common but can obscure subtle shifts in the MIC distribution, a phenomenon known as "MIC creep" [131]. More sophisticated models that respect the censored data structure are often more powerful for surveillance:
- Cumulative Logistic Regression: Treats the ordered S/I/R categories as an outcome.
- Accelerated Failure Time–Frailty Models: Directly model the interval-censored nature of the MIC values [131].
The choice of model depends on the study's objective, the degree of censoring in the data, and the consistency of testing parameters [131].
The Integrated AST Workflow: From Culture to Clinical Decision
The process of AST is a multi-step workflow that integrates laboratory culture with data management and clinical interpretation. The following diagram illustrates the key stages and decision points.
Synergy with Genotypic and Data Management Tools
Culture-based AST does not exist in a vacuum. Its value is amplified when integrated with other data streams. As shown in the workflow, results are fed into data management systems like WHONET, a free software package used by over 2,300 laboratories globally for the management and analysis of microbiology laboratory data with a focus on AMR surveillance [135]. Furthermore, while culture defines the phenotypic expression of resistance, genotypic methods like Whole Genome Sequencing (WGS) can identify the specific resistance genes (e.g., blaCTX-M, mcr-1, blaNDM) responsible for the observed phenotype [131] [132] [130]. This combined approach provides the most comprehensive understanding of AMR.
The relationship between key AST concepts, from the laboratory measurement to its clinical and research implications, is summarized below.
Within the framework of foundational bacteriology protocols, culture-based antibiotic susceptibility testing remains an indispensable practice. The determination of the Minimum Inhibitory Concentration provides a phenotypic, quantitative measure of bacterial response to antimicrobials that is critical for both patient care and global public health surveillance. While genotypic methods offer powerful complementary information, they have not supplanted the need for robust culture techniques. The continued evolution of AST data analysis, its integration with genomic findings, and its support by specialized software ensure that microbial culture will maintain its central role in the ongoing battle against antimicrobial resistance.
Conclusion
Mastering foundational bacterial culture protocols remains indispensable for biomedical research and clinical diagnostics. While molecular techniques like 16S metagenomics offer powerful alternatives for identifying unculturable or fastidious organisms, traditional culturing provides a live, manipulable resource essential for virulence studies, antibiotic testing, and genome sequencing. The synergy between refined classical methods and cutting-edge molecular tools paves the way for future advancements. For researchers, this entails developing novel axenic media for challenging pathogens, further integrating culture with omics technologies, and standardizing high-throughput culturomics approaches to fully unravel the complexities of microbial life and its impact on human health and disease.
References
- 1. Robert Koch [https://en.wikipedia.org/wiki/Robert_Koch]
- 2. Louis Pasteur: A Legacy Unmasked - PMC [https://pmc.ncbi.nlm.nih.gov/articles/PMC11438523/]
- 3. Koch–Pasteur rivalry [https://en.wikipedia.org/wiki/Koch%E2%80%93Pasteur_rivalry]
- 4. From Anthrax to Tuberculosis – A Journey in Medical Science [https://pmc.ncbi.nlm.nih.gov/articles/PMC11617125/]
- 5. Bacterial culture through selective and non ... [https://pmc.ncbi.nlm.nih.gov/articles/PMC6961714/]
- 6. Microbial testing system (VITEK 2) [https://www.biorender.com/icon/microbial-testing-system-vitek-2-311]
- 7. 微生物生长的六大营养来源及其培养基 [https://lab.jgvogel.cn/c/2022-05-30/1186826.shtml]
- 8. Carbon Source - an overview [https://www.sciencedirect.com/topics/medicine-and-dentistry/carbon-source]
- 9. Carbon Source - (Microbiology) - Vocab, Definition ... [https://fiveable.me/key-terms/microbio/carbon-source]
- 10. Exploring the biochemical landscape of bacterial medium with ... [https://pmc.ncbi.nlm.nih.gov/articles/PMC12378656/]
- 11. Exploring the Landscape of Bacterial Culture Media [https://www.the-scientist.com/exploring-the-landscape-of-bacterial-culture-media-72052]
- 12. 大豆蛋白作为微生物培养氮源的筛选方法及应用 [https://patents.google.com/patent/CN117969862A/zh]
- 13. Carbon components in organic amendments drive nitrogen ... [https://www.frontiersin.org/journals/microbiology/articles/10.3389/fmicb.2025.1588169/full]
- 14. Microbial Growth under Limiting Conditions-Future ... [https://pmc.ncbi.nlm.nih.gov/articles/PMC10383181/]
- 15. “99%难培养”微生物的概念与初步评价:以固氮菌为例 [https://actamicro.ijournals.cn/html/actamicrocn/2021/4/20210412.htm]
- 16. Improved maximum growth rate prediction from microbial ... [https://www.nature.com/articles/s41467-025-59558-9]
- 17. Current and Past Strategies for Bacterial Culture in Clinical ... [https://pmc.ncbi.nlm.nih.gov/articles/PMC4284306/]
- 18. Bacterial culture through selective and non- ... [https://www.sciencedirect.com/science/article/pii/S2052297519301192]
- 19. Protocols Inoculating a Liquid Bacterial Culture [https://www.addgene.org/protocols/inoculate-bacterial-culture/]
- 20. Bacterial cultivation media and antibiotics [https://www.qiagen.com/us/knowledge-and-support/knowledge-hub/bench-guide/plasmid/working-with-plasmids/bacterial-cultivation-media-and-antibiotics]
- 21. Bacteriology Culture Guide [https://www.atcc.org/resources/culture-guides/bacteriology-culture-guide]
- 22. Media Index for BAM [https://www.fda.gov/food/laboratory-methods-food/media-index-bam]
- 23. The Method and Analysis of Some Biochemical Tests ... [https://brieflands.com/journals/chbs/articles/160199]
- 24. 6.3B: Complex and Synthetic Media [https://bio.libretexts.org/Bookshelves/Microbiology/Microbiology_(Boundless)/06%3A_Culturing_Microorganisms/6.03%3A_Culturing_Bacteria/6.3B%3A_Complex_and_Synthetic_Media]
- 25. Complex media - (Microbiology) - Vocab, Definition ... [https://fiveable.me/key-terms/microbio/complex-media]
- 26. What is the difference between complex media and defined ... [https://www.pearson.com/channels/microbiology/asset/ceedd606/what-is-the-difference-between-complex-media-and-defined-media]
- 27. Basics of Culture Media | Thermo Fisher Scientific - US [https://www.thermofisher.com/us/en/home/references/gibco-cell-culture-basics/cell-culture-environment/culture-media.html]
- 28. A comparison of chemically defined and complex media for ... [https://pubmed.ncbi.nlm.nih.gov/6103033/]
- 29. Microbiology and Bacterial Culture Media Market Size to ... [https://www.precedenceresearch.com/microbiology-and-bacterial-culture-media-market]
- 30. 2025 Microbiology And Bacterial Culture Media Industry ... [https://www.openpr.com/news/4171700/2025-microbiology-and-bacterial-culture-media-industry-trends]
- 31. Aseptic Technique: What It Is & What To Know [https://my.clevelandclinic.org/health/treatments/aseptic-technique]
- 32. Aseptic Laboratory Techniques and Safety in Cell Culture [https://www.thermofisher.com/us/en/home/references/gibco-cell-culture-basics/aseptic-technique.html]
- 33. Sterilization (microbiology) [https://en.wikipedia.org/wiki/Sterilization_(microbiology)]
- 34. Aseptic Laboratory Techniques: Plating Methods - PMC [https://pmc.ncbi.nlm.nih.gov/articles/PMC4846335/]
- 35. 6 Powerful Laboratory Sterilization Methods In Microbiology [https://bitesizebio.com/853/5-laboratory-sterilisation-methods/]
- 36. Other Sterilization Methods | Infection Control [https://www.cdc.gov/infection-control/hcp/disinfection-sterilization/other-sterilization-methods.html]
- 37. Aseptic techniques [https://practicalbiology.org/standard-techniques/aseptic-techniques]
- 38. Comprehensive Microbial Control Strategy [https://www.bioprocessintl.com/qa-qc/beyond-traditional-microbiology-testing-developing-a-comprehensive-strategy-for-microbial-control-and-detection]
- 39. Novel method detects microbial contamination in cell cultures [https://news.mit.edu/2025/novel-method-detects-microbial-contamination-smart-0425]
- 40. Aseptic technique [https://www.awri.com.au/industry_support/winemaking_resources/laboratory_methods/microbiological/aseptic/]
- 41. 1.9: Aseptic Transfer [https://bio.libretexts.org/Bookshelves/Microbiology/Microbiology_Laboratory_Manual_(Miller)/01%3A_Labs/1.09%3A_Aseptic_Transfer]
- 42. 2: Aseptic Transfers [https://bio.libretexts.org/Learning_Objects/Laboratory_Experiments/Microbiology_Labs/Microbiology_Labs_I/02%3A_Aseptic_Transfers]
- 43. In Vitro Co-culture of Bacterial and Mammalian Cells to ... [https://bio-protocol.org/en/bpdetail?id=5361&type=0]
- 44. Isolation and identification of bacteria from blood within 12 ... [https://www.nature.com/articles/s41598-025-09024-9]
- 45. Streak Plate Method: Principle, Types & Step-by-Step Guide [https://microbenotes.com/streak-plate-method-principle-methods-significance-limitations/]
- 46. Streaking (microbiology) [https://en.wikipedia.org/wiki/Streaking_(microbiology)]
- 47. Bacteriological Culture Methods – Microbiology [https://milnepublishing.geneseo.edu/suny-microbiology-lab/chapter/bacteriological-culture-methods/]
- 48. Streak Plate Method [https://www.ossila.com/pages/streak-plate-method]
- 49. Streak Plate Method: Principle, Techniques, Significance & ... [https://gmpplastic.com/blogs/useful-articles-on-lab-supplies-faq-section/streak-plate-method-principle-techniques-significance-limits?srsltid=AfmBOor9y3zIyO-o08vcOsoSSnE7yTp80x6S08LY_d3bPJn3p_wcaMU6]
- 50. Streak Plating Method of Sample Plating [https://opentrons.com/applications/sample-plating/streak-plating?srsltid=AfmBOop_QmC9UMLK6ZCbvx-IxWd7vRY4MKu0iIJGY02BHyHPwGZ4MLj5]
- 51. 9: ISOLATION BY STREAK PLATE [https://bio.libretexts.org/Courses/Irvine_Valley_College/IVC_Microbiology_Lab_Manual/09%3A_ISOLATION_BY_STREAK_PLATE]
- 52. 1.11: Streaking for Isolation [https://bio.libretexts.org/Bookshelves/Microbiology/Microbiology_Laboratory_Manual_(Miller)/01%3A_Labs/1.11%3A_Streaking_for_Isolation]
- 53. 8: Bacterial Colony Morphology [https://bio.libretexts.org/Learning_Objects/Laboratory_Experiments/Microbiology_Labs/Microbiology_Labs_I/08%3A_Bacterial_Colony_Morphology]
- 54. Protocols Colony Morphology [https://asm.org/protocols/colony-morphology-protocol]
- 55. Guidelines for a Morphometric Analysis of Prokaryotic and ... [https://pmc.ncbi.nlm.nih.gov/articles/PMC8699492/]
- 56. TAMMiCol: Tool for analysis of the morphology of microbial ... [https://pmc.ncbi.nlm.nih.gov/articles/PMC6292648/]
- 57. How to count colonies with ImageJ (and Fiji) [https://www.singerinstruments.com/resource/counting-colonies-with-imagej/]
- 58. 8 free open source software programs for image analysis ... [https://digitalpathologyplace.com/8-free-open-source-software-programs-for-image-analysis-of-pathology-slides/]
- 59. Current Applications of Absolute Bacterial Quantification in ... [https://pmc.ncbi.nlm.nih.gov/articles/PMC8467167/]
- 60. Anaerobes: General Characteristics - Medical Microbiology [https://www.ncbi.nlm.nih.gov/books/NBK7638/]
- 61. The Study of Microbial Physiology Under Microoxic ... [https://pmc.ncbi.nlm.nih.gov/articles/PMC12169914/]
- 62. Simultaneous aerobic and anaerobic respiration in hot ... [https://www.nature.com/articles/s41467-025-56418-4]
- 63. Do I Choose Aerobic or Anaerobic Culture?? [https://www.ksvdl.org/resources/news/diagnostic_insights/january2019/aeorbic-anaerobic-culture.html]
- 64. Incubation Temperature - an overview [https://www.sciencedirect.com/topics/immunology-and-microbiology/incubation-temperature]
- 65. Incubation Times in Environmental Monitoring [https://www.bioprocessintl.com/qa-qc/a-case-study-in-environmental-monitoring-reviewing-incubation-times-upon-recovery-of-microorganisms]
- 66. The Effects of Ventilation, Humidity, and Temperature on ... [https://pmc.ncbi.nlm.nih.gov/articles/PMC9691097/]
- 67. Accurate modeling and simulation of the effect of bacterial ... [https://www.nature.com/articles/s41598-025-16150-x]
- 68. A simple, low-cost, and highly efficient protocol for rapid ... [https://pmc.ncbi.nlm.nih.gov/articles/PMC12380869/]
- 69. Investigation Update: Infant Botulism Outbreak, November ... [https://www.cdc.gov/botulism/outbreaks-investigations/infant-formula-nov-2025/investigation.html]
- 70. Cell Culture Contamination | Thermo Fisher Scientific - US [https://www.thermofisher.com/us/en/home/references/gibco-cell-culture-basics/biological-contamination.html]
- 71. Cell Culture Contamination: How to Prevent Fungal, Yeast, ... [https://www.corning.com/worldwide/en/products/life-sciences/resources/stories/at-the-bench/how-to-control-bacterial-contamination-and-other-unwelcome-micro.html]
- 72. Cell Culture Contamination Troubleshooting [https://www.sigmaaldrich.com/US/en/technical-documents/technical-article/cell-culture-and-cell-culture-analysis/mammalian-cell-culture/cell-culture-troubleshooting-contamination?srsltid=AfmBOorEaL5vAKK4sgaWaa2lJE98Y_UlLTiOueuv4MG6zmo4OjREyWPL]
- 73. A simple, low-cost, and highly efficient protocol for rapid ... [https://www.frontiersin.org/journals/microbiology/articles/10.3389/fmicb.2025.1637776/full]
- 74. A Guide to Utilization of the Microbiology Laboratory for ... [https://pmc.ncbi.nlm.nih.gov/articles/PMC7108105/]
- 75. Best Practices For Designing Microbiology Experiments [https://www.outsourcedpharma.com/doc/best-practices-for-designing-microbiology-experiments-0001]
- 76. Culture-free detection of bacteria from blood for rapid ... [https://www.nature.com/articles/s41746-025-01948-w]
- 77. Optimization of a Bacterial Cultivation Medium via a Design ... [https://www.mdpi.com/2311-5637/9/12/1002]
- 78. Optimized bacterial absolute quantification method by qPCR ... [https://pubmed.ncbi.nlm.nih.gov/38331102/]
- 79. Quantitative profiling of bacterial communities via full length ... [https://bmcmicrobiol.biomedcentral.com/articles/10.1186/s12866-025-04399-1]
- 80. Optimized bacterial absolute quantification method by ... [https://www.sciencedirect.com/science/article/pii/S0167701224000071]
- 81. Shake Flask - an overview [https://www.sciencedirect.com/topics/engineering/shake-flask]
- 82. Effect of High‐Speed Shaking on Oxygen Transfer in ... [https://pmc.ncbi.nlm.nih.gov/articles/PMC11995246/]
- 83. Why choose baffled cell culture flasks? [https://gmpplastic.com/blogs/useful-articles-on-lab-supplies-faq-section/why-choose-baffled-cell-culture-flasks?srsltid=AfmBOoqIPihNAs89AmwdGFfPSkx78d_Kt35zyod28WA47qaX8GAZzIMB]
- 84. New KIMBLE KIMAX Baffled Shake Flask for High- ... [https://pipette.com/news/new-kimble-kimax-baffled-shake-flask-for-high-efficiency-cell-culture?srsltid=AfmBOorXRyPqQfF5Cth7xpEvBN5pp5VFfi--ukTqqCo6N1Fqj2CTYAdc]
- 85. Baffled Versus Non-baffled Shake Flasks: What You Need ... [https://www.scientificbio.com/blog/baffled-versus-non-baffled-shake-flasks]
- 86. Optimum Growth® General Information & FAQ's [https://htslabs.com/faqog]
- 87. How Orbital Diameter and Shaker Agitation Rate Affect ... [https://orbitalshakers.net/blogs/blog/how-orbital-diameter-and-shaker-agitation-rate-affect-cultured-bacteria-growth]
- 88. Shaking Incubator for Bacterial Growth: What to Know | Blog [https://labsup.net/blogs/blog/shaking-incubator-for-bacterial-growth-what-to-know?srsltid=AfmBOoogyZQ2oPJ4bV1301keNEMAVJaYcw79g1jxw5wXPKga1-zD3Jg-]
- 89. Get Great Yields by Optimizing Your Bacterial Cultures [https://bitesizebio.com/22908/get-great-yields-by-optimizing-your-bacterial-cultures/]
- 90. Magnesium: Biochemistry, Nutrition, Detection, and Social ... [https://www.mdpi.com/2072-6643/13/4/1136]
- 91. Magnesium Matters: A Comprehensive Review of Its Vital ... [https://pmc.ncbi.nlm.nih.gov/articles/PMC11557730/]
- 92. Magnesium supplements may aid gut health and cancer ... [https://newatlas.com/health-wellbeing/magnesium-supplements-gut-bacteria-colorectal-cancer/]
- 93. Study links magnesium supplements to gut bacteria growth ... [https://www.livemint.com/news/us-news/study-links-magnesium-supplements-to-gut-bacteria-growth-and-reduced-colorectal-cancer-risk-especially-in-women-11758735115322.html]
- 94. Magnesium treatment increases gut microbiome ... [https://www.sciencedirect.com/science/article/pii/S0002916525005271]
- 95. Data-driven discovery of the interplay between genetic and ... [https://www.nature.com/articles/s42003-024-07347-3]
- 96. Predicting and Testing Bioavailability of Magnesium ... [https://pmc.ncbi.nlm.nih.gov/articles/PMC6683096/]
- 97. Prediction of Bacterial Growth on Different Culture Media ... [https://pmc.ncbi.nlm.nih.gov/articles/PMC12495271/]
- 98. Rapid method for screening of both calcium and ... [https://link.springer.com/article/10.1007/s00775-024-02078-6]
- 99. Cultivation strategies for growth of uncultivated bacteria [https://pmc.ncbi.nlm.nih.gov/articles/PMC5382963/]
- 100. Review Axenic culture of fastidious and intracellular bacteria [https://www.sciencedirect.com/science/article/abs/pii/S0966842X12001953]
- 101. The CURE for Cultivating Fastidious Microbes - PMC [https://pmc.ncbi.nlm.nih.gov/articles/PMC6508911/]
- 102. Optimization of the fermentation culture conditions ... [https://www.frontiersin.org/journals/microbiology/articles/10.3389/fmicb.2025.1552645/full]
- 103. Direct identification and antimicrobial susceptibility testing ... [https://pubmed.ncbi.nlm.nih.gov/41039200/]
- 104. Comparison among the Quantification of Bacterial ... [https://www.frontiersin.org/journals/microbiology/articles/10.3389/fmicb.2017.01174/full]
- 105. Are Semi-Quantitative Clinical Cultures Inadequate ... [https://pmc.ncbi.nlm.nih.gov/articles/PMC8303231/]
- 106. Validation Protocols | Pioneering Diagnostics - bioMerieux [https://www.biomerieux.com/us/en/our-offer/industry-products/validation-protocols.html]
- 107. All you need to know about equipment validation for ... [https://pmc.ncbi.nlm.nih.gov/articles/PMC12421869/]
- 108. Improvements on colony morphology identification towards ... [https://pubmed.ncbi.nlm.nih.gov/24121049/]
- 109. Tool for analysis of the morphology of microbial colonies [https://journals.plos.org/ploscompbiol/article?id=10.1371/journal.pcbi.1006629]
- 110. Isolation, identification and comparative genomic analysis ... [https://www.frontiersin.org/journals/microbiology/articles/10.3389/fmicb.2025.1635639/full]
- 111. How to Grow Bacterial Cultures for Plasmid Prep [https://www.zymoresearch.com/blogs/blog/7-expert-tips-to-growing-bacterial-cultures-for-plasmid-prep?srsltid=AfmBOooo43k11xQAQyedhfgwvj_lJdiGtKTicftH3HYa3yfnxoppzzpU]
- 112. Workflow overview: 16S sequencing [https://nanoporetech.com/resource-centre/workflow-16s-sequencing]
- 113. Next Generation Sequencing Improves Diagnostic 16S ... [https://pmc.ncbi.nlm.nih.gov/articles/PMC12418051/]
- 114. Comparative analysis of illumina and oxford nanopore ... [https://www.nature.com/articles/s41598-025-18768-3]
- 115. Comparative analysis of Illumina, PacBio, and nanopore ... [https://www.frontiersin.org/journals/microbiomes/articles/10.3389/frmbi.2025.1587712/full]
- 116. 基于微生物组新颖指数构建龋病菌群诊断模型- PMC [https://pmc.ncbi.nlm.nih.gov/articles/PMC10427253/]
- 117. SUMMER 2025 EARLY RESEARCH SERIES • Metagenomics [https://www.csi.cuny.edu/summer-2025-early-research-series-metagenomics-dna-sequencing]
- 118. 微生物学标准 [https://www.sigmaaldrich.com/HK/zh/products/analytical-chemistry/reference-materials/microbiology-standards?srsltid=AfmBOoovq00psmsM86GiJO-e02wLRbUsqdty7WDpSNUnq4WOAF7RxbTX]
- 119. 16s+宏基因组binning揭示大型藻类附生微生物群落核心组成 [https://blog.csdn.net/SHANGHAILINGEN/article/details/133384898]
- 120. Isolation and proteomic analysis of bacterial outer ... [https://pmc.ncbi.nlm.nih.gov/articles/PMC12059987/]
- 121. Metagenomics Global Market Research Report 2025-2030 [https://www.globenewswire.com/news-release/2025/11/03/3179165/0/en/Metagenomics-Global-Market-Research-Report-2025-2030-New-Diagnostic-Approaches-Aging-Populations-Advancements-in-Known-and-Emerging-Biomarkers-and-Accelerated-Research-Growth.html]
- 122. of the Comparison - next (NGS) technology... generation sequencing [https://pmc.ncbi.nlm.nih.gov/articles/PMC7578456/]
- 123. Application of next-generation sequencing to identify ... [https://www.frontiersin.org/journals/microbiology/articles/10.3389/fmicb.2023.1329330/full]
- 124. Next Generation Sequencing of Infectious Pathogens - PMC [https://pmc.ncbi.nlm.nih.gov/articles/PMC6682455/]
- 125. Bacterial Species In the Age of Next-Generation Sequencing [https://asm.org/articles/2021/october/bacterial-species-in-the-age-of-next-generation-se]
- 126. Comparison of microbial culture, metagenomic next- ... [https://www.frontiersin.org/journals/cellular-and-infection-microbiology/articles/10.3389/fcimb.2025.1606283/full]
- 127. Dataset for comparative analysis of precision ... [https://www.sciencedirect.com/science/article/pii/S235234092500071X]
- 128. of the Comparison - next (NGS) technology... generation sequencing [https://jtd.amegroups.org/article/view/42495/html]
- 129. Microbial Growth Protocols [https://www.sigmaaldrich.com/US/en/technical-documents/protocol/cell-culture-and-cell-culture-analysis/microbial-cell-culture/microbial-growth?srsltid=AfmBOoqRk5tof7Z_XUCq80dN9XNXYZP6zHP5iu_ZMp7fE9kQ5WNBnWst]
- 130. IDSA 2024 Guidance on the Treatment of Antimicrobial ... [https://www.idsociety.org/practice-guideline/amr-guidance/]
- 131. Overview of Quantitative Methodologies to Understand ... [https://pmc.ncbi.nlm.nih.gov/articles/PMC7459578/]
- 132. Antibiotics Tested by NARMS [https://www.cdc.gov/narms/about/antibiotics-tested.html]
- 133. What Every Pharmacist Should Know about Antimicrobial ... [https://www.tldrpharmacy.com/content/what-every-pharmacist-should-know-about-antimicrobial-susceptibility-testing]
- 134. Antibacterial Susceptibility Test Interpretive Criteria [https://www.fda.gov/drugs/development-resources/antibacterial-susceptibility-test-interpretive-criteria]
- 135. WHONET microbiology laboratory database software [https://whonet.org/]