A Step-by-Step PCR Optimization Protocol: Maximizing Specificity, Yield, and Fidelity for Biomedical Research
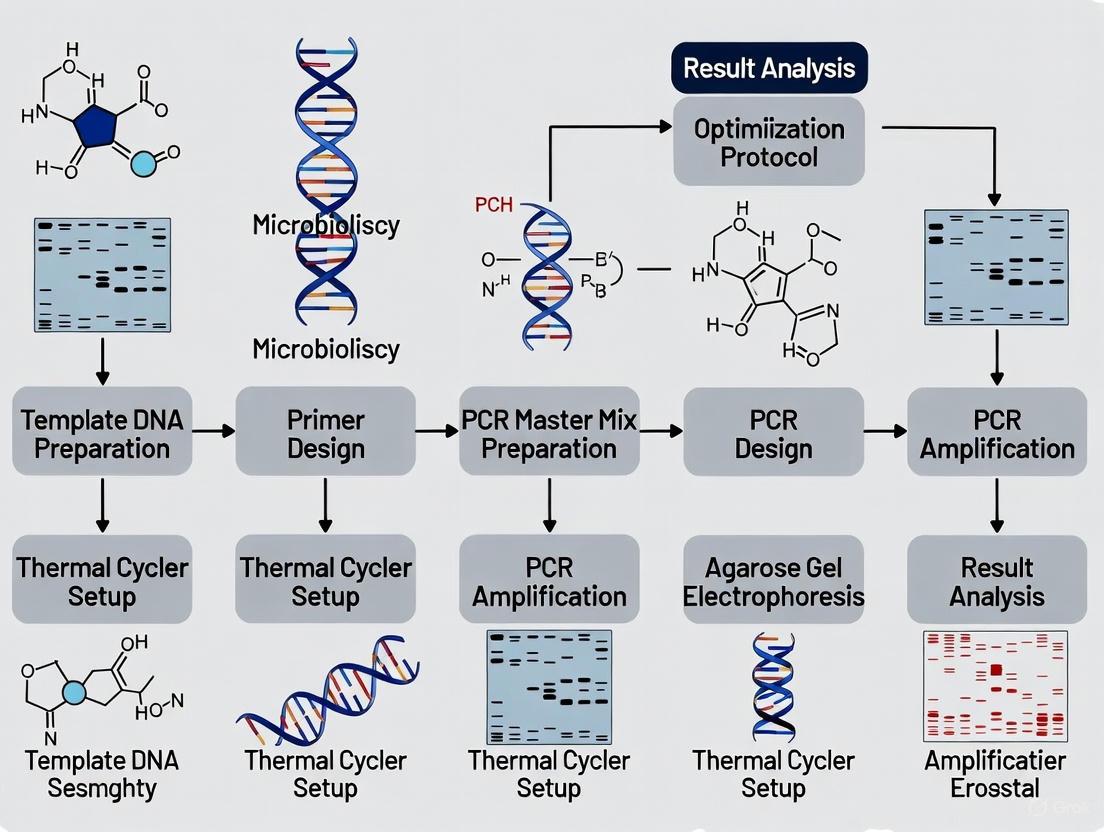
This article provides a comprehensive, step-by-step guide to PCR optimization tailored for researchers, scientists, and drug development professionals.
A Step-by-Step PCR Optimization Protocol: Maximizing Specificity, Yield, and Fidelity for Biomedical Research
Abstract
This article provides a comprehensive, step-by-step guide to PCR optimization tailored for researchers, scientists, and drug development professionals. It covers the foundational principles of reaction components, detailed methodological protocols for standard and complex templates, systematic troubleshooting for common amplification issues, and rigorous validation techniques to ensure assay robustness. By integrating proven strategies with advanced optimization methods, this guide serves as an essential resource for achieving reliable, reproducible, and high-quality PCR results in diverse research and diagnostic applications.
Understanding the Core Principles: The Building Blocks of a Robust PCR
The polymerase chain reaction (PCR) is a cornerstone technique in molecular biology, enabling the exponential amplification of specific DNA sequences from minimal starting material [1] [2]. Its versatility supports a vast array of applications, from basic research and clinical diagnostics to drug development and forensic analysis [1] [3]. However, the success and reproducibility of PCR are critically dependent on the precise function and optimal concentration of its core reaction components. This application note details the roles of DNA polymerases, buffers, dNTPs, and essential co-factors within the context of a systematic PCR optimization protocol. The information is structured to provide researchers and drug development professionals with detailed methodologies and data presentation to enhance experimental outcomes, particularly for challenging amplification targets.
Core Components of a PCR Reaction
A standard PCR requires a fundamental set of components, each fulfilling a specific role that collectively facilitates the targeted amplification of DNA [4] [5]. The table below summarizes these critical elements and their functions.
Table 1: Core Components of a PCR Reaction
| Component | Primary Function | Typical Final Concentration/Range |
|---|---|---|
| Template DNA | The DNA sequence to be amplified. | Genomic DNA: 5–50 ng; Plasmid DNA: 0.1–1 ng (in a 50 µL reaction) [4] |
| DNA Polymerase | Enzyme that synthesizes new DNA strands. | 1–2.5 units per 50 µL reaction [4] [2] |
| Primers | Short oligonucleotides that define the start and end of the target sequence. | 0.1–1 µM each [4] |
| Deoxynucleoside Triphosphates (dNTPs) | The building blocks (dATP, dCTP, dGTP, dTTP) for new DNA synthesis. | 200 µM of each dNTP [4] [5] |
| Reaction Buffer | Provides the optimal chemical environment (pH, ionic strength) for the polymerase. | 1X concentration [2] |
| Divalent Cations (Mg²⁺) | Essential co-factor for DNA polymerase activity. | 1.5–5.0 mM (often supplied with the buffer) [4] [5] |
| Water | Nuclease-free solvent to bring the reaction to its final volume. | Quantity sufficient (Q.S.) for final volume [2] |
The following diagram illustrates the logical relationships and dependencies between these core components during the PCR process.
DNA Polymerases: The Enzymatic Engine
Types and Characteristics
The selection of an appropriate DNA polymerase is paramount to PCR success. These enzymes vary significantly in their properties, which are tailored for specific applications [6] [7].
Table 2: Key Characteristics of DNA Polymerases Used in PCR
| Characteristic | Taq & Family A Polymerases | Proofreading (Family B) Polymerases |
|---|---|---|
| 5'→3' Polymerase Activity | Yes | Yes |
| 3'→5' Exonuclease (Proofreading) | No | Yes |
| Fidelity (Error Rate) | Lower (~1 x 10⁻⁴) [6] | Higher (~1 x 10⁻⁶) [6] |
| Extension Speed | High (~150 nt/sec) [7] | Slower (~25 nt/sec) [7] |
| 'A-Tailing' Activity | Yes, efficient | Variable, often less efficient [7] |
| Common Applications | Standard PCR, real-time PCR [7] | Cloning, sequencing, site-directed mutagenesis [6] [7] |
Hot-Start DNA Polymerases: A critical advancement for reaction specificity is the development of hot-start enzymes. These polymerases are intentionally inhibited at room temperature during reaction setup, preventing non-specific primer binding and the formation of primer-dimers [6] [7]. Activation occurs only after the initial high-temperature denaturation step (e.g., >90°C), which can be achieved through antibody-based inhibition or chemical modification of the enzyme [6].
Protocol: Determining Optimal DNA Polymerase Concentration
Objective: To identify the enzyme concentration that yields maximal target product with minimal non-specific amplification.
Prepare a Master Mix (on ice) for all common reagents sufficient for n+1 reactions, where n is the number of test conditions. The table below outlines a sample setup for a 50 µL reaction. Table 3: Master Mix for Polymerase Titration
Component Final Concentration Volume per 50 µL Reaction 10X PCR Buffer (with Mg²⁺) 1X 5 µL dNTP Mix 200 µM each 1 µL Forward Primer 0.3 µM 0.75 µL of 20 µM stock Reverse Primer 0.3 µM 0.75 µL of 20 µM stock Template DNA e.g., 50 ng gDNA X µL Nuclease-free Water - To 49.5 µL Master Mix Total 49.5 µL Aliquot 49.5 µL of the Master Mix into each PCR tube.
Add DNA Polymerase to each tube to create a concentration gradient. For example:
- Tube 1: 0.5 µL (1.0 U/50 µL reaction)
- Tube 2: 0.75 µL (1.5 U/50 µL reaction)
- Tube 3: 1.0 µL (2.0 U/50 µL reaction)
- Tube 4: 1.25 µL (2.5 U/50 µL reaction)
Run PCR using the recommended cycling conditions for your polymerase and target.
Analyze Results via agarose gel electrophoresis. The optimal concentration produces a strong, specific band with the least background smearing or non-specific bands [4].
Buffers and Divalent Cations: The Reaction Environment
Reaction Buffer Composition
The PCR buffer stabilizes the reaction components, particularly the DNA polymerase, by maintaining a suitable pH (typically between 8.0 and 9.5) and providing necessary ionic strength [8] [9]. Key constituents often include:
- Tris-HCl: Provides buffering capacity in the slightly alkaline range [9].
- Potassium Chloride (KCl): Promotes primer annealing by stabilizing duplex formation [3].
- Ammonium Sulfate ((NH₄)₂SO₄): Can increase specificity by destabilizing weak, non-specific primer-template interactions [3].
An ideal buffer should be water-soluble, have a pKa within the physiological range (6-8), exhibit minimal salt effects, and not interfere with enzyme activity or form complexes with reaction components [8] [9].
Magnesium Ions: An Essential Co-factor
Magnesium ions (Mg²⁺) are an absolutely essential co-factor for DNA polymerases [4]. They serve two critical functions:
- Enzymatic Cofactor: Mg²⁺ is directly involved in the catalytic mechanism of the phosphodiester bond formation during nucleotide incorporation [4].
- Nucleotide Binding: Mg²⁺ binds to dNTPs to form a complex that is the actual substrate for the polymerase [4].
The free Mg²⁺ concentration is crucial, as it is competitively chelated by dNTPs and nucleic acids. Therefore, the optimal concentration must be determined empirically [4] [5].
Protocol: Optimizing Mg²⁺ Concentration
Objective: To determine the concentration of MgCl₂ that provides the highest yield and specificity for a given PCR.
Use a PCR Kit that supplies MgCl₂ separately from the 10X buffer. Alternatively, use a buffer without Mg²⁺.
Prepare a Master Mix without Mg²⁺, similar to the protocol in Section 3.2.
Aliquot the Master Mix into a series of tubes.
Add MgCl₂ (e.g., 25 mM stock) to each tube to create a gradient. A typical test range is 0.5 mM to 5.0 mM in 0.5 mM increments.
- Example: To achieve 1.5 mM in a 50 µL reaction, add 3 µL of 25 mM MgCl₂ stock.
Run PCR and analyze the products by gel electrophoresis. The optimal Mg²⁺ concentration will produce a strong, specific band. Insufficient Mg²⁺ leads to low or no yield, while excess Mg²⁺ can promote non-specific amplification and increase error rates [4] [2].
dNTPs and Primer Design
Deoxynucleoside Triphosphates (dNTPs)
dNTPs are the foundational monomers for DNA synthesis. For standard PCR, the four dNTPs (dATP, dCTP, dGTP, dTTP) are used at equimolar concentrations, typically 200 µM each, to ensure balanced and efficient incorporation [4] [5]. Key considerations include:
- Quality and Purity: Impurities can inhibit PCR.
- Concentration: Excessive dNTP concentrations can be inhibitory and also sequester Mg²⁺, effectively reducing the availability of this critical co-factor [4]. Lowering dNTP concentrations (0.01–0.05 mM) can improve the fidelity of non-proofreading polymerases [4].
- Modified dNTPs: Substitutes like dUTP can be used in conjunction with Uracil-DNA Glycosylase (UDG) to prevent carryover contamination. However, proofreading polymerases may not efficiently incorporate modified nucleotides [4] [6].
Primer Design Guidelines
Well-designed primers are critical for specificity and efficiency. The following table summarizes key design parameters.
Table 4: Guidelines for Effective Primer Design
| Parameter | Ideal Characteristic | Rationale |
|---|---|---|
| Length | 15–30 nucleotides [4] [2] | Balances specificity and binding efficiency. |
| Melting Temperature (Tm) | 55–70°C; Tm of primer pair within 5°C [4] [2] | Ensures both primers anneal efficiently at the same temperature. |
| GC Content | 40–60% [4] [2] | Stable hybridization; extremes can cause overly strong or weak binding. |
| 3' End | Avoid runs of 3 or more G/C; end with a C or G is beneficial [4] [2] | Prevents nonspecific "breathing" and promotes stable initiation of extension. |
| Self-Complementarity | Avoid secondary structures and primer-dimer formation [4] [2] | Prevents amplification artifacts that compete for reagents. |
The Scientist's Toolkit: Research Reagent Solutions
Table 5: Essential Materials and Reagents for PCR Optimization
| Item | Function/Description | Example Applications |
|---|---|---|
| Hot-Start DNA Polymerase | Polymerase inactive at room temp to reduce off-target amplification [6]. | Standard and high-specificity PCR assays. |
| High-Fidelity DNA Polymerase | Enzyme with proofreading (3'→5' exonuclease) activity for low error rates [6] [7]. | PCR cloning, sequencing, mutagenesis. |
| dNTP Mix | Prepared equimolar mixture of dATP, dCTP, dGTP, dTTP. | All PCR applications. |
| MgCl₂ Solution | Separate source of magnesium co-factor for optimization. | Titration to determine optimal Mg²⁺ concentration. |
| PCR Enhancers (e.g., DMSO, Betaine) | Additives that lower DNA melting temperature, reduce secondary structure [3]. | Amplification of GC-rich templates, long-range PCR. |
| Nuclease-Free Water | Solvent free of RNases and DNases. | Preparing all reaction mixtures and dilutions. |
| Thermal Cycler | Instrument that automates PCR temperature cycles. | Performing amplification. |
| Agarose Gel Electrophoresis System | For separation and visualization of PCR products. | Analysis of amplification specificity and yield. |
Advanced Optimization: PCR Enhancers
For challenging templates (e.g., GC-rich, long amplicons, or those with secondary structure), standard optimization may be insufficient. PCR enhancers are additives that help overcome these challenges through various mechanisms [3].
Table 6: Common PCR Enhancers and Their Applications
| Additive | Proposed Mechanism | Typical Final Concentration | Ideal For |
|---|---|---|---|
| Dimethyl Sulfoxide (DMSO) | Disrupts base pairing, lowers DNA Tm, reduces secondary structure [3]. | 1–10% [2] [3] | GC-rich templates, long amplicons. |
| Betaine | Equalizes the stability of AT and GC base pairs, homogenizes DNA melting [3]. | 0.5 M to 2.5 M [2] [3] | GC-rich templates, high multiplex PCR. |
| Formamide | Denaturant that lowers DNA melting temperature [3]. | 1.25–10% [2] [3] | Difficult templates with strong secondary structure. |
| Bovine Serum Albumin (BSA) | Binds to inhibitors present in the sample (e.g., phenols, polysaccharides) [2] [3]. | 10–100 μg/mL [2] | PCR from complex samples (e.g., blood, plant). |
Protocol for Testing Enhancers:
- Prepare your standard PCR Master Mix.
- Aliquot the Master Mix into separate tubes.
- Add a different enhancer to each tube at its recommended starting concentration.
- Include a control tube with no enhancer.
- Run the PCR and analyze the results. The optimal enhancer will improve product yield and specificity without inhibiting the reaction. Note that some enhancers can be used in combination (e.g., DMSO and betaine) for synergistic effects on particularly difficult templates [3].
Within the comprehensive framework of a step-by-step PCR optimization protocol, primer design emerges as the most critical foundational step. Primers are short, single-stranded DNA oligonucleotides that define the start and end points of the amplified product, and their precise design dictates the entire experiment's success [10] [11]. A well-designed primer ensures specific, efficient amplification and clean sequencing results, while a poorly designed one can lead to hours of troubleshooting, wasted reagents, and ambiguous data [10]. This guide details the scientific principles and practical protocols for designing primers with optimal length, melting temperature (Tm), GC content, and structural characteristics, providing researchers and drug development professionals with a reliable methodology to maximize PCR success.
Core Principles of Primer Design
The following parameters form the cornerstone of effective primer design. Adherence to these guidelines promotes specific binding to the target DNA sequence and efficient amplification by DNA polymerase.
Optimal Primer Parameters
The table below summarizes the key quantitative parameters for designing high-performance primers.
Table 1: Optimal Parameters for Primer Design
| Parameter | Recommended Value | Rationale & Practical Considerations |
|---|---|---|
| Length | 18–30 nucleotides [12] [13] [14]; Ideal: 20–25 [11] | Shorter primers may lack specificity; longer primers are prone to secondary structures and inefficient binding [10] [11]. |
| Melting Temperature (Tm) | 55–65°C [11]; Optimal range: 60–64°C [10] [13] | Ensures stable primer-template binding under standard cycling conditions. The Tms of the forward and reverse primer should be within 1–2°C of each other for balanced amplification [10] [13]. |
| GC Content | 40–60% [10] [12] [14] | Provides a balance of strong binding (GC bases form three hydrogen bonds) and sequence complexity to ensure specificity. Avoid extremes [10]. |
| GC Clamp | 1–2 G or C bases at the 3' end [10] [11] | Stabilizes the binding of the primer's 3' end, which is critical for polymerase initiation. Avoid more than 3 G/C in the last 5 bases [10]. |
| Annealing Temperature (Ta) | Set 2–5°C below the primer Tm [10] [13] | A Ta too low causes non-specific binding; a Ta too high reduces yield. Optimize empirically if needed [15]. |
| Specificity | Checked via BLAST/Primer-BLAST against the target genome [16] [11] | Confirms the primer binds uniquely to the intended target and not to off-target sites, pseudogenes, or repetitive elements [10]. |
Parameters to Avoid
Equally important is avoiding sequence features that lead to reaction failure or artifacts.
- Secondary Structures: Primers must remain linear. Avoid:
- Hairpins: Intramolecular folding where a primer binds to itself, blocking the 3' end. Screen for hairpins with a free energy (ΔG) more positive than -5 kcal/mol [11].
- Self-Dimers and Cross-Dimers: Intermolecular binding between two copies of the same primer (self-dimer) or between the forward and reverse primer (cross-dimer). These reduce available primer and can be extended into primer-dimer artifacts. The ΔG for any dimer should be weaker (more positive) than -9.0 kcal/mol [13].
- Repetitive Sequences: Avoid long homopolymer runs (e.g., AAAA or CCCC) of more than 3–4 bases, as they can cause slippage and mispriming [10] [14]. Also avoid dinucleotide repeats (e.g., ATATAT) [14].
- 3' End Complementarity: Pay special attention to the 3' end. Complementarity of 3 or more bases at the 3' ends of a primer pair can lead to primer-dimer formation, which is highly amplified and can overwhelm the desired product [10] [11].
Experimental Protocol: A Step-by-Step Primer Design Workflow
This protocol provides a robust, reproducible methodology for designing and validating primers for PCR and sequencing applications.
Define the Target and Retrieve Sequence
- Select Target Region: Identify the exact genomic, cDNA, or promoter region you wish to amplify.
- Obtain Reference Sequence: Retrieve the sequence from a curated database such as NCBI RefSeq or Ensembl using its FASTA format or accession number. Using a RefSeq entry reduces ambiguity [10].
- Set Flanking Boundaries: Decide the boundaries for your primers so they anneal outside the specific variant or region of interest.
Utilize Primer Design Software
- Access NCBI Primer-BLAST: This tool integrates the design capabilities of Primer3 with a BLAST-based specificity check, making it an industry standard [10] [16].
- Input Sequence and Parameters:
- Run the Tool: Submit the job. Primer-BLAST will return a list of candidate primer pairs with predicted parameters and a specificity report.
Evaluate and Select Candidate Primers
- Review Parameters: For each candidate pair, verify that the Tm, GC content, and length meet your criteria.
- Check for Secondary Structures: Copy each primer sequence into a tool like the IDT OligoAnalyzer Tool [13] [17]. Analyze for hairpins and self-dimers, rejecting any with strong ΔG values (e.g., hairpin ΔG < -5 kcal/mol; dimer ΔG < -9 kcal/mol) [11] [13].
- Analyze Specificity Report: Prefer primer pairs that show a single, clear amplicon in the intended target location in the Primer-BLAST report. Discard pairs with multiple off-target matches [10].
In Silico Validation
- Simulate PCR: Use an in silico PCR tool (e.g., UCSC in silico PCR) to confirm the expected product size and sequence.
- Final Selection: Record the final primer sequences, their Tm, GC%, amplicon size, and specificity confirmation. For critical applications, consider ordering a small-scale test synthesis first [10].
The following workflow diagram summarizes this experimental protocol:
Successful primer design and validation rely on a suite of bioinformatic tools and laboratory reagents.
Table 2: Essential Research Reagent Solutions for Primer Design and Validation
| Tool / Reagent Category | Specific Example(s) | Primary Function |
|---|---|---|
| Primer Design Tools | NCBI Primer-BLAST [16], PrimerQuest (IDT) [17], OligoPerfect (Thermo Fisher) [14] | Designs primer pairs based on input parameters and checks for specificity against genomic databases. |
| Oligo Analysis Tools | IDT OligoAnalyzer Tool [13], UNAFold Tool [13] | Analyzes oligonucleotide properties: melting temperature (Tm), hairpins, self-dimers, and heterodimers. |
| Specificity Databases | RefSeq mRNA, Refseq representative genomes, core_nt (NCBI) [16] | High-quality, non-redundant sequence databases used to verify primer uniqueness and avoid off-target binding. |
| High-Fidelity DNA Polymerase | Q5 Hot-Start High-Fidelity DNA Polymerase (NEB) [12] | Enzyme for PCR amplification; high fidelity reduces incorporation errors, and hot-start prevents mispriming. |
| PCR Master Mix | Hieff Ultra-Rapid II HotStart PCR Master Mix (Yeasen) [18] | Pre-mixed optimized solution of Taq polymerase, dNTPs, and buffer for robust and fast amplification, simplifying reaction setup. |
Troubleshooting Common Primer Design Issues
Even with careful design, primers can fail. The table below outlines common problems, their causes, and solutions.
Table 3: Troubleshooting Guide for Primer-Related PCR Failures
| Observed Problem | Likely Cause(s) | Corrective Action |
|---|---|---|
| No Amplification | Primer mismatches (especially at 3' end), overly high Ta, strong secondary structures, degraded primers. | Verify primer sequence; lower Ta empirically; check for hairpins; make fresh primer aliquots [10] [12]. |
| Non-Specific Bands / Multiple Bands | Low Ta, primers binding to off-target sites, low primer specificity. | Increase Ta (2–5°C increments); re-check primer specificity with BLAST; redesign primers in a more unique genomic region [10] [15]. |
| Primer-Dimer Formation | Significant 3' complementarity between forward and reverse primers. | Redesign one or both primers to eliminate 3' complementarity; use a hot-start polymerase to prevent activity at low temperatures [10] [18]. |
| Low Yield / Weak Signal | Weak binding stability, primer degradation, suboptimal Mg²⁺ concentration. | Redesign primers with better GC balance and a GC clamp; use fresh primers; optimize Mg²⁺ concentration (e.g., test 2.0-3.0 mM) [10] [15]. |
| Asymmetric Amplification | Large difference in Tm between primer pairs (>2°C), imbalanced primer efficiency. | Redesign the less efficient primer to match the Tm of its partner; empirically adjust primer concentrations [10]. |
Mastering the science of primer design is a non-negotiable skill for achieving reliable and reproducible results in PCR and sequencing. By systematically applying the guidelines for length, Tm, GC content, and structural integrity, and by rigorously validating designs with modern bioinformatic tools, researchers can circumvent common pitfalls and ensure their experiments yield high-quality data. This protocol, when integrated into a broader PCR optimization strategy, provides a robust foundation for advancing research and drug development projects.
The quality and characteristics of template DNA are foundational to the success of any polymerase chain reaction (PCR) experiment. Within the broader context of developing a step-by-step PCR optimization protocol, understanding template DNA essentials becomes paramount for researchers, scientists, and drug development professionals who require reliable, reproducible results. Template DNA serves as the blueprint for amplification, and its integrity, concentration, and sequence composition directly influence amplification efficiency, specificity, and yield. Challenges in PCR often originate not from the enzyme or cycling conditions themselves, but from suboptimal template quality or quantity. This application note provides detailed methodologies for assessing, preparing, and optimizing template DNA for a wide range of applications, with particular emphasis on handling complex templates such as genomic DNA, cDNA, and GC-rich sequences that frequently challenge conventional protocols.
DNA Quality Assessment and Quantification Methods
Accurate assessment of DNA quality and quantity is a critical first step prior to any PCR amplification. Using compromised or poorly quantified template DNA can lead to complete amplification failure or misleading results, compromising experimental outcomes and wasting valuable reagents.
DNA Quantification Techniques
Three primary methods are available for DNA quantification, each with distinct advantages, limitations, and appropriate use cases [19].
Table 1: Comparison of DNA Quantification Methods
| Method | Principle | Information Provided | Sample Volume | Equipment Needed | Advantages | Disadvantages |
|---|---|---|---|---|---|---|
| Spectrophotometry | Measures absorbance of light at 260 nm | Concentration, purity (A260/A280 and A260/A230 ratios) | 1-2 µL (microvolume); 50-100 µL (cuvette) | Spectrophotometer or microspectrophotometer | Fast, requires small sample volume, provides purity assessment | Cannot distinguish between DNA, RNA, or free nucleotides; sensitive to contaminants |
| Fluorometry | Fluorescent dyes bind specifically to DNA | Concentration and yield | 1-20 µL | Fluorometer and assay kit | Highly specific for DNA; sensitive; not affected by contaminants | Cannot assess purity; requires standard curve; more costly and time-consuming |
| Agarose Gel Electrophoresis | Separation by size and charge in an electric field | Approximate concentration, integrity, and size distribution | 5-20 µL | Gel electrophoresis system, power supply, imager | Assesses DNA degradation and contamination; relatively inexpensive | Semi-quantitative; requires size standard; time-consuming |
Protocol: Assessing DNA Quality and Quantity
Method 1: Spectrophotometric Analysis
- Instrument Preparation: Clean the pedestals of a microspectrophotometer with distilled water and a lint-free wipe [19].
- Blank Measurement: Pipette 1-2 µL of the suspension buffer onto the lower pedestal and perform a blank measurement to establish baseline [19].
- Sample Measurement: Wipe the pedestals clean and apply 1-2 µL of DNA sample. Measure absorbance at 230 nm, 260 nm, and 280 nm [19].
- Calculation and Interpretation:
Method 2: Fluorometric Quantitation
- Assay Preparation: Prepare DNA standards and samples according to the fluorometric assay kit instructions (e.g., Qubit dsDNA assay, PicoGreen) [19].
- Standard Curve Generation: Measure fluorescence of standards to generate a standard curve [19].
- Sample Measurement: Measure sample fluorescence and interpolate concentration from the standard curve [19].
- Yield Calculation: Yield (µg) = Concentration (µg/mL) × Total sample volume (mL) [19].
Method 3: Agarose Gel Electrophoresis Quality Assessment
- Gel Preparation: Prepare a 0.8-1.2% agarose gel in TAE or TBE buffer with a fluorescent nucleic acid stain (e.g., ethidium bromide or safer alternatives) [19] [20].
- Sample Loading: Mix DNA samples with loading dye and load alongside an appropriate DNA molecular weight marker [20].
- Electrophoresis: Run gel at 5-10 V/cm until adequate separation is achieved [20].
- Visualization and Interpretation: Visualize under UV light; intact genomic DNA should appear as a single high-molecular-weight band with minimal smearing toward lower molecular weights [19].
Diagram 1: DNA Quality Control Workflow. This workflow integrates multiple quantification and quality assessment methods to ensure template DNA is suitable for PCR.
DNA Quantity Optimization for Different Template Types
Optimal template concentration varies significantly based on template complexity and target abundance. Suboptimal DNA quantities can lead to non-specific amplification, primer-dimer formation, or complete amplification failure.
Recommended Template Quantities by Type
Table 2: Optimal Template DNA Quantities for PCR
| Template Type | Optimal Amount | Copies of Target DNA | Notes |
|---|---|---|---|
| Genomic DNA | 10-500 ng [21] | Approximately 10^4 copies required for detection in 25-30 cycles [22] | Higher complexity templates require more DNA (e.g., mammalian genomic DNA: 30-100 ng) [21] |
| Plasmid or Viral DNA | 1 pg-10 ng [22] | Varies with plasmid size and copy number | Lower amounts typically sufficient due to lower complexity and higher target abundance |
| E. coli Genomic DNA | 100 pg-1 ng [21] | ~2 × 10^8 molecules/µg [21] | Less complex than mammalian genomic DNA; requires less input |
| Lambda DNA | 100 pg [21] | ~1.9 × 10^10 molecules/µg [21] | Minimal input required due to minimal complexity |
| cDNA | 10 pg-100 ng (RNA equivalent) [21] | Depends on transcript abundance | Must be optimized based on target gene expression level |
Protocol: Determining Optimal Template Concentration
- Preliminary Quantification: Quantify DNA stock solution using fluorometry or spectrophotometry [19].
- Dilution Series Preparation: Prepare a 5-point dilution series spanning two orders of magnitude (e.g., 0.1 ng/µL, 1 ng/µL, 10 ng/µL, 100 ng/µL, 1 µg/µL).
- PCR Amplification: Amplify each dilution using standardized PCR conditions and a positive control primer set.
- Analysis: Separate PCR products by agarose gel electrophoresis and identify the concentration that yields a strong, specific product with minimal background.
- Troubleshooting:
- No product: Increase template concentration or improve DNA quality
- Non-specific bands: Decrease template concentration or increase annealing temperature
- Primer-dimer: Optimize primer design or concentration
Handling Complex Templates: GC-Rich Regions
GC-rich templates (defined as >60% GC content) present significant challenges due to strong hydrogen bonding and stable secondary structures that hinder DNA denaturation and polymerase progression [23] [24]. These regions are particularly common in gene promoters, including those of housekeeping and tumor suppressor genes [23].
Challenges with GC-Rich Templates
- Strong Hydrogen Bonding: G-C base pairs form three hydrogen bonds compared to two for A-T pairs, requiring more energy for denaturation [23]
- Secondary Structure Formation: GC-rich sequences readily form stable hairpins and other secondary structures that block polymerase progression [23] [21]
- Incomplete Denaturation: Standard denaturation temperatures (94-95°C) may be insufficient for complete strand separation [21]
- Premature Termination: Polymerase stalling at secondary structures results in truncated amplification products [23]
Comprehensive Strategy for GC-Rich Amplification
Table 3: Optimization Strategies for GC-Rich Templates
| Parameter | Standard Conditions | GC-Rich Optimized Conditions | Rationale |
|---|---|---|---|
| Polymerase Selection | Standard Taq polymerase | Specialty polymerases (OneTaq Hot Start, Q5 High-Fidelity, PrimeSTAR GXL) [23] [21] | Enhanced capability to read through secondary structures |
| Denaturation Temperature | 94-95°C [21] | 98°C [23] [21] | Higher temperature improves separation of strongly bonded strands |
| Additives | None | DMSO (2.5-5%) [21], betaine, GC enhancers [23] | Destabilizes secondary structures; reduces DNA melting temperature |
| Mg²⁺ Concentration | 1.5-2.0 mM [22] | May require optimization (1.0-4.0 mM) [23] | Balancing polymerase processivity with specificity |
| Annealing Temperature | Calculated Tm - 5°C | Higher annealing temperatures possible with high-Tm primers [21] | Increases specificity when using specialized buffers |
| Primer Design | Standard parameters | Tm >68°C; avoid secondary structure; potentially longer primers [21] | Withstands higher annealing temperatures needed for specificity |
Protocol: Amplification of GC-Rich Templates
- Polymerase Selection: Choose a polymerase specifically designed for GC-rich templates, such as OneTaq DNA Polymerase with GC Buffer or Q5 High-Fidelity DNA Polymerase with GC Enhancer [23].
- Reaction Setup:
- Primer Design Considerations:
- Thermal Cycling Conditions:
- Magnesium Optimization: If needed, test Mg²⁺ concentrations from 1.0-4.0 mM in 0.5 mM increments [23] [22].
Diagram 2: GC-Rich PCR Optimization Strategy. A multi-pronged approach addressing polymerase selection, reaction additives, primer design, and cycling parameters is essential for successful amplification of GC-rich templates.
Comprehensive Experimental Protocol: Template DNA Evaluation and Optimization
This integrated protocol provides a systematic approach to template DNA assessment and optimization within a complete PCR optimization workflow.
Materials and Equipment
Research Reagent Solutions and Essential Materials
| Item | Function | Examples/Notes |
|---|---|---|
| Microspectrophotometer | DNA quantification and purity assessment | Nanodrop-style instrument [19] |
| Fluorometer | Specific DNA quantification | Qubit with dsDNA assay kit [19] |
| Agarose Gel Electrophoresis System | DNA quality and size assessment | Standard horizontal gel system [19] [20] |
| Specialty Polymerases | Amplification of challenging templates | OneTaq with GC Buffer, Q5 High-Fidelity, PrimeSTAR GXL [23] [21] |
| PCR Additives | Destabilize secondary structures | DMSO, betaine, commercial GC enhancers [23] [21] [24] |
| DNA Molecular Weight Marker | Size reference for gel electrophoresis | Essential for quality assessment and amplicon verification [19] |
| Thermal Cycler | Precise temperature cycling | Gradient capability beneficial for optimization [23] |
Integrated Step-by-Step Procedure
Phase 1: Template Quality Assessment
- Quantification: Determine DNA concentration using fluorometry for accuracy or spectrophotometry for rapid assessment [19].
- Purity Evaluation: Calculate A260/A280 and A260/A230 ratios; acceptable ranges are 1.8-1.9 and 2.0-2.4, respectively [19].
- Integrity Verification:
Phase 2: Template Quantity Optimization
- Dilution Series Setup: Prepare a 5-point dilution series of template DNA spanning recommended concentration range for the specific template type (see Table 2).
- Pilot PCR:
- Use a positive control primer set known to work under standard conditions
- Maintain consistent reaction composition except for template concentration
- Use standardized cycling conditions appropriate for the amplicon
- Analysis: Identify the concentration yielding strong specific amplification with minimal background.
Phase 3: Specialized Conditions for Complex Templates
GC-Rich Templates:
- Select appropriate polymerase (e.g., OneTaq with GC Buffer) [23]
- Supplement with DMSO (2.5-5% final concentration) [21] or betaine [24]
- Implement touchdown PCR: Start 5-10°C above calculated Tm and decrease 1°C every cycle for 5-10 cycles, then continue with remaining cycles at the final temperature [21]
- Use higher denaturation temperature (98°C) and potentially longer denaturation times [23]
Long Amplicons (>4 kb):
Phase 4: Troubleshooting and Validation
No Amplification:
- Verify template quality and concentration
- Check primer design and annealing temperature
- Consider inhibitor presence (add BSA or use inhibitor-resistant polymerases)
- For GC-rich templates: implement full GC-rich protocol
Non-specific Amplification:
Validation:
- Sequence amplification products to verify specificity
- Include appropriate controls (no-template, positive control)
- Ensure reproducibility across multiple replicates
Successful PCR amplification fundamentally depends on appropriate template DNA quality, quantity, and handling. This application note has detailed comprehensive protocols for DNA assessment and optimization, with particular emphasis on challenging GC-rich templates that frequently impede conventional amplification. The integrated approach—combining accurate quantification, systematic quality assessment, and template-specific optimization strategies—provides researchers with a methodological framework for overcoming common amplification challenges. Implementation of these protocols within the broader context of PCR optimization will enhance experimental reproducibility, reliability, and efficiency, particularly in drug development and research applications where sample integrity is paramount.
Magnesium ions (Mg²⁺) are an essential cofactor for DNA polymerase activity, serving as a critical determinant in the success of the Polymerase Chain Reaction (PCR). Within the reaction mixture, Mg²⁺ directly influences the specificity, efficiency, and fidelity of DNA amplification through its roles in enzyme catalysis, nucleic acid stability, and primer-template interactions [4] [27]. The concentration of Mg²⁺ requires precise optimization because it affects multiple aspects of PCR thermodynamics and kinetics simultaneously [28] [29]. While the total magnesium concentration in cells is high (often exceeding 10 mM), the physiologically relevant free Mg²⁺ concentration is approximately 0.5 mM, a crucial consideration when attempting to mimic cellular conditions in enzymatic assays [30]. Understanding the nuanced effects of Mg²⁺ concentration enables researchers to develop robust PCR protocols that deliver specific, efficient, and accurate amplification results across diverse experimental applications.
Biochemical Mechanisms of Magnesium in PCR
The Two-Metal-Ion Catalytic Mechanism
DNA polymerases, including those used in PCR, employ a conserved two-metal-ion mechanism for nucleotidyl transfer catalysis [27] [31]. Structural studies of DNA polymerase β and other polymerases reveal that metal ion A (the catalytic metal) coordinates the 3'-OH group of the primer terminus, lowering its pKa and facilitating deprotonation to create a potent nucleophile that attacks the α-phosphate of the incoming dNTP [32] [27]. Metal ion B (the nucleotide-binding metal) coordinates the triphosphate moiety of the dNTP, stabilizing the negative charges and facilitating binding while assisting in pyrophosphate release after catalysis [32] [31]. Both metal ions work in concert to stabilize the pentacovalent transition state of the phosphoryl transfer reaction [32]. Recent research has identified a third metal ion that appears essential for the phosphoryl transfer reaction in some polymerase systems, further complicating the catalytic landscape [27]. The geometric arrangement of these metal ions within the active site is crucial for efficient catalysis, with proper coordination requiring the presence of both the primer 3'-OH and catalytic Mg²⁺ [32].
Structural and Thermodynamic Roles
Beyond direct catalysis, Mg²⁺ plays critical structural and thermodynamic roles in PCR. The ions facilitate the formation of stable complexes between primers and DNA templates by neutralizing negative charges on the phosphate backbones of DNA molecules, thereby reducing electrostatic repulsion and promoting hybridization [4] [29]. This charge stabilization affects the melting temperature (Tm) of DNA duplexes, with meta-analyses demonstrating a logarithmic relationship between MgCl₂ concentration and DNA melting temperature [28]. Specifically, within the optimal concentration range of 1.5-3.0 mM, every 0.5 mM increase in MgCl₂ raises the melting temperature by approximately 1.2°C [28]. This property allows Mg²⁺ to directly influence the stringency of primer annealing, which subsequently impacts reaction specificity and product yield [28] [29]. The thermodynamic basis for these effects lies in the Mg²⁺-dependent stabilization of DNA duplexes through charge screening and specific interactions with DNA bases and phosphate groups [33].
Concentration-Dependent Effects on PCR Performance
Specificity
Mg²⁺ concentration critically impacts PCR specificity, primarily through its effect on primer annealing stringency. At excessively high concentrations (>3-5 mM, depending on template and reaction conditions), Mg²⁺ over-stabilizes primer-template interactions, leading to increased nonspecific binding and amplification of off-target products [29] [34]. This occurs because elevated Mg²⁺ concentrations reduce the electrostatic penalty for mismatched hybrids, allowing primers to anneal to partially complementary sequences with greater stability [35]. Conversely, insufficient Mg²⁺ (<1 mM) can prevent formation of stable primer-template complexes, resulting in failed amplification or substantially reduced yield of the desired product [29] [34]. Research has demonstrated that priming from mismatched primers becomes detectable when the 3'-terminal portion forms a continuous duplex more stable than -11 kcal/mol with the target DNA, a threshold directly influenced by Mg²⁺ concentration [35]. The optimal Mg²⁺ range for maximizing specificity typically falls between 1.5-3.0 mM, though this must be determined empirically for each primer-template system [28].
Efficiency
PCR efficiency depends heavily on Mg²⁺ availability for DNA polymerase function. As an essential cofactor, Mg²⁺ must be present at sufficient concentrations to form productive enzyme-substrate complexes [4]. The binding affinity of the catalytic Mg²⁺ (Metal A) to the enzyme-DNA-dNTP complex is relatively weak, with a Kd of approximately 3.7 mM for HIV reverse transcriptase, highlighting the importance of maintaining adequate free Mg²⁺ concentrations beyond what is chelated by dNTPs and nucleic acids [31]. The recommended starting concentration of Mg²⁺ is typically 1.5-2.0 mM, which generally exceeds the total dNTP concentration (usually 0.8-1.0 mM) to ensure sufficient unchelated Mg²⁺ remains available for polymerase catalysis [4] [34]. Mathematical modeling of PCR optimization has identified significant interactions between dNTP and primer concentrations with respect to Mg²⁺ requirements, with the dNTP-primer interaction accounting for 28.5% of relative importance in determining optimal Mg²⁺ concentration [33]. Template characteristics also influence optimal Mg²⁺ requirements, with complex templates such as genomic DNA typically requiring higher concentrations than simpler plasmid DNA templates [28].
Fidelity
The fidelity of DNA synthesis—the accuracy of nucleotide incorporation—is significantly influenced by Mg²⁺ concentration, particularly for enzymes lacking proofreading activity. Studies on reverse transcriptases have demonstrated that HIV-1 RT exhibits higher fidelity at physiological Mg²⁺ concentrations (approximately 0.5 mM) compared to the elevated concentrations (5-10 mM) traditionally used in vitro assays [30]. This fidelity enhancement at lower Mg²⁺ concentrations appears conserved across multiple viral reverse transcriptases (HIV-1 subtypes B and A/E, HIV-2, and prototype foamy virus RT), though not all polymerases show this sensitivity [30]. The mechanistic basis for improved fidelity at lower Mg²⁺ concentrations involves altered kinetics of nucleotide incorporation, where reduced Mg²⁺ increases nucleotide specificity by favoring the rate of chemistry relative to nucleotide release [31]. For PCR applications requiring high fidelity, such as cloning or sequencing library preparation, using lower Mg²⁺ concentrations (0.5-2.0 mM) and proportionally reduced dNTP concentrations (0.01-0.05 mM) can improve accuracy, though this may come at the cost of reduced efficiency and yield [4].
Table 1: Effects of Mg²⁺ Concentration on PCR Parameters
| Mg²⁺ Concentration | Specificity | Efficiency | Fidelity | Primary Mechanisms |
|---|---|---|---|---|
| Low (<1.0 mM) | High | Low | High (for some enzymes) | Reduced nonspecific annealing; limited polymerase activity |
| Optimal (1.5-3.0 mM) | High | High | Variable | Balanced primer-template stability; sufficient cofactor availability |
| High (>3.0-5.0 mM) | Low | Variable (may decrease) | Lower | Stabilized mismatched hybrids; altered enzyme kinetics |
Table 2: Quantitative Relationships Between Mg²⁺ and PCR Parameters Based on Meta-Analysis [28]
| Parameter | Effect of Mg²⁺ | Magnitude | Notes |
|---|---|---|---|
| Melting Temperature (Tm) | Increases with [Mg²⁺] | +1.2°C per 0.5 mM MgCl₂ | Logarithmic relationship within 1.5-3.0 mM range |
| Template Specificity | Higher complexity requires more Mg²⁺ | Genomic > plasmid DNA | GC-rich templates may require higher concentrations |
| Optimal Range | Balance of specificity and efficiency | 1.5-3.0 mM | Must be determined empirically for each system |
Practical Optimization Protocols
Systematic Mg²⁺ Titration Experiment
Objective: To determine the optimal MgCl₂ concentration for a specific PCR assay by evaluating specificity, efficiency, and yield across a concentration gradient.
Materials:
- Template DNA (e.g., genomic DNA, plasmid)
- Target-specific primers
- 10X PCR buffer (without MgCl₂)
- MgCl₂ stock solution (25 mM)
- dNTP mix (10 mM each)
- DNA polymerase (e.g., Taq, Pfu)
- PCR-grade water
- Thermal cycler
- Gel electrophoresis equipment
Protocol:
- Prepare a master mix containing all PCR components except MgCl₂ and template DNA. Calculate for n+1 reactions to account for pipetting error.
- Aliquot the master mix into 8 PCR tubes (200 μL thin-walled tubes or 96-well plate).
- Add MgCl₂ from a stock solution to create a concentration gradient (e.g., 0.5, 1.0, 1.5, 2.0, 2.5, 3.0, 4.0, 5.0 mM final concentration).
- Add template DNA to each tube and mix gently.
- Perform PCR amplification using cycling parameters appropriate for your primer-template system.
- Analyze results by agarose gel electrophoresis with appropriate DNA molecular weight standards.
- Evaluate for (1) presence of single band of expected size, (2) absence of nonspecific products/primer dimers, and (3) band intensity.
Troubleshooting Notes:
- If no amplification occurs at any concentration, verify template quality and primer design, then expand the titration range.
- If nonspecific amplification persists at all concentrations, increase annealing temperature or redesign primers.
- If specific product is faint but clear, intermediate concentrations may provide better yield with optimization of cycle number.
Mathematical Modeling and Prediction of Optimal Mg²⁺
Objective: To utilize computational approaches for predicting optimal Mg²⁺ concentration based on reaction component properties, reducing experimental optimization time.
Materials:
- Primer sequences (with GC content, length, Tm)
- Template information (type, complexity)
- dNTP concentration
- Planned polymerase concentration
- Buffer conditions (pH, monovalent cations)
- Computational tools (Python with scikit-learn, R, or online calculators)
Protocol:
- Calculate primer parameters including length (L), GC content, and theoretical Tm.
- Apply the predictive equation derived from multivariate Taylor series expansion and thermodynamic principles [33]:
(MgCl₂) ≈ 1.5625 + (-0.0073 × Tm) + (-0.0629 × GC) + (0.0273 × L) + (0.0013 × dNTP) + (-0.0120 × Primers) + (0.0007 × Polymerase) + (0.0012 × log(L)) + (0.0016 × Tm_GC) + (0.0639 × dNTP_Primers) + (0.0056 × pH_Polymerase)
where concentrations are in mM, Tm in °C, GC as percentage, L in base pairs.
- Use this predicted value as a starting point for experimental verification.
- For advanced modeling, implement ridge, lasso, or elastic net regression algorithms using thermodynamic parameters (ΔH/RT, ΔS/R) as additional variables [33].
- Validate predictions with a limited experimental titration centered on the calculated optimum.
Interpretation Guidelines:
- The dNTP-primer interaction term carries the highest weight (28.5% relative importance) in the model [33].
- GC content (22.1% importance) and amplicon length (15.7% importance) are secondary significant factors [33].
- Linear regression models have demonstrated excellent predictive capability (R² = 0.9942) for MgCl₂ optimization [33].
Figure 1: Workflow for systematic optimization of Mg²⁺ concentration in PCR
The Scientist's Toolkit: Research Reagent Solutions
Table 3: Essential Reagents for Mg²⁺ Optimization Studies
| Reagent/Category | Specific Examples | Function/Application | Optimization Considerations |
|---|---|---|---|
| Magnesium Sources | MgCl₂, MgSO₄ | Primary cofactor for DNA polymerase | MgCl₂ most common; concentration typically 1.5-5.0 mM |
| DNA Polymerases | Taq, Pfu, Q5, reverse transcriptases | Catalyzes DNA synthesis | Varying Mg²⁺ optima; fidelity differences [30] [34] |
| Buffer Systems | Tris-HCl, Bicine, commercial optimized buffers | Maintain pH and ionic environment | May contain proprietary cation combinations [29] |
| Template DNA | Genomic DNA, plasmid, cDNA | Target for amplification | Complexity influences Mg²⁺ requirements [28] |
| Enhanced Specificity Additives | DMSO, glycerol, BSA, betaine | Reduce secondary structure, improve specificity | May alter effective Mg²⁺ concentration [29] |
| dNTP Solutions | dATP, dCTP, dGTP, dTTP | Nucleotide substrates | Chelate Mg²⁺; typically used at 0.2-0.5 mM each [4] |
Mg²⁺ concentration represents a pivotal parameter in PCR optimization, exerting simultaneous effects on reaction specificity, efficiency, and fidelity through well-defined biochemical mechanisms. The optimal concentration balances the requirement for sufficient enzyme cofactor activity with the need to maintain appropriate stringency in primer-template interactions. While general guidelines suggest a starting range of 1.5-3.0 mM, template characteristics, primer design, and polymerase selection necessitate empirical determination of ideal conditions for each experimental system. Advanced computational approaches now offer predictive frameworks to reduce optimization time, though laboratory verification remains essential. By understanding the multifaceted roles of Mg²⁺ in PCR thermodynamics and kinetics, researchers can systematically troubleshoot amplification challenges and develop robust, reproducible protocols tailored to their specific application requirements.
A Practical Optimization Workflow: From Basic Setup to Advanced Techniques
Polymersse Chain Reaction (PCR) optimization is critical for achieving high specificity and yield in genetic amplification. Among the most influential parameters are primer concentration and annealing temperature. Suboptimal primer concentrations can lead to primer-dimer formation and nonspecific amplification, while an incorrect annealing temperature can drastically reduce PCR efficiency or even cause reaction failure [36] [37]. This application note details a systematic protocol for empirically optimizing primer concentrations (across a 50-800 nM range) and annealing temperature using a gradient thermocycler, forming the foundational step in a comprehensive PCR optimization strategy for researchers and drug development professionals.
Principles of Optimization
The Critical Role of Annealing Temperature
The annealing temperature (Ta) is a pivotal experimental variable. The melting temperature (Tm) of a primer provides a theoretical starting point but is an insufficient predictor of the optimal Ta on its own [37]. The Tm describes the temperature at which 50% of the DNA duplex dissociates, but the optimal Ta—the temperature enabling maximum specific primer binding—must be determined empirically [38]. Using a Ta that is too low promotes mispriming and nonspecific amplification, whereas a Ta that is too high can reduce or prevent primer binding, leading to low yields of the desired product [36] [39].
The Importance of Primer Concentration
Primer concentration directly influences reaction efficiency and specificity. Excessively high primer concentrations increase the likelihood of primer-dimer formation and off-target binding, while excessively low concentrations may result in inefficient amplification and poor yield [37] [40]. A balanced concentration of forward and reverse primers is crucial, especially when their Tms differ. The primer with the higher Tm could bind to unintended targets, while the primer with the lower Tm might not bind effectively at a chosen annealing temperature [36].
Experimental Protocol
Reagents and Equipment
- Thermocycler: A thermal cycler with a gradient function across the block.
- DNA Polymerase: A standard thermostable DNA polymerase (e.g., Taq DNA Polymerase) and its corresponding reaction buffer [39] [40].
- Primers: Lyophilized forward and reverse primers for the target of interest.
- Template DNA: A purified DNA sample containing the target sequence, ideally of known concentration.
- dNTPs, Nuclease-free Water, MgCl₂ (if not included in the buffer).
- Agarose Gel Electrophoresis equipment or other methods for amplicon analysis.
Primer and Template Preparation
- Primer Resuspension: Resuspend lyophilized primers in nuclease-free water to create a concentrated stock solution (e.g., 100 µM). Store at -20°C.
- Intermediate Dilution: Prepare a working stock of both forward and reverse primers at 10 µM from the concentrated stock.
- Template Dilution: Dilute the DNA template to a working concentration in a range appropriate for the template complexity (e.g., 10-100 ng/µL for human genomic DNA) [39].
Master Mix and Reaction Setup
For a single 50 µL reaction, the components are listed in the table below. A master mix containing common components should be prepared to minimize pipetting errors and ensure reaction uniformity.
Table 1: Reaction Setup for a Single 50 µL PCR
| Component | Final Concentration/Amount | Volume per 50 µL Reaction |
|---|---|---|
| Nuclease-free Water | - | To 50 µL final volume |
| Reaction Buffer (10X) | 1X | 5 µL |
| dNTP Mix (10 mM each) | 200 µM | 1 µL |
| MgCl₂ (25 mM)* | 1.5 mM | 3 µL |
| DNA Template | e.g., 50-100 ng | Variable (X µL) |
| DNA Polymerase (5 U/µL) | 1.25 U | 0.25 µL |
| Total Volume (before primers) | ~50 - (Y µL) |
*Note: The optimal Mg²⁺ concentration may require separate optimization. The concentration here is a common starting point, but the buffer manufacturer's recommendation should be followed [39].
- Calculate the total number of reactions (n), including one for a negative control (no template). Prepare a master mix for (n+1) reactions.
- Combine all components from Table 1 (except primers and template) in a single tube. Mix thoroughly by pipetting gently.
- Aliquot the appropriate volume of the master mix into each PCR tube.
- Primer Addition: Add forward and reverse primers from the 10 µM working stock to each tube according to the optimization scheme in Section 3.4.
- Template Addition: Add the DNA template to all reaction tubes except the negative control. Add nuclease-free water to the negative control tube instead.
- Cap the tubes, mix gently, and centrifuge briefly to collect the contents at the bottom.
Optimization Scheme Design
This protocol employs a two-dimensional matrix to test primer concentration and annealing temperature simultaneously.
Table 2: Primer Concentration and Annealing Temperature Test Matrix
| Tube | Final Primer Concentration (nM) | Volume of 10 µM Primer Stock (µL) | Gradient Annealing Temp. Range (°C) |
|---|---|---|---|
| 1 | 50 | 0.25 | Tm -5°C to Tm +5°C |
| 2 | 100 | 0.50 | Tm -5°C to Tm +5°C |
| 3 | 200 | 1.00 | Tm -5°C to Tm +5°C |
| 4 | 400 | 2.00 | Tm -5°C to Tm +5°C |
| 5 | 600 | 3.00 | Tm -5°C to Tm +5°C |
| 6 | 800 | 4.00 | Tm -5°C to Tm +5°C |
| 7 (Negative Control) | 200 | 1.00 | Tm -5°C to Tm +5°C |
Thermocycling Parameters
Program the gradient thermocycler with the following protocol, setting the annealing step to a gradient spanning the desired range (e.g., Tm -5°C to Tm +5°C).
Table 3: Standard Thermocycling Protocol
| Step | Temperature | Time | Cycles |
|---|---|---|---|
| Initial Denaturation | 94-98°C | 2-5 min | 1 |
| Denaturation | 94-95°C | 30 sec | |
| Annealing | Gradient: Tm -5°C to Tm +5°C | 30 sec | 30-35 |
| Extension | 72°C | 1 min/kb | |
| Final Extension | 72°C | 5-10 min | 1 |
| Hold | 4-10°C | ∞ | 1 |
*Note: Specific temperatures and times, particularly denaturation and extension, should be adjusted according to the DNA polymerase manufacturer's instructions [39] [40].
Analysis of PCR Products
- Prepare a 1-2% agarose gel in 1X TAE or TBE buffer with a safe DNA stain.
- Combine 5 µL of each PCR product with 1 µL of DNA loading dye and load into the gel wells. Include an appropriate DNA molecular weight marker.
- Run the gel at a constant voltage (e.g., 100-120 V) until bands are sufficiently separated.
- Visualize the gel under UV light and document the results.
Data Interpretation and Optimization
Analyze the gel image to identify the conditions that produce a single, sharp band of the expected size with the highest intensity and the absence of primer-dimers or nonspecific products.
- Identify the Optimal Annealing Temperature: For each primer concentration column on the gel, note the temperature that gives the strongest specific band and the cleanest background.
- Identify the Optimal Primer Concentration: Compare the results across different primer concentrations at their respective optimal annealing temperatures. The ideal concentration provides robust yield without nonspecific amplification.
- Synthesize Findings: The combination of primer concentration and annealing temperature that yields the brightest specific band with minimal background is the optimal condition for this primer set. A robust assay will perform well over a broad temperature range, whereas amplification restricted to a narrow optimum is less robust [37].
The following workflow diagram summarizes the key steps in this optimization process:
The Scientist's Toolkit
Table 4: Essential Research Reagent Solutions for PCR Optimization
| Item | Function / Role in Optimization |
|---|---|
| Gradient Thermocycler | Enables empirical testing of multiple annealing temperatures in a single run, drastically reducing optimization time [38]. |
| High-Fidelity DNA Polymerase | Provides superior accuracy for cloning and sequencing applications. Many are supplied with optimized buffers. |
| Universal Annealing Buffer Systems | Specialized buffers (e.g., with isostabilizing components) can allow for a universal annealing temperature (e.g., 60°C), simplifying protocols for primers with different Tms [36]. |
| dNTP Mix | The building blocks for DNA synthesis. Consistent quality and accurate concentration are vital for efficient amplification. |
| MgCl₂ Solution | A required cofactor for thermostable DNA polymerases. Its concentration can be optimized separately to enhance specificity and yield [39]. |
| PCR Additives (e.g., DMSO) | Can improve amplification of difficult templates, such as GC-rich sequences, by disrupting secondary structures [39]. |
This protocol provides a systematic and efficient method for the concurrent optimization of primer concentration and annealing temperature. By employing a gradient thermocycler and a structured experimental matrix, researchers can rapidly identify robust conditions for specific primer-template systems. This foundational step is essential for ensuring the success of subsequent PCR applications in research, diagnostics, and drug development. Establishing optimal conditions minimizes the risk of false results, saves time and reagents, and forms a critical part of any rigorous molecular biology workflow.
Within a comprehensive, step-by-step PCR optimization protocol, the precise selection of thermal cycling parameters is a critical determinant of success. Following the careful preparation of reaction components, the deliberate configuration of denaturation, annealing, and extension steps ensures the specific, efficient, and faithful amplification of the target DNA sequence. This application note provides detailed methodologies and protocols for optimizing these core thermal cycling parameters, framed specifically for researchers, scientists, and drug development professionals engaged in assay development and diagnostic refinement. The guidelines herein are designed to be integrated into a broader thesis on systematic PCR optimization, providing a actionable, data-driven framework for achieving robust and reproducible amplification results.
Optimization of Core Cycling Parameters
The three fundamental steps of PCR—denaturation, annealing, and extension—are repeated in cycles to exponentially amplify the target DNA. Each step must be optimized based on the template DNA, primer characteristics, and the DNA polymerase employed [41].
Denaturation
Function: The denaturation step separates double-stranded DNA into single strands, providing a template for primer binding. Complete denaturation is essential for efficient amplification in the first and subsequent cycles [41].
Optimization Parameters:
- Temperature: The standard temperature range is 94–98°C [41] [42]. Higher temperatures (e.g., 98°C) may be necessary for templates with high GC content or when using buffers with high salt concentrations [41].
- Duration: The initial denaturation at the start of PCR is typically 1–3 minutes [41]. Subsequent denaturation steps in each cycle are shorter, ranging from 10–60 seconds [41] [43]. For GC-rich templates, longer denaturation times may be required [41].
Table 1: Denaturation Parameter Guidelines
| Template Type | Temperature Range | Initial Duration | Cycle Duration |
|---|---|---|---|
| Standard DNA | 94–95°C | 1–3 minutes | 10–30 seconds |
| High-GC Content | 98°C | 3–5 minutes | 30–60 seconds |
| With proofreading polymerases (Q5, Phusion) | 98°C | 30 seconds | 5–20 seconds [42] |
Annealing
Function: In this step, the reaction temperature is lowered to allow primers to bind (anneal) to their complementary sequences on the single-stranded template DNA. The annealing temperature (T_a) is the most critical parameter for controlling reaction specificity [41] [44].
Optimization Parameters:
- Temperature Calculation: The annealing temperature is primarily determined by the primer melting temperature (T_m). A common starting point is 3–5°C below the lowest T_m of the primer pair [41]. However, for high-fidelity polymerases like Q5 and Phusion, an annealing temperature 0–3°C higher than the lowest T_m is recommended [42]. The T_m can be calculated using the nearest-neighbor method, which accounts for salt and primer concentrations and is considered the most accurate [41] [42].
- Duration: Annealing times are typically short, 15–60 seconds per cycle, which is sufficient for primer binding [42] [43].
- Gradient PCR: Using a thermal cycler with a gradient function is the most efficient empirical method for determining the optimal T_a. It allows for testing a range of temperatures across multiple reactions simultaneously, balancing specificity and yield [41] [44].
Table 2: Annealing Temperature Optimization Strategy
| Observation | Problem | Solution |
|---|---|---|
| No or low yield | T_a too high | Lower T_a in 2–3°C increments |
| Non-specific bands or smearing | T_a too low | Increase T_a in 2–3°C increments |
| Formula | Application | Example/Notes |
| T_a = T_m - (3–5°C) | Standard polymerases (e.g., Taq) | A starting point for optimization [41] |
| T_a = T_m + (0–3°C) | High-fidelity polymerases (e.g., Q5, Phusion) | A starting point for optimization [42] |
Extension
Function: The DNA polymerase synthesizes a new DNA strand by adding nucleotides to the 3' end of the annealed primer, using the single-stranded DNA as a template. The temperature is raised to the optimal operating temperature for the enzyme.
Optimization Parameters:
- Temperature: The standard extension temperature is 68–72°C for most thermostable DNA polymerases [41] [42].
- Duration: Extension time is directly proportional to the length of the amplicon and the synthesis speed of the polymerase. General guidelines are:
- Two-Step PCR: If the annealing temperature is within 3°C of the extension temperature, the annealing and extension steps can be combined into a single two-step PCR protocol (e.g., annealing and extending at 68°C), which shortens the total run time [41].
Table 3: Polymerase-Specific Extension Parameters
| DNA Polymerase | Typical Extension Temperature | Extension Rate (per kb) |
|---|---|---|
| Taq / OneTaq | 68–72°C [42] | 1 minute [41] [42] |
| Pfu | 72°C | 2 minutes [41] |
| Q5 / Phusion | 72°C [42] | 15–30 seconds [42] |
| LongAmp Taq | 65°C [42] | 50 seconds [42] |
Cycle Number and Final Extension
- Cycle Number: The number of amplification cycles typically ranges from 25–35 [41]. Fewer cycles (25–30) are preferred for high-template concentrations or to minimize bias in applications like cloning, while more cycles (up to 40) may be needed for low-copy number targets. Exceeding 45 cycles is not recommended as it can lead to plateau effects and increased non-specific background [41].
- Final Extension: A single, final extension step of 5–15 minutes at the extension temperature is recommended to ensure all PCR products are fully double-stranded and to facilitate proper 3'-dA tailing by Taq polymerase if required for TA cloning [41] [42].
Experimental Protocols for Parameter Optimization
Protocol: Optimization of Annealing Temperature Using a Thermal Gradient
Objective: To empirically determine the optimal annealing temperature (T_a) for a specific primer-template pair to maximize yield and specificity.
Materials:
- Purified DNA template
- Forward and reverse primers (resuspended to a standard concentration, e.g., 10 µM)
- Selected DNA polymerase with corresponding reaction buffer, MgCl₂, and dNTPs
- Nuclease-free water
- Thermal cycler with gradient functionality
Method:
- Prepare a Master Mix: Calculate the volumes for a single 50 µL reaction and multiply by the number of gradient reactions (e.g., 8). Combine the following components on ice:
- Nuclease-free water: to a final volume of 50 µL
- 10X PCR Buffer: 5 µL per reaction
- MgCl₂ (25 mM): 3 µL per reaction (final 1.5 mM, adjust as needed)
- dNTP mix (10 mM each): 1 µL per reaction (final 200 µM each)
- Forward Primer (10 µM): 1.25 µL per reaction (final 0.25 µM)
- Reverse Primer (10 µM): 1.25 µL per reaction (final 0.25 µM)
- DNA Template: 50–100 ng genomic DNA or 1–10 pg plasmid DNA per reaction
- DNA Polymerase: 0.5–1.0 U per reaction
- Aliquot: Mix the master mix thoroughly and dispense equal volumes into each PCR tube.
- Set Gradient Parameters: Program the thermal cycler with an initial denaturation (e.g., 98°C for 30 s), followed by 30 cycles of:
- Denaturation: 98°C for 10 s
- Annealing: Gradient from 55°C to 70°C for 30 s
- Extension: 72°C for 30 s/kb
- Run and Analyze: Execute the PCR program. Analyze the results using agarose gel electrophoresis. The lane with the strongest, single band of the correct size indicates the optimal annealing temperature.
Protocol: Optimization of Extension Time for Long-Range PCR
Objective: To determine the minimal extension time required for the efficient and accurate amplification of long DNA fragments (>5 kb).
Materials: (As in Protocol 3.1, using a polymerase blend suitable for long-range PCR)
Method:
- Prepare Reactions: Prepare a master mix as in Protocol 3.1, using a polymerase system designed for long amplicons (e.g., LongAmp Taq).
- Set Cycling Conditions: Program the thermal cycler with a constant denaturation and annealing temperature, but vary the extension time across a set of reactions. For example, for a 10 kb target, test extension times of 8, 10, 12, and 14 minutes at 65°C.
- Run and Analyze: Execute the PCR program. Analyze the yield and specificity via agarose gel electrophoresis. The optimal time is the shortest duration that produces a strong, specific band without smearing or secondary products.
Workflow Diagram for Thermal Cycling Optimization
The following diagram illustrates the logical decision-making process for optimizing the core thermal cycling parameters, integrating the strategies discussed above.
The Scientist's Toolkit: Research Reagent Solutions
The following table details key reagents and their roles in supporting optimal thermal cycling conditions.
Table 4: Essential Reagents for PCR Thermal Cycling Optimization
| Reagent / Solution | Function | Optimization Consideration |
|---|---|---|
| High-Fidelity DNA Polymerase (e.g., Q5, Phusion) | Catalyzes DNA synthesis; offers 3'→5' proofreading for high accuracy [42]. | Requires higher annealing temperatures and shorter extension times than Taq [42]. |
| Hot-Start DNA Polymerase | Remains inactive until initial high-temperature step, preventing non-specific amplification at room temperature [43]. | Crucial for improving specificity; initial denaturation step often doubles to activate the enzyme [41]. |
| MgCl₂ Solution | Essential cofactor for DNA polymerase activity; stabilizes primer-template duplex [42] [44]. | Concentration (typically 1.5-2.0 mM) must be optimized; too low causes no product, too high causes non-specific bands [42] [34]. |
| PCR Additives (e.g., DMSO, Betaine) | Modifies nucleic acid melting behavior. DMSO helps denature GC-rich templates; Betaine homogenizes DNA stability [41] [44]. | Lowers effective Tm of primers; requires recalibration of annealing temperature [41]. Use at 1-10% (DMSO) or 1-2 M (Betaine). |
| Gradient Thermal Cycler | Allows a single experiment to test a range of temperatures for a parameter (e.g., annealing) across a block of reactions [41]. | Enables empirical, data-driven optimization of Ta, saving time and reagents compared to sequential testing. |
Polymerase chain reaction (PCR) is a foundational technique in molecular biology, but conventional protocols often fall short when faced with challenging templates. Issues such as nonspecific amplification, complex secondary structures, or long target sequences can drastically reduce yield and specificity. This application note details three advanced PCR methods—Hot-Start, Touchdown, and Long-Range PCR—that address these challenges. Framed within a comprehensive thesis on PCR optimization, this guide provides researchers, scientists, and drug development professionals with detailed protocols and strategic insights to enhance the specificity, sensitivity, and efficiency of their amplification experiments, particularly for difficult templates encountered in diagnostic and research applications.
Hot-Start PCR
Principle and Applications
Hot-Start PCR is a technique designed to suppress nonspecific amplification and primer-dimer formation by inhibiting DNA polymerase activity during reaction setup. A common source of nonspecific amplification is the extension of misprimed sequences by DNA polymerases at room temperature before thermal cycling begins. Hot-Start methods employ an enzyme modifier that blocks polymerase activity at ambient temperatures. This modifier is released during the initial high-temperature denaturation step, activating the enzyme only after the reaction mixture has reached a temperature that promotes specific primer-template binding [45] [46].
The core benefits of Hot-Start technology include:
- Prevention of Mispriming: Inhibits extension of primers bound to template sequences with low homology.
- Reduction of Primer-Dimers: Prevents extension of primers that bind to each other during reaction setup.
- Increased Assay Robustness: Enables PCR setup on high-throughput or automated liquid-handling platforms without compromising specificity, as reactions remain stable at room temperature for extended periods [45] [47].
Hot-Start PCR is particularly beneficial when the amount of template DNA is limited (less than 10^4 copies), the template is highly complex (e.g., mammalian genomic DNA), or when the reaction contains multiple primer pairs, as in multiplex PCR [47].
Experimental Protocol
Reagent Preparation
- Primers: Design and synthesize specific primers for the target DNA fragment. Resuspend primers in sterile TE buffer or nuclease-free water to a stock concentration of 10-100 µM.
- Template DNA: Prepare template DNA (genomic DNA, cDNA, etc.) and ensure its concentration and quality are suitable for PCR. The typical amount is 10-100 ng per reaction, though this may vary with template complexity.
- Master Mix Components: Prepare a master mix containing all common reagents to ensure consistency across multiple reactions.
Reaction Setup (50 µL Volume)
Keep all reagents on ice during setup. The following table details a typical reaction mixture:
Table 1: Hot-Start PCR Reaction Setup
| Component | Final Concentration/Amount | Volume for 50 µL Reaction (µL) |
|---|---|---|
| 10X PCR Buffer | 1X | 5 |
| dNTP Mix (e.g., 10 mM) | 200 µM (each dNTP) | 1 |
| MgCl₂ (e.g., 25 mM) | 1.5-2.5 mM | 1-2 (if not in buffer) |
| Forward Primer (e.g., 20 µM) | 0.1-1 µM | 0.25-2.5 |
| Reverse Primer (e.g., 20 µM) | 0.1-1 µM | 0.25-2.5 |
| Template DNA | 10-100 ng | Variable |
| Hot-Start DNA Polymerase | 1.0-2.5 units | 0.5-1 |
| Nuclease-Free Water | - | To 50 µL |
Thermal Cycling Conditions
Program the thermal cycler with the following steps:
- Initial Denaturation/Activation: 95°C for 2-10 minutes. This step simultaneously activates the Hot-Start polymerase and fully denatures the template DNA [47].
- Amplification Cycles (25-35 cycles):
- Denaturation: 95°C for 15-30 seconds.
- Annealing: 50-65°C for 15-30 seconds. The temperature is determined by the calculated Tm of the primers.
- Extension: 72°C for 1 minute per kilobase of the target amplicon.
- Final Extension: 72°C for 5-10 minutes to ensure all amplicons are fully elongated.
- Hold: 4°C, indefinitely.
Product Analysis
Analyze PCR products by agarose gel electrophoresis. Use a 1-2% agarose gel containing a DNA stain (e.g., SYBR Green I or Ethidium Bromide) and visualize the results under UV light to assess amplification specificity and yield [47].
Hot-Start Technology Comparison
The stringency, activation time, and performance of Hot-Start PCR can vary significantly depending on the inhibition method used. The following table compares the four primary types of Hot-Start technologies [45] [47]:
Table 2: Comparison of Hot-Start Technologies
| Technology | Mechanism of Inhibition | Benefits | Considerations |
|---|---|---|---|
| Chemical Modification | Polymerase is covalently linked to a chemical group. | High stringency; animal-origin free. | Requires longer activation time; may not achieve full enzyme activity. |
| Antibody-Based | An antibody binds the polymerase's active site. | Short activation; full enzyme activity restored. | Antibody may be animal-derived; exogenous protein in reaction. |
| Affibody-Based | An Affibody molecule (alpha-helical peptide) binds the active site. | Low protein content; short activation; animal-origin free. | Potentially less stringent; poor benchtop stability. |
| Aptamer-Based | An oligonucleotide aptamer binds the active site. | Short activation time; animal-origin free. | Can be less stringent; poor benchtop stability. |
Hot-Start PCR activation and amplification workflow. The polymerase remains inhibited until the high-temperature activation step, preventing nonspecific amplification during reaction setup.
Touchdown PCR
Principle and Applications
Touchdown PCR is a thermal cycling strategy that enhances amplification specificity by progressively lowering the annealing temperature during the initial cycles. The process begins with an annealing temperature set 5-10°C above the calculated Tm of the primers. This high, stringent temperature favors the formation of only perfect primer-template hybrids, selectively amplifying the most specific products in the early stages. The annealing temperature is then gradually decreased—typically by 0.5-1°C per cycle—over a series of cycles until it reaches the optimal, calculated Tm (the "touchdown" temperature) [48] [49].
This method is particularly advantageous when the optimal annealing temperature is unknown or difficult to determine due to variable buffer components or template characteristics. It is also highly effective for amplifying difficult templates, such as those with extensive secondary structures, high GC content, or when the primer-template identity is not perfect (e.g., in evolutionary PCR or when amplifying members of a multigene family) [50]. A key recommendation for maximizing specificity is to use Touchdown PCR in conjunction with a Hot-Start protocol [48].
Experimental Protocol
Primer and Reaction Setup
- Primer Design: Follow standard primer design rules. The Tm calculation is still critical for establishing the starting and ending temperatures.
- Master Mix: Prepare a standard PCR master mix, ideally employing a Hot-Start DNA polymerase to prevent nonspecific amplification during reaction setup [48].
Thermal Cycling Conditions
The following protocol is based on a primer pair with a calculated Tm of 57°C [48].
Table 3: Example Touchdown PCR Protocol (Based on Primer Tm of 57°C)
| Step | Temperature (°C) | Time | Stage and Number of Cycles |
|---|---|---|---|
| Initial Denaturation | 95 | 3:00 | - |
| Denaturation | 95 | 0:30 | Stage 1: Touchdown Phase |
| Annealing | 67 (Tm +10) | 0:45 | 10 cycles |
| Extension | 72 | 0:45 | - |
| Denaturation | 95 | 0:30 | Stage 2: Amplification Phase |
| Annealing | 57 (Target Tm) | 0:45 | 15-20 cycles |
| Extension | 72 | 0:45 | - |
| Final Extension | 72 | 5:00 | - |
Protocol Notes:
- Stage 1 (Touchdown): The annealing temperature decreases by 1°C per cycle from 67°C down to 57°C over 10 cycles. Not all thermal cyclers have an automatic touchdown feature. For older or basic instruments, a Stepdown PCR protocol can be used, where the temperature is decreased in sharper steps (e.g., 3 cycles at 62°C, 3 cycles at 58°C, 3 cycles at 54°C, then 29 cycles at 50°C) [49].
- Stage 2 (Amplification): The remaining cycles proceed at the final, optimal annealing temperature (57°C in this example).
Troubleshooting and Optimization
- Low Yield: Set the final annealing temperature in Stage 2 to 1-2°C below the calculated Tm. Alternatively, adjust the touchdown phase to decrease the temperature every 2-3 cycles instead of every cycle.
- Persistent Nonspecific Bands: Keep all reagents on ice until thermal cycling begins. Ensure a Hot-Start polymerase is used. Reduce the total number of cycles (including the touchdown phase) to below 35, as excessive cycling can lead to nonspecific amplification [48].
Touchdown PCR temperature profile. The gradual decrease in annealing temperature during the initial phase enriches the reaction with the desired specific product before bulk amplification.
Long-Range PCR
Principle and Applications
Long-Range PCR refers to the amplification of DNA fragments longer than 5 kb, with some systems capable of amplifying targets up to 20-30 kb or more. This technique overcomes the limitations of conventional PCR by using specialized enzyme blends, typically containing a proofreading polymerase (for high fidelity and processivity) and a non-proofreading polymerase (for speed and efficiency). The proofreading activity is crucial for correcting misincorporated nucleotides during the long extension phases, preventing premature termination [51] [52].
Key applications of Long-Range PCR include:
- Next-Generation Sequencing (NGS): A fast and cost-effective method for targeting large genomic regions (e.g., entire genes like BRCA1 and BRCA2) for sequencing on platforms like Illumina MiSeq [51].
- Genetic Analysis: Identifying structural rearrangements in mitochondrial DNA, mapping chromosomal translocation breakpoints, and analyzing long trinucleotide repeat expansions.
- cDNA Amplification: Amplifying long or full-length cDNA transcripts to study gene expression and splicing variants [52].
Experimental Protocol
Template and Primer Requirements
- Template Quality: The method of nucleic acid extraction is critical. Use high-quality, high-molecular-weight DNA with minimal shearing or degradation. For a 50 µL reaction, use 100-500 ng of genomic DNA.
- Primer Design: Design primers that are longer than standard primers (e.g., 25-30 nucleotides) with a higher Tm (e.g., 60-68°C) to enhance binding specificity for large fragments.
Reaction Setup and Optimized Conditions
A comparative study of six long-range enzymes found that performance varies significantly by amplicon and enzyme [51]. The following setup uses PrimeSTAR GXL DNA polymerase, which demonstrated robust performance across multiple amplicon sizes.
Table 4: Long-Range PCR Reaction Setup and Enzyme Comparison
| Component | Final Concentration/Amount | Volume for 50 µL Reaction (µL) |
|---|---|---|
| 5X PrimeSTAR GXL Buffer | 1X | 10 |
| dNTP Mix (2.5 mM each) | 200 µM (each dNTP) | 4 |
| Forward Primer | 0.2-0.4 µM | 0.5-1 |
| Reverse Primer | 0.2-0.4 µM | 0.5-1 |
| Template DNA | 100-500 ng | Variable |
| PrimeSTAR GXL Polymerase | 1.25 units | 0.5-1 |
| Nuclease-Free Water | - | To 50 µL |
Thermal Cycling Conditions for PrimeSTAR GXL:
- Initial Denaturation: 98°C for 2-5 minutes.
- Amplification Cycles (30-35 cycles):
- Denaturation: 98°C for 10-15 seconds.
- Annealing/Extension: 68°C for 1-2 minutes per kb. This two-step protocol is often sufficient and efficient.
- Final Extension: 68°C for 5-10 minutes.
Critical Optimization Strategies
- Enzyme Selection: Different enzymes have different performance characteristics. A comparative study showed that under identical conditions, TaKaRa PrimeSTAR GXL and Invitrogen SequalPrep could amplify a 12.9 kb fragment, while other enzymes required condition optimization or could not amplify it [51].
- PCR Additives: For particularly difficult templates (e.g., GC-rich regions or amplicons with secondary structures), include additives in the reaction mix.
- Extension Time: Calculate extension time based on the polymerase's synthesis speed, not just a generic "time per kb." Highly processive enzymes require less time.
The Scientist's Toolkit: Research Reagent Solutions
Successful amplification of challenging templates relies on selecting the appropriate reagents. The following table details key solutions and their functions.
Table 5: Essential Reagents for Advanced PCR Methods
| Reagent Category | Specific Examples | Primary Function & Application |
|---|---|---|
| Hot-Start DNA Polymerases | Antibody-based (Platinum Taq, DreamTaq HS), Chemically modified (AmpliTaq Gold) | Suppresses enzyme activity at room temperature to prevent nonspecific amplification and primer-dimer formation; essential for high-throughput setup and multiplex PCR [45] [46]. |
| Long-Range DNA Polymerase Blends | PrimeSTAR GXL, SequalPrep, KAPA LongRange HotStart | Specialized enzyme mixes with high processivity and proofreading activity to efficiently amplify long DNA fragments (>5 kb) with high fidelity [51]. |
| PCR Additives & Enhancers | DMSO, Betaine, Formamide, BSA | Disrupts secondary structures, lowers template Tm, and reduces base composition bias. Critical for amplifying GC-rich templates and difficult amplicons [51] [2]. |
| Specialized Primers | CleanAmp Primers (with OXT group) | Contains a thermally-labile protective group for inherent Hot-Start capability, improving specificity without requiring a modified polymerase [47]. |
| High-Fidelity Buffers | Manufacturer-supplied optimized buffers (e.g., with Mg2+, K+, betaine) | Provides optimal ionic environment and co-factors for specific polymerase blends, often including enhancers for long or difficult targets [52]. |
Hot-Start, Touchdown, and Long-Range PCR are powerful, complementary techniques that significantly expand the capabilities of standard PCR protocols. By understanding the principles behind each method and meticulously following the detailed protocols provided, researchers can overcome common obstacles such as nonspecific amplification, suboptimal primer annealing, and the challenges of amplifying long DNA fragments. Integrating these advanced methods—for instance, using a Hot-Start polymerase in a Touchdown program for a difficult long-range target—provides a robust framework for successful amplification in the most demanding research and diagnostic applications, from candidate gene validation to next-generation sequencing library preparation.
The polymerase chain reaction (PCR) is a foundational technique in molecular biology, yet the amplification of difficult templates, such as those with high guanine-cytosine (GC) content or samples containing inhibitors, often requires meticulous optimization. GC-rich regions (typically >60%) are prevalent in genomic regulatory elements but form stable secondary structures that can hinder polymerase progression, leading to poor specificity and yield [53] [54]. Similarly, inhibitor-prone samples from sources like formalin-fixed paraffin-embedded (FFPE) tissue can sequester essential reaction components, preventing efficient amplification. The strategic use of PCR additives, including dimethyl sulfoxide (DMSO), betaine, and bovine serum albumin (BSA), provides a powerful means to overcome these challenges. This application note details the mechanisms, optimal concentrations, and integrated protocols for employing these additives within a comprehensive PCR optimization framework for researchers and drug development professionals.
Additive Mechanisms and Comparative Profiles
Different additives function through distinct mechanisms to enhance PCR. DMSO and betaine primarily facilitate the amplification of GC-rich templates by reducing the formation of secondary DNA structures and lowering the melting temperature (Tm), thereby improving strand separation and primer access [55] [56]. In contrast, BSA is particularly valuable for inhibitor-prone samples, as it binds to phenolic compounds and other contaminants, preventing them from inactivating the DNA polymerase [55] [54]. Single-stranded binding (SSB) proteins can also improve specificity by binding to single-stranded DNA and preventing non-specific primer annealing [57].
The table below summarizes the key characteristics and optimal use conditions for these additives.
Table 1: Properties and Application of Common PCR Additives
| Additive | Primary Mechanism | Optimal Concentration Range | Main Application | Key Considerations |
|---|---|---|---|---|
| DMSO | Reduces DNA secondary structure; lowers Tm [55] [56]. | 2% - 10% [56] [53]; Commonly 5% [53]. | GC-rich templates [53]. | Can inhibit Taq polymerase at high concentrations; requires empirical optimization [55] [56]. |
| Betaine | Eliminates base composition dependence of DNA melting; reduces secondary structure formation [55] [56]. | 1.0 M - 1.7 M [55] [56]. | GC-rich templates [58]. | Use betaine or betaine monohydrate, not betaine hydrochloride, to avoid pH shifts [55] [56]. |
| BSA | Binds and neutralizes inhibitors (e.g., phenols, SDS); stabilizes polymerase [55] [54]. | 0.1 - 0.8 mg/mL [55] [56]; Up to 10 µg/µL (10 mg/mL) for co-enhancement [54]. | Inhibitor-prone samples (e.g., FFPE, fecal, environmental) [54]. | Enhances effects of DMSO/formamide; may be heat-labile, benefiting from supplemental addition in long cycles [54]. |
| TMAC | Increases hybridization specificity; elevates melting temperature [57] [56]. | 15 - 100 mM [56]; 40 mM for high specificity in EXPAR [57]. | Reactions requiring high specificity (e.g., with degenerate primers) [57] [56]. | Reduces non-specific amplification and potential DNA-RNA mismatch [56]. |
| Glycerol | Stabilizes enzymes; improves efficiency and specificity [59] [60]. | 5% - 20% [59]. | GC-rich templates; often used in combination with DMSO [60]. | Acts as a cryoprotectant; high concentrations may inhibit amplification [59]. |
Detailed Experimental Protocols
Protocol A: Optimizing PCR for a GC-Rich Template Using DMSO and Betaine
This protocol is designed for amplifying a GC-rich target, such as the epidermal growth factor receptor (EGFR) promoter region (GC content >75%) [53].
Reagent Setup
- Template: 1-100 ng genomic DNA. For FFPE-derived DNA, a concentration of at least 2 µg/mL may be necessary [53].
- Primers: 0.2-0.4 µM each.
- PCR Master Mix: 1x reaction buffer, 0.2 mM each dNTP, 1.5-2.0 mM MgCl₂, 1.25 U of a thermostable DNA polymerase (e.g., Taq).
- Additive Stock Solutions: 100% DMSO, 5M Betaine (monohydrate).
Procedure
- Prepare a series of PCR reactions on ice with the following additive conditions:
- Reaction 1: No additive (control).
- Reaction 2: 5% DMSO (v/v).
- Reaction 3: 1.0 M Betaine.
- Reaction 4: 5% DMSO + 1.0 M Betaine.
- Optional: Test a combination of 5% DMSO, 1.3 M Betaine, and 50 µM 7-deaza-dGTP for extremely refractory targets (GC >79%) [58].
- Adjust the final volume of all reactions to 25 µL with nuclease-free water.
- Use the following thermal cycling parameters, optimizing the annealing temperature as needed:
- Initial Denaturation: 94°C for 3 minutes.
- 35-40 Cycles:
- Denaturation: 94°C for 30 seconds.
- Annealing: 63°C for 20-30 seconds (Note: This may be 7°C higher than the calculated Tm for GC-rich targets) [53].
- Extension: 72°C for 60 seconds.
- Final Extension: 72°C for 7 minutes.
- Prepare a series of PCR reactions on ice with the following additive conditions:
Expected Results and Analysis Analyze 5 µL of each PCR product by agarose gel electrophoresis. The control reaction may show no product or non-specific bands. The addition of DMSO or betaine should increase the yield of the specific product. The combination of both additives often yields the strongest specific band with the least background [58]. For the EGFR promoter, a successful amplification will show a clear 197 bp band [53].
Protocol B: Enhancing Amplification from Inhibitor-Prone Samples Using BSA
This protocol is suitable for samples like FFPE tissues, soil extracts, or fecal DNA.
Reagent Setup
- Template: DNA extracted from the inhibitor-prone sample.
- PCR Master Mix: As in Protocol A.
- Additive Stock Solutions: 10-20 mg/mL BSA (acetylated), 100% DMSO.
Procedure
- Prepare reactions on ice with the following conditions:
- Reaction 1: No additive (control).
- Reaction 2: 0.8 mg/mL BSA.
- Reaction 3: 5% DMSO.
- Reaction 4: 0.8 mg/mL BSA + 5% DMSO.
- Adjust the final volume to 25 µL with nuclease-free water.
- For protocols involving amplification of long fragments or many cycles, consider a BSA supplementation strategy: pause the thermal cycler after every 10 cycles, quickly chill the tubes on ice, add a fresh bolus of BSA (to restore the initial concentration), and resume cycling [54].
- Run the PCR with standard thermal cycling conditions appropriate for your target.
- Prepare reactions on ice with the following conditions:
Expected Results and Analysis The control reaction may show weak or no amplification. BSA alone should improve yield, while the combination of BSA and DMSO is expected to produce the highest and most specific yield, acting as powerful co-enhancers [54].
Workflow for Additive Optimization
The following diagram summarizes the decision-making process for selecting and optimizing PCR additives.
The Scientist's Toolkit: Research Reagent Solutions
The following table lists essential reagents and their specific functions for implementing the protocols described in this note.
Table 2: Essential Research Reagents for Additive-Enhanced PCR
| Reagent | Specification/Form | Primary Function in PCR |
|---|---|---|
| DMSO (Dimethyl Sulfoxide) | Molecular biology grade, sterile-filtered. | Disrupts DNA secondary structures, facilitating the denaturation of GC-rich templates [55] [53]. |
| Betaine | Betaine monohydrate; prepare as a 5M stock solution. | Acts as a universal base analog, equalizing the stability of AT and GC base pairs and preventing secondary structure formation [55] [58]. |
| BSA (Bovine Serum Albumin) | Acetylated BSA, molecular biology grade (e.g., 20 mg/mL stock). | Binds to and neutralizes common PCR inhibitors (phenolics, humic acids) present in complex biological samples [55] [54]. |
| 7-deaza-dGTP | Sodium salt; typically used at 50 µM in combination with dGTP. | Incorporates into DNA in place of dGTP, reducing the stability of GC-rich duplexes by disrupting Hoogsteen base pairing [58]. |
| Hot-Start DNA Polymerase | Antibody-mediated or chemically modified. | Suppresses polymerase activity at room temperature, dramatically reducing primer-dimer and non-specific amplification during reaction setup [61]. |
| Magnesium Chloride (MgCl₂) | Separate 25-50 mM stock solution (not in buffer). | Essential co-factor for DNA polymerase; its concentration must be empirically optimized as it critically affects specificity and yield [55] [56]. |
Troubleshooting and Synergistic Combinations
Lack of Amplification with Single Additive: Proceed to test combinations of additives, as they often work synergistically. For instance, a powerful mixture for extremely GC-rich targets (≥79%) is 5% DMSO, 1.3 M betaine, and 50 µM 7-deaza-dGTP [58]. Similarly, combining BSA with DMSO or formamide can significantly boost yields for a broad range of GC-rich template sizes compared to using solvents alone [54].
Increased Non-specific Amplification: This can occur if the concentration of an additive like DMSO is too high [55] [54]. Titrate the additive across its recommended range. Also, consider increasing the annealing temperature or using hot-start polymerase to increase stringency [61]. The additive TMAC (40 mM) can be introduced to increase hybridization specificity [57].
Inconsistent Results with BSA: BSA can be heat-labile. If amplification fails for long targets or high cycle numbers, implement a BSA supplementation strategy by pausing the reaction after the first 10 cycles and adding a fresh bolus of BSA [54].
By systematically applying these protocols and leveraging synergistic additive combinations, researchers can robustly overcome the significant challenges posed by GC-rich templates and inhibitor-prone samples, thereby enhancing the reliability and scope of their PCR-based analyses.
Diagnosing and Solving Common PCR Problems for Perfect Results
The Polymerase Chain Reaction (PCR) is a foundational technique in molecular biology, yet researchers frequently encounter challenges such as a complete lack of amplification, low product yield, or the appearance of non-specific bands that compromise results. This guide provides a systematic, step-by-step framework for diagnosing and resolving these common PCR issues within the broader context of optimization protocol research. Even experienced researchers can face subtle pitfalls that affect experimental outcomes, making a structured troubleshooting approach essential [18]. Even a single parameter—such as magnesium concentration, annealing temperature, or template quality—can significantly impact amplification success, necessitating methodical investigation rather than random adjustments [62] [63].
The following workflow provides a logical sequence for diagnosing and resolving the most prevalent PCR problems, from initial verification of reagents to targeted optimization of specific parameters. Adhering to this structured pathway can significantly reduce troubleshooting time and improve experimental reproducibility.
Diagnostic Procedures and Experimental Protocols
Initial Diagnostic Protocol: Component Verification
When troubleshooting failed PCR, begin by systematically verifying each reaction component to eliminate simple errors and contamination issues.
Materials:
- Fresh aliquots of all PCR reagents (polymerase, buffer, dNTPs, MgCl₂)
- High-quality nuclease-free water
- Primers confirmed by sequence analysis
- Validated positive control template and primers
- New PCR tubes and filter pipette tips
Methodology:
- Prepare a Master Mix excluding template, calculating volumes for all samples plus 10% excess to account for pipetting error [2].
- Set up control reactions including:
- Complete positive control: Known working primers and template
- Negative control: Master mix with water substituted for template
- Test reactions: Experimental primers with both new and existing template stocks
- Use thin-walled 0.2 ml PCR tubes and maintain reagents on ice throughout setup to minimize non-specific priming [2].
- Add template DNA last to prevent carryover contamination, changing pipette tips between samples.
- Perform gentle mixing after adding polymerase by pipetting up and down 20 times to ensure homogeneous distribution [2].
Interpretation: If the positive control fails, the master mix is faulty. If only test reactions fail, the issue lies with template quality or primer design. If negative control shows amplification, contamination is present.
Template DNA Quality Assessment Protocol
Template quality and quantity significantly impact amplification success. This protocol provides a comprehensive assessment method.
Materials:
- Spectrophotometer (NanoDrop or equivalent)
- Agarose gel electrophoresis equipment
- DNA molecular weight markers
- Fluorescent DNA quantification kit (optional)
Methodology:
- Quantitative Analysis:
- Dilute template DNA appropriately and measure absorbance at 260nm and 280nm.
- Calculate DNA concentration: [DNA] (ng/μL) = A260 × 50 × dilution factor.
- Assess purity: A260/A280 ratio of ~1.8 indicates pure DNA; ratios significantly lower suggest protein contamination [64].
- Qualitative Analysis:
- Cast a 0.8-1.0% agarose gel in TAE buffer with appropriate fluorescent nucleic acid stain.
- Load 100-500 ng of DNA alongside molecular weight marker.
- Electrophorese at 5-8 V/cm until adequate separation achieved.
- Visualize under UV light: Intact genomic DNA should appear as a single high-molecular-weight band; degraded DNA will show a smear toward lower molecular weights [63].
Troubleshooting: For degraded templates, re-extract DNA using fresh reagents. For contaminated samples, perform ethanol precipitation or use commercial clean-up kits. The optimal amount of template DNA varies by source, as detailed in Table 1.
Table 1: Optimal Template DNA Quantities for PCR Applications
| Template Type | Optimal Amount | Copy Number Equivalent | Notes |
|---|---|---|---|
| Human Genomic DNA | 30-100 ng [65] [43] | ~10⁴-10⁵ molecules [43] | High-copy targets (e.g., housekeeping genes) may require only 10 ng [65] |
| E. coli Genomic DNA | 100 pg - 1 ng [65] | ~10⁴-10⁵ molecules | Complex genome; avoid excess template |
| Plasmid DNA | 1 pg - 10 ng [64] | >10⁶ molecules | Lower amounts reduce non-specific amplification |
| cDNA | 10 pg (RNA equivalent) [65] | Variable | Depends on transcript abundance |
Troubleshooting by Problem Type
No Amplification or Low Yield
When no bands or faint bands are observed after gel electrophoresis, specific parameters require optimization as outlined in Table 2.
Table 2: Troubleshooting No Amplification or Low Yield
| Cause | Solution | Experimental Protocol |
|---|---|---|
| Insufficient/inferior template | Increase template amount; re-purify degraded DNA | Use 10-1000 ng genomic DNA; check A260/A280 ratio (≥1.8); run gel to verify integrity [62] [63] [64] |
| Suboptimal cycling parameters | Adjust annealing temperature; increase cycle number | Perform gradient PCR (1-2°C increments); increase to 45 cycles for low-copy targets [66] [63] |
| Insufficient Mg²⁺ concentration | Optimize Mg²⁺ concentration (0.5-5.0 mM) | Set up reactions with 0.5 mM Mg²⁺ increments; note that EDTA contamination chelates Mg²⁺ [62] [63] [43] |
| Primer-related issues | Redesign problematic primers; optimize concentration | Verify specificity with NCBI Primer-BLAST; use 0.1-1 μM final concentration [2] [63] [64] |
| PCR inhibitors | Add enhancers; re-purify template | Include 1-10% DMSO for GC-rich templates; use BSA (10-100 μg/mL) for inhibitor neutralization [62] [65] [43] |
Optimization Protocol for Magnesium Concentration:
- Prepare a master mix containing all components except MgCl₂ and template.
- Aliquot equal volumes into 8 PCR tubes.
- Add MgCl₂ to create a concentration series: 0.5, 1.0, 1.5, 2.0, 2.5, 3.0, 4.0, and 5.0 mM.
- Add template to each tube, amplify using standard cycling conditions.
- Analyze products by agarose gel electrophoresis to determine optimal Mg²⁺ concentration.
Non-Specific Bands and Primer-Dimer Formation
Non-specific amplification occurs when primers bind to unintended sequences, while primer-dimers form through self-annealing of primers. Table 3 addresses these issues.
Table 3: Troubleshooting Non-Specific Bands and Primer-Dimers
| Cause | Solution | Experimental Protocol |
|---|---|---|
| Low annealing temperature | Increase temperature incrementally | Use gradient PCR; set temperature 3-5°C below primer Tm [62] [63] [64] |
| Non-hot-start polymerase | Switch to hot-start enzyme | Use antibody-inactivated or chemically modified hot-start polymerases [62] [63] |
| Excessive primer concentration | Reduce primer concentration (0.1-1 μM) | Titrate primers from 0.05-1 μM; 0.2 μM often optimal for specificity [66] [63] [18] |
| Poor primer design | Redesign with optimal parameters | Ensure primers are 18-30 bases, 40-60% GC content, and Tm within 5°C of each other [2] [64] [43] |
| Long annealing/extension times | Shorten incubation times | Reduce annealing to 15-30 sec; optimize extension time (typically 1 min/kb) [65] [63] |
Touchdown PCR Protocol for Enhanced Specificity:
- Set initial annealing temperature 10°C above calculated Tm.
- Decrease annealing temperature by 1°C every cycle for the first 10 cycles.
- Continue with remaining 20-25 cycles at the final, lower annealing temperature.
- This approach preferentially enriches specific products formed during early high-stringency cycles.
The Scientist's Toolkit: Research Reagent Solutions
Table 4: Essential Reagents for PCR Troubleshooting and Optimization
| Reagent | Function | Optimal Concentration | Application Context |
|---|---|---|---|
| Hot-Start DNA Polymerase | Inhibits polymerase activity at room temperature; prevents mispriming | 0.5-2.5 units/50 μL reaction [2] | Standard PCR; eliminates primer-dimers and non-specific products [62] [63] |
| DMSO (Dimethyl Sulfoxide) | Disrupts secondary structures; lowers DNA melting temperature | 1-10% [65] [43] | GC-rich templates (>65% GC); reduces formation of hairpin structures [65] [63] |
| BSA (Bovine Serum Albumin) | Binds inhibitors; stabilizes polymerase | 10-100 μg/mL [62] [43] | Crude samples (blood, soil, plant extracts); neutralizes PCR inhibitors [62] [63] |
| Betaine | Equalizes DNA melting temperatures; reduces secondary structures | 0.5 M to 2.5 M [2] [43] | GC-rich templates; enhances amplification efficiency of difficult targets [2] |
| MgCl₂ | Essential polymerase cofactor; critical for enzyme activity and fidelity | 0.5-5.0 mM [62] [65] [43] | All PCR applications; requires optimization for each primer-template system [62] [63] |
Advanced Optimization Strategies
Primer Design Optimization Protocol
Proper primer design is fundamental to PCR success. This protocol ensures primers meet optimal specifications.
Materials:
- Primer design software (NCBI Primer-BLAST, Primer3)
- Template sequence in FASTA format
- Computer with internet access
Methodology:
- Determine Optimal Length: Design primers 18-30 nucleotides long to balance specificity and binding efficiency [2] [43].
- Calculate GC Content: Aim for 40-60% GC content to ensure appropriate melting temperature [2] [64].
- Check 3' End Composition: Terminate with G or C to increase priming efficiency through stronger hydrogen bonding (GC clamp) [2] [18].
- Calculate Melting Temperatures (Tm): Use software to determine Tm; ensure both primers have Tm within 5°C of each other [2] [43].
- Evaluate Specificity: Run BLAST analysis against appropriate database to ensure primers target unique sequence [2].
- Check for Secondary Structures: Avoid self-complementarity (>3 bp complementarity) and hairpin formation [2] [64].
Validation: Synthesize primers with HPLC purification, resuspend in TE buffer or nuclease-free water, and store at -20°C in small aliquots to minimize freeze-thaw cycles.
Thermal Cycler Parameter Optimization
Precise temperature control is critical for specific amplification. This optimization protocol addresses cycling parameters.
Materials:
- Thermal cycler with gradient capability
- Validated primer-template system
- Standard PCR reagents
Methodology:
- Initial Denaturation: 94-98°C for 1-2 minutes for complex templates (genomic DNA); 98°C for 2 minutes for direct amplification from tissue [65].
- Denaturation: 94-98°C for 10-30 seconds; use shorter times for heat-resistant enzymes [65].
- Annealing Optimization:
- Set up gradient PCR with temperatures spanning 5-10°C range.
- Calculate starting point: 3-5°C below lowest primer Tm.
- Run amplification with identical template and reagent conditions across temperatures.
- Extension: 68-72°C for 1 minute per kb for standard polymerases; 5-20 seconds per kb for high-speed enzymes [65].
- Cycle Number: 25-35 cycles typically sufficient; increase to 45 for low-copy targets [66] [63].
Two-Step PCR Protocol: For primers with Tm >68°C, combine annealing and extension at 68-72°C, eliminating separate annealing step [65].
Effective PCR troubleshooting requires systematic investigation of template quality, primer design, reagent concentrations, and cycling parameters. By implementing the structured protocols and optimization strategies outlined in this guide, researchers can efficiently resolve common amplification problems and achieve robust, specific results. The quantitative data tables and experimental workflows provide a comprehensive reference for diagnosing PCR failures and implementing evidence-based solutions, ultimately enhancing experimental reproducibility and success in molecular biology research and drug development applications.
Eliminating Primer-Dimers and Spurious Products through Design and Condition Refinement
Polymerase chain reaction (PCR) is a foundational technique in molecular biology, yet its efficiency is often compromised by nonspecific amplification artifacts such as primer-dimers and spurious products. Primer-dimers are short, double-stranded DNA fragments formed when primers anneal to each other instead of the target DNA template, significantly reducing reaction efficiency and yield [67]. These artifacts arise through inter-primer complementarity and are amplified preferentially, consuming valuable reagents and potentially leading to false positives or failed reactions [68]. This application note provides a comprehensive, step-by-step framework encompassing primer design principles and reaction condition optimization to systematically eliminate these amplification artifacts, enabling robust and reliable PCR amplification for research and diagnostic applications.
Primer Design Strategies for Specificity
Fundamental Design Parameters
Careful primer design is the most critical factor in preventing nonspecific amplification. The following parameters should be strictly adhered to during the design process.
- Primer Length: Optimal primers are typically 18-30 nucleotides in length [69] [13] [25]. This provides sufficient sequence for unique binding while maintaining practical annealing kinetics.
- Melting Temperature (Tm): Aim for a Tm between 55-65°C for each primer, with the forward and reverse primer Tm values within 1-2°C of each other [13] [44]. This ensures synchronous binding of both primers to the template.
- GC Content: Maintain GC content between 40-60% [69] [25]. Avoid long stretches of a single nucleotide, particularly runs of four or more G or C bases [25] [70].
- 3'-End Stability: The last five bases at the 3' end, particularly the ultimate base, are critical for polymerase extension. A G or C residue at the 3' terminus (GC clamp) strengthens binding through stronger hydrogen bonding, but avoid having more than 3 G/C bases in the last 5 nucleotides to prevent mispriming [25] [44].
Avoiding Secondary Structures
Computational analysis of potential secondary structures is essential during primer design. The following artifacts must be screened for using tools like IDT's OligoAnalyzer Tool or NCBI BLAST [13] [70].
- Primer-Dimers: These form through complementarity between primers, especially at the 3' ends. Self-dimers (a primer binding to itself) and cross-dimers (forward and reverse primers binding to each other) must be avoided. The ΔG of any heterodimers should be weaker (more positive) than -9.0 kcal/mol [13].
- Hairpins: Intramolecular folding within a primer can prevent template binding. Screen for and eliminate primers with stable hairpin structures (ΔG > -9.0 kcal/mol) [13] [44].
Table 1: Critical Primer Design Parameters to Minimize Artifacts
| Parameter | Optimal Range | Rationale | Consequence of Deviation |
|---|---|---|---|
| Length | 18-30 nucleotides | Balances specificity with efficient annealing | Shorter: Reduced specificity; Longer: Reduced efficiency [69] |
| Tm | 55-65°C (within 2°C for pair) | En synchronous primer annealing | Differential Tm: Reduced yield; Incorrect Tm: Nonspecific binding [44] |
| GC Content | 40-60% | Provides sequence complexity and stable binding | Low GC: Unstable binding; High GC: Secondary structures [69] |
| 3'-End Sequence | G or C clamp, no complementarity | Ensures specific initiation of extension | Complementarity: Primer-dimer formation [25] |
Reaction Component Optimization
Cycling Conditions and Temperature Optimization
Precise thermal cycling parameters are crucial for enforcing specific primer-template binding.
- Annealing Temperature (Ta): The Ta is the most critical thermal parameter. Start by calculating Ta as 5°C below the primer Tm [13]. For greater specificity, empirically determine the optimal Ta using a gradient PCR block, testing a range from 55-72°C [44]. A Ta that is too low permits nonspecific binding, while a Ta that is too high reduces yield [44].
- Hot-Start Activation: Utilize hot-start DNA polymerases, which remain inactive until a high-temperature activation step (e.g., 95°C for 2 minutes). This prevents enzymatic activity during reaction setup and initial denaturation, dramatically reducing primer-dimer formation [67] [43].
- Cycling Protocol: A typical protocol for a 500 bp amplicon includes: initial denaturation at 95°C for 2 minutes; 25-35 cycles of [95°C for 15 seconds, Ta for 15 seconds, 68°C for 45 seconds]; and a final extension at 68°C for 5 minutes [69].
Chemical Composition and Concentrations
The chemical environment of the reaction directly impacts specificity and yield.
- Magnesium Concentration: Mg2+ is an essential cofactor for polymerase activity. The optimal concentration is typically 1.5-2.0 mM but must be titrated for each primer-template system [69]. Titrate MgCl2 in 0.5 mM increments from 1.0-4.0 mM. Low Mg2+ reduces polymerase activity, while high Mg2+ increases error rate and promotes nonspecific binding [69] [44].
- Primer Concentration: Use a final primer concentration of 0.1-0.5 µM each [69] [43]. Higher concentrations (>0.5 µM) increase the likelihood of primer-dimer formation and nonspecific binding [69].
- dNTP Concentration: Standard concentrations are 200 µM of each dNTP. Higher concentrations can increase yield but may reduce fidelity, while lower concentrations (50-100 µM) can enhance fidelity at the cost of yield [69].
- Template Quality and Quantity: Use high-quality, purified DNA. For genomic DNA, use 1 ng–1 µg; for plasmid DNA, use 1 pg–10 ng [69]. Inhibitors or excessive template can reduce specificity and yield.
Table 2: PCR Component Optimization Guidelines
| Component | Standard Concentration | Optimization Range | Effect of Improper Concentration |
|---|---|---|---|
| Mg2+ | 1.5-2.0 mM | 0.5-4.0 mM (titrate in 0.5 mM steps) | Too low: No product; Too high: Nonspecific bands [69] |
| Primers | 0.1-0.5 µM each | 0.05-1.0 µM | High: Primer-dimers; Low: No amplification [69] |
| dNTPs | 200 µM each | 50-200 µM (balance with Mg2+) | High: Reduced fidelity; Low: Reduced yield [69] |
| Template DNA | Varies by source (e.g., 10-100 ng genomic) | 104 copies (~25-30 cycles) | Too high: Nonspecific bands; Too low: No product [69] [43] |
Advanced Chemical Additives
For challenging templates (e.g., high GC content, strong secondary structure), chemical additives can dramatically improve results.
- DMSO (Dimethyl Sulfoxide): Used at 2-10% final concentration, DMSO disrupts base pairing and helps denature GC-rich templates, improving amplification efficiency [43] [44].
- Betaine: At 1.0-1.3 M, betaine equalizes the contribution of GC and AT base pairs to duplex stability, particularly beneficial for long amplicons and GC-rich templates [44].
- Other Additives: Formamide (1.25-10%) can increase stringency, while non-ionic detergents (Tween 20, Triton X-100 at 0.1-1%) can stabilize polymerase enzymes [43].
Experimental Protocols
Protocol 1: Gradient PCR for Annealing Temperature Optimization
Purpose: To empirically determine the optimal annealing temperature (Ta) for a primer pair.
Materials:
- Template DNA (diluted to appropriate concentration)
- Forward and reverse primers (resuspended to 10 µM working stock)
- 2X PCR Master Mix (containing buffer, dNTPs, Mg2+, hot-start polymerase)
- Nuclease-free water
- Thermal cycler with gradient capability
Procedure:
- Prepare a master mix on ice: 25 µL 2X Master Mix, 2 µL forward primer (10 µM), 2 µL reverse primer (10 µM), 1 µL template DNA, and 20 µL nuclease-free water for a total volume of 50 µL.
- Aliquot equal volumes of the master mix into PCR tubes.
- Program the thermal cycler with a gradient across the block: set the annealing temperature gradient from 55°C to 72°C.
- Run the following program: Initial denaturation: 95°C for 2 minutes; 30 cycles of: [95°C for 15 seconds], [Gradient Ta for 30 seconds], [72°C for 1 minute/kb]; Final extension: 72°C for 5 minutes; Hold at 4°C.
- Analyze results by agarose gel electrophoresis. The optimal Ta will produce a single, intense band of the expected size with minimal background or primer-dimer.
Protocol 2: Magnesium Titration for Reaction Specificity
Purpose: To determine the optimal Mg2+ concentration for specific amplification.
Materials:
- Template DNA and primers (as in Protocol 1)
- 10X PCR Buffer (without MgCl2)
- 50 mM MgCl2 stock solution
- 10 mM dNTP mix
- Hot-start DNA polymerase (e.g., Taq polymerase)
Procedure:
- Prepare a master mix without Mg2+: 5 µL 10X PCR Buffer (without Mg2+), 1 µL dNTP mix (10 mM), 1 µL forward primer (10 µM), 1 µL reverse primer (10 µM), 0.25 µL DNA polymerase (5 U/µL), 1 µL template DNA, and variable MgCl2 and water.
- Set up reactions with MgCl2 concentrations of: 1.0, 1.5, 2.0, 2.5, 3.0, 3.5, and 4.0 mM.
- Adjust nuclease-free water volumes accordingly to maintain a final volume of 50 µL per reaction.
- Run the PCR using the previously determined optimal Ta and standard cycling conditions.
- Analyze by agarose gel electrophoresis. Select the Mg2+ concentration that yields the strongest specific product with minimal nonspecific amplification.
Workflow and Mechanism Visualization
Diagram 1: Systematic PCR optimization workflow. This flowchart outlines the step-by-step process for eliminating primer-dimers and spurious products, from initial primer design through empirical condition optimization.
Diagram 2: Mechanism of primer-dimer formation and prevention. The top pathway shows how complementary 3' ends lead to artifactual amplification, while the bottom pathway demonstrates how proper primer design prevents this issue.
Research Reagent Solutions
Table 3: Essential Reagents for PCR Optimization
| Reagent Category | Specific Examples | Function and Application |
|---|---|---|
| Hot-Start Polymerases | Taq Hot Start, OneTaq Hot Start, ZymoTaq [69] [70] | Prevents primer-dimer formation during reaction setup by requiring thermal activation; essential for high-specificity applications |
| High-Fidelity Enzymes | Pfu, KOD polymerase [43] [44] | Provides 3'→5' exonuclease (proofreading) activity for error correction; crucial for cloning and sequencing |
| PCR Additives | DMSO, Betaine, Formamide [43] [44] | Disrupts secondary structures, homogenizes base stability; critical for GC-rich templates and long amplicons |
| Primer Design Tools | IDT OligoAnalyzer, PrimerQuest, NCBI BLAST [13] [70] | Computational screening for secondary structures, specificity, and optimal melting temperatures |
| Specialty Primers | SAMRS (Self-Avoiding Molecular Recognition Systems) [68] | Modified bases that enhance binding to natural DNA while avoiding primer-primer interactions; valuable for multiplex PCR |
Systematic elimination of primer-dimers and spurious PCR products requires a multifaceted approach combining rigorous in silico primer design with empirical optimization of reaction conditions. By adhering to established design parameters, utilizing hot-start enzymes, and methodically optimizing annealing temperatures and Mg2+ concentrations, researchers can achieve highly specific and efficient amplification. The protocols and guidelines presented here provide a comprehensive framework for troubleshooting and optimizing PCR assays, enabling reliable results across diverse applications from basic research to diagnostic development.
The polymerase chain reaction (PCR) is a foundational technique in molecular biology, yet the amplification of difficult templates remains a significant challenge that can impede research and diagnostic progress. Difficult templates typically include sequences with high GC content (>60%), long amplicons (>5 kb), and targets present in low copy numbers. These templates present unique obstacles such as strong hydrogen bonding, secondary structure formation, and increased susceptibility to stochastic amplification effects. The persistence of these challenges underscores the critical need for robust, optimized protocols. This application note provides detailed methodologies and strategic frameworks to overcome these barriers, framed within the broader context of developing a comprehensive, step-by-step PCR optimization protocol for researchers, scientists, and drug development professionals. The strategies outlined herein synthesize current literature and technical advances to provide a systematic approach for successful amplification of even the most recalcitrant targets.
GC-Rich Regions: Overcoming Stability and Structural Challenges
GC-rich DNA sequences, where guanine (G) and cytosine (C) bases constitute 60% or more of the sequence, present two primary challenges for PCR amplification. First, the three hydrogen bonds in G-C base pairs confer greater thermal stability compared to the two bonds in A-T pairs, requiring higher denaturation energies [71] [72]. Second, these sequences are highly prone to forming stable secondary structures such as hairpin loops that can block polymerase progression [24] [72]. These factors collectively result in failed amplifications, low yields, or non-specific products. The following optimized protocol addresses these challenges through a multi-pronged approach involving specialized reagents, customized cycling conditions, and strategic additive incorporation.
Experimental Protocol for GC-Rich Amplification
Step 1: Template Preparation
- Use 25 ng/μL of high-quality genomic DNA as starting material [73]. Ensure DNA is free of contaminants through spectrophotometric assessment (A260/A280 ratio of ~1.8).
Step 2: Reaction Setup
- Prepare a 50 μL reaction mixture with the following components:
- 1X GC Buffer (commercially available with specialized polymerases)
- Organic Additives: Include betaine (1-1.5 M final concentration) and DMSO (3-10% v/v) to reduce secondary structure formation and lower DNA melting temperature [24] [71] [46].
- MgCl₂: Optimize concentration between 1.0-4.0 mM, testing in 0.5 mM increments [71]. Begin with 2.0 mM for initial tests [73].
- dNTPs: 0.2 mM each dNTP
- Primers: 0.2-0.5 μM each forward and reverse primer
- Polymerase: 1.25 U of a polymerase specifically engineered for GC-rich templates (e.g., Q5 High-Fidelity DNA Polymerase or OneTaq DNA Polymerase with GC Enhancer) [71] [46].
- Prepare a 50 μL reaction mixture with the following components:
Step 3: Thermal Cycling
- Use the following cycling parameters:
- Initial Denaturation: 98°C for 30 seconds
- Amplification (35-40 cycles):
- Final Extension: 72°C for 2 minutes
- Use the following cycling parameters:
Step 4: Post-Amplification Analysis
- Analyze 5-10 μL of PCR product by agarose gel electrophoresis. Expect a single, discrete band of the expected size. Sequence the product to confirm target specificity and absence of mutations [73].
Research Reagent Solutions for GC-Rich Templates
- Specialized Polymerases: Q5 High-Fidelity DNA Polymerase (NEB #M0491) or OneTaq DNA Polymerase (NEB #M0480) with GC Enhancer [71]. These enzymes are specifically optimized for challenging templates and often include proprietary buffer systems.
- GC Enhancers: Commercial formulations (e.g., from NEB) containing a proprietary mix of additives that disrupt secondary structures [71].
- Organic Additives: Molecular biology grade DMSO, betaine, and glycerol for optimizing reaction stringency and melting characteristics [24] [71] [46].
- MgCl₂ Solutions: Sterile, nuclease-free MgCl₂ solutions for titration experiments to optimize cofactor concentration [71] [73].
Quantitative Data for GC-Rich Optimization
Table 1: Effects of Additives on GC-Rich PCR Amplification
| Additive | Concentration Range | Mechanism of Action | Effect on Tm |
|---|---|---|---|
| DMSO | 3-10% (v/v) | Disrupts base stacking, reduces secondary structure formation | Lowers by ~0.6°C per 1% DMSO |
| Betaine | 1-1.5 M | Equalizes stability of AT and GC base pairs, prevents hairpin formation | Lowers significantly |
| Glycerol | 5-15% (v/v) | Stabilizes enzymes, alters DNA melting properties | Lowers slightly |
| 7-deaza-dGTP | 50-100 μM (as dGTP substitute) | Analog that reduces hydrogen bonding in GC pairs | Lowers moderately |
Long Amplicons: Maintaining Polymerase Processivity and Integrity
Amplifying long DNA fragments (>5 kb) presents distinct challenges related to polymerase processivity (the ability to incorporate nucleotides continuously) and template integrity. Standard polymerases like Taq may stall or dissociate from long templates, leading to truncated products. Additionally, mechanical shearing from vortexing or pipetting can fragment long DNA templates before amplification [74]. Success requires specialized enzyme systems, gentle template handling, and extended cycling times to accommodate reduced polymerization rates.
Experimental Protocol for Long Amplicon Amplification
Step 1: Template Handling and Quality Assessment
- Use high-molecular-weight DNA (minimum 50 ng/μL) assessed by pulse-field gel electrophoresis for integrity.
- Avoid vortexing and excessive pipetting of DNA stocks. Aliquot working concentrations and store at 4°C to prevent freeze-thaw damage [74].
Step 2: Reaction Setup
- Prepare a 50 μL reaction mixture with the following components:
- 1X specialized long-range PCR buffer
- MgCl₂: 2.0-2.5 mM (optimize for specific template)
- dNTPs: 0.2-0.3 mM each (higher than standard PCR)
- Primers: 0.2-0.5 μM each
- Polymerase Blend: Use a high-processivity polymerase or enzyme blend specifically designed for long amplicons (e.g., Q5 DNA Polymerase for 10-20 kb targets or LongAmp Taq DNA Polymerase for up to 30 kb targets) [74].
- Prepare a 50 μL reaction mixture with the following components:
Step 3: Thermal Cycling
- Use the following cycling parameters:
- Initial Denaturation: 98°C for 30 seconds
- Amplification (30-35 cycles):
- Denaturation: 98°C for 10-20 seconds
- Annealing: 55-65°C for 30 seconds (optimize based on primer Tm)
- Extension: 68-72°C for 2-4 minutes per kb (adjust based on polymerase recommendations)
- Final Extension: 72°C for 10-15 minutes to ensure complete product extension.
- Use the following cycling parameters:
Step 4: Product Analysis
- Analyze products on low-percentage agarose gels (0.6-0.8%) for resolution of large fragments. Use appropriate DNA size ladders spanning the expected amplicon size.
Research Reagent Solutions for Long Amplicons
- High-Processivity Polymerases: Q5 High-Fidelity DNA Polymerase (NEB #M0491) for complex templates up to 20 kb, or LongAmp Taq DNA Polymerase for maximum length (up to 30 kb) [74].
- Specialized Long-Range Buffers: Commercial buffer systems formulated with enhanced processivity factors and optimized Mg²⁺ concentrations.
- High-Fidelity Enzyme Blends: Mixtures of Taq polymerase with proofreading enzymes to maintain accuracy over extended amplifications [46].
Quantitative Data for Long Amplicon Optimization
Table 2: Polymerase Selection Guide for Long Amplicons
| Polymerase Type | Maximum Amplicon Length | Template Type | Extension Time/kb | Key Features |
|---|---|---|---|---|
| Standard Taq | 3-5 kb | Simple genomic, plasmid | 1 minute | Low processivity, cost-effective |
| Q5 High-Fidelity | 10-20 kb | Complex genomic | 30-45 seconds | High fidelity, high processivity |
| LongAmp Taq | Up to 30 kb | Genomic, simple templates | 1-2 minutes | Specialized blend, 65°C extension |
Low-Copy Targets: Maximizing Sensitivity and Specificity
Amplifying low-abundance targets presents unique challenges related to stochastic effects, where random molecular interactions dominate at minimal concentrations, and increased technical variability [75]. At low template concentrations (e.g., <20 copies/reaction), Poisson distribution effects mean some reactions may contain no template molecules while others contain one or two, leading to inconsistent amplification. This variability is often exacerbated by suboptimal amplification efficiency, pipetting inaccuracies, and inhibitor presence. Successful amplification requires strategies that maximize sensitivity while maintaining rigorous specificity controls.
Experimental Protocol for Low-Copy Target Amplification
Step 1: Reaction Setup and Design
- Increase Technical Replicates: Use 5 or more replicates for targets with expected Cq values >30 to account for stochastic effects [75].
- Miniaturize Reactions Carefully: While 2.5-5 μL reactions are feasible, avoid 1 μL volumes which show markedly increased variability and non-detection rates [75].
- Incorporate Inhibitor Resistant Components: Use polymerases and buffers formulated for direct PCR from complex samples if purification is limited [46].
Step 2: qPCR Setup for Quantification
- Prepare reactions containing:
- 1X specialized master mix for low-copy detection
- Probe-Based Chemistry: Use hydrolysis probes (e.g., TaqMan) for enhanced specificity over intercalating dyes in complex samples [76].
- Template: Up to 25 μL of sample DNA in 50 μL reaction
- Enhanced Enzyme Concentration: Consider increasing polymerase concentration by 25-50% above standard recommendations.
- Prepare reactions containing:
Step 3: Thermal Cycling and Data Collection
- Use the following cycling parameters:
- Extended Initial Steps: Reverse transcription at 50°C for 10 minutes (if detecting RNA)
- Pre-incubation/Activation: 95°C for 2 minutes
- Amplification (45-50 cycles):
- Denaturation: 95°C for 10 seconds
- Annealing/Extension: 60°C for 30-60 seconds
- Extended Cycle Numbers: Increase from standard 40 to 45-50 cycles to detect late-amplifying templates.
- Use the following cycling parameters:
Step 4: Data Analysis and Validation
- Calculate Confidence Intervals: Report 95% confidence intervals for copy number estimates rather than single values [75].
- Establish Limits of Detection: Determine LoD with 24 replicates at 20-50 copies/reaction [75].
- Efficiency Correction: Apply efficiency corrections to all quantification calculations rather than assuming 100% efficiency [75].
Research Reagent Solutions for Low-Copy Targets
- High-Sensitivity Master Mixes: Commercial formulations specifically designed for low-copy detection with inhibitor-resistant properties.
- Single Enzyme RT-PCR Systems: Novel engineered DNA polymerase variants (e.g., Thermus aquaticus DNA polymerase I variants) that catalyze both reverse transcription and DNA amplification in a single tube, reducing hands-on time and contamination risk [76].
- Digital PCR Systems: For absolute quantification without standard curves, though this represents an alternative platform rather than PCR optimization.
Quantitative Data for Low-Copy Target Optimization
Table 3: Optimization Strategies for Low-Copy Target Amplification
| Parameter | Standard Protocol | Enhanced Low-Copy Protocol | Rationale |
|---|---|---|---|
| Technical Replicates | 3 replicates | 5-12 replicates [75] | Accounts for stochastic distribution at low concentrations |
| Total Cycle Number | 40 cycles | 45-50 cycles | Enables detection of very late-amplifying templates |
| Reaction Volume | 20 μL | 2.5-5 μL (avoid 1 μL) [75] | Maintains detection sensitivity while conserving sample |
| Data Reporting | Mean Cq only | 95% confidence intervals [75] | Reflects technical variability in quantification |
| Polymerase Concentration | Standard | 25-50% increase | Enhances probability of target capture and amplification |
The amplification of difficult templates—whether GC-rich, long, or low-copy—requires a systematic approach that addresses the unique biochemical challenges each presents. Through strategic polymerase selection, customized buffer formulations, optimized thermal cycling parameters, and appropriate data analysis methods, researchers can overcome these common PCR obstacles. The protocols presented here provide a framework for developing targeted solutions while emphasizing the importance of empirical optimization for specific template-primer systems. As PCR continues to evolve as a fundamental tool in biomedical research and diagnostics, these strategies for handling difficult templates will remain essential for generating reliable, reproducible results across diverse applications.
Multiplex polymerase chain reaction (PCR) represents a transformative molecular technique that enables the simultaneous amplification of multiple target sequences within a single reaction vessel [77]. This approach delivers significant benefits, including maximized information yield from precious samples, increased throughput, reduced operational costs, and enhanced data reliability through the incorporation of internal controls [78]. However, achieving robust and balanced amplification of all targets presents considerable technical challenges, primarily centered on the strategic design of primer pools and reaction optimization to minimize adverse interactions [77].
The fundamental challenge in multiplex PCR development lies in designing specific, non-reactive primers for multiple targets and optimizing reaction conditions so that no single target dominates the reaction or fails to amplify efficiently [78]. This application note provides a comprehensive, step-by-step framework for researchers and drug development professionals to systematically overcome these challenges, with particular emphasis on harmonizing primer melting temperatures (Tms) and amplicon sizes. The protocols outlined herein are grounded in both established principles and recent technological advances, including modern computational tools that have revolutionized multiplex assay development [77].
Fundamental Design Principles for Multiplex PCR
Primer Design and Thermodynamic Considerations
Successful multiplex PCR requires careful consideration of numerous technical parameters to achieve optimal amplification efficiency and specificity while minimizing adverse interactions between primer pairs [77]. The optimal primer length ranges from 18-22 nucleotides, providing sufficient binding specificity without excessive secondary structure formation [77].
Critical to multiplex PCR success is the design of primer pairs with compatible annealing temperatures for all targets within the reaction. Advanced multiplex protocols employ primers designed with high annealing temperatures within narrow ranges (65-68°C), enabling PCR to be performed as a 2-step protocol with 95°C denaturation and 65°C combined annealing and extension phases [77]. This temperature harmonization approach eliminates the need for nested primer strategies while maintaining exceptional specificity in complex clinical samples.
Modern primer design platforms incorporate sophisticated algorithms that evaluate thousands of potential primer combinations to identify optimal sets for multiplex applications [77]. These tools perform comprehensive analysis of primer-primer interactions, off-target binding potential, and amplification efficiency predictions across diverse template concentrations.
Table 1: Key Primer Design Parameters for Multiplex PCR
| Parameter | Optimal Range | Importance |
|---|---|---|
| Primer Length | 18-22 nucleotides | Balances specificity and compatibility [77] |
| Annealing Temperature (Ta) | 65-68°C (narrow range) | Ensures uniform amplification across all targets [77] |
| GC Content | 40-60% | Provides appropriate binding stability |
| 3' End Stability | Avoid strong secondary structures | Prevents primer-dimer formation and mispriming |
| Amplicon Size | Balanced lengths (e.g., 2.5 ± 0.2 kb) | Minimizes amplification bias [79] |
Amplicon Size Optimization
Amplicon size standardization is crucial for minimizing amplification bias in multiplex PCR systems. Recent work on long-amplicon sequencing panels for malaria drug resistance surveillance demonstrated the effectiveness of standardizing amplicons to 2.5 ± 0.2 kb using specialized software to balance amplification efficiency across targets [79]. This approach ensured consistent coverage of multiple Plasmodium falciparum genes (Pfk13, Pfcoronin, Pfap2μ, Pfubp1, Pfmdr1, and Pfcrt) despite their inherent length variations.
For applications requiring differentiation by size, such as traditional gel electrophoresis, amplicons should be designed with sufficient size differences to allow clear resolution (typically 50-100 bp differences). However, in fluorescence-based detection systems that don't rely on size separation, the priority should be on achieving balanced amplification efficiency rather than distinct size variations.
Experimental Protocols for Multiplex PCR Optimization
Primer Concentration Optimization
Even well-designed assays require experimental optimization to achieve balanced amplification. The following protocol provides a systematic approach for determining optimal primer concentrations:
- Prepare primer stock solutions at 100 µM in nuclease-free water or TE buffer.
- Set up a matrix of reactions testing various forward and reverse primer concentrations, typically ranging from 50 nM to 600 nM (e.g., 50, 100, 200, 400, 600 nM) [80].
- Maintain constant reaction conditions including buffer composition, polymerase, dNTPs, probe concentration (if used), and template amount across all tests.
- Include appropriate controls: no-template control (NTC) for contamination detection, and positive control for each target.
- Perform amplification using standardized cycling conditions.
- Analyze results by selecting the concentration combination that produces the earliest Cq (quantification cycle) value with minimal variation between replicates and no amplification in NTCs [80].
If one target in a multiplex reaction is significantly more abundant than others, its amplification may dominate the reaction and deplete shared reagents. In such cases, reducing the primer concentration for high-abundance targets and/or increasing primer concentration for low-abundance targets can achieve more balanced amplification [80].
Annealing Temperature Optimization
While harmonized primer Tms simplify multiplexing, empirical verification of the optimal annealing temperature is essential:
- Design primers with calculated Tms within a 2°C range [77].
- Set up identical reactions with primer concentrations determined from section 3.1.
- Use a thermal cycler with gradient functionality to test a range of annealing temperatures (typically 55-65°C) in a single run [80].
- Perform amplification with the temperature gradient applied during the annealing phase.
- Analyze results by assessing amplification efficiency, specificity, and Cq values at each temperature.
- Select the optimal temperature that provides the lowest Cq values for all targets while maintaining specificity (no amplification in NTCs) and generating single, specific products as verified by melt curve analysis or gel electrophoresis [80].
For probe-based multiplex qPCR, two-step cycling protocols (denaturation at 95°C, combined annealing/extension at 60°C) are often preferred because the longer incubation at lower temperature facilitates the 5'→3' exonuclease activity of DNA polymerase, enabling probe cleavage without displacement [80].
Assay Validation and Performance Assessment
Once optimal conditions are established, comprehensive validation is essential:
- Generate standard curves for each target using serial dilutions of known template quantities, run in both singleplex and multiplex formats.
- Calculate amplification efficiency for each target from the standard curve using the formula: Efficiency = [10(-1/slope)] - 1.
- Assess precision through intra-assay and inter-assay reproducibility testing.
- Determine limits of detection (LOD) for each target using probit analysis, defined as the concentration detectable with ≥95% probability [81].
- Verify specificity against non-target organisms or samples known to lack the targets.
Table 2: Performance Characteristics of Optimized Multiplex PCR Systems from Recent Applications
| Application | Targets | Amplicon Size Range | LOD/Sensitivity | Key Optimization Feature |
|---|---|---|---|---|
| Malaria drug resistance surveillance [79] | 6 genes (Pfk13, Pfcoronin, etc.) | 2.5 ± 0.2 kb | 5-50 parasites/μL | Standardized amplicon size to minimize bias |
| Respiratory pathogen detection [81] | 6 pathogens (SARS-CoV-2, influenza, etc.) | 64-115 bp | 4.94-14.03 copies/μL | FMCA with asymmetric PCR and abasic site probes |
| Periodontal pathobiont quantification [82] | 3 bacteria (P. gingivalis, A. actinomycetemcomitans, F. nucleatum) | Varies by target | Superior sensitivity for low bacterial loads | Multiplex dPCR with partitioned amplification |
Advanced Strategies and Troubleshooting
Computational Design Tools
Modern primer design has been revolutionized by sophisticated computational platforms that automate and enhance the multiplex assay development process:
- PrimerPooler: This breakthrough computational tool automates the strategic allocation of primer pairs into optimized subpools to minimize potential cross-hybridization. It performs comprehensive inter- and intra-primer hybridization analysis and enables simultaneous mapping of all primers onto genome sequences without requiring prior genome indexing [77].
- Primal Scheme: This web-based platform provides a comprehensive pipeline for developing efficient multiplex primer schemes that generate overlapping amplicon products spanning complete target genomes or specific regions of interest [77].
- NGS-PrimerPlex: This high-throughput design system supports different types of amplicon-based genome target enrichment, including nested PCR, anchored multiplex PCR, and automatic redistribution of existing primer sets [77].
These tools utilize advanced analytical features including secondary structure analysis, non-target amplicon prediction between all primers within a pool, and primer overlap assessment with high-frequency genome single-nucleotide polymorphisms [77].
Troubleshooting Common Issues
Even with careful design and optimization, multiplex PCR assays may encounter specific challenges:
- Imbalanced Amplification: If some targets amplify efficiently while others show poor sensitivity, adjust primer concentrations (typically reducing primers for high-abundance targets and increasing for low-abundance targets). Re-evaluate primer Tms and consider redesigning outliers.
- Primer-Dimer Formation: Analyze potential secondary structures using software tools. The strongest total dimer should be unstable (ΔG ≥ -6.0 kcal/mol), and any 3'-terminal dimers must be very weak (ΔG ≥ -2.0 kcal/mol) to prevent extension [80].
- Non-Specific Amplification: Increase annealing temperature incrementally. Verify primer specificity using BLAST analysis against relevant databases. Consider incorporating additives such as betaine or DMSO to enhance specificity, particularly for GC-rich targets.
- Reduced Sensitivity in Multiplex vs. Singleplex: This typically indicates competition for reagents. Ensure polymerase and dNTP concentrations are sufficient for simultaneous amplification of all targets. Increase cycle number if necessary while monitoring background in NTCs.
The Scientist's Toolkit: Essential Research Reagent Solutions
Table 3: Key Reagents and Tools for Successful Multiplex PCR Development
| Reagent/Tool | Function | Application Notes |
|---|---|---|
| High-Efficiency DNA Polymerase | Catalyzes DNA synthesis | Select enzymes with high processivity and fidelity; some formulations are specifically optimized for multiplex applications |
| dNTP Mix | Building blocks for DNA synthesis | Use balanced mixtures; quality is critical for efficient amplification across multiple targets |
| Optimized Buffer Systems | Provides optimal chemical environment | May include additives like betaine to reduce secondary structure; Mg2+ concentration typically requires optimization |
| Fluorophore-Labeled Probes | Target-specific detection | Select non-overlapping fluorophore combinations with compatible detection channels on your instrument [81] |
| Primer Design Software | In silico assay development | Tools like PrimerPooler, Primal Scheme, or NGS-PrimerPlex analyze interactions and optimize pool composition [77] |
| Nuclease-Free Water | Reaction preparation | Essential for preventing enzymatic degradation of reagents |
| Magnetic Bead-based Purification Systems | Nucleic acid isolation | Provide high-quality template free of inhibitors that can differentially affect multiplex targets |
The successful development of multiplex PCR assays requires meticulous attention to both in silico design parameters and empirical optimization. The harmonious balancing of primer Tms through design of primers with annealing temperatures in the 65-68°C range, coupled with careful management of amplicon sizes to minimize amplification bias, forms the foundation of robust multiplex assays [77]. The optimization protocols outlined herein, particularly the systematic approach to primer concentration and annealing temperature refinement, provide researchers with a validated pathway to achieving sensitive, specific, and balanced multiplex PCR systems.
As PCR technologies continue to evolve, with emerging trends including the integration of artificial intelligence for assay design and the development of point-of-care applications [83], the fundamental principles of balanced primer design and comprehensive validation will remain essential. By adhering to these structured optimization approaches, researchers can reliably develop multiplex PCR assays that maximize efficiency while delivering reproducible, reliable results across diverse applications from clinical diagnostics to fundamental research.
Ensuring Assay Robustness: Validation, QC, and Technology Comparison
Polymersse Chain Reaction (PCR) is a cornerstone technique in molecular biology, widely used for gene cloning, diagnostic testing, and research [18]. While the fundamental principles of PCR are well-established, the reliability of results hinges on rigorous validation and optimization of the reaction itself. Accurate assessment of PCR performance is not merely a supplementary step but a critical component for generating publication-quality, reproducible data, especially in drug development and diagnostic applications where results directly impact scientific and clinical decisions.
This application note provides detailed protocols for three fundamental pillars of PCR performance assessment: standard curves for quantifying amplification efficiency, melt curve analysis for verifying amplification specificity, and the systematic optimization of reaction components. By implementing these standardized methodologies, researchers can transform their PCR from a qualitative tool into a robust, quantitative assay, ensuring data integrity across experimental replicates and laboratory settings.
Theoretical Background and Key Concepts
The qPCR Amplification Curve
In quantitative PCR (qPCR), the amplification curve provides a real-time visualization of DNA synthesis. The curve is typically divided into four distinct phases [84] [85]:
- Baseline Phase: The initial cycles where fluorescence is masked by background noise.
- Exponential Phase: The critical stage where amplification is most efficient and the amount of product doubles each cycle. The data from this phase is used for quantitative calculations.
- Linear Phase: The stage where reaction components become limiting, and amplification efficiency decreases.
- Plateau Phase: The final stage where the reaction stops and no more product is accumulated.
The Cycle threshold (Ct) value is the fractional cycle number at which the fluorescence crosses a predefined threshold, set within the exponential phase of amplification [84]. A lower Ct value indicates a higher starting concentration of the target template. The quantification is based on the principle that there is a linear relationship between the logarithm of the starting template copy number and the Ct value [84].
PCR Amplification Efficiency
PCR Amplification Efficiency (E) is a critical metric that quantifies the rate of product amplification during each cycle of the PCR [85]. In an ideal reaction, efficiency is 100%, meaning the product doubles every cycle (a doubling corresponds to an efficiency of 2). The efficiency is derived from the slope of the standard curve using the formula: [ E = 10^{(-1/slope)} ] [84]
The theoretical ideal slope for 100% efficiency (a perfect doubling) is -3.32 [84]. In practice, an amplification efficiency between 90% and 110% (corresponding to a slope between -3.58 and -3.10) is generally considered acceptable for reliable quantitative analysis [84]. Efficiencies outside this range can indicate issues with the reaction, such as poor primer design, suboptimal reagent concentrations, or the presence of inhibitors [86] [84].
Melt Curve Analysis Fundamentals
Melt curve analysis is a powerful technique used to verify the specificity of PCR amplification, particularly when using intercalating dyes like SYBR Green I or EvaGreen [87] [88]. After amplification, the reaction temperature is gradually increased while fluorescence is continuously monitored. As the temperature reaches the melting temperature (Tm) of the double-stranded DNA (dsDNA) amplicon, the strands separate, causing the dye to be released and a subsequent drop in fluorescence [88].
The raw data is often converted into a negative derivative plot (-dF/dT vs. Temperature), which displays distinct peaks at the Tm of each amplified product [85]. A single, sharp peak typically indicates specific amplification of a single product, while multiple peaks can suggest the presence of primer-dimers, non-specific amplification, or multiple amplicons with different Tm values [84] [88]. It is important to note that a single amplicon can sometimes produce multiple peaks due to complex melting behaviors in regions with varying GC content or secondary structures [88].
Experimental Protocols
Protocol 1: Generating and Analyzing a Standard Curve
A standard curve is essential for determining the amplification efficiency and dynamic range of a qPCR assay.
Materials:
- Purified, quantified target DNA (e.g., gBlocks, plasmid, or PCR amplicon)
- qPCR master mix (e.g., SYBR Green-based)
- Forward and reverse primers
- Nuclease-free water
- qPCR instrument
Procedure:
- Standard Preparation: Serially dilute the standard DNA template in at least five, 10-fold dilutions across the expected concentration range of your experimental samples [84].
- qPCR Setup:
- Prepare a master mix containing the qPCR mix, primers, and water.
- Aliquot the master mix into reaction wells.
- Add each standard dilution to replicate wells (at least 3-4 technical replicates are recommended for precision [86]).
- Include a no-template control (NTC).
- qPCR Run: Execute the cycling protocol as defined for your assay, including a subsequent melt curve analysis.
- Data Analysis:
- The qPCR software will automatically plot the log of the starting template quantity against the mean Ct value for each standard dilution to generate the standard curve.
- Record the slope and R² value (a measure of linearity) from the curve.
- Calculate the PCR efficiency (E) using the formula: ( E = 10^{(-1/slope)} ) [84].
Table 1: Interpretation of Standard Curve Parameters
| Parameter | Optimal Value | Acceptable Range | Deviation Implications |
|---|---|---|---|
| Slope | -3.32 | -3.58 to -3.10 | Slope > -3.58 indicates efficiency < 90%; Slope < -3.10 indicates efficiency > 110% [84] |
| Amplification Efficiency (E) | 100% | 90% - 110% | Low efficiency reduces sensitivity; high efficiency may indicate non-specific amplification [84] |
| R² Value | > 0.99 | > 0.98 | Values below this indicate poor linearity and unreliable quantification [89] |
Protocol 2: Performing and Interpreting Melt Curve Analysis
This protocol is performed immediately after the amplification cycles in the same tube.
Materials:
- Post-amplification qPCR plates
- qPCR instrument with melt curve generation capability
Procedure:
- Program Setup: After the final PCR cycle, set the melt curve protocol on your qPCR instrument. A typical program is:
- Hold: 65°C for 30 seconds (to equilibrate).
- Melt/Ramp: Increase temperature gradually from 65°C to 95°C (e.g., 0.2°C/sec to 0.5°C/sec) while continuously acquiring fluorescence data [88].
- Execute Melt Curve: Run the program.
- Data Analysis:
- Use the instrument's software to generate the negative derivative melt curve plot.
- Identify the peak(s) in the plot. The x-axis value of the peak center is the Tm.
- Compare the Tm of the sample peaks to that of a known positive control.
Table 2: Troubleshooting Guide for Melt Curve Analysis
| Melt Curve Profile | Interpretation | Recommended Actions |
|---|---|---|
| Single, sharp peak at expected Tm | Specific amplification of a single product [84] | Proceed with data analysis. |
| Main peak (80-90°C) + small peak (~60-75°C) | Specific product with primer-dimer formation [84] | Optimize annealing temperature; reduce primer concentration; redesign primers with non-complementary 3' ends [43]. |
| Main peak + secondary peak above 90°C | Non-specific amplification or genomic DNA contamination [84] | Increase annealing temperature; use hot-start polymerase; design primers spanning exon-exon junctions; treat samples with DNase. |
| Multiple peaks or broad peak | Multiple amplicons or a single amplicon with complex melting domains [88] | Run agarose gel electrophoresis to confirm product size; use prediction software (e.g., uMelt [88]) to validate the expected melt profile. |
Protocol 3: A Step-by-Step PCR Optimization Guide
Systematic optimization is key to achieving a robust and efficient PCR assay.
Step 1: Optimize Primer Design and Concentration
- Design: Ensure primers are 15-30 bp long with a GC content of 40-60%. The Tm for forward and reverse primers should be within 5°C of each other. Avoid complementarity at the 3' ends to prevent primer-dimer formation [43].
- Concentration: Test final primer concentrations between 0.1-1.0 µM. The optimal concentration is typically 0.4-0.5 µM. High concentrations promote primer-dimers, while low concentrations reduce yield [18] [43].
Step 2: Optimize Template Quality and Quantity
- Quality: Use high-integrity DNA or RNA. Assess purity via A260/A280 and A260/A230 ratios. For long-range PCR, DNA integrity is critical [90].
- Quantity: Use an appropriate amount of template. A common starting point is 10-100 ng of genomic DNA or 1-10 ng of cDNA per reaction. Excess template can be inhibitory [90] [43].
Step 3: Optimize Thermal Cycling Conditions
- Annealing Temperature: Perform a temperature gradient PCR (e.g., from 50°C to 65°C) to identify the temperature that yields the highest specificity and yield. The annealing temperature is often set 5°C below the primer Tm [43].
- Extension Time: Generally, use 1 min/kb for conventional polymerases. High-speed enzymes (e.g., SpeedSTAR HS) may require only 10 sec/kb [90].
- Cycle Number: Typically, 25-40 cycles are used. Too few cycles may not yield enough product, while too many can increase background and non-specific amplification [18].
Step 4: Utilize Additives for Challenging Templates
- GC-Rich Templates: Add DMSO (1-10%), formamide (1.25-10%), or glycerol to help denature secondary structures and improve yield [90] [43].
- Inhibition Prevention: Add BSA (400 ng/µL) or non-ionic detergents (e.g., Tween 20) to counteract inhibitors in the sample [43].
The Scientist's Toolkit: Research Reagent Solutions
Table 3: Essential Reagents for PCR Performance Assessment
| Reagent / Kit | Function | Example Use Case |
|---|---|---|
| SYBR Green I / EvaGreen Dye | Intercalating dyes that fluoresce when bound to dsDNA, enabling real-time monitoring of amplification and subsequent melt curve analysis [89] [87]. | Standard qPCR for gene expression analysis; melt curve analysis for amplicon verification. |
| Hot-Start DNA Polymerase | Polymerase that is inactive at room temperature, preventing non-specific priming and primer-dimer formation during reaction setup [43]. | Essential for improving specificity in high-sensitivity applications and with complex templates. |
| Hieff Ultra-Rapid II HotStart PCR Master Mix | A pre-mixed, optimized formulation containing a hot-start polymerase, buffers, and dNTPs designed for fast, high-yield amplification [18]. | Rapid colony PCR; amplification of difficult templates (e.g., high GC content). |
| DMSO (Dimethyl Sulfoxide) | Additive that reduces DNA melting temperature, aiding in the denaturation of templates with high GC content or strong secondary structures [90] [43]. | Amplification of GC-rich regions (>65% GC). |
| uMELT Software | A free online tool that predicts the melting behavior of PCR amplicons, helping to interpret complex melt curves and design assays [88]. | Predicting if a single amplicon will produce multiple melt peaks; troubleshooting melt curve data. |
Workflow Visualization
The following diagram illustrates the integrated workflow for a comprehensive PCR performance assessment, from initial setup to data interpretation.
Within a comprehensive PCR optimization protocol, the establishment of robust quality control (QC) measures is a non-negotiable prerequisite for generating reliable, reproducible data. The incorporation of positive and negative controls in every experimental run serves as the fundamental mechanism for verifying assay accuracy, diagnosing contamination, and ensuring that results are trustworthy. This document provides detailed application notes and protocols for integrating these essential controls, framed within the broader context of a step-by-step PCR optimization thesis. The procedures are designed to meet the stringent requirements of researchers, scientists, and drug development professionals, enabling them to distinguish true experimental outcomes from technical artifacts with high confidence.
The Critical Role of Controls in PCR Optimization
Controls are the benchmark against which all experimental samples are measured. Their consistent use directly safeguards the integrity of your data throughout the PCR optimization process.
Negative Controls are reactions that contain all the components of the master mix (primers, polymerase, dNTPs, buffer) but no template DNA. The primary function of a negative control is to detect contamination, most commonly from amplicon carryover, contaminated reagents, or environmental nucleic acids. A clean negative control, showing no amplification, validates that the reagents and the setup environment are free of contaminating DNA [91]. Any amplification in the negative control invalidates the entire run and necessitates a decontamination of the workspace and reagents.
Positive Controls are reactions that contain a known, verified template that your primers are designed to amplify. This control confirms that all reaction components are functioning correctly and that the thermal cycler conditions are appropriate. A successful amplification in the positive control, yielding the expected product with high efficiency, verifies that the entire experimental system is working as intended [91]. Failure of the positive control indicates a problem with the reagents, primer integrity, or instrument parameters, and the run cannot be trusted.
During assay development and optimization, controls are indispensable for troubleshooting. For instance, when optimizing the annealing temperature using a gradient PCR, the positive control should amplify efficiently across a range of temperatures, while the negative controls should remain blank, helping to identify the temperature that provides the best specificity and yield [44].
A Protocol for Control Implementation
This section provides a detailed, step-by-step protocol for incorporating positive and negative controls into a standard qPCR run, using a SYBR Green-based assay for the detection of Macrocystis pyrifera in sediment samples as a model [91]. The principles, however, are universally applicable to all PCR-based assays.
Research Reagent Solutions
Table 1: Essential materials and reagents for control implementation in qPCR.
| Item | Function / Description | Example / Specification |
|---|---|---|
| Positive Control Template | A known sequence that the primers are designed to amplify. Used to verify assay functionality. | Synthetic gBlock (IDT) or purified DNA from target organism [91]. |
| Negative Control Solution | A template-free solution to monitor for contamination. | Nuclease-free water [91]. |
| qPCR Master Mix | A pre-mixed solution containing DNA polymerase, dNTPs, salts, and buffer. | PowerUp SYBR Green Master Mix [91]. |
| Species-Specific Primers | Oligonucleotides designed to bind and amplify the target DNA sequence. | Forward and reverse primers at 10 µM working stock [91]. |
| Optical Plate & Sealing Film | A thin-walled plate and optically clear seal for qPCR detection. | Microseal PCR plates and Sealing Film [91]. |
| Real-Time PCR Instrument | Thermocycler with optical detection for monitoring amplification in real-time. | Biorad CFX Connect [91]. |
Experimental Workflow and Plate Map
The following diagram illustrates the logical workflow for preparing and analyzing a qPCR run with integrated controls.
Step-by-Step Procedure
Preliminary Setup and Calculation
- Calculate the number of reactions for your run. This includes all test samples, positive controls, and negative controls (NTCs), all run in triplicate. Add an extra 10% to the total volume to account for pipetting error [91].
- Create a plate map to organize sample and control placement. An example is provided below.
Preparation of Master Mix and Plate Aliquotting
- In a sterile 1.5 mL microcentrifuge tube, prepare a master mix for all reactions. For a 10 µL final reaction volume, the mixture for a single reaction is:
- 5 µL PowerUp SYBR Green Master Mix
- 0.5 µL Forward Primer (10 µM)
- 0.5 µL Reverse Primer (10 µM)
- 3 µL Nuclease-free water
- Total Master Mix per reaction: 9 µL [91]
- Mix the master mix gently but thoroughly by pipetting up and down.
- Aliquot 9 µL of the master mix into each well of a 96-well PCR plate according to your plate map.
- In a sterile 1.5 mL microcentrifuge tube, prepare a master mix for all reactions. For a 10 µL final reaction volume, the mixture for a single reaction is:
Addition of Template and Controls
- Test Samples: Add 1 µL of each test DNA sample to its designated triplicate wells.
- Positive Control: Add 1 µL of your positive control template (e.g., a serial dilution of a gBlock or control DNA) to its designated triplicate wells.
- Negative Control (NTC): Add 1 µL of nuclease-free water to its designated triplicate wells.
Sealing, Centrifugation, and qPCR Run
- Seal the plate with an optical adhesive film.
- Briefly centrifuge the plate to collect all liquid at the bottom and eliminate air bubbles.
- Place the plate in the real-time PCR instrument and start the run using the following cycling conditions [91]:
- Hot Start: 95 °C for 2 minutes
- Amplification (39 cycles):
- Denature: 95 °C for 10 seconds
- Anneal/Extend: 60 °C for 30 seconds
- Melt Curve: 65 °C to 95 °C
Data Analysis and Interpretation
Table 2: Interpretation of control results in a qPCR run.
| Control Type | Expected Result | Unexpected Result & Potential Cause |
|---|---|---|
| Negative Control (NTC) | No amplification curve, or a Ct value that is undetermined or >10 cycles later than the last positive standard [91]. | Amplification with a low Ct value: Indicates significant contamination of reagents or the setup environment. The run is invalid. |
| Positive Control | A robust, normal amplification curve with a Ct value falling within the expected range based on its known concentration. | No amplification, high Ct, or abnormal curve: Indicates degraded control template, faulty reagents (e.g., polymerase, primers), or incorrect thermal cycler programming. The run is invalid. |
After the run, first examine the amplification plots and the melt curve. The positive control should show a single, sharp peak in the melt curve, indicating specific amplification. The negative control should show no amplification and no melt peak [91]. Any deviation requires investigation before proceeding with data analysis.
The following diagram outlines the logical decision process for analyzing control data post-run.
Advanced Applications and Considerations
Determining Cut-Off Values and Validating Specificity
For diagnostic qPCR assays, particularly those using hydrolysis (TaqMan) probes, establishing a logical cut-off cycle threshold (Ct) value is crucial. A study on Entamoeba histolytica diagnosis utilized droplet digital PCR (ddPCR) to absolutely quantify template copy number and correlate it with Ct values from qPCR. This approach allowed researchers to set a specific, primer-probe set cut-off Ct value of 36 cycles, which helped differentiate true low-level infections from false positives [92]. This highlights an advanced QC strategy where a control material of known concentration is used not just for validation, but for defining the quantitative limits of the assay itself.
Furthermore, the high-resolution melting (HRM) analysis used in malaria research exemplifies another layer of quality control. After amplification, the melt curve profile acts as a control for amplicon specificity, allowing for discrimination between different Plasmodium species based on their melting temperatures [93]. Incorporating such a step provides an additional, post-amplification verification that the intended target was amplified.
Efficient Experimental Design with Controls
A strategic dilution-replicate experimental design can streamline qPCR optimization while maintaining rigorous quality control. This method involves running a single reaction on several dilutions for every test sample, creating a standard curve for each, rather than performing multiple identical replicates. This design inherently incorporates controls for PCR efficiency estimation for every sample and reduces the total number of reactions required. It also provides robustness against anomalies, as outliers at high dilutions can be identified and excluded without needing to repeat the entire sample analysis [94]. This approach is highly efficient for optimizing conditions across a large set of samples or primer pairs.
Polymersse Chain Reaction (PCR) methodologies have evolved significantly since their inception, offering researchers a suite of tools for nucleic acid analysis. Each platform—endpoint, quantitative (qPCR), and digital (dPCR)—possesses distinct strengths, limitations, and optimal application domains. Endpoint PCR provides qualitative analysis through gel electrophoresis, while qPCR enables relative quantification by monitoring amplification in real-time. Digital PCR represents the third generation of PCR technology, allowing absolute nucleic acid quantification without standard curves by partitioning samples into thousands of individual reactions [95]. This application note systematically compares these three methodologies within the context of PCR optimization protocol research, providing structured comparisons, detailed experimental protocols, and practical guidance for researchers and drug development professionals seeking to implement these technologies in their workflows.
Technical Comparison of PCR Platforms
The evolution of PCR technologies has expanded analytical capabilities from simple detection to precise quantification. Understanding the fundamental differences between these platforms is essential for selecting the appropriate methodology for specific research applications.
dPCR Workflow
Core Principles and Detection Methods
Endpoint PCR represents the foundational technology, where amplification products are detected after the reaction completion typically via gel electrophoresis. This method provides qualitative or semi-quantitative data based on band intensity but lacks robust quantification capabilities [96].
Quantitative PCR (qPCR), also known as real-time PCR, monitors amplification progress as it occurs using fluorescent detection systems. Two primary chemistries dominate: DNA-binding dyes (e.g., SYBR Green) and target-specific probes (e.g., TaqMan). qPCR focuses on the exponential phase of amplification, where the cycle threshold (Ct) - the point at which fluorescence crosses a predetermined threshold - correlates with the initial template concentration [96] [97]. The critical distinction from endpoint PCR lies in its ability to provide quantitative data throughout the amplification process rather than just at the endpoint.
Digital PCR (dPCR) takes a fundamentally different approach by partitioning a PCR reaction into thousands of nanoliter-scale reactions, effectively creating a digital assay where each partition contains either 0, 1, or a few target molecules. Following endpoint amplification, partitions are scored as positive or negative, and absolute quantification is calculated using Poisson statistics [98] [95]. This partitioning method eliminates the need for standard curves and provides direct absolute quantification.
Table 1: Fundamental Characteristics of PCR Platforms
| Parameter | Endpoint PCR | Quantitative PCR (qPCR) | Digital PCR (dPCR) |
|---|---|---|---|
| Quantification Capability | Semi-quantitative | Relative quantification | Absolute quantification |
| Detection Method | Gel electrophoresis | Fluorescence in real-time | Endpoint fluorescence |
| Standard Curve Requirement | Not applicable | Required for quantification | Not required |
| Dynamic Range | Limited | 5-6 log decades | 4-5 log decades |
| Sensitivity | Low | Moderate | High (detection of rare variants) |
| Key Output | Band intensity | Cycle threshold (Ct) | Copies/μL |
Performance Metrics and Applications
Sensitivity and Precision: dPCR demonstrates superior sensitivity for detecting rare mutations and low-abundance targets, with studies showing consistent detection at copy numbers as low as 1.35-4.26 copies/μL depending on the platform [99]. This makes it particularly valuable for liquid biopsy applications and minimal residual disease detection. qPCR typically achieves sensitivity down to single copies but requires optimized standard curves for accurate quantification [96].
Tolerance to Inhibitors: dPCR exhibits greater resilience to PCR inhibitors compared to qPCR. The partitioning process effectively dilutes inhibitors across thousands of reactions, reducing their impact on amplification efficiency [98] [100]. This advantage makes dPCR particularly suitable for complex sample matrices like soil, food, and clinical samples where purification may be incomplete.
Multiplexing Capability: qPCR systems support robust multiplexing with different fluorescent probes, typically up to 4-5 targets simultaneously. dPCR platforms also offer multiplexing capabilities, with some systems supporting up to 5-plex reactions [101]. However, spectral overlap can present challenges in both systems that require careful panel design.
Table 2: Platform Performance Comparison in Quantitative Applications
| Performance Metric | qPCR | dPCR |
|---|---|---|
| Accuracy | Dependent on standard curve quality | High (absolute quantification) |
| Precision | Moderate (CV 10-25%) | High (CV 2-10%) [99] |
| Inhibitor Tolerance | Moderate | High [98] [100] |
| Multiplexing Capacity | High (up to 5-plex) | Moderate (up to 5-plex) [101] |
| Throughput | High | Moderate to high |
| Cost per Reaction | Low to moderate | Moderate to high |
Experimental Protocols for Platform Comparison
Side-by-Side Platform Validation Study
Objective: To systematically compare the performance of qPCR and dPCR platforms for gene quantification using a certified reference material.
Materials and Reagents:
- Certified plasmid DNA reference material (e.g., pNIM-001 [102])
- DNA extraction kit (RSC PureFood GMO kit or equivalent)
- qPCR master mix (TaqMan Universal PCR Master Mix or equivalent)
- dPCR master mix (appropriate for platform: ddPCR Supermix for Bio-Rad, Naica multiplex PCR mix for Stilla, or QIAcuity nanoplate PCR mix for Qiagen)
- Target-specific primers and probes (FAM-labeled)
- Endogenous control primers and probes (VIC-labeled)
- Nuclease-free water
- Microfluidic chips or cartridges as required by platform
Equipment:
- qPCR instrument (e.g., Applied Biosystems QuantStudio series)
- dPCR platform(s) (e.g., Bio-Rad QX200, Qiagen QIAcuity, Stilla Naica)
- Droplet generator (for droplet-based dPCR systems)
- Thermal cycler
- Fluorometer or spectrophotometer for DNA quantification
- Analytical balance
Methodology:
Sample Preparation:
- Extract genomic DNA from reference materials using standardized protocols [98]
- Quantify DNA concentration using fluorometric methods and confirm purity (A260/A280 ratio of 1.8-2.0)
- Prepare serial dilutions of certified reference material covering the dynamic range of interest (e.g., 0.1%-10% for GMO analysis [98])
Reaction Setup:
- Prepare master mixes according to Table 3, maintaining consistent primer and probe concentrations across platforms
- Aliquot appropriate volumes into reaction vessels (PCR plates, microfluidic chips, or cartridges)
- For dPCR systems: Perform partitioning according to manufacturer instructions
Table 3: Reaction Setup for Platform Comparison
| Component | qPCR (20 μL) | dPCR (Bio-Rad QX200) | dPCR (Qiagen QIAcuity) |
|---|---|---|---|
| Master Mix | 10 μL 2× qPCR mix | 10 μL 2× ddPCR Supermix | 10 μL 2× QIAcuity PCR mix |
| Forward Primer (10 μM) | 0.8 μL (400 nM) | 0.9 μL (450 nM) | 0.8 μL (400 nM) |
| Reverse Primer (10 μM) | 0.8 μL (400 nM) | 0.9 μL (450 nM) | 0.8 μL (400 nM) |
| Probe (10 μM) | 0.4 μL (200 nM) | 0.5 μL (250 nM) | 0.4 μL (200 nM) |
| DNA Template | 2 μL (50 ng) | 2 μL (50 ng) | 2 μL (50 ng) |
| Nuclease-free Water | To 20 μL | To 20 μL | To 20 μL |
- Thermal Cycling:
- Program thermal cyclers using platform-optimized conditions (Table 4)
Table 4: Thermal Cycling Conditions for Platform Comparison
| Step | qPCR | dPCR (Bio-Rad) | dPCR (Qiagen) |
|---|---|---|---|
| Initial Denaturation | 10 min @ 95°C | 10 min @ 95°C | 10 min @ 95°C |
| Amplification (Cycles) | 40 cycles | 40 cycles | 40 cycles |
| Denaturation | 15 sec @ 95°C | 30 sec @ 94°C | 15 sec @ 95°C |
| Annealing/Extension | 60 sec @ 60°C | 60 sec @ 60°C | 60 sec @ 60°C |
| Droplet Stabilization | N/A | 10 min @ 98°C | N/A |
| Hold | 4°C ∞ | 4°C ∞ | 4°C ∞ |
- Data Analysis:
- For qPCR: Analyze Ct values using comparative Ct (ΔΔCt) method with standard curve validation [97]
- For dPCR: Use manufacturer software to calculate absolute copy numbers based on Poisson statistics
- Calculate precision (coefficient of variation), accuracy (deviation from expected value), and linearity (R²) for each platform
Inhibition Resistance Assessment
Objective: To evaluate platform performance in the presence of PCR inhibitors.
Method:
- Spike DNA samples with known concentrations of common PCR inhibitors (humic acid, heparin, or IgG)
- Perform quantification using both qPCR and dPCR platforms
- Compare deviation from expected values across inhibitor concentrations
- Calculate the inhibition resistance ratio (IRR) as: (measured concentration/expected concentration) × 100
Platform Selection Guide
PCR Platform Selection
Application-Based Selection Criteria
Choose Endpoint PCR When:
- Qualitative detection is sufficient (presence/absence)
- Budget constraints are significant
- Equipment access is limited to basic thermal cyclers and gel electrophoresis systems
- Semi-quantitative analysis via band intensity is acceptable
Choose qPCR When:
- Relative quantification meets research needs
- High-throughput analysis is required
- Established standard curves are available
- Cost-effectiveness is a priority
- Multi-target screening (multiplexing) is needed
Choose dPCR When:
- Absolute quantification without standards is required [100] [102]
- Detection of rare variants or low-abundance targets is critical [95]
- Sample contains PCR inhibitors [98] [100]
- Highest precision and accuracy are essential [99]
- Copy number variation analysis is needed
Practical Implementation Considerations
Workflow Efficiency: qPCR typically offers the most streamlined workflow for routine applications, while dPCR systems vary in complexity. Droplet-based systems (e.g., Bio-Rad QX200) require multiple instruments and transfer steps, while integrated systems (e.g., Qiagen QIAcuity) combine partitioning, thermocycling, and imaging in a single instrument [101].
Throughput Requirements: qPCR systems generally support higher throughput with 96- or 384-well formats. dPCR throughput has improved with systems like QIAcuity (96-well nanoplates) but may remain lower than qPCR for large sample batches [101].
Cost Analysis: While dPCR reagents and consumables typically cost more per reaction than qPCR, the elimination of standard curves and reduced replication requirements can offset these costs for certain applications. A thorough cost-benefit analysis should consider both reagent costs and personnel time.
The Scientist's Toolkit: Essential Research Reagent Solutions
Table 5: Key Reagents for PCR Platform Optimization
| Reagent/Category | Function | Platform Compatibility | Optimization Considerations |
|---|---|---|---|
| Hot-Start DNA Polymerases | Reduces non-specific amplification by limiting activity until high temperatures | All platforms | Critical for complex templates; examples: Hieff Ultra-Rapid II HotStart [18] |
| dNTP Mix | Building blocks for DNA synthesis | All platforms | Quality affects efficiency; balance concentration (200 μM each) |
| MgCl₂ Solution | Cofactor for DNA polymerase | All platforms | Concentration optimization critical (1-4 mM); affects specificity [103] |
| Fluorescent Probes (TaqMan) | Sequence-specific detection | qPCR, dPCR | Design for Tm 10°C above primers; concentration 50-300 nM |
| DNA Binding Dyes (SYBR Green) | Non-specific DNA detection | qPCR, dPCR | Cost-effective; requires specificity validation |
| PCR Additives (DMSO, BSA) | Enhance amplification of difficult templates | All platforms | DMSO (2-5%) for GC-rich templates [103] |
| Restriction Enzymes | Enhance target accessibility in complex genomes | dPCR | Particularly useful for tandem repeats [99] |
| Droplet Stabilizers/Surfactants | Maintain partition integrity | ddPCR systems | Critical for emulsion stability during thermal cycling [101] |
The selection of appropriate PCR methodology represents a critical decision point in experimental design. Endpoint PCR remains valuable for basic qualitative applications, while qPCR provides robust relative quantification for most routine applications. Digital PCR offers distinct advantages for absolute quantification, rare variant detection, and analysis of challenging samples containing inhibitors. As PCR technologies continue to evolve, researchers must consider their specific application requirements, available resources, and desired data quality when selecting platforms. The protocols and comparisons presented in this application note provide a framework for systematic evaluation and implementation of these powerful molecular tools in research and diagnostic environments.
For PCR-based assays transitioning from research to clinical or diagnostic applications, rigorous validation is a non-negotiable prerequisite. Validation provides the objective evidence that an assay consistently fulfills its intended purpose, ensuring the reliability, accuracy, and reproducibility of results that inform critical decisions in patient management and drug development [104]. The profound sensitivity of PCR, while a great strength, also makes it susceptible to subtle variations that can lead to erroneous conclusions if not properly controlled [105]. Without a thorough validation process, laboratories risk reporting inaccurate data, which can have severe consequences, including misdiagnosis, failure to detect treatment toxicity, or the misallocation of millions in drug development resources [105].
The validation framework for clinical PCR assays is built on three cornerstone parameters: sensitivity, which defines the lowest amount of analyte an assay can reliably detect; specificity, which confirms the assay detects only the intended target; and reproducibility, which demonstrates the assay's consistency under varying conditions [104] [105]. This document outlines detailed application notes and protocols for establishing these parameters, providing a step-by-step guide for researchers and scientists developing robust, clinically applicable PCR assays.
Core Validation Parameters: Experimental Protocols and Acceptance Criteria
A full validation is required for laboratory-developed tests (LDTs), whereas a partial validation may suffice when introducing a commercially developed assay into a new laboratory setting [104]. The following section provides the experimental methodologies and quantitative criteria for core validation parameters.
Sensitivity: Limit of Detection (LoD) and Limit of Quantification (LoQ)
Sensitivity validation defines the boundaries of an assay's detection capability through two key metrics.
2.1.1 Limit of Detection (LoD) The LoD is the lowest concentration of an analyte that can be reliably distinguished from a blank sample (e.g., no template control) [104] [105]. It is a measure of presence or absence.
Experimental Protocol:
- Sample Preparation: Prepare a minimum of 10 independent replicates of a sample containing the analyte at a concentration near the expected LoD. A commercial standard or a sample of known concentration should be used [105].
- Dilution Series: A dilution series should be created to accurately pinpoint the LoD. The template should be diluted in the same matrix as the test samples (e.g., human plasma, CSF) [104].
- qPCR Run: Amplify all replicates in a single run.
- Data Analysis: The LoD is the lowest concentration at which ≥95% of the replicates return a positive result (e.g., a Cq value below a predetermined cutoff) [105].
Acceptance Criterion: The predefined concentration must demonstrate a detection rate of 95% or higher.
2.1.2 Limit of Quantification (LoQ) The LoQ is the lowest concentration of an analyte that can be quantitatively determined with acceptable precision and accuracy [104]. It defines the lower limit of the assay's quantitative range.
- Experimental Protocol:
- Sample Preparation: Prepare a minimum of 10 replicates each at 3-5 different concentrations near the expected LoQ, diluted in the relevant matrix.
- qPCR Run: Amplify all replicates.
- Data Analysis: Calculate the concentration for each replicate. For each concentration level, calculate the mean concentration, accuracy (as % bias from the expected concentration), and precision (as % coefficient of variation, %CV).
- Acceptance Criteria: The LoQ is the lowest concentration where the accuracy is within ±25% of the true value and the precision (CV) is ≤25% [104].
Specificity: Inclusivity and Exclusivity
Specificity validation ensures the assay accurately detects the target (inclusivity) and does not react with non-targets (exclusivity, or cross-reactivity) [105].
2.2.1 Inclusivity Inclusivity measures the assay's ability to detect all known strains, subtypes, or genetic variants of the target organism or gene.
- Experimental Protocol:
- In Silico Analysis: Perform a BLAST analysis of the oligonucleotide and amplicon sequences against genetic databases (e.g., NCBI, Ensembl) to check for conserved regions across all intended targets [96] [105].
- Wet-Bench Testing: Test a panel of well-characterized isolates or samples representing the genetic diversity of the target. International standards recommend using up to 50 certified strains if possible [105].
- Acceptance Criterion: The assay must generate a positive result for 100% of the target variants included in the panel.
2.2.2 Exclusivity (Cross-Reactivity) Exclusivity confirms the assay does not generate a positive signal from genetically related or co-occurring non-target organisms or background matrix.
- Experimental Protocol:
- In Silico Analysis: Check primer and probe sequences for homology with non-target sequences that may be present in the sample type [105].
- Wet-Bench Testing: Test a panel of non-target samples that are genetically or clinically related. This should include samples known to cause cross-reactivity in other assays and samples with high concentrations of potentially interfering substances (e.g., other common pathogens, human genomic DNA) [105].
- Acceptance Criterion: The assay must generate a negative result for 100% of the non-target samples tested.
Reproducibility and Precision
Precision, the closeness of agreement between independent test results, is investigated under three sets of conditions to demonstrate robustness against laboratory variables [104].
- Experimental Protocol:
- Sample Selection: Select a minimum of 3 samples spanning the assay's dynamic range (low, medium, and high analyte concentrations) [104].
- Testing Scheme:
- Repeatability (Within-Run Precision): One operator runs all three samples in a minimum of 10 replicates within a single run.
- Intermediate Precision (Between-Run Precision): Multiple operators run the three samples in duplicate over at least 3 different days, using different reagent lots and instruments where possible.
- Reproducibility (Between-Lab Precision): If applicable, the same set of samples is tested in multiple independent laboratories.
- Data Analysis: For each concentration level and condition, calculate the mean concentration and the %CV.
- Acceptance Criteria: The precision performance goals are dependent on the assay's intended use and the biological variation of the analyte. However, a CV of ≤25% for the LoQ and ≤15% for higher concentrations is often applied as a starting benchmark [104].
Table 1: Summary of Key Validation Parameters, Protocols, and Acceptance Criteria
| Parameter | Definition | Experimental Method | Acceptance Criteria |
|---|---|---|---|
| Limit of Detection (LoD) | Lowest concentration reliably detected. | Test ≥10 replicates of a low-concentration sample. | ≥95% detection rate [105]. |
| Limit of Quantification (LoQ) | Lowest concentration quantified with precision and accuracy. | Test ≥10 replicates at multiple low concentrations. | Accuracy within ±25% and CV ≤25% [104]. |
| Inclusivity | Ability to detect all target variants. | In silico analysis and wet-bench testing of a diverse panel of targets (e.g., up to 50 strains) [105]. | 100% detection of all target variants. |
| Exclusivity | Ability to avoid detection of non-targets. | In silico analysis and wet-bench testing of a panel of non-targets. | 100% negative results for all non-targets. |
| Precision (Repeatability) | Agreement under same conditions (within-run). | ≥10 replicates of 3 concentrations in one run. | CV ≤25% at LoQ, ≤15% at mid/high concentrations [104]. |
| Precision (Intermediate) | Agreement under varying conditions (between-run/day/operator). | Duplicates of 3 concentrations over ≥3 days. | CV meeting pre-defined criteria based on intended use. |
The Validation Workflow and Its Role in Assay Development
The following diagram illustrates the logical sequence and relationships between the key stages of the assay validation lifecycle.
The Scientist's Toolkit: Essential Reagents and Materials
The reliability of a validated assay is contingent upon the quality and consistency of the core components used. The following table details key research reagent solutions.
Table 2: Essential Reagents and Materials for Clinical PCR Assay Validation
| Reagent / Material | Function / Description | Validation Consideration |
|---|---|---|
| High-Fidelity DNA Polymerase | Enzyme for DNA synthesis with 3'→5' exonuclease (proofreading) activity for high-fidelity amplification (e.g., Pfu, KOD) [44] [43]. | Essential for cloning or sequencing applications to minimize misincorporation errors. Lower error rate (as low as 1×10⁻⁶ errors/base) compared to standard Taq [44]. |
| Hot-Start DNA Polymerase | Engineered enzyme inactive at room temperature, activated only at high temperatures [43]. | Critical for improving specificity and yield by preventing non-specific amplification and primer-dimer formation during reaction setup [44] [18]. |
| Optimal PCR Buffer & MgCl₂ | Provides optimal pH, ionic strength, and the essential Mg²⁺ cofactor for polymerase activity [44] [43]. | Mg²⁺ concentration (typically 1.5-2.5 mM) must be titrated and fixed; it profoundly affects specificity, yield, and fidelity [44] [34]. |
| PCR Additives (DMSO, Betaine) | Chemical enhancers that disrupt DNA secondary structures, particularly in GC-rich templates [44] [43]. | DMSO (2-10%) or Betaine (1-2 M) can be critical for amplifying difficult templates but require validation of their optimal concentration [44]. |
| Certified Reference Material (CRM) | A well-characterized sample of known concentration/identity, traceable to a higher standard [104]. | Serves as the foundation for the standard curve in LoD/LoQ and precision studies, ensuring quantitative accuracy across labs [104] [105]. |
| Validated Primer/Probe Sets | Oligonucleotides designed for maximum specificity and consistent efficiency (90-110%) [96]. | Must undergo in silico and wet-bench specificity testing. Predesigned assays from commercial vendors can save development time [96] [105]. |
Adherence to a rigorous validation protocol is not merely a bureaucratic hurdle but a fundamental scientific and ethical imperative for deploying PCR assays in clinical and diagnostic settings. By systematically establishing the sensitivity, specificity, and reproducibility of an assay, researchers and drug development professionals can have full confidence in the data they generate, ensuring that patient diagnoses are accurate and that promising drug candidates are evaluated on a reliable foundation. This document provides a detailed roadmap for this critical process, from initial experimental design to the final validation report, empowering scientists to deliver results of the highest integrity.
Conclusion
A systematic approach to PCR optimization is non-negotiable for generating reliable and reproducible data in biomedical research and drug development. This protocol underscores that success hinges on a deep understanding of core principles, a meticulous step-by-step methodology, proactive troubleshooting, and rigorous validation. By mastering these elements, researchers can develop highly specific, sensitive, and efficient assays. The future of PCR lies in its integration with novel technologies like digital PCR for absolute quantification and its adaptation for point-of-care diagnostics, further solidifying its indispensable role in advancing clinical research and personalized medicine.
References
- 1. Polymerase Chain Reaction (PCR) - StatPearls - NCBI - NIH [https://www.ncbi.nlm.nih.gov/books/NBK589663/]
- 2. Polymerase Chain Reaction: Basic Protocol Plus ... [https://pmc.ncbi.nlm.nih.gov/articles/PMC4846334/]
- 3. Types, mechanisms, and applications in long-range PCR [https://www.sciencedirect.com/science/article/abs/pii/S0300908422000499]
- 4. PCR Setup—Six Critical Components to Consider [https://www.thermofisher.com/us/en/home/life-science/cloning/cloning-learning-center/invitrogen-school-of-molecular-biology/pcr-education/pcr-reagents-enzymes/pcr-component-considerations.html]
- 5. Polymerase Chain Reaction [https://www.sigmaaldrich.com/US/en/technical-documents/technical-article/genomics/pcr/polymerase-chain-reaction?srsltid=AfmBOoouq4_3-GNIdCYmyubqlkoIQ9vn4jPdjuyhDsrUzdt_ZxfjPL5S]
- 6. DNA Polymerase—Four Key Characteristics for PCR [https://www.thermofisher.com/us/en/home/life-science/cloning/cloning-learning-center/invitrogen-school-of-molecular-biology/pcr-education/pcr-reagents-enzymes/dna-polymerase-characteristics.html]
- 7. DNA polymerases used in PCR [https://www.qiagen.com/us/knowledge-and-support/knowledge-hub/bench-guide/pcr/introduction/enzymes-used-in-pcr]
- 8. Are buffers really that important? | Blog [https://www.biosynth.com/blog/are-buffers-really-that-important]
- 9. Buffers for Biochemical Reactions [https://www.promega.com/resources/guides/lab-equipment-and-supplies/buffers-for-biochemical-reactions/]
- 10. How to Design Primers for DNA Sequencing | Practical Lab ... [https://www.cd-genomics.com/resource-how-to-design-primers-for-dna-sequencing.html]
- 11. Primer Selection Guidelines: A Comprehensive Guide to ... [https://genecommons.com/primer-selection-guidelines-a-comprehensive-guide-to-designing-high-performance-primers-for-pcr-and-sequencing/]
- 12. Proven tips for PCR primer design [https://www.neb.com/en-us/nebinspired-blog/proven-tips-for-pcr-primer-design?srsltid=AfmBOopQZj7Kk9dnZBvr8gl7_0IQUyvxNv0zi5EQA2dWKhBNrePwAcXB]
- 13. Rules and Tips for PCR & qPCR Primer Design | IDT [https://www.idtdna.com/page/support-and-education/decoded-plus/how-to-design-primers-and-probes-for-pcr-and-qpcr/]
- 14. Oligo Design Tools | Thermo Fisher Scientific - PR [https://www.thermofisher.com/pr/en/home/life-science/oligonucleotides-primers-probes-genes/custom-dna-oligos/oligo-design-tools/oligoperfect.html]
- 15. PCR Optimization for Beginners: A Step by Step Guide [http://rmm.mazums.ac.ir/article-1-414-en.html;]
- 16. Primer designing tool - NCBI - NIH [https://www.ncbi.nlm.nih.gov/tools/primer-blast/]
- 17. PrimerQuest PCR & qPCR Primer Design Tool | IDT [https://www.idtdna.com/pages/tools/primerquest]
- 18. Free Guide: Top 5 PCR Optimization Tips - Yeasen [https://www.yeasenbio.com/blogs/molecular-biology/free-guide-top-5-pcr-optimization-tips]
- 19. DNA quantification methods - INTEGRA Biosciences [https://www.integra-biosciences.com/united-states/en/blog/article/dna-quantification]
- 20. Agarose Gel Electrophoresis for the Separation of DNA ... [https://pmc.ncbi.nlm.nih.gov/articles/PMC4846332/]
- 21. Optimizing your PCR [https://www.takarabio.com/learning-centers/pcr/faq/optimization?srsltid=AfmBOopRkB1FsIDErWB87TUmbt79GoUdYbbQ26mM-HeAvl4EYCvTU444]
- 22. Guidelines for PCR Optimization with Taq DNA Polymerase [https://www.neb.com/en-us/tools-and-resources/usage-guidelines/guidelines-for-pcr-optimization-with-taq-dna-polymerase?srsltid=AfmBOorEFFgtdWcv7eyNOhlTXJa4OF-fZuoSXOHw2JHgNoFZs5KO-Nv4]
- 23. Four tips for PCR amplification of GC-rich sequences [https://www.neb.com/en-us/nebinspired-blog/four-tips-for-pcr-amplification-of-gc-rich-sequences?srsltid=AfmBOopAeTEOncDA9zOreUlWP4mNCfi59Fvwp-K5k6JwpjvZ0qN7RiOp]
- 24. Optimizing PCR amplification of GC-rich nicotinic ... [https://www.sciencedirect.com/science/article/pii/S2405580825001396]
- 25. PCR Primer Design Tips - Behind the Bench [https://www.thermofisher.com/blog/behindthebench/pcr-primer-design-tips/]
- 26. Primer design guide - 5 tips for best PCR results [https://the-dna-universe.com/2022/09/05/primer-design-guide-the-top-5-factors-to-consider-for-optimum-performance/]
- 27. Different Divalent Cations Alter the Kinetics and Fidelity of ... [https://www.sciencedirect.com/science/article/pii/S0021925820358683]
- 28. Investigating concentration effects on reaction efficiency ... [https://www.sciencedirect.com/science/article/abs/pii/S0003269725001472]
- 29. PCR conditions | Primer annealing specificity | PCR buffers [https://www.qiagen.com/us/knowledge-and-support/knowledge-hub/bench-guide/pcr/introduction/pcr-conditions]
- 30. Physiological magnesium concentrations increase fidelity ... [https://pmc.ncbi.nlm.nih.gov/articles/PMC10019084/]
- 31. Kinetic and thermodynamic analysis defines roles for two ... [https://www.sciencedirect.com/science/article/pii/S0021925820001805]
- 32. Magnesium Induced Assembly of a Complete DNA ... [https://pmc.ncbi.nlm.nih.gov/articles/PMC1868394/]
- 33. Mathematical Modeling and Thermodynamic Integration for ... [https://pmc.ncbi.nlm.nih.gov/articles/PMC12620865/]
- 34. PCR Optimization: Factors Affecting Reaction Specificity ... [https://www.mybiosource.com/learn/pcr-optimization-factors-affecting-reaction-specificity-and-efficien/]
- 35. Priming efficiency in PCR [https://pubmed.ncbi.nlm.nih.gov/7702859/]
- 36. How to Simplify PCR Optimization Steps for Primer Annealing [https://www.thermofisher.com/us/en/home/brands/thermo-scientific/molecular-biology/molecular-biology-learning-center/molecular-biology-resource-library/spotlight-articles/pcr-annealing-optimization-universal-annealing.html]
- 37. qPCR primer design revisited - PMC - PubMed Central - NIH [https://pmc.ncbi.nlm.nih.gov/articles/PMC5702850/]
- 38. Gradient PCR for Optimization [https://www.eppendorf.com/us-en/lab-academy/life-science/molecular-biology/gradient-pcr-for-optimization/]
- 39. Optimizing your PCR [https://www.takarabio.com/learning-centers/pcr/faq/optimization?srsltid=AfmBOorcX1rkiO_aWankIHR718pIdcQ1m8Bi2TS1zqK3H4lkyMyEUg4S]
- 40. PCR Protocols & Primer Design Guide | Boster Bio [https://www.bosterbio.com/protocol-and-troubleshooting/pcr-protocol?srsltid=AfmBOoqsETmzHKOvq6g4vZ7HSYZyn2UpcYNAWw8p0mw8CKr7wVE9KGqh]
- 41. PCR Cycling Parameters—Six Key Considerations for ... [https://www.thermofisher.com/us/en/home/life-science/cloning/cloning-learning-center/invitrogen-school-of-molecular-biology/pcr-education/pcr-reagents-enzymes/pcr-cycling-considerations.html]
- 42. Guidelines for PCR Optimization with Thermophilic DNA ... [https://www.neb.com/en-us/tools-and-resources/usage-guidelines/guidelines-for-pcr-optimization-with-thermophilic-dna-polymerases?srsltid=AfmBOopIQSPV6vmZ5TOsGpxUs7o2zA3VC3Wb2HqPiCS78oleiFPVdiea]
- 43. Optimizing PCR: Proven Tips and Troubleshooting Tricks [https://www.the-scientist.com/optimizing-pcr-proven-tips-and-troubleshooting-tricks-71660]
- 44. Optimizing PCR Reaction Conditions for High Fidelity and ... [https://www.labx.com/resources/optimizing-pcr-reaction-conditions-for-high-fidelity-and-yield/5579]
- 45. How is Hot-Start Technology Beneficial For Your PCR [https://www.thermofisher.com/us/en/home/brands/thermo-scientific/molecular-biology/molecular-biology-learning-center/molecular-biology-resource-library/spotlight-articles/hot-start-technology-benefits-PCR.html]
- 46. PCR Methods - Top Ten Strategies [https://www.thermofisher.com/us/en/home/life-science/cloning/cloning-learning-center/invitrogen-school-of-molecular-biology/pcr-education/pcr-reagents-enzymes/pcr-methods.html]
- 47. Hot Start PCR: Definition, Protocol and Application [https://www.bocsci.com/resources/hot-start-pcr-definition-protocol-and-application.html?srsltid=AfmBOoqDDm-twKCkZXO9g9rx8SavzyI5O_Mq1b0SZQijwmJz-dmQR_fg]
- 48. Touchdown PCR: Easy Intro Plus 5 Expert Tips [https://bitesizebio.com/2203/touchdown-pcr-a-primer-and-some-tips/]
- 49. Touchdown and Stepdown PCR [https://bento.bio/resources/thoughts-notes-and-ideas/touchdown-and-stepdown-pcr/]
- 50. Standard vs. Touchdown PCR [https://www.aatbio.com/resources/application-notes/standard-vs-touchdown-pcr]
- 51. Long-range PCR in next-generation sequencing [https://www.nature.com/articles/srep05737]
- 52. Long-Range PCR Overview & Best Practices [https://www.aatbio.com/resources/application-notes/long-range-pcr-overview-best-practices]
- 53. Optimization of PCR Conditions for Amplification of GC‐ ... [https://pmc.ncbi.nlm.nih.gov/articles/PMC6807403/]
- 54. Bovine serum albumin further enhances the effects of organic ... [https://bmcresnotes.biomedcentral.com/articles/10.1186/1756-0500-5-257]
- 55. Enhancement of DNA amplification efficiency by using ... [https://www.bocsci.com/blog/enhancement-of-dna-amplification-efficiency-by-using-pcr-additives/?srsltid=AfmBOorpxTPjhXYtPqLSDgHPe1qt_ndm-u0wutIrjFrsWoa2M9ASfTJY]
- 56. Just What Do All These Additives Do? [https://bitesizebio.com/19420/just-what-do-all-these-additives-do/]
- 57. Comprehensive evaluation of molecular enhancers of the ... [https://www.nature.com/articles/srep37837]
- 58. Betaine, Dimethyl Sulfoxide, and 7-Deaza-dGTP, a Powerful ... [https://pmc.ncbi.nlm.nih.gov/articles/PMC1876170/]
- 59. Effects of DMSO, glycerol, betaine and their combinations ... [https://www.sciencedirect.com/science/article/abs/pii/S0731708516302473]
- 60. Enhancement Effects and Mechanism Studies of Two ... [https://www.mdpi.com/1420-3049/28/11/4515]
- 61. PCR Amplification | An Introduction to PCR Methods [https://www.promega.com/resources/guides/nucleic-acid-analysis/pcr-amplification/]
- 62. PCR Troubleshooting: Common Problems and Solutions [https://www.mybiosource.com/learn/pcr-troubleshooting-common-problems-and-solutions/]
- 63. PCR Troubleshooting Guide | Thermo Fisher Scientific - US [https://www.thermofisher.com/us/en/home/life-science/cloning/cloning-learning-center/invitrogen-school-of-molecular-biology/pcr-education/pcr-reagents-enzymes/pcr-troubleshooting.html]
- 64. PCR Troubleshooting Guide [https://www.genscript.com/pcr-troubleshooting-guide.html]
- 65. Optimizing your PCR [https://www.takarabio.com/learning-centers/pcr/faq/optimization?srsltid=AfmBOorObmLjT5PMTW6TKegOi2rFybTo0vSXf8igiAAIRc3ZudVMCKAG]
- 66. FAQ: Why do I have a low yield of PCR product? [https://www.neb.com/en-us/faqs/2012/01/02/why-do-i-have-a-low-yield-of-pcr-product1?srsltid=AfmBOoryNjvR-0lCDMHuRlCkRIiky52qGz051tbmXsDwg1gZ9w9KG-DL]
- 67. PCR Optimization: Strategies To Minimize Primer Dimer [https://genemod.net/blog/pcr-optimization]
- 68. Application Note Polymerase Chain Reaction (PCR) ... [https://www.glenresearch.com/reports/gr36-23]
- 69. Guidelines for PCR Optimization with Taq DNA Polymerase [https://www.neb.com/en-us/tools-and-resources/usage-guidelines/guidelines-for-pcr-optimization-with-taq-dna-polymerase?srsltid=AfmBOoqJrofa3zkIqXKHWGBCFKFoc5DxyHBCqNfYkWZjRlxS9BumZ0Ap]
- 70. How to Design Primers for PCR Experiments [https://www.zymoresearch.com/blogs/blog/how-to-design-primers-for-pcr-experiments?srsltid=AfmBOoom7mIM9fbSpTMU-EmLvSdrEJLAO1L-4YajV3pLuYBLhPkjqWgQ]
- 71. Four tips for PCR amplification of GC-rich sequences [https://www.neb.com/en-us/nebinspired-blog/four-tips-for-pcr-amplification-of-gc-rich-sequences?srsltid=AfmBOopciXRkKeeVOBWXWVeYQl9fqQLn_RFa4LY1CPMvJwHvLb2lTMq7]
- 72. 5 easy tips to address problems amplifying GC-rich regions [https://bitesizebio.com/24002/problems-amplifying-gc-rich-regions-problem-solved/]
- 73. PCR Optimization for Beginners: A Step by Step Guide [https://rmm.mazums.ac.ir/browse.php?a_id=414&sid=1&slc_lang=en&ftxt=0]
- 74. Tips for Amplifying Large Amplicons [https://www.neb.com/en-us/tools-and-resources/video-library/tips-for-amplifying-large-amplicons?srsltid=AfmBOoph4PyEmOjrIBK4-Tc0LbWlak8wrCky7LAJT_ZfPnFfej3Ny0B2]
- 75. When Two-Fold Is Not Enough: Quantifying Uncertainty in Low ... [https://pmc.ncbi.nlm.nih.gov/articles/PMC12387016/]
- 76. Engineering of novel DNA polymerase variants for single ... [https://www.nature.com/articles/s41598-025-10211-x]
- 77. Primer Pool Design Strategies for Multiplex PCR Success [https://www.dynegene.com/en/detail-416.html]
- 78. Evolution of Multiplex PCR: Benefits, Challenges & Key ... [https://www.eurogentec.com/en/news/111_evolution-of-multiplex-pcr-benefits-challenges-key-applications]
- 79. Multiplex long-amplicon sequencing for comprehensive ... [https://pmc.ncbi.nlm.nih.gov/articles/PMC12539163/]
- 80. PCR Assay Optimization and Validation [https://www.sigmaaldrich.com/US/en/technical-documents/technical-article/genomics/pcr/assay-optimization-and-validation?srsltid=AfmBOooK9oR5A3Xa9Cfg0ySjo0Eil_PglCN5_nmQSQlgkJ3u2G5aIfED]
- 81. Development and clinical validation of a novel multiplex ... [https://www.nature.com/articles/s41598-025-16434-2]
- 82. Digital PCR outperforms quantitative real-time PCR for the ... [https://pmc.ncbi.nlm.nih.gov/articles/PMC12288185/]
- 83. Quantitative or digital PCR? A comparative analysis for ... [https://www.sciencedirect.com/science/article/abs/pii/S0165993624001584]
- 84. Understanding Fluorescent Quantitative PCR (qPCR) Curves [https://www.cd-genomics.com/resource-understanding-fluorescent-quantitative-pcr-curves.html]
- 85. Web-based LinRegPCR: application for the visualization and ... [https://bmcbioinformatics.biomedcentral.com/articles/10.1186/s12859-021-04306-1]
- 86. How good is a PCR efficiency estimate: Recommendations ... [https://www.sciencedirect.com/science/article/pii/S2214753515000169]
- 87. Digital Melting Curve Analysis for Multiplex Quantification ... [https://www.mdpi.com/2079-6374/15/1/36]
- 88. Explaining multiple peaks in qPCR melt curve analysis | IDT [https://www.idtdna.com/page/support-and-education/decoded-plus/interpreting-melt-curves-an-indicator-not-a-diagnosis/]
- 89. Development and validation of a multiplex PCR assay with ... [https://pmc.ncbi.nlm.nih.gov/articles/PMC12216036/]
- 90. Optimizing your PCR [https://www.takarabio.com/learning-centers/pcr/faq/optimization?srsltid=AfmBOoqChFAXfF9Mncl8P8rXI0F6UDizPiyBszaGNvZLrsI9iwcJBP3g]
- 91. SOP for Macrocystis pyrifera specific qPCR [https://www.protocols.io/view/sop-for-macrocystis-pyrifera-specific-qpcr-gzahbx2b7.html]
- 92. Optimization of TaqMan-based quantitative PCR diagnosis ... [https://pmc.ncbi.nlm.nih.gov/articles/PMC12165414/]
- 93. Optimization of the real-time PCR platform method using ... [https://www.nature.com/articles/s41598-025-16972-9]
- 94. Efficient experimental design and analysis of real-time ... [https://pmc.ncbi.nlm.nih.gov/articles/PMC3710343/]
- 95. Digital PCR: from early developments to its future application ... [https://pubs.rsc.org/en/content/articlehtml/2025/lc/d5lc00055f]
- 96. Introduction to Quantitative PCR (qPCR) Gene Expression ... [https://www.thermofisher.com/us/en/home/life-science/pcr/real-time-pcr/real-time-pcr-learning-center/gene-expression-analysis-real-time-pcr-information/introduction-gene-expression.html]
- 97. How To Interpret RT-qPCR Results [https://www.goldbio.com/blogs/articles/how-to-interpret-rt-qpcr-results?srsltid=AfmBOopfdTTFKx5FVlozGCi1TmomZx_SWHuobFYsB0-mqc8jM3kUwNXW]
- 98. Comparison of two digital PCR platforms for quantification ... [https://pmc.ncbi.nlm.nih.gov/articles/PMC12622311/]
- 99. Comparing the precision of two digital PCR applications for ... [https://www.nature.com/articles/s41598-025-13143-8]
- 100. Comparison of digital PCR platforms using the molecular ... [https://pmc.ncbi.nlm.nih.gov/articles/PMC10326530/]
- 101. Comparison of digital PCR methods [https://www.qiagen.com/us/knowledge-and-support/knowledge-hub/bench-guide/pcr/digital-pcr/comparison-of-digital-pcr-methods]
- 102. Comparison of four digital PCR platforms for accurate ... [https://www.nature.com/articles/srep13174]
- 103. Optimizing your PCR [https://www.takarabio.com/learning-centers/pcr/faq/optimization?srsltid=AfmBOoqGrK8hDN9QUqIrejkJedr4vXFYSpQTZpB246ytG974CF7Ubhsa]
- 104. A Practical Guide to Immunoassay Method Validation - PMC [https://pmc.ncbi.nlm.nih.gov/articles/PMC4541289/]
- 105. Quantitative PCR validation for research scientists: Part 1 of 2 [https://virologyresearchservices.com/2023/01/13/quantitative-pcr-validation-part-1-of-2/]