A Comprehensive Method Verification Plan Template for Clinical Microbiology Laboratories
This article provides a structured framework for developing and executing a robust method verification plan in clinical microbiology laboratories.
A Comprehensive Method Verification Plan Template for Clinical Microbiology Laboratories
Abstract
This article provides a structured framework for developing and executing a robust method verification plan in clinical microbiology laboratories. Tailored for researchers, scientists, and drug development professionals, it demystifies CLIA and ISO 15189 requirements, offering a step-by-step guide from foundational concepts and study design to troubleshooting and final validation. The content synthesizes current standards from CLSI, USP, and ICH to equip laboratories with a practical template for verifying unmodified FDA-cleared tests, ensuring reliability, compliance, and patient safety.
Laying the Groundwork: Understanding Verification Requirements and Regulatory Standards
In clinical microbiology laboratories, the processes of method verification and validation are fundamental to ensuring the accuracy, reliability, and regulatory compliance of diagnostic tests. While often used interchangeably, these terms represent distinct activities with different regulatory requirements and implementation scenarios. Understanding the distinction between verification (confirming that a test performs as claimed by the manufacturer) and validation (establishing that a lab-developed or modified test performs appropriately for its intended use) is critical for laboratory professionals navigating the complex landscapes of the Clinical Laboratory Improvement Amendments (CLIA) and the In Vitro Diagnostic Regulation (IVDR) in the European Union [1] [2].
The regulatory environment for in vitro diagnostics (IVDs) is evolving significantly. IVDR implementation continues through key transition periods, while CLIA has introduced updated personnel requirements and proficiency testing standards effective in 2025 [3] [4] [5]. Within this framework, clinical microbiology laboratories must establish robust protocols for verifying commercial tests and validating laboratory-developed tests (LDTs), particularly as laboratories increasingly implement molecular methods such as next-generation sequencing and complex multiplex PCR panels that may fall outside FDA-cleared indications [1] [2].
This application note provides detailed guidance for distinguishing between verification and validation requirements, designing appropriate experimental protocols, and implementing compliant processes within clinical microbiology laboratories operating under CLIA and IVDR frameworks.
Regulatory Background
CLIA Requirements
The Clinical Laboratory Improvement Amendments (CLIA) establishes quality standards for all laboratory testing in the United States. CLIA requires that laboratories perform method verification for any non-waived test system (moderate or high complexity) before reporting patient results [2] [6]. For unmodified FDA-cleared or approved tests, laboratories must verify that performance specifications for accuracy, precision, reportable range, and reference range are comparable to those established by the manufacturer and appropriate for the laboratory's patient population [2] [6]. For modified FDA-cleared tests or laboratory-developed tests (LDTs), CLIA requires a more extensive validation process to establish performance specifications [2].
Recent updates to CLIA regulations effective in 2025 have revised personnel qualifications and updated proficiency testing acceptance criteria [4] [5]. These changes include more specific educational requirements for laboratory directors and testing personnel, with updated definitions for "laboratory training or experience" requiring that experience be obtained in CLIA-compliant facilities [5].
IVDR Requirements
The In Vitro Diagnostic Regulation (IVDR, EU 2017/746) represents a significant regulatory shift in the European Union, with full implementation ongoing through 2025-2027 [3]. IVDR imposes stricter requirements for clinical evidence, performance evaluation, and post-market surveillance for all IVD devices [3].
Under IVDR, most laboratories performing in-house tests must comply with ISO 15189 requirements for verification and validation [1]. IVDR specifically mandates that laboratories validate their in-house tests according to established performance evaluation requirements, with documentation demonstrating the test's analytical and clinical performance [1] [3]. The regulation also introduces a risk-based classification system (Class A-D) that determines the level of regulatory control, with genetic tests like those used in clinical microbiology typically classified as Class C (high risk) [3].
Key Differences Between Verification and Validation
The fundamental distinction between verification and validation lies in their purpose and scope. Verification confirms that a commercially developed test performs according to the manufacturer's claims when implemented in a specific laboratory setting. In contrast, validation establishes performance characteristics for tests developed or significantly modified by the laboratory itself [1] [2].
Table 1: Comparison of Method Verification vs. Validation
| Feature | Verification | Validation |
|---|---|---|
| Definition | Confirming performance of commercial tests [1] | Establishing performance of lab-developed or modified tests [1] |
| When Required | Introducing unmodified FDA-cleared/CE-marked tests [1] [2] | Developing LDTs or modifying commercial tests [1] [2] |
| Regulatory Basis | CLIA for FDA-cleared tests; ISO 15189 for CE-IVD [1] | CLIA for LDTs; IVDR & ISO 15189 for in-house tests in EU [1] |
| Scope | Less extensive - confirms manufacturer claims [1] | More extensive - establishes full performance [1] |
| Examples | Implementing a commercial CE-marked PCR assay [1] | Developing an in-house NGS test for oncology [1] |
The decision pathway for determining whether verification or validation is required can be visualized through the following workflow:
Method Verification Protocols
Verification Study Design
For unmodified FDA-cleared or CE-marked tests, verification must confirm that the test performs according to manufacturer specifications in your laboratory environment. The verification study should evaluate accuracy, precision, reportable range, and reference range appropriate for your patient population [2] [6].
For qualitative tests (e.g., pathogen detection), focus on verifying analytical sensitivity and specificity. For quantitative tests (e.g., microbial load determination), verify precision, accuracy, and reportable range. For semi-quantitative tests (e.g., antimicrobial susceptibility testing with breakpoints), verify both quantitative cutoffs and qualitative categorization [2].
Sample Planning and Acceptance Criteria
Adequate sample planning is essential for meaningful verification results. The following table summarizes recommended sample sizes and types for verifying qualitative microbiological assays:
Table 2: Sample Planning Guide for Verification of Qualitative Microbiological Assays
| Performance Characteristic | Minimum Sample Recommendation | Sample Types | Acceptance Criteria |
|---|---|---|---|
| Accuracy | 20 clinically relevant isolates [2] | Combination of positive and negative samples; can include standards, controls, reference materials, proficiency test samples, or de-identified clinical samples [2] | Meet manufacturer's stated claims or laboratory director-defined criteria [2] |
| Precision | 2 positive and 2 negative samples tested in triplicate for 5 days by 2 operators [2] | Controls or de-identified clinical samples; for semi-quantitative assays, include samples with high to low values [2] | Meet manufacturer's stated claims or laboratory director-defined criteria [2] |
| Reportable Range | 3 samples [6] | Known positive samples for detected analyte; for semi-quantitative assays, samples near upper and lower cutoff values [2] | Laboratory-established reportable result (e.g., Detected/Not detected) verified across range [2] |
| Reference Range | 20 isolates [2] | De-identified clinical samples or reference samples representing laboratory's patient population [2] | Representative of laboratory's patient population; may need redefinition if manufacturer range isn't appropriate [2] |
Experimental Methodologies
Accuracy Assessment
Accuracy verification confirms acceptable agreement between the new method and a comparative method [2]. For a qualitative PCR assay for pathogen detection:
- Select a minimum of 20 clinically relevant bacterial isolates representing both positive and negative targets [2]
- Test samples in parallel with the new method and a previously validated method
- Calculate percent agreement: (Number of results in agreement / Total number of results) × 100 [2]
- Compare observed agreement to manufacturer claims or establish laboratory-specific acceptance criteria
Precision Evaluation
Precision verification confirms acceptable within-run, between-run, and operator variance [2]. For a microbial identification system:
- Select 2 positive and 2 negative control materials (can include clinical isolates)
- Test each sample in triplicate over 5 separate days
- Utilize 2 different operators if the process involves manual steps
- Calculate within-run, between-run, and total precision
- Express precision as percent agreement for qualitative tests or coefficient of variation for quantitative measurements [2]
Method Validation Protocols
Validation Study Design
Validation is required for laboratory-developed tests (LDTs) or significantly modified commercial tests [1] [2]. The validation process is more extensive than verification and must establish all performance characteristics de novo. A comprehensive validation study for a microbiology LDT should include assessment of analytical sensitivity (detection limit), analytical specificity (including interfering substances), precision, reportable range, reference range, and accuracy [6].
For molecular LDTs such as laboratory-developed PCR assays, also include evaluation of amplification efficiency, linear dynamic range for quantitative assays, and robustness to minor variations in testing conditions [2].
Sample Planning and Acceptance Criteria
Validation requires more extensive sample testing to establish performance characteristics across clinically relevant ranges. The following table outlines minimum sample recommendations for validation studies:
Table 3: Sample Planning Guide for Validation of Laboratory-Developed Tests
| Performance Characteristic | Minimum Sample Recommendation | Experimental Design | Acceptance Criteria |
|---|---|---|---|
| Reportable Range/Linearity | 5 specimens with known values tested in triplicate [6] | Samples spanning claimed reportable range including low, medium, and high concentrations | Establish linear range with coefficient of determination (R²) >0.98 |
| Precision | 20 replicate determinations on at least two levels of control materials [6] | Within-run, between-run, and between-operator comparisons for qualitative tests; CV determination for quantitative tests | Total error < allowable total error based on clinical requirements |
| Accuracy/Method Comparison | 40 patient specimens analyzed by both new and comparison method [6] | Method comparison using clinical samples analyzed by both LDT and reference method | Deming regression showing no significant bias compared to reference method |
| Analytical Sensitivity | Blank and spiked specimen each analyzed 20 times [6] | Limit of detection (LOD) determination using diluted positive samples | 95% detection rate at claimed LOD |
| Analytical Specificity | Testing against cross-reactive organisms and potentially interfering substances [6] | Evaluation of interference from hemolysis, lipemia, common medications, and cross-reactivity with related organisms | No significant interference at clinically relevant concentrations |
Experimental Methodologies
Detection Limit (Analytical Sensitivity) Experiment
For establishing the detection limit of a qualitative LDT for pathogen detection:
- Prepare a series of dilutions from a known positive sample with high concentration
- Analyze each dilution in replicates of 20 [6]
- Identify the lowest concentration where ≥19/20 (95%) replicates test positive
- Confirm this detection limit with at least 3 independent sample preparations
- Document the claimed detection limit with supporting data
Interference Testing (Analytical Specificity)
To evaluate potential interfering substances for a microbiology assay:
- Select potentially interfering substances relevant to the test (e.g., hemoglobin for blood culture, mucus for respiratory tests, antimicrobial agents)
- Prepare test samples with and without interferent at clinically relevant concentrations
- Include samples with structurally or genetically related microorganisms that might cross-react
- Analyze paired samples (with/without interferent) in triplicate
- Consider the test acceptable if results for samples with and without interferent show no significant differences [6]
The Scientist's Toolkit: Essential Research Reagents
Successful verification and validation studies require carefully selected reagents and materials. The following table outlines essential research reagent solutions for microbiology method evaluation:
Table 4: Essential Research Reagent Solutions for Method Verification and Validation
| Reagent/Material | Function in Verification/Validation | Application Examples |
|---|---|---|
| Certified Reference Materials | Provides standardized samples with known characteristics for accuracy assessment | Quantification of microbial loads; quality control for molecular assays |
| Clinical Isolates | Represents real-world samples for performance evaluation; essential for inclusivity testing | Panel for analytical sensitivity/specificity; accuracy studies with diverse strains |
| Molecular Grade Water | Serves as negative control in molecular assays; diluent for sample preparation | PCR negative controls; preparation of sample dilutions |
| Interferent Stocks | Evaluates assay robustness against common interfering substances | Hemoglobin, lipids, mucus testing for analytical specificity |
| Nucleic Acid Extraction Kits | Standardizes sample preparation component of molecular tests | Evaluation of extraction efficiency in LDT validations |
| Proficiency Testing Materials | Provides externally validated samples for accuracy assessment | Inter-laboratory comparison; twice-yearly CLIA requirement [4] |
| Quality Control Panels | Monitors ongoing assay performance post-implementation | Daily QC monitoring; trend analysis for precision |
Navigating Current Regulatory Challenges
IVDR Implementation in 2025
With key IVDR transition periods ending in 2025, laboratories must focus on several challenging areas. Performance evaluation requirements for in-house tests under IVDR Annex I require comprehensive clinical evidence, potentially including data from clinical performance studies [3]. Risk classification challenges are particularly relevant for microbiology tests, with genetic tests typically classified as Class C under IVDR Rule 3 [3]. For legacy devices, transition periods extend through 2027-2028, but laboratories must maintain technical documentation that remains audit-ready [3].
CLIA Updates for 2025
Recent CLIA updates include revised personnel requirements with more specific educational pathways and updated definitions for laboratory training and experience [5]. Proficiency testing acceptance criteria have been updated for multiple analytes, with changes implemented January 1, 2025 [4]. Laboratories must ensure their verification and validation protocols align with these updated standards.
Special Considerations for Microbiology
Microbiology presents unique verification and validation challenges compared to other laboratory disciplines. Verification of antimicrobial susceptibility testing methods requires careful consideration of organism selection, interpretation against FDA versus CLSI breakpoints, and correlation with clinical outcomes [2]. For molecular microbiology assays, verification and validation must address extraction efficiency, amplification inhibitors, and strain genetic diversity that might affect performance [2].
Method verification and validation represent distinct but complementary processes in the clinical microbiology laboratory. Verification confirms that commercial tests perform as claimed by the manufacturer in your specific laboratory environment, while validation establishes performance characteristics for laboratory-developed or significantly modified tests. With evolving regulatory landscapes including IVDR implementation and CLIA updates, laboratories must maintain robust, well-documented processes for both activities. By implementing the protocols and strategies outlined in this application note, clinical microbiology laboratories can ensure regulatory compliance while providing accurate, reliable test results essential for patient care.
In clinical microbiology, introducing new instruments, assays, or implementing major changes requires a rigorous assessment to ensure reliable patient results. This process is governed by a critical distinction between method verification and method validation [2]. Understanding this distinction is fundamental to regulatory compliance and quality patient care.
Method verification is a one-time study confirming that a test performs according to the manufacturer's established performance characteristics when used as intended in your laboratory. It applies to unmodified FDA-cleared or approved tests [2]. In contrast, method validation is a more extensive process to establish that an assay works as intended for non-FDA cleared tests, such as laboratory-developed tests (LDTs), or when modifications are made to an FDA-approved test [2]. Such modifications can include using different specimen types, sample dilutions, or altering test parameters like incubation times, all of which could affect assay performance.
Scenarios Requiring Verification or Validation
Navigating the requirements for new tests and changes can be complex. The table below outlines common laboratory scenarios and the required level of assessment.
Table 1: Guidance on When Verification or Validation is Required
| Laboratory Scenario | Type of Assessment Required | Key Rationale |
|---|---|---|
| Implementing a new, unmodified FDA-cleared test | Verification [2] | Confirms the test performs as stated by the manufacturer in your laboratory environment. |
| Implementing a laboratory-developed test (LDT) or a modified FDA-cleared test | Validation [2] | Establishes performance characteristics for a test without existing manufacturer claims for your specific use. |
| Major change in procedure or instrument relocation | Verification [2] | Ensures the change or new location has not adversely affected the test's performance. |
| Updating antimicrobial susceptibility testing (AST) breakpoints on an FDA-cleared device | Validation (treated as an LDT) [7] | Modifying an FDA-cleared device to use current CLSI breakpoints is considered a laboratory-developed test. |
| Implementing a test for sterility testing under current Good Manufacturing Practices (cGMP) | Equipment Validation (IOPQ) [8] | cGMP standards require Installation, Operational, and Performance Qualification for equipment used in manufacturing. |
The regulatory landscape is dynamic. A significant recent development is the FDA's final rule on Laboratory Developed Tests (LDTs), which began phasing in during 2024 [7]. This rule subjects LDTs to greater FDA oversight. Consequently, modifying an FDA-cleared AST device to interpret results with current CLSI breakpoints (if the device was cleared with older, obsolete breakpoints) is now explicitly classified as creating an LDT, thus requiring a full validation by the laboratory [7].
The following workflow diagram provides a decision pathway to help determine whether a verification or validation is needed for a new test or procedure.
Core Performance Characteristics for Verification
For unmodified FDA-cleared tests, verification studies must confirm several core performance characteristics as required by the Clinical Laboratory Improvement Amendments (CLIA) [2]. The specific experiments and acceptance criteria should align with the test's intended use and the laboratory's patient population.
Table 2: Core Performance Characteristics and Verification Protocols for Qualitative and Semi-Quantitative Assays
| Performance Characteristic | Objective | Minimum Sample Recommendation | Acceptance Criteria |
|---|---|---|---|
| Accuracy [2] | Confirm agreement between the new method and a comparative method. | 20 clinically relevant isolates (combination of positive and negative for qualitative; high to low values for semi-quantitative). | Meets manufacturer's stated claims or laboratory director-defined criteria. |
| Precision [2] | Confirm acceptable within-run, between-run, and operator variance. | 2 positive and 2 negative samples, tested in triplicate for 5 days by 2 operators. | Meets manufacturer's stated claims or laboratory director-defined criteria. |
| Reportable Range [2] | Confirm the acceptable upper and lower limits of the test system. | 3 known positive samples (for qualitative) or samples near the upper/lower cutoff (for semi-quantitative). | The laboratory-defined reportable result (e.g., "Detected", "Not detected", Ct value cutoff) is verified. |
| Reference Range [2] | Confirm the normal result for the tested patient population. | 20 isolates using de-identified clinical samples or reference samples. | The manufacturer's reference range is verified as representative. If not, the lab must redefine it. |
Experimental Protocol for Accuracy and Precision
The following protocol provides a step-by-step guide for conducting accuracy and precision studies, which are foundational to any verification plan.
Accuracy Verification Protocol
- Sample Selection: Obtain a minimum of 20 clinically relevant isolates. For qualitative assays, use a combination of positive and negative samples. For semi-quantitative assays, use a range of samples with high to low values [2].
- Source Material: Acceptable specimens can include standardized controls, reference materials, proficiency test samples, or de-identified clinical samples previously tested with a validated method [2].
- Testing Procedure: Test all samples in parallel using the new method (test method) and the established comparative method (reference method).
- Data Analysis: Calculate the percentage of agreement: (Number of results in agreement / Total number of results) × 100 [2].
- Acceptance Criteria: The calculated percentage of agreement must meet the performance claims stated by the manufacturer or criteria defined by the laboratory director.
Precision Verification Protocol
- Sample Selection: Select a minimum of 2 positive and 2 negative samples. For semi-quantitative assays, use samples with high and low values [2].
- Testing Procedure: Test each sample in triplicate, over the course of 5 days, using two different operators. If the system is fully automated, operator variance may not be required [2].
- Data Analysis: Calculate the percentage of agreement for the repeated measurements across all runs and operators: (Number of concordant results / Total number of results) × 100.
- Acceptance Criteria: The precision percentage must meet the manufacturer's stated claims or laboratory director-defined criteria.
The Scientist's Toolkit: Essential Research Reagent Solutions
Successful verification and validation studies rely on well-characterized materials. The following table details essential reagents and resources for executing these studies.
Table 3: Key Research Reagent Solutions for Verification & Validation
| Reagent / Resource | Function in Verification/Validation | Application Example |
|---|---|---|
| Reference Materials & Controls [2] | Serve as objective benchmarks for assessing accuracy and precision. | Using standardized controls from ATCC or other recognized sources to verify a new microbial identification system. |
| Proficiency Test (PT) Samples [2] | Provide an external performance check with pre-characterized samples. | Using archived PT samples with known results to challenge the reportable range of a new qualitative PCR assay. |
| De-identified Clinical Samples [2] | Represent the real-world patient population for verifying reference ranges and accuracy. | Using stored, characterized patient isolates to validate updated breakpoints on an AST system. |
| CLSI Standards (e.g., M07, M100) [7] [2] | Provide reference methods and interpretive criteria (breakpoints) for AST. | Using CLSI M07 broth microdilution as the reference method when validating a new automated AST system. |
| Verification Plan Template [9] | Provides a structured document outlining study design, samples, and acceptance criteria. | Customizing a quantitative validation plan template to detail the verification protocol for a new quantitative HBV nucleic acid test [10]. |
Navigating Regulatory and Standards Frameworks
Adherence to evolving regulatory requirements and international standards is paramount. Key frameworks impacting clinical microbiology include:
- CLIA Regulations: Mandate verification for all non-waived, unmodified FDA-cleared tests before patient results can be reported [2].
- FDA Recognition of CLSI Breakpoints: In a significant 2025 update, the FDA recognized many CLSI breakpoints (from M100, M45, M24S, etc.), simplifying the regulatory path for using current breakpoints with AST devices [7].
- ISO Standards: The ISO 16140 series provides a structured protocol for method validation and verification in the food and feed chain, with part 3 specifically dedicated to verification in a single laboratory [11]. While focused on the food chain, its principles are informative for clinical labs.
- cGMP for Equipment: When performing testing under current Good Manufacturing Practices (e.g., for product sterility testing), equipment must undergo a formal validation process known as Installation, Operational, and Performance Qualification [8].
Clinical microbiology laboratories operate within a stringent regulatory ecosystem to ensure the quality, accuracy, and reliability of diagnostic testing. Three cornerstone organizations establish the critical standards governing this field: the Clinical and Laboratory Standards Institute (CLSI), the International Organization for Standardization through its ISO 15189 standard, and the United States Pharmacopeia (USP). These frameworks collectively address method validation, quality management systems, and microbiological control, forming the foundation for laboratory compliance and patient safety. Adherence to these guidelines is not merely a regulatory exercise but a fundamental component of diagnostic excellence, impacting every phase from test selection and verification to routine patient reporting and quality control [12] [13].
For researchers and drug development professionals, understanding the interplay between these standards is crucial for designing robust verification plans, developing new diagnostic products, and ensuring that laboratory data meets stringent regulatory scrutiny. This article delineates the roles of these key organizations and provides actionable protocols for implementing their requirements within the context of a clinical microbiology laboratory.
Core Regulatory Frameworks and Their Synergy
The following table summarizes the primary focus and key documents for each major standards organization relevant to clinical microbiology.
Table 1: Key Standards Organizations and Their Primary Guidance
| Organization | Primary Focus | Key Documents/Guidelines |
|---|---|---|
| CLSI | Method evaluation, verification, and antimicrobial susceptibility testing standards [14] [15]. | EP07 (Interference Testing), EP12 (Qualitative Performance), M52 (Verification of ID/AST Systems), M100 (AST Breakpoints) [12] [2] [16]. |
| ISO | Quality Management System (QMS) and technical competence for medical laboratories [13]. | ISO 15189:2022 (Medical laboratories—Requirements for quality and competence) [13]. |
| USP | Microbiological quality control for pharmaceuticals, compounding, and dietary supplements [17]. | <61> Microbial Enumeration, <62> Specified Microorganisms, <71> Sterility Tests, <1112> Microbial Contamination Control [17]. |
These frameworks are highly complementary. CLSI provides the detailed technical protocols for test verification and performance, while ISO 15189 establishes the overarching quality management system in which these tests are performed. USP standards, though more directly applicable to pharmaceutical manufacturing and compounding, provide critical guidance on microbiological control that supports laboratory reagent quality and sterility assurance. Laboratories aiming for the highest level of recognition often seek accreditation to ISO 15189, which can be combined with CLIA requirements in comprehensive programs like A2LA's "Platinum Choice Accreditation Program" [13].
Experimental Protocols for Method Verification
Method verification is a mandatory process under regulations like the Clinical Laboratory Improvement Amendments (CLIA) for any non-waived test system before patient results are reported [2]. The process confirms that a test's performance characteristics, as established by the manufacturer, are accurately reproduced in the user's laboratory environment.
Distinction Between Verification and Validation
A critical first step is determining whether a verification or a validation is required:
- Verification: A one-time study for unmodified, FDA-cleared or approved tests. It demonstrates that the test performs in line with the manufacturer's established performance characteristics when used as intended [2].
- Validation: A more extensive process meant to establish that an assay works as intended. This is required for laboratory-developed tests (LDTs) and modified FDA-approved tests [2].
The following workflow outlines the key decision points and stages for planning and executing a method verification study in clinical microbiology.
Verification of Qualitative and Semi-Quantitative Assays
Most tests in clinical microbiology are qualitative or semi-quantitative. The table below outlines the minimum verification criteria as required by CLIA and detailed in CLSI guidelines.
Table 2: Method Verification Criteria for Qualitative/Semi-Quantitative Assays [2]
| Performance Characteristic | Minimum Sample Recommendation | Acceptable Specimen Types | Data Analysis |
|---|---|---|---|
| Accuracy | 20 clinically relevant isolates (positive and negative) [2]. | Standards/controls, reference materials, proficiency test samples, de-identified clinical samples [2]. | (Number of results in agreement / Total results) × 100 [2]. |
| Precision | 2 positive and 2 negative samples, tested in triplicate for 5 days by 2 operators [2]. | Controls or de-identified clinical samples [2]. | (Number of results in agreement / Total results) × 100 [2]. |
| Reportable Range | 3 known positive samples [2]. | Samples with analytes detected; for semi-quantitative, use samples near cutoff values [2]. | Verify that results fall within the laboratory's established reportable range (e.g., "Detected," "Not detected") [2]. |
| Reference Range | 20 isolates [2]. | De-identified clinical samples or reference samples representing the lab's patient population [2]. | Confirm the manufacturer's reference range is appropriate for the laboratory's patient population [2]. |
Specific Protocol for Microbial Identification and AST Systems
For instrument-based microbial identification and antimicrobial susceptibility testing systems, CLSI M52 provides essential recommendations.
- Scope: This guideline covers the verification of FDA-cleared Microbial Identification Systems and Antimicrobial Susceptibility Testing Systems, and can also apply to manual methods like disk diffusion [16].
- Key Focus Areas:
- Accuracy of Identification: Testing a range of organisms that represent the system's claimed database.
- AST Categorization Agreement: Ensuring the system correctly categorizes isolates as Susceptible, Intermediate, or Resistant compared to a reference method.
- Implementation of Alternative Breakpoints: Appendix B of M52 addresses studies for implementing updated CLSI breakpoints that may differ from those approved by the FDA for the commercial system [16].
The Scientist's Toolkit: Essential Research Reagent Solutions
Successful method verification and quality control rely on high-quality, standardized reagents and materials. The following table details essential items and their functions in the verification process.
Table 3: Essential Reagents and Materials for Verification Studies
| Item | Function/Application | Relevant Standards |
|---|---|---|
| Reference Microorganisms | Served as standardized controls for accuracy and precision studies of identification and AST systems [17]. | USP, CLSI M52 [17] [16]. |
| Endotoxin Reference Standard | Used for validation of the Bacterial Endotoxins Test to ensure parenteral products are free of pyrogens [17]. | USP <85> [17]. |
| Competency Testing Kits | Used for verifying the competency of personnel and processes in surface sampling and other monitoring activities [17]. | USP <1116> [17]. |
| Clinical Isolates & De-identified Samples | Used as patient-like samples for verifying accuracy, reportable range, and reference range [2]. | CLSI M52, EP12 [2] [16]. |
| Quality Control Strains | Used for daily or routine QC monitoring of instruments and media to ensure ongoing performance [15]. | CLSI AST Standards [15]. |
The integrated application of CLSI, ISO 15189, and USP standards provides a robust framework for ensuring the quality and reliability of work in clinical microbiology laboratories. CLSI's method evaluation protocols offer the technical "how-to" for verifying test performance. ISO 15189 establishes the overarching quality management system that ensures sustained competency and continuous improvement. USP standards underpin the quality and sterility of critical reagents and products used in testing and pharmaceutical preparation.
For researchers and scientists, a deep understanding of these frameworks is indispensable. It allows for the development of a comprehensive method verification plan template that is not only compliant with regulatory and accreditation requirements but also scientifically sound, thereby safeguarding patient care and supporting the advancement of diagnostic technologies.
In clinical microbiology laboratories, accurately determining the nature of an assay—whether qualitative, quantitative, or semi-quantitative—is a critical first step before method verification or validation. This classification directly influences the study design, performance characteristics evaluated, and statistical analyses employed. Method verification studies are required by the Clinical Laboratory Improvement Amendments (CLIA) for all non-waived systems before patient results can be reported, making proper assay classification essential for regulatory compliance [2]. Understanding these categories ensures that laboratory professionals select appropriate verification protocols that accurately demonstrate a test's performance characteristics within their specific operational environment.
The terms validation and verification, while sometimes used interchangeably, represent distinct processes. A validation establishes that an assay works as intended for laboratory-developed methods or modified FDA-approved tests. In contrast, a verification is a one-time study for unmodified FDA-approved or cleared tests, demonstrating that the test performs according to established characteristics when used as intended by the manufacturer [2]. This application note provides detailed guidance for classifying assays and executing appropriate verification protocols within the framework of clinical microbiology research.
Fundamental Assay Classifications
Clinical laboratory testing methods are divided into three main categories based on the results they report. Each category corresponds to a specific scale of measurement in metrology, which determines the appropriate statistical analyses and quality indicators [18].
Qualitative Assays
- Definition: Assays that provide a binary, categorical result without magnitude (e.g., "detected/not detected," "positive/negative").
- Measurement Scale: Nominal scale, where results are names or categories that cannot be ordered or ranked by size [18].
- Common Examples: Pathogen detection by lateral flow immunoassay, presence of specific genetic markers by PCR without threshold cycles, cultural characteristics for preliminary organism identification.
- Key Consideration: For nominal properties, only equality matters; the cut-off value between categories cannot be arbitrarily changed without affecting the test's fundamental classification performance [18].
Quantitative Assays
- Definition: Assays that provide a numerical value with units, representing a continuous measurement.
- Measurement Scale: Typically ratio scale, with equally sized units, a natural zero point, and constant ratio between quantity values [18].
- Common Examples: Bacterial colony counts (CFU/mL), minimum inhibitory concentration (MIC) values, viral load measurements, enzyme activity levels.
- Key Consideration: This is the highest measurement scale where all statistical methods apply, including calculation of mean, standard deviation, and confidence intervals [18].
Semi-Quantitative Assays
- Definition: Assays that use numerical values to determine cutoffs but report qualitative results or ranked categories.
- Measurement Scale: Ordinal scale, where results can be ordered by size but units may not be identical across the measuring interval [18].
- Common Examples: Cycle threshold (Ct) values in PCR with established cutoffs for detection, agglutination tests graded as 1+/2+/3+/4+, antigen tests with signal-to-cutoff ratios.
- Key Consideration: These methods provide more information than qualitative tests but typically have less optimal quality indicators for trueness, precision, and detectability compared to fully quantitative methods [18].
Table 1: Comparative Analysis of Assay Types in Clinical Microbiology
| Characteristic | Qualitative Assays | Semi-Quantitative Assays | Quantitative Assays |
|---|---|---|---|
| Result Type | Binary/categorical | Ranked categories or ordinal values | Numerical with units |
| Measurement Scale | Nominal | Ordinal | Ratio |
| Statistical Analysis | Sensitivity, specificity, predictive values | Non-parametric statistics, rank-based tests | Mean, SD, correlation, regression |
| Data Presentation | Contingency tables, prevalence | Ordered categories, thresholds | Continuous numerical values |
| CLIA Verification Focus | Accuracy, precision at cut-off | Accuracy across categories, reportable range | Accuracy, precision, reportable range, reference range |
| Example Methods | Rapid strep test, HIV rapid test | PCR with Ct values, agglutination tests | MIC testing, bacterial counts |
Method Verification Requirements by Assay Type
The Clinical Laboratory Improvement Amendments (CLIA) require laboratories to verify specific performance characteristics for unmodified FDA-approved tests before implementing them for patient testing. The verification requirements differ based on whether the assay is qualitative, quantitative, or semi-quantitative [2].
Verification of Qualitative Assays
For qualitative assays, CLIA requires verification of accuracy, precision, reportable range, and reference range [2]. The following protocols provide detailed methodologies for meeting these requirements:
Accuracy Verification Protocol:
- Sample Requirements: Minimum of 20 clinically relevant isolates or samples, combining both positive and negative samples [2].
- Sample Types: Standards, controls, reference materials, proficiency test samples, or de-identified clinical samples tested previously or in parallel with a validated method [2].
- Calculation Method: (Number of results in agreement / Total number of results) × 100 [2].
- Acceptance Criteria: Should meet the manufacturer's stated claims or laboratory director's determination [2].
Precision Verification Protocol:
- Sample Requirements: Minimum of 2 positive and 2 negative samples tested in triplicate for 5 days by 2 operators [2].
- Automated Systems: If the system is fully automated, user variance testing may not be required [2].
- Calculation Method: (Number of results in agreement / Total number of results) × 100 [2].
- Acceptance Criteria: Should meet the manufacturer's stated claims or laboratory director's determination [2].
Reportable Range Verification Protocol:
Reference Range Verification Protocol:
Verification of Quantitative Assays
Quantitative assays require verification of the same performance characteristics but with different experimental approaches focused on numerical results:
- Accuracy Verification: Method comparison studies using at least 40 patient samples compared to a reference method [9].
- Precision Verification: Within-run, between-run, and between-operator testing following established CLSI guidelines [9].
- Reportable Range Verification: Testing samples with concentrations at the upper and lower limits of detection to verify the assay's measurable range [2].
- Reference Range Verification: Establishing normal values for the tested patient population using appropriate statistical methods [9].
Verification of Semi-Quantitative Assays
Semi-quantitative assays require a hybrid approach, combining elements from both qualitative and quantitative verification protocols:
- Accuracy Verification: Use a range of samples with high to low values to verify correct categorization across the entire reporting spectrum [2].
- Precision Verification: Test samples representing different categories in triplicate over multiple days to ensure consistent classification [2].
- Reportable Range Verification: Use a range of positive samples near the upper and lower ends of the manufacturer-determined cutoff values [2].
- Reference Range Verification: Use de-identified clinical samples or reference samples with known expected results for the laboratory's patient population [2].
Experimental Design and Workflow
The following diagram illustrates the decision pathway for determining assay type and selecting the appropriate verification protocol:
Data Analysis and Presentation
Proper data analysis and presentation methods vary significantly by assay type and must be selected accordingly:
Table 2: Data Analysis and Presentation Methods by Assay Type
| Analysis Type | Appropriate Quantitative Analysis | Presentation Format |
|---|---|---|
| Univariate Analysis | Descriptive statistics (range, mean, median, mode, standard deviation) | Graphs (line graphs, histograms), charts (pie chart, descriptive table) [19] |
| Univariate Inferential Analysis | T-test, chi-square | Summary tables of test results, contingency table [19] |
| Bivariate Analysis | T-tests, ANOVA, Chi-square | Summary tables; contingency tables [19] |
| Multivariate Analysis | ANOVA, MANOVA, Chi-square, correlation, regression | Summary tables [19] |
For quantitative data presentation, several principles should be followed. Tables should be numbered consecutively and given brief, self-explanatory titles. Headings of columns and rows should be clear and concise, with data presented in a logical order (e.g., by size, importance, chronological, alphabetical, or geographical). When presenting percentages or averages for comparison, place them as close as possible, and avoid tables that are too large, as most people find vertical arrangements easier to scan than horizontal ones [20].
For frequency distribution of quantitative data, histograms provide a pictorial diagram consisting of a series of rectangular and contiguous blocks. The class intervals are represented along the horizontal axis (width of the column), while frequencies are represented along the vertical axis (length of the column). The area of each column depicts the frequency, which is why columns touch each other without space between them [20].
The Scientist's Toolkit: Research Reagent Solutions
Table 3: Essential Research Reagents and Materials for Method Verification Studies
| Reagent/Material | Function in Verification Studies |
|---|---|
| Reference Materials | Provide known values for accuracy determination and calibration verification [2] |
| Quality Controls (QC) | Monitor precision and detect systematic errors during verification studies [2] |
| Proficiency Test Samples | External assessment of method performance compared to peer laboratories [2] |
| Clinical Isolates | Cultured microorganisms representing target pathogens for clinical relevance [2] |
| De-identified Clinical Samples | Patient specimens that maintain biological matrix without privacy concerns [2] |
| Standard Strains | ATCC or reference strains with well-characterized properties for comparison [9] |
Implementation Workflow for Assay Verification
The following workflow diagram outlines the comprehensive process for planning and executing a method verification study in clinical microbiology:
Successful implementation of a new assay requires careful documentation throughout the verification process. The verification plan should include the type and purpose of the study, test purpose and method description, detailed study design (including number and types of samples, quality control procedures, replicates, and performance characteristics), materials and equipment needed, safety considerations, and expected timeline for completion [2]. This plan must be reviewed and signed by the laboratory director before commencement of the verification study. Following successful verification, ongoing quality monitoring is essential to ensure the test continues to meet performance requirements throughout its implementation lifetime [2].
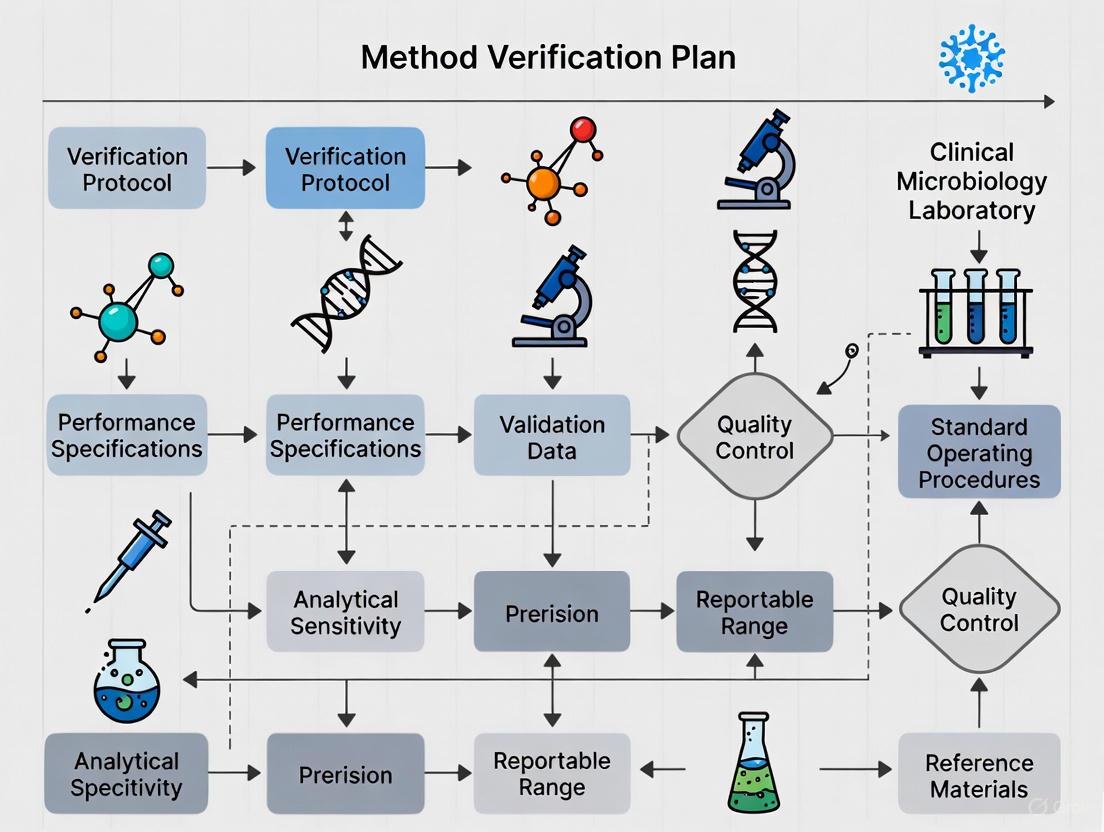
Building Your Verification Protocol: A Step-by-Step Template and Study Design
In clinical microbiology laboratories, method verification is a standard and required practice before reporting patient results from any new, unmodified FDA-cleared or approved test system. This process, mandated by the Clinical Laboratory Improvement Amendments (CLIA) for non-waived systems (tests of moderate or high complexity), serves as a one-time study to demonstrate that a test performs according to the manufacturer's established performance characteristics within the operator's specific environment [2]. Verification is distinctly different from validation; the latter is a more extensive process required for laboratory-developed tests (LDTs) or modified FDA-approved tests to establish that an assay works as intended [2] [21]. A well-structured verification plan is crucial for ensuring that laboratory tests are reliable, accurate, and ready for diagnostic use, ultimately safeguarding patient care.
Core Components of a Verification Plan
A comprehensive verification plan acts as a formal protocol, ensuring that all regulatory and performance requirements are met before a new test is implemented. The plan must be reviewed and signed off by the laboratory director and typically includes the following core elements [2]:
- Type of Verification and Purpose of Study: Clearly state whether the activity is a verification (for an unmodified FDA-approved test) or a validation (for an LDT or modified test). Define the primary objective of the study.
- Purpose of Test and Method Description: Describe the clinical application of the test and provide a detailed description of the methodology.
- Details of Study Design: This is the most critical section, specifying the number and types of samples, quality assurance and control procedures, number of replicates, days, and analysts, the performance characteristics to be evaluated, and the acceptance criteria for each.
- Materials, Equipment, and Resources: List all necessary reagents, instruments, and other resources required to perform the verification.
- Safety Considerations: Outline any specific safety protocols relevant to the test or specimens.
- Expected Timeline for Completion: Provide a projected timeline for finalizing the verification study.
The following workflow outlines the key stages in developing and executing a method verification plan:
Purpose: Verification vs. Validation
A fundamental first step is determining whether a verification or a validation is required. The terms are not interchangeable, and the required rigor and scope of the study differ significantly [2].
- Verification: This is conducted for unmodified, FDA-cleared or approved tests. It is a confirmation process, providing evidence that the test performs as claimed by the manufacturer in the user's laboratory setting. It is a one-time study [2] [21].
- Validation: This is a more extensive process required for laboratory-developed tests (LDTs) or modified FDA-approved tests. Any change to the manufacturer's instructions, such as using different specimen types, sample dilutions, or altering test parameters like incubation times, constitutes a modification. Validation establishes that the assay works as intended for its specific use case [2].
Experimental Design: Performance Characteristics
The study design must detail the experiments to verify key performance characteristics as required by CLIA regulations. The specific approach depends on whether the assay is qualitative, quantitative, or semi-quantitative [2]. The following table summarizes the core characteristics and the minimum sample suggestions for qualitative and semi-quantitative assays, which are common in microbiology.
Table 1: Verification Criteria for Qualitative and Semi-Quantitative Assays [2]
| Performance Characteristic | Objective | Minimum Sample Suggestions | Acceptance Criteria |
|---|---|---|---|
| Accuracy | Confirm agreement between the new method and a comparative method. | 20 clinically relevant isolates (combination of positive and negative). | Meets manufacturer's stated claims or as determined by the lab director. |
| Precision | Confirm acceptable within-run, between-run, and operator variance. | 2 positive and 2 negative samples, tested in triplicate for 5 days by 2 operators. | Meets manufacturer's stated claims or as determined by the lab director. |
| Reportable Range | Confirm the upper and lower limits of what the test system can report. | 3 known positive samples (for qualitative) or samples near cutoff values (for semi-quantitative). | The laboratory's defined reportable result (e.g., "Detected," "Not detected") is verified. |
| Reference Range | Confirm the normal result for the tested patient population. | 20 isolates from de-identified clinical or reference samples. | Represents the standard for the laboratory’s patient population. |
Defining Acceptance Criteria
Acceptance criteria are the predefined benchmarks that determine the success or failure of the verification study. These criteria should be established before testing begins and documented in the verification plan [2]. Typically, the primary reference for acceptance criteria is the manufacturer's stated performance claims for the test. Where manufacturer claims are unavailable or deemed insufficient, the laboratory director is responsible for establishing and documenting appropriate acceptance criteria based on laboratory needs and clinical requirements [2]. For accuracy and precision, the results (calculated as the percentage of results in agreement) must meet or exceed these predefined benchmarks.
Detailed Experimental Protocols
This section provides detailed methodologies for key experiments cited in the verification plan.
Protocol for Verifying Accuracy
Objective: To confirm the acceptable agreement of results between the new method and a comparative method [2].
Materials:
- New test system and instrumentation.
- Comparative method (a previously validated method).
- A minimum of 20 clinically relevant isolates or samples [2].
- Appropriate sample types: standards, controls, reference materials, proficiency test samples, or de-identified clinical samples [2].
Procedure:
- Select samples that represent the expected range of analytes, including positive and negative samples.
- Test each sample using both the new method and the comparative method.
- Ensure testing is performed according to each method's standard operating procedure.
Data Analysis:
- Compare the results from the new method to those from the comparative method.
- Calculate the percent agreement using the formula: (Number of results in agreement / Total number of results) × 100 [2].
- Compare the calculated percentage to the predefined acceptance criteria.
Protocol for Verifying Precision
Objective: To confirm acceptable variance within a run, between runs, and between different operators [2].
Materials:
- New test system and instrumentation.
- A minimum of 2 positive and 2 negative samples [2].
- These can be controls or de-identified clinical samples.
Procedure:
- Two different operators should perform the testing.
- Each operator tests the selected samples in triplicate.
- This testing is repeated over the course of 5 days to capture between-run variability [2].
- If the system is fully automated, testing for user variance may not be required [2].
Data Analysis:
- Compile all results from the different runs and operators.
- Calculate the overall percent agreement for each sample level as described in the accuracy protocol.
- Compare the calculated percentages to the predefined acceptance criteria for precision.
The Scientist's Toolkit
A successful verification study relies on more than just the instrument and reagents. The following table details key resources and their functions in the verification process.
Table 2: Essential Research Reagent Solutions and Resources for Verification
| Item / Resource | Function / Purpose in Verification |
|---|---|
| Clinical and Laboratory Standards Institute (CLSI) Guidelines | Provides authoritative standards and guidelines for designing and evaluating verification studies (e.g., EP12, M52, MM03) [2]. |
| Reference Materials & Controls | Well-characterized samples (from standards, PT panels, or commercial controls) used as a benchmark for assessing accuracy and precision [2]. |
| De-identified Clinical Samples | Real patient samples used to verify performance in a matrix representative of the laboratory's routine workload and patient population [2]. |
| Verification Plan Template | A customizable document that ensures all necessary components of the verification are planned, executed, and documented consistently [9] [22]. |
| Calculation Spreadsheets | Tools for performing standardized calculations for accuracy, precision, and other parameters, reducing human error and improving efficiency [9]. |
| Individualized Quality Control Plan (IQCP) | A framework for developing a quality control plan tailored to the specific test and laboratory environment, extending beyond initial verification [2]. |
Method verification is a mandatory practice for clinical laboratories, required by the Clinical Laboratory Improvement Amendments (CLIA) before implementing new, unmodified FDA-approved tests for patient reporting [2]. A cornerstone of a robust verification study is the appropriate selection of clinically relevant isolates and matrices, coupled with a sample size sufficient to demonstrate that the test performs as claimed within your specific laboratory environment [2]. This document provides detailed application notes and protocols for establishing the sample size and selection criteria for method verification in clinical microbiology, framed within a comprehensive method verification plan template.
Core Principles of Sample Size Calculation
The Importance of Adequate Sample Size
An appropriately calculated sample size is an essential component of any research or verification study, ensuring scientific validity and ethical use of resources [23] [24]. An inadequate sample size can lead to underpowered studies that fail to detect true performance characteristics of a test, resulting in the rejection of valid findings or, conversely, the acceptance of false results [23] [24]. Conversely, an excessively large sample size wastes resources, time, and may unnecessarily consume valuable clinical specimens [24].
Prerequisites for Sample Size Determination
The calculation of sample size requires several key components to be defined during the initial planning phase of the study, as outlined in Table 1 [24].
Table 1: Key Components for Sample Size Calculation
| Component | Description | Typical Values in Medical Research |
|---|---|---|
| Type I Error (α) | The probability of falsely rejecting the null hypothesis (i.e., falsely detecting a difference when none exists). Also known as the significance level [23] [24]. | 0.05 or 0.01 [24] |
| Power (1-β) | The probability of correctly rejecting a false null hypothesis (i.e., correctly detecting a true effect) [23] [24]. | 80% or higher [24] |
| Effect Size | The smallest clinically relevant difference in the outcome that the study aims to detect [23] [24]. | Determined from previous studies, pilot data, or clinical experience [24] |
| Variance/Standard Deviation | The variability of the outcome measure within the population [23] [24]. | Obtained from previous studies, pilot data, or published literature [24] |
These components are used in various statistical formulas tailored to specific study designs (e.g., cross-sectional, case-control, clinical trials) [24]. For verification studies, the "effect size" is often related to the performance criteria you aim to verify, such as a minimum threshold for accuracy.
Sample Size for Different Study Types in Microbiology
The required sample size and the formula used for its calculation depend on the objective of the study and the type of data being generated. Clinical microbiology verification often involves qualitative or semi-quantitative assays.
Cross-Sectional Studies (e.g., Prevalence or Accuracy)
For studies aiming to estimate a proportion, such as the accuracy or prevalence of a microorganism, the following sample size formula is applicable [23]: [ n = \frac{Z^2 P(1-P)}{d^2} ] Where:
- ( n ) = sample size
- ( Z ) = statistic corresponding to the level of confidence (e.g., 1.96 for 95% confidence)
- ( P ) = expected prevalence or proportion (e.g., expected accuracy)
- ( d ) = precision (margin of error)
The expected proportion (( P )) significantly influences the required sample size. Table 2 demonstrates how different values of ( P ) and precision (( d )) affect the sample size [23].
Table 2: Sample Size Calculation for Different Prevalences and Precision Levels (95% Confidence)
| Precision (d) | Assumed Prevalence (P) | ||
|---|---|---|---|
| 0.05 | 0.20 | 0.60 | |
| 0.01 | 1825 | 6147 | 9220 |
| 0.04 | 114 | 384 | 576 |
| 0.10 | 18 | 61 | 92 |
For rare events (very low P), the precision should be chosen carefully, often as a fraction of the prevalence, to avoid crude estimates [23].
Experimental and Multi-Centre Trials
In experimental settings, such as comparing a new microbiological method against a reference standard, more complex designs are used. For multi-centre trials, which increase recruitment rate and generalisability, sample size calculation must account for between-centre heterogeneity using mixed models [25]. Failure to account for this clustering can lead to underpowered studies [25]. A key consideration is that block randomisation, used to balance treatment groups within centres, can result in unbalanced treatment allocations if centre sizes are small and block lengths are large, which may necessitate a larger overall sample size to maintain power [25].
Sampling Methods for Isolate and Matrix Selection
Selecting the right samples is as crucial as determining the right number. The goal is to ensure the study population (the selected samples) is representative of the target population for which the test will ultimately be used [26].
Probability Sampling Methods
Probability sampling methods give all subjects in the target population an equal chance of being selected, maximizing representativeness [26].
- Simple Random Sampling: The basic method where a sampling frame (a list of all units) is available, and samples are drawn randomly [26]. This is ideal if a comprehensive repository of all available isolates is accessible.
- Stratified Random Sampling: The population is divided into homogeneous subgroups (strata) based on a characteristic like bacterial species, specimen type (e.g., urine, sputum), or patient demographics. A random sample is then drawn from each stratum [26]. This ensures adequate representation of minority or clinically important subgroups.
Non-Probability Sampling Methods
In clinical practice, a perfect sampling frame rarely exists, making non-probability methods more common, though they require careful implementation to avoid bias [26].
- Convenience Sampling: Involves enrolling subjects according to their availability and accessibility [26]. For a lab, this might mean using all consecutive clinical isolates received during the verification study period. While convenient and inexpensive, investigators must be cautious that this sample does not systematically differ from the broader target population [26].
- Judgmental Sampling: The investigator selects samples based on specific characteristics deemed important for the study [26]. In microbiology, this is a key strategy for ensuring a verification panel includes isolates with specific resistance mechanisms (e.g., ESBLs, carbapenemases) or a range of colony morphologies.
The following workflow diagram (Figure 1) illustrates the decision process for selecting a sampling method for a verification study.
Figure 1. Sampling Method Selection Workflow. This diagram outlines the logical process for choosing an appropriate sampling strategy based on data availability and study objectives.
Practical Protocols for Verification Studies
For a clinical microbiology laboratory verifying an unmodified FDA-cleared test, CLIA regulations require verification of accuracy, precision, reportable range, and reference range [2]. The following protocols provide detailed methodologies.
Protocol 1: Verifying Accuracy for a Qualitative Assay
Purpose: To confirm the acceptable agreement of results between the new method and a comparative method [2].
Sample Size and Selection:
- Minimum Sample Number: A minimum of 20 clinically relevant isolates is recommended [2].
- Sample Types: Use a combination of positive and negative samples. These can be sourced from standards or controls, reference materials, proficiency test samples, or de-identified clinical samples previously tested with a validated method [2].
- Matrix Considerations: Include different sample matrices (e.g., sputum, urine, swabs) if the test claims to support them.
Methodology:
- Test all selected samples using the new method.
- Compare the results to those obtained from the reference method.
- Calculate the percentage agreement: (Number of results in agreement / Total number of results) × 100.
- Compare the calculated percentage to the manufacturer's stated claims or a laboratory-director-defined acceptance criterion.
Protocol 2: Verifying Precision for a Semi-Quantitative Assay
Purpose: To confirm acceptable within-run, between-run, and operator variance [2].
Sample Size and Selection:
- Minimum Sample Number: A minimum of 2 positive and 2 negative samples [2].
- Sample Types: For semi-quantitative assays, use a combination of samples with high, medium, and low values (e.g., different colony counts or cycle threshold values). These can be controls or de-identified clinical samples [2].
Methodology:
- Test each sample in triplicate.
- Perform this testing over 5 days.
- Employ 2 different operators to perform the testing (if the system is not fully automated).
- Calculate the percentage agreement for results across all replicates, days, and operators.
- Compare the calculated percentage to the manufacturer's stated claims or a laboratory-director-defined acceptance criterion.
Protocol 3: Verifying Reportable and Reference Ranges
- Reportable Range: Verify using a minimum of 3 samples. For qualitative assays, use known positive samples. For semi-quantitative assays, use positive samples near the upper and lower cutoff values defined by the manufacturer [2].
- Reference Range: Verify using a minimum of 20 isolates. Use de-identified clinical samples or reference samples with results known to be standard for the laboratory’s patient population. If the manufacturer's range does not fit your population, additional testing is needed to redefine it [2].
The Scientist's Toolkit: Research Reagent Solutions
The following table details essential materials and their functions for conducting a method verification study in clinical microbiology.
Table 3: Essential Research Reagents and Materials for Verification Studies
| Item Category | Specific Examples | Function in Verification |
|---|---|---|
| Characterized Isolates | ATCC strains, proficiency test panels, archived clinical isolates with whole-genome sequence data | Serve as positive and negative controls; provide ground truth for accuracy assessment. |
| Clinical Matrices | Sputum, urine, blood, swabs in transport media | Assess test performance across different sample types as claimed by the manufacturer. |
| Quality Controls | Commercial positive/negative controls, internal controls | Monitor the daily performance and reliability of the test system during verification. |
| Reference Method Materials | Culture media, susceptibility testing discs/materials, PCR reagents for a validated lab-developed test | Provide the comparator result for establishing accuracy. |
| Data Analysis Software | Statistical software (e.g., R, SPSS, EP Evaluator) | Calculate performance metrics (e.g., % agreement, CV%) and perform statistical comparisons. |
The entire process of planning and executing the sample size and selection components of a verification study can be summarized in the following workflow (Figure 2).
Figure 2. Method Verification Workflow. This diagram illustrates the three-phase process for establishing sample size and selection, from initial planning through execution and final reporting.
A scientifically sound method verification study in clinical microbiology hinges on a statistically justified sample size and a deliberate strategy for selecting clinically relevant isolates and matrices. By applying the principles, formulas, and protocols outlined in this document, researchers and laboratory professionals can create a verification plan that is both compliant with regulatory standards and robust enough to ensure the reliability of patient test results. Proper planning at this stage adds transparency and credibility to the verification process and ensures the new test is safely and effectively implemented in the clinical laboratory.
Method verification is a mandatory, one-time study required by the Clinical Laboratory Improvement Amendments (CLIA) for unmodified, FDA-approved laboratory tests before patient results can be reported [2]. It is a critical process that demonstrates a test performs according to the manufacturer's established performance characteristics within a specific laboratory's operational environment. This process is distinct from method validation, which is a more extensive process to establish performance specifications for non-FDA cleared tests, such as laboratory-developed tests (LDTs) or modified FDA-approved tests [2] [27]. For clinical microbiology laboratories, which primarily utilize qualitative and semi-quantitative assays, a structured verification plan is essential for ensuring reliable test performance and, ultimately, high-quality patient care.
The following workflow outlines the core decision-making process for embarking on method verification:
Core Performance Characteristics: Verification Protocols
CLIA regulations mandate that laboratories verify specific performance characteristics for non-waived (moderate or high complexity) test systems [2]. The following sections provide detailed protocols for verifying the four core characteristics: Accuracy, Precision, Reportable Range, and Reference Range.
Accuracy
Accuracy confirms the acceptable agreement of results between the new method and a comparative method [2].
- Objective: To confirm that the new method provides results that agree with a previously validated method or a reference method.
- Principle: A set of clinical samples is tested in parallel using both the new method and the comparative method. The results are compared to determine the percentage of agreement.
- Sample Requirements:
- Type: A minimum of 20 clinically relevant isolates or samples is recommended [2].
- Composition: For qualitative assays, use a combination of positive and negative samples. For semi-quantitative assays, use a range of samples with high to low values [2].
- Sources: Acceptable specimens can include standards, controls, reference materials, proficiency test samples, or de-identified clinical samples tested in parallel with a validated method [2].
- Procedure:
- Test all selected samples using the new method and the comparative method.
- Ensure testing is performed within the stability period of the samples.
- Record all results for comparison.
- Data Analysis: Calculate the percentage agreement as (Number of results in agreement / Total number of results) × 100.
- Acceptance Criteria: The percentage agreement should meet the performance claims stated by the manufacturer or a criteria determined by the laboratory director [2].
Precision
Precision confirms acceptable variance within a run (repeatability), between runs, and between operators [2].
- Objective: To verify the reproducibility and repeatability of the test method.
- Principle: The same samples are tested repeatedly under defined conditions to measure the inherent random variation of the test system.
- Sample Requirements:
- Type: A minimum of 2 positive and 2 negative samples [2].
- Composition: Use controls or de-identified clinical samples. For semi-quantitative assays, include samples with high and low values.
- Procedure:
- Test the selected samples in triplicate.
- Repeat this process over 5 days.
- Involve 2 different operators in the testing process. If the system is fully automated, operator variance may not be required [2].
- Data Analysis: Calculate the percentage agreement for qualitative results. For quantitative data, calculate the coefficient of variation (CV).
- Acceptance Criteria: The observed precision should meet the manufacturer's stated claims or the laboratory's predefined goals, such as a CV of less than one-quarter of the allowable total error (ATE) [2] [27].
Reportable Range
The reportable range verification confirms the acceptable upper and lower limits of the test system [2].
- Objective: To verify that the test can accurately measure analytes across the entire range of values claimed by the manufacturer.
- Principle: Samples with known values at the extremes and within the manufacturer's declared range are tested to confirm they are reported correctly.
- Sample Requirements:
- Procedure:
- Test the selected samples using the new method.
- Ensure that the lowest and highest samples fall within the reportable range.
- Data Analysis: The reportable range is verified by confirming that the results for all tested samples fall within the laboratory's established reportable criteria (e.g., "Detected," "Not detected," or a specific cycle threshold (Ct) value) [2].
- Acceptance Criteria: All results should be accurately reported across the verified range.
Reference Range
Reference range verification confirms the normal or expected result for the tested patient population [2].
- Objective: To confirm that the reference interval provided by the manufacturer is appropriate for the laboratory's patient population.
- Principle: Test samples from individuals who are representative of the "normal" or "negative" condition for the laboratory's patient population.
- Sample Requirements:
- Procedure:
- Test the selected samples using the new method.
- Record the results.
- Data Analysis: The reference range is verified if a pre-defined percentage (e.g., ≥90%) of the results align with the expected normal or negative condition.
- Acceptance Criteria: If the manufacturer's reference range does not represent the laboratory's patient population, the laboratory must redefine the range by testing additional samples from its specific population [2].
The following workflow summarizes the experimental design for these core verification studies:
Experimental Design and Data Interpretation
Structured Verification Plan
A written verification plan, reviewed and approved by the laboratory director, is the foundation of a successful study [2]. This plan should include:
- Type and Purpose: Clearly state whether it is a verification or validation and the reason for the study.
- Test Method Description: Detail the purpose of the test and a description of the methodology.
- Study Design: Specify the number and type of samples, quality control procedures, number of replicates, days of testing, and personnel involved.
- Performance Characteristics and Acceptance Criteria: List each characteristic being verified and the predefined criteria for acceptability.
- Resources and Timeline: Outline required materials, equipment, and the expected timeline for completion [2].
The table below consolidates the key parameters for designing verification studies for qualitative and semi-quantitative assays in clinical microbiology.
Table 1: Method Verification Study Design for Qualitative/Semi-Quantitative Assays
| Performance Characteristic | Minimum Sample Number | Sample Type & Composition | Experimental Replication | Acceptance Criteria |
|---|---|---|---|---|
| Accuracy [2] | 20 | Clinically relevant isolates; mix of positive and negative samples. | Single test per sample versus comparative method. | Meets manufacturer's claims or director-defined percentage agreement. |
| Precision [2] | 2 positive, 2 negative | Controls or clinical samples; range of values for semi-quantitative. | Triplicate testing over 5 days by 2 operators. | Meets manufacturer's claims or director-defined percentage agreement/CV. |
| Reportable Range [2] | 3 | Known positive samples; near cutoff values for semi-quantitative. | Single test per sample. | All results fall within established reportable parameters. |
| Reference Range [2] | 20 | De-identified clinical/negative samples representing "normal". | Single test per sample. | Confirmation of manufacturer's range for the local patient population. |
Troubleshooting Common Issues
Laboratories may encounter challenges during verification. Here are solutions to common problems:
- Precision Issues: If day-to-day precision fails, check for outliers, repeat the study, select different QC materials, or compare the CV to the current method's performance [27].
- Accuracy Issues: For accuracy studies, investigate outliers, recalibrate both assays, or change reagent lots. If unable to obtain high-concentration samples, consider spiking or using historical proficiency testing samples [27].
- Reportable Range Issues: If the range cannot be verified, use different diluents, try a new lot of linearity material, or use serially diluted patient samples. Truncating the analytical measurement range within the approved limits is also an option and is not considered a modification [27].
The Scientist's Toolkit: Essential Research Reagent Solutions
Successful method verification relies on carefully selected materials. The following table details key reagents and resources essential for executing the verification protocols.
Table 2: Essential Research Reagent Solutions for Method Verification
| Reagent / Material | Function in Verification | Application Examples |
|---|---|---|
| Reference Materials & Panels | Serves as a benchmark for accuracy and reportable range studies. | Quantified microbial panels for AST verification; characterized strain panels for molecular assay accuracy [2]. |
| Quality Control (QC) Materials | Used for precision studies and daily monitoring of assay performance. | Commercial QC strains with defined positive/negative reactivity for qualitative tests, or defined values for quantitative tests [2] [27]. |
| Proficiency Testing (PT) Samples | Provides an external assessment of accuracy; often used as a sample source in verification. | Blinded samples from PT providers used to verify the lab's ability to obtain correct results on the new method [2]. |
| De-identified Clinical Samples | Provides authentic, clinically relevant matrices for all verification studies. | Residual patient samples (e.g., sputum, blood cultures) used for accuracy, precision, and reference range verification [2]. |
| CLSI Documentation | Provides standardized protocols and consensus guidelines for designing and evaluating verification studies. | CLSI M52 (Verification of Commercial Microbial ID/AST), EP12 (Qualitative Test Performance) [2]. |
In clinical microbiology laboratories, the implementation of new testing methods requires rigorous verification to ensure reliable patient results. A meticulously documented verification plan serves as the foundational blueprint for this process, providing a clear roadmap for laboratory staff and establishing the criteria for formal review and approval by the laboratory director. This document outlines the essential elements required in a method verification plan, specifically tailored for clinical microbiology research and development, to facilitate comprehensive director evaluation and official endorsement.
The distinction between method verification and method validation is a critical starting point for planning. Method verification is the process of confirming that a previously validated method—typically an unmodified, FDA-cleared test—performs as expected within a specific laboratory's environment and meets pre-established performance characteristics [2] [28]. In contrast, method validation is a more extensive process required for laboratory-developed tests (LDTs) or modified FDA-approved methods to establish that the assay works for its intended purpose [2]. For a verification plan, this distinction dictates the scope of the evaluation needed.
Core Components of a Verification Plan
A robust verification plan must comprehensively address several key areas to enable effective director review. The plan is a prerequisite before commencing any verification study and must be signed off by the lab director, ensuring that the design is scientifically sound and meets all regulatory obligations [2].
Administrative and Test Definition Elements
This section establishes the fundamental purpose and operational context of the verification activity.
- Type of Verification and Purpose of Study: Clearly state whether the activity is a verification or validation and define the primary objective [2].
- Purpose of Test and Method Description: Provide a detailed description of the test, including its intended use, the analyte(s) it detects, and the principle of the method [2].
- Applicable Regulations and Standards: Reference all guiding regulations (e.g., CLIA) and standards (e.g., CLSI documents like EP12, M52, MM03) that will be used to define the verification protocol [2].
Detailed Study Design and Performance Characteristics
The plan must specify the experimental design for evaluating each performance characteristic as required by CLIA for non-waived tests [2]. The following table summarizes the key characteristics and the associated experimental parameters for a qualitative or semi-quantitative microbiological assay.
Table 1: Verification Study Design Parameters for Qualitative/Semi-Quantitative Assays
| Performance Characteristic | Minimum Sample Number | Sample Type Recommendations | Experimental Replication | Acceptance Criteria |
|---|---|---|---|---|
| Accuracy [2] | 20 clinically relevant isolates | Combination of positive and negative samples; can include controls, reference materials, proficiency tests, or de-identified clinical samples. | Not specified for accuracy alone. | Meet manufacturer's stated claims or criteria determined by the CLIA director. |
| Precision [2] | 2 positive and 2 negative samples | Combination of positive and negative samples; can use controls or de-identified clinical samples. | Tested in triplicate for 5 days by 2 operators (if not fully automated). | Meet manufacturer's stated claims or criteria determined by the CLIA director. |
| Reportable Range [2] | 3 samples | Known positive samples for the detected analyte; for semi-quantitative, use samples near the upper and lower cutoff values. | Not specified. | The laboratory's established reportable result (e.g., "Detected," "Not detected"). |
| Reference Range [2] | 20 isolates | De-identified clinical samples or reference samples known to be standard for the laboratory's patient population. | Not specified. | The expected result for a typical sample; must be verified for the laboratory's specific patient population. |
Resource and Compliance Documentation
This section ensures all practical and safety aspects of the verification are planned.
- Materials, Equipment, and Resources: List all instruments, reagents, software, and consumables required to execute the study [2] [29].
- Safety Considerations: Document any specific biosafety or chemical hazards associated with the samples or reagents and the required safety protocols [2].
- Expected Timeline for Completion: Provide a realistic timeline outlining the major phases of the verification study [2].
Experimental Protocols for Key Verification Experiments
Protocol for a Method-Comparison (Accuracy) Study
A method-comparison study is central to verifying accuracy, assessing the agreement between the new method and a comparative method [30] [2].
Design Considerations:
- Selection of Methods: Ensure both methods measure the same analyte. The comparative method should be a well-established, stable method in use by the laboratory [30].
- Simultaneous Sampling: Measure the variable of interest at the same time with both methods to prevent real physiological changes from being misinterpreted as a difference between methods. The definition of "simultaneous" depends on the stability of the analyte [30].
- Sample Size and Range: Use a sufficient number of samples (e.g., minimum of 20) that cover the entire clinical reportable range, including low, medium, and high values, as well as positive and negative samples for qualitative tests [30] [2].
- Randomization: If sequential measurement is necessary, randomize the order of testing to avoid systematic bias [30].
Procedure:
- Sample Selection: Obtain the required number of samples, ensuring they are representative of the clinical samples the lab routinely tests [2].
- Parallel Testing: Test each sample using both the new (candidate) method and the established (comparative) method following manufacturers' instructions.
- Data Collection: Record all results in a structured format, ensuring each sample has a paired result from both methods.
Analysis and Interpretation:
- Bland-Altman Analysis: For quantitative data, use a Bland-Altman plot to visualize the agreement. This plot displays the average of the two methods on the x-axis and the difference between the two methods on the y-axis [30].
- Bias and Limits of Agreement: Calculate the bias (mean difference between methods) and the limits of agreement (bias ± 1.96 standard deviations of the differences). This range defines where 95% of the differences between the two methods are expected to lie [30].
- Accuracy Percentage: For qualitative assays, calculate the percentage of agreement: (Number of results in agreement / Total number of results) × 100 [2].
Protocol for a Precision Study
Precision confirms the consistency of results under specified conditions [2].
Procedure:
- Sample Preparation: Select at least 2 positive and 2 negative samples that span the assay's dynamic range [2].
- Replicate Testing: Test each sample in triplicate [2].
- Multiple Runs and Operators: Perform this testing over 5 days with 2 different operators to capture within-run, between-run, and operator-related variance. If the system is fully automated, operator variance may not be required [2].
Analysis and Interpretation:
- Calculate the percentage agreement for qualitative results or the standard deviation and coefficient of variation (%CV) for quantitative results across all replicates, runs, and operators [2].
- Compare the calculated precision against the manufacturer's claims or other pre-defined acceptance criteria [2].
Workflow Visualization and Essential Research Tools
Method Verification Plan Approval Workflow
The following diagram illustrates the logical sequence and decision points from plan creation through director approval.
The Scientist's Toolkit: Key Research Reagent Solutions
A successful verification study relies on well-characterized materials. The following table details essential reagents and their functions.
Table 2: Essential Research Reagent Solutions for Verification Studies
| Reagent/Material | Function in Verification | Key Considerations |
|---|---|---|
| Clinical Isolates [2] | Serve as positive and negative samples for accuracy and precision studies. | Must be clinically relevant and include a range of genotypes/phenotypes. Minimum of 20 isolates recommended. |
| Reference Materials [2] | Provide a benchmark with an assigned value to assess accuracy and calibrate measurements. | Can include standards, proficiency test samples, or commercially available reference panels. |
| Quality Controls (QC) [2] | Monitor the daily performance and stability of the test system during the verification period. | Should include positive, negative, and if applicable, low-positive controls to challenge the test's limits. |
| De-identified Clinical Samples [2] | Used for reference range verification and accuracy studies, representing the laboratory's actual patient population. | Must be properly de-identified in compliance with HIPAA and institutional IRB policies. |
The Director's Review Checklist for Plan Approval
The laboratory director's final review is the critical gatekeeper before a verification study begins. This checklist consolidates the essential elements the director must confirm.
Table 3: Director's Review and Approval Checklist
| Review Item | Essential Element for Approval | Verified |
|---|---|---|
| Regulatory Alignment | The plan correctly identifies the process as verification or validation and references all applicable CLIA regulations and CLSI guidelines (e.g., M52, EP12) [2]. | ☐ |
| Study Scope & Design | The experimental design for Accuracy, Precision, Reportable Range, and Reference Range is detailed, with clear sample numbers, types, and replication schemes [2]. | ☐ |
| Sample Suitability | The proposed samples (e.g., 20+ isolates, relevant matrices) are adequate to challenge the test across its intended use and represent the lab's patient population [2]. | ☐ |
| Data Analysis Plan | The methods for calculating results (e.g., percent agreement, bias, Bland-Altman analysis) are specified and appropriate for the data type [30] [2]. | ☐ |
| Objective Acceptance Criteria | Clear, numerical acceptance criteria are defined for each performance characteristic prior to data collection, based on manufacturer claims or director-defined goals [2] [29]. | ☐ |
| Resource & Safety Readiness | All necessary instruments, reagents, and safety protocols are in place to conduct the study safely and effectively [2]. | ☐ |
| Documentation Completeness | The plan is fully documented as a single, coherent document, ready for signing and archiving upon approval [2] [22]. | ☐ |
Navigating Common Pitfalls and Implementing Advanced Solutions
In the clinical microbiology laboratory, the reliability of test results is paramount for patient diagnosis and treatment. Despite rigorous quality control, discrepancies and non-conforming results (NCEs) inevitably occur. A non-conforming event is defined as any deviation from expected performance specifications or established procedures [31]. Effective management of these events requires a shift from attributing blame to individuals to a systematic examination of how the quality system allowed the error to happen [32]. This framework provides a structured root cause analysis (RCA) protocol, designed to be integrated within a laboratory's broader Quality Management System (QMS) as outlined in standards like ISO 15189 [31]. The goal is to move beyond superficial fixes, like retraining, and implement corrective actions that prevent recurrence through continual improvement [31] [32].
Theoretical Framework: Principles of Root Cause Analysis in the QMS
A successful RCA framework is built upon core principles that align with the QMS infrastructure.
- Systems Thinking: The fundamental principle is to focus on system-level failures rather than individual oversights. The question should not be "Why did this person make a mistake?" but "How did the quality system allow this mistake to happen?" [32]. This approach fosters a culture of continuous improvement and encourages proactive problem-solving among all staff.
- Structured Methodology: A consistent, documented process ensures RCA is thorough and unbiased. The "Rule of 3 Whys" is often sufficient to move past symptoms to an underlying cause without overcomplicating the process [32].
- Cross-Functional Collaboration: Engaging stakeholders from various areas of the lab (e.g., pre-analytical processing, technical sections, informatics) during investigations reveals overlooked contributing factors and prevents narrow conclusions [32].
- Focus on Follow-Through: Identifying a root cause is futile without effective implementation and monitoring of corrective actions. Establishing pre-determined review intervals to assess the effectiveness of actions is critical for long-term success [32].
Experimental Protocol: The Root Cause Analysis Workflow
This protocol provides a step-by-step guide for investigating a non-conforming event in a clinical microbiology laboratory.
Protocol Objectives and Materials
- Primary Objective: To identify the underlying (root) cause of a non-conforming event and implement a robust corrective action to prevent its recurrence.
- Materials Required:
- Non-Conforming Event (NCE) Log: A centralized record for documenting all initial event reports [31].
- RCA Team: A cross-functional group including a quality manager, section supervisor, senior technologist, and representatives from other affected areas (e.g., specimen processing) [31] [32].
- RCA Report Form: A standardized document to guide the investigation.
Step-by-Step Procedure
Initiation and Triage:
- Document the initial details of the NCE in the NCE log, including the date, test involved, nature of the discrepancy, and personnel involved.
- Assemble the RCA team and brief all members on the initial facts. The laboratory director or quality manager is ultimately responsible for the process [31].
Containment (Short-Term Fix):
- Implement immediate actions to contain the impact, such as quarantining affected samples, recalling erroneous reports if possible, and notifying the treating physician.
- Documentation: Record all containment actions taken.
Data Collection and Process Mapping:
- Gather all relevant data, including the original specimen, instrument printouts, QC records, reagent lot numbers, the written procedure, and personnel competency records.
- Interview all involved staff to understand the sequence of events from their perspective.
- Map the total testing process, from specimen collection to result reporting, to visualize where the failure occurred.
Root Cause Identification (The "Rule of 3 Whys"):
- Apply the "Rule of 3 Whys" iteratively to drill down from the immediate failure to the system-level root cause [32].
- Example: An internal audit finds staff do not know the location of a spill kit.
- Why #1: Why didn't the employees know where the spill kit was? Answer: They forgot after safety training.
- Why #2: Why did they forget? Answer: The spill kit was stored in a closed, unlabeled cupboard and was not visible.
- Why #3: Why wasn't it visible/labeled? Answer: Because no process existed for ensuring critical safety equipment is visibly marked and accessible.
- Root Cause: The system lacked a requirement for labeling and ensuring the visibility of critical safety equipment, not individual forgetfulness. The corrective action is to label the cupboard and audit other safety equipment locations.
Root Cause Categorization and Corrective Action Development:
- Categorize the root cause. Avoid defaulting to "lack of training"; it is only a valid root cause if training genuinely did not exist [32].
- Develop a corrective action that directly addresses the system-level root cause identified. The action should be Specific, Measurable, Achievable, Realistic, and Time-bound (SMART).
Effectiveness Verification and Monitoring:
- Establish a timeline for reviewing the effectiveness of the corrective action (e.g., 30, 60, 90 days). The review should verify that the same issue has not reoccurred and that no unintended consequences have emerged [32].
- Monitoring mechanisms can include tracking specific quality indicators, follow-up audits, and review of subsequent NCEs.
Management Review and Documentation:
- Present the findings, actions, and effectiveness verification to laboratory management. This ensures leadership alignment and resource allocation for systemic fixes [31].
- Close the RCA report and archive all records as part of the QMS documentation.
Expected Outcomes and Data Analysis
The primary outcome is the successful implementation of a corrective action that prevents the recurrence of the NCE. Data analysis involves tracking NCE trends over time. A successful RCA program will show a reduction in repeat incidents for similar failure modes.
Table 1: Quantitative Requirements for Method Verification in Clinical Microbiology (based on CLIA requirements for unmodified, FDA-cleared tests) [2]
| Performance Characteristic | Minimum Sample Requirement (Qualitative/Semi-Quantitative Assays) | Experimental Design & Acceptance Criteria |
|---|---|---|
| Accuracy | 20 clinically relevant isolates | Combination of positive and negative samples; results ≥90% agreement with comparative method or manufacturer's claims. |
| Precision | 2 positive and 2 negative samples | Tested in triplicate for 5 days by 2 operators; results should meet manufacturer's stated precision claims. |
| Reportable Range | 3 samples | Verify that samples near the upper and lower limits of the assay report the expected result (e.g., "Detected," "Not detected"). |
| Reference Range | 20 isolates | Verify the manufacturer's stated reference range is appropriate for the laboratory's patient population using de-identified clinical samples. |
Table 2: Essential Research Reagent Solutions for Microbiology Method Verification
| Reagent / Material | Function in Verification & RCA |
|---|---|
| Reference Strains (e.g., ATCC controls) | Served as positive and negative controls for accuracy and precision studies; essential for tracing discrepancies in organism identification or AST. |
| Proficiency Testing (PT) Samples | Used as a gold standard for verifying method accuracy and for investigating discrepancies when PT failures occur. |
| De-identified Clinical Samples | Used for verifying reference ranges and for precision studies, ensuring the method performs correctly with real patient matrices. |
| Commercial Quality Control (QC) Materials | Used for daily monitoring of analytical performance; trends in QC data can be an early indicator of a non-conforming event. |
Workflow Visualization
Discussion
Integrating this RCA framework into the laboratory's QMS transforms non-conforming events from failures into powerful drivers of continual improvement [31]. The critical success factor is fostering a non-punitive culture where staff feel safe to report errors without fear of blame, allowing the laboratory to uncover and address true system weaknesses [32]. Technology, such as modern Quality Management System software, can enhance this process by automating alerts for corrective action follow-up and analyzing historical data to identify recurring patterns [32]. Ultimately, a laboratory's resilience is measured not by the absence of errors, but by its ability to learn from them and systematically strengthen its processes to enhance patient safety and result reliability.
Challenges in Antimicrobial Susceptibility Testing (AST) Verification
Antimicrobial resistance (AMR), affecting 2.8 million Americans annually, underscores the critical importance of accurate Antimicrobial Susceptibility Testing (AST) in clinical microbiology laboratories [7]. The verification of AST methods ensures that testing systems perform reliably within a specific laboratory environment, providing accurate and reproducible results that directly impact patient care. However, several formidable challenges complicate this process, including evolving regulatory landscapes, rapidly updated interpretive standards, and the technical complexities of validating tests for diverse microbial organisms.
Recent regulatory changes have significantly altered the verification landscape. The final rule on Laboratory Developed Tests (LDTs) by the U.S. Food and Drug Administration (FDA), effective in 2024, phases out previous enforcement discretion and clarifies that LDTs are in vitro diagnostic devices subject to FDA regulatory oversight [7]. This change profoundly affects laboratories that modify FDA-cleared AST devices to implement current breakpoints or develop novel AST methodologies. Concurrently, a pivotal development occurred in January 2025 when the FDA recognized many breakpoints published by the Clinical and Laboratory Standards Institute (CLSI), including those for microorganisms representing an unmet medical need [7]. This recognition helps alleviate, but does not eliminate, the persistent challenge of reconciling differences between FDA and CLSI breakpoints, which previously exceeded 100 discrepancies [7].
Key Regulatory and Standards-Based Challenges
Evolving Breakpoint Recognition
The dynamic nature of interpretive criteria (breakpoints) presents a persistent verification hurdle. Breakpoints are revised periodically in response to emerging resistance mechanisms, pharmacokinetic/pharmacodynamic data, and clinical outcome evidence [7]. Laboratories face the dilemma of implementing updated CLSI breakpoints that lack immediate FDA recognition, creating a regulatory gap. Although the FDA's recognition of CLSI standards in early 2025 marked substantial progress, exceptions remain where FDA does not recognize specific CLSI breakpoints, such as ciprofloxacin for Acinetobacter spp. and Neisseria meningitidis [7]. This ongoing misalignment necessitates careful scrutiny of the FDA's Susceptibility Test Interpretive Criteria (STIC) webpages during verification planning to identify recognized standards and exceptions.
Laboratory Developed Test (LDT) Regulations
The FDA's LDT final rule fundamentally alters the verification paradigm for modified AST methods. Common laboratory practices now classified as LDTs subject to FDA oversight include:
- Modification of FDA-cleared AST devices to interpret results with current breakpoints (CLSI or updated FDA breakpoints)
- Validation for new organism-antimicrobial combinations not included in the device's cleared indications
- Development of AST methodologies not considered reference methods (e.g., broth disk elution for colistin) [7]
While the rule provides some enforcement discretion for pre-existing LDTs and those meeting unmet needs within integrated health systems, reference laboratories face particular challenges as they typically serve patients outside their system and thus require FDA clearance for post-May 2024 LDTs [7]. This regulatory environment creates an impasse for testing where FDA-recognized breakpoints do not exist, making clearance impossible for many organism-drug combinations.
Technical Verification Requirements
Verification demonstrates that an unmodified, FDA-cleared test performs according to manufacturer specifications in the user's environment, whereas validation establishes performance for laboratory-developed or modified tests [33] [2]. For AST systems, verification must address specific performance criteria through structured experimental protocols.
Accuracy Assessment
Accuracy verification confirms acceptable agreement between the new method and a reference standard. The recommended experimental protocol involves:
- Sample Size: Minimum of 30 clinically relevant bacterial isolates for comprehensive verification [33]
- Sample Composition: Isolates representing clinically relevant species with appropriate resistance mechanisms, including resistant, intermediate, and susceptible phenotypes
- Reference Method: One of three options: (1) previously verified FDA-cleared testing method, (2) reference broth microdilution or agar dilution, or (3) isolates with known AST results from a verified system [33]
- Acceptance Criteria: ≥90% categorical agreement (CA) between test and reference methods, with <3% very major errors (false susceptible) or major errors (false resistant) [33]
Table 1: Accuracy Acceptance Criteria for AST Verification
| Parameter | Definition | Acceptance Limit |
|---|---|---|
| Categorical Agreement (CA) | Percentage of isolates with equivalent susceptibility category (S, I, R) between methods | ≥90% |
| Essential Agreement (EA) | MIC results within ±1 doubling dilution of reference method | ≥90% |
| Very Major Error (VME) | False susceptible rate compared to reference | <3% |
| Major Error (ME) | False resistant rate compared to reference | <3% |
Precision Evaluation
Precision verification establishes test reproducibility under defined conditions, assessing within-run, between-run, and operator variability.
- Sample Requirements: Minimum of 5 bacterial isolates tested in triplicate by two operators [33]
- Testing Protocol: Isolates tested repeatedly over 3-5 days to capture inter-day variability
- Acceptance Criteria: ≥95% agreement for categorical results and MIC values within ±1 doubling dilution [33]
Table 2: Precision Testing Matrix for AST Verification
| Precision Type | Testing Scheme | Minimum Requirements |
|---|---|---|
| Within-Run | Multiple replicates of same isolate in single run | 5 isolates × 3 replicates |
| Between-Run | Same isolates tested on different days | 5 isolates × 3 days |
| Between-Operator | Same isolates tested by different technologists | 5 isolates × 2 operators |
Reportable and Reference Range Verification
Although AST results are typically categorical (S/I/R), the minimum inhibitory concentration (MIC) represents a quantitative value requiring verification of reportable ranges.
- Reportable Range: Verify that the system accurately reports MIC values across the manufacturer's claimed range using samples with known MIC values near upper and lower limits [2]
- Reference Range: Confirm expected susceptibility patterns using ≥20 isolates representative of the laboratory's patient population [2]
Practical Implementation Strategies
Isolate Selection and Sourcing
Appropriate isolate selection is fundamental to robust verification. The selection strategy should encompass:
- Clinical Relevance: Isolates from infection sites typically tested in the laboratory
- Resistance Mechanism Diversity: Isolates harboring clinically relevant resistance mechanisms (ESBL, carbapenemases, etc.)
- Phenotypic Diversity: Representation of susceptible, intermediate, and resistant phenotypes
- QC Strains: Include quality control strains for which expected ranges are established
Valuable resources for sourcing verification isolates include the CDC-FDA Antimicrobial Resistance Isolate Bank and EUCAST panels of phenotypically defined strains [33]. Proficiency testing isolates and archived clinical isolates with well-characterized susceptibility profiles also serve as appropriate verification materials.
Verification Study Design
A structured verification plan, approved by the laboratory director, should outline:
- Study Purpose and Type (comprehensive vs. limited verification)
- Test Method Description and intended use
- Sample Selection Criteria and sourcing information
- Experimental Design detailing accuracy, precision, and range verification protocols
- Acceptance Criteria for each performance parameter
- Timeline and Resources required for completion
For AST verification, the extent of testing depends on the type of change being implemented. Comprehensive verification (new system or testing method) requires more extensive evaluation than limited verification (new antimicrobial agent added to existing system) [33].
Table 3: Verification Scope Based on System Modification
| Type of Change | Accuracy Testing | Precision Testing |
|---|---|---|
| New system or testing method | Minimum 30 isolates | 5 isolates × 3 replicates |
| New antimicrobial agent | Minimum 10 isolates | QC strains 3× for 5 days |
| Breakpoint change | Minimum 30 isolates | QC strains 1× for 5 days |
Workflow Diagram of AST Verification Process
The following diagram illustrates the systematic process for verifying antimicrobial susceptibility testing methods in clinical microbiology laboratories:
Essential Research Reagent Solutions
Successful AST verification requires carefully selected biological materials and reference standards. The following reagents are essential for comprehensive verification studies:
Table 4: Essential Research Reagents for AST Verification
| Reagent Category | Specific Examples | Function in Verification |
|---|---|---|
| Quality Control Strains | Pseudomonas aeruginosa ATCC 27853, Staphylococcus aureus ATCC 29213, Escherichia coli ATCC 25922 | Establish precision and monitor system performance |
| Characterization Panels | CDC-FDA AR Isolate Bank strains, EUCAST defined strain sets | Provide well-characterized isolates with known resistance mechanisms |
| Reference Method Materials | Cation-adjusted Mueller-Hinton broth, BMD panels, agar dilution materials | Serve as gold standard for accuracy comparisons |
| Clinical Isolates | Archived specimens with defined susceptibility profiles, fresh clinical isolates | Represent local epidemiology and test clinical relevance |
Verification of antimicrobial susceptibility testing systems remains challenging due to evolving regulatory requirements, constantly updated breakpoints, and the technical complexity of ensuring accurate performance across diverse pathogens. The recent FDA recognition of CLSI standards in 2025 represents significant progress, though laboratories must maintain vigilance regarding exceptions and updates [7]. Successful verification requires systematic planning, appropriate isolate selection, and rigorous assessment of accuracy, precision, and reportable ranges. By adhering to structured protocols and leveraging available resources like the CDC-FDA AR Isolate Bank, clinical laboratories can implement robust verification processes that ultimately support accurate antimicrobial resistance detection and optimal patient care.
The integration of Rapid Microbial Methods (RMMs) and advanced technologies, including automation and artificial intelligence (AI), represents a paradigm shift in clinical microbiology quality control. These methods offer significant advantages over traditional culture-based techniques, including reduced time-to-result, increased sensitivity, and enhanced workflow efficiency [34]. However, their implementation introduces unique validation complexities that must be addressed within a structured framework to ensure regulatory compliance and analytical reliability.
This application note provides detailed protocols for validating RMMs and novel technologies within the context of a clinical microbiology laboratory's method verification plan. It addresses the specific challenges posed by emerging technologies, the evolving regulatory landscape, and the practical considerations for demonstrating method equivalence and robustness.
Regulatory and Compendial Framework
The validation of RMMs occurs within a complex regulatory environment. Understanding the distinction between validation and verification is crucial. Validation establishes that an assay works as intended for laboratory-developed tests or modified FDA-approved tests, while verification is a one-time study for unmodified FDA-cleared tests to demonstrate performance aligns with established characteristics [2].
The European Pharmacopoeia (Ph. Eur.) Chapter 5.1.6, "Alternative methods for microbiological quality control," is currently undergoing significant revision to address implementation challenges [35]. Key issues under discussion include:
- Resource-intensive validation requirements and the need for streamlined processes to avoid duplicated work across laboratories.
- Technical scope limitations, such as nucleic acid amplification techniques (NAT) being primarily limited to mycoplasma testing despite broader potential applications in sterility testing.
- Debates over comparability testing, particularly whether theoretical limits of detection can replace direct side-by-side testing with pharmacopoeial methods.
A proposed EDQM certification system for RMMs could potentially save time and enable shared validation resources among laboratories [35]. Furthermore, the recent implementation of the In Vitro Diagnostic Regulation (IVDR) and updated ISO 15189:2022 standards are increasing the need for robust validation and verification procedures in clinical laboratories [36] [37].
Validation Parameters and Experimental Design
The validation of RMMs requires a systematic approach evaluating multiple performance characteristics. The following sections provide detailed protocols for key validation experiments.
Accuracy and Comparability Assessment
Objective: To confirm acceptable agreement between the new RMM and a compendial or reference method.
Protocol:
- Sample Selection: Use a minimum of 20 clinically relevant isolates or samples [2]. For qualitative assays, select a combination of positive and negative samples. For semi-quantitative assays, use samples with values ranging from high to low across the reportable range.
- Sample Sources: Obtain samples from certified reference materials, proficiency testing samples, or de-identified clinical samples previously characterized by a validated method [2] [38].
- Testing Procedure: Test all samples in parallel using both the new RMM and the reference method under standardized conditions.
- Data Analysis: Calculate percent agreement as (Number of results in agreement / Total number of results) × 100 [2]. Compare the calculated accuracy to the manufacturer's stated claims or laboratory-defined acceptance criteria.
Table 1: Sample Requirements for Accuracy Assessment
| Assay Type | Minimum Samples | Sample Characteristics | Reference Method |
|---|---|---|---|
| Qualitative | 20 isolates | Combination of positive and negative samples | Compendial method |
| Semi-Quantitative | 20 isolates | Range from high to low values | Validated reference method |
| Sterility Testing | 3 samples | Known positives for detected analyte | Pharmacopoeial sterility test |
Precision Evaluation
Objective: To confirm acceptable within-run, between-run, and operator variability.
Protocol:
- Sample Preparation: Select a minimum of 2 positive and 2 negative samples. For semi-quantitative assays, use samples with high and low values [2].
- Testing Scheme: Test each sample in triplicate over 5 days using 2 different operators. For fully automated systems, operator variance may not be required [2].
- Data Analysis: Calculate percent agreement for each sample type and operator combination as (Number of concordant results / Total number of results) × 100.
- Acceptance Criteria: Precision should meet the manufacturer's stated claims or laboratory-defined criteria, typically with ≥95% agreement for qualitative tests.
Method Applicability and Product-Specific Validation
Objective: To demonstrate the RMM's performance with specific sample matrices and products.
Protocol:
- Matrix Selection: Identify all relevant sample matrices used in the laboratory (e.g., water-soluble products, viscous solutions, cell therapy products) [38].
- Interference Testing: Spike each matrix with representative microorganisms at low inoculum levels (approximately 10-100 CFU).
- Recovery Comparison: Compare microbial recovery between the RMM and the reference method for each matrix.
- Inhibition Assessment: For molecular methods, include internal controls to detect potential inhibition in different matrices.
Challenges and Considerations:
- Viable-but-non-culturable microorganisms may require specialized detection approaches beyond traditional culture methods [38].
- Process additives and raw materials can introduce contaminants or inhibit detection [38].
- Cell therapy products present unique challenges as they cannot undergo conventional purification steps [38].
Advanced Technology-Specific Validation Considerations
AI-Enhanced Diagnostic Systems
Objective: To validate AI-driven RMMs that utilize machine learning for microbial detection, identification, or enumeration.
Protocol:
- Algorithm Transparency: Document the AI model type (e.g., support vector machines, random forest, deep learning), training data sets, and decision logic [39] [40].
- Interpretability Assessment: Implement tools such as SHapley Additive exPlanations (SHAP) to explain feature contribution to predictions [39].
- Database Comprehensiveness: Verify the reference database includes clinically relevant strains and covers expected microbial diversity in the test population.
- Continuous Learning Protocols: Establish procedures for ongoing performance monitoring and algorithm updates without compromising validation status.
Applications: AI models have been successfully applied to predict immune-escaping viral variants, classify drug resistance, and diagnose diseases using gut microbiome biomarkers with AUROC values ranging from 0.67 to 0.90 across different phenotypes [39].
Automated and Robotic Systems
Objective: To validate automated RMMs that reduce human intervention in sample processing, testing, and interpretation.
Protocol:
- Hardware Qualification: Perform installation, operational, and performance qualification (IQ/OQ/PQ) following manufacturer specifications.
- Error Rate Documentation: Quantify the system's error rates in sample handling, plate streaking, or colony picking.
- Cross-Contamination Assessment: Test for carryover between samples with high microbial loads and negative controls.
- Data Integrity Verification: Ensure the system maintains complete traceability and audit trails for all automated steps.
Examples: Systems such as the Micronview EMC Robot for environmental monitoring and COPAN's PhenoMATRIX for automated plate reading demonstrate how automation reduces human-borne contamination and interpreter bias [34].
Comprehensive Validation Workflow
The following diagram illustrates the complete validation pathway for implementing Rapid Microbial Methods in a clinical microbiology laboratory:
Comparability Testing and Decision Framework
Establishing comparability between RMMs and traditional methods presents significant challenges. The following diagram outlines the decision process for demonstrating method equivalence:
Key Challenges in Comparability Testing:
- Strained Microorganisms: There is no clear standard for producing pharmaceutical-representative stressed strains, creating validation inconsistencies [35].
- Detection Limit Debates: While some argue that methods with a theoretical limit of detection (LOD) of 1 CFU may not require direct comparability testing, others caution that recovery varies by strain and conditions [35].
- Technology-Specific Parameters: AI-based systems require validation of algorithm performance and training data representativeness beyond traditional parameters [39] [40].
Essential Research Reagent Solutions
Successful validation of RMMs requires carefully selected reagents and reference materials. The following table details essential solutions and their applications:
Table 2: Key Research Reagent Solutions for RMM Validation
| Reagent/ Material | Function in Validation | Application Examples | Critical Quality Attributes |
|---|---|---|---|
| USP Reference Strains | Accuracy assessment, system suitability | Compendial method comparisons | Authenticated identity, viability, purity |
| Stressed Microorganisms | Challenging method robustness | Detection capability at low inoculum | Representative stress response, clinical relevance |
| Certified Microbial Standards | Quantification verification | Instrument calibration, DNA-based methods | Certified values, stability data, homogeneity |
| Matrix-Specific Controls | Interference assessment | Product-specific validation | Commutability with patient samples |
| DNA Extraction Kits | Nucleic acid-based method validation | Mycoplasma testing, NAT | Demonstrated absence of contaminating DNA |
Critical Considerations: Reagents must be properly authenticated and handled. Contaminated test reagents, including DNA extraction kits, have been identified as overlooked contamination sources that can skew validation conclusions [38].
The successful integration of RMMs and new technologies into clinical microbiology laboratories requires navigating significant validation complexities. A comprehensive, well-documented approach addressing accuracy, precision, technology-specific parameters, and comparability is essential for regulatory compliance and patient safety.
Future developments in the field will likely include:
- Standardized certification processes for RMMs to reduce validation burdens across laboratories [35].
- Advanced AI interpretation tools that provide transparent reasoning for microbial identification and susceptibility testing [39] [40].
- Integrated quality systems that combine traditional QC testing with continuous environmental monitoring and data analytics for proactive contamination control [38] [34].
As technologies continue to evolve, validation frameworks must remain adaptable while maintaining scientific rigor and focus on patient safety. The protocols outlined in this application note provide a foundation for laboratories to confidently implement RMMs while addressing current regulatory expectations and technical challenges.
In clinical microbiology laboratories, the implementation of a new testing method is a significant undertaking that culminates in a one-time verification study to demonstrate that the test performs according to established performance characteristics when used as intended by the manufacturer [2]. However, this initial verification represents merely the beginning of the quality assurance journey. A robust quality system requires a strategic shift from viewing verification as a solitary event to embracing continuous lifecycle management of laboratory methods. This ongoing process ensures that tests continue to meet their intended purpose throughout their operational lifespan, adapting to changes in patient populations, reagent lots, and laboratory conditions while maintaining compliance with regulatory standards such as the Clinical Laboratory Improvement Amendments (CLIA) [2].
This application note outlines a structured framework for implementing ongoing quality monitoring specifically for clinical microbiology laboratories, providing detailed protocols to transition from one-time verification to comprehensive lifecycle management of laboratory methods.
Establishing the Lifecycle Management Framework
The cornerstone of effective lifecycle management is understanding the distinction between verification and validation. A verification is a one-time study for unmodified FDA-approved or cleared tests, demonstrating that the test performs in line with previously established performance characteristics in the user's environment [2]. In contrast, a validation establishes that an assay works as intended and is required for laboratory-developed tests or modified FDA-approved methods [2]. Both processes initiate a test's lifecycle, but neither guarantees long-term performance without sustained monitoring.
The following diagram illustrates the continuous quality management lifecycle for clinical microbiology methods:
Figure 1: The Quality Management Lifecycle for Clinical Microbiology Methods. This continuous process begins with proper planning and initial verification/validation, then transitions to ongoing monitoring with periodic performance assessment, triggering corrective actions when deviations occur, ultimately leading to system improvements.
Core Components of Ongoing Quality Monitoring
Critical Quality Indicators (CQIs)
CQIs are measurable parameters that provide objective evidence of test performance over time. Laboratories should establish CQIs based on the test's critical performance characteristics and monitor them at predefined intervals. The selection of appropriate CQIs depends on the assay type (qualitative, quantitative, or semi-quantitative) and its clinical application [2].
Table 1: Essential Critical Quality Indicators for Microbiology Assays
| CQI Category | Specific Metrics | Monitoring Frequency | Acceptance Criteria |
|---|---|---|---|
| Accuracy | Percent agreement with reference method, discrepant result rate | Quarterly | ≥ Manufacturer's claims or laboratory-established benchmarks [2] |
| Precision | Within-run, between-run, and operator variability | Semi-annually | ≥ Manufacturer's claims or laboratory-established benchmarks [2] |
| Reportable Range | Upper and lower limits of detection | After major maintenance or annually | Consistent with established reportable range [2] |
| Specimen Quality | Rejection rates, inappropriate submissions | Monthly | Laboratory-established benchmarks based on historical data |
| Turnaround Time | Collection to result time, processing to result time | Weekly | Laboratory-established benchmarks based on clinical needs |
Statistical Quality Control Approaches
Implementing statistical quality control (QC) methods provides an objective foundation for monitoring test performance. Westgard rules and Levy-Jennings charts are fundamental tools for detecting systematic and random errors in quantitative methods. For qualitative methods, consistent performance of controls at expected values is essential. Laboratories should establish an Individualized Quality Control Plan (IQCP) that considers the test's complexity, reagent stability, operator competency, and historical performance data [2].
Experimental Protocols for Ongoing Monitoring
Protocol for Quarterly Accuracy Assessment
Purpose: To verify that the test method continues to demonstrate acceptable agreement with a comparative method throughout its operational lifespan.
Materials:
- 20 clinically relevant isolates (positive and negative samples) [2]
- Reference materials, proficiency test samples, or previously characterized clinical samples
- Appropriate culture media, reagents, and equipment
Methodology:
- Select samples that represent the laboratory's typical patient population and clinically relevant microorganisms.
- Test all samples in parallel using the implemented method and the comparative method (if available).
- For tests without a practical comparative method, use previously characterized samples with known results.
- Calculate percent agreement: (Number of results in agreement / Total number of results) × 100 [2].
- Compare results to established acceptance criteria (typically ≥ manufacturer's claims).
- Document any discrepancies and investigate root causes for divergent results.
Acceptance Criteria: Results must meet or exceed the manufacturer's stated performance claims or laboratory-established benchmarks based on initial verification studies [2].
Protocol for Semi-Annual Precision Assessment
Purpose: To confirm acceptable within-run, between-run, and operator variance over time.
Materials:
- 2 positive and 2 negative samples (for qualitative assays) or samples with high to low values (for semi-quantitative assays) [2]
- Appropriate reagents and equipment
- Multiple operators if applicable
Methodology:
- Test samples in triplicate for 5 consecutive days using 2 different operators [2].
- For fully automated systems, operator variance testing may not be necessary.
- Calculate precision: (Number of results in agreement / Total number of results) × 100 [2].
- Analyze results for trends or shifts in performance.
- Document any outliers and investigate potential causes.
Acceptance Criteria: Precision should meet or exceed the manufacturer's stated claims or laboratory-established benchmarks [2].
Protocol for Ongoing Reference Range Verification
Purpose: To confirm that the reference range (normal result) remains appropriate for the tested patient population.
Materials:
- 20 de-identified clinical samples or reference samples with known results [2]
- Appropriate testing materials and equipment
Methodology:
- Select samples representative of the laboratory's patient population.
- Test samples using the standard procedure.
- Compare results to expected reference range.
- If the manufacturer's reference range does not represent the laboratory's typical patient population, additional samples should be screened and the reference range re-defined if necessary [2].
- Document findings and any adjustments to reference ranges.
Acceptance Criteria: ≥95% of results should fall within the established reference range when testing samples from healthy populations or samples with known negative results [2].
The Scientist's Toolkit: Essential Research Reagent Solutions
Table 2: Key Reagents and Materials for Quality Monitoring in Clinical Microbiology
| Reagent/Material | Function | Application Examples |
|---|---|---|
| Quality Control Strains | Verification of test performance and reproducibility | American Type Culture Collection (ATCC) strains for susceptibility testing, biochemical identification |
| Proficiency Testing Samples | External assessment of testing accuracy | CAP, AAB, or manufacturer-provided samples for quarterly testing |
| Reference Materials | Calibration and standardization of methods | Certified reference materials for quantitative assays (e.g., bacterial antigen detection) |
| Molecular Grade Reagents | Ensuring purity and performance in molecular assays | DNase/RNase-free water, ultrapure nucleotides for PCR-based methods |
| Culture Media Components | Support microbial growth and differentiation | Selective agents, indicators, growth factors for custom media preparation |
Implementing a Data Management Strategy
Effective ongoing quality monitoring generates substantial data that requires systematic management and analysis. A Laboratory Information Management System (LIMS) is invaluable for tracking quality metrics over time, trending performance, and generating reports for quality assurance reviews [41]. LIMS validation ensures the system operates according to its intended purpose, adhering to regulatory standards and maintaining data integrity [42] [41] [43].
The LIMS validation process includes:
- Installation Qualification (IQ): Verifying proper software installation and configuration [41]
- Operational Qualification (OQ): Assessing system functionality under specified conditions [41]
- Performance Qualification (PQ): Testing system performance under actual operating conditions [41]
Regular review of quality data should occur at least quarterly, with more frequent review (monthly) for critical tests or those with performance concerns. The following workflow illustrates the ongoing monitoring process:
Figure 2: Ongoing Quality Monitoring Workflow. This process begins with routine testing and systematic data collection, progressing through automated alerts for deviations, root cause analysis, corrective actions, and ultimately documentation of improvements for continuous enhancement.
Continuous Improvement and Documentation
Lifecycle management extends beyond monitoring to encompass continuous improvement based on collected data. Laboratories should establish a formal process for reviewing quality data, investigating deviations, implementing corrective actions, and verifying their effectiveness. All quality monitoring activities, including any adjustments to procedures or acceptance criteria, must be thoroughly documented to demonstrate compliance during inspections [2] [44].
Maintaining validation over time requires periodic re-evaluation of the LIMS and testing methods as laboratory operations evolve and regulatory requirements change [42]. This includes updating validation documentation to reflect any changes in the system or its use [42].
The transition from one-time verification to ongoing quality monitoring represents an essential evolution in quality management for clinical microbiology laboratories. By implementing structured protocols for continuous assessment of critical quality indicators, establishing robust data management systems, and fostering a culture of continuous improvement, laboratories can ensure the long-term reliability, accuracy, and clinical utility of their testing methods. This lifecycle approach not only maintains regulatory compliance but ultimately enhances patient care through the delivery of consistently accurate and timely results.
Ensuring Compliance and Comparability: Data Analysis and Final Sign-Off
In clinical microbiology laboratories, the verification of new methods requires robust data analysis to confirm that performance characteristics align with established claims. For qualitative and semi-quantitative assays commonly used in microbiology, percent agreement serves as a fundamental statistical measure for assessing both accuracy and precision [2]. This calculation provides a straightforward, standardized approach to demonstrate acceptable performance before implementing new tests for patient diagnostics. The reliability of results is paramount, and these calculations form the backbone of the verification process, ensuring that technical criteria are met and comparable results can be obtained regardless of the specific laboratory performing the test [45].
The analytical approach differs based on the performance characteristic being verified and the type of assay being implemented. The principles outlined here are designed to fit within the broader context of a method verification plan template, providing the calculable evidence needed to satisfy Clinical Laboratory Improvement Amendments (CLIA) requirements for non-waived test systems [2].
Key Calculations and Statistical Measures
Fundamental Formula for Percent Agreement
The primary calculation for assessing method performance is the percent agreement, which is calculated as follows:
Percent Agreement (%) = (Number of Results in Agreement / Total Number of Results) × 100 [2]
This formula is universally applied for both accuracy and precision studies in qualitative and semi-quantitative microbiology assays. The resulting percentage is then compared against pre-defined acceptance criteria, which are typically based on the manufacturer's stated claims or determinations made by the laboratory director [2].
Log Reduction Calculations for Antimicrobial Testing
In antimicrobial efficacy testing and certain microbiological applications, log reduction provides a more meaningful measure of microbial kill rate than simple percentage calculations. The relationship between log reduction and percent reduction follows a predictable pattern [46]:
Table 1: Log Reduction versus Percent Reduction
| Log Reduction | Percent Reduction |
|---|---|
| 1 | 90% |
| 2 | 99% |
| 3 | 99.9% |
| 4 | 99.99% |
| 5 | 99.999% |
| 6 | 99.9999% |
The mathematical formulas to convert between these values are:
- Log Reduction = log10 (Initial Population / Final Population) [46]
- Percent Reduction = [(Initial Population - Final Population) / Initial Population] × 100 [46]
- Converting Log Reduction to Percent Reduction: Percent Reduction = (1 - 10^(-Log Reduction)) × 100 [46]
These calculations are particularly valuable when evaluating disinfectants, sterilants, and antimicrobial products where demonstrating substantial reduction in microbial load is critical.
Experimental Protocols for Verification Studies
Protocol for Accuracy Assessment
Purpose: To verify the acceptable agreement of results between the new method and a comparative method [2].
Experimental Design:
- Sample Selection: Use a minimum of 20 clinically relevant isolates or specimens [2]. For qualitative assays, include a combination of positive and negative samples. For semi-quantitative assays, use samples with a range of values from high to low.
- Sample Sources: Obtain acceptable specimens from standards or controls, reference materials, proficiency tests, or de-identified clinical samples previously tested with a validated method [2]. Consider including different sample matrices if applicable to the test's intended use.
- Testing Procedure: Test all samples using both the new method and the established comparative method. Ensure testing is performed according to manufacturers' instructions for both systems.
- Data Analysis: Calculate percent agreement using the fundamental formula. Compare results against pre-established acceptance criteria.
Acceptance Criteria: The calculated percent agreement should meet or exceed the manufacturer's stated claims or laboratory-defined criteria [2].
Protocol for Precision Assessment
Purpose: To confirm acceptable within-run, between-run, and operator variance [2].
Experimental Design:
- Sample Selection: Use a minimum of 2 positive and 2 negative samples tested in triplicate for 5 days by 2 different operators [2]. For semi-quantitative assays, use samples with high and low values.
- Sample Sources: Use quality control materials or de-identified clinical samples with known results [2].
- Testing Procedure: Perform testing according to the standard operating procedure for the new method. Include multiple operators unless the system is fully automated, in which case operator variance may not be needed [2].
- Data Analysis: Calculate percent agreement for within-run, between-run, and between-operator comparisons separately.
Acceptance Criteria: The precision percentage should meet the manufacturer's stated claims or laboratory-defined criteria [2].
Protocol for Reportable Range Verification
Purpose: To confirm the acceptable upper and lower limits of the test system [2].
Experimental Design:
- Sample Selection: Use a minimum of 3 samples with known characteristics [2]. For qualitative assays, use known positive samples. For semi-quantitative assays, use samples with values near the upper and lower ends of the manufacturer-determined cutoff values.
- Testing Procedure: Test samples according to the standard protocol.
- Data Analysis: Verify that results fall within the manufacturer's specified reportable range. For qualitative tests, this includes confirming appropriate "detected" or "not detected" calls; for semi-quantitative tests, confirm that Ct values or other quantitative measures align with expected ranges [2].
Research Reagent Solutions
Table 2: Essential Materials for Verification Studies
| Item | Function in Verification |
|---|---|
| Clinically Relevant Isolates | Represents actual patient samples for accuracy studies; minimum 20 recommended [2] |
| Reference Standards | Provides materials with known characteristics for comparison and calibration |
| Quality Control Materials | Verifies ongoing assay performance; used in precision studies [2] |
| Proficiency Test Samples | External validation of assay performance with blinded samples |
| Different Sample Matrices | Assesses assay performance across various specimen types when applicable [2] |
Data Analysis Workflow
The following diagram illustrates the logical workflow for data analysis and interpretation in method verification:
Implementation in Verification Plan Template
When incorporating these calculations and protocols into a method verification plan template, specific acceptance criteria must be predefined for each performance characteristic. The template should include:
- Sample Size Justification: Reference the minimum sample requirements (e.g., 20 samples for accuracy, specific precision testing protocols) [2].
- Calculation Methods: Specify the formulas to be used, particularly the standard percent agreement calculation [2].
- Acceptance Criteria: Document the specific percentage targets that will constitute acceptable performance, typically based on manufacturer claims [2].
- Data Recording: Include standardized forms or spreadsheets for consistent data collection and calculation.
The verification process must be thoroughly documented, with all calculations and results included in the final verification summary report. This documentation demonstrates compliance with regulatory requirements and provides evidence of due diligence in method evaluation [2] [9].
Core Principles and Definitions
In clinical microbiology, demonstrating that a new method is equivalent to an established reference standard is a critical step before implementation. This process ensures the reliability of results used for safety-critical decisions [47]. The fundamental question is whether two methods for measuring the same analyte produce equivalent results, enabling substitution in clinical practice [30].
Terminology
- Accuracy vs. Bias: In method-comparison studies, "accuracy" refers to how close a measurement is to a true value, typically assessed against a gold standard. "Bias" quantifies the systematic difference between a new method and an established one [30].
- Precision vs. Repeatability: "Precision" can refer to the closeness of repeated measurements using the same method (repeatability) or the dispersion of values around a mean. Repeatability is a necessary precondition for assessing method agreement [30].
- Verification vs. Validation: A verification is a one-time study for unmodified FDA-approved tests to demonstrate performance matches established claims. A validation establishes performance for laboratory-developed tests or modified FDA-approved methods [2].
Experimental Design Considerations
Proper design is fundamental to a robust equivalency study. Key considerations ensure the comparison is valid, clinically relevant, and statistically sound [30].
Table 1: Key Design Considerations for Method-Comparison Studies
| Design Element | Requirement | Application in Clinical Microbiology |
|---|---|---|
| Method Selection | Both methods must measure the same analyte [30]. | Ensure both the new and reference method target the same microbial analyte (e.g., detection of MRSA, quantification of viral load). |
| Timing of Measurement | Simultaneous or near-simultaneous sampling to avoid changes in the analyte [30]. | For stable samples (e.g., bacterial isolates), sequential testing may be acceptable. For labile analytes, simultaneous testing is critical. |
| Sample Size | Adequate paired measurements to decrease chance findings and power the study [30]. | CLIA guidelines suggest a minimum of 20 clinically relevant isolates for accuracy assessment of qualitative/semi-quantitative assays [2]. |
| Physiological Range | Measurements should span the clinical range of values for which the methods will be used [30]. | Include isolates with a range of reactivity (high to low values) and relevant negative samples to challenge the assay's reportable range [2]. |
Statistical Analysis and Data Interpretation
A method-comparison study employs both graphical and statistical techniques to quantify the agreement between methods.
Bias and Precision Statistics
The core analysis involves calculating the bias (mean difference between methods) and the limits of agreement (Bland-Altman analysis) [30].
- Bias: The overall mean difference (new method – established method).
- Limits of Agreement (LOA): Defined as Bias ± 1.96 SD of the differences. This range is expected to contain 95% of the differences between the two methods [30].
Table 2: Key Quantitative Metrics for Equivalency Analysis
| Metric | Definition | Interpretation |
|---|---|---|
| Bias | Mean difference between paired measurements from the two methods. | A positive bias indicates the new method gives higher results on average. |
| Standard Deviation (SD) of Bias | Measure of the variability of the individual differences. | Quantifies the scatter of the differences; a smaller SD indicates better repeatability. |
| Limits of Agreement | Bias ± 1.96 SD | The interval within which 95% of differences between the two methods are expected to fall. |
| Percentage Error | The ratio between the magnitude of measurement error and the measurement value. | Provides a relative measure of error, useful for comparing performance across different analytes. |
Visual Data Inspection
Before statistical analysis, data should be visually inspected for patterns, outliers, and the nature of the relationship between methods.
- Bland-Altman Plot: The primary graphical tool, plotting the difference between the two methods against their average for each sample. This plot visually reveals the bias, LOA, and any relationship between the difference and the magnitude of measurement [30].
- Scatter Diagram: A plot of values from the new method against the reference method can help visualize correlation and identify outliers.
Experimental Protocols
Protocol for a Method Verification Study (Qualitative/Semi-Quantitative Assay)
This protocol outlines the minimum requirements for verifying an unmodified, FDA-cleared qualitative or semi-quantitative assay in a clinical microbiology laboratory, as per CLIA standards [2].
1. Accuracy Verification
- Samples: A minimum of 20 clinically relevant isolates or samples. Use a combination of positive and negative samples. For semi-quantitative assays, include a range from high to low values [2].
- Source: Samples can be from reference materials, proficiency test samples, or de-identified clinical samples previously characterized by a validated method.
- Procedure: Test all samples using the new method and the established comparative method.
- Calculation: Calculate percent agreement: (Number of results in agreement / Total number of results) × 100.
- Acceptance Criteria: The percentage agreement must meet the manufacturer's stated claims or a criterion determined by the laboratory director.
2. Precision Verification
- Samples: A minimum of 2 positive and 2 negative samples (or a range of values for semi-quantitative assays).
- Procedure: Test samples in triplicate, over 5 days, by 2 different operators. If the system is fully automated, operator variance may not be required [2].
- Calculation: Calculate percent agreement for all replicates.
- Acceptance Criteria: The percentage agreement must meet the manufacturer's stated claims or a director-defined criterion.
3. Reportable Range Verification
- Samples: A minimum of 3 samples. For qualitative assays, use known positives. For semi-quantitative assays, use samples near the upper and lower cutoff values [2].
- Procedure: Test samples to verify that the results fall within the manufacturer-defined reportable range (e.g., "Detected," "Not detected," or a specific Ct value cutoff).
- Acceptance Criteria: All results are reportable as defined by the laboratory.
4. Reference Range Verification
- Samples: A minimum of 20 isolates representative of the laboratory's patient population [2].
- Procedure: Test samples to confirm the expected "normal" or negative result.
- Acceptance Criteria: The reference range matches the manufacturer's claim. If the laboratory's patient population differs, the reference range may need to be re-defined.
Protocol for a Method-Comparison Study (Bland-Altman Analysis)
This protocol is suitable for a more rigorous research-based equivalency study, particularly for quantitative data.
1. Study Design
- Define the clinical acceptance criteria for bias and limits of agreement a priori.
- Based on these criteria, perform a sample size calculation using power (e.g., 80-90%), alpha (e.g., 0.05), and the smallest clinically important difference [30].
- Collect paired measurements from a sufficient number of subjects and samples that cover the entire analytical measurement range.
2. Data Collection
- For each sample or subject, measure the analyte using both the new method and the reference standard method simultaneously or in a randomized order to avoid systematic bias [30].
- Record all paired results.
3. Data Analysis
- Calculate Differences: For each pair, calculate the difference (New Method value – Reference Method value).
- Calculate Averages: For each pair, calculate the average of the two measurements [(New Method value + Reference Method value)/2].
- Compute Statistics: Calculate the mean difference (Bias) and the standard deviation (SD) of the differences.
- Determine Limits of Agreement: Calculate the Upper LOA (Bias + 1.96 SD) and Lower LOA (Bias – 1.96 SD) [30].
4. Data Interpretation
- Create a Bland-Altman plot with the averages on the x-axis and the differences on the y-axis.
- Plot the Bias line and the Upper and Lower LOA lines.
- Assess whether the Bias and LOA fall within the pre-defined clinical acceptance limits. If so, the methods can be considered equivalent.
Visualization of Workflows
Method Equivalency Study Workflow
Method Verification Process for Qualitative Assays
The Scientist's Toolkit: Research Reagent Solutions
Table 3: Essential Materials for Microbiological Method Equivalency Studies
| Item | Function in Equivalency Studies |
|---|---|
| Reference Strains (e.g., ATCC) | Provide characterized, stable microbial materials for assessing accuracy and precision across a defined analytical range [2] [47]. |
| Clinical Isolates | De-identified patient samples representing the laboratory's true patient population and the full spectrum of expected results (positive, negative, low/high values) [2]. |
| Proficiency Test Samples | Externally provided, blinded samples with assigned values to independently assess a method's performance without prior knowledge of the expected result. |
| Quality Controls | Materials used to monitor the daily performance of an assay, ensuring it operates within specified parameters during the verification study. |
| Standardized Reference Method | The established method (e.g., a national or international standard method) against which the new method is compared to establish equivalence [47]. |
| CLSI Guidance Documents (e.g., M52, EP12-A2) | Standardized protocols and statistical frameworks for designing and evaluating method verification and comparability studies in clinical microbiology [2]. |
Method verification is a mandatory, one-time study required by the Clinical Laboratory Improvement Amendments (CLIA) for unmodified, FDA-cleared or approved tests before patient results can be reported [2]. Its purpose is to demonstrate that a test performs according to the manufacturer's established performance characteristics and is reliable in the operator's specific environment [2]. This process is distinct from validation, which is required for laboratory-developed tests or modified FDA-approved tests and aims to establish that an assay works as intended [2]. A well-executed verification study provides confidence that a new method, such as a microbial identification panel or an antimicrobial susceptibility test (AST), will produce consistent, accurate results that meet the needs of the laboratory's patient population.
Regulatory Framework and Key Definitions
Adherence to regulatory standards is foundational to any verification study. In the United States, the CLIA regulations (42 CFR §493.1253) mandate verification for all non-waived test systems of moderate or high complexity [2] [48]. Furthermore, laboratories operating under a Quality Management System (QMS) often align with international standards such as ISO 15189, which provides requirements for quality and competence in medical laboratories [31]. A successful QMS encourages "systems thinking" by considering the effects of any change across the entire testing process [31].
Key definitions include:
- Verification: Confirming through objective evidence that specified requirements, typically those set by the manufacturer for an unmodified FDA-cleared test, have been fulfilled [2].
- Validation: The process of establishing by objective evidence that an assay (often a laboratory-developed test or a modified FDA-approved test) works as intended for its specific purpose [2].
- Acceptance Criteria: Predefined specifications, derived from manufacturer claims and laboratory requirements, that verification results must meet for the test to be implemented. These criteria shall be specific, measurable, and approved by the laboratory director [2] [31].
- Nonconforming Events (NCEs): Deviations from expected performance, which are reviewed within the QMS not to assign blame, but as opportunities for systemic improvement [31].
Establishing Acceptance Criteria
Acceptance criteria form the benchmark against which verification data is judged. For FDA-cleared tests, the manufacturer's package insert is the primary source for performance specifications, such as claimed accuracy and precision. The laboratory director is ultimately responsible for setting and approving these criteria, which must be established before the verification study begins [2] [31]. The criteria must be realistic and achievable, yet stringent enough to ensure high-quality patient care. If a laboratory's typical patient population differs from the population used by the manufacturer to establish its reference range, the laboratory must verify or re-define the reference range using samples representative of its own population [2].
Experimental Protocols for Verification
The following section details the core experiments required for a comprehensive verification of qualitative and semi-quantitative tests, which are common in clinical microbiology.
Accuracy Verification
Objective: To confirm acceptable agreement between results from the new method and a comparative method.
Detailed Protocol:
- Sample Selection: Use a minimum of 20 clinically relevant isolates [2].
- Sample Composition: For qualitative assays, select a combination of positive and negative samples. For semi-quantitative assays, use a range of samples with high to low values (e.g., high, medium, and low bacterial loads) [2].
- Sample Sources: Acceptable specimens can be obtained from:
- Standards, controls, or reference materials
- Proficiency test (PT) samples
- De-identified clinical samples previously characterized by a validated method
- Different sample matrices, if applicable to the test's intended use [2].
- Testing Procedure: Test all samples in parallel using the new method and the comparative (reference) method.
- Calculation: Calculate the percentage agreement.
Accuracy (%) = (Number of results in agreement / Total number of results) × 100[2]. - Acceptance Criterion: The calculated percentage must meet or exceed the manufacturer's stated claims for accuracy or the criterion set by the laboratory director [2].
Precision Verification
Objective: To confirm acceptable variance within a run, between runs, and between different operators.
Detailed Protocol:
- Sample Selection: Use a minimum of 2 positive and 2 negative samples [2].
- Sample Composition: For semi-quantitative assays, use samples with values across the reportable range (high and low) [2].
- Testing Procedure:
- Test each sample in triplicate.
- Perform this testing over 5 days to assess between-run precision.
- Involve 2 operators to assess operator-related variance. If the system is fully automated, operator variance may not be required [2].
- Calculation: For each level of control, calculate the percentage agreement across all replicates and days.
Precision (%) = (Number of concordant results / Total number of results) × 100[2]. - Acceptance Criterion: The precision percentage must meet the manufacturer's stated claims or the laboratory director's requirements [2].
Reportable Range Verification
Objective: To confirm the upper and lower limits of detection that the test system can accurately measure and report.
Detailed Protocol:
- Sample Selection: Verify using a minimum of 3 samples [2].
- Sample Composition:
- For qualitative assays, use known positive samples for the detected analyte.
- For semi-quantitative assays, use a range of positive samples near the upper and lower ends of the manufacturer-determined cutoff values (e.g., cycle threshold (Ct) cutoffs in PCR) [2].
- Testing Procedure: Test the selected samples according to the standard operating procedure.
- Evaluation: The reportable range is verified if the test system correctly identifies and reports results for samples that fall within the defined limits (e.g., "Detected," "Not detected," or a specific Ct value) [2].
Reference Range Verification
Objective: To confirm the normal or expected result for the laboratory's specific patient population.
Detailed Protocol:
- Sample Selection: Verify using a minimum of 20 isolates [2].
- Sample Composition: Use de-identified clinical samples or reference samples with results known to be standard for the laboratory's patient population. For example, for a MRSA detection assay, use samples negative for MRSA [2].
- Testing Procedure: Test the selected samples using the new method.
- Evaluation: At least 95% (19 out of 20) of the results should fall within the manufacturer's stated reference range. If the manufacturer's range does not represent the laboratory's patient population, additional screening must be performed, and the reference range may need to be re-defined [2].
The following workflow diagram illustrates the sequential process of a method verification study from planning to implementation.
Data Analysis and Acceptance Criteria Tables
The following tables summarize the minimum sample sizes and key calculations for each performance characteristic, providing a clear framework for data analysis.
Table 1: Sample Size and Composition for Verification Experiments
| Performance Characteristic | Minimum Sample Number | Recommended Sample Composition |
|---|---|---|
| Accuracy | 20 isolates [2] | Combination of positive and negative samples for qualitative assays; range of high to low values for semi-quantitative assays [2]. |
| Precision | 2 positive + 2 negative [2] | Tested in triplicate over 5 days by 2 operators (if not fully automated) [2]. |
| Reportable Range | 3 samples [2] | Known positive samples for qualitative assays; samples near upper/lower cutoff for semi-quantitative assays [2]. |
| Reference Range | 20 isolates [2] | De-identified clinical or reference samples representative of the laboratory's patient population [2]. |
Table 2: Calculation and Acceptance Criteria for Verification Experiments
| Performance Characteristic | Calculation Method | Acceptance Criteria |
|---|---|---|
| Accuracy | (Number of agreements / Total results) × 100 [2] |
Meets manufacturer's stated claims or laboratory director's requirements [2]. |
| Precision | (Number of concordant results / Total results) × 100 [2] |
Meets manufacturer's stated claims or laboratory director's requirements [2]. |
| Reportable Range | Qualitative assessment of correct identification and reporting [2] | Test system correctly reports results for samples within the defined limits [2]. |
| Reference Range | (Number of results within range / Total results) × 100 |
≥95% of results fall within the stated reference range [2]. |
The Scientist's Toolkit: Research Reagent Solutions
Successful verification relies on high-quality, traceable materials. The table below lists essential resources for planning and executing a verification study.
Table 3: Essential Materials and Resources for Method Verification
| Item / Resource | Function / Purpose |
|---|---|
| Clinically Relevant Isolates | Serve as the test substrate for accuracy, precision, and reference range studies. They must be well-characterized and relevant to the test's intended use [2]. |
| Reference Materials / Controls | Provide a known value against which test performance (accuracy, reportable range) can be measured. These can be commercial standards, proficiency test samples, or previously characterized clinical samples [2]. |
| CLSI Documents (e.g., EP12, M52) | Provide standardized protocols and guidance for evaluating qualitative test performance and verifying commercial microbial identification and AST systems, ensuring studies meet industry standards [2]. |
| Verification Plan Template | A pre-formatted document that outlines the study design, including sample size, acceptance criteria, and timeline. It ensures all necessary elements are considered and must be approved by the lab director before starting [2] [9]. |
| Calculation Spreadsheets | Pre-configured tools for statistically analyzing verification data for accuracy, linearity, and reference range experiments, ensuring consistent and correct calculations [9]. |
Special Considerations for Antimicrobial Susceptibility Testing (AST)
Verifying AST methods presents unique challenges, particularly regarding the use of non-FDA breakpoints with an FDA-cleared panel. The process is not always clear-cut and requires careful planning [2]. Key considerations include:
- Organism Selection: The choice of organisms must cover the relevant antimicrobial spectra and resistance mechanisms the test is designed to detect.
- Interpretive Criteria: It is critical to determine whether the laboratory will use FDA breakpoints or other recognized standards (e.g., CLSI or EUCAST). If using non-FDA breakpoints, additional validation is required to ensure the test performs accurately with these interpretive criteria [2] [37].
- Resolution of Discrepancies: A procedure must be established to resolve discrepancies between the new test and the reference method, which may involve using a third, definitive method [37]. Given these complexities, laboratory leaders and clinical microbiologists are invaluable resources for overseeing the AST verification process [2].
Documentation and the Verification Plan
A written verification plan, reviewed and signed by the laboratory director, is a critical component of the process. This document serves as the blueprint for the entire study and should include [2]:
- The type of verification and the purpose of the study.
- A description of the test and its intended use.
- Detailed study design, including:
- Number and type(s) of samples.
- Quality control procedures.
- Number of replicates, days, and operators.
- Performance characteristics to be evaluated and the specific acceptance criteria for each.
- A list of all required materials and equipment.
- Safety considerations.
- The expected timeline for completion.
A robust method verification study is a systematic process that confirms a test performs as claimed by the manufacturer and is suitable for the laboratory's unique environment and patient population. By meticulously planning experiments for accuracy, precision, reportable range, and reference range, and by establishing clear, predefined acceptance criteria, laboratories can ensure the reliability of their new methods. This process, supported by thorough documentation and a commitment to quality, is fundamental to providing accurate and timely results that underpin effective patient diagnosis and treatment. Ultimately, verification is not merely a regulatory hurdle but a core component of a laboratory's Quality Management System, ensuring the continued delivery of high-quality patient care [2] [31].
Within the framework of a method verification plan for a clinical microbiology laboratory, the verification report serves as the definitive record of your study. It is the written documentation that provides the support for your laboratory's representation that an unmodified, FDA-approved or cleared test performs in line with the manufacturer's established performance characteristics within your specific operational environment [2]. This document transitions a method from the experimental verification phase to an approved, patient-reportable assay.
Regulatory bodies, such as those enforcing the Clinical Laboratory Improvement Amendments (CLIA), require verification studies for non-waived systems before patient results can be reported [2]. The verification report is the primary evidence inspected during audits to demonstrate compliance. It must therefore be a complete, accurate, and transparent record that enables an experienced auditor, with no prior connection to the engagement, to understand the procedures performed, evidence obtained, and conclusions reached [49]. This article provides detailed application notes and protocols for completing this critical document, ensuring it meets both scientific and regulatory standards.
Core Components of a Verification Report
A robust verification report must document the testing and evaluation of specific performance characteristics as stipulated by CLIA regulations. The following components are essential.
Performance Characteristics and Data Documentation
For a qualitative or semi-quantitative assay in clinical microbiology, such as a PCR for pathogen detection or an immunochromatographic test, four key characteristics must be verified [2]. The report must summarize the experimental data for each, structured for clear comprehension and comparison. The following table outlines the minimum sample requirements and performance evaluation criteria for these assays.
Table 1: Minimum Sample Requirements for Verifying Qualitative/Semi-Quantitative Assays
| Performance Characteristic | Minimum Sample Number & Type | Data Analysis & Acceptance Criteria |
|---|---|---|
| Accuracy [2] | A minimum of 20 clinically relevant isolates, comprising a combination of positive and negative samples. | Percentage of agreement = (Number of results in agreement / Total number of results) × 100. The result must meet the manufacturer's stated claims or criteria determined by the laboratory director. |
| Precision [2] | A minimum of 2 positive and 2 negative samples, tested in triplicate for 5 days by 2 operators (operator variance may not be needed for fully automated systems). | Percentage of agreement = (Number of results in agreement / Total number of results) × 100. The result must meet the manufacturer's stated claims or laboratory director's criteria. |
| Reportable Range [2] | A minimum of 3 samples. For qualitative assays, use known positive samples; for semi-quantitative, use samples near the upper and lower cutoffs. | The laboratory verifies that the reportable result (e.g., "Detected," "Not detected," or a specific Ct value cutoff) is correctly assigned for samples within the defined range. |
| Reference Range [2] | A minimum of 20 isolates. Use de-identified clinical samples or reference samples known to be standard for the laboratory’s patient population. | The laboratory verifies that the manufacturer's reference range is appropriate for its patient population. If not, the range must be re-defined using representative samples. |
The data supporting these characteristics should be presented in clearly structured tables within the report. For example, accuracy data should list each sample, the comparative method result, the new method result, and the agreement. Precision tables should detail the results for each replicate, day, and operator, clearly showing any variances.
Supporting Documentation and Audit Trail
Beyond the performance data, the report must include an audit trail that demonstrates the integrity of the entire verification process. This includes [49] [50]:
- Records of Planning and Supervision: The signed verification plan, which outlines the objectives, study design, and acceptance criteria, should be referenced and retained.
- Personnel and Dates: The report must clearly document who performed the work, who reviewed it, and the dates of such activities [49].
- Instrument Logs and QC Records: Copies of relevant quality control data and instrument maintenance logs from the verification period should be included as appendices.
- Reagent and Material Records: Lot numbers and expiration dates of all reagents, kits, and critical materials used in the study.
- Inconsistent Findings: The report must include information the auditor identified relating to significant findings that were inconsistent with, or contradicted, the final conclusions, as well as records of how these discrepancies were resolved [49].
Experimental Protocols for Verification Studies
The following protocols provide detailed methodologies for conducting the key experiments required for a verification report.
Protocol for Verifying Accuracy of a Qualitative Assay
1. Objective: To confirm the acceptable agreement of results between the new method and a comparative method for a qualitative assay (e.g., a multiplex PCR for respiratory pathogens).
2. Materials:
- Samples: A panel of at least 20 characterized samples. These can be from commercial panels, reference materials, proficiency test samples, or de-identified clinical samples previously tested with a validated method [2].
- Controls: Kit positive and negative controls.
- Equipment: The new instrument system (e.g., thermocycler, analyzer) and any equipment for the comparative method.
3. Procedure: 1. Ensure all samples have been characterized using a validated comparative method. 2. Process the entire sample panel using the new test method according to the manufacturer's instructions for use (IFU). 3. Include appropriate quality controls in each run as specified by the IFU. 4. Record all results, including any invalid runs or repeat testing.
4. Data Analysis: - For each sample, record the result from the comparative method and the new method. - Calculate the percent agreement for each analyte detected by the test. - Compare the calculated percentage to the pre-defined acceptance criteria (e.g., ≥95% agreement).
Protocol for Verifying Precision (Reproducibility)
1. Objective: To confirm acceptable within-run, between-run, and operator variance.
2. Materials:
- Samples: At least 2 positive and 2 negative samples. For semi-quantitative assays, select samples with values at high and low ends of the measurable range [2].
- Controls: Kit controls.
3. Procedure: 1. Over the course of 5 non-consecutive days, two qualified operators will test the selected samples in triplicate. 2. Operators should perform the testing independently, following the standard IFU. 3. Each run should include the required quality controls.
4. Data Analysis: - Calculate the percent agreement for all replicates within a run (within-run precision). - Calculate the percent agreement between runs performed on different days (between-run precision). - Calculate the percent agreement between the results obtained by the two different operators (operator variance).
Protocol for Verifying Reportable and Reference Ranges
1. Objective for Reportable Range: To confirm the acceptable upper and lower limits of the test system [2].
- Procedure: Test a minimum of 3 samples. For a qualitative assay, this includes known positive samples. For a semi-quantitative assay, use samples with values near the manufacturer's established upper and lower cutoffs.
- Data Analysis: Confirm that the results are correctly reported as "Detected" or "Not detected," or that the semi-quantitative values fall within the expected cutoff-defined ranges.
2. Objective for Reference Range: To confirm the normal result for the tested patient population [2].
- Procedure: Test a minimum of 20 samples that are representative of the "normal" or "negative" state for your patient population (e.g., samples negative for MRSA in an MRSA detection assay).
- Data Analysis: Verify that at least 95% (19/20) of the results align with the expected reference range (e.g., "Not detected"). If the results do not match, the laboratory may need to establish a new reference range specific to its population.
The Verification Workflow: From Data to Report
The process of transforming raw experimental data into a finalized, audit-ready verification report requires a structured, multi-stage workflow. The following diagram visualizes this critical path, from the initial planning phase through to final approval and documentation archiving.
The Scientist's Toolkit: Essential Research Reagent Solutions
Successful method verification relies on high-quality, well-characterized materials. The following table details key reagents and resources essential for conducting verification studies in clinical microbiology.
Table 2: Essential Reagents and Resources for Verification Studies
| Item | Function in Verification | Application Notes |
|---|---|---|
| Characterized Clinical Isolates | Serve as positive and negative samples for accuracy, precision, and reportable range studies. | Sources include ATCC strains, proficiency test samples, biobanked clinical isolates, or commercial panels. Must be relevant to the assay's intended targets [2]. |
| Chromogenic Media | Used for comparative detection and screening of specific microorganisms (e.g., MRSA, VRE, ESBL). | Provides visual confirmation of target organism growth and is a common comparator method in verification studies [51]. |
| Commercial MIC Susceptibility Systems | Dried MIC panels for verifying antimicrobial susceptibility testing (AST) methods. | Used in equivalency studies to compare against reference broth microdilution methods as per CLSI guidelines [51]. |
| Quality Control Strains | Used to monitor the precision and ongoing performance of the test system. | Should include strains that generate positive, negative, and borderline results. Tested during the precision phase of verification [2]. |
| Molecular Detection Kits | Kits for specific targets (e.g., Group A Strep, MRSA) used as the test method under verification. | Must be FDA-cleared and used according to the manufacturer's IFU without modification during verification [2]. |
| Reference Standards & Guidelines | Documents such as CLSI M52 and MM03-A2 provide standardized protocols and acceptance criteria. | Critical for ensuring the verification study design meets industry and regulatory standards [2]. |
A meticulously completed verification report is more than a regulatory formality; it is a cornerstone of quality in the clinical microbiology laboratory. By adhering to structured protocols for accuracy, precision, reportable range, and reference range studies, and by documenting every aspect of the process with transparency and rigor, the report provides defensible evidence of assay reliability. This detailed documentation, organized for clarity and anchored in relevant guidelines, ensures not only a successful regulatory audit but also instills confidence in the test results used to guide patient diagnosis and treatment.
Conclusion
A meticulously executed method verification plan is the cornerstone of reliable test performance in the clinical microbiology laboratory, directly impacting patient diagnosis and treatment. Success hinges on a clear understanding of regulatory requirements, a robust study design tailored to the specific assay, proactive troubleshooting strategies, and rigorous data analysis against predefined acceptance criteria. As the field evolves with the introduction of rapid methods, AI-driven analytics, and CRISPR-based detection, the verification framework must adapt. Future efforts should focus on streamlining the validation of these innovative technologies through enhanced collaboration between industry and regulators, ensuring that laboratories can confidently adopt advanced methods while maintaining the highest standards of quality and compliance.
References
- 1. Verification vs. Validation: When do I need which in the lab? [https://platomics.com/verification-vs-validation-when-do-i-need-which-in-the-lab/]
- 2. Planning a Method Verification Study in Clinical ... [https://asm.org/articles/2022/january/planning-a-method-verification-study-in-clinical-m]
- 3. Mastering IVDR in 2025: Challenges and Strategies Across ... [https://www.ul.com/resources/mastering-ivdr-2025-challenges-and-strategies-across-full-compliance-spectrum]
- 4. 2025 CLIA Acceptance Limits for Proficiency Testing [https://www.westgard.com/clia-a-quality/quality-requirements/2024-clia-requirements.html]
- 5. CMS Enacts New CLIA Regulations Effective January 2025 [https://www.bakerdonelson.com/cms-enacts-new-clia-regulations-effective-january-2025]
- 6. Final 5 CLIA Rule. Part V: Method Validation Process and ... [https://www.westgard.com/clia-a-quality/clia-final-rule/cliafinalrule5.html]
- 7. Major updates to FDA-recognized Clinical and Laboratory ... [https://pmc.ncbi.nlm.nih.gov/articles/PMC12077184/]
- 8. All you need to know about equipment validation for ... [https://pmc.ncbi.nlm.nih.gov/articles/PMC12421869/]
- 9. Test Method Validation and Verification [https://resources.psmile.org/resources/test-method-validation-and-verification]
- 10. Microbiology Devices; Reclassification of Antigen, Antibody ... [https://www.federalregister.gov/documents/2025/09/18/2025-18082/microbiology-devices-reclassification-of-antigen-antibody-and-nucleic-acid-based-hepatitis-b-virus]
- 11. Method validation and method verification - Introduction - ISO [https://committee.iso.org/sites/tc34sc9/home/essential-information/content-left-area/validation-of-methods/method-validation-and-method-ver.html]
- 12. Guidelines on Clinical Method Validation & Verfication [https://clsi.org/resources/insights/interference-with-laboratory-tests/]
- 13. Clinical Testing Lab Accreditation (ISO 15189 & CLIA) [https://a2la.org/accreditation/clinical-testing/]
- 14. Method Evaluation | Areas of Focus [https://clsi.org/standards-development/specialty-areas/method-evaluation/]
- 15. Specialty Areas [https://clsi.org/standards-development/specialty-areas/]
- 16. M52 | Verification of Commercial Microbial Identification ... [https://clsi.org/shop/standards/m52/]
- 17. Microbiological quality control testing [https://www.usp.org/microbiology]
- 18. Semi-quantitative procedures; half professional or ... [https://myadlm.org/science-and-research/scientific-shorts/2023/semi-quantitative-procedures-half-professional-or-half-amateur-what-is-the-other-half]
- 19. Types of Quantitative Data Analysis and Presentation Format [https://pressbooks.bccampus.ca/undergradresearch/chapter/types-of-quantitative-data-analysis-and-presentation-format/]
- 20. Presentation of Quantitative Data [https://ihatepsm.com/blog/presentation-quantitative-data]
- 21. Verification and Validation of Tests Used in the Clinical ... [https://www.sciencedirect.com/science/article/abs/pii/S019643991500077X]
- 22. Method Verification Validation Plan Approval Checklist | PDF [https://www.scribd.com/document/858531094/Method-Verification-Validation-Plan-Approval-Checklist]
- 23. Sample size calculation in medical studies - PMC [https://pmc.ncbi.nlm.nih.gov/articles/PMC4017493/]
- 24. Sample Size Calculation in Medical Research: A Primer [https://nams-annals.in/sample-size-calculation-in-medical-research-a-primer/]
- 25. Sample size calculation in multi-centre clinical trials [https://bmcmedresmethodol.biomedcentral.com/articles/10.1186/s12874-018-0602-y]
- 26. Sampling methods in Clinical Research; an Educational ... [https://pmc.ncbi.nlm.nih.gov/articles/PMC5325924/]
- 27. Navigating method evaluation in clinical laboratories [https://myadlm.org/cln/articles/2024/mayjune/navigating-method-evaluation-in-clinical-laboratories]
- 28. Method Validation vs Method Verification: Which is Better ... [https://www.labmanager.com/method-validation-vs-method-verification-which-is-better-for-use-in-laboratories-33982]
- 29. A step by step guide to quantitative comparisons in ... [https://finbiosoft.com/a-step-by-step-guide-to-quantitative-comparisons-in-validation-manager/]
- 30. Design, Analysis and Interpretation of Method-Comparison ... [https://pmc.ncbi.nlm.nih.gov/articles/PMC2944826/]
- 31. Practical Guidance for Clinical Microbiology Laboratories [https://pmc.ncbi.nlm.nih.gov/articles/PMC6056841/]
- 32. Root Cause Analysis: The Fix for Recurring Lab Errors [https://www.labmanager.com/root-cause-analysis-the-fix-for-recurring-lab-errors-34044]
- 33. Verification of new AST testing systems [https://www.thermofisher.com/us/en/home/industrial/microbiology/microbiology-learning-center/susceptibility-testing-empowered/AST-verification.html]
- 34. Transformational Technologies for Microbiology [https://www.rapidmicrobiology.com/news/special-focus-on-transformational-technologies-for-microbiology-ai-ar-and-data-analytics]
- 35. AMM/RMM – Pharmacopoeial Developments and More [https://www.rapidmicrobiology.com/news/amm-rmm-pharmacopoeial-developments-and-more]
- 36. How to verify and validate a clinical microbiology test ... [https://pubmed.ncbi.nlm.nih.gov/38977077/]
- 37. How to verify and validate a clinical microbiology test ... [https://www.sciencedirect.com/science/article/pii/S1198743X24003094]
- 38. Comprehensive Microbial Control Strategy [https://www.bioprocessintl.com/qa-qc/beyond-traditional-microbiology-testing-developing-a-comprehensive-strategy-for-microbial-control-and-detection]
- 39. Microbial Technologies Enhanced by Artificial Intelligence ... [https://pmc.ncbi.nlm.nih.gov/articles/PMC11917392/]
- 40. Exploring the synergy of artificial intelligence in microbiology [https://www.sciencedirect.com/science/article/pii/S295036392400005X]
- 41. LIMS Validation: Importance, Benefits, and Steps to Perform It [https://cloudlims.com/lims-validation-importance-benefits-and-steps-to-perform-it/]
- 42. How To Perform LIMS Validation [https://genemod.net/blog/how-to-perform-lims-validation]
- 43. Best Practices for LIMS Implementation and Validation [https://assureallc.com/best-practices-for-lims-implementation-and-validation/]
- 44. Microbiology Writing Guide: Lab Report Format [https://wic.oregonstate.edu/microbiology-writing-guide-lab-report-format]
- 45. [Validation and verfication of microbiology ] methods [https://pubmed.ncbi.nlm.nih.gov/24958671/]
- 46. Log & Percent Reductions in Microbiology & Antimicrobial Testing [https://microchemlab.com/information/log-and-percent-reductions-microbiology-and-antimicrobial-testing/]
- 47. Evaluating Microbiological Method Equivalence [https://www.foodprotection.org/publications/food-protection-trends/archive/2023-05-evaluating-microbiological-method-equivalence-a-decision-guide/]
- 48. 42 CFR Part 493 -- Laboratory Requirements [https://www.ecfr.gov/current/title-42/chapter-IV/subchapter-G/part-493]
- 49. AS 1215: Audit Documentation (effective on 12/15/2026) [https://pcaobus.org/oversight/standards/auditing-standards/details/as-1215--audit-documentation-(effective-on-12-15-2026)]
- 50. Audit Evidence & Documentation: Guide & Best Practices [https://www.scrut.io/post/audit-evidence-documentation-reporting]
- 51. Clinical Microbiology Resource Library [https://www.thermofisher.com/mx/en/home/clinical/clinical-microbiology/clinical-microbiology-learning-center/clinical-microbiology-resource-library.html]